Category: Home Decor

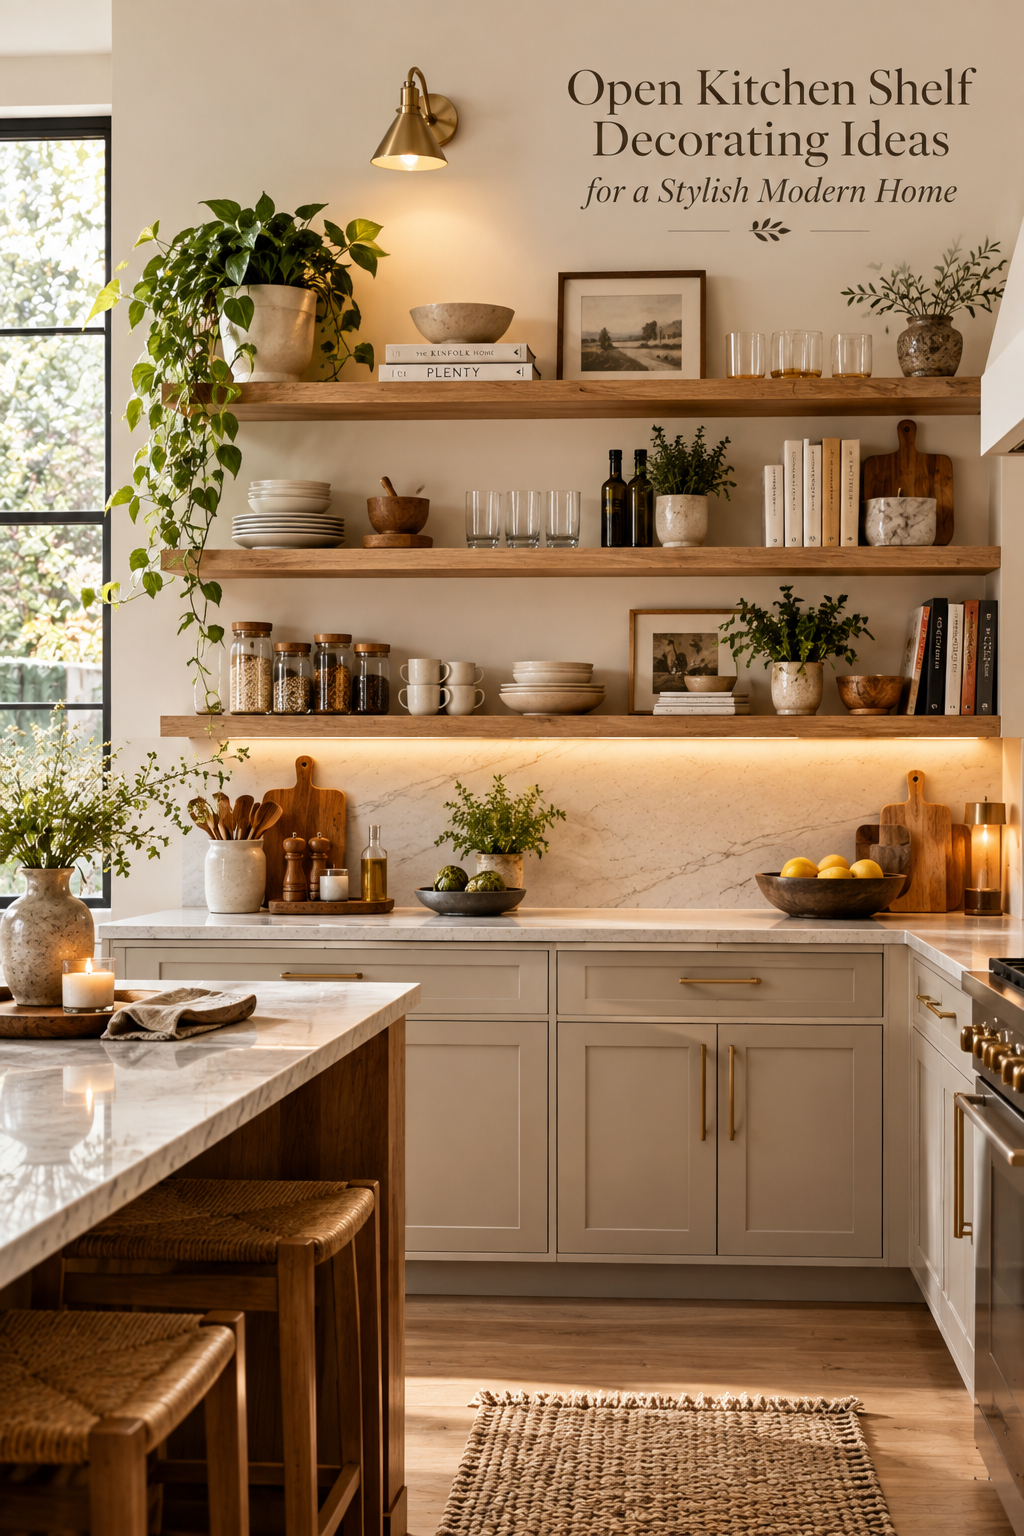
  • Open Kitchen Shelf Decorating Ideas for a Stylish Modern Home

    Open Kitchen Shelf Decorating Ideas for a Stylish Modern Home

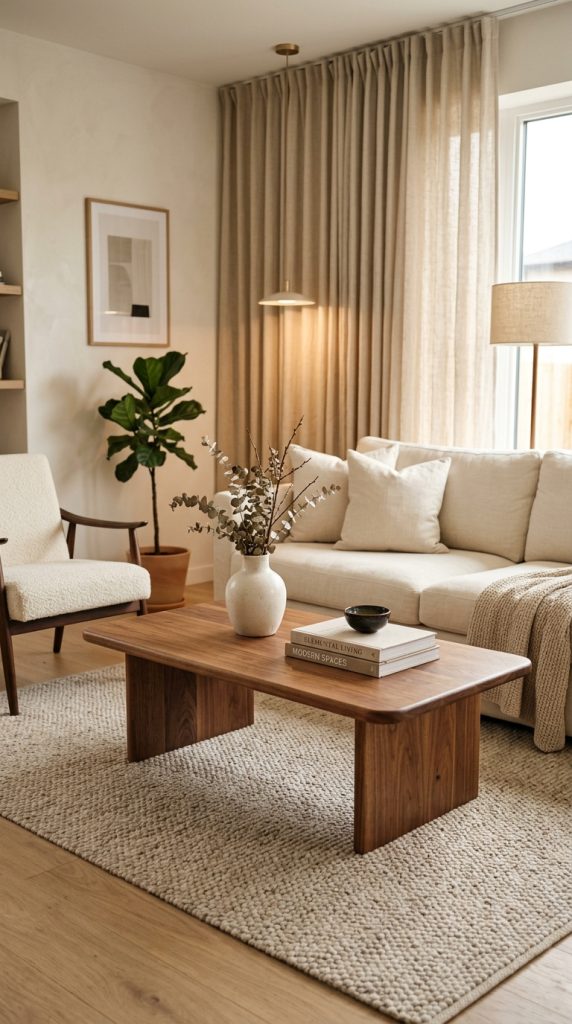
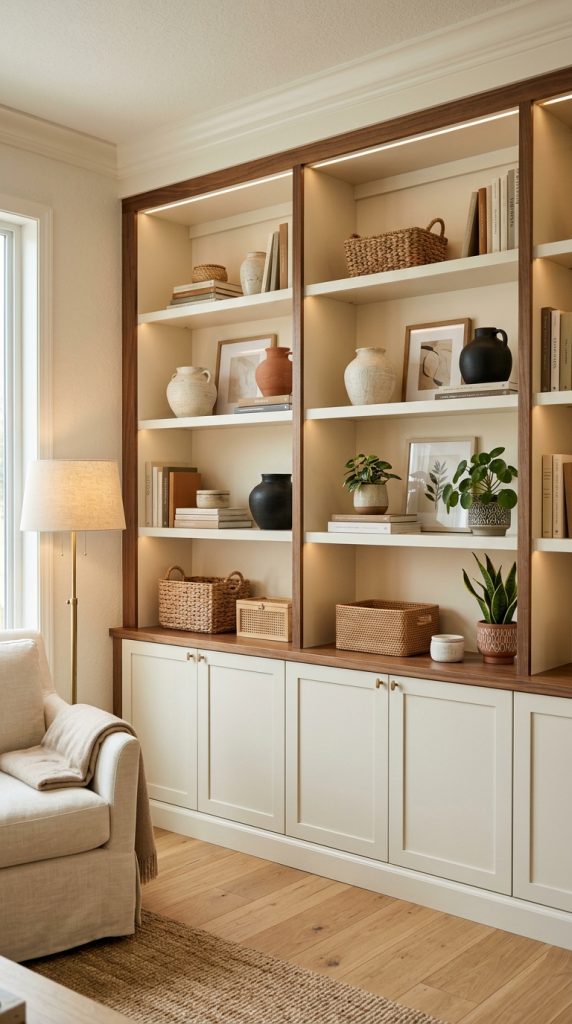
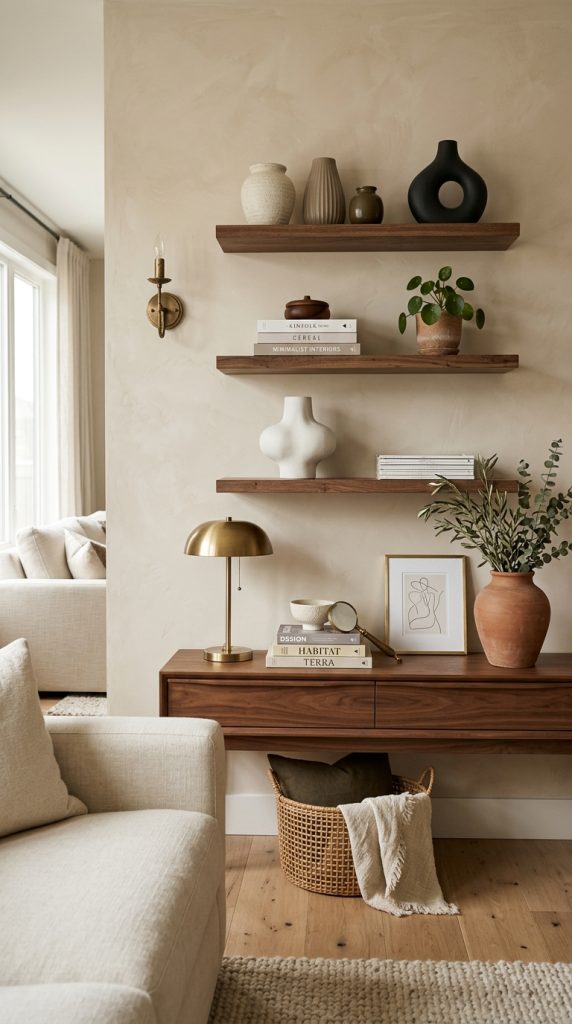
    Open kitchen shelf decorating ideas can completely transform the personality of a modern kitchen. Instead of keeping every attractive plate, bowl, glass, cookbook, vase, and serving piece behind closed cabinet doors, open shelving allows carefully chosen objects to become part of the interior design. When styled correctly, open shelves can make a kitchen feel warmer, more personal, organized, and sophisticated without sacrificing its practical purpose.
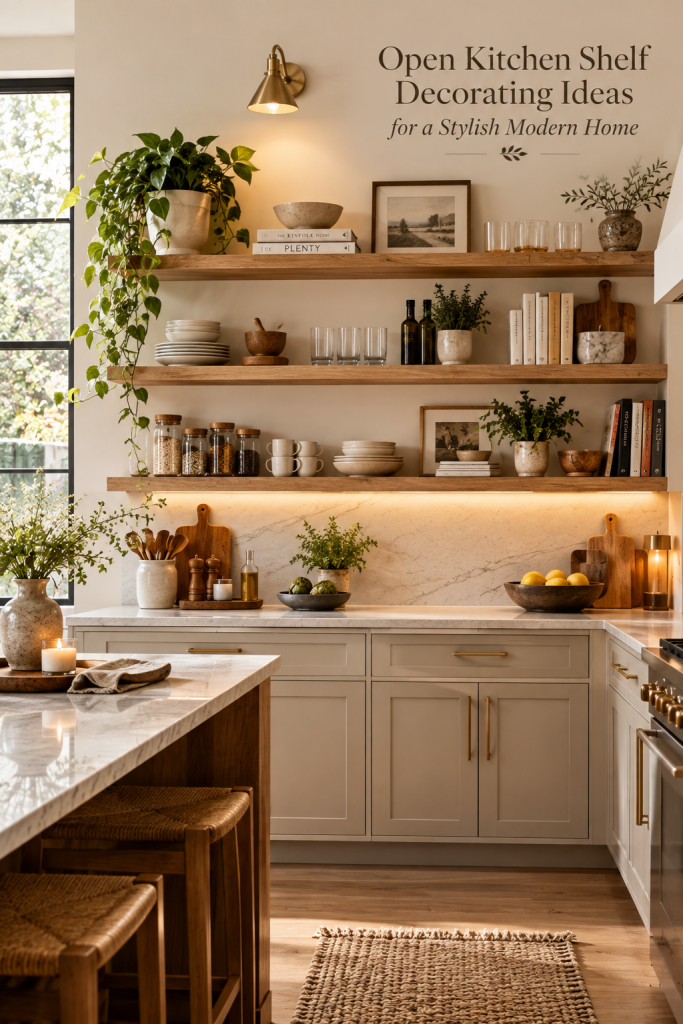
    The biggest challenge with open shelving is that everything becomes visible. A closed cabinet can hide mismatched dishes, colorful packaging, rarely used appliances, and everyday kitchen clutter. An open shelf cannot. Every object contributes to the overall appearance of the room, which means successful shelf styling depends on thoughtful selection, proportion, spacing, color, and texture.

    This does not mean your shelves need to look perfectly staged or almost empty. A modern kitchen should still feel like a real kitchen. Plates should be accessible. Mugs should be easy to reach. Cookbooks should look used rather than untouched. Wooden cutting boards can lean against the backsplash. Glassware can remain within reach. The goal is to make useful objects attractive rather than filling the shelves with unnecessary decorations.

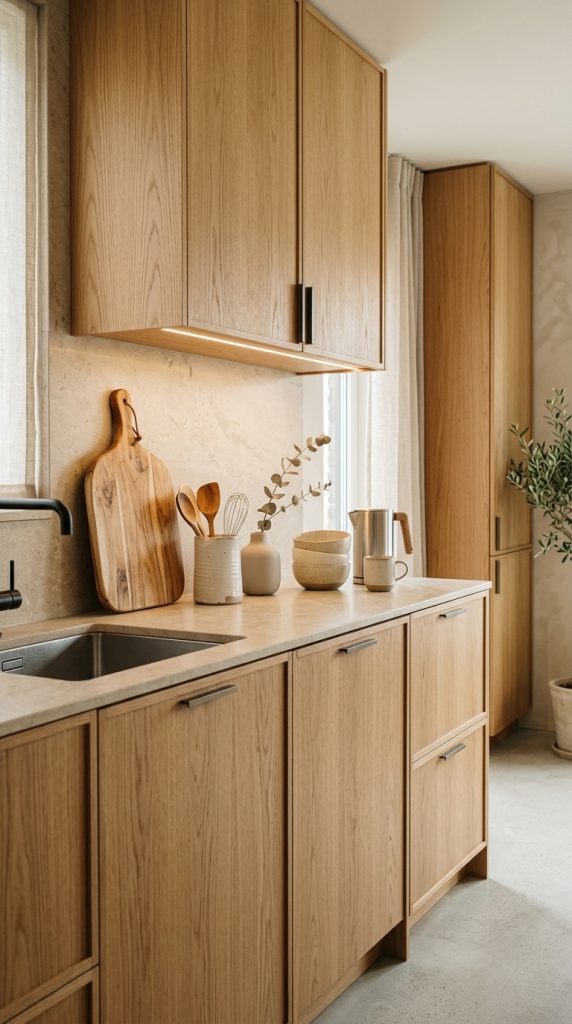
    One of the easiest ways to achieve this is to create a controlled visual palette. If your kitchen has white or cream cabinets, warm oak shelves, beige countertops, and black hardware, you can repeat those same tones through the objects you display. Cream ceramics, natural wood, clear glass, and a few black accessories can create a cohesive arrangement without requiring everything to match.

    Color repetition is particularly powerful because it visually connects the shelves with the rest of the room. A black mug can echo a black faucet. A wooden bowl can repeat the tone of oak cabinetry. A cream vase can relate to the backsplash. A small brass object can complement cabinet hardware or pendant lights.

    Materials matter just as much as color. Modern kitchens often contain smooth and hard surfaces such as stone countertops, glossy cabinets, metal appliances, glass, and tile. Open shelves provide an opportunity to introduce materials that make the room feel softer and more layered.

    Natural wood brings warmth.

    Ceramic adds handcrafted character.

    Glass creates lightness.

    Woven baskets introduce texture.

    Linen adds softness.

    Stone brings an organic quality.

    Greenery adds life.

    Combining a few of these materials can make even a very neutral kitchen feel interesting without adding bright colors or excessive decoration.

    The shelf itself is also part of the design. Natural oak shelves can create a warm Scandinavian-inspired appearance. Walnut shelving gives a richer, more sophisticated impression. Black shelves can add architectural contrast. White floating shelves can blend seamlessly into a pale kitchen. Thick wood shelves can add character to a modern farmhouse interior, while slim shelves can create a lighter contemporary appearance.

    Before decorating, consider what the shelf is actually being used for. If it is positioned near the coffee maker, coffee mugs and attractive containers may be more useful than decorative objects. If it is beside the dining area, glassware and serving dishes may make more sense. If it is close to food preparation, wooden boards, bowls, and frequently used cooking pieces can be practical choices.

    This functional approach prevents the shelves from becoming purely decorative.

    Open shelving is also an excellent way to personalize a modern kitchen. Contemporary kitchens can sometimes feel too uniform because of large expanses of cabinetry and stone. A few handmade ceramics, vintage cookbooks, meaningful serving pieces, or collected objects can give the space personality.

    The items do not need to be expensive.

    A handmade ceramic bowl from a local market can be more visually interesting than an expensive mass-produced accessory. An old wooden cutting board can add character to a newly renovated kitchen. A favorite cookbook can introduce personality and color. A simple vase filled with a few branches can make an otherwise clean shelf feel alive.

    The important thing is that the pieces relate to each other.

    You can mix styles without creating chaos when there is some consistency in color, material, shape, or scale.

    Another important consideration is negative space. Empty shelf space is not wasted space. It allows the objects around it to stand out and prevents the kitchen from feeling overloaded.

    If every shelf is packed from one end to the other, individual objects lose their visual importance. A beautiful vase may disappear among dozens of smaller accessories. A stack of handmade plates may look ordinary if surrounded by too many decorative items.

    Leaving some breathing room gives the display a more sophisticated appearance.

    Height is another major part of successful styling. If every object is approximately the same size, the shelf can look flat. Instead, combine tall, medium, and low objects.

    A tall vase can provide vertical height.

    A stack of plates can create a low horizontal form.

    A bowl can fill the middle.

    A leaning cutting board can create another vertical element.

    This creates visual movement while keeping the arrangement simple.

    Depth can also be used to make shelves look more interesting. Objects do not have to sit in one perfectly straight row. A wooden board can lean against the backsplash while a bowl sits slightly in front of it. Plates can be positioned behind a vase. A small object can sit closer to the edge.

    This layering gives the shelf dimension.

    However, there is an important difference between layered and cluttered.

    Layering means objects have a clear relationship.

    Clutter means there are too many unrelated objects competing for attention.

    If you are unsure whether a shelf feels crowded, remove one or two pieces and look again.

    Often, editing creates a bigger improvement than adding more decoration.

    Open kitchen shelves can also change with the seasons. You do not need to redecorate completely every few months. A neutral foundation can remain in place while a few accents change.

    In autumn, you might add muted brown ceramics or dried branches. In spring, fresh greenery can bring softness. During the holiday season, a few understated seasonal objects can be introduced. This keeps the kitchen fresh without creating unnecessary storage problems.

    Another benefit is that open shelving encourages you to be selective about what you own. Because everything is visible, you become more aware of which pieces actually contribute to the kitchen.

    This can lead to a cleaner, more intentional home.

    The most beautiful modern shelves are rarely filled with dozens of unrelated decorative pieces. Instead, they contain a carefully edited collection of useful objects and a few accessories that add personality.

    The following ten ideas offer different approaches to styling open kitchen shelves. You do not need to use all ten. Choose the direction that best fits your kitchen, your storage needs, and your personal style.

    1. Create a Warm Neutral Ceramic Display

    A warm neutral ceramic display is one of the easiest ways to make open kitchen shelves look elegant and modern.
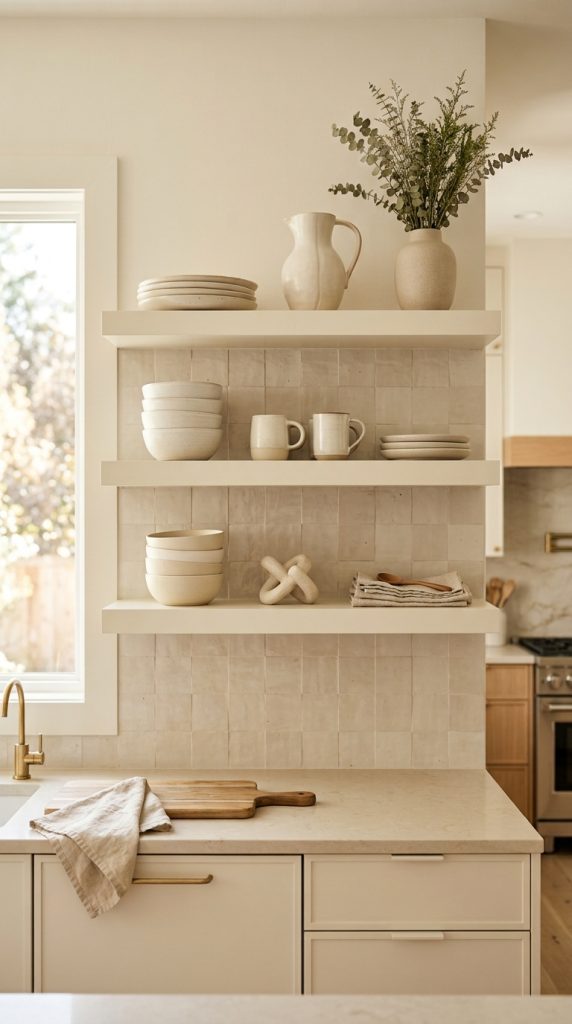
    The concept is simple: use everyday plates, bowls, mugs, pitchers, and decorative ceramics in a restrained family of neutral colors.

    Think about shades such as ivory, cream, oatmeal, beige, taupe, warm white, and soft gray.

    The goal is not to make every piece identical.

    In fact, slightly different ceramic shapes often make the arrangement more interesting. A handmade bowl with an irregular edge can sit beside simple modern plates. A softly curved pitcher can provide height next to a stack of dishes. A small matte vase can fill a gap without making the shelf feel decorated for decoration’s sake.

    Begin with the largest pieces.

    Place dinner plates in a neat vertical arrangement toward the back of the shelf. If necessary, use a discreet plate stand designed for secure display.

    Next, add a small stack of bowls.

    Then place a taller ceramic object toward one side.

    The arrangement should have a clear visual hierarchy.

    You want the eye to move naturally from the tallest piece to the middle-sized objects and then toward the lower items.

    A small amount of greenery can also work beautifully with neutral ceramics. Place one simple branch in a narrow vase rather than adding several plants.

    If your kitchen has warm wood cabinets, the neutral ceramics will create a soft contrast.

    If the kitchen has white cabinets and pale countertops, they can create a seamless, calm appearance.

    For a darker kitchen, cream and ivory pieces can provide brightness.

    The finish of the ceramics is important as well. Matte and softly glazed surfaces tend to create a more contemporary appearance than highly glossy pieces with elaborate patterns.

    However, a small amount of shine can add variety. A glossy ceramic bowl beside several matte pieces can catch the light and create a subtle highlight.

    Try not to place all the same shapes together.

    Instead, mix round bowls with flat plates, tall pitchers, and small cups.

    This creates variation without requiring additional colors.

    One useful technique is to create a visual group of three.

    For example, place a tall ceramic pitcher, a medium stack of bowls, and a low cup together.

    Then leave some empty space before the next group.

    This prevents the shelf from becoming one continuous block of objects.

    You can also use the shelf as functional storage.

    If the dishes are used regularly, place them where they can be reached easily. The most frequently used pieces should not be hidden behind the most decorative items.

    The result should feel like a beautiful kitchen that happens to have excellent styling rather than a showroom that no one is allowed to touch.

    A neutral ceramic shelf is especially effective in modern, minimalist, Scandinavian, organic modern, and transitional kitchens because the palette remains quiet while the different shapes and textures provide visual interest.

    2. Combine Natural Wood With Contemporary Accessories

    Natural wood is one of the most effective materials for adding warmth to a modern kitchen.
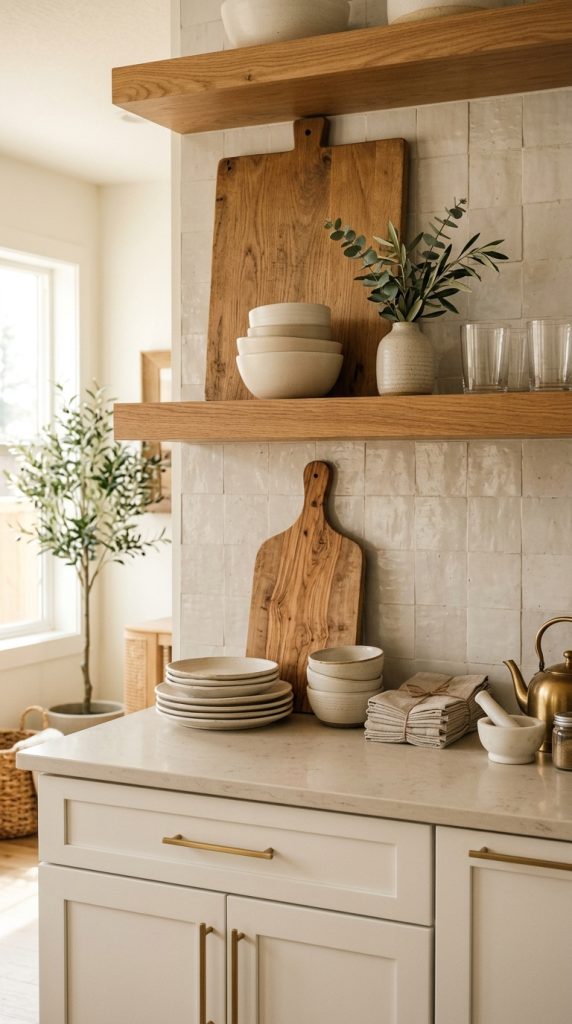
    Contemporary kitchens often contain large areas of stone, metal, glass, and smooth cabinetry. These materials can look beautiful but sometimes feel visually cold.

    Wood immediately changes that atmosphere.

    Use wooden cutting boards, serving boards, bowls, trays, utensils, or small vessels on the shelves.

    A large cutting board can lean vertically against the backsplash.

    Place a stack of cream plates slightly in front of it.

    Add a ceramic bowl toward one side.

    On another shelf, position a wooden serving bowl next to clear glasses.

    This combination creates a balance between organic warmth and modern simplicity.

    The wood tone should relate to the rest of the kitchen.

    Light oak works beautifully with white, cream, pale gray, and beige.

    Walnut can create a sophisticated look when paired with black, charcoal, cream, or brass.

    Medium-toned wood can work well with warm neutrals and earthy colors.

    You do not have to use exactly the same wood throughout the shelf, but avoiding too many unrelated wood colors will help the display feel cohesive.

    The natural grain should remain visible.

    Avoid covering beautiful wooden boards with too many decorative pieces.

    A single large board can be more effective than several small wooden objects.

    You can also vary the orientation.

    One board can stand vertically while a smaller board lies flat beneath a bowl.

    This creates a combination of horizontal and vertical lines.

    Ceramics are especially useful for balancing wood.

    The smooth surface of pottery contrasts with the natural grain of timber.

    Clear glass adds another layer by providing transparency.

    A small plant or branch can connect the natural materials together.

    The finished display might include a walnut cutting board, cream bowl, clear glasses, a small olive branch, and a simple ceramic vase.

    There are enough differences in texture to make the shelf interesting without making it busy.

    Wooden accessories also make the display practical.

    A serving board can be taken down when needed.

    A bowl can be used for food.

    A tray can organize the coffee station.

    This means your styling does not have to sacrifice functionality.

    Natural wood is particularly effective in kitchens that need warmth.

    If your kitchen already has wood cabinetry, repeat the tone lightly through accessories.

    If your kitchen is mostly white, wood can become the main warmth-producing element.

    If your kitchen has darker cabinetry, lighter wood can provide contrast.

    3. Turn Everyday Dinnerware Into the Main Display

    Open shelves do not need to be decorated with objects that were purchased specifically for styling.
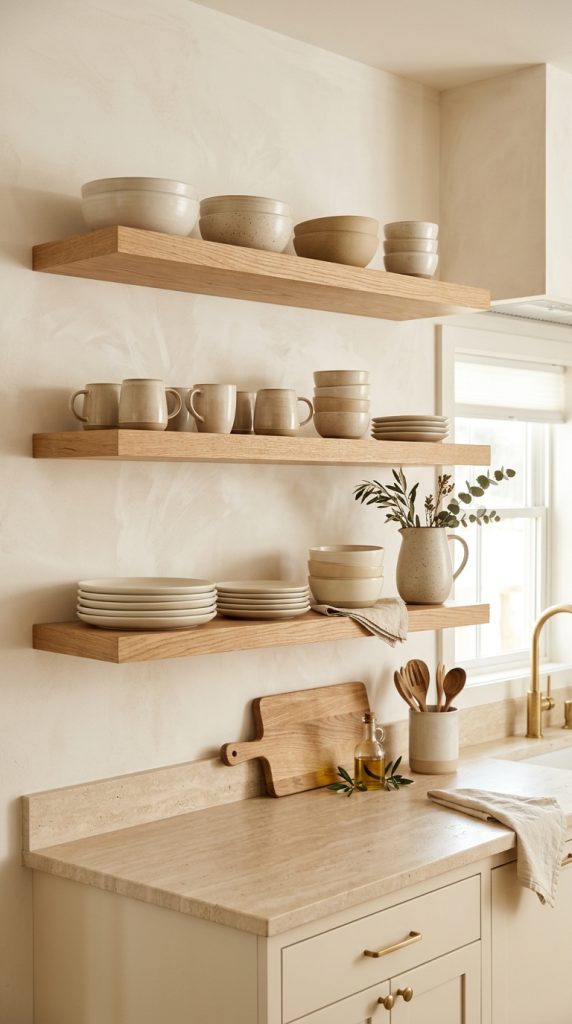
    Your everyday dinnerware can become the decoration.

    This approach is especially useful when you want your kitchen to remain highly functional.

    Choose the plates, bowls, mugs, and serving pieces that are attractive enough to display.

    Arrange them in organized groups.

    Place dinner plates into one stack.

    Create another stack with smaller plates.

    Group bowls together.

    Keep mugs in a row or small cluster.

    The arrangement should look organized without appearing rigid.

    One way to make the display more interesting is to vary the height of each group.

    For example, the dinner plate stack can be taller than the bowl stack.

    The mugs can form another low group.

    Then place one taller pitcher or vase beside them.

    This creates visual movement.

    Color is particularly important when displaying everyday dishes.

    If your dinnerware is white or cream, you can introduce a little contrast through wood, black, or muted greenery.

    If your dinnerware is colorful, keep the other shelf accessories relatively neutral.

    This prevents the arrangement from becoming overwhelming.

    You can also create a subtle gradient.

    For example, use cream plates beside beige bowls and warm brown wooden pieces.

    The colors transition naturally.

    If you own patterned dishes, do not necessarily display every pattern at once.

    Choose the most visually compatible pieces.

    Open shelves are highly visible, so editing matters.

    Frequently used pieces should remain accessible.

    If you use your breakfast bowls every morning, place them where they can be reached easily.

    If a decorative serving plate is rarely used, it can occupy a less accessible position.

    This creates a practical hierarchy.

    Another advantage of displaying dinnerware is that it makes the kitchen feel lived-in.

    A shelf filled entirely with decorative objects can sometimes feel staged.

    A shelf containing the plates you actually use feels authentic.

    You can still add a few decorative elements.

    A small vase, plant, or wooden object can provide personality.

    Just make sure the decoration does not interfere with access to the dishes.

    This style works particularly well for modern farmhouse, Scandinavian, minimalist, transitional, and contemporary kitchens.

    4. Design a Stylish Coffee and Tea Shelf

    A coffee and tea shelf can become one of the most charming areas of a modern kitchen.
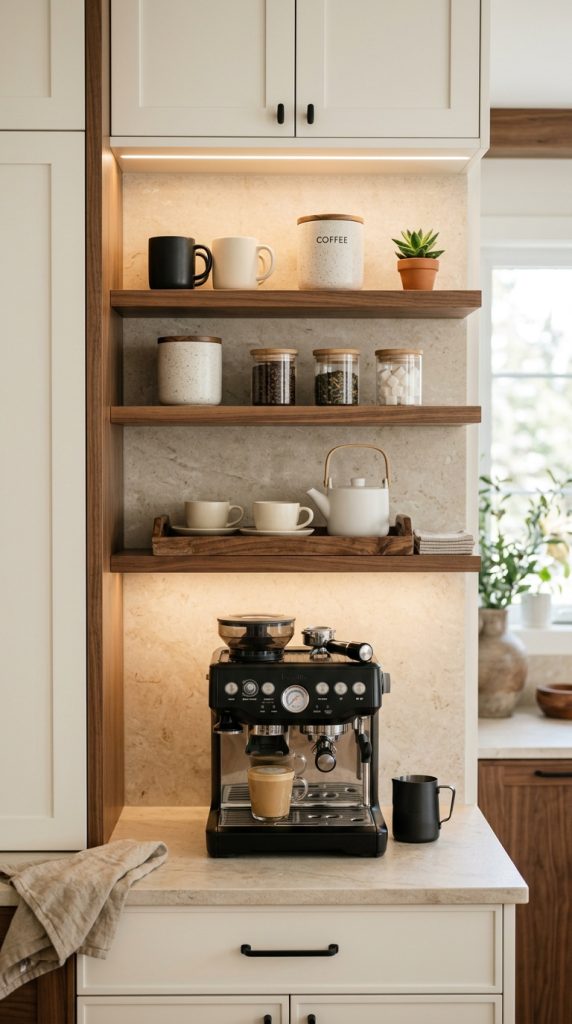
    Because the objects already belong together functionally, it is easy to create a cohesive display.

    Start with the mugs.

    Choose a small collection of mugs in complementary colors.

    Black, cream, white, beige, or muted brown work particularly well.

    Arrange them together rather than scattering them across the kitchen.

    Add a coffee container.

    If you store coffee beans or ground coffee in an attractive container, it can remain visible.

    The same applies to tea.

    A simple glass or ceramic container can look much more cohesive than brightly colored packaging.

    You can add a small wooden tray to organize the smaller items.

    A tray visually connects separate objects and gives the coffee area a defined boundary.

    If the shelf is above or near your coffee machine, make sure the arrangement does not interfere with appliance use.

    Keep electrical cords, steam outlets, and hot surfaces clear.

    The decorative pieces should support the coffee station rather than obstruct it.

    A small ceramic vase can provide a vertical element.

    A compact plant can add freshness.

    A stack of two small cups can create another level.

    The palette should remain controlled.

    Try cream, walnut, and matte black for a modern look.

    Try beige, oak, and white for a softer appearance.

    Try charcoal, brass, and cream for a more dramatic sophisticated palette.

    If you enjoy entertaining, you could also display a beautiful serving tray, glass carafe, or small teapot.

    Keep the arrangement relatively compact.

    Coffee stations naturally contain equipment and supplies, so adding too many accessories can quickly make the area look crowded.

    One useful principle is to leave one clear working zone.

    The coffee machine and frequently used items should remain easy to access.

    The shelf should make your morning routine more pleasant rather than requiring constant rearranging.

    This idea is especially effective when open shelving is positioned near a breakfast nook or kitchen island.

    5. Use Glassware to Create a Light and Airy Arrangement

    Glassware is one of the best choices for open shelves when you want the kitchen to feel visually light.
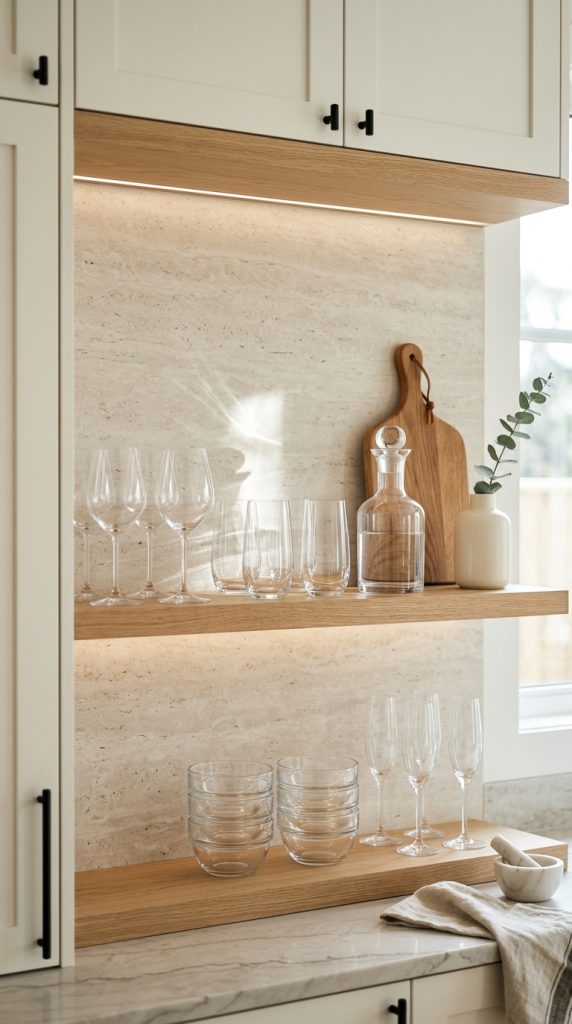
    Unlike solid ceramics, transparent glasses allow the background to remain visible.

    This is particularly useful in smaller kitchens.

    Arrange clear drinking glasses in small groups.

    If you regularly use wine glasses, add a few.

    A glass carafe can provide a larger shape.

    You can also introduce subtle amber, smoky, or lightly tinted glass for additional character.

    Avoid filling the shelf completely with glassware.

    Instead, allow the pieces to breathe.

    For example, place four clear tumblers together.

    Leave some space.

    Then add a simple ceramic vase.

    On another shelf, display a small collection of wine glasses beside a wooden serving board.

    The contrast between transparent glass and solid wood creates visual depth.

    Glass also responds beautifully to natural light.

    If the shelf is near a window, the glassware can catch daylight and create delicate reflections.

    In the evening, warm kitchen lighting can make the display glow subtly.

    The shelf material affects the appearance too.

    Clear glassware looks beautiful against natural oak.

    It also looks sophisticated against dark walnut.

    Against black shelves, transparent glass creates a crisp contrast.

    Against white shelves, combine glass with darker ceramics or wood so the display does not become too pale.

    Practicality is important.

    Make sure the shelf is strong enough for the glassware.

    Place heavier glass pieces toward more secure areas.

    Keep fragile objects away from places where they can easily be bumped.

    If children frequently use the kitchen, consider whether delicate pieces are appropriate for lower shelves.

    Glassware can also make a kitchen feel more elegant without adding unnecessary decoration.

    A few beautiful glasses are both functional and visually refined.

    6. Add Cookbooks and Personal Objects for Character

    A modern kitchen should not feel like a showroom.
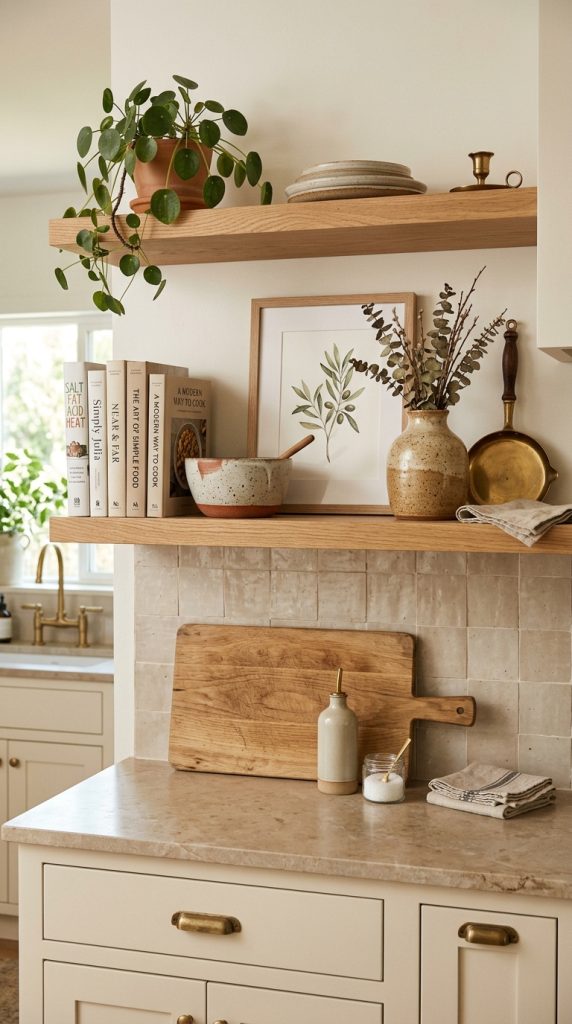
    One of the easiest ways to make open shelves more personal is to include cookbooks and meaningful objects.

    Cookbooks naturally belong in the kitchen, so they add personality without feeling random.

    Create a small stack of two or three books.

    Place a simple ceramic bowl or decorative object on top.

    Beside the stack, position a vase or small framed print.

    You can also arrange several books vertically.

    The important thing is to avoid turning the shelf into a library.

    A few books create personality.

    Too many can make the shelves feel visually heavy.

    Book colors can also influence the kitchen palette.

    Neutral covers are ideal for a calm minimalist interior.

    Muted olive, brown, terracotta, burgundy, or dusty blue can introduce controlled color.

    If your kitchen already has strong colors, choose quieter book covers.

    Personal objects can be even more meaningful.

    Perhaps you have a handmade ceramic bowl.

    Maybe you own a vintage serving platter.

    Perhaps there is a small object from a memorable trip.

    These pieces can become part of the kitchen story.

    You do not need to display every sentimental object.

    Choose a few.

    This makes them more noticeable.

    Small artwork can also work well.

    A botanical print, abstract sketch, or simple black-and-white illustration can lean against the backsplash.

    Keep the frame simple.

    The kitchen should remain the dominant environment.

    A personal shelf arrangement can be especially useful in a very modern kitchen because it introduces warmth and individuality.

    The goal is not to make the shelves look perfectly coordinated.

    A little variation makes the display feel collected.

    The colors should still relate to the room.

    A vintage wooden piece can work beautifully with contemporary ceramics.

    An old cookbook can sit beside modern glassware.

    A handmade vase can contrast with minimalist plates.

    These combinations create depth.

    7. Use Black and Cream for a Sophisticated Modern Contrast

    Black and cream create one of the most timeless combinations for modern kitchen shelving.
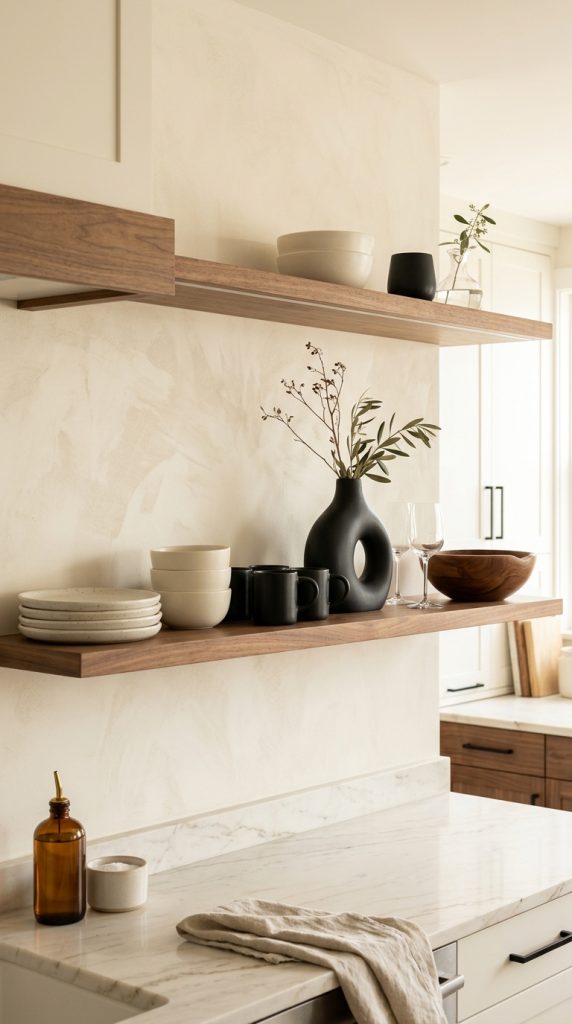
    The contrast is strong enough to create visual interest but simple enough to remain elegant.

    Start with cream or ivory ceramics.

    Add several matte-black accessories.

    These could include mugs, bowls, a vase, or a small serving piece.

    Then introduce natural wood to soften the contrast.

    For example, a shelf could contain cream plates, a black ceramic vase, a walnut bowl, and clear glasses.

    The black pieces should act as accents rather than dominating the entire display.

    This is especially effective if your kitchen already has black hardware.

    A black faucet, cabinet handles, pendant lights, or appliances can be echoed through the shelf accessories.

    This repetition creates visual continuity.

    Matte black works particularly well because it has a quiet, sophisticated surface.

    Glossy black can also work, but too much shine may make the display feel more dramatic.

    The cream pieces create visual brightness.

    Wood provides warmth.

    Glass provides transparency.

    Together, the four materials create a balanced composition.

    You can also use a small amount of brass if the kitchen already contains brass hardware.

    One brass object is enough.

    Avoid turning the shelf into a collection of black, cream, wood, and brass accessories without a clear hierarchy.

    The cream ceramics should remain the foundation.

    Black creates contrast.

    Wood introduces warmth.

    Brass provides a subtle highlight.

    This type of arrangement works particularly well in contemporary, modern farmhouse, transitional, and luxury-inspired kitchens.

    8. Add Woven Baskets for Warmth and Practical Storage

    Woven baskets are useful when your kitchen needs additional storage but you do not want the shelves to look purely functional.
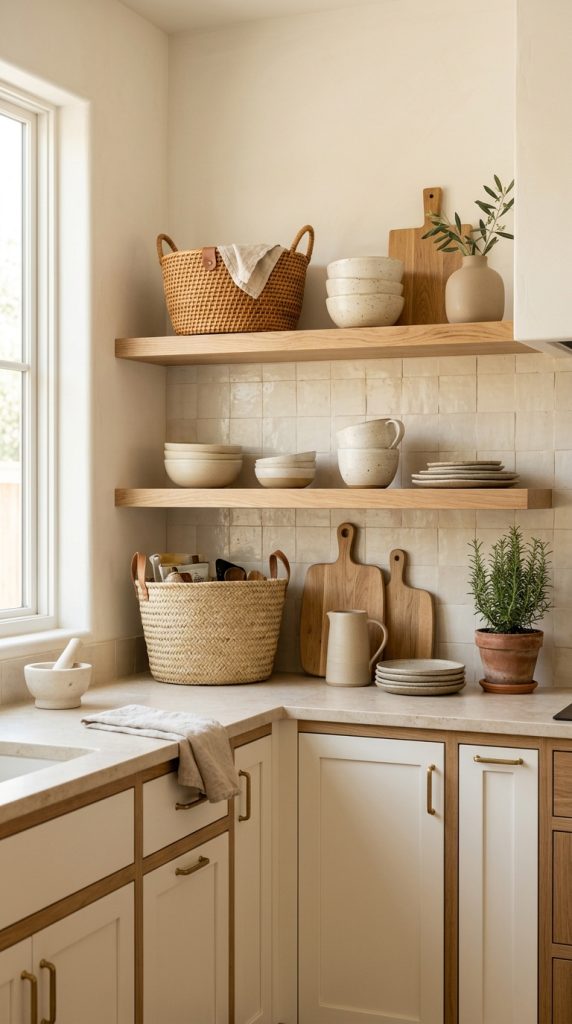
    Choose a small basket made from rattan, cane, seagrass, or another natural fiber.

    Use it to contain smaller items that would otherwise create visual clutter.

    You might store:

    • Tea towels
    • Napkins
    • Small kitchen tools
    • Coffee supplies
    • Reusable bags
    • Baking accessories

    Because the contents are contained, the shelf remains visually calm.

    Place the basket beside ceramic bowls or plates.

    The contrast between woven texture and smooth pottery creates depth.

    A natural-fiber basket also works beautifully with wood.

    You can create a warm arrangement using:

    Woven basket + oak board + cream ceramic bowl + small green plant.

    The palette remains neutral, but the different textures prevent it from looking boring.

    Do not use baskets on every shelf.

    One or two are generally enough.

    Too many can make the kitchen feel like a storage room.

    Choose baskets that fit the shelf proportions.

    A basket that is too large can overwhelm the arrangement.

    A very small basket may look insignificant.

    The weave should also complement the kitchen.

    Fine, structured cane can look sophisticated in a contemporary kitchen.

    Rougher woven fibers can create a more relaxed organic appearance.

    Baskets are especially useful when open shelves are part of a small kitchen.

    They help hide less attractive small items while keeping them accessible.

    This makes the shelves both beautiful and practical.

    9. Create an Organic Modern Shelf With Greenery

    An organic modern kitchen combines contemporary simplicity with natural materials, earthy colors, and living elements.
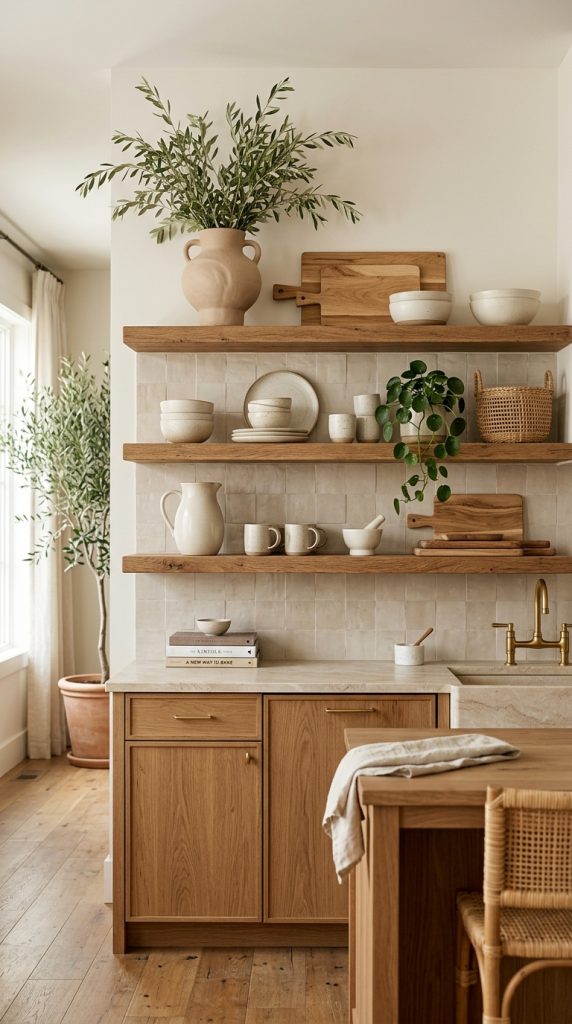
    Open shelves are perfect for this style.

    Start with warm wood.

    Add cream, beige, sand, or taupe ceramics.

    Then introduce a carefully chosen plant or botanical arrangement.

    You might use a small olive tree, trailing plant, eucalyptus, herbs, or a few sculptural branches.

    The greenery should be intentional.

    One beautiful plant can have more impact than five small plants scattered across the shelves.

    Choose a planter that works with the palette.

    Matte cream ceramic is an easy option.

    Natural stone can create a more earthy look.

    Dark charcoal can add contrast.

    You can also use handmade vessels with irregular shapes.

    Organic modern interiors benefit from imperfect forms.

    A rounded bowl, uneven ceramic vase, or naturally shaped wooden object can soften the straight lines of modern cabinetry.

    Muted colors are ideal.

    Think:

    • Warm beige
    • Cream
    • Olive
    • Sand
    • Walnut
    • Soft brown

    Avoid introducing too many strong colors.

    The beauty of organic modern styling comes from material and texture rather than bright decoration.

    You can create a layered shelf using wood, ceramic, stone, greenery, and woven material.

    For example, place a tall olive branch in a cream vase.

    Beside it, stack two neutral bowls.

    Behind them, lean a wooden cutting board.

    On the next shelf, add a small woven basket and a stone-colored serving dish.

    The display feels natural without looking rustic.

    This style works especially well in kitchens with oak cabinetry, natural stone, warm flooring, neutral walls, or large windows.

    10. Create a Curated Designer-Style Shelf

    If you want your open shelves to look professionally styled, treat them as a composition rather than simply arranging objects wherever there is space.
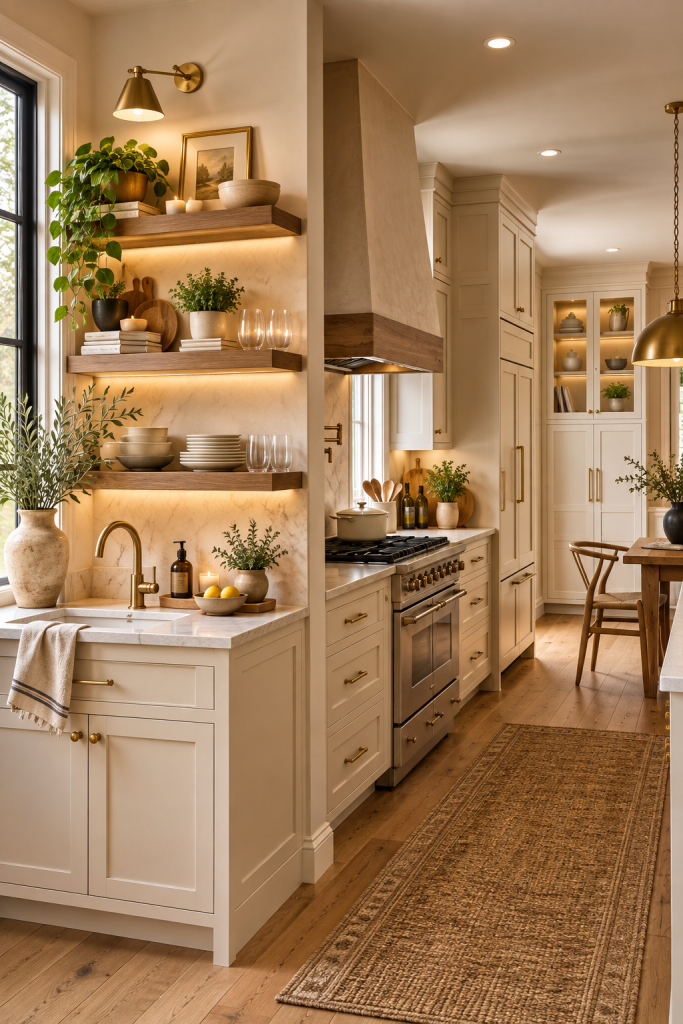
    Start with one focal piece.

    This could be a large ceramic vase, sculptural pitcher, distinctive serving bowl, or beautiful wooden board.

    Position it where it can be noticed immediately.

    Then build around it.

    Add a medium-sized object.

    Then add something low.

    This creates a clear hierarchy.

    For example:

    Tall ceramic vase + medium wooden bowl + low stack of plates.

    On the next shelf, change the arrangement.

    You might use:

    Leaning cutting board + handmade bowl + clear glasses.

    The compositions should relate to each other without being identical.

    This avoids a repetitive showroom effect.

    Depth is important.

    Lean larger flat pieces such as cutting boards or artwork against the backsplash.

    Place smaller objects slightly forward.

    Use the back of the shelf for visual height.

    Use the front for low functional pieces.

    This creates dimension.

    You should also consider the negative space around your focal piece.

    A statement vase cannot stand out if it is surrounded by ten other decorative objects.

    Give it room.

    The same applies to handmade pottery or unusual serving pieces.

    The less competition they have, the more important they appear.

    A designer-style arrangement also uses repetition.

    If you introduce black on one shelf, repeat a small amount of black elsewhere.

    If you use walnut, repeat walnut.

    If your main ceramics are cream, allow that color to appear throughout the display.

    This creates continuity.

    But repetition should not become duplication.

    You do not need three identical vases.

    You need a relationship between the objects.

    The final step is editing.

    Look at the shelf from across the room.

    Ask whether one object feels unnecessary.

    Remove it.

    Then look again.

    Often the shelf becomes more sophisticated immediately.

    This approach is particularly useful when you want your kitchen to feel luxurious without spending a large amount on accessories.

    How to Keep Open Kitchen Shelves From Looking Cluttered

    The biggest secret to attractive open shelving is not adding more.

    It is editing.

    Before styling, remove everything from the shelves.

    Clean the surface.

    Then select only the items that deserve to remain visible.

    Start with functional pieces.

    Add a few decorative objects.

    Then step back.

    If there are too many small objects, group them.

    If the colors are competing, remove some.

    If every object is the same height, introduce a taller piece.

    If the shelf feels heavy, remove something and create more empty space.

    You can also use a simple visual rule: avoid putting similarly sized objects directly beside each other throughout the entire shelf.

    Mix tall and short pieces.

    Mix round and straight forms.

    Mix solid and transparent materials.

    This creates variety without clutter.

    How to Choose Colors for Modern Open Shelves

    A simple palette is easier to maintain.

    For a warm modern kitchen, try:

    Cream + oak + beige + black.

    For an organic modern kitchen:

    Sand + olive + walnut + ivory.

    For a sophisticated contemporary kitchen:

    Charcoal + cream + walnut + brass.

    For a bright minimalist kitchen:

    White + pale wood + clear glass + greenery.

    You do not need to use every color equally.

    One should dominate.

    One or two should support it.

    Another can become a small accent.

    This creates visual hierarchy.

    How to Make Open Shelving Look Expensive

    Expensive-looking styling usually comes from restraint rather than price.

    Choose natural materials.

    Prioritize ceramics, wood, glass, stone, linen, and woven fibers.

    Avoid excessive plastic.

    Choose fewer larger pieces rather than many tiny objects.

    Create negative space.

    Keep the colors coordinated.

    Use warm lighting.

    And most importantly, avoid overcrowding.

    A simple shelf with one beautiful ceramic vase, a few cream plates, a wooden board, and clear glasses can look far more sophisticated than a shelf packed with inexpensive decorations.

    Open Shelving in a Small Kitchen

    A small kitchen benefits from visual lightness.

    Use clear glass, pale ceramics, slim accessories, and small amounts of greenery.

    Avoid oversized vases.

    Keep the shelves relatively open.

    If storage is limited, prioritize items you actually use.

    A shelf filled with everyday plates and glasses may be more useful than a shelf filled entirely with decorative objects.

    You can also use baskets to contain smaller items.

    This keeps the visual field calm.

    Another useful technique is to keep the upper shelf lighter than the lower one.

    Place taller or heavier objects lower down.

    Use lighter glassware and small ceramics higher up.

    This can make the entire arrangement feel more balanced.

    Open Shelves in a Large Modern Kitchen

    A larger kitchen can support stronger focal points.

    You can use larger ceramic vessels, substantial wooden boards, bigger plants, or more extensive dinnerware collections.

    However, a large shelf does not need to be completely filled.

    In fact, empty sections can make a large kitchen feel more luxurious.

    Use the additional space to create separate visual zones.

    One area can focus on dinnerware.

    Another can feature glassware.

    Another can contain cookbooks and a statement object.

    The zones should still share a color palette.

    This prevents the shelves from looking like unrelated displays.

    Final Thoughts

    Open kitchen shelves can be one of the most beautiful design features in a modern home when they are styled with intention.

    They can make everyday kitchen objects feel special.

    They can introduce warmth into a sleek contemporary space.

    They can provide practical storage.

    They can showcase your favorite ceramics.

    They can bring greenery into the room.

    And they can make a kitchen feel more personal without requiring a major renovation.

    The most important thing is to avoid treating the shelf as an empty space that needs to be filled.

    Instead, think of it as a visual composition.

    Start with your kitchen’s existing architecture.

    Look at the cabinets.

    Look at the countertops.

    Look at the backsplash.

    Look at the flooring.

    Look at the hardware and lighting.

    Then choose objects that complement those elements.

    If your kitchen is mostly white, natural wood and warm ceramics can create contrast.

    If it is already rich in wood, pale ceramics and glass can provide balance.

    If the kitchen has black hardware, a few black shelf accessories can connect the design.

    If the space feels cold, woven baskets and greenery can add softness.

    If the kitchen already has plenty of visual activity, keep the shelves quiet.

    There is no requirement to use every styling idea at once.

    Choose one direction and develop it consistently.

    A neutral ceramic display can create a peaceful minimalist look.

    Natural wood can make a contemporary kitchen feel warmer.

    Everyday dinnerware can turn storage into decoration.

    A coffee shelf can create a beautiful functional station.

    Glassware can make the room feel lighter.

    Cookbooks can add personality.

    Black and cream can create sophisticated contrast.

    Woven baskets can provide texture and practical storage.

    Greenery can bring an organic quality.

    A curated designer-style arrangement can create a polished focal point.

    Each approach can work independently.

    The strongest results usually come from choosing one primary idea and supporting it with two or three complementary materials.

    For example, if natural wood is the main feature, use ceramic and greenery as supporting elements.

    If black and cream are the main colors, add wood to soften them.

    If glassware is the focus, use ceramic and wood to create contrast.

    This prevents the shelves from becoming visually confused.

    Remember that open shelving is highly visible.

    That is both its advantage and its challenge.

    Because the shelves are exposed, they can make the kitchen look beautifully styled.

    But because they are exposed, they also require more editing than closed storage.

    Use the shelves to display things you genuinely enjoy seeing.

    Store the things that create visual noise elsewhere.

    Bright packaging, mismatched containers, cleaning products, and rarely used objects do not need to become part of the kitchen’s visual identity.

    Your shelves should show the best version of your everyday kitchen.

    At the same time, do not make them so perfect that they become inconvenient.

    If you use a mug every morning, you should be able to pick it up easily.

    If you cook frequently, your bowls and serving pieces should remain accessible.

    If you entertain regularly, your glasses should be positioned where they make sense.

    The best shelf styling combines beauty with real life.

    It is also worth remembering that modern does not have to mean cold.

    Modern kitchen design can include handmade ceramics, natural wood, woven baskets, vintage cookbooks, soft greenery, warm lighting, and collected objects.

    These details can make clean architecture feel inviting.

    The most successful modern interiors often combine precise lines with organic materials.

    Open shelves are an ideal place to create that balance.

    A straight wooden shelf can hold an irregular ceramic vase.

    Smooth stone countertops can sit below woven baskets.

    Modern cabinets can be softened by natural greenery.

    Clear glass can reflect warm lighting.

    The contrast is what creates character.

    Do not be afraid of small imperfections.

    A handmade bowl that is slightly uneven can make the shelf feel more authentic.

    A wooden board with visible grain can add warmth.

    A vintage book can introduce history.

    A slightly irregular vase can soften a perfectly modern kitchen.

    These details give the space a collected appearance.

    At the same time, restraint remains important.

    One handmade piece can be beautiful.

    Ten unrelated handmade pieces may become overwhelming.

    The goal is not to create a museum collection.

    It is to create a kitchen that feels intentional and comfortable.

    When styling your shelves, take your time.

    Try one arrangement.

    Step back.

    Take a photo of the kitchen from across the room.

    Look at the image rather than only looking closely at the shelf.

    You will often notice things in a photograph that you do not notice while standing directly in front of the arrangement.

    Maybe one side looks heavier.

    Maybe there are too many small objects.

    Maybe the colors are not balanced.

    Maybe one beautiful object is being hidden.

    Make small adjustments.

    You do not need to completely redo the shelf every time.

    Sometimes moving one vase or removing one bowl is enough.

    The final result should feel effortless.

    It should look as though the beautiful objects naturally belong there.

    That is the difference between a shelf that is decorated and a shelf that is well styled.

    Whether your kitchen is large or small, bright or dark, minimalist or layered, open shelving can become a defining feature.

    Use it to display what is beautiful.

    Use it to store what is useful.

    Use it to add warmth where the kitchen feels cold.

    Use it to introduce personality where the architecture feels too uniform.

    And always leave enough space for the kitchen to breathe.

    Ultimately, the best open kitchen shelf decorating ideas are not about following a strict formula.

    They are about understanding your space and making thoughtful choices.

    Choose a cohesive palette.

    Mix materials.

    Vary heights.

    Create depth.

    Repeat a few colors.

    Leave negative space.

    Display useful pieces.

    Add personality.

    Remove anything unnecessary.

    When these principles come together, open shelves can make a modern kitchen feel polished, warm, functional, and genuinely lived in.

    The result is not a kitchen filled with decorations.

    It is a kitchen where the everyday objects become part of the beauty of the room.
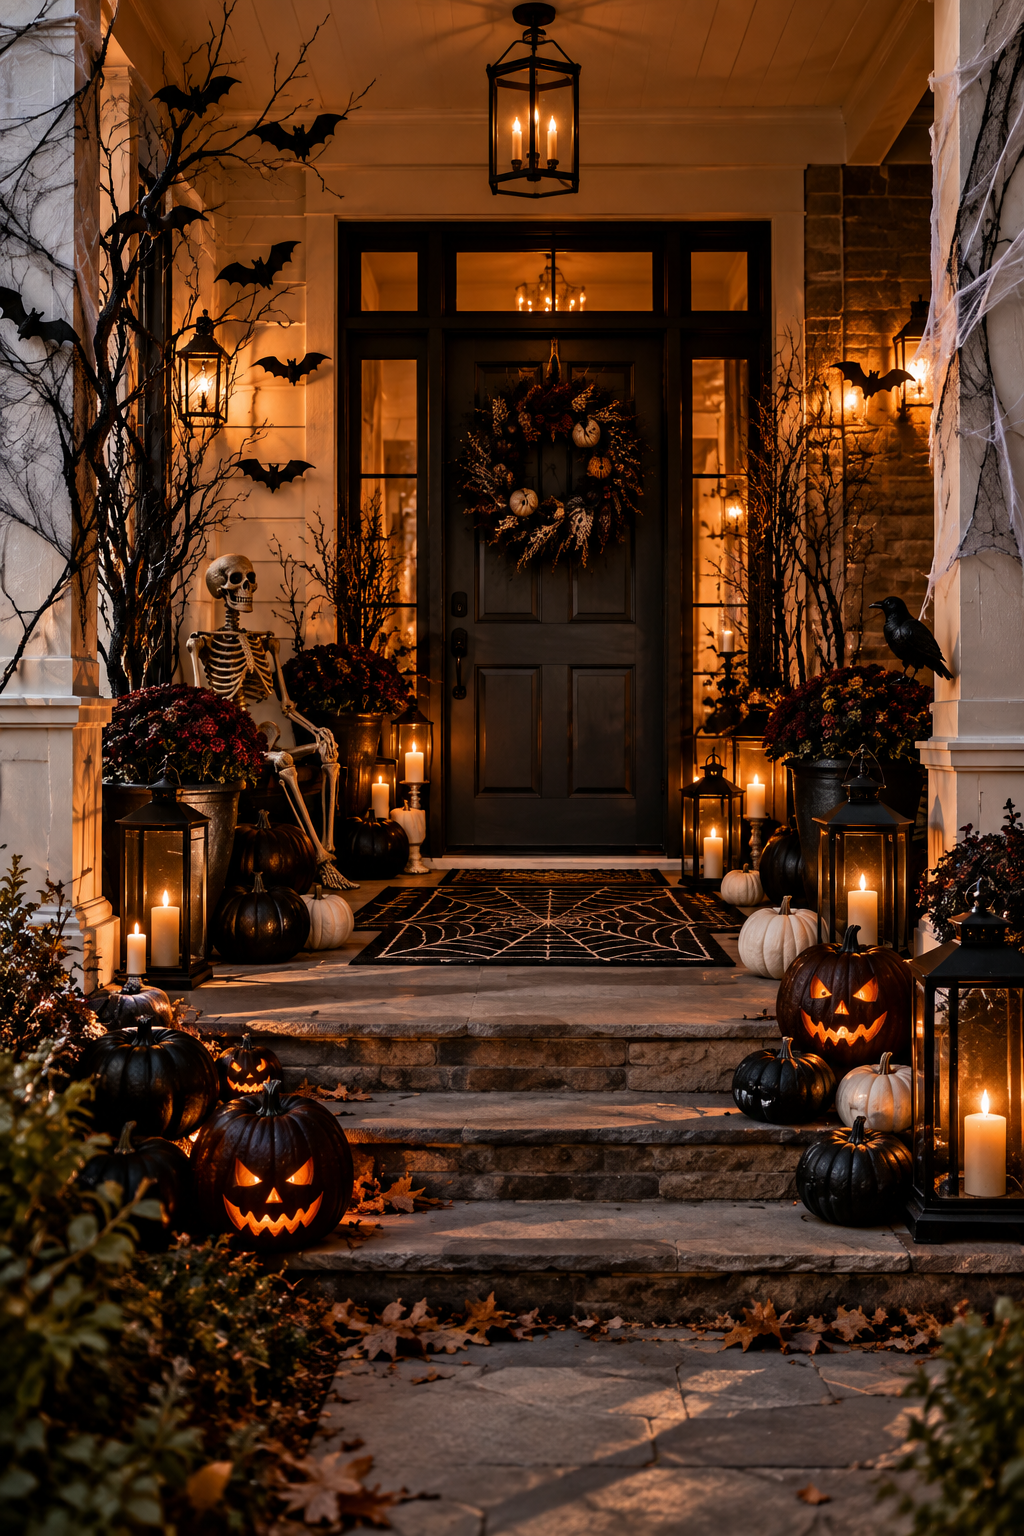

  • Scary Halloween Porch Ideas for a Spooky Home

    Scary Halloween Porch Ideas for a Spooky Home

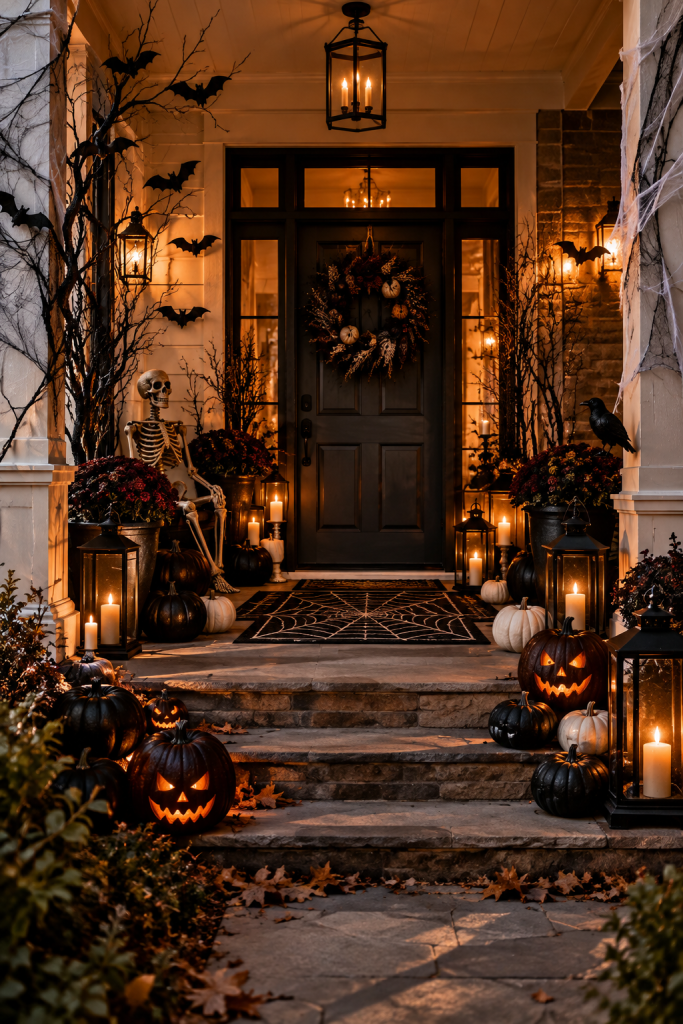
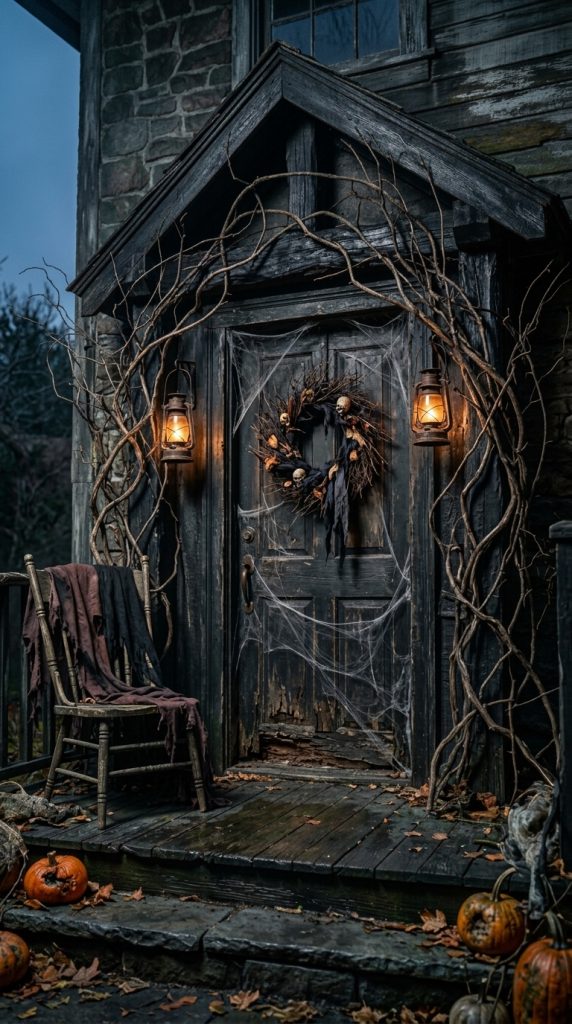
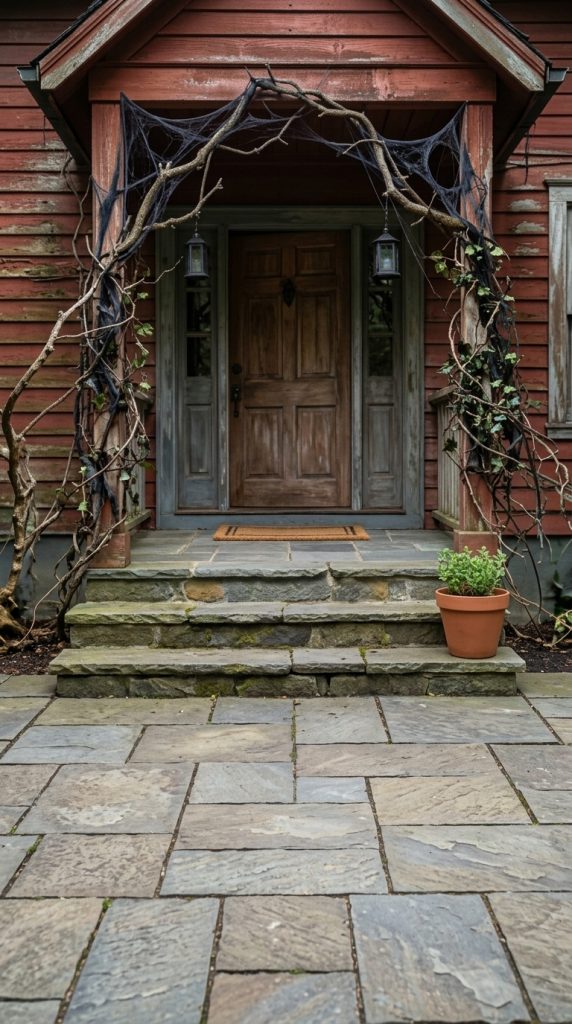
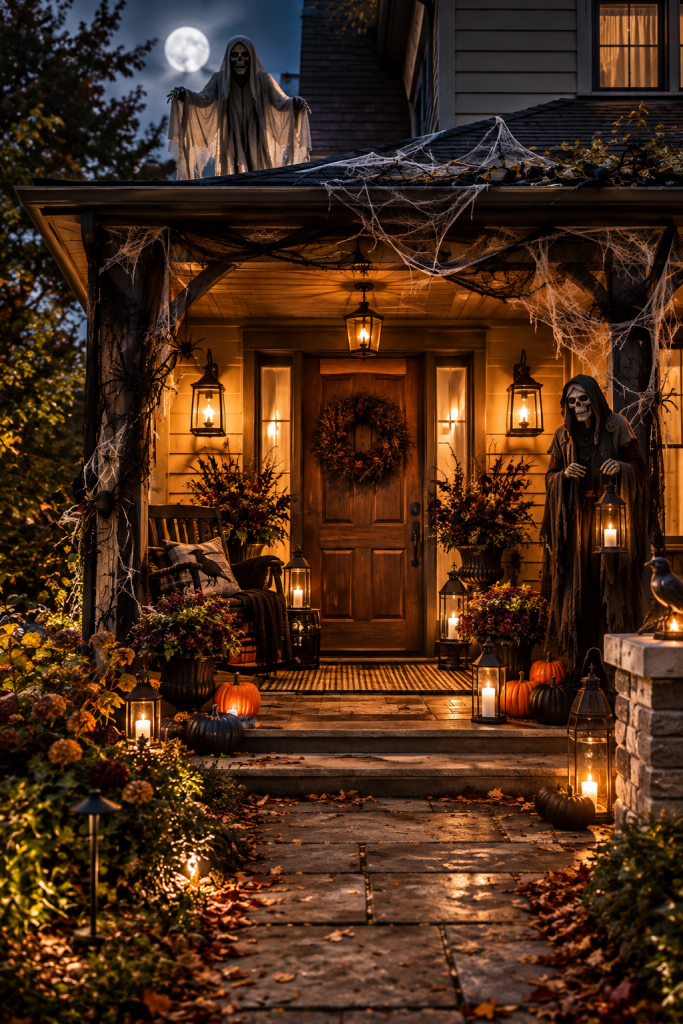
    Halloween is the perfect time to transform an ordinary front porch into a dramatic entrance that immediately sets the mood for the rest of the home. Scary Halloween porch ideas can range from eerie and mysterious to genuinely frightening, depending on how intense you want the atmosphere to feel. A well-designed Halloween porch does not need to be filled with random decorations. Instead, the most effective spooky displays use lighting, shadows, texture, sound, height, and carefully positioned props to create a scene that feels intentional.

    The front porch is especially important because it is the first part of the home guests, neighbors, trick-or-treaters, and visitors see. Unlike indoor Halloween decorating, porch decorating has the advantage of natural darkness, outdoor shadows, changing weather, and architectural features that can all contribute to the atmosphere. A staircase can become part of a haunted entrance. A doorway can look like the entrance to an abandoned house. A porch railing can disappear beneath artificial cobwebs. A simple pathway can become an eerie passage surrounded by ghostly silhouettes.

    The key to creating a genuinely scary Halloween porch is not simply adding more decorations. Too many props competing for attention can actually make the display less frightening because the eye has nowhere specific to focus. A better approach is to create a visual story.

    Imagine walking toward a dark porch after sunset.

    The pathway is barely illuminated.

    A few twisted branches cast long shadows across the ground.

    An old lantern flickers beside the front door.

    A weathered chair sits beneath a dark window.

    A life-size figure stands quietly in the corner.

    Above the entrance, something moves slightly in the wind.

    Nothing is completely obvious.

    That uncertainty is what creates suspense.

    A spooky porch can be much more effective when some areas are left dark rather than illuminated. Shadows allow the imagination to fill in what cannot be seen. Instead of lighting every decoration equally, use light selectively to highlight certain objects while allowing others to remain partially hidden.

    Color also has an important role.

    Traditional orange and black can create a recognizable Halloween appearance, but a more frightening porch can use charcoal, deep burgundy, aged brown, gray, muted orange, and dark green alongside black. These colors can make the display feel more atmospheric and less like a collection of brightly colored holiday decorations.

    Lighting deserves particular attention.

    Warm amber lights can create an old haunted-house feeling. Cool white or pale blue lighting can create a colder, ghostly atmosphere. Red lighting can be dramatic when used sparingly. Flickering lights can suggest an abandoned or unstable environment.

    However, the most effective lighting is often a combination rather than a single color.

    A warm lantern near the door can provide a welcoming but eerie glow while a dim cooler light illuminates a shadowy figure farther away.

    Texture can make a porch feel much more convincing.

    Weathered wood, burlap, aged metal, artificial moss, rough rope, dried branches, gauze, distressed fabric, and tangled vines can all contribute to a haunted atmosphere. These materials create visual depth even when the colors remain dark.

    The porch architecture should also be considered.

    If you have columns, wrap them with subtle vines or cobwebs.

    If you have railings, use them to create depth with hanging fabric or skeletal decorations.

    If your porch has steps, use each level to create a gradual transition from the yard to the doorway.

    If you have a covered porch, take advantage of the ceiling and upper areas.

    Hanging ghosts, bats, branches, lanterns, and suspended props can make the entire space feel immersive.

    Safety should always remain part of the design.

    Keep stairs and walking paths clear.

    Secure decorations against wind.

    Keep electrical cords protected and away from standing water.

    Use outdoor-rated lighting where appropriate.

    Keep open flames away from fabric, dried vegetation, paper, and other flammable decorations.

    Battery-operated candles and outdoor-rated LED lighting can create atmospheric effects without requiring open flames.

    The following ten ideas are designed to create different types of scary Halloween porches. You can choose one complete theme or combine elements carefully to create a personalized haunted entrance.

    1. Create a Haunted House Entrance With Dark Lighting

    One of the most effective ways to make a porch look genuinely frightening is to transform the entire entrance into a haunted-house scene.

    Instead of concentrating on individual decorations, focus on changing the atmosphere of the porch itself.

    Start with the front door.

    A dark or weathered-looking door provides an excellent foundation. If your door is already black, charcoal, dark brown, or deep green, you have an ideal starting point. If it is a lighter color, you can create contrast by surrounding it with darker decorations rather than trying to change the door permanently.

    Add an old-looking wreath.

    Instead of using a cheerful autumn wreath, choose one made from dark branches, dried foliage, black leaves, or twisted vines. Add a few subtle elements such as small ravens, dark flowers, or distressed ribbon.

    Keep the wreath relatively simple.

    The doorway should feel mysterious rather than covered in decorations.

    Next, create darkness around the entrance.

    Place warm lanterns or dim outdoor lights on either side of the door. The lighting should illuminate the doorway without making every decoration completely visible.

    The areas outside the light should remain darker.

    This creates a natural transition between visibility and shadow.

    Add weathered wooden elements around the entrance.

    Old-looking crates, distressed boards, or vintage-style signs can create the impression that the house has been abandoned.

    You can use a few carefully selected pieces rather than covering the porch with props.

    One of the strongest additions is an old chair.

    Place it slightly away from the center of the doorway.

    The chair can hold a dark fabric, an artificial crow, or a weathered lantern.

    The object becomes more mysterious because it looks like something that might actually belong in an abandoned home.

    Artificial cobwebs can be used around the doorframe, but apply them selectively.

    Stretch them across corners, railings, and architectural details rather than covering every surface.

    Natural-looking irregularity is more convincing than a thick layer of white material.

    You can also add black branches.

    Place tall twisted branches in a large outdoor planter beside the entrance.

    Their silhouettes will become dramatic after sunset.

    If the branches are positioned near a light source, they can cast shadows onto the wall.

    Those shadows become part of the decoration.

    The final element should be sound.

    A low-volume outdoor speaker can play subtle environmental sounds such as distant wind, creaking wood, or quiet atmospheric effects.

    Avoid making the sound constant and overwhelming.

    A subtle soundscape can create more suspense.

    The result should feel like a house with a story.

    Guests should feel as though they are approaching somewhere they are not completely sure they want to enter.

    2. Build a Creepy Cemetery on the Front Porch

    A miniature cemetery is a classic Halloween theme, but it can become much more sophisticated and frightening when the arrangement is carefully designed.

    The first step is deciding how much of the porch and yard you want to use.

    If you have a small porch, create a compact cemetery scene around the entrance.

    If you have a larger front yard, extend the cemetery outward so that the porch becomes the center of the scene.

    Use artificial tombstones with different heights and shapes.

    Avoid arranging them in a perfectly straight line.

    Instead, create an irregular pattern.

    Some tombstones can appear slightly tilted.

    Others can be partially hidden behind artificial fog, plants, or fabric.

    This irregularity makes the scene feel older.

    Place the tallest tombstone toward the back.

    Use medium-sized stones around it.

    Keep shorter pieces toward the front.

    This creates depth.

    You can also add small ground-level props.

    Artificial bones, skeletal hands, old lanterns, and weathered signs can be placed near the tombstones.

    Use these pieces sparingly.

    A few strategically positioned objects can be more effective than covering every inch of the ground.

    Lighting is particularly important for a cemetery.

    Instead of brightly illuminating every tombstone, place small lights near the ground.

    A dim amber light can illuminate one stone.

    Another cool-toned light can highlight a different section.

    This creates visual separation.

    Artificial fog can add another layer.

    If you use a fog machine, position it so the fog remains low and does not obscure stairs or walking paths.

    The fog should move through the scene rather than creating a thick cloud everywhere.

    Add dead-looking vegetation.

    Dark grasses, bare branches, artificial moss, and dried foliage can soften the edges of the cemetery props.

    This helps the tombstones feel integrated into the landscape.

    You can also create a pathway through the cemetery.

    Use lanterns to mark the edges.

    Keep the walkway completely clear.

    The pathway itself becomes part of the story because visitors have to move through the scene.

    For an extra eerie detail, add a shadowy figure behind the cemetery.

    It does not need to be immediately obvious.

    A partially concealed silhouette can create suspense.

    The goal is to make visitors look twice.

    A cemetery display works especially well with older homes, traditional porches, brick houses, and homes with mature landscaping.

    The architectural character provides a natural backdrop for the haunted scene.

    3. Create a Ghostly Porch With Hanging Spirits

    For a more supernatural Halloween porch, create an environment filled with ghostly figures.

    The main advantage of hanging ghosts is that they use vertical space.

    Instead of occupying the floor, they float above it.

    This can make a porch feel much more immersive.

    Begin with one large central ghost.

    Place it above or slightly beside the entrance.

    The figure should be high enough that it does not interfere with anyone walking beneath it.

    Then add smaller ghostly forms at different heights.

    Do not place them all at the same level.

    Varying heights create movement.

    Some ghosts can hang near the ceiling.

    Others can appear farther out toward the porch edge.

    One or two can be positioned closer to the yard.

    Use lightweight outdoor-safe materials appropriate for the weather conditions.

    Flowing white or pale gray fabric can create the appearance of floating figures.

    The fabric should move naturally in the wind.

    Avoid making every ghost identical.

    Different sizes create a more believable scene.

    Lighting should come from below or behind.

    A small light positioned beneath a ghost can illuminate the fabric and create dramatic shadows.

    Another option is placing a dim light behind the figure so it becomes a silhouette.

    The second technique can be particularly effective because it hides details.

    You can also use pale blue or cool white illumination for a colder atmosphere.

    Keep warmer lights near the doorway so the entrance remains visible.

    Add a few dark elements around the ghosts.

    Black branches, dark lanterns, or shadowy planters can create contrast.

    The combination of pale ghostly forms and dark surroundings creates a strong visual effect.

    Avoid filling the entire porch with white fabric.

    Too much fabric can make the display look messy.

    Instead, create a few distinct floating figures with plenty of dark space between them.

    You can also add subtle movement.

    Lightweight hanging elements that sway in the wind can create an unsettling effect.

    If you use electronic moving props, choose outdoor-rated equipment and secure everything carefully.

    A ghostly porch works particularly well for homes with covered entrances because the overhead structure provides natural attachment points for hanging decorations.

    The final scene should look as though the porch has become occupied by things that do not belong there.

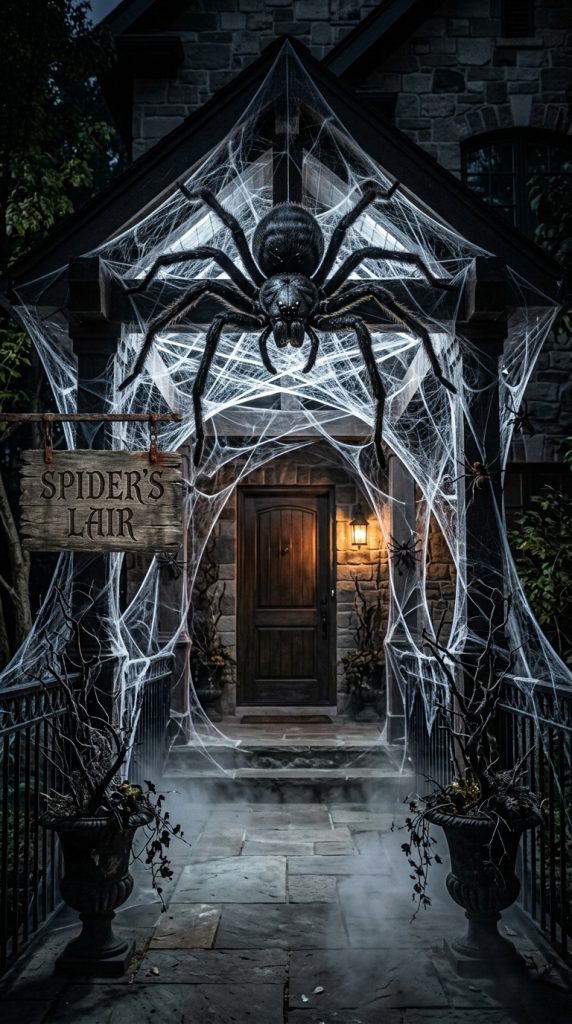
    4. Turn the Porch Into a Dark Spider-Web Tunnel

    For a dramatic Halloween entrance, transform the walkway or porch into a giant spider-web passage.

    This theme works particularly well if your porch has columns, railings, or a covered walkway.

    Begin at the outer edge of the porch.

    Stretch artificial web material across selected areas.

    Do not make the web perfectly symmetrical.

    Pull it unevenly across railings and corners.

    Allow sections to hang slightly lower.

    Then add oversized artificial spiders.

    Use different sizes.

    One large spider can become the primary focal point.

    Smaller spiders can be positioned farther away.

    Place the largest spider somewhere that visitors will notice immediately, but keep it away from the actual walking path.

    You can also position one spider above the doorway.

    The contrast between the dark spider and the lighter web creates a strong visual focal point.

    Lighting can make the web dramatically more visible.

    Use a light positioned behind or beneath the web so the strands catch the illumination.

    A warm amber light can create an old haunted-house feeling.

    A cool white light can make the web feel colder and more unnatural.

    Avoid illuminating the entire porch evenly.

    Allow some areas of web to disappear into darkness.

    This creates depth.

    Add black branches around the entrance.

    They can look like the spider web has spread into surrounding vegetation.

    A weathered sign can add storytelling.

    For example, a simple distressed sign could suggest that visitors are entering a forbidden area.

    Keep the lettering limited.

    The visual scene should remain the main attraction.

    The spider-web theme can also extend to planters.

    Place dark artificial vines around the base of a planter.

    Allow some strands to trail naturally.

    Do not cover every plant.

    The contrast between ordinary landscaping and the web creates a more believable effect.

    For safety, make sure web material does not obstruct handrails, steps, door handles, lighting fixtures, or pathways.

    Secure loose material against wind.

    The result should feel like visitors are walking into a giant hidden spider lair.

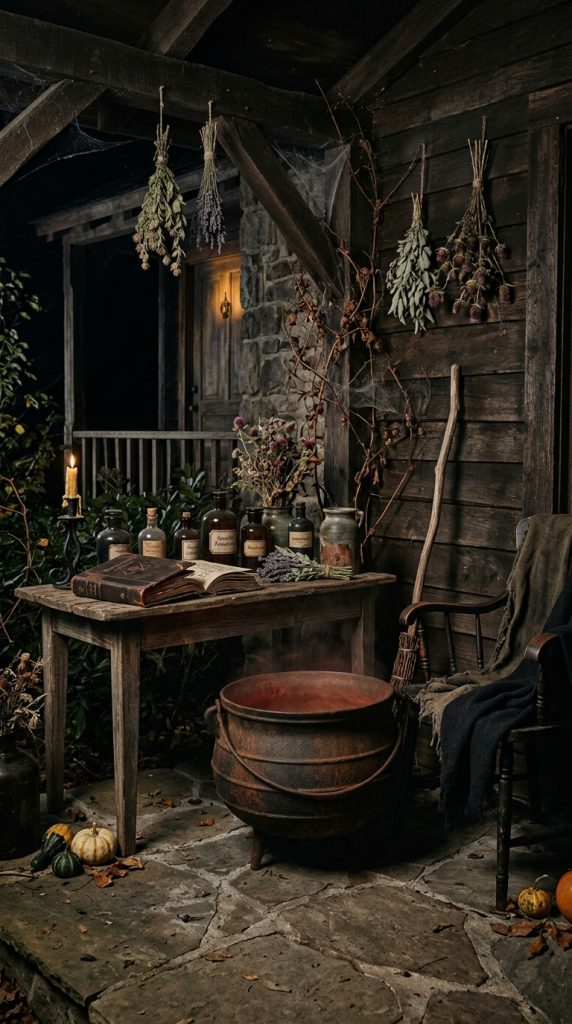
    5. Create a Sinister Witch’s Porch

    A witch-themed porch can be spooky without relying on an overwhelming collection of cartoon-style Halloween decorations.

    The key is to create the impression that a mysterious witch lives inside the house.

    Start with an old-looking wooden table or small console.

    Place it against one side of the porch.

    On the table, arrange dark bottles, an old-looking book, a black candle holder, dried herbs, and a dark ceramic vessel.

    Keep the objects arranged like a working collection rather than a random Halloween display.

    A large black cauldron can become another focal point.

    Place it safely away from the walkway.

    If you want to create a glowing effect inside the cauldron, use battery-operated lighting rather than an exposed flame.

    A low red or amber glow can create a mysterious atmosphere.

    Add a broom.

    Lean it against a wall or place it beside the table.

    A pointed witch hat can be positioned nearby, but keep the styling restrained.

    The scene should feel atmospheric rather than humorous.

    Lighting can transform the display.

    Use one warm lantern near the table.

    Add a dim colored light behind the cauldron.

    Keep the rest of the porch darker.

    You can also add hanging herbs or dried branches.

    Tie small bundles together and hang them from a protected area.

    Use natural-looking materials and avoid placing anything that could easily fall onto a walkway.

    A vintage-style mirror can add another layer.

    Position it against the wall where it can reflect a dim light or another part of the porch.

    The reflection can create an unsettling visual effect.

    A dark chair can complete the scene.

    Place it slightly away from the main arrangement.

    Add a dark shawl or distressed fabric.

    Avoid placing a person inside the chair.

    The empty chair itself can feel more mysterious.

    You can also use a shadowy witch silhouette behind a window.

    This creates the impression that something is moving inside the house.

    The silhouette should remain subtle.

    The goal is suspense rather than a fully explained scene.

    A witch’s porch works particularly well with dark green, black, brown, burgundy, and antique brass.

    These colors create an old-world atmosphere that feels more sophisticated than bright Halloween colors.

    6. Design a Sinister Scarecrow and Harvest Porch

    For a frightening fall porch that still incorporates seasonal autumn elements, create a sinister scarecrow display.

    Instead of a cheerful harvest arrangement, use weathered textures and darker colors.

    Begin with the scarecrow.

    Choose a figure with worn clothing, distressed fabric, and an aged appearance.

    Position it slightly to the side rather than directly in front of the door.

    This creates an element of surprise.

    The scarecrow can stand beside a stack of wooden crates or old barrels.

    Add muted pumpkins around the base.

    Choose colors such as:

    • Charcoal
    • Dark green
    • Muted orange
    • Cream
    • Brown

    Avoid making every pumpkin bright orange.

    The darker palette creates a more ominous appearance.

    Add dried cornstalks or tall grasses behind the scarecrow.

    Their height creates a strong vertical background.

    At night, these plants can cast long shadows.

    Lighting should be low and directional.

    Place a warm light near the ground so it illuminates the scarecrow from below.

    This creates dramatic shadows across the face.

    Avoid a bright overhead light.

    The upward lighting technique makes the figure appear much more unsettling.

    You can add an old lantern beside the scarecrow.

    If using a real lantern with a flame, ensure it is positioned safely away from dry vegetation and fabric. Battery-operated lanterns are often easier for a decorative display.

    A wooden sign can add atmosphere.

    Use a weathered finish and simple lettering.

    The sign should support the scene without becoming the focal point.

    Add a few crows.

    One artificial crow perched on a crate or branch can be enough.

    Multiple birds may make the display feel overly themed.

    The scarecrow should remain the main character.

    This idea is especially useful if you want a porch that transitions naturally from autumn to Halloween.

    After Halloween, remove the frightening details and keep the pumpkins, dried plants, wooden crates, and lanterns for the rest of the fall season.

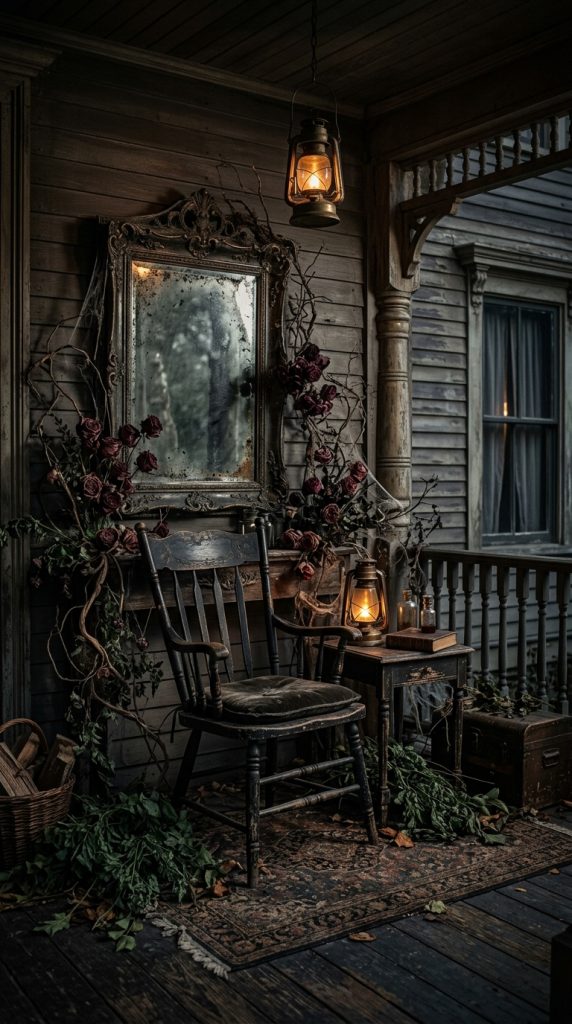
    7. Create a Victorian Haunted Porch

    For a more sophisticated scary Halloween look, use Victorian-inspired styling.

    This theme works particularly well with older homes, traditional architecture, dark wood, brick, ornate railings, or covered porches.

    Start with the lighting.

    Use vintage-style lanterns with warm amber bulbs.

    The glow should be soft rather than extremely bright.

    Next, add dark furniture.

    A weathered wooden chair or antique-style bench can become the foundation of the display.

    Place it against one wall.

    Add a dark cushion or distressed textile.

    A large vintage-style mirror can create another focal point.

    Position it so that it reflects the porch rather than directly reflecting the street.

    The reflection can add visual depth.

    Black or deep burgundy flowers can be arranged in a dark vase.

    Dried roses, branches, or deep-colored foliage can create an old-world atmosphere.

    Add an antique-style picture frame.

    The frame can contain a dark botanical print, an old-fashioned portrait-style artwork, or another suitably mysterious image.

    Keep the artwork tasteful.

    The goal is to create a haunted historical atmosphere rather than a crowded Halloween store.

    Architectural details can be enhanced with artificial vines.

    Allow them to grow around one column or along one section of railing.

    Do not cover the entire porch.

    Use aged brass accessories where appropriate.

    A brass candle holder, lantern, or tray can add warmth against the dark colors.

    Black and antique brass create a particularly sophisticated combination.

    Add subtle cobwebs around corners.

    The cobwebs should look old and neglected.

    The lighting can cast shadows across the wall and furniture.

    For additional atmosphere, use quiet sound effects such as distant wind, an old clock, or soft creaking sounds.

    The Victorian porch should feel as though it has been untouched for decades.

    Its strength comes from atmosphere, age, and restraint.

    8. Build a Skeleton-Filled Haunted Entry

    A skeleton display can be dramatic when the figures are arranged as part of a scene instead of simply standing around the porch.

    Choose one main skeleton as the focal character.

    Place it in a chair near the entrance.

    Another can stand near the railing.

    A third can appear to be climbing the steps or leaning against a wall.

    Vary their positions.

    The figures should interact with the environment.

    For example, one skeleton could hold an old lantern.

    Another could sit beside a small table.

    Another could be positioned behind a planter.

    This creates a narrative.

    Avoid placing all the skeletons upright facing forward.

    That arrangement quickly becomes repetitive.

    Use different poses and heights.

    You can also create a skeleton family or group, but keep the number appropriate to the size of the porch.

    The surrounding decorations should support the skeletons.

    Use black lanterns, weathered wood, dark fabric, dried branches, and muted pumpkins.

    Avoid introducing too many unrelated Halloween characters.

    Lighting should highlight one skeleton more strongly than the others.

    A dim spotlight can illuminate the main figure.

    Secondary figures can remain partially hidden.

    This creates a sense of depth.

    You can also use shadows.

    Position a skeleton near a wall so that lighting creates a large shadow behind it.

    The shadow becomes a second visual element.

    Add a few cobwebs to the railing and furniture.

    Use dark fabric on the chair.

    Place an old-looking book on the table.

    These details create the feeling that the skeletons are part of a larger story.

    For a particularly dramatic effect, place one skeleton near the doorway but slightly off to the side.

    Visitors may notice it only as they approach.

    This can create a small surprise without obstructing the entrance.

    The skeleton theme is highly adaptable.

    It can be frightening, gothic, humorous, or theatrical depending on the styling.

    For a genuinely spooky home, keep the colors dark and the lighting dramatic.

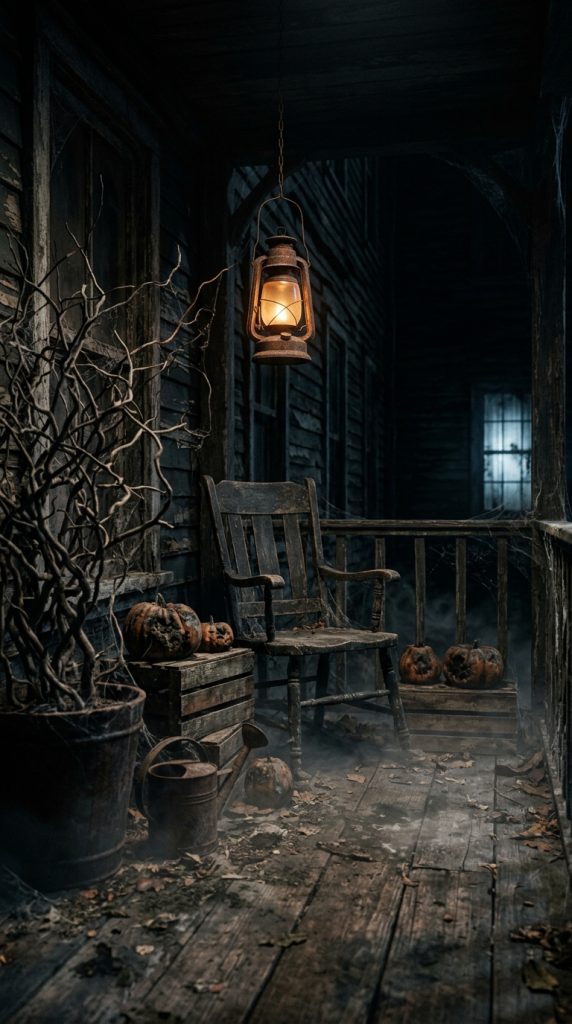
    9. Create a Foggy, Abandoned Porch

    Fog can instantly change the atmosphere of a Halloween porch.

    When combined with dark architecture, low lighting, and weathered props, it can make an ordinary entrance feel abandoned.

    Start by reducing visual brightness.

    You do not want the porch flooded with light.

    Instead, use a few focused sources.

    Place one warm lantern near the entrance.

    Add a dim cool light farther away.

    Then introduce low-lying fog.

    If using a fog machine, position it carefully so the fog does not create a slipping hazard or obscure stairs.

    Keep pathways visible.

    The fog should drift around objects rather than completely hide them.

    Add weathered furniture.

    A distressed chair, old wooden crate, or vintage bench can create the impression that the porch has been neglected.

    Add dried branches.

    Place them in large dark planters.

    Allow the branches to extend into the fog.

    Their silhouettes can look particularly dramatic.

    A few muted pumpkins can add seasonal context.

    Choose dark green, gray, cream, or aged orange.

    Add a distressed lantern.

    A flickering LED light inside can create movement.

    One of the most important elements is negative space.

    Do not fill every part of the porch with props.

    Allow empty dark areas where the fog can move.

    This makes the porch feel larger and more mysterious.

    You can also use a partially open-looking door effect if it can be done safely and securely.

    A narrow gap of darkness can be more unsettling than a fully decorated doorway.

    Do not compromise home security for decoration.

    Sound can enhance the scene.

    Low wind, distant thunder, or quiet creaking sounds can accompany the visual atmosphere.

    Keep the volume low enough that the effect remains subtle.

    The abandoned porch theme works particularly well at night because the darkness becomes part of the design.

    During daylight, the weathered props provide visual interest.

    After sunset, lighting and fog transform the same arrangement into something much more dramatic.

    10. Create an Ultimate Haunted Porch With Layered Scary Details

    If you want the most immersive Halloween porch possible, combine several elements into one carefully planned scene.

    The key is not to use every decoration you own.

    Instead, build the porch in layers.

    Start with the background.

    Use dark fabric, weathered boards, branches, vines, or architectural shadows to create depth.

    Next, establish one main focal point.

    This could be a life-size haunted figure, a large cemetery gate, a sinister doorway, or an oversized skeleton.

    Then create secondary focal points.

    A chair can occupy one corner.

    A cemetery stone can sit near the steps.

    A dark planter can hold twisted branches.

    A hanging ghost can occupy the upper area.

    These elements should support the central scene.

    Do not make every object equally dramatic.

    The main focal point should receive the strongest visual emphasis.

    Lighting is the final layer.

    Use different levels of brightness.

    A warm lantern can illuminate the doorway.

    A cool light can highlight a distant figure.

    A small ground light can illuminate a tombstone.

    Another light can create dramatic branch shadows on the wall.

    The result is a porch with multiple visual zones.

    As visitors approach, they notice different details at different distances.

    From far away, they see the overall silhouette.

    Closer to the house, they notice the central figure.

    At the entrance, smaller details become visible.

    This creates an experience rather than a static decoration display.

    Add texture throughout the scene.

    Use distressed wood, artificial moss, dried branches, rough fabric, dark metal, and aged-looking props.

    Keep the color palette coordinated.

    A strong combination might include:

    Black + charcoal + aged brown + muted orange + deep burgundy.

    Another option is:

    Black + gray + cream + dark green.

    You can also use small amounts of red for dramatic contrast.

    Do not overuse it.

    The porch should remain visually coherent.

    Sound can complete the experience.

    Use subtle atmospheric audio rather than loud continuous effects.

    Distant wind.

    Low creaking.

    Soft footsteps.

    Occasional eerie sounds.

    These can create suspense without becoming annoying to neighbors or guests.

    Most importantly, keep the actual entrance functional.

    The front door should open easily.

    Steps should remain visible.

    Handrails should remain accessible.

    Electrical cables should be secured.

    Decorations should not create trip hazards.

    Fog should not obscure walking areas.

    Outdoor lighting should provide enough visibility for safe movement.

    The best scary porch is one that looks frightening while remaining comfortable and practical to navigate.

    How to Make a Halloween Porch Look Scarier at Night

    Daylight and darkness create completely different visual experiences.

    During the day, visitors can see every decoration clearly.

    At night, you can control what they see.

    This is where lighting becomes one of your most powerful tools.

    Avoid lighting everything equally.

    Instead, choose a few focal points.

    Light the face of a figure.

    Illuminate one tombstone.

    Highlight a hanging ghost.

    Allow the rest to disappear into shadow.

    This creates suspense.

    Warm amber light creates an old haunted-house atmosphere.

    Cool blue-white light can create a ghostly feeling.

    Deep red can be used for a dramatic accent.

    You can combine them carefully rather than using only one color.

    Shadows are equally important.

    Place lights behind branches or objects so they cast silhouettes across walls.

    A simple branch can become visually dramatic when its shadow moves across the porch.

    How to Decorate a Small Porch for Halloween

    A small porch does not require fewer ideas.

    It simply requires better editing.

    Choose one major focal point.

    This could be:

    • A life-size skeleton
    • A haunted wreath
    • A large lantern
    • A creepy chair
    • A hanging ghost

    Then use vertical space.

    Hang bats, ghosts, branches, or fabric overhead.

    Use the doorway and walls rather than covering the floor.

    Keep the stairs clear.

    Use a few smaller accessories around the main focal point.

    A compact porch can actually feel scarier because the decorations are closer together and the available darkness creates stronger contrast.

    How to Create a Scary Halloween Porch Without Spending Too Much

    You do not need to purchase expensive animatronic props.

    Atmosphere can be created using relatively simple materials.

    Start with black fabric.

    Use it to create dark backgrounds or draped areas.

    Add inexpensive artificial branches.

    Use them in planters or around doorways.

    Battery-operated lanterns can provide atmospheric lighting.

    Old wooden crates can become display platforms.

    Secondhand chairs can become haunted furniture.

    Black spray paint can transform suitable decorative objects.

    Thrift stores can be useful sources for old-looking frames, baskets, furniture, vases, and trays.

    The key is not the price of the object.

    It is how the object is used.

    An inexpensive old chair placed under dramatic lighting can feel more frightening than an expensive novelty decoration placed randomly.

    Safety Tips for Scary Halloween Porch Decorating

    A dramatic Halloween porch should never create unnecessary safety risks.

    Keep stairs completely clear.

    Do not cover handrails with materials that make them difficult to grip.

    Secure hanging decorations.

    Outdoor decorations can move significantly in wind.

    Protect electrical connections from moisture.

    Use lighting rated for outdoor conditions when required.

    Keep candles away from fabric, dried plants, paper, and other combustible materials.

    Battery-operated candles are a practical alternative.

    Do not use fog machines where visibility becomes dangerously limited.

    Keep decorations away from heaters, outdoor fireplaces, and other heat sources.

    Check the porch after dark before guests arrive.

    Make sure visitors can clearly see the walking path.

    The goal is to create fear through atmosphere, not actual hazards.

    Final Thoughts

    A scary Halloween porch can completely change the way your home feels during the Halloween season.

    The most memorable displays are rarely the ones with the greatest number of decorations.

    They are the ones with the strongest atmosphere.

    A dark entrance can feel more frightening than a brightly lit collection of props.

    A single shadowy figure can create more suspense than ten characters standing together.

    A weathered chair beneath a dim lantern can suggest an entire story.

    A few tombstones surrounded by fog can make an ordinary yard feel abandoned.

    A hanging ghost can transform an otherwise simple covered porch.

    The secret is to create a scene that makes people curious about what they are seeing.

    Use darkness strategically.

    Use lighting to direct attention.

    Use texture to create age.

    Use different heights to build depth.

    Use sound sparingly.

    And leave enough empty space for the imagination to work.

    Your porch does not have to look like a commercial haunted attraction.

    It can feel more personal and atmospheric.

    Maybe your theme is an abandoned Victorian house.

    Maybe it is a forgotten cemetery.

    Maybe the porch belongs to a mysterious witch.

    Maybe the entire entrance has been taken over by enormous spiders.

    Maybe ghostly figures are quietly floating above the walkway.

    Maybe an old scarecrow is waiting beside the door.

    The important thing is consistency.

    Choose a theme and allow the colors, props, lighting, and textures to support it.

    If you want a truly frightening look, keep bright colors limited.

    Black, charcoal, dark brown, gray, deep green, muted orange, and burgundy create a strong foundation.

    Then use small amounts of brighter color as accents.

    Lighting can bring the entire composition together.

    A warm lantern beside the door can make the entrance feel old and mysterious.

    A cool light behind a ghost can make the figure appear almost weightless.

    A low light beneath a skeleton can create dramatic shadows.

    A dim light behind branches can turn ordinary vegetation into something unsettling.

    Do not underestimate the power of sound either.

    A porch that looks frightening during the day can become much more immersive after sunset when combined with subtle environmental sounds.

    Keep the audio controlled.

    Halloween should be fun for the people living in the neighborhood as well as the visitors experiencing the decoration.

    Another important consideration is the transition from daytime to nighttime.

    A good porch should still look intentional in daylight.

    Weathered wood, dark plants, pumpkins, lanterns, and architectural details can create an attractive autumn composition during the day.

    After sunset, lighting and shadows take over.

    This creates two different experiences without requiring two different decorations.

    If you want your porch to feel sophisticated rather than overly commercial, focus on materials.

    Use wood.

    Use metal.

    Use ceramic.

    Use natural branches.

    Use aged-looking fabric.

    Use glass lanterns.

    Use muted colors.

    These materials create a more believable haunted environment.

    You can still include traditional Halloween props, but surround them with realistic textures so they feel integrated.

    The same principle applies to skeletons and ghosts.

    Instead of placing a skeleton alone on a porch, give it a setting.

    Put it in a chair.

    Place a lantern beside it.

    Add a weathered table.

    Create shadows behind it.

    Suddenly the skeleton becomes part of a story.

    The same is true for a ghost.

    Hang it in a dark corner.

    Give it movement.

    Illuminate it from behind.

    Leave empty darkness around it.

    The visual result becomes much more atmospheric.

    Remember that the front porch is an architectural space.

    Use its existing features.

    Columns can become part of the haunted scene.

    Railings can support vines and webs.

    Steps can become a transition into the cemetery.

    Windows can become locations for silhouettes.

    Doorways can become dramatic focal points.

    Ceilings can hold hanging figures.

    Walls can receive shadows.

    When decorations interact with architecture, they feel much more intentional.

    Ultimately, the best scary Halloween porch ideas are the ones that create an emotional reaction before visitors even reach the front door.

    A little uncertainty.

    A little darkness.

    A strange shadow.

    A quiet sound.

    A figure that seems to be watching.

    A doorway that looks different after sunset.

    Those small details create suspense.

    You do not need to reveal everything immediately.

    Let some decorations remain hidden.

    Let some areas stay dark.

    Let shadows create questions.

    That is where the real Halloween atmosphere comes from.

    Whether you have a tiny apartment entrance, a traditional front porch, a large covered veranda, or a spacious suburban entryway, the same principles can be adapted to your space.

    Start with one focal point.

    Build the background.

    Add supporting details.

    Introduce texture.

    Layer the lighting.

    Create shadows.

    Then stop before the porch becomes overcrowded.

    A frightening Halloween porch should still allow people to move safely and comfortably.

    Keep pathways clear.

    Secure every decoration.

    Protect electrical equipment.

    Use safe lighting.

    Keep open flames away from flammable materials.

    Check the display after dark.

    These practical details allow you to enjoy the atmosphere without unnecessary problems.

    When everything comes together, your porch can become more than a collection of Halloween decorations.

    It can become a small theatrical scene.

    A place where autumn darkness, architecture, lighting, texture, and imagination meet.

    And when Halloween arrives, visitors will not simply notice that your home is decorated.

    They will feel that they have stepped into a different world before they even reach the front door.


  • Japandi Interior Design Ideas for a Calm, Warm & Minimalist Home

    Japandi Interior Design Ideas for a Calm, Warm & Minimalist Home

    Japandi interior design is one of the most beautiful ways to create a home that feels calm, warm, intentional, and effortlessly sophisticated. By combining the simplicity of Japanese interiors with the cozy functionality of Scandinavian design, Japandi style creates spaces that feel peaceful without becoming cold and minimalist without feeling empty.

    The beauty of Japandi interior design ideas comes from balance. Instead of filling a room with decorative objects, Japandi interiors focus on carefully selected furniture, natural materials, warm neutral colors, soft textures, organic shapes, and plenty of breathing room. Every item has a purpose, but the room still feels comfortable and inviting.

    Japandi style is particularly appealing if you love minimalist interiors but do not want your home to look stark or overly modern. Scandinavian design contributes warmth, comfort, and practicality, while Japanese design brings simplicity, craftsmanship, natural materials, and a strong appreciation for negative space.

    Think of a warm oak coffee table, a low-profile beige sofa, handmade ceramic accessories, soft linen curtains, woven baskets, sculptural branches, warm ambient lighting, and a few carefully chosen plants. Nothing needs to be excessive. The atmosphere comes from the relationship between the materials, colors, light, and space.

    A Japandi home also does not have to look completely neutral. Although beige, cream, taupe, warm white, and natural wood are common, deeper shades such as charcoal, muted brown, olive, clay, and soft black can add contrast and character.

    The goal is not simply to make a room look minimalist. It is to create an environment where the eye can rest.

    That means avoiding unnecessary visual noise.

    Instead of multiple small decorations, choose one beautiful ceramic vase.

    Instead of several competing furniture pieces, select one well-proportioned sofa.

    Instead of filling a wall with accessories, allow some empty space.

    Instead of using bright artificial lighting everywhere, layer warm sources of illumination.

    Japandi interiors also work beautifully with different types of homes. You can adapt the style to an apartment, family home, small living room, bedroom, kitchen, dining area, or open-plan space. You do not need to replace everything you own. Often, changing the color palette, reducing clutter, introducing natural materials, and adding softer lighting can move a room significantly closer to the Japandi aesthetic.

    Another important characteristic is quality over quantity. Japandi design encourages choosing fewer pieces that are useful, durable, beautiful, and timeless. This makes the style especially suitable for anyone who wants a home that feels sophisticated without constantly following decorating trends.

    The following ideas explore practical ways to bring Japandi interior design into your home while maintaining warmth, comfort, and personality.

    1. Build a Warm Neutral Japandi Color Palette

    Color is one of the easiest ways to establish a Japandi atmosphere.

    Start with a warm neutral foundation rather than a bright white one.

    Consider:

    • Warm ivory
    • Cream
    • Oatmeal
    • Beige
    • Taupe
    • Sand
    • Warm gray
    • Mushroom
    • Soft brown

    These shades create a calm background that allows natural materials and furniture to become the visual focus.

    Choose one dominant neutral

    Avoid using too many unrelated neutrals.

    For example, a living room might use warm ivory walls, a beige sofa, oatmeal curtains, and natural oak furniture.

    The colors are different, but they belong to the same visual family.

    Add darker accents

    Japandi interiors benefit from controlled contrast.

    Introduce charcoal, soft black, dark walnut, or deep brown through small furniture pieces, lighting, frames, ceramics, or textiles.

    You do not need a lot of dark color.

    A single black floor lamp or dark wood side table can provide enough definition.

    Introduce muted earthy colors

    If you want more personality, add muted tones such as:

    • Olive green
    • Clay
    • Terracotta
    • Dusty brown
    • Muted rust
    • Deep beige

    Keep these shades soft rather than bright.

    Why this works

    A restrained color palette makes the room feel visually connected.

    It also allows texture to become more important than color.

    Linen, wood, stone, ceramic, and woven fibers can create depth even when the palette remains neutral.

    2. Choose Low-Profile Natural Wood Furniture

    Natural wood is one of the most recognizable elements of a warm Japandi interior.

    Choose furniture with clean lines and visible natural grain.

    Oak is especially useful when you want a lighter, Scandinavian-inspired appearance.

    Walnut creates a deeper and more sophisticated mood.

    Ash and maple can provide a softer, lighter effect.

    Look for simple silhouettes

    Avoid furniture with excessive ornamentation.

    A simple oak coffee table with gently rounded corners can have more visual impact than a heavily carved table.

    Choose:

    • Low-profile sofas
    • Simple wooden coffee tables
    • Minimal sideboards
    • Clean-lined dining tables
    • Slender wooden benches
    • Simple bedside tables

    Use rounded edges

    Organic curves can soften the geometry of minimalist furniture.

    Consider a rounded coffee table or dining table.

    A curved wooden bench can also introduce visual softness.

    Let the wood remain visible

    Do not cover every wooden surface with accessories.

    The grain itself is decorative.

    A beautiful wooden sideboard may only need one ceramic vase and a small sculptural object.

    Keep proportions balanced

    Large furniture should have enough surrounding space.

    This prevents the room from feeling crowded and helps preserve the calm quality associated with Japandi interiors.

    3. Create a Japandi Living Room With Soft Textures

    A Japandi living room should feel comfortable without becoming overloaded with cushions, blankets, and accessories.

    Start with a simple sofa in a warm neutral fabric.

    Cream, beige, oatmeal, taupe, and light gray work especially well.

    Add tactile cushions

    Choose cushions made from:

    • Linen
    • Cotton
    • Bouclรฉ
    • Wool
    • Textured woven fabric

    Use a limited number.

    Two or three well-selected cushions can look more sophisticated than a sofa covered in decorative pillows.

    Add one soft throw

    A textured wool or cotton throw can be casually folded over the arm of the sofa.

    Choose a neutral shade or muted earthy color.

    Use an organic coffee table

    Pair the sofa with a natural wood or stone coffee table.

    A rounded or irregular shape can make the room feel softer.

    Keep the floor visually calm

    A large neutral area rug can connect the seating arrangement.

    Choose a subtle woven pattern rather than a high-contrast design.

    Add one plant

    A single large plant can provide natural color and movement.

    Consider an olive tree, ficus, rubber plant, or another architectural indoor plant.

    The plant should feel like part of the composition rather than another object filling an empty corner.

    4. Introduce Wabi-Sabi-Inspired Imperfection

    One of the most appealing aspects of Japandi interiors is their appreciation for natural imperfections.

    Instead of choosing objects that look perfectly manufactured, introduce pieces with subtle variations.

    A handmade ceramic bowl might have a slightly uneven rim.

    A wooden stool may show natural knots.

    A stone vase might have an irregular surface.

    A linen curtain may have visible texture.

    These details create warmth.

    Choose handcrafted ceramics

    Place one handmade vase on a sideboard.

    Add a small ceramic bowl to a coffee table.

    Use handmade dinnerware in the kitchen or dining room.

    Avoid displaying too many pieces.

    The objective is to appreciate the individual object.

    Use natural irregularities

    Wood grain, stone variations, handmade glaze, and woven fibers can all add character.

    This prevents minimalism from becoming sterile.

    Keep the surrounding area simple

    If one object has an interesting handmade quality, give it space.

    Do not surround it with ten other decorative pieces.

    Negative space makes the object more noticeable.

    5. Use Layered Warm Lighting

    Lighting is essential for creating a calm Japandi home.

    A room filled with one bright overhead fixture can feel much harsher than the same room illuminated through several softer sources.

    Combine multiple light sources

    Use a mixture of:

    • Pendant lights
    • Floor lamps
    • Table lamps
    • Wall sconces
    • Under-cabinet lighting
    • Warm accent lighting

    You do not need every type in one room.

    Choose two or three layers depending on the space.

    Choose warm bulbs

    Warm illumination works beautifully with wood, beige, cream, and natural textiles.

    It can make the room feel softer during the evening.

    Use sculptural lighting

    A simple paper pendant, linen shade, ceramic lamp, or minimalist floor lamp can become part of the decor.

    Choose a fixture with an interesting silhouette but limited visual detail.

    Create pools of light

    Instead of trying to illuminate every corner equally, allow some areas to remain softer.

    A lamp beside a sofa can create a comfortable reading area.

    A small lamp on a sideboard can highlight a ceramic vase.

    Under-cabinet lighting can gently illuminate a kitchen workspace.

    Why lighting matters

    Japandi is about atmosphere as much as appearance.

    Warm, layered lighting can make even a very simple room feel sophisticated.

    6. Style a Minimal Japandi Bedroom

    The bedroom is an ideal place to use Japandi principles because the style naturally supports a peaceful atmosphere.

    Begin with a simple bed frame in natural wood or upholstered neutral fabric.

    Choose bedding in:

    • Ivory
    • Cream
    • Beige
    • Oatmeal
    • Soft gray
    • Warm taupe

    Layer natural fabrics

    Use cotton or linen sheets.

    Add a textured duvet.

    Finish with a lightweight wool or woven throw.

    The layers should feel soft rather than overly decorative.

    Keep bedside styling minimal

    A wooden bedside table may need only:

    • One small lamp
    • One ceramic cup or vase
    • One book

    Avoid filling the nightstand with unnecessary objects.

    Use soft lighting

    Warm bedside lamps create a relaxing evening atmosphere.

    Avoid extremely bright overhead lighting when possible.

    Keep wall decor restrained

    One large piece of neutral artwork can be enough.

    Alternatively, leave the wall mostly empty.

    The empty space contributes to the sense of calm.

    7. Design a Japandi Kitchen With Natural Materials

    Japandi kitchen design combines functionality with visual simplicity.

    Start with warm wood cabinetry or wood accents.

    Oak is especially effective for creating a light, contemporary appearance.

    Pair wood with soft neutrals

    Cream, warm white, beige, and pale stone countertops can complement natural wood beautifully.

    For more contrast, introduce charcoal or dark brown hardware.

    Keep countertops clear

    Instead of covering the counter with appliances and decorations, select only the items you use regularly.

    For example:

    A wooden cutting board can lean naturally against the backsplash.

    A handmade ceramic utensil holder can sit nearby.

    A small plant or vase can add a touch of organic softness.

    Everything else can remain stored.

    Choose simple hardware

    Matte black, brushed brass, aged bronze, or understated wood pulls can work depending on the kitchen palette.

    Avoid overly decorative hardware.

    Use open shelving carefully

    If you have open shelves, display a small collection of cream ceramics, wooden bowls, and glassware.

    Leave empty space between groups.

    This keeps the shelving visually quiet.

    8. Add Organic Shapes to Soften Minimalism

    Minimalist rooms can sometimes become too geometric.

    Organic shapes help create a softer, more welcoming environment.

    Look for furniture and accessories with:

    • Rounded corners
    • Curved silhouettes
    • Irregular edges
    • Arched forms
    • Natural asymmetry

    Use a round coffee table

    A circular or softly rounded coffee table can break up the straight lines of a sofa and rug.

    Try an organic mirror

    A softly irregular mirror can work beautifully above a console or dresser.

    Choose a simple frame in wood, black, or warm metal.

    Add curved seating

    A rounded accent chair can introduce comfort and visual softness.

    Use sculptural ceramics

    An irregular vase or bowl can bring organic form to an otherwise clean arrangement.

    Keep the shapes intentional

    You do not need every object to be curved.

    The contrast between straight furniture and a few organic accessories is often more effective.

    9. Create Calm Through Intentional Negative Space

    Negative space is one of the most important elements of a successful Japandi interior.

    It means deliberately leaving areas of the room open rather than filling them simply because they are available.

    Avoid filling every wall

    A large blank wall can make a room feel more spacious.

    Instead of several small artworks, consider one larger piece.

    Give furniture breathing room

    Do not push every piece against another.

    Allow visual space around the sofa, coffee table, sideboard, and plants.

    Reduce decorative objects

    Before adding something new, ask whether it contributes to the room.

    Does it provide function?

    Does it add texture?

    Does it have sentimental value?

    Does it improve the composition?

    If not, it may not need to be there.

    Create intentional corners

    An empty corner does not automatically need furniture.

    Sometimes a single plant, floor lamp, or wooden stool is enough.

    Sometimes leaving it empty is the better design decision.

    Why negative space works

    It gives the eye somewhere to rest.

    This is one reason Japandi interiors often feel calmer than heavily decorated rooms.

    10. Combine Japandi With Cozy Scandinavian Comfort

    The Scandinavian influence in Japandi design is especially useful when you want minimalism to feel warm.

    Introduce cozy elements without creating clutter.

    Use:

    • Soft rugs
    • Linen curtains
    • Wool throws
    • Bouclรฉ seating
    • Warm wood
    • Soft cushions
    • Woven baskets

    Create tactile contrast

    A smooth wooden table can sit beside a textured rug.

    A linen sofa can be paired with a wool throw.

    A ceramic vase can sit on a woven tray.

    The contrast makes the room feel layered.

    Keep the palette controlled

    The room should still feel calm.

    Avoid introducing many bright colors.

    Choose warm neutrals with one or two muted accents.

    Focus on comfort

    Furniture should not only look beautiful.

    It should feel comfortable and useful.

    A deep sofa, supportive dining chair, or soft bedroom rug can make the minimalist environment more inviting.

    11. Add Nature Without Turning the Room Into a Jungle

    Plants are excellent for Japandi interiors, but restraint is important.

    You do not need dozens of plants.

    Choose one or two architectural plants with simple forms.

    Good options include:

    • Olive trees
    • Fiddle-leaf figs
    • Rubber plants
    • Snake plants
    • Branch arrangements
    • Minimal bonsai-inspired plants

    Use simple planters

    Choose ceramic, stone, terracotta, or woven planters in neutral shades.

    Avoid highly decorative containers.

    Try branches instead of flowers

    A few sculptural branches in a ceramic vase can create a very Japandi-inspired arrangement.

    This works especially well when you want something seasonal without introducing bright color.

    Place plants intentionally

    A tall plant can soften a hard architectural corner.

    A small plant can add life to a shelf.

    A branch arrangement can become the focal point on a dining table.

    Each plant should have a visual purpose.

    12. Create a Warm Japandi Dining Area

    A Japandi dining area should feel simple, natural, and inviting.

    Start with a solid wood dining table.

    Choose a design with a clean silhouette and visible grain.

    Pair it with simple upholstered, wooden, or woven chairs.

    Keep the table styling minimal

    A ceramic vase with a few branches can be enough.

    Alternatively, use a low stoneware bowl containing seasonal fruit.

    Use natural textiles

    Linen napkins can soften the setting.

    A woven runner can add texture.

    Choose simple dinnerware

    Cream, beige, warm gray, or earthy ceramics work well.

    Handmade textures can make the table feel more personal.

    Add a soft pendant light

    A simple pendant above the dining table can define the area.

    Paper, linen, wood, or matte ceramic fixtures can work beautifully.

    Use warm illumination for evening meals.

    13. Bring Japandi Style Into a Small Apartment

    Japandi is particularly effective in small homes because its emphasis on simplicity can help a space feel more open.

    Begin by reducing visual clutter.

    Instead of several small furniture pieces, choose a few multifunctional ones.

    Use multifunctional furniture

    Consider:

    • Storage benches
    • Nesting tables
    • Storage beds
    • Slim sideboards
    • Extendable dining tables
    • Ottomans with storage

    Choose light natural colors

    Cream, beige, warm white, and pale wood can help maintain an airy appearance.

    Use vertical space carefully

    A tall wooden cabinet can provide storage without requiring a large floor footprint.

    Avoid oversized furniture

    Choose pieces that fit the scale of the room.

    A small sofa with clean lines may work better than a large sectional.

    Keep sightlines clear

    Avoid placing too many objects directly in walking paths.

    The more open the circulation, the calmer the apartment will feel.

    14. Use Japandi Bathroom Ideas for a Spa-Like Atmosphere

    The bathroom is another space where Japandi principles can create a peaceful retreat.

    Begin with warm neutral finishes.

    Consider:

    • Beige stone
    • Warm white tile
    • Light oak
    • Microcement-inspired surfaces
    • Natural stone
    • Matte ceramic

    Add wood carefully

    A floating wooden vanity can provide warmth.

    Wood-look finishes can also create a similar appearance where real wood is unsuitable for moisture exposure.

    Use simple accessories

    A small stone tray can hold toiletries.

    A wooden stool can provide a practical surface.

    A ceramic container can organize small items.

    Avoid leaving many colorful bottles visible.

    Add soft lighting

    Warm sconces or concealed lighting can create a relaxing atmosphere.

    Bring in one plant

    A moisture-tolerant plant can add natural character.

    The final bathroom should feel calm rather than heavily decorated.

    15. Create a Japandi Home With Fewer, Better Accessories

    Accessories are important, but Japandi design works best when they are carefully edited.

    Instead of buying many decorative pieces, choose a small collection of objects that have strong shapes, natural textures, or practical functions.

    Consider:

    • Handmade ceramics
    • Stone objects
    • Wooden bowls
    • Woven baskets
    • Linen textiles
    • Sculptural lamps
    • Simple artwork
    • Natural branches
    • Minimal clocks
    • Handmade trays

    Create small groupings

    Three objects can work beautifully together.

    For example:

    Ceramic vase + small wooden bowl + sculptural stone.

    But do not repeat the same formula on every surface.

    Leave breathing room

    Place a few accessories on a large sideboard and leave the rest of the surface open.

    This makes the objects more noticeable.

    Choose quality-looking finishes

    Matte ceramics, natural wood, textured linen, aged metal, and stone generally complement the Japandi aesthetic better than highly glossy or heavily decorative finishes.


    How to Make Japandi Interior Design Feel Warm Instead of Cold

    One common concern about minimalist interiors is that they can feel sterile.

    The solution is not to add lots of decoration.

    Instead, introduce warmth through materials.

    Use natural wood.

    Layer linen.

    Add wool.

    Choose warm cream instead of stark white.

    Introduce soft lighting.

    Use handmade ceramics.

    Bring in muted earthy colors.

    Add one or two plants.

    These details create warmth while preserving the minimalist structure.

    How to Make Japandi Decor Look Expensive

    A sophisticated Japandi home is usually more about editing than spending.

    Start by reducing visual clutter.

    Then focus on proportion.

    A well-sized coffee table can look more luxurious than an expensive but oversized one.

    Choose materials that feel authentic.

    Natural wood grain, linen texture, ceramic glaze, and stone surfaces provide visual richness.

    Repeat materials throughout the home.

    For example, if you use oak furniture in the living room, small oak or wood details can appear in the dining area.

    Similarly, repeat warm cream textiles across multiple rooms.

    This creates continuity.

    Japandi Decorating Mistakes to Avoid

    Using Too Much White

    Bright white everywhere can make Japandi rooms feel cold.

    Warm ivory and cream often create a softer atmosphere.

    Adding Too Many Accessories

    Minimalism requires editing.

    Do not fill every shelf simply because you have space.

    Choosing Only Modern Furniture

    Japandi benefits from a mixture of contemporary simplicity and natural craftsmanship.

    Handmade-looking pieces can add character.

    Using Too Many Colors

    Keep the palette restrained.

    Muted earthy accents are usually more effective than bright colors.

    Ignoring Texture

    A room with only smooth surfaces can feel flat.

    Introduce linen, wood, wool, ceramic, stone, and woven fibers.

    Making Everything Match

    Japandi does not mean every piece must come from the same collection.

    Different materials and shapes can coexist when the overall palette remains cohesive.

    How to Decorate a Japandi Home on a Budget

    You do not need to redesign your entire home.

    Start with the areas that create the most visual impact.

    Remove unnecessary objects.

    Change bright textiles to warm neutral ones.

    Add one natural wood piece.

    Replace several small decorations with one handmade ceramic vase.

    Introduce warm lighting.

    Use a neutral woven rug.

    Add one plant.

    Rearrange your furniture to create more open space.

    These small changes can significantly alter the atmosphere.

    You can also shop secondhand for wooden furniture, ceramic pieces, baskets, and vintage lamps.

    The Japandi aesthetic works particularly well with simple secondhand finds because natural materials often become more attractive with age.

    How to Combine Japandi With Other Interior Styles

    Japandi can be adapted rather than followed rigidly.

    Japandi + Modern

    Use clean furniture, neutral colors, natural wood, and architectural lighting.

    Japandi + Organic Modern

    Add stone, curved furniture, plants, earthy colors, and handmade ceramics.

    Japandi + Scandinavian

    Increase the use of soft textiles, pale wood, cozy rugs, and functional furniture.

    Japandi + Minimalist

    Reduce accessories further and emphasize negative space.

    Japandi + Rustic

    Introduce aged wood, handmade pottery, woven baskets, and natural stone while maintaining simple silhouettes.

    The key is to preserve the balance and calmness that make Japandi recognizable.

    Final Thoughts

    Japandi interior design is ultimately about creating a home that feels calm without feeling empty, minimalist without feeling cold, and sophisticated without feeling overly decorated.

    The style works because it focuses on relationships rather than individual trends.

    Warm wood looks beautiful against cream walls.

    Linen becomes more interesting beside smooth ceramic.

    A sculptural vase stands out when surrounded by negative space.

    A simple sofa becomes more inviting when layered with one textured throw.

    A small lamp can transform an entire room when the overhead lighting is reduced.

    These relationships create the atmosphere.

    If you are beginning with a completely different decorating style, you do not need to change everything at once. Start by removing unnecessary visual clutter. Introduce warmer neutrals. Replace overly decorative furniture with simpler silhouettes. Add natural wood. Bring in linen and other tactile fabrics. Choose a few handmade-looking ceramics. Then introduce warm layered lighting.

    Most importantly, give every element room to breathe.

    A Japandi home should not feel like a showroom where every object has been perfectly arranged. It should feel lived-in, comfortable, and intentional.

    Use a beautiful wooden dining table without covering it with decorations.

    Let a handmade ceramic vase sit alone on a sideboard.

    Allow natural light to enter through simple linen curtains.

    Place a comfortable chair near a warm floor lamp.

    Keep kitchen countertops mostly clear.

    Let your favorite objects have space around them.

    And choose pieces that are useful as well as beautiful.

    The result is a home that feels slower, softer, and more connected to natural materials.

    Whether you are decorating a living room, bedroom, kitchen, bathroom, dining room, or small apartment, Japandi principles can help you create an environment that feels peaceful and timeless.

    The most important idea is simple:

    Choose less, but choose thoughtfully.

    Use natural materials.

    Keep colors warm and restrained.

    Add texture instead of clutter.

    Use organic shapes to soften clean lines.

    Bring nature indoors.

    Layer warm lighting.

    And leave enough empty space for the room itself to become part of the design.

    That balance is what gives Japandi interiors their distinctive sense of calm, warmth, and understated beauty.


  • 15 Modern Thanksgiving Table Decorating Ideas for a Sophisticated Dinner

    15 Modern Thanksgiving Table Decorating Ideas for a Sophisticated Dinner

    Introduction

    Modern Thanksgiving table decorating ideas can transform an ordinary dining room into an elegant, welcoming setting that feels festive without looking overly traditional. For a sophisticated Thanksgiving dinner, the goal is not to cover the table with pumpkins, colorful leaves, and seasonal signs. Instead, a modern Thanksgiving tablescape uses thoughtful layers of texture, restrained autumn colors, beautiful tableware, natural materials, soft lighting, and one memorable centerpiece to create an atmosphere that feels polished and inviting.

    A beautifully decorated Thanksgiving table should make guests feel welcome before the first dish is served. It should encourage conversation, complement the dining room, and provide enough practical space for plates, glasses, serving dishes, and comfortable movement. The best modern Thanksgiving table ideas balance decoration with function, creating a setting that looks beautiful in photographs but still works naturally during a real family dinner.

    One of the biggest advantages of modern Thanksgiving decorating is flexibility. You can create an elegant tablescape without completely changing your existing dining room. A neutral linen runner, a few beautiful ceramic plates, warm brass candleholders, natural branches, and carefully chosen napkins may be enough to completely change the mood. You can also use pieces you already own and combine them with a few seasonal accents.

    Color is especially important when designing a sophisticated Thanksgiving table. Instead of relying only on bright orange and yellow, consider a more refined palette of ivory, cream, taupe, beige, chocolate brown, walnut, olive green, muted rust, burgundy, charcoal, and antique brass. These shades still feel connected to autumn but create a calmer and more contemporary appearance.

    Texture can make a simple tablescape feel luxurious. Natural linen provides softness, handmade ceramics add character, wood brings warmth, glass creates lightness, and brushed brass introduces a subtle glow. When these materials are layered carefully, the table can look rich without requiring dozens of decorative accessories.

    The centerpiece is another important consideration. Modern Thanksgiving decorating often works best with one strong focal point instead of several competing arrangements. A sculptural ceramic vessel filled with dried branches can become the visual anchor. A shallow bowl of seasonal fruit can provide a natural harvest reference. A collection of candles can create intimacy for an evening dinner. The important thing is to select one primary idea and allow the rest of the table to support it.

    Modern does not have to mean cold or minimalist. A sophisticated Thanksgiving table can still feel cozy. Warm candlelight, natural wood, soft textiles, seasonal foliage, and earthy colors can create plenty of warmth while maintaining clean lines and visual simplicity.

    Another advantage of this style is that it can transition beautifully into late-fall decorating. After Thanksgiving dinner, you can remove the most specific seasonal details while leaving the linen, candles, ceramics, branches, brass pieces, and neutral accessories in place.

    Whether you are hosting a large Thanksgiving gathering, an intimate family meal, or a small dinner with friends, the following 15 modern Thanksgiving table decorating ideas offer different ways to create a beautiful, sophisticated tablescape. Each idea has a distinct focal point so you can choose a style that suits your home, dining room, and personal taste.

    The goal is not to create a table that looks perfect in an artificial way. Instead, create a table that feels intentional, comfortable, warm, and memorable. Use beautiful materials, leave enough breathing room, and allow the Thanksgiving meal itself to remain part of the visual experience.

    1. Create a Neutral Layered Thanksgiving Tablescape

    A neutral Thanksgiving table is an excellent starting point when you want an elegant and timeless appearance.

    Begin with a cream, ivory, beige, or soft taupe linen tablecloth. Natural linen is particularly effective because its relaxed texture keeps the setting from feeling too formal. If you prefer to show the beauty of a wood dining table, skip the tablecloth and use a long linen runner instead.

    Layer each place setting carefully.

    Start with a charger if you have one, followed by a dinner plate and a smaller salad plate or bowl. Cream or ivory ceramics create a soft foundation that works with almost any seasonal accent.

    Choose linen napkins in a slightly darker shade such as taupe, warm beige, olive, muted rust, or chocolate brown.

    For flatware, brushed brass can add warmth. Matte black creates stronger contrast, while stainless steel provides a cleaner contemporary appearance.

    Add natural texture

    The neutral palette becomes much more interesting when several materials are combined.

    Use:

    • linen napkins
    • handmade ceramic plates
    • natural wood
    • clear glassware
    • brushed metal
    • woven details

    Instead of adding many decorative objects, allow these textures to create visual richness.

    Create a restrained centerpiece

    Place one low ceramic bowl or elongated vessel in the center.

    Fill it with dried branches, olive foliage, eucalyptus, muted grasses, or seasonal stems.

    Keep the arrangement loose and organic rather than perfectly symmetrical.

    A few warm candles can surround the vessel without competing with it.

    This style is especially effective for homes with modern, Scandinavian, organic-modern, or transitional interiors.

    2. Make a Sculptural Ceramic Centerpiece the Star

    A sophisticated Thanksgiving table does not need an elaborate floral arrangement.

    A sculptural ceramic vessel can create a strong focal point while keeping the overall design modern.

    Choose a large handmade-looking vase, stoneware bowl, sculptural urn, or organic-shaped vessel.

    Look for interesting silhouettes rather than highly decorative patterns.

    A matte cream, warm gray, taupe, brown, or charcoal finish can work beautifully.

    Fill it with natural elements

    Use dried branches or seasonal foliage with enough height to create visual movement.

    Allow some branches to extend beyond the edges of the vessel.

    The slightly irregular shape makes the arrangement feel more natural.

    Keep everything else quiet

    Once the centerpiece becomes the focal point, the surrounding table should remain relatively restrained.

    Use simple cream dinnerware.

    Choose plain linen napkins.

    Add a few understated candleholders.

    Avoid placing small decorations around every plate.

    The negative space helps the centerpiece stand out.

    Make it functional

    For a dinner table, consider the height carefully.

    If the arrangement blocks the view between guests, shorten it or use a wider, lower vessel.

    A centerpiece should contribute to the conversation rather than interrupt it.

    3. Bring Warmth With Natural Wood Accents

    Natural wood can instantly make a contemporary Thanksgiving table feel warmer.

    This idea is particularly useful when your dining room has neutral walls, white furniture, or modern lighting.

    Introduce wood through chargers, serving boards, candleholders, trays, or small decorative bowls.

    Walnut provides a rich, sophisticated appearance.

    Oak feels lighter and more relaxed.

    Reclaimed wood adds character and a slightly rustic quality.

    Pair wood with refined materials

    The key to keeping the table sophisticated is balance.

    Pair a walnut serving board with ivory ceramics.

    Place brass flatware beside a light linen napkin.

    Use clear glassware to prevent the table from becoming visually heavy.

    This combination creates contrast without requiring bright seasonal colors.

    Use wood practically

    A beautiful wooden serving board can hold bread, cheese, fruit, or appetizers.

    A shallow wooden bowl can contain pears, figs, or pomegranates.

    This allows your decorative pieces to remain useful during dinner.

    4. Create a Candlelit Thanksgiving Dinner

    Lighting can make an enormous difference to a Thanksgiving tablescape, particularly if dinner takes place in the evening.

    Instead of relying completely on overhead lighting, create several smaller sources of illumination.

    Taper candles are a classic choice, while realistic flameless candles are useful when open flames are not practical.

    Choose modern candleholders

    Brushed brass holders provide warmth.

    Black metal creates a dramatic contemporary contrast.

    Clear glass holders make the table feel lighter.

    Stone or ceramic holders can create a softer organic-modern appearance.

    Create different heights

    A combination of slightly different candle heights can produce a more natural arrangement.

    However, avoid creating tall objects directly in front of guests.

    The candlelight should enhance conversation rather than interfere with it.

    Let the glow reflect

    Place glassware near the candleholders.

    Clear, amber, or smoky glasses can catch the light and create subtle reflections.

    The result can feel especially beautiful once the room becomes darker.

    5. Style an Olive Green and Cream Thanksgiving Table

    Olive green is a sophisticated alternative to traditional bright autumn colors.

    Begin with an ivory or cream tablecloth.

    Use cream ceramic dinnerware and neutral linen napkins.

    Then introduce olive through foliage, napkins, glassware, or small ceramic accents.

    Build the centerpiece with greenery

    Use olive branches, eucalyptus, or another muted foliage arrangement.

    Place the stems inside a long neutral ceramic vessel.

    Allow some greenery to extend naturally across the table.

    Add warm metal

    Brushed brass pairs beautifully with olive green.

    Use brass flatware, candleholders, or a small serving tray.

    The warm metallic surface catches the light and prevents the palette from appearing too muted.

    Add darker contrast

    Walnut wood or charcoal details can give the table more depth.

    For example, use walnut serving boards and charcoal linen napkins.

    The combination of olive, cream, walnut, and brass creates a refined autumn atmosphere without relying on traditional orange.

    6. Use Burgundy for a Rich Contemporary Tablescape

    Burgundy can create an elegant and dramatic Thanksgiving table while still feeling warm and seasonal.

    The easiest way to introduce it is through textiles.

    Choose burgundy linen napkins or a narrow runner.

    Pair them with ivory plates and natural wood.

    Keep the centerpiece understated

    Use a dark ceramic vase filled with dried branches.

    Add a few muted rust or burgundy stems if desired.

    Avoid turning the centerpiece into a large multicolor floral arrangement.

    The burgundy textiles should provide most of the visual intensity.

    Add brass

    Brushed brass candleholders or flatware can warm the deep red tone.

    If you have burgundy dining chairs or nearby artwork, repeat the color subtly in the tablescape to connect the room.

    Balance the palette

    Burgundy looks particularly sophisticated alongside:

    • ivory
    • walnut
    • taupe
    • chocolate brown
    • muted olive
    • antique brass

    These colors soften the richness of the red.

    7. Design a Black-and-Cream Thanksgiving Table

    Black can make a Thanksgiving table feel modern, elegant, and architectural.

    Use a cream tablecloth as the foundation.

    Choose cream or ivory dinnerware.

    Then introduce black through flatware, candleholders, napkins, or small ceramic pieces.

    Add warm natural materials

    Because black can feel visually strong, soften it with natural elements.

    Add a walnut serving board.

    Use dried branches in a cream stoneware vase.

    Include warm candlelight.

    Create contrast

    The beauty of this palette comes from the relationship between light and dark.

    Cream dinnerware stands out against black accents.

    Warm brass can provide a bridge between the two.

    A few olive or brown foliage elements can connect the table to autumn.

    This approach is especially effective in contemporary dining rooms with clean architecture and minimal furniture.

    8. Create Elegant Individual Place Settings

    A beautiful place setting can make guests feel especially welcome.

    Begin with a neutral dinner plate.

    Layer a smaller plate or bowl on top.

    Place the linen napkin beside or across the setting.

    Add a subtle napkin ring

    Choose a material that complements the room.

    Good options include:

    • brushed brass
    • natural wood
    • black metal
    • woven fiber
    • ceramic

    Avoid highly themed Thanksgiving napkin rings if you want a sophisticated appearance.

    Add a personal detail

    A small handwritten place card can make the setting feel intentional.

    You could also place a tiny dried leaf, herb sprig, or natural fiber detail on the napkin.

    Keep the decoration small enough that it does not interfere with the guest’s place setting.

    Coordinate without matching perfectly

    The napkin can be slightly darker than the tablecloth.

    The napkin ring can repeat the centerpiece’s metal finish.

    The place card can echo the dinnerware color.

    These subtle relationships make the table feel cohesive.

    9. Use Handmade Ceramic Dinnerware

    Handmade or artisan-inspired ceramics can give a Thanksgiving table warmth and personality.

    Look for plates with subtle variations in glaze, shape, or texture.

    Cream and ivory are particularly versatile.

    Warm gray, taupe, brown, and charcoal can also work beautifully.

    Mix complementary forms

    You can combine round dinner plates with softly irregular bowls.

    Keep the number of shapes limited so the table does not become visually chaotic.

    Let the ceramics provide the decoration

    If your dinnerware has a beautiful handmade finish, you may not need decorative chargers or heavily patterned napkins.

    Pair the ceramics with simple linen.

    Add warm wood.

    Use understated glassware.

    The result will feel organic rather than overly decorated.

    Choose durable pieces

    Because Thanksgiving involves substantial food preparation and serving, choose tableware that can handle actual use.

    Beautiful design is most successful when it remains practical.

    10. Add Transparent or Tinted Glassware

    Glassware can add elegance without taking up much visual space.

    Clear glass is particularly useful when you want the tablescape to feel airy.

    Choose glasses with graceful silhouettes and thin-looking rims if that fits your style.

    Introduce subtle color

    For a more distinctive tablescape, try:

    • amber glass
    • smoky gray glass
    • pale olive glass
    • soft brown glass

    Keep the colors understated.

    The goal is to complement the table rather than create a rainbow of competing shades.

    Use glass to amplify candlelight

    Position the glasses where they can catch reflections from nearby candles.

    The result adds movement and glow to an evening dinner.

    Glass also works well with metallic flatware because both materials reflect small amounts of light.

    11. Create a Minimal Harvest Fruit Centerpiece

    Thanksgiving is closely associated with harvest, so seasonal produce can become a beautiful centerpiece.

    Instead of filling the table with pumpkins, use a shallow stone or ceramic bowl containing carefully selected fruit.

    Consider:

    • pears
    • figs
    • pomegranates
    • apples
    • walnuts
    • seasonal grapes

    Choose a controlled palette

    Do not use every available color.

    For example, combine deep burgundy pomegranates with cream pears and warm brown walnuts.

    Another option is muted green pears with olive foliage and dark wood.

    Keep the arrangement natural

    The fruit does not need to be perfectly arranged.

    A relaxed composition can look more contemporary.

    Leave some empty space around the bowl so the centerpiece remains visually clear.

    Make it useful

    After dinner, the fruit can be served.

    This makes the centerpiece practical as well as decorative.

    12. Use a Textured Linen Runner

    A linen runner can define the center of a rectangular dining table without completely covering the tabletop.

    Choose a neutral shade such as:

    • ivory
    • oatmeal
    • taupe
    • beige
    • warm gray
    • muted brown

    Layer the centerpiece

    Place your primary vessel along the runner.

    Add candleholders at carefully spaced intervals.

    Use small natural elements around the centerpiece if needed.

    Allow the tabletop to remain visible

    This is particularly important when the table itself is beautiful.

    A walnut, oak, or stone surface can become part of the design.

    Try slight asymmetry

    A modern table does not need to be perfectly symmetrical.

    You can place the main vase slightly off-center and balance it with two smaller objects at the opposite side.

    The result should feel intentional rather than accidental.

    13. Combine Charcoal, Taupe, and Warm Brass

    For an especially sophisticated Thanksgiving table, move away from traditional autumn colors altogether.

    Use charcoal, taupe, cream, and warm brass.

    Charcoal plates or napkins create depth.

    Taupe linen softens the overall palette.

    Brass adds warmth and a subtle reflective quality.

    Introduce autumn through materials

    Instead of orange pumpkins, use:

    • dried grasses
    • walnut
    • amber glass
    • branches
    • natural linen
    • dark ceramic
    • muted foliage

    These elements create an autumn feeling without obvious seasonal symbols.

    Use lighting strategically

    Warm candlelight works particularly well with this palette.

    The brass reflects the glow.

    The charcoal creates contrast.

    The taupe and cream prevent the table from appearing too dark.

    This style is ideal for an evening Thanksgiving dinner.

    14. Create an Intimate Thanksgiving Table for Four

    A sophisticated Thanksgiving dinner does not need a huge dining room.

    For a smaller gathering, focus on creating intimacy.

    A round or compact rectangular table can become beautiful with just a few carefully selected pieces.

    Begin with a neutral linen tablecloth or runner.

    Use one low centerpiece.

    Then create individual place settings with quality ceramics, linen napkins, glassware, and elegant flatware.

    Keep the middle open

    Small tables become crowded quickly.

    Avoid filling the center with large arrangements.

    One vase surrounded by two or three small candles may be enough.

    Personalize each place

    A handwritten name card can make the dinner feel thoughtful.

    You can also place a tiny seasonal sprig on each napkin.

    Focus on atmosphere

    Because there are fewer guests, candlelight can play a stronger role.

    Use nearby lamps or wall sconces to create additional warmth.

    The result should feel intimate rather than sparse.

    15. Create a Chocolate Brown Thanksgiving Tablescape

    Chocolate brown is a rich and sophisticated alternative to bright orange.

    It works particularly well with walnut furniture, cream walls, beige upholstery, and warm lighting.

    Start with a cream tablecloth.

    Add chocolate-brown linen napkins.

    Use walnut serving boards or chargers.

    Then introduce cream ceramic dinnerware and brushed brass details.

    Build a natural centerpiece

    Place dried branches or muted foliage into a warm stoneware vessel.

    Add a few pears or pomegranates if you want a harvest reference.

    Avoid adding too many additional colors.

    Balance the dark tones

    Chocolate brown looks beautiful with:

    • ivory
    • cream
    • taupe
    • muted olive
    • soft rust
    • antique brass

    These shades create enough contrast while maintaining an earthy appearance.

    Finish with warm lighting

    Candlelight will bring out the warmth in the brown textiles and wood.

    The final result should feel cozy, elegant, and appropriate for an intimate Thanksgiving dinner.

    How to Choose the Right Thanksgiving Table Color Palette

    A sophisticated tablescape usually becomes easier to design when you choose the color palette before buying or arranging decorations.

    For a soft neutral table, combine:

    Ivory + beige + taupe + warm wood

    For a richer autumn look:

    Cream + chocolate brown + burgundy + brass

    For an organic modern style:

    Cream + olive + walnut + stone

    For a dramatic contemporary table:

    Ivory + charcoal + black + brass

    For a warm minimalist table:

    Oatmeal + cream + natural wood + muted rust

    You do not need to use every color equally.

    Choose one dominant shade, one supporting shade, and one or two accent colors.

    This makes the tablescape feel more intentional.

    How to Choose a Thanksgiving Centerpiece

    The centerpiece should match the shape and size of your table.

    A long rectangular table usually benefits from an elongated arrangement.

    A round table can accommodate a central bowl, vase, or sculptural object.

    A narrow table requires a compact design.

    Always consider the height.

    If guests cannot see one another across the table, the centerpiece may be too tall.

    For dinner parties, low arrangements are often easier.

    For decorative photographs taken before dinner, you can temporarily use a taller arrangement and move it later.

    How to Make a Thanksgiving Table Look Expensive

    A luxurious tablescape is not necessarily about expensive decorations.

    The appearance of quality often comes from consistency.

    Choose fewer pieces.

    Use natural-looking materials.

    Keep the color palette controlled.

    Repeat one metal finish.

    Coordinate your textiles.

    Leave some empty space.

    For example, a simple cream tablecloth can look exceptionally elegant when paired with handmade ceramics, linen napkins, brushed brass flatware, clear glassware, and a single sculptural centerpiece.

    The same table could feel less sophisticated if it contains many unrelated seasonal objects.

    Editing is one of the most powerful decorating tools.

    If an object does not contribute to the color, texture, function, or focal point of the table, consider removing it.

    How to Create a Thanksgiving Table Without Traditional Pumpkins

    If you want a modern Thanksgiving tablescape that looks different from conventional seasonal decorating, you can completely skip pumpkins.

    Use branches, dried grasses, pears, pomegranates, figs, walnuts, olive foliage, ceramic vessels, linen, wood, and candlelight.

    These elements still communicate autumn without creating a heavily themed appearance.

    This approach is particularly effective in homes with modern, minimalist, Scandinavian, organic-modern, or contemporary interiors.

    How to Keep the Table Elegant but Comfortable

    A Thanksgiving table should not simply look beautiful.

    It should work.

    Leave enough space between place settings.

    Make sure guests can reach serving dishes.

    Do not allow candleholders or decorations to block sightlines.

    Keep napkins easy to access.

    Use tableware that is comfortable to hold.

    If you are serving many dishes, consider placing the main food on a nearby buffet, sideboard, or kitchen island instead of crowding the dining table.

    This allows the table to remain visually clean while keeping dinner practical.

    How to Coordinate Your Tablescape With the Dining Room

    Your Thanksgiving table should feel connected to the surrounding room.

    If you have walnut furniture, repeat the wood tone through a serving board.

    If the dining room contains brass lighting, introduce brass candleholders.

    If your chairs are cream or beige, choose a similar neutral for the table linens.

    If the room has dark walls, lighter dinnerware can create contrast.

    If the room is already visually busy, keep the table simpler.

    If the room is minimal, the table can carry slightly more decorative interest.

    Think of the tablescape as another layer of the interior rather than a completely separate design.

    Final Thoughts

    A sophisticated Thanksgiving table does not need to look traditional to feel festive.

    The most beautiful modern Thanksgiving table decorating ideas often rely on simple principles: a restrained palette, beautiful texture, natural materials, thoughtful proportions, practical place settings, and one strong focal point.

    Start with your table itself.

    If you have beautiful wood, allow some of it to remain visible.

    If your dining room is neutral, introduce warmth through brass, walnut, olive, burgundy, or chocolate brown.

    If your furniture is already dramatic, keep the tableware simple.

    Choose one centerpiece that gives the table personality without overwhelming it.

    Then build outward.

    Layer the dinnerware.

    Add linen.

    Introduce glassware.

    Repeat one or two colors.

    Bring in a warm metallic finish.

    Finally, use lighting to bring everything together.

    Remember that Thanksgiving is ultimately about gathering people around the table. Decoration should support that experience rather than interfere with it.

    Leave enough space for food.

    Keep the centerpiece low enough for conversation.

    Use comfortable place settings.

    Make the lighting warm and inviting.

    And do not feel pressured to decorate every available inch.

    A little negative space can make the table look considerably more sophisticated.

    For a particularly memorable result, combine cream linen, handmade ceramics, walnut wood, muted seasonal foliage, brushed brass, and soft candlelight. This combination creates warmth while remaining modern and refined.

    You can also make the table more personal through small details. Handwritten place cards, family-owned dishes, vintage glassware, or a meaningful serving bowl can give the tablescape a story. These personal elements often make a table feel more special than expensive decorations.

    The best modern Thanksgiving tablescape is one that feels beautiful but not overly designed. It should look inviting enough that guests immediately want to sit down.

    Whether you choose a neutral tablescape, olive and cream palette, burgundy accents, chocolate brown layers, charcoal and brass contrast, or a minimalist harvest centerpiece, keep the overall composition intentional.

    Use fewer decorative pieces, but make each one count.

    Let natural materials provide texture.

    Allow candlelight to create warmth.

    Keep seasonal colors sophisticated.

    And most importantly, design the table around the people who will gather around it.

    When the styling, food, lighting, and conversation come together naturally, the table becomes more than Thanksgiving decoration. It becomes the visual and emotional center of the celebration.


  • Vintage Halloween Home Decor Ideas for a Spooky Nostalgic Interior

    Vintage Halloween Home Decor Ideas for a Spooky Nostalgic Interior

    Vintage Halloween home decor ideas can transform an ordinary home into a space that feels mysterious, nostalgic, and wonderfully old-fashioned without relying on overly bright decorations or excessive plastic props. A vintage Halloween interior combines antique-inspired pieces, faded autumn colors, candlelight, old-fashioned Halloween imagery, aged textures, and moody details to create a spooky nostalgic atmosphere.

    Unlike modern Halloween decorating, which often focuses on bold orange-and-black displays, a vintage approach is quieter and more atmospheric. Think aged wood, antique brass, old books, velvet, lace, amber glass, distressed frames, dried branches, ceramic pumpkins, vintage-style Halloween artwork, and soft candlelight. The result can feel like a beautifully decorated historic home rather than a themed party room.

    This decorating style is particularly appealing because it allows Halloween to blend naturally with an existing interior. You do not need to completely redesign your living room or cover every surface with decorations. A few carefully selected pieces can introduce the season while preserving the character of the room.

    The beauty of a nostalgic Halloween interior comes from layering atmosphere rather than simply adding objects. A weathered mirror beside a collection of old-looking books can create more mystery than a shelf filled with plastic skeletons. A black velvet pillow can make a cream sofa feel seasonal without changing the entire room. A brass candlestick surrounded by dried foliage can provide a subtle Halloween moment while still looking sophisticated.

    Color is also important. Traditional Halloween orange can certainly appear, but vintage decorating works especially well with muted shades such as burnt orange, rust, mustard, burgundy, olive green, charcoal, faded black, cream, brown, and antique gold. These colors create warmth and depth while maintaining the slightly mysterious character associated with old-fashioned Halloween decor.

    Texture plays an equally important role. Velvet, linen, lace, aged wood, tarnished metal, ceramic, glass, paper, and woven materials make a room feel collected over time. When these materials are combined thoughtfully, the space develops a sense of history.

    You can also use ordinary home decor items in a Halloween-inspired way. An antique-looking frame can hold a vintage-style botanical print. A dark vase can contain bare branches. A stack of old books can support a small ceramic pumpkin. A black candleholder can sit beside a bowl of dried leaves. This approach makes the decorations feel integrated instead of temporary.

    Another advantage of vintage Halloween decorating is flexibility. The same pieces can often remain in the room throughout autumn and transition naturally into Thanksgiving or late-fall decorating. Instead of buying decorations that are useful for only one night, you can create an interior that feels seasonal for several weeks.

    The ideas below focus on different areas, materials, and decorative techniques so that each concept contributes something distinct to the overall look. Whether you live in a traditional house, modern apartment, cottage, farmhouse, or small rental, you can adapt these vintage Halloween decorating ideas to suit your space.

    1. Create a Vintage Halloween Living Room With Velvet and Candlelight

    The living room is one of the best places to establish a nostalgic Halloween atmosphere because textiles, lighting, artwork, and accessories can all be changed without major renovations.

    Start with the sofa as the foundation.

    If you already have a cream, beige, brown, gray, or neutral sofa, you have an excellent starting point. Instead of covering it with Halloween-themed patterns, introduce a few richer seasonal textures.

    A black velvet cushion can create instant drama.

    Add another pillow in rust, burgundy, olive, or warm brown. A faded patterned cushion can introduce the feeling of an old European textile without making the sofa look like a Halloween display.

    For an even more nostalgic appearance, place a dark velvet or worn-looking throw casually across one arm of the sofa.

    The key is to make the textiles look comfortable rather than perfectly arranged.

    Use an antique-inspired coffee table arrangement

    A wooden coffee table can become the central seasonal display.

    Place a stack of aged-looking books in the center. Add a dark ceramic vase containing a few dried branches. Beside the books, place a small brass candlestick or vintage-style candleholder.

    A ceramic pumpkin in a muted cream, charcoal, or faded orange can complete the arrangement.

    Avoid using several pumpkin shapes together.

    One or two distinctive pieces will feel more collected and sophisticated.

    Build atmosphere with lighting

    Lighting can dramatically change the appearance of the living room after sunset.

    Use table lamps with warm bulbs rather than depending exclusively on a bright ceiling fixture.

    Place candles on safe, stable surfaces such as a fireplace mantel, coffee table, or side table.

    If you prefer flameless options, realistic LED candles can provide a similar visual effect.

    The objective is a room illuminated by several small pools of warm light rather than one intense source.

    Add vintage Halloween artwork

    A framed reproduction of an old-fashioned Halloween illustration can introduce nostalgic character.

    Look for imagery inspired by early Halloween postcards, antique botanical illustrations, black cats, moons, ravens, witches, pumpkins, or autumn foliage.

    Choose artwork with muted colors rather than extremely saturated graphics.

    A distressed-looking frame can reinforce the historic character.

    The finished living room should feel like an old home decorated for autumnโ€”not a modern room temporarily filled with Halloween merchandise.

    2. Style a Vintage Halloween Fireplace Mantel

    A fireplace mantel naturally becomes a focal point, making it ideal for vintage Halloween decor.

    Begin with one large anchor.

    This could be an antique-style mirror, an old portrait frame, a vintage clock, or a dark piece of artwork.

    The anchor establishes the vertical center of the arrangement.

    From there, introduce objects at different heights.

    Place taller candlesticks on one side and a shorter ceramic vessel on the other. Add dried branches, old books, or small seasonal objects between them.

    Use aged materials

    The mantel becomes especially convincing when the decorations have variation in texture.

    Try combining:

    • aged brass
    • distressed wood
    • black ceramic
    • amber glass
    • antique-style paper
    • dried foliage
    • dark iron

    These materials create depth without requiring a large number of decorations.

    Add subtle Halloween imagery

    A small black cat silhouette, crow figure, moon artwork, or vintage pumpkin can introduce the theme.

    Rather than placing Halloween objects everywhere, allow a few pieces to act as visual punctuation.

    Use the fireplace itself

    If the fireplace is functional, keep the hearth clear of anything that could create a safety hazard.

    For a decorative fireplace that is not being used, the lower opening can become another styling area.

    A cluster of LED candles, stacked firewood, a large basket, or seasonal branches can create a beautiful foundation.

    The mantel should look layered but not overloaded.

    3. Decorate With Vintage Halloween Gallery Walls

    A gallery wall is an effective way to introduce nostalgic Halloween imagery without covering every surface with seasonal accessories.

    The concept works particularly well in hallways, staircases, dining rooms, and living rooms.

    Start with a mixture of frame sizes.

    Use black, dark brown, aged gold, distressed wood, and antique brass finishes.

    They do not need to match exactly.

    The variation creates the feeling that the collection was gathered over time.

    Mix different types of artwork

    Instead of using fifteen identical Halloween prints, combine several visual categories.

    You could include:

    • old-fashioned Halloween illustrations
    • botanical prints
    • moon imagery
    • vintage pumpkins
    • black cat artwork
    • autumn landscapes
    • raven illustrations
    • antique typography
    • faded portraits
    • old botanical specimens

    This makes the wall feel like a genuine collection.

    Keep the color palette controlled

    Even when the artwork is different, maintain a common palette.

    Cream, black, muted orange, brown, olive, burgundy, and antique gold work beautifully together.

    Avoid overly bright modern graphics if the goal is a nostalgic interior.

    Add one-dimensional objects

    A gallery wall does not have to contain only framed artwork.

    A small antique-style clock, decorative key, dried botanical arrangement, or small wall-mounted object can introduce dimension.

    This creates a more collected appearance.

    4. Create a Nostalgic Halloween Entryway

    The entryway establishes the mood before anyone reaches the main living area.

    A console table provides an ideal surface for a small vintage Halloween vignette.

    Start with an antique-style mirror or framed artwork above the console.

    On the tabletop, place a narrow ceramic vase with dried branches.

    Add a small stack of old-looking books and one muted ceramic pumpkin.

    A brass bowl can provide a practical place for keys while also contributing to the aesthetic.

    Introduce a seasonal runner

    If the console has enough depth, a narrow runner or textile underneath the arrangement can add another layer.

    Choose faded stripes, subtle floral patterns, muted plaid, or a dark neutral textile rather than an obviously Halloween-themed print.

    Add candlelight

    A pair of small candleholders can frame the arrangement.

    For safety and convenience, flameless candles are particularly useful in busy entryways.

    Use a dark color accent

    A black frame, charcoal vase, dark wood, or burgundy textile can create contrast against a light wall.

    The entryway should feel atmospheric but remain easy to move through.

    5. Use Antique Mirrors to Create a Haunted-But-Elegant Mood

    Mirrors have long been associated with mysterious interiors, which makes them naturally suited to Halloween decorating.

    Instead of using novelty Halloween mirrors, consider antique-inspired pieces with aged frames or slightly weathered finishes.

    An oversized mirror can become the centerpiece of a living room, hallway, bedroom, or entryway.

    Choose an appropriate frame

    Dark carved wood can create a dramatic historic appearance.

    A distressed gold frame feels more ornate.

    Black metal offers a simpler Gothic direction.

    A weathered cream frame can produce a softer cottage-inspired effect.

    Surround the mirror carefully

    Place dried branches, candlesticks, or small antique-style objects nearby.

    Avoid covering the mirror itself with excessive decorations.

    Its reflective surface should remain visible.

    Use reflections strategically

    A mirror can reflect candlelight, warm lamps, branches, or seasonal artwork.

    This can make the room feel deeper and more atmospheric without requiring additional decoration.

    The result is especially effective in evening lighting.

    6. Build a Vintage Halloween Dining Table

    A Halloween dining table can be elegant rather than frightening.

    Begin with a natural wood table or a simple neutral surface.

    Add a runner in charcoal, deep brown, faded burgundy, or muted olive.

    Instead of a large collection of themed objects, create one central centerpiece.

    A long ceramic vessel filled with dried branches can work beautifully.

    Surround the base with a few small LED candles or antique-style candleholders.

    Choose vintage-inspired tableware

    Use ceramic plates in cream, ivory, charcoal, or muted earth tones.

    Antique-style brass flatware can introduce warmth.

    Amber glasses can add another layer of color.

    If you own vintage dishes, Halloween is an excellent occasion to bring them out.

    Slight imperfections can actually contribute to the nostalgic atmosphere.

    Add old-fashioned details

    Cloth napkins tied with simple ribbon, dried leaves, small paper tags, or tiny vintage-inspired illustrations can personalize the table.

    Avoid filling every place setting with decorative objects.

    Guests still need comfortable space to eat.

    Keep the centerpiece low enough

    A dining table should remain functional.

    A centerpiece that blocks conversation can quickly become inconvenient.

    Use height carefully, especially if the table will be used for an actual dinner.

    7. Decorate With Dried Branches and Autumn Botanicals

    One of the easiest ways to create vintage Halloween atmosphere without obvious Halloween decorations is through botanical styling.

    Bare branches immediately introduce an autumnal feeling.

    Place them in a large ceramic vase, antique glass bottle, or aged metal container.

    You can use:

    • dried eucalyptus
    • curly willow
    • preserved grasses
    • bare branches
    • dried hydrangeas
    • wheat
    • seed pods
    • muted autumn leaves

    The shapes should remain natural.

    Avoid making the arrangement too symmetrical.

    Use unexpected containers

    A vintage pitcher can become a vase.

    An old crock can hold branches.

    A dark glass bottle can contain a small arrangement.

    A weathered urn can create a more formal appearance.

    This makes the botanical display feel collected rather than purchased as a seasonal decoration.

    Introduce subtle color

    Muted rust, olive, brown, cream, and faded burgundy can connect the arrangement to the rest of the room.

    You do not need bright orange leaves everywhere.

    The quieter palette is what creates the nostalgic quality.

    8. Create a Vintage Halloween Bookshelf

    Bookshelves are perfect for nostalgic Halloween styling because books already carry an old-world feeling.

    Start by keeping your existing books.

    Rearrange them into small groups rather than completely redesigning the shelf.

    Place some books vertically and others horizontally.

    Use a small stack as a platform for a ceramic object or candle.

    Add vintage-inspired objects

    Between the books, introduce a few seasonal pieces.

    For example:

    • black ceramic bird
    • small brass candlestick
    • antique-style clock
    • ceramic pumpkin
    • amber bottle
    • framed Halloween print
    • dried botanical specimen

    The objects should complement the books rather than overwhelm them.

    Create one darker section

    A bookshelf does not need to have Halloween decorations on every shelf.

    Instead, choose one or two areas to receive stronger seasonal styling.

    This keeps the overall room sophisticated.

    Use book covers as part of the palette

    If your books have warm brown, cream, black, or burgundy covers, arrange them so those colors connect with your seasonal accessories.

    This can make the shelf feel naturally coordinated.

    9. Add Vintage Halloween Decor to the Kitchen

    The kitchen is often overlooked when decorating for Halloween, but small changes can create a charming seasonal atmosphere.

    Start with practical areas.

    A countertop corner can hold a ceramic vase with dried branches.

    A shelf can display vintage-style Halloween artwork.

    A kitchen island can feature a shallow wooden bowl containing a few muted decorative pumpkins.

    Use vintage kitchen objects

    Old-fashioned ceramic pitchers, enamel containers, wooden cutting boards, glass jars, and brass utensils can all contribute to the look.

    These objects feel natural in a kitchen and do not need to be explicitly Halloween-themed.

    Add a seasonal tea towel

    A linen or cotton towel with a subtle autumn pattern can introduce seasonal color without dominating the room.

    Look for muted checks, botanical prints, small pumpkins, or traditional typography.

    Style open shelving

    If your kitchen has open shelves, replace just a few items with seasonal pieces.

    For example, introduce an amber glass bottle, cream ceramic pumpkin, dark bowl, or vintage-inspired artwork.

    Do not remove everything and start again.

    Small changes often create a more sophisticated result.

    10. Create a Moody Vintage Halloween Bedroom

    The bedroom can become one of the most atmospheric rooms in the home because soft textiles and low lighting naturally create an intimate environment.

    Start with bedding in cream, ivory, charcoal, brown, or muted burgundy.

    Add one or two velvet pillows.

    A dark throw at the foot of the bed can provide contrast.

    Use bedside styling

    Place a warm table lamp on the nightstand.

    Add a small vintage-style frame, candle, or ceramic vessel.

    Avoid turning the nightstand into a decorative display.

    The bedroom should remain restful.

    Introduce an antique-inspired element

    A distressed mirror, old-looking portrait, vintage clock, or dark wooden frame can add character.

    For a subtle Gothic influence, choose furniture with curved lines, dark wood, or aged metal details.

    Use candlelight carefully

    LED candles are a practical choice for the bedroom.

    Their soft flickering appearance can create the feeling of candlelight without an open flame.

    The result should feel mysterious and romantic rather than frightening.

    11. Style a Vintage Halloween Coffee Station

    A small coffee or beverage station can become an unexpectedly charming seasonal feature.

    This idea works especially well on a kitchen counter, bar cart, sideboard, or small cabinet.

    Start with a vintage tray.

    Place your everyday coffee or tea essentials inside it.

    Then add one or two seasonal details.

    A ceramic pumpkin, amber glass jar, dried branches, or small vintage Halloween sign can introduce the theme.

    Use old-fashioned containers

    Glass jars with simple labels can store coffee beans, tea, sugar, or cocoa.

    A ceramic sugar bowl or brass spoon can reinforce the vintage aesthetic.

    Add seasonal warmth

    A cinnamon, vanilla, apple, or pumpkin-inspired scent can complement the atmosphere.

    You can also display a small autumn arrangement beside the tray.

    The advantage of this approach is that the decoration remains useful.

    It becomes part of the home’s everyday routine rather than an object that sits untouched.

    12. Create a Vintage Halloween Bar Cart

    A bar cart is another natural place for sophisticated Halloween styling.

    Choose a cart in brass, black metal, dark wood, or aged bronze.

    Use the lower shelf for bottles or glassware and reserve the upper surface for the seasonal arrangement.

    Build a simple focal point

    Place a dark ceramic vase with dried branches in the center.

    Surround it with amber glasses, brass accessories, and a small vintage-inspired Halloween object.

    You can add black or burgundy napkins for extra color.

    Use glass as decoration

    Amber bottles and vintage-style glassware catch warm light beautifully.

    They can make the bar cart feel rich and atmospheric even when the cart is not actively being used.

    Keep the arrangement functional

    Leave enough space to prepare and serve drinks.

    Decor should enhance the cart’s purpose rather than eliminate its usability.

    13. Use Vintage Halloween Textiles Throughout the Home

    Textiles are one of the easiest ways to change the atmosphere of a room without purchasing large decorative pieces.

    For a vintage Halloween interior, focus on texture and muted pattern.

    Velvet is especially useful because its deep surface absorbs and reflects light differently throughout the day.

    Linen creates a softer, more rustic feeling.

    Wool and woven blankets add warmth.

    Lace can introduce an old-fashioned quality when used sparingly.

    Use seasonal textiles selectively

    A dark throw on a sofa can be enough.

    A burgundy cushion can create a color accent.

    A vintage-style table runner can transform a dining table.

    A patterned pillow can introduce Halloween imagery without making the entire room themed.

    Choose patterns carefully

    Look for:

    • faded florals
    • vintage checks
    • botanical motifs
    • subtle stripes
    • damask patterns
    • antique-inspired Halloween illustrations

    The pattern does not need to contain pumpkins or ghosts.

    Sometimes the atmosphere comes from the texture and color rather than the literal theme.

    14. Create a Nostalgic Halloween Staircase

    A staircase offers vertical space that can be decorated without consuming valuable floor area.

    Start with the railing.

    A simple garland of dried branches, eucalyptus, or dark foliage can create a natural seasonal layer.

    For a more traditional look, use a muted ribbon to attach the greenery.

    Add vintage frames

    If the staircase wall has enough space, create a small collection of antique-style frames.

    Use a combination of autumn artwork, botanical illustrations, vintage Halloween prints, and old-looking portraits.

    This creates the impression of a family collection accumulated over decades.

    Add candle-inspired lighting

    Battery-powered candle lights can be positioned safely along steps or nearby surfaces where appropriate.

    Avoid anything that creates a tripping hazard or interferes with movement.

    The staircase should remain completely functional.

    Use the architecture

    Do not try to hide every architectural feature under decorations.

    Let the railing, wall molding, woodwork, or staircase shape remain visible.

    The vintage decorations should emphasize the character already present.

    15. Create a Full Vintage Halloween Vignette With Old-World Character

    For the strongest overall effect, create one carefully composed vintage Halloween vignette somewhere in your home.

    This could be on a console table, sideboard, fireplace mantel, entryway cabinet, or small corner table.

    Instead of spreading decorations everywhere, treat this area like a miniature scene.

    Begin with a large background element such as an antique mirror or dark framed artwork.

    Place a tall ceramic vase or aged brass candlestick on one side.

    Add a stack of old-looking books toward the center.

    Place a muted ceramic pumpkin or black cat figure nearby.

    Finish with a small bowl of dried leaves, an amber glass bottle, and soft candlelight.

    Create contrast

    Use light and dark elements together.

    A cream wall can support a black frame.

    A dark console can support ivory ceramics.

    Warm brass can bridge the two.

    Add one unusual detail

    A vintage key, old clock, antique-looking photograph, weathered letter, or small raven figure can give the arrangement a sense of mystery.

    Choose only one unusual focal detail.

    The goal is to make people look twice.

    Make it feel collected

    Avoid using objects that all appear to have come from the same Halloween collection.

    Mix different textures and finishes.

    Pair new-looking ceramic with aged wood.

    Combine brass with glass.

    Place modern lighting beside vintage-inspired objects.

    This contrast makes the display feel more authentic.

    How to Choose a Vintage Halloween Color Palette

    A cohesive color palette can make the entire home feel connected.

    Traditional orange and black can certainly be included, but they do not need to dominate.

    A sophisticated vintage palette could include:

    Cream + charcoal + faded orange + walnut

    Ivory + burgundy + olive + antique gold

    Warm beige + black + rust + dark brown

    Taupe + muted pumpkin + olive green + aged brass

    The best combination depends on your existing interior.

    If your home already has warm wood and beige upholstery, muted orange and burgundy can blend naturally.

    If your furniture is mostly black and white, olive and antique gold can introduce warmth.

    How to Make Halloween Decor Look Truly Vintage

    The word โ€œvintageโ€ is often used loosely, but the atmosphere depends on several recognizable characteristics.

    Choose aged-looking finishes

    Distressed wood, tarnished brass, imperfect ceramics, antique-style frames, and weathered paper all contribute to the impression of age.

    Avoid excessive novelty decorations

    Plastic skeletons, brightly colored signs, and oversized novelty props can quickly shift the look toward a modern Halloween party.

    If you enjoy those pieces, use them separately.

    For a nostalgic interior, emphasize materials and atmosphere instead.

    Mix old and new

    A room does not need to contain genuine antiques.

    Modern furniture can work beautifully with vintage-inspired accessories.

    The contrast can actually make the decorative pieces more noticeable.

    Let imperfections show

    Vintage-inspired decor often feels more convincing when it is not perfectly polished.

    A slightly irregular ceramic vase, distressed frame, worn-looking book cover, or aged metal finish can add character.

    How to Decorate a Small Home for Vintage Halloween

    Small spaces benefit from concentrated decorating.

    Instead of trying to decorate every room, choose two or three areas.

    An entryway console, living-room coffee table, and kitchen shelf may be enough.

    Use vertical surfaces whenever possible.

    A framed artwork collection can create impact without consuming floor space.

    A mirror can provide atmosphere while also making the room feel more open.

    Small ceramic pumpkins, candles, books, and branches can create seasonal interest without overwhelming furniture.

    For apartments, temporary decorations are particularly useful because they can be removed easily after the season.

    How to Keep Vintage Halloween Decor Elegant Instead of Cluttered

    The biggest difference between a sophisticated seasonal interior and an overloaded one is usually editing.

    Before adding another object, ask whether the room actually needs it.

    If you already have a strong centerpiece, allow it to remain dominant.

    If your mantel contains several decorative pieces, do not automatically fill the hearth with more.

    If the sofa already has rich velvet pillows, you may not need additional patterned textiles.

    Visual breathing room is important.

    The goal is to create atmosphere while preserving the original character of the home.

    How to Add Spooky Details Without Making the Home Scary

    Vintage Halloween does not have to mean horror.

    You can create a mysterious atmosphere through subtle details.

    Try:

    • black taper candles
    • ravens
    • old keys
    • antique portraits
    • dried branches
    • dark botanical prints
    • moon artwork
    • vintage clocks
    • amber glass
    • old books
    • weathered frames

    These objects suggest mystery without relying on graphic imagery.

    If you prefer a more playful Halloween atmosphere, introduce pumpkins and black cats while keeping the colors muted.

    How to Transition Vintage Halloween Decor Into Thanksgiving

    One of the advantages of this style is that many pieces can remain after Halloween.

    Remove the most obvious Halloween imagery first.

    Take away black cats, witch motifs, Halloween typography, and novelty pieces.

    Keep:

    • dried branches
    • ceramic vessels
    • amber glass
    • brass candlesticks
    • velvet textiles
    • autumn artwork
    • wooden accessories
    • warm neutral colors

    Then introduce Thanksgiving elements such as natural foliage, seasonal fruit, warm table linens, and subtle harvest details.

    This allows the home to transition gradually instead of requiring a complete redecorating session.

    Practical Tips for Shopping Vintage Halloween Decor

    You do not need to purchase everything from specialty Halloween stores.

    Look at antique shops, thrift stores, flea markets, estate sales, and vintage-inspired home collections.

    Search for objects based on material and shape rather than simply searching for โ€œHalloween decor.โ€

    For example, look for:

    • brass candlesticks
    • antique frames
    • ceramic vessels
    • amber glass
    • old books
    • wooden boxes
    • vintage clocks
    • botanical prints
    • dark vases

    These objects can become Halloween decor when combined with seasonal styling.

    This approach also gives the interior a more authentic collected appearance.

    Final Thoughts

    Vintage Halloween home decor is ultimately about creating a feeling.

    The most memorable interiors do not necessarily contain the greatest number of decorations. They create atmosphere through color, texture, lighting, proportion, and carefully selected objects.

    A velvet cushion can transform a neutral sofa.

    Aged brass can make a simple console feel historic.

    Dried branches can create an autumnal silhouette.

    An antique-inspired mirror can introduce mystery.

    Old-looking books can add depth.

    Warm candlelight can completely change the mood after sunset.

    The strongest approach is to choose a few of these elements and allow them to work together.

    Start with the room you use most.

    Choose one focal point.

    Build around it with two or three supporting textures.

    Then step back and edit.

    If the room already feels atmospheric, stop.

    You do not need another pumpkin simply because there is an empty corner.

    The beauty of a nostalgic Halloween interior comes from restraint. It should feel as though the home has naturally evolved into its autumn personality rather than being covered in decorations overnight.

    Whether you prefer a romantic Gothic living room, a cozy vintage farmhouse, an old-world dining room, or a subtle modern interior with antique Halloween accents, the same principle applies: create mystery through atmosphere rather than excess.

    Use muted autumn colors instead of relying exclusively on bright orange. Choose aged materials over disposable-looking decorations. Combine old-fashioned imagery with your existing furniture. Introduce candlelight and warm lamps to create depth after dark. Let books, textiles, ceramics, branches, mirrors, and artwork carry much of the visual story.

    Most importantly, allow your home to remain recognizable.

    The best Halloween decorating does not erase the personality of a room.

    It enhances it for the season.

    With the right combination of nostalgic objects, moody colors, natural textures, and warm illumination, even a simple living room or entryway can become a beautiful autumn retreat that feels mysterious, timeless, and unmistakably Halloween.


  • Walk-In Closet Organization Ideas for a Stylish & Functional Space

    Walk-In Closet Organization Ideas for a Stylish & Functional Space

    A walk-in closet can be one of the most useful spaces in a home, but having extra square footage does not automatically make a closet organized.

    Without a thoughtful system, even a large walk-in can become difficult to navigate. Clothes end up packed too tightly on rods, shoes collect along the floor, handbags occupy random shelves, accessories disappear into drawers, and seasonal pieces take over valuable everyday storage.

    The real goal of a well-designed walk-in closet is not simply to store more things.

    It is to make everything easier to see, reach, use, and put away.

    A successful closet should support the way you actually get dressed.

    If you reach for dresses every morning, they should be easy to access. If you own a large shoe collection, shoes need a dedicated zone. If handbags are important to your wardrobe, they should not be squeezed onto a shelf designed for folded clothing. If you frequently plan outfits in advance, a valet rod or designated outfit-planning area can make the morning routine much easier.

    Modern closet design is increasingly moving toward this type of personalized organization. Designers are treating walk-in closets as carefully planned rooms rather than simple storage spaces, incorporating different types of hanging storage, drawers, shelves, lighting, mirrors, islands, and display areas according to individual routines.

    Another important change is the growing interest in making closets feel beautiful.

    Warm wood finishes, elegant lighting, glass-front storage, decorative hardware, upholstered seating, mirrors, and carefully displayed accessories can turn a practical wardrobe area into something that feels more like a private boutique.

    This does not mean every closet needs an enormous island or custom cabinetry.

    Even a modest walk-in closet can feel significantly more functional when its storage is divided into clear zones and its vertical space is used efficiently.

    For example, double hanging rods can increase hanging capacity without expanding the footprint. Floor-to-ceiling shelving can make use of otherwise wasted upper wall space. Pull-out drawers can make small accessories easier to locate. Shoe shelves can prevent footwear from spreading across the floor. Baskets can contain less frequently used items.

    Lighting is equally important.

    A poorly lit closet can make organization difficult because colors, textures, and individual pieces become harder to distinguish. Current closet-design guidance recommends layered lighting, including general illumination plus integrated lighting within shelving or cabinets.

    A stylish closet also benefits from visual calm.

    This does not necessarily mean hiding everything behind doors. Open shelving can work beautifully when it is reserved for frequently used or attractive pieces, while drawers and closed cabinets can conceal items that create visual noise.

    The key is assigning every category a logical home.

    Once the storage system is planned around your wardrobe, maintaining it becomes much easier.

    Before beginning, completely emptying the closet and sorting clothing by category is a useful first step. Organization experts commonly recommend editing the wardrobe before designing the final storage arrangement so that the system reflects what you actually keep and use.

    Then think about your closet in terms of zones rather than individual shelves.

    Where should everyday clothing go?

    Where should formalwear go?

    Where will shoes live?

    Where should handbags be displayed?

    Where will accessories be stored?

    Where will laundry go?

    Where can you prepare an outfit?

    Once these questions are answered, the closet becomes much easier to plan.

    Below are ten practical and stylish walk-in closet organization ideas that combine storage efficiency with an elevated interior-design aesthetic.

    1. Divide the Closet Into Dedicated Clothing Zones

    One of the simplest ways to make a walk-in closet easier to use is to divide it into dedicated clothing zones.

    Instead of treating every rod and shelf as interchangeable storage, give different parts of the closet specific jobs.

    For example, one section can hold dresses and long coats. Another can contain shirts and blouses. A lower hanging section can accommodate pants and skirts. Shelves can be reserved for folded sweaters, denim, or knitwear.

    This creates a natural flow.

    You know where to look when you need something, and you know where to return it after wearing it.

    A useful starting point is to organize clothing according to how you use it, not simply how much of each category you own.

    Everyday clothing should occupy the easiest-to-reach areas.

    Occasional clothing can be placed slightly higher or farther away.

    Special-event pieces can occupy a dedicated section rather than taking up prime everyday space.

    Use different hanging heights

    A single continuous rod may look simple, but it can waste valuable vertical space.

    Double-hanging sections are especially useful for shorter garments such as shirts, blouses, folded trousers, and skirts. Longer sections can be reserved for dresses, coats, jumpsuits, and other full-length pieces.

    Using different rod heights allows more clothing to fit within the same wall area.

    Current walk-in closet guidance specifically recommends combining storage types and varying rod and shelf heights to make better use of available space.

    Organize within each zone

    Once clothing is divided by category, you can organize further.

    For example, dresses can be grouped by length or occasion.

    Shirts can be grouped by sleeve length.

    Trousers can be grouped separately from skirts.

    You can then use color organization within each category if that makes items easier for you to locate.

    The important thing is consistency.

    A system only works when you can remember it.

    Keep frequently used clothing at eye level

    The most accessible areas of the closet should contain pieces you wear regularly.

    Upper shelves can hold seasonal clothing, luggage, extra bedding, or other less frequently used belongings.

    This creates a natural hierarchy between everyday and occasional storage.

    The result is a closet that feels easier to navigate because everything has a logical location.

    2. Use Floor-to-Ceiling Shelving to Maximize Vertical Space

    The walls of a walk-in closet provide valuable storage capacity, particularly above normal eye level.

    Instead of leaving a large empty area between the top shelf and the ceiling, consider extending shelving or cabinetry upward.

    Vertical storage is especially helpful when the closet has limited floor space.

    Upper shelves can hold:

    • seasonal clothing
    • handbags
    • luggage
    • extra blankets
    • storage boxes
    • special-occasion accessories
    • rarely used shoes
    • travel items

    The key is not to use high shelves for things you need every morning.

    Those areas are best reserved for items that can be accessed occasionally.

    Use attractive storage containers

    Upper shelves can easily become visually messy when they contain a collection of mismatched boxes.

    Use coordinated baskets, fabric bins, or storage boxes instead.

    Neutral colors such as ivory, beige, taupe, warm gray, or natural woven fibers can create a calmer appearance.

    Labels can make less frequently used storage much easier to manage.

    For example:

    Winter Accessories

    Travel

    Special Occasion

    Seasonal Shoes

    Extra Linens

    This prevents you from opening every container whenever you need something.

    Make vertical storage part of the architecture

    Floor-to-ceiling cabinetry can make a closet look more intentional because the storage appears integrated into the room.

    Rather than seeing a collection of individual shelves, the entire wall becomes one cohesive storage system.

    This approach also reflects a broader design preference for built-in storage that blends with architecture rather than looking like temporary furniture.

    Add safe access

    If upper storage is difficult to reach, keep a stable step stool nearby.

    In larger luxury closets, a rolling library-style ladder can become both a practical feature and an architectural element.

    The goal is to make every part of the storage system genuinely usable.

    3. Create a Dedicated Shoe Organization Wall

    Shoes deserve their own storage strategy because they are awkward to organize with ordinary shelves.

    When footwear is scattered across the floor, it immediately makes a walk-in closet feel less organized.

    A dedicated shoe wall solves this problem while giving you an opportunity to display your collection attractively.

    Adjustable shelves are particularly useful because different types of shoes require different amounts of vertical space.

    Flat sandals need very little room.

    Sneakers require more.

    Ankle boots need additional height.

    Tall boots may require an even larger compartment.

    Adjust the shelves to the collection

    Avoid designing every shoe shelf at exactly the same height.

    Adjustable shelves allow you to change the configuration as your collection changes.

    This makes the closet more adaptable.

    Use the vertical wall

    A full-height shoe wall can hold a surprising number of pairs without using much floor area.

    For a boutique-inspired appearance, arrange shoes in a consistent direction and leave enough space between pairs so they remain visible.

    You can organize them by:

    • type
    • color
    • frequency of use
    • season
    • occasion

    Choose whichever method makes finding your shoes fastest.

    Use lower storage for everyday shoes

    Shoes you wear frequently can remain within easy reach.

    Special-occasion footwear can be placed higher.

    Seasonal shoes can move into upper storage or clearly labeled boxes.

    This keeps the most useful footwear accessible without sacrificing capacity.

    Add lighting carefully

    If your shoe shelves are open, integrated LED lighting can make the collection easier to see.

    Lighting positioned inside or beneath shelving can create a subtle boutique effect while improving functionality.

    Architectural Digest notes that retail-inspired lighting is becoming an important part of modern closet design because integrated lighting can enhance the visibility of clothing, shoes, colors, and textures.

    4. Organize Handbags and Accessories Like a Boutique Display

    Handbags, belts, scarves, hats, and other accessories are often difficult to store because they have different shapes and sizes.

    Instead of forcing all of them into one drawer or shelf, create smaller dedicated zones.

    Handbags can be displayed vertically on shelves.

    Small purses can stand upright inside cubbies.

    Clutches can fit into narrow compartments.

    Belts can be stored on hooks or specialized organizers.

    Scarves can be folded into drawers or rolled into individual compartments.

    Hats can occupy higher shelves or dedicated wall hooks.

    Give handbags enough room

    Avoid stacking handbags on top of one another if you use them frequently.

    When bags are squeezed together, it becomes difficult to see what you own and even harder to remove one without disturbing the others.

    Open cubbies can work particularly well for handbags because each item remains visible.

    For valuable or delicate pieces, glass-front cabinetry can offer display visibility while providing additional protection from dust.

    Protect the shape of bags

    Store structured handbags upright when possible.

    Use appropriate inserts or tissue material for delicate bags if necessary.

    Avoid crushing soft materials under heavier pieces.

    Organization should protect your belongings, not simply make them fit.

    Create an accessory drawer

    Small items such as jewelry, sunglasses, watches, belts, and hair accessories can quickly disappear into large drawers.

    Use drawer dividers or shallow compartments to separate categories.

    Expandable organizers and adjustable inserts can be particularly useful because they allow storage to change as your collection changes.

    Turn beautiful accessories into decor

    If you have a few handbags or accessories that are visually appealing, display them intentionally.

    A row of neutral handbags against warm wood cabinetry can create a sophisticated boutique appearance without adding decorative clutter.

    5. Install Drawer Organization for Small Items

    Drawers are essential in a well-organized walk-in closet because they provide a place for smaller items that would otherwise create visual clutter.

    They work particularly well for:

    • underwear
    • socks
    • jewelry
    • belts
    • scarves
    • sleepwear
    • workout accessories
    • small personal items

    The key is dividing large drawers into smaller compartments.

    Without dividers, even a beautiful drawer can quickly become a tangled collection of unrelated objects.

    Use shallow drawers for accessories

    Deep drawers are useful for larger folded clothing.

    Shallow drawers are better for small accessories because individual items remain visible.

    Jewelry can be separated into sections for earrings, necklaces, bracelets, and watches.

    Socks can be divided by type.

    Belts can be rolled or placed into narrow compartments.

    Keep categories together

    Avoid creating a system that requires you to remember too many locations.

    If all scarves are in one drawer, keep them together.

    If all jewelry is in another, keep that category consistent.

    The purpose of organization is to reduce mental effort.

    Consider soft-close drawers

    If you are building a new custom closet, smooth-running drawers with soft-close mechanisms can make the space feel more refined.

    They also create a quieter experience, particularly in bedrooms where you may use the closet early in the morning or late at night.

    Choose finishes that complement the room

    Warm wood drawers can create a furniture-like appearance.

    Cream cabinetry can make a smaller closet feel brighter.

    Dark cabinetry can create a dramatic boutique atmosphere.

    The interior storage does not need to look purely utilitarian.

    It can contribute to the design of the room.

    6. Add a Center Island When the Space Allows

    A center island can completely change how a large walk-in closet functions.

    It provides additional drawers, a folding surface, and a central visual anchor.

    However, an island should only be added when the room has enough circulation space around it.

    A beautiful island that makes the closet difficult to walk through is not a successful solution.

    The surrounding clearance should be considered before installation. Angi recommends planning sufficient room for comfortable movement through the closet rather than maximizing furniture at the expense of circulation.

    Use the island for small storage

    The drawers can hold:

    • jewelry
    • watches
    • underwear
    • scarves
    • accessories
    • folded clothing
    • small personal items

    This frees wall shelving for larger categories.

    Create a folding station

    A smooth countertop provides a convenient place to fold clothing.

    Materials such as quartz, wood, marble-look surfaces, or natural stone can make the island feel like a piece of furniture rather than a basic storage unit.

    Add a decorative tray

    A small tray on the island can hold perfume bottles, jewelry, or other frequently used items.

    Keep the surface mostly open so the island remains useful.

    Use the island as a design feature

    In a larger closet, the island can introduce a contrasting material.

    For example:

    Warm oak cabinetry + stone countertop.

    Cream cabinetry + walnut island.

    Dark cabinetry + light stone.

    This adds visual depth without requiring excessive decoration.

    7. Create a Dedicated Outfit-Planning Area

    One of the most useful upgrades for a walk-in closet is a small area dedicated to planning outfits.

    A simple valet rod can provide a temporary place to hang tomorrow’s clothing.

    This eliminates the need to search through the wardrobe in the morning.

    A valet rod can hold:

    • blouse or shirt
    • trousers
    • jacket
    • dress
    • accessories
    • scarf
    • belt

    Current walk-in closet trends include valet rods specifically because they help with outfit planning and temporarily hold prepared clothing without disrupting the main wardrobe.

    Add hooks nearby

    A few strategically placed hooks can provide another useful temporary storage area.

    Use them for:

    • tomorrow’s outfit
    • recently worn clothing
    • robes
    • hats
    • scarves

    Avoid allowing hooks to become permanent dumping points.

    Their purpose is temporary organization.

    Place a mirror nearby

    If space allows, an outfit-planning area works especially well near a full-length mirror.

    This creates a small dressing zone within the larger closet.

    You can see the outfit, adjust accessories, and return everything to its proper storage location afterward.

    Make the area visually distinct

    A different wall finish, small bench, or decorative mirror can help establish the dressing zone without requiring a physical partition.

    The result feels more intentional and makes the closet function like a private dressing room.

    8. Use Layered Lighting to Make the Closet Easier to Use

    Lighting should be treated as part of the organization system rather than an afterthought.

    A closet with excellent storage but poor lighting can still be frustrating.

    You need to see:

    • clothing colors
    • fabric textures
    • shoes
    • accessories
    • drawer contents
    • labels
    • mirrors

    A layered lighting plan can solve this.

    Start with general lighting

    A central ceiling fixture provides overall illumination.

    Depending on the style of the closet, this could be:

    • recessed lighting
    • a flush mount
    • a decorative chandelier
    • multiple ceiling fixtures
    • a linear light

    A decorative fixture can give a large walk-in a more luxurious character.

    Add shelf lighting

    LED strips beneath shelves or inside cabinets can illuminate dark areas.

    This is particularly useful for shoes, handbags, and folded clothing.

    Illuminate the mirror

    A full-length mirror should be positioned where you can see your clothing clearly.

    Additional lighting around the mirror can help eliminate harsh shadows.

    Use warm but accurate lighting

    A closet should feel inviting, but color accuracy is important.

    You want to distinguish black from navy, cream from white, and warm brown from cool brown.

    For this reason, lighting quality matters as much as the decorative appearance of the fixture.

    Layered lighting is now a major feature in high-end closet design, with integrated shelf illumination being used to make storage both more functional and visually sophisticated.

    9. Incorporate a Comfortable Dressing and Seating Area

    If your walk-in closet has enough room, a small seating area can make it much more comfortable.

    You do not need a full sofa.

    A compact upholstered bench, ottoman, stool, or accent chair can be enough.

    A seat provides somewhere to:

    • put on shoes
    • fold clothing
    • prepare outfits
    • place a garment temporarily
    • pause while getting dressed

    Choose multifunctional furniture

    A storage ottoman can provide seating while hiding additional belongings.

    This is particularly useful when the closet has limited space.

    Current storage design guidance increasingly emphasizes furniture that performs more than one function, particularly in spaces where square footage needs to work harder.

    Match the seating to the closet

    For a warm luxury closet, consider:

    • cream boucle
    • taupe linen
    • warm brown leather
    • textured beige upholstery
    • natural wood

    For a contemporary closet, a sculptural stool can provide a cleaner appearance.

    Avoid overcrowding

    A seat should improve the closet rather than reduce the walking space.

    If the room is narrow, choose a compact bench that can sit against the wall when not being used.

    10. Create a Boutique-Inspired Display With Warm Wood and Glass

    The final step is bringing organization and style together.

    Instead of making the closet feel like a utility room, create a boutique-inspired environment where selected clothing and accessories become part of the visual design.

    Warm wood is particularly effective for this.

    Natural oak and walnut can make storage feel warmer and more furniture-like than stark white cabinetry. Current 2026 closet discussions increasingly highlight warm wood tones as an alternative to purely white storage systems.

    Combine open and closed storage

    Open shelving is ideal for:

    • favorite handbags
    • shoes
    • folded sweaters
    • attractive accessories

    Closed cabinetry is better for:

    • clutter-prone items
    • seasonal belongings
    • personal products
    • less attractive storage categories

    The combination creates visual balance.

    Use glass strategically

    Glass-front cabinets can display special pieces while protecting them from dust.

    Smoked glass can create a more dramatic appearance.

    Clear glass keeps the space light and allows the contents to remain visible.

    Add a warm material palette

    Consider combining:

    • natural walnut
    • oak
    • cream
    • brushed brass
    • soft beige
    • stone
    • glass
    • subtle black accents

    This creates a sophisticated wardrobe environment without excessive decoration.

    Let your wardrobe become the decor

    Beautiful clothing can contribute to the design.

    A carefully arranged row of neutral clothing, coordinated handbags, elegant shoes, and neatly folded knitwear can create the visual richness of a boutique.

    The key is organization.

    Once everything is arranged intentionally, the wardrobe itself becomes part of the room.

    How to Organize a Small Walk-In Closet

    A small walk-in closet needs a different strategy from a large dressing room.

    The priority should be capacity without crowding.

    Start by using the walls efficiently.

    Double-hanging rods can create additional hanging capacity.

    Floor-to-ceiling shelving can take advantage of vertical space.

    Shallow drawers can hold small accessories.

    Wall hooks can handle temporary items.

    A full-length mirror can be mounted on a door or wall rather than taking up valuable floor space.

    Avoid oversized islands and bulky seating unless the room has enough clearance.

    Instead, use narrow solutions that preserve movement.

    A small closet can still look luxurious.

    Warm wood, consistent hangers, integrated lighting, and coordinated storage containers can make a compact space feel intentional.

    How to Organize a Luxury Walk-In Closet

    Luxury does not require filling the room with expensive features.

    The feeling usually comes from proportion, materials, lighting, and consistency.

    A luxury closet might include:

    • custom cabinetry
    • warm wood
    • glass-front doors
    • integrated LED lighting
    • a center island
    • full-length mirror
    • upholstered seating
    • dedicated shoe storage
    • handbag display
    • jewelry drawers
    • valet rod

    However, the layout should still be based on how the owner actually uses the wardrobe.

    A huge closet with inefficient storage is less useful than a smaller closet that places everything exactly where it belongs.

    How to Organize a Shared Walk-In Closet

    Shared closets work best when each person has clearly defined zones.

    Divide the space before filling it.

    Each person can have:

    • hanging storage
    • shelves
    • drawers
    • shoe space
    • accessories
    • seasonal storage

    Shared areas can include the island, mirror, seating, or laundry section.

    Clear boundaries reduce confusion and make putting things away easier.

    You can also use different sections of the closet for different wardrobe categories rather than dividing every shelf equally.

    For example, one side might prioritize long garments while the other has more double-hanging space.

    The system should reflect each person’s wardrobe.

    How to Organize Seasonal Clothing

    Seasonal clothing can consume enormous amounts of closet space if everything remains equally accessible throughout the year.

    If your closet has sufficient room, you may not need a seasonal rotation.

    But in smaller walk-ins, moving less frequently used items to upper shelves or clearly labeled storage can create valuable space.

    Store:

    • winter coats
    • heavy sweaters
    • summer beachwear
    • special occasion pieces
    • seasonal accessories

    in designated containers.

    Before storing anything, make sure it is clean and completely dry.

    Use labels so you can identify the contents without opening every container.

    When the season changes, rotate only what is necessary.

    This prevents seasonal transitions from becoming a complete closet reorganization.

    How to Keep Shoes From Taking Over the Floor

    The floor should remain primarily a circulation area.

    If shoes repeatedly accumulate there, the problem is usually not a lack of discipline.

    It is often a lack of convenient shoe storage.

    Create a dedicated shoe zone at a height that makes sense for your collection.

    Use open shelves for frequently worn shoes.

    Use boxes for delicate or seasonal pairs.

    Place everyday shoes where they can be returned easily.

    If you have tall boots, provide dedicated vertical compartments rather than laying them across the floor.

    The easier it is to put shoes away, the more likely the system is to remain organized.

    How to Make a Walk-In Closet Look More Expensive

    There are several ways to create an elevated appearance without completely rebuilding the space.

    Use matching hangers

    Uniform hangers immediately make a closet look more cohesive.

    Choose one material and shape rather than a mixture of plastic, wire, and wood.

    Upgrade the hardware

    Changing basic handles and knobs to more refined hardware can make cabinetry feel more intentional.

    Brushed brass, aged brass, matte black, and understated bronze can all work depending on the design.

    Improve the lighting

    Good lighting can dramatically change the appearance of storage.

    Integrated shelf lighting can highlight clothing and accessories while making the room easier to use.

    Introduce warm materials

    Warm wood can make a closet feel less sterile.

    Walnut, oak, and other natural finishes add texture and depth.

    Coordinate storage containers

    Mismatched bins can make even a beautiful closet look chaotic.

    Use a consistent family of baskets or boxes on upper shelves.

    Display selectively

    Do not display every possession.

    Choose your most attractive shoes, handbags, accessories, or folded pieces for open shelving.

    The rest can remain behind doors or inside drawers.

    Common Walk-In Closet Organization Mistakes

    Even expensive closet systems can fail when the planning is wrong.

    Using one storage type everywhere

    A closet needs different storage for different belongings.

    Clothing, shoes, handbags, accessories, and folded items do not all require the same shelf or rod.

    Ignoring vertical space

    Leaving large empty areas above storage wastes capacity.

    Use upper shelves for items that are not needed daily.

    Creating shelves that are too deep

    Deep shelves can cause items to disappear behind one another.

    Choose dimensions based on what the shelf will actually store.

    Adding an island too early

    A center island can be beautiful, but it should never come at the expense of comfortable circulation.

    Overfilling open shelving

    Open shelves should remain visually manageable.

    If every shelf is packed tightly, the closet can feel chaotic.

    Poor lighting

    A beautiful closet becomes frustrating when you cannot see its contents clearly.

    No designated laundry area

    Worn clothing often becomes the source of visible clutter.

    A built-in hamper or concealed laundry section can help keep the floor and seating areas clear.

    Modern closet systems increasingly incorporate concealed hampers and sorting compartments for precisely this reason.

    Organizing for appearance instead of routine

    A closet should look beautiful, but it must also work.

    If the items you use every day are stored in inconvenient locations simply because the arrangement looks attractive, the system will not remain functional.

    A Simple Walk-In Closet Organization Formula

    If you are starting from scratch, follow this sequence.

    Step 1: Empty the closet.

    Remove everything so you can see the actual space.

    Step 2: Edit your wardrobe.

    Separate what you keep, donate, sell, repair, relocate, or store seasonally. This type of editing is a recommended first step in professional closet organization.

    Step 3: Measure the room.

    Record wall lengths, ceiling height, doors, windows, outlets, and existing architectural features.

    Step 4: Create zones.

    Plan separate areas for hanging clothing, folded pieces, shoes, handbags, accessories, and laundry.

    Step 5: Assign priority.

    Place everyday belongings in the easiest-to-reach areas.

    Step 6: Use vertical space.

    Reserve high shelves for seasonal and occasional items.

    Step 7: Add lighting.

    Plan general illumination and task lighting before finalizing storage.

    Step 8: Add specialized features.

    Consider valet rods, jewelry drawers, pull-out shelves, shoe racks, or a center island based on your actual needs.

    Step 9: Add comfort.

    If space permits, introduce a mirror, bench, ottoman, or small seating area.

    Step 10: Style selectively.

    Finish with warm materials, coordinated hangers, attractive containers, and a few carefully displayed accessories.

    How to Maintain an Organized Walk-In Closet

    A closet is not truly organized if it looks perfect for one week and then becomes difficult to use.

    The best systems are easy to maintain.

    When you remove clothing, return it to the same category.

    When you buy something new, decide where it will live before bringing it into the closet.

    When an item no longer fits your lifestyle, remove it instead of allowing it to occupy valuable space indefinitely.

    Periodically review upper shelves and seasonal storage.

    If you notice one category repeatedly overflowing, reconsider the amount of storage dedicated to it.

    You may need more space for one category and less for another.

    This is one reason adjustable storage systems are valuable.

    Your wardrobe changes.

    Your storage should be able to change with it.

    Final Thoughts

    A well-organized walk-in closet should make getting dressed easier, not simply make the room look impressive.

    The most successful designs combine clear zones, appropriate storage, accessible everyday items, smart vertical organization, good lighting, and carefully selected design details.

    Start by understanding your wardrobe.

    Then design the storage around it.

    Use double-hanging sections where shorter clothing allows it. Reserve long-hanging areas for dresses and coats. Use floor-to-ceiling shelving for seasonal and occasional belongings. Give shoes, handbags, and accessories their own dedicated zones. Add drawer dividers for small items. Consider a valet rod for outfit planning. If the room is large enough, introduce a center island or seating area.

    Then bring in the visual details.

    Warm wood can make the space feel sophisticated.

    Glass can create a boutique-style display.

    Integrated lighting can make shelves and clothing easier to see.

    Coordinated hangers and storage containers can reduce visual noise.

    A beautiful mirror can make the closet feel more like a dressing room.

    The most important principle is simple:

    Organize the closet around the way you actually live.

    A stunning walk-in closet is not defined by how many shelves, drawers, or luxury features it contains.

    It is defined by how effortlessly you can find what you need, put things away, plan an outfit, and move through your morning routine.

    When every category has a logical home and the room itself feels calm and inviting, organization becomes much easier to maintain.

    The result is more than a tidy closet.

    It becomes a stylish, functional personal space that makes everyday life feel a little more effortless.


  • Console Table Decor Accessories for an Elegant Entryway

    Console Table Decor Accessories for an Elegant Entryway

    An entryway may be one of the smallest areas in a home, but it has an outsized effect on how the entire house feels. It is the first space you see when you arrive home, the first area guests experience, and often the transition point between the outside world and your private living spaces.

    That makes an entryway worth decorating intentionally.

    A console table is one of the easiest ways to give this area structure. It fills an empty wall, provides a convenient surface for everyday items, and creates a natural place to introduce the colors, materials, and personality found throughout the rest of the home.

    But an elegant console table does not require dozens of decorative objects.

    In fact, the opposite is usually true.

    A successful arrangement depends more on selection and proportion than quantity. One beautiful mirror can have more impact than a crowded gallery wall. One sculptural lamp can make a stronger statement than several small accessories. A carefully chosen tray can make everyday keys and sunglasses feel organized rather than messy.

    Current entryway styling guidance continues to emphasize this balance between decoration and function. Designers are recommending practical catch-all pieces, soft lighting, mirrors, ceramic vessels, natural textures, and personalized objects while discouraging surfaces that become overloaded with small decorative items.

    This approach is particularly useful for modern homes because entryways need to look beautiful while still handling real life.

    Keys need somewhere to go.

    Mail needs to be controlled.

    Small personal belongings inevitably arrive at the front door.

    The console table should accommodate those habits rather than fight them.

    A decorative tray can provide a landing zone. A bowl can collect keys. A lamp can provide warm evening illumination. A vase can bring height and organic texture. Books can add personality. A sculptural object can introduce an artistic element.

    The goal is to make every accessory earn its place.

    Another important consideration is scale.

    A console table that is beautifully styled with appropriately sized accessories can make an entryway feel polished and intentional. The same table can feel cluttered if it is covered with objects that are all the same size or competing for attention.

    The wall above the table matters just as much as the tabletop.

    A mirror or artwork establishes the vertical focal point, while the objects below create a visual connection between the wall and furniture. Together, they form one composition rather than two separate decorating projects.

    For smaller entryways, restraint becomes even more important. A narrow console should not be overwhelmed by oversized accessories, and the walking path should remain comfortable. A slim table paired with a mirror, one tall accessory, a functional tray, and a little greenery can be enough to make a compact foyer feel complete.

    Larger entryways offer more freedom, but even a wide console does not need to be filled from end to end. Empty space helps important pieces stand out and preserves the practical purpose of the surface.

    The most elegant entryways also tend to feel personal.

    They are not simply collections of things that look good together. A framed photograph, vintage object, handmade ceramic piece, travel find, or favorite book can give the arrangement a sense of history and individuality.

    The following ten accessories provide a flexible starting point for creating an elegant console table. You do not need every item. Select the pieces that suit your table, entryway, lifestyle, and decorating style.

    1. Make a Statement With a Mirror

    A mirror is one of the most effective accessories for an entryway console because it combines decoration with everyday function.

    It gives the wall above the console a clear focal point while reflecting available light and creating a greater sense of openness. This can be particularly valuable in narrow hallways, apartments, or entryways without large windows.

    The shape of the mirror can influence the character of the entire arrangement.

    A round mirror introduces softness and works especially well with rectangular furniture. An arched mirror adds architectural interest and draws the eye upward. A rectangular mirror creates a more structured appearance and can suit contemporary or minimalist interiors.

    The frame provides another opportunity to establish the design direction.

    Consider warm walnut for an organic interior, aged brass for traditional elegance, matte black for contrast, natural oak for a relaxed look, or champagne-toned metal for subtle sophistication.

    The mirror should relate visually to the console rather than appear disconnected from it. A useful starting point is a mirror that is somewhat narrower than the console, allowing the furniture to remain visually grounded.

    Instead of surrounding a large mirror with numerous wall decorations, allow it to function as the primary focal point.

    The simpler surrounding wall often makes the mirror feel more substantial.

    A mirror can also be positioned strategically to reflect a window, attractive artwork, architectural feature, or light source. This adds depth without requiring additional decoration.

    2. Introduce a Sculptural Table Lamp

    A table lamp is both a practical lighting source and a decorative accessory, making it particularly valuable on an entryway console.

    During daylight, the lamp contributes shape and material. In the evening, it creates a warm pool of light that makes the entryway feel more welcoming.

    Current design advice increasingly favors decorative lamps and layered lighting instead of relying exclusively on overhead fixtures. Sculptural lamps can provide warmth while also functioning as an intentional design feature.

    The lamp itself can establish the mood.

    A ceramic lamp feels soft and handcrafted.

    A stone or plaster-style lamp suits organic modern interiors.

    A brass base introduces warmth.

    A linen shade creates a relaxed, timeless appearance.

    A dark sculptural lamp can provide contrast against a light console or wall.

    For a narrow console, choose a lamp with a relatively compact footprint. A wider console can support a more substantial design or even a pair of lamps.

    One lamp works especially well with an asymmetrical arrangement, allowing the opposite side of the table to contain a vase, books, or another lower object.

    Warm-toned lighting is generally more inviting in an entryway than harsh, cool illumination. The lamp should illuminate the surrounding area without producing uncomfortable glare in the mirror.

    The best lamp is one that looks intentional even when it is switched off.

    3. Add a Decorative Tray for Everyday Function

    A decorative tray is one of the most useful accessories you can add to an entryway console.

    Its primary purpose is organization, but it can also strengthen the visual composition.

    Keys, sunglasses, wallets, small accessories, and other daily necessities tend to spread across an unstructured surface. A tray creates a defined zone for those objects.

    This means the console can remain functional without looking like a storage station.

    The material of the tray can also introduce contrast.

    A wooden tray works naturally with walnut or oak.

    A stone tray adds sophistication.

    A brass tray creates a subtle glamorous accent.

    A woven tray introduces warmth and texture.

    A lacquered tray can complement a more polished contemporary interior.

    A shallow catch-all bowl can be placed inside the tray or used independently for keys and loose items.

    The important distinction is between organized function and accumulated clutter.

    The tray should not become a container for every object that enters the house. Give it a clear purpose and remove items that do not belong there.

    This is one of the simplest ways to make an elegant entryway practical enough for everyday use. Designers continue to recommend trays and catch-all bowls as stylish ways to control loose belongings.

    4. Bring Height With a Ceramic Vase and Branches

    A tall vase provides vertical interest and gives a console table a natural focal element.

    Ceramic is particularly versatile because it can look sophisticated without feeling overly formal.

    Choose a vessel with a shape that complements the furniture rather than competing with it.

    A handmade-looking ceramic vase can add character to a modern wood console. A smooth stone-colored vessel works beautifully in minimalist interiors. Dark ceramic provides contrast against pale walls, while warm white can maintain a softer neutral palette.

    Instead of filling the vase with an enormous bouquet, consider a smaller arrangement of branches.

    Suitable options include:

    • olive branches
    • eucalyptus
    • dried grasses
    • delicate flowering branches
    • preserved greenery
    • seasonal foliage

    The slightly irregular shapes of branches create movement and keep the arrangement from appearing overly manufactured.

    A tall vase is especially useful when the console itself is low or visually horizontal.

    It introduces another vertical layer without requiring additional wall decoration.

    Keep the arrangement proportionate to the table. The vase should have enough presence to be noticed while leaving enough visual room for the other accessories.

    5. Layer Two or Three Books

    Books add personality while also providing a practical styling layer.

    A small horizontal stack can raise a decorative object, create visual weight, or bridge the height difference between larger and smaller accessories.

    Choose books that you genuinely enjoy whenever possible. Their presence should make the entryway feel lived-in rather than staged.

    Neutral covers work particularly well in elegant interiors:

    • cream
    • beige
    • warm brown
    • charcoal
    • black
    • muted green
    • soft taupe

    Two or three books are generally enough.

    A small ceramic object, candle, or decorative bowl can sit on top of the stack.

    Books are especially useful when the other accessories are tall. They introduce a lower horizontal layer that keeps the composition from becoming a collection of vertical objects.

    They can also connect the entryway to the personality of the people who live in the home.

    6. Add One Sculptural Object

    A single sculptural object can prevent an elegant console from feeling too predictable.

    This could be an abstract ceramic form, stone sculpture, wooden object, metal shape, architectural piece, decorative knot, or handcrafted vessel.

    The purpose is not necessarily to communicate a particular theme.

    Instead, look for something with an interesting silhouette.

    Shape can become the decoration.

    If your console has straight architectural lines, a rounded sculpture can soften it. If you already have a round mirror, a more angular object can provide contrast.

    The material can introduce another layer of texture.

    Stone feels grounded.

    Wood feels warm.

    Metal adds structure.

    Ceramic feels artistic and tactile.

    Glass can provide lightness.

    One strong sculptural piece is usually more effective than several small decorative objects competing for attention.

    Let the sculpture provide personality without asking it to share the spotlight with too many other statement pieces.

    7. Add a Candle for Warmth and Atmosphere

    A candle is a small accessory that can have a surprisingly strong effect on an entryway.

    Its container contributes to the visual design, while its fragrance can influence how the home feels when someone enters.

    For a refined arrangement, consider candles housed in ceramic, amber glass, stone, brass, or other understated vessels.

    Warm scents such as cedar, sandalwood, amber, fig, vanilla, or bergamot can create an inviting atmosphere.

    Choose one fragrance direction rather than combining several strong scents in a small space.

    The candle can sit directly on the console, on top of a small stack of books, or inside a decorative tray.

    A candleholder can also function as a sculptural accessory even when no candle is burning.

    If you prefer not to use an open flame in an entryway, a high-quality flameless candle can provide a similar visual effect.

    Always keep real candles away from curtains, branches, paper, and other combustible materials.

    8. Include One Personal Object

    A polished entryway should still feel like someone’s home.

    One personal object can make a major difference.

    Consider displaying:

    • a framed photograph
    • a small travel souvenir
    • an inherited object
    • handmade pottery
    • a favorite book
    • a vintage box
    • a small artwork
    • a meaningful sculpture

    The goal is not to turn the console into a family archive.

    One carefully selected object can communicate more personality than a collection of unrelated pieces.

    A framed photograph can be particularly effective when the frame connects with another material in the entryway.

    Walnut can echo a wooden console.

    Brass can connect with lighting.

    Matte black can repeat hardware.

    Natural oak can complement flooring.

    This creates continuity while allowing the personal object to remain individual.

    9. Add a Small Plant or Natural Greenery

    Greenery introduces life and softness into an entryway.

    If the area receives enough natural light, a small living plant can work beautifully. In darker spaces, preserved, dried, or high-quality faux greenery can provide a similar visual effect without demanding unsuitable growing conditions.

    Choose greenery according to the scale of the console.

    A small table does not need an enormous plant.

    A larger console can support a more substantial arrangement.

    The container is also part of the design.

    A ceramic planter creates a clean, sophisticated look.

    A woven vessel introduces natural texture.

    A stone pot reinforces an organic palette.

    Greenery is particularly effective when the console contains hard materials such as marble, glass, metal, or polished wood. The organic shapes soften those surfaces.

    You can also use greenery to connect the entryway with other rooms. If olive branches, eucalyptus, or muted greenery appear elsewhere in the home, repeating them near the front door can create visual continuity.

    10. Complete the Arrangement With a Layered Composition

    The final accessory is not necessarily a physical object.

    It is the way everything works together.

    Once the mirror, lamp, tray, vase, books, sculpture, candle, personal piece, and greenery have been considered, select only the pieces that genuinely improve the arrangement.

    The goal is a composition with different visual levels.

    A typical combination might include:

    Tall: lamp or vase

    Medium: books or framed object

    Low: tray, bowl, or candle

    This creates movement across the tabletop.

    A symmetrical arrangement can work beautifully in traditional interiors, particularly when using matching lamps on both sides.

    An asymmetrical composition often feels more relaxed and contemporary.

    For example, place a lamp on one side, a small stack of books toward the center, and a low tray or bowl on the opposite side.

    The mirror or artwork above can remain centered.

    The arrangement does not need mathematical symmetry.

    It needs visual balance.

    A darker object can carry more visual weight than a lighter object of the same size. A large lamp may balance several smaller accessories. A substantial vase may require fewer surrounding objects.

    Step away from the console after arranging it and look at the entire wall rather than only the tabletop.

    That broader view makes it easier to see whether the composition feels balanced.

    Universal Styling Rules for an Elegant Console Table

    Rather than repeating the same styling advice for every accessory, use these universal principles throughout the entire arrangement.

    Start With One Strong Vertical Anchor

    Begin with the wall.

    A mirror or large piece of artwork establishes the primary focal point and gives the console a sense of scale.

    A useful starting point is an anchor that is narrower than the console so the furniture remains visually grounded. Recent console-styling guidance similarly recommends treating the mirror or artwork and console as one composition rather than unrelated pieces.

    Create Three Height Levels

    Avoid placing accessories in one flat row.

    Combine:

    • one tall element
    • one medium layer
    • one low element

    A lamp or vase can provide height. Books or a framed object can occupy the middle layer. A tray, bowl, or candle can create the lowest level.

    This simple variation gives the eye somewhere to move.

    Give Function a Dedicated Zone

    Because the entryway is a working space, reserve part of the console for everyday necessities.

    A tray or bowl can contain keys, sunglasses, and other small items.

    If shoes, bags, or coats tend to collect nearby, consider baskets, drawers, hooks, or another dedicated storage solution rather than forcing the tabletop to handle everything. Current entryway guidance emphasizes combining decorative styling with practical storage to prevent everyday clutter.

    Keep Materials Related

    You do not need everything to match.

    Instead, repeat a few materials or finishes.

    For example:

    Walnut + ceramic + aged brass

    Oak + linen + stone

    Black + ivory + wood

    Marble + bronze + glass

    Repeating a finish once or twice throughout the entryway creates cohesion without making the room look like a matching furniture set.

    Vary Shapes

    If every piece has the same silhouette, the arrangement can feel flat.

    Combine straight and curved forms.

    Pair a rectangular console with a round mirror.

    Place a curved vase beside angular books.

    Use a sculptural object against a simple architectural frame.

    Shape variation creates interest without requiring more accessories.

    Leave Meaningful Empty Space

    Do not feel obligated to fill every inch.

    Empty tabletop space allows decorative objects to remain visible and gives you somewhere to place everyday items.

    Recent console-styling guidance commonly recommends leaving a significant portion of the surface open rather than treating the entire table as a display shelf.

    If the console feels crowded, remove something before adding anything else.

    Consider the Walking Path

    The console must fit the architecture of the entryway.

    Measure the furniture before purchasing it and make sure doors can open comfortably and people can move through the area without bumping into the table or accessories.

    For narrow hallways, shallow consoles and wall-mounted solutions can preserve circulation while still providing the visual effect of an entryway table.

    Use Lighting to Finish the Mood

    A beautiful console can disappear after sunset if the entryway depends entirely on overhead lighting.

    A table lamp, wall sconce, or appropriate cordless light source can provide a softer layer.

    Warm illumination is particularly effective when paired with wood, ceramic, linen, brass, or stone.

    The lighting should support the arrangement rather than dominate it.

    Choose Personality Over Perfect Matching

    A home feels more sophisticated when it contains objects with meaning and character.

    Mix contemporary pieces with something vintage.

    Combine a new ceramic vase with an inherited photograph.

    Place a favorite book beside a modern sculpture.

    These small contrasts can make the entryway feel collected rather than purchased as a complete set.

    Edit Before You Finish

    Once the console is styled, look at it from the doorway.

    Ask:

    • Is there an obvious focal point?
    • Can I still use the surface?
    • Are the accessories different heights?
    • Is anything competing with the mirror or artwork?
    • Does the color palette feel connected?
    • Does the entryway still feel easy to walk through?
    • Does every object have a purpose?

    If something feels unnecessary, remove it.

    The goal is not to create the fullest possible arrangement.

    It is to create the clearest one.

    Styling a Narrow Console Table

    A narrow console requires particularly careful selection.

    Choose pieces with compact footprints and strong vertical presence.

    A slim lamp, small tray, narrow vase, and one decorative object may be enough.

    Avoid large bowls, oversized sculptures, or accessories that extend into the walking path.

    Wall-mounted lighting can be useful when the tabletop is extremely shallow.

    The most important rule is to protect circulation.

    The entryway should feel open even when the console is fully styled.

    Styling a Large Console Table

    A large console provides additional surface area, but that does not mean every section needs decoration.

    You can introduce a pair of lamps, a larger vase, a substantial tray, or a wider arrangement of books and accessories.

    However, preserve visual pauses between groups.

    A wide walnut console with two lamps, a large mirror, and one low bowl can feel more luxurious than the same table covered with dozens of objects.

    Scale the accessories upward rather than simply increasing their quantity.

    Modern Elegant Entryway

    For a modern elegant look, focus on clean forms and a restrained palette.

    A combination such as walnut, cream, black, brass, and stone can create depth without visual noise.

    Choose an oversized round or arched mirror, one sculptural lamp, a ceramic vase, and a simple tray.

    Keep decorative objects purposeful.

    Texture becomes particularly important when the color palette is minimal.

    Ceramic, stone, wood, linen, and woven materials prevent the space from feeling sterile.

    Traditional Elegant Entryway

    Traditional interiors can support greater symmetry.

    Consider a rectangular mirror, paired lamps, a wooden console, brass details, books, and a decorative bowl.

    A vintage or antique-inspired accessory can introduce character.

    Warm wood and aged finishes usually feel more timeless than an arrangement dominated by glossy, perfectly matching surfaces.

    Organic Modern Entryway

    Organic modern styling combines clean architecture with natural materials.

    Try a natural oak console with a rounded mirror, handmade ceramic vase, branches, stone tray, and linen-shaded lamp.

    A palette of cream, sand, taupe, warm brown, natural wood, and muted green creates a calm foundation.

    Current interior-design reporting also highlights warm earth tones, tactile materials, meaningful decor, and a mixture of vintage-inspired pieces rather than overly coordinated sets.

    Luxury Entryway

    Luxury styling is less about expensive accessories and more about proportion, materials, and restraint.

    Choose a few substantial pieces.

    For example:

    • walnut console
    • oversized mirror
    • sculptural lamp
    • stone vase
    • aged-brass tray
    • two carefully selected books

    Keep the surface open.

    Use materials that feel tactile and substantial.

    Instead of adding more accessories to make the console appear luxurious, allow the quality and scale of the existing pieces to create the effect.

    How to Keep the Console Looking Elegant Every Day

    Even the most carefully styled console can become cluttered when everyday life takes over.

    Create a simple routine.

    Keys go into the bowl.

    Mail gets removed.

    Bags return to their storage area.

    Books are straightened.

    Decorative pieces return to their original positions.

    A tray should control daily objects rather than permanently store everything.

    If the same item repeatedly ends up on the console, that is useful information. It probably needs a permanent home nearby.

    Good decorating works with your habits instead of constantly requiring you to fight them.

    Seasonal Updates Without Redecorating the Whole Table

    The easiest way to update a console for the seasons is to keep the main structure unchanged.

    Keep the mirror, lamp, and tray.

    Change the botanical element, candle, or one decorative object.

    For fall, you might introduce dried branches, amber glass, warm brown ceramics, or muted rust tones.

    For winter, use evergreen branches, darker vessels, or subtle metallic accents.

    For spring, choose lighter greenery and softer ceramics.

    For summer, natural textures and lighter colors can refresh the arrangement.

    This approach keeps seasonal decorating sophisticated instead of turning the entryway into a heavily themed display.

    Final Thoughts

    An elegant console table does not require a large collection of accessories.

    It requires thoughtful choices.

    Start with a strong mirror or artwork.

    Add a lamp or tall vase for vertical interest.

    Give everyday objects a home with a tray or bowl.

    Introduce books, greenery, a candle, or one sculptural piece for texture and personality.

    Then edit.

    The most successful console arrangements feel intentional without appearing overworked.

    They combine beauty with function.

    They provide enough decoration to make the entryway memorable while leaving enough space for everyday life.

    Whether your console is a substantial walnut piece in a spacious foyer or a slim table in a narrow hallway, the principle remains the same:

    Choose fewer, better-connected pieces and give each one a clear role.

    A beautiful entryway does not need to look like a showroom.

    It should feel like a natural extension of the home beyond the front doorโ€”welcoming, organized, personal, and effortlessly elegant.


  • DIY Home Decor Ideas on a Budget That Look Expensive

    DIY Home Decor Ideas on a Budget That Look Expensive

    Creating a beautiful home does not have to mean spending thousands of dollars on designer furniture, luxury accessories, or expensive renovations. Some of the most impressive decorating transformations begin with ordinary materials, furniture you already own, thrifted finds, and a little creativity.

    The secret behind expensive-looking home decor is rarely the actual price of an item. What makes a room appear polished is usually the combination of color, proportion, texture, lighting, arrangement, and restraint. A simple wooden table can look sophisticated when it is styled thoughtfully. An inexpensive mirror can become a beautiful focal point when it is given the right wall and surrounding accessories. Even an old cabinet can feel completely different after fresh paint and updated hardware.

    That is why DIY home decor is such a useful approach for decorating on a budget. Instead of buying an entirely new room, you can transform individual elements yourself.

    A DIY project can be as simple as painting a thrifted frame, creating your own oversized artwork, updating a lampshade, making decorative wall molding, refinishing a small table, sewing simple cushion covers, or turning ordinary containers into attractive storage.

    The goal is not to make your home look homemade in a craft-project way. The goal is to use affordable materials to create pieces that feel intentional, sophisticated, and connected to the rest of your interior.

    One of the most important principles is to avoid trying to make inexpensive materials imitate luxury materials too literally. A poorly finished faux-marble object may look less expensive than a simple handmade ceramic bowl. A realistic-looking plastic plant can sometimes feel less convincing than a small real plant in an inexpensive terracotta pot. A crowded shelf filled with cheap accessories can look less polished than three carefully chosen objects.

    Recent interior-design advice similarly emphasizes warm earth tones, meaningful decor, mixed textures, vintage-inspired pieces, and layered lighting rather than relying on matching showroom-style furniture. (Better Homes & Gardens)

    The same principle applies to DIY decorating.

    You do not need more things.

    You need better decisions.

    A coordinated color palette can make inexpensive pieces feel connected. Good lighting can transform basic furniture. Texture can make simple materials feel richer. Oversized artwork can create a dramatic focal point. Clean edges and careful finishing can make a handmade project look professionally designed.

    Before beginning any project, think about the overall feeling you want your home to have.

    Maybe you love warm modern interiors with cream, walnut, and brass. Perhaps you prefer cozy earthy rooms with terracotta, olive green, and natural wood. You might prefer minimalist Scandinavian spaces, vintage-inspired interiors, organic modern decorating, or soft neutral rooms.

    Choose a visual direction first.

    Then make your DIY projects support it.

    The following ideas are designed to help you decorate beautifully without overspending. Most can be adapted to different rooms, apartment sizes, decorating styles, and skill levels.

    1. Create Oversized DIY Wall Art

    Large artwork can make a room feel dramatically more finished, but oversized art can also be surprisingly expensive when purchased from designer stores.

    One of the easiest ways to recreate that visual impact on a budget is to make your own large-scale artwork.

    The important word here is large.

    Many inexpensive decorating projects fail because the artwork is too small for the wall. A tiny frame placed in the center of a large wall can make the room feel unfinished. A large, simple composition can have much more visual impact.

    You do not need advanced painting skills.

    For an abstract piece, you can create a sophisticated design using a limited color palette. Choose colors already present in your room, such as warm white, beige, taupe, brown, muted olive, charcoal, or terracotta.

    Materials you can use

    • Large blank canvas
    • Acrylic paint
    • Wide paintbrushes
    • Small detail brush
    • Painter’s tape
    • Mixing palette
    • Water container
    • Optional texture paste
    • Wooden frame or canvas floater frame

    Start by deciding where the artwork will go.

    If it will hang above a sofa, measure the wall and the furniture below it. The artwork should have enough presence to visually connect with the sofa without overwhelming the room.

    Choose two or three main colors rather than using every shade available.

    For example, a warm neutral living room could use ivory, mushroom beige, and chocolate brown.

    Begin with the lightest color as the background.

    Once dry, add large loose shapes. Avoid making every shape perfectly symmetrical. Slightly irregular forms often feel more artistic and sophisticated.

    Add one darker color sparingly.

    You might create a large curved brown shape in one corner and a thin charcoal line through part of the composition.

    Do not cover every section of the canvas.

    Negative space is part of the artwork.

    If you want additional dimension, experiment with texture paste. A lightly textured surface can create shadows that make the artwork appear more substantial.

    The frame can make an enormous difference.

    A simple canvas can look more finished when placed inside a slim walnut, oak, black, or antique-brass-toned frame.

    If a professional frame is outside your budget, create a simple wooden frame from trim pieces. Paint or stain the wood to coordinate with the room.

    How to make DIY artwork look expensive

    The most important factors are:

    Scale: Make the artwork large enough for its location.

    Palette: Use colors that already exist in the room.

    Composition: Keep the design simple.

    Frame: Give attention to the edges.

    Placement: Hang it at a comfortable visual height.

    Styling: Avoid surrounding it with too many competing decorations.

    A large piece of simple artwork can often look more sophisticated than a wall filled with unrelated inexpensive prints.

    This is especially useful in living rooms, bedrooms, dining areas, and entryways.

    2. Transform an Old Furniture Piece With Paint and New Hardware

    One of the most rewarding budget decorating projects is giving an old furniture piece a completely new identity.

    Instead of buying a new console, nightstand, dresser, side table, or cabinet, look around your home first.

    You may already have something that has good proportions but an outdated finish.

    Thrift stores and secondhand marketplaces are also excellent places to find inexpensive furniture that can be transformed.

    The key is to look beyond the current color.

    A scratched brown cabinet might look unattractive in its current state but have excellent bones.

    A dated nightstand may become beautiful with paint and modern hardware.

    A plain wooden side table can become a sophisticated accent piece with sanding and staining.

    Choose the right furniture

    Look for:

    • Solid construction
    • Attractive proportions
    • Useful storage
    • Straight or interesting lines
    • Drawers that open properly
    • Doors that close correctly
    • Surfaces that can be repaired

    Avoid pieces with major structural damage unless you are comfortable with furniture repair.

    Once you find the right piece, remove all hardware.

    Clean the furniture thoroughly.

    This step matters more than many beginners realize.

    Dust, grease, and residue can interfere with paint adhesion.

    Lightly sand the surface according to the type of finish you are working with.

    Then repair visible imperfections.

    Fill small holes or dents if necessary and sand them smooth.

    Choose a sophisticated color.

    Warm white, mushroom, taupe, muted olive, deep charcoal, warm brown, and soft black can all create an elevated appearance.

    You do not need an extremely complicated paint technique.

    A clean, even finish often looks more expensive than an intentionally distressed finish.

    After the paint has cured properly, install new hardware.

    This is where a relatively inexpensive furniture transformation can suddenly feel much more refined.

    Choose hardware with a substantial appearance.

    Brushed brass, aged bronze, matte black, antique brass, or simple wooden pulls can change the entire character of the furniture.

    For a more modern look, use simple linear handles.

    For a vintage-inspired room, try antique-style knobs.

    For a soft organic interior, wooden pulls can work beautifully.

    Style the finished furniture

    Do not cover the entire surface with accessories.

    Instead, create one intentional arrangement.

    For example:

    A large ceramic vase + two books + a small bowl.

    Or:

    A framed artwork + table lamp + small plant.

    Leave some empty surface visible.

    That negative space makes the furniture look more substantial and the styling more sophisticated.

    3. Make a High-End Looking DIY Mirror Frame

    Mirrors are one of the easiest ways to add visual impact to a room.

    They reflect light, create depth, and can act as decorative focal points.

    However, decorative mirrors with beautiful frames can be expensive.

    A simple mirror can become much more attractive when you create your own frame.

    This project works especially well for:

    • Entryways
    • Bedrooms
    • Living rooms
    • Bathrooms
    • Dining rooms
    • Narrow hallways

    Start with a basic mirror that has the right size and shape.

    Large mirrors generally create more impact than tiny decorative mirrors, particularly in small spaces.

    Measure the mirror carefully.

    Choose the frame material based on your interior.

    Natural wood creates an organic look.

    Dark-stained wood creates a sophisticated modern appearance.

    Gold-toned trim adds glamour.

    Black creates contrast.

    You can use simple wooden trim from a hardware store to build a frame around the mirror.

    Cut the pieces carefully and join the corners.

    If you do not have woodworking equipment, choose materials that can be assembled using accessible tools or consider having the pieces cut for you.

    Sand the edges before finishing.

    For a warm luxury aesthetic, stain the wood walnut or medium brown.

    For a lighter Scandinavian look, use pale oak tones.

    For a modern look, paint the frame charcoal or black.

    If you want a metallic appearance, use a quality metallic finish rather than applying an excessive amount of glittery paint.

    The final result should look restrained.

    Place the mirror somewhere where it can reflect natural light or an attractive part of the room.

    Avoid positioning it directly opposite clutter.

    Make the mirror part of a larger composition

    A beautiful mirror does not have to stand alone.

    You can place a narrow console beneath it.

    Add one ceramic vase and a small lamp.

    Or pair the mirror with wall sconces.

    In a bedroom, a framed mirror above a dresser can create a boutique-hotel feeling.

    In an entryway, combine it with a slim shelf and a small tray for keys.

    The mirror itself provides visual impact, so the surrounding styling can remain minimal.

    4. Create DIY Decorative Wall Molding

    Architectural wall details can make a room feel much more expensive than it actually is.

    One of the most effective examples is decorative wall molding.

    You can create simple rectangular or square panels using affordable trim.

    This project works particularly well in:

    • Dining rooms
    • Bedrooms
    • Hallways
    • Entryways
    • Living rooms

    The key is precision.

    Measure the wall carefully before buying materials.

    Decide how many panels you want and determine the spacing between them.

    Use painter’s tape to map out the design before attaching anything.

    This lets you see whether the proportions feel right.

    For a sophisticated look, keep the design relatively simple.

    You do not need complicated geometric patterns.

    Classic rectangular molding can create an elegant architectural effect.

    Once the trim is installed, fill any visible gaps or nail holes.

    Sand the repaired areas.

    Then paint the entire wall and molding the same color.

    This tonal approach can be particularly beautiful.

    Imagine a warm mushroom-beige wall with slightly raised molding in the same color.

    The result is subtle during the day but becomes more dimensional when light moves across the wall.

    For a dramatic bedroom, try deep olive, charcoal, chocolate brown, or muted navy.

    For a soft living room, use warm white, cream, beige, or greige.

    Why this DIY looks expensive

    The luxury effect comes from architectural detail rather than expensive material.

    Clean lines and consistent spacing create a custom appearance.

    This is a perfect example of why craftsmanship matters more than price.

    Take your time with measuring.

    Do not rush the finishing.

    A simple design installed carefully will look better than a complicated design with uneven spacing.

    5. Make Custom Cushion Covers From Affordable Fabric

    Textiles can completely change the appearance of a room.

    Fortunately, they are also one of the easiest things to update without spending much money.

    Instead of replacing your sofa or bed, create new cushion covers.

    This is especially useful if the furniture itself is neutral.

    A cream sofa can take on a completely different personality depending on the cushions.

    For a warm modern aesthetic, use:

    • Oatmeal
    • Rust
    • Caramel
    • Olive
    • Chocolate brown
    • Cream

    For a softer minimalist room:

    • Ivory
    • Beige
    • Taupe
    • Pale gray
    • Muted sage

    For a vintage-inspired room:

    • Floral patterns
    • Small-scale botanical prints
    • Faded stripes
    • Traditional-inspired patterns

    You do not need every cushion to match.

    In fact, mixing several coordinated textures usually looks more sophisticated.

    Combine one plain linen-style fabric with a textured fabric and one subtle pattern.

    Avoid using too many competing prints.

    Simple DIY approach

    Measure an existing cushion.

    Use the dimensions to determine how much fabric you need.

    If you are comfortable sewing, create a simple envelope-style cover.

    This design is particularly beginner-friendly because it does not require a zipper.

    For a more professional finish, use a hidden zipper.

    Iron the fabric before cutting.

    Keep your measurements accurate.

    Straight seams make the final cushion look more polished.

    Once finished, place the cushions on the sofa with different orientations.

    Avoid arranging every cushion in a perfectly symmetrical row.

    A relaxed arrangement can make the room feel more natural.

    Add one throw blanket over the arm or corner of the sofa.

    The combination of coordinated cushions and one soft throw can make an old sofa feel refreshed without replacing it.

    6. Turn Thrifted Frames Into an Expensive-Looking Gallery Wall

    A gallery wall can create a strong focal point, but buying multiple matching frames can become expensive.

    A better DIY approach is to collect inexpensive secondhand frames and transform them into one cohesive collection.

    The trick is not to make every frame identical.

    Instead, create consistency through color.

    For example, collect frames in different shapes and sizes, then paint them all warm white.

    Or use black.

    Or warm walnut.

    Or aged brass.

    This makes mismatched frames feel intentionally collected.

    You can also combine photographs, artwork, vintage-style prints, botanical illustrations, handwritten pieces, or meaningful personal images.

    Before putting holes in the wall, arrange the frames on the floor.

    Experiment with the composition.

    Start with the largest frame.

    Then build smaller pieces around it.

    Maintain relatively consistent spacing.

    Do not make every gap exactly identical if you want a relaxed collected look, but avoid extremely uneven placement.

    Budget artwork ideas

    You can use:

    • Your own photography
    • Free public-domain artwork
    • Botanical illustrations
    • Simple abstract paintings
    • Children’s artwork
    • Vintage postcards
    • Black-and-white photography
    • Personal travel photographs
    • Printable line art

    The frame is often what makes the collection feel expensive.

    Use consistent matting where appropriate.

    White or cream mats can give inexpensive prints a more refined appearance.

    For a particularly sophisticated look, keep the artwork palette connected.

    A gallery wall with cream, brown, black, olive, and muted rust will feel more cohesive than one containing every bright color.

    7. Upgrade Basic Lamps Into Decorative Lighting

    Lighting is one of the most powerful ways to make a room feel more sophisticated.

    You do not necessarily need an expensive designer lamp.

    You can transform a basic lamp by changing the shade, finish, placement, or surrounding styling.

    Start with a secondhand or inexpensive lamp base.

    Look for attractive shapes.

    A sculptural base can look beautiful even if the original finish is outdated.

    Clean the lamp thoroughly.

    If the material is suitable, refresh it with an appropriate paint or finish.

    Warm brass, aged bronze, matte black, cream, and stone-inspired finishes can all work well.

    The lampshade is equally important.

    A poorly proportioned shade can make an otherwise attractive lamp look cheap.

    Choose a shade that has a balanced relationship with the base.

    Fabric shades generally create a softer, more sophisticated glow than exposed bulbs.

    Place the lamp somewhere that benefits from warm light.

    A console.

    A bedside table.

    A sideboard.

    A reading corner.

    A shelf.

    A small entryway table.

    Layered lighting is consistently highlighted as a way to create a warmer and more polished interior, and current budget-decor guidance similarly recommends multiple light sources instead of relying on one harsh overhead fixture. (Home and Gardenes)

    Use warm-toned bulbs suitable for the fixture.

    Avoid making every light in the room equally bright.

    The goal is to create layers.

    One lamp might illuminate a reading area.

    Another can highlight a console.

    A small light can illuminate artwork or a dark corner.

    DIY lamp upgrade

    If the lamp base is attractive but the shade is outdated, replace only the shade.

    If the shade is fine but the base looks dated, refresh the base.

    If the entire lamp is inexpensive but structurally sound, combine both updates.

    You may be surprised how different a basic lamp can look after these small changes.

    8. Create a DIY Wood Coffee Table or Refresh an Existing One

    A coffee table often becomes the center of a living room.

    Unfortunately, large stylish coffee tables can be expensive.

    If you have basic woodworking skills, you can create a simple wooden coffee table from affordable materials.

    You do not need a complicated design.

    A thick wooden top with substantial legs can look beautiful.

    For an organic-modern style, choose a warm wood finish.

    For a more minimalist appearance, use a clean rectangular design.

    For a softer room, a rounded or oval top can work beautifully.

    If building furniture from scratch is beyond your skill level, transform an existing table instead.

    Sand the surface.

    Repair scratches.

    Stain it a warmer tone.

    Replace outdated legs if practical.

    Or paint the base while leaving the top natural.

    Once finished, style the table carefully.

    This is where many people accidentally make budget furniture look more cluttered.

    Do not cover the entire surface.

    Create one main arrangement.

    For example:

    Two large books + a ceramic bowl + a small candle.

    Or:

    A low tray + one vase + a small sculptural object.

    You can add a coffee table book if it genuinely fits the room.

    Keep generous empty space around the arrangement.

    This gives the table a more substantial visual presence.

    A large table should not have twenty tiny decorations.

    One thoughtful composition will generally look more expensive.

    9. Make Affordable Storage Look Like Custom Built-Ins

    Storage does not have to be purely practical.

    It can become part of the design.

    One of the best budget decorating tricks is to make ordinary storage pieces look more intentional.

    Start with inexpensive cube shelves, basic cabinets, baskets, or floating shelves.

    Then unify them through color and hardware.

    For example, basic white cabinets can be upgraded with:

    • New handles
    • Wood trim
    • Decorative molding
    • A fresh coat of paint
    • Matching baskets
    • Coordinated labels

    You can also create a built-in appearance by placing several storage units together and framing them with trim.

    Paint the entire arrangement the same color as the wall.

    This creates a more architectural appearance.

    If you are working with open shelves, avoid filling every section.

    Mix storage with display.

    Use attractive baskets for items you do not want visible.

    Then leave some shelves open for books, artwork, ceramics, and plants.

    This creates balance between practical storage and decoration.

    Affordable basket makeover

    Plain baskets can sometimes look inconsistent when several different styles are used together.

    If you already own multiple baskets, consider creating visual consistency by grouping similar colors.

    Natural woven baskets work beautifully with warm neutral interiors.

    Black baskets can create contrast in a modern room.

    Cream baskets can create a softer appearance.

    You can also add simple fabric liners if appropriate.

    The goal is not to hide every object.

    The goal is to create a controlled visual environment.

    When storage looks intentional, the entire room can feel more expensive.

    10. Create a Luxury-Looking DIY Accent Wall

    An accent wall can completely change the atmosphere of a room without requiring a full renovation.

    The trick is choosing an accent that adds depth rather than simply adding another color.

    There are several budget-friendly approaches.

    Paint

    The simplest option is paint.

    Instead of choosing a bright accent color that may dominate the room, consider sophisticated shades such as:

    • Warm mushroom
    • Olive green
    • Chocolate brown
    • Charcoal
    • Terracotta
    • Deep taupe
    • Muted clay
    • Warm cream

    A darker color behind a bed or sofa can create a strong focal point.

    Painted arch

    A painted arch is another relatively simple DIY project.

    Use painter’s tape, a measuring method, and a carefully drawn curved line.

    Paint inside the shape.

    A large arch behind a console, chair, bed, or small desk can visually define the area.

    Limewash-inspired effect

    If you want more texture, experiment with a decorative paint technique that creates subtle movement.

    The result should remain soft rather than heavily mottled.

    Warm beige, mushroom, taupe, and soft clay shades work especially well.

    Peel-and-stick wallpaper

    Removable wallpaper can create an expensive-looking effect without permanent installation.

    Choose a subtle pattern.

    Textured-looking neutral wallpaper, botanical patterns, fine stripes, or understated geometric designs can create visual interest.

    Avoid selecting a pattern simply because it is dramatic.

    The design should support the rest of the room.

    Wood slats or paneling

    For a modern accent wall, narrow wood slats can create vertical rhythm.

    This can make a room feel taller.

    Use warm natural wood for an organic style or paint the slats to match the wall for a more subtle architectural appearance.

    Make the accent wall look intentional

    The wall should have a purpose.

    Place it behind:

    • A bed
    • Sofa
    • Dining table
    • Desk
    • Console
    • Reading chair

    Then keep the furniture and accessories relatively simple.

    If the wall itself is the focal point, you do not need to cover it with many decorations.

    How to Make DIY Decor Look More Expensive

    The actual DIY project is only half the process.

    Styling and finishing determine whether the result looks polished.

    Use a limited color palette

    Choose two or three main colors and one optional accent.

    For example:

    Cream + walnut + brass.

    Or:

    Beige + olive + natural wood.

    Or:

    Warm white + chocolate brown + terracotta.

    Repeating colors throughout the room creates cohesion.

    Focus on scale

    Large rooms need appropriately sized furniture and artwork.

    Small rooms benefit from carefully proportioned pieces.

    Do not make every decorative item tiny simply because you are decorating on a budget.

    A large DIY artwork can be more impactful than ten tiny pieces.

    Prioritize texture

    Texture creates visual richness.

    Combine:

    Wood + linen.

    Ceramic + woven material.

    Bouclรฉ + metal.

    Stone + cotton.

    Glass + wood.

    You do not need expensive materials to create contrast.

    Improve the finishing

    This may be the most important DIY principle.

    Sand rough edges.

    Clean paint lines.

    Fill holes.

    Iron fabric.

    Use appropriate hardware.

    Hide visible cords.

    Keep glue residue off finished surfaces.

    Take your time.

    An inexpensive project with excellent finishing can look far more sophisticated than an expensive item with poor styling.

    Leave empty space

    Do not feel obligated to fill every shelf, wall, or tabletop.

    Negative space allows the eye to rest.

    It also makes the objects you do display feel more important.

    DIY Home Decor Ideas for the Living Room

    The living room is often the best place to begin because relatively small changes can create a noticeable transformation.

    Start with the seating.

    Instead of buying a new sofa, update the cushions and throw.

    Then improve the coffee table.

    Create one attractive centerpiece.

    Add a DIY artwork or framed gallery wall.

    Upgrade one lamp.

    Add a large plant or a beautiful branch arrangement.

    Then step back.

    Do not continue adding things just because there is empty space.

    Empty space can be intentional.

    If the room still feels unfinished, look at lighting.

    A floor lamp in a dark corner can make the entire space feel warmer.

    A table lamp on a console can create another layer.

    A picture light can draw attention to artwork.

    These changes can have a surprisingly large impact.

    DIY Home Decor Ideas for the Bedroom

    Bedrooms benefit from soft textures and calm colors.

    You can create an expensive-looking bedroom without changing the bed.

    Start with bedding.

    Use a coordinated palette and layer several textures.

    Then update the bedside lighting.

    Create a large artwork above the bed or make a simple upholstered headboard if your existing bed lacks one.

    A DIY fabric headboard can become the focal point.

    Use neutral fabric such as oatmeal, cream, beige, or warm gray.

    Add simple bedside styling.

    One lamp.

    One book.

    One ceramic object.

    That may be enough.

    If you have a plain dresser, upgrade the hardware.

    Add a large mirror.

    Style the top with one vase and a small tray.

    Finish the room with full-length curtains and a soft rug.

    The result can feel like a boutique-inspired retreat without replacing the major furniture.

    DIY Home Decor Ideas for the Kitchen

    Kitchen decorating should remain practical.

    Do not add so many decorative pieces that countertops become difficult to use.

    Instead, make everyday objects attractive.

    Display a wooden cutting board.

    Use ceramic containers for frequently used ingredients.

    Place utensils in a beautiful crock.

    Add a small plant.

    Create a simple tray arrangement.

    Update cabinet hardware.

    Paint an old kitchen stool.

    Add removable backsplash treatment if appropriate.

    Under-cabinet lighting can also create a significant visual improvement.

    Keep the lighting warm and soft for evening use while maintaining functional illumination for food preparation.

    The combination of wood, ceramic, warm lighting, and clean surfaces can make an ordinary kitchen feel much more sophisticated.

    DIY Home Decor Ideas for Small Spaces

    Small spaces benefit from projects that improve both appearance and function.

    Create floating shelves instead of bulky furniture.

    Build a slim entryway shelf.

    Frame one large artwork rather than filling the wall with tiny decorations.

    Use a large mirror to reflect light.

    Upgrade storage with matching baskets.

    Paint a small accent wall.

    Use wall-mounted lighting where appropriate.

    Choose furniture with multiple purposes.

    Most importantly, avoid clutter.

    A small room can feel expensive when it has breathing room.

    The expensive-looking effect often comes from editing rather than decorating more.

    Mistakes That Can Make DIY Decor Look Cheap

    Even a well-designed DIY project can look less polished if certain mistakes are made.

    Adding too many decorations

    More objects do not necessarily create more style.

    Choose a few strong pieces.

    Using too many colors

    A room with ten unrelated colors can quickly feel chaotic.

    Keep the palette controlled.

    Ignoring scale

    A tiny rug beneath large furniture can make the room feel disconnected.

    A tiny artwork on a huge wall can look lost.

    Poor finishing

    Uneven paint, visible glue, rough edges, crooked frames, and unfinished surfaces can immediately reveal a DIY project.

    Overusing faux luxury materials

    You do not need to make everything look like marble, gold, or expensive stone.

    Natural-looking affordable materials can be more convincing.

    Using too much artificial greenery

    A few realistic plants can add life, but excessive artificial greenery can make a room look staged.

    Relying on one overhead light

    Harsh lighting can make even beautiful furniture look less appealing.

    Layer your lighting instead.

    Decorating without a plan

    Before starting a project, determine where it will go and how it will connect with the rest of the room.

    A beautiful DIY piece can still look wrong if it has no relationship to the surrounding furniture.

    How to Choose the Right DIY Projects for Your Home

    You do not need to complete all ten projects.

    Start with the area that bothers you most.

    If the room feels empty, try oversized artwork.

    If furniture looks dated, refresh one piece.

    If the room feels cold, add textiles.

    If the room feels flat, improve lighting.

    If the walls feel unfinished, try molding or a gallery wall.

    If the room feels cluttered, improve storage.

    This approach saves money because you are solving an actual decorating problem rather than buying supplies simply because a project looks attractive online.

    Before starting, ask yourself:

    What does this room need?

    More warmth?

    Better storage?

    A focal point?

    More texture?

    Better lighting?

    More personality?

    Once you know the answer, choose the DIY project that directly addresses it.

    Final Thoughts

    DIY home decor on a budget does not mean your home has to look inexpensive.

    The most effective budget transformations focus on the things that make interiors feel polished: thoughtful proportions, cohesive colors, beautiful textures, layered lighting, clean finishes, and intentional styling.

    You can create oversized artwork instead of buying expensive art.

    You can transform a thrifted cabinet instead of purchasing a new console.

    You can frame an ordinary mirror.

    You can sew new cushion covers.

    You can create wall molding.

    You can upgrade lamps.

    You can build or refinish a coffee table.

    You can turn basic storage into something that looks custom.

    And you can completely transform a room with a carefully planned accent wall.

    The key is to avoid treating DIY as an excuse to add more things.

    Instead, use it to create better things.

    One beautifully finished project can change an entire room.

    One large piece of artwork can establish a focal point.

    One upgraded lamp can improve the evening atmosphere.

    One freshly painted cabinet can make an outdated corner feel new.

    One coordinated collection of cushions can refresh an old sofa.

    One carefully designed accent wall can make a bedroom or living room feel architectural.

    The most expensive-looking homes are not necessarily the homes with the highest budgets. They are often the homes where someone paid attention to the details.

    Choose materials thoughtfully.

    Keep your palette controlled.

    Give your projects enough time to dry, cure, and finish properly.

    Measure before cutting.

    Sand before painting.

    Style with restraint.

    Leave some empty space.

    Mix practical pieces with decorative ones.

    And most importantly, make your home personal.

    A beautiful home should not look like a copy of a showroom or a social-media image. It should feel like a place where real people live, relax, gather, and create memories.

    When you combine creativity with thoughtful styling, even a small DIY project can create a surprisingly sophisticated result.


  • Aesthetic Home Decor Ideas for a Cozy, Stylish & Beautiful Home

    Aesthetic Home Decor Ideas for a Cozy, Stylish & Beautiful Home

    Creating a beautiful home does not always require expensive furniture, a huge renovation, or a perfectly coordinated collection of decorations. The most inviting homes usually come from thoughtful choices that make everyday spaces feel comfortable, personal, and visually balanced.

    An aesthetic home is more than simply choosing attractive colors or following the latest decorating trend. It is about creating a space where furniture, lighting, textures, colors, accessories, and architectural details work together naturally. The goal is to make your home feel beautiful when you look at it while still being comfortable enough to actually live in.

    A cozy aesthetic can be soft and neutral, warm and earthy, modern and sophisticated, vintage-inspired, organic, or even slightly eclectic. What matters most is creating visual harmony. When every item has a purpose and the room has enough breathing space, even a simple home can feel incredibly stylish.

    One of the easiest ways to achieve this look is to begin with a calm foundation. Cream, warm white, beige, taupe, soft brown, muted olive, dusty terracotta, and natural wood can create a welcoming backdrop. From there, you can introduce personality through artwork, cushions, ceramics, lighting, books, mirrors, plants, vintage finds, and other meaningful objects.

    Texture is equally important. A room filled with flat, smooth surfaces can feel cold even when the color palette is warm. Adding bouclรฉ, linen, wool, cotton, woven materials, wood, ceramic, stone, rattan, and brushed metal gives the eye something interesting to explore.

    Lighting can completely change the atmosphere of an aesthetic room as well. Instead of depending on one bright ceiling fixture, consider several softer sources throughout the room. Table lamps, floor lamps, sconces, pendant lights, candles, and subtle accent lighting can create small pools of illumination that make the space feel warmer and more sophisticated.

    Window treatments also deserve attention. Full-length curtains can visually increase the height of a room, while linen or sheer fabrics allow natural light to move through the space. Layered window treatments can add depth without taking up valuable floor space, making them especially useful in bedrooms and smaller living areas.

    The most beautiful aesthetic homes also tend to have personality. Instead of buying every accessory from the same collection, mix new pieces with vintage objects, personal photographs, handmade ceramics, books, artwork, and items collected over time. This prevents the room from looking like a furniture showroom.

    For 2026, designers are increasingly emphasizing interiors that feel lived-in, warm, personal, and connected to natural materials rather than spaces that look overly coordinated. Warm wood, tactile materials, layered lighting, meaningful objects, and individuality are all useful directions for creating this type of home.

    The following aesthetic home decor ideas will help you create that feeling room by room. You do not need to use all of them. Choose the ideas that fit your home, budget, lifestyle, and personal taste, then build your space gradually.

    1. Create a Warm Neutral Foundation

    One of the easiest ways to create a beautiful aesthetic home is to begin with a warm neutral color palette.

    Neutral decorating does not have to mean boring. In fact, warm neutrals can create some of the most sophisticated and relaxing interiors when they are layered correctly.

    Instead of decorating an entire room in one shade of white, combine several related colors. Try warm ivory walls with a beige sofa, oatmeal curtains, a taupe rug, walnut furniture, and cream-colored accessories. Small variations between the shades create depth while keeping the overall appearance calm.

    Natural wood is especially useful in a warm neutral room. A walnut coffee table, oak console, wooden dining table, or cane accent chair can introduce warmth without making the room visually heavy.

    The key is to avoid making everything the exact same color.

    For example, a cream sofa can be paired with a slightly darker beige rug. Add caramel or warm brown cushions, a walnut coffee table, and aged-brass accents. The room remains neutral, but it has enough contrast to feel intentional.

    If your walls are already white, you do not necessarily need to repaint them. Instead, introduce warmth through furniture and textiles.

    Try adding:

    • Beige or oatmeal curtains
    • Cream cushions
    • Natural wood furniture
    • Textured neutral rugs
    • Woven baskets
    • Ceramic vases
    • Linen throws
    • Warm metallic accents
    • Soft brown artwork

    For a stronger aesthetic effect, choose one darker neutral as an anchor color.

    Chocolate brown works beautifully with cream. Charcoal can create a more contemporary look. Deep olive gives a natural feeling, while muted terracotta adds warmth.

    The most important thing is balance.

    If everything is extremely light, the room may lack visual definition. If every accessory is dark, the space can feel heavy. Use lighter shades for large surfaces and introduce darker tones through smaller furniture pieces and accessories.

    A warm neutral foundation is also practical because it allows you to change the personality of your home without replacing large pieces. You can switch cushions, artwork, throws, flowers, and small accessories seasonally while keeping the same basic furniture.

    This makes neutral decorating especially useful if you enjoy refreshing your Pinterest-inspired home throughout the year.

    For an especially sophisticated appearance, repeat your main neutral colors in several different materials. For example, use cream in upholstery, ivory in ceramics, oatmeal in curtains, beige in the rug, and warm white in artwork.

    The colors remain connected, but the different textures prevent the room from looking flat.

    2. Layer Different Textures for a Cozy Aesthetic

    Texture is one of the biggest secrets behind a cozy and visually attractive home.

    A room can have beautiful furniture and an excellent color palette but still feel unfinished if every surface is smooth and visually similar.

    Layering textures gives a room depth.

    Think about the difference between a plain sofa with one cushion and a sofa layered with linen pillows, a bouclรฉ cushion, a knitted throw, and a soft textured blanket. The furniture itself may be identical, but the second version immediately feels more inviting.

    Start with large textures and gradually add smaller ones.

    Your rug is one of the most important texture layers in a room. Choose something with a subtle woven, looped, vintage, or slightly irregular surface rather than a completely flat design.

    Then introduce upholstered furniture.

    Bouclรฉ is useful for creating a soft contemporary appearance, while linen gives a relaxed natural feeling. Velvet can add richness and a touch of luxury, particularly when used on one or two accent pieces.

    Wood introduces another kind of texture.

    Instead of choosing furniture with completely smooth painted surfaces, consider natural or lightly finished wood that allows some grain to show.

    Ceramic accessories can add tactile contrast. Look for handmade-looking vases, bowls, candleholders, and decorative objects with imperfect surfaces.

    Woven materials are also excellent for aesthetic decorating.

    Consider:

    • Rattan baskets
    • Woven lampshades
    • Cane furniture
    • Jute rugs
    • Seagrass storage
    • Woven wall art
    • Linen curtains
    • Cotton throws

    The secret is not to use every texture at once.

    Choose a few major textures and repeat them naturally throughout the room.

    For example, a living room could combine:

    Cream bouclรฉ upholstery + walnut wood + woven rug + linen curtains + ceramic accessories + brushed brass lighting.

    That combination already creates significant visual interest without requiring lots of decoration.

    Texture is particularly important in bedrooms because softness contributes directly to the feeling of comfort.

    Layer a quilt or coverlet beneath a duvet. Add two or three decorative pillows rather than covering the entire bed. Place a soft throw casually over the foot of the bed.

    You can also use texture on walls through limewash-inspired finishes, subtle wallpaper, wood paneling, or woven artwork.

    In smaller homes, texture can be more useful than adding more objects. Instead of filling a small shelf with decorations, choose one textured vase, one small framed artwork, and a beautiful woven basket underneath.

    The room will feel interesting without becoming cluttered.

    3. Use Layered Lighting to Transform the Atmosphere

    Beautiful decor can lose its impact under harsh overhead lighting.

    Lighting should be considered part of the decorating scheme rather than something added after the room is finished.

    One of the most effective ways to create an aesthetic home is to use several different light sources.

    A basic living room might include a ceiling fixture for general illumination, a floor lamp beside a sofa, a table lamp on a console, and perhaps a small accent lamp on a shelf.

    Each light serves a different purpose.

    Instead of making the entire room equally bright, layered lighting creates several smaller areas of warmth. This makes the space feel more intimate and visually sophisticated. Designers are continuing to emphasize layered lighting rather than relying on one central source.

    Begin with your main ceiling light.

    Choose something that complements the overall aesthetic. A sculptural pendant can become a focal point in a modern home, while a linen-shaded fixture can create a softer atmosphere.

    Then add secondary lighting.

    A floor lamp beside a reading chair can create a dedicated cozy corner. A small table lamp on a console can make an entryway feel more welcoming. Wall sconces can provide beautiful accent lighting around a mirror or artwork.

    Bedrooms benefit enormously from bedside lighting.

    Instead of relying on a bright ceiling fixture, use matching or complementary bedside lamps to create a soft evening atmosphere.

    The lampshade matters as much as the fixture itself.

    Fabric shades diffuse light and can make a room feel warmer. Decorative shades can also introduce pattern or color without requiring major changes.

    Warm bulbs are generally useful for cozy living spaces because they create a softer atmosphere than very cool, blue-toned light.

    Do not forget decorative lighting.

    Candles, small rechargeable lamps, picture lights, and subtle accent lights can create additional layers.

    Place lighting where it supports the way you use the room.

    For example:

    A reading chair needs focused light.

    A console needs decorative illumination.

    A dining table benefits from a pendant or chandelier.

    A bedroom benefits from soft bedside lighting.

    Artwork can be highlighted with a picture light.

    A dark corner can become more attractive with a floor lamp.

    The goal is to make lighting feel intentional.

    A beautiful room should not look dramatically different only during daylight. At night, the lighting should create its own atmosphere.

    4. Build an Aesthetic Living Room Around One Beautiful Focal Point

    A common decorating mistake is trying to make every object in a room compete for attention.

    Instead, choose one primary focal point and allow the rest of the room to support it.

    Your focal point could be a beautiful sofa, fireplace, large artwork, sculptural coffee table, statement chandelier, oversized mirror, or architectural feature.

    For a cozy modern living room, an oversized cream sofa can become the foundation.

    Add a large textured rug beneath it and position a substantial coffee table in front. Place one or two accent chairs nearby so the furniture creates a comfortable conversation area.

    Then choose a focal point for the wall.

    An oversized artwork can immediately give the room personality. If you prefer a more minimal aesthetic, try a large organic-shaped mirror.

    The mirror can reflect natural light and visually expand the room.

    A console behind the sofa or against a wall can provide another opportunity for styling. Keep the surface edited rather than filling it with accessories.

    Try a simple arrangement:

    One large ceramic vase + a small stack of books + a candle or sculptural object.

    This is often more effective than ten tiny decorations.

    For cushions, use variation rather than matching sets.

    A cream sofa could have:

    • One warm brown cushion
    • One textured ivory cushion
    • One muted rust or olive cushion
    • One patterned accent cushion

    The combination feels collected rather than overly coordinated.

    A throw should also look naturally placed rather than perfectly folded. Drape it over one arm or the corner of the sofa.

    This creates the lived-in feeling that makes an aesthetic room more welcoming.

    Keep walking paths open.

    Beautiful interiors need negative space. If every corner contains furniture or accessories, the room becomes visually tiring.

    Leave some areas intentionally quiet.

    A beautiful empty wall can be more effective than a wall covered with decorations.

    The same principle applies to the coffee table.

    Instead of filling it completely, create one central arrangement and leave generous open space around it.

    Aesthetic decorating is often about editing rather than adding.

    5. Add Natural Wood and Organic Materials

    Natural materials can instantly make a home feel warmer and more grounded.

    Wood is particularly powerful because it works across many interior styles.

    You can use pale oak for a Scandinavian-inspired room, medium walnut for a sophisticated modern space, or darker wood for a richer traditional atmosphere.

    Do not feel pressured to make every wooden item match perfectly.

    A home can look more natural when different wood tones are connected thoughtfully.

    For example, a walnut coffee table can work beautifully with a lighter oak side table if both are balanced by similar warm tones elsewhere in the room.

    Beyond wood, introduce other organic materials.

    Try:

    • Rattan
    • Cane
    • Linen
    • Cotton
    • Jute
    • Woven grass
    • Ceramic
    • Stone
    • Marble
    • Terracotta
    • Natural fibers

    A wooden dining table with linen chairs and ceramic tableware creates an entirely different feeling from a room dominated by glossy synthetic surfaces.

    Organic materials also help prevent neutral interiors from feeling sterile.

    Imagine a cream bedroom with white walls, white bedding, and white furniture. It may look clean but could lack warmth.

    Now introduce a walnut nightstand, woven basket, linen curtains, ceramic lamp, and oak-framed artwork.

    The same neutral palette suddenly feels much richer.

    Natural materials also age beautifully.

    Wood develops character. Brass develops patina. Linen becomes softer. Handmade ceramics have small variations.

    These imperfections can make a home feel more personal.

    Current design discussions are placing increasing emphasis on natural materials, craftsmanship, and spaces that feel grounded rather than overly polished.

    For an aesthetic home, this does not mean every object must be handmade or expensive.

    A simple woven basket from an affordable store can provide the same visual idea.

    The important thing is how it works with everything around it.

    6. Create a Beautiful Bedroom With Soft Layers

    The bedroom should be one of the calmest rooms in your home.

    Instead of treating it simply as a place for sleeping, think of it as a private retreat.

    Start with the bed.

    A large upholstered headboard can immediately create a luxurious appearance. If your bed does not have one, you can create visual height with oversized artwork, wall molding, wallpaper, or carefully arranged pillows.

    Keep the bedding palette soft.

    Cream, ivory, beige, oatmeal, taupe, muted brown, soft sage, or dusty blue can all create a relaxing environment.

    Layer the bedding instead of using one flat duvet.

    Start with the fitted sheet and main bedding. Add a folded quilt or coverlet across the lower portion of the bed. Then add two or three decorative cushions and a soft throw.

    The goal is to create softness without making the bed look overloaded.

    Bedside tables should be functional but attractive.

    Choose a table large enough for your essentials without overwhelming the bed.

    A beautiful lamp, small ceramic object, book, and perhaps a tiny vase can be enough.

    Do not fill every inch of the nightstand.

    Curtains can dramatically change the bedroom.

    Floor-to-ceiling linen or linen-look curtains make the room feel taller and softer. If privacy or light control is important, layer sheer curtains with a more substantial outer layer. Layered window treatments can create additional depth without taking up floor space.

    A rug placed beneath or around the bed adds warmth underfoot.

    If your bedroom is small, you do not need a huge rug. Even a properly positioned runner or smaller textured rug can create comfort.

    Lighting should remain soft.

    Use bedside lamps rather than depending entirely on a bright ceiling fixture.

    If you have space, add a small chair or bench.

    A single upholstered chair near the window can create a peaceful reading or dressing corner.

    Finish the room with a few meaningful accessories.

    A framed photograph, favorite artwork, ceramic vase, decorative book, or small plant can make the room feel like yours.

    Avoid turning the bedroom into a storage area for every decorative object you own.

    The most relaxing aesthetic bedrooms have enough detail to feel beautiful but enough empty space to feel peaceful.

    7. Style Shelves and Surfaces With an Intentional Aesthetic

    Shelves, consoles, coffee tables, dressers, and sideboards are some of the easiest places to create an aesthetic look.

    They are also some of the easiest places to create clutter.

    The secret is to style surfaces in small groups instead of scattering objects randomly.

    Start with one larger anchor object.

    This could be:

    • A ceramic vase
    • A framed artwork
    • A sculptural lamp
    • A large bowl
    • A stack of books
    • A mirror

    Then add smaller objects around it.

    For example, a console might include a large ceramic vase on one side, a stack of two books in the center, and a small candle or bowl on the other side.

    The arrangement should have variation in height.

    If everything is the same height, the display can look flat.

    Use a tall vase next to a shorter bowl. Place books horizontally beneath a smaller decorative object. Lean artwork against the wall rather than hanging everything.

    This creates a more relaxed appearance.

    Books are particularly useful because they add both color and personality.

    Choose books that genuinely interest you rather than using them only as decorative props.

    A shelf can tell a story about the people who live in the home.

    Add a few personal objects.

    Travel souvenirs, family photographs, handmade ceramics, inherited pieces, or artwork can make a display feel meaningful.

    This is where an aesthetic home becomes more than a trend.

    A perfectly coordinated room can be attractive, but personal details make it memorable.

    When styling shelves, leave empty space between groups.

    You do not need something on every shelf.

    Empty areas allow individual objects to stand out.

    For open shelving in a kitchen, combine useful items with decorative ones.

    Place attractive ceramics beside a few cookbooks, a wooden cutting board, and a small plant.

    In a bathroom, use folded towels, a ceramic soap dispenser, a small tray, and one decorative object.

    The principle remains the same: group, vary height, repeat materials, and leave breathing room.

    8. Use Artwork and Mirrors to Give Your Home Personality

    Walls have a major influence on how a room feels.

    Completely empty walls can sometimes make a room feel unfinished, while overcrowded gallery walls can make a small home feel visually busy.

    The right balance depends on scale.

    One large artwork can often have more impact than several tiny pieces.

    For a living room, consider an oversized abstract artwork in muted tones.

    A palette of cream, brown, charcoal, olive, rust, and beige can connect beautifully with a warm neutral interior.

    If you prefer a more personal style, create a gallery wall.

    Keep the frame colors coordinated so the artwork can vary without looking chaotic.

    Natural wood frames create a relaxed organic feeling. Black frames create more contrast. Brass or antique frames can add traditional character.

    You do not need dozens of pieces.

    Three to seven thoughtfully selected artworks can be enough depending on the wall size.

    Mirrors are another powerful decorating tool.

    A large mirror can reflect daylight and make a smaller room feel more open. Position it where it reflects something attractive rather than an empty wall or cluttered area.

    Organic-shaped mirrors are particularly useful when a room contains many straight lines.

    An arched or softly rounded mirror can introduce visual softness.

    You can also use mirrors in unexpected locations.

    A narrow mirror in an entryway can make the space feel more functional. A decorative mirror above a bedroom dresser can become a focal point. A small vintage mirror on a gallery wall can add dimension.

    Artwork does not always need to be expensive.

    Look for affordable prints, vintage-style posters, photography, botanical illustrations, or handmade artwork.

    The frame often has as much influence on the final appearance as the artwork itself.

    If you want an expensive-looking result, prioritize proportion.

    A large wall deserves artwork large enough to hold its own visually.

    Tiny artwork floating in the center of a large empty wall can make the room feel disconnected.

    Measure before buying.

    9. Bring Nature Indoors With Plants and Organic Details

    Plants can make an aesthetic home feel alive.

    However, you do not need to turn your home into a jungle.

    A few carefully selected plants are usually more effective than dozens of small pots scattered throughout the room.

    Choose plants according to the amount of natural light available.

    A large floor plant can fill an empty corner beautifully.

    Place it beside a sofa, near a window, or next to a console where its shape can soften the furniture.

    Smaller plants work well on shelves, kitchen counters, bathroom ledges, and bedside tables.

    The planter is important.

    Instead of using brightly colored plastic pots, choose ceramic, terracotta, stone, woven, or textured planters that connect with your overall palette.

    A terracotta planter can introduce warmth.

    A cream ceramic planter can maintain a neutral look.

    A dark charcoal planter can create contrast.

    You can also use branches or dried botanicals when live plants are not practical.

    A tall arrangement of dried branches in a sculptural vase can become a striking focal point.

    Olive branches, eucalyptus, pampas-style grasses, dried seed pods, and other natural arrangements can add organic movement.

    But restraint matters.

    If every surface has greenery, the room can begin to feel visually repetitive.

    Use plants to highlight important areas rather than filling every empty corner.

    Nature can also appear through color.

    Muted olive, sage, moss, clay, sand, and warm brown are easy ways to introduce an organic feeling without relying heavily on actual plants.

    Stone and wood provide another connection to nature.

    A marble tray, wooden bowl, stone vase, ceramic lamp, or woven basket can create the same grounded atmosphere.

    The objective is to make the room feel connected to natural materials without becoming overly themed.

    10. Add Personal Details That Make the Home Feel Uniquely Yours

    The final step in creating a beautiful aesthetic home is perhaps the most important: add personality.

    Without personal details, even a perfectly decorated room can feel generic.

    Your home should show some evidence of the people who live there.

    Display books you actually read.

    Frame photographs that have meaning.

    Keep a favorite vintage object.

    Display artwork you genuinely enjoy.

    Use a ceramic piece from a local artist or a bowl passed down through your family.

    Mixing old and new pieces can create a much richer interior than buying everything at the same time.

    An antique side table beside a contemporary sofa can look beautiful.

    A vintage mirror above a modern console can create contrast.

    A traditional rug beneath contemporary furniture can add character.

    The goal is not to make every object match.

    Instead, create connections through color, material, scale, or shape.

    For example, an old wooden stool may not match your modern furniture exactly, but if its warm wood tone connects with your coffee table and picture frames, it can feel intentional.

    Personal decorating also means allowing some imperfection.

    A home should not feel like a showroom.

    A slightly worn wooden table, books stacked beside the sofa, a blanket casually resting on a chair, or a favorite mug left on a kitchen counter can make a room feel real.

    The most inviting spaces balance beauty with everyday life.

    Current interior design commentary increasingly points toward homes that feel personal and lived-in rather than overly curated.

    This is especially useful for anyone trying to create a Pinterest-worthy home without making it look artificial.

    Pinterest inspiration should provide ideas, not dictate exactly how your home must look.

    Take the colors you love.

    Choose the textures that make you comfortable.

    Keep furniture that works for your lifestyle.

    Then add beautiful details gradually.

    How to Create an Aesthetic Home on a Budget

    You do not need a large decorating budget to create a beautiful home.

    The first step is to avoid buying too many small items.

    Instead of purchasing ten inexpensive accessories, save for one piece that will make a stronger visual impact.

    This could be a beautiful rug, a large mirror, a quality lamp, an oversized artwork, or a wooden coffee table.

    You can also transform existing furniture.

    Paint an old side table.

    Change cabinet hardware.

    Replace lampshades.

    Add new cushion covers.

    Rearrange artwork.

    Move furniture into a more functional layout.

    These changes can dramatically alter the feeling of a room without requiring major spending.

    Thrift stores, antique markets, secondhand shops, and online marketplaces can also be excellent sources for aesthetic furniture and accessories.

    Look for pieces with good proportions and interesting materials rather than focusing only on brand names.

    A simple vintage wooden stool can become a beautiful plant stand.

    An old frame can be repainted.

    A secondhand ceramic vase can become a centerpiece.

    A vintage mirror can add more character than a brand-new mass-produced piece.

    Textiles are another affordable way to change a room.

    New cushion covers, a throw blanket, curtains, or a small rug can shift the entire color story.

    If you are working with a limited budget, prioritize in this order:

    Furniture layout.

    Lighting.

    Large textiles.

    Wall decor.

    Small accessories.

    This approach prevents you from spending money on decorative objects before the room itself feels functional.

    How to Make a Small Home Look More Aesthetic

    Small homes can be incredibly beautiful when the decorating strategy focuses on scale, function, and visual breathing room.

    Start by avoiding oversized furniture that blocks pathways.

    Choose pieces that provide more than one function whenever possible.

    An ottoman can provide seating, storage, and a coffee-table surface.

    A console can function as storage and a workspace.

    A narrow wall-mounted shelf can display accessories without consuming floor space.

    Use vertical space.

    Tall curtains can make ceilings appear higher.

    Vertical artwork can draw the eye upward.

    Tall bookshelves can provide storage while emphasizing the height of the room.

    Mirrors can also be helpful.

    Place one opposite a window when possible so it reflects natural light.

    Keep colors relatively connected across rooms.

    You do not need every room to look identical, but a consistent base palette can make a small home feel larger and more cohesive.

    Avoid filling every surface.

    In a small home, negative space is valuable.

    One beautiful lamp is better than five small decorations.

    One large artwork can be more effective than a crowded collection.

    One substantial rug can visually connect the furniture better than several small rugs.

    Think carefully about what deserves attention.

    How to Create a Cozy Aesthetic Kitchen

    The kitchen is often one of the hardest spaces to make aesthetic because it must remain highly functional.

    Begin with the countertop.

    Remove anything that does not need to remain visible.

    Then choose a few beautiful everyday objects to display intentionally.

    A wooden cutting board leaning against the backsplash can add warmth.

    A ceramic utensil holder can make practical tools look decorative.

    A small bowl of fruit can provide natural color.

    A linen tea towel can soften the space.

    Warm lighting can make a huge difference.

    Under-cabinet lighting provides useful illumination while creating a cozy evening atmosphere.

    Pendant lights over an island or peninsula can become a decorative focal point.

    Natural wood accessories can also soften kitchens dominated by stone, tile, or metal.

    Try wooden trays, cutting boards, stools, bowls, and serving pieces.

    For an aesthetic open shelf, avoid filling it with too many objects.

    Combine plates, bowls, glasses, cookbooks, ceramics, and one or two decorative pieces.

    The goal is for the kitchen to look functional rather than staged.

    How to Create an Aesthetic Bathroom

    Bathrooms can become beautiful through small details.

    Start with towels.

    Replace mismatched towels with a coordinated palette such as ivory, beige, taupe, white, or muted sage.

    Then introduce a beautiful bath mat.

    Use matching or complementary containers for soap and lotion.

    A wooden or stone tray can organize everyday products.

    Add one plant if the lighting and humidity conditions are appropriate.

    Artwork can also make a bathroom feel more finished.

    Choose something simple and moisture-appropriate.

    Lighting should be flattering and functional.

    Wall sconces beside a mirror can create a more sophisticated appearance than relying entirely on a ceiling fixture.

    For a luxury aesthetic, keep countertops relatively clear.

    One vase, candle, tray, or decorative object is enough.

    The combination of clean surfaces, warm materials, soft towels, and beautiful lighting can make even a small bathroom feel like a peaceful retreat.

    How to Make Your Entryway Aesthetic

    The entryway creates the first impression of your home.

    Even if your entrance is tiny, you can make it feel intentional.

    A mirror is one of the most useful additions.

    It gives you a practical place to check your appearance while visually expanding the space.

    Add a slim console if you have enough room.

    If the entryway is narrow, choose a wall-mounted shelf instead.

    Use a small bowl or tray for keys.

    Add one decorative vase or lamp.

    A runner can define the space and add warmth.

    Hooks can provide practical storage for bags, coats, or hats without requiring a large cabinet.

    The important thing is to keep the entryway functional.

    A beautiful entrance that cannot handle everyday belongings will quickly become frustrating.

    Use closed storage wherever possible.

    Then reserve the visible areas for a few carefully selected decorative details.

    How to Combine Different Aesthetic Styles

    You do not have to choose one decorating style and follow it perfectly.

    Some of the most interesting homes combine several influences.

    For example, you could combine:

    Modern + organic

    Vintage + contemporary

    Scandinavian + warm rustic

    Minimalist + traditional

    Bohemian + modern

    Japandi + organic modern

    The key is to create connections.

    If you mix styles randomly, the room can look disconnected.

    Instead, repeat colors and materials.

    A vintage wooden table can work with modern cream seating if both are connected through warm neutral colors.

    A traditional brass lamp can look contemporary when paired with simple furniture.

    A modern sofa can feel more relaxed when combined with a vintage rug and handmade ceramics.

    Think of your home as a collection rather than a matching set.

    Common Mistakes to Avoid When Creating an Aesthetic Home

    One of the biggest mistakes is buying too many decorative accessories.

    More does not automatically mean more beautiful.

    When every shelf, table, and corner is filled, individual pieces lose their impact.

    Another mistake is choosing everything in the same color.

    A beige room can be beautiful, but if every surface is the exact same beige, it may look flat.

    Introduce tonal variation and texture.

    Avoid using too many unrelated accent colors.

    Choose a primary palette and one or two supporting colors.

    Lighting is another common problem.

    A room can look beautiful during the day but feel completely different at night if the only light source is a bright ceiling fixture.

    Create several layers of light.

    Scale is equally important.

    A tiny coffee table can look lost in front of a large sectional.

    A small artwork can disappear on a huge wall.

    A massive pendant can overwhelm a compact dining area.

    Always consider the size of the room before purchasing furniture or decor.

    Finally, avoid copying an aesthetic so literally that your home stops feeling personal.

    Pinterest and social media are excellent sources of inspiration, but your home should still reflect your lifestyle.

    Keep the pieces that matter to you.

    Use the colors you enjoy.

    Choose furniture that is comfortable.

    Create rooms that support how you actually live.

    How to Make an Aesthetic Home Feel More Expensive

    An expensive-looking home is usually not about having the most expensive objects.

    It is about creating visual consistency.

    Start with quality-looking lighting.

    Beautiful lamps can instantly elevate a room.

    Then focus on curtains.

    Hang them as high and wide as practical rather than stopping them directly above the window frame.

    Choose substantial-looking fabrics such as linen or linen-look textiles.

    Next, focus on scale.

    Large artwork, properly sized rugs, substantial coffee tables, and appropriately scaled lighting can make a room feel more professionally designed.

    Use fewer accessories but choose them carefully.

    A large ceramic vase can have more visual impact than several tiny ornaments.

    A substantial mirror can become an architectural feature.

    A sculptural lamp can function as both lighting and artwork.

    Finally, keep surfaces clean.

    Luxury often comes from restraint.

    A clear kitchen counter, an edited coffee table, and an uncluttered console allow the beautiful pieces to stand out.

    A Simple Room-by-Room Aesthetic Decorating Formula

    If you are unsure where to begin, use this simple formula.

    For the living room:

    Comfortable seating + large rug + coffee table + layered lighting + artwork or mirror + natural material + a few personal accessories.

    For the bedroom:

    Soft bedding + upholstered or visually substantial bed + bedside lighting + curtains + rug + artwork + natural textures.

    For the kitchen:

    Functional storage + warm wood accents + decorative lighting + limited countertop styling + attractive everyday objects.

    For the bathroom:

    Coordinated towels + beautiful containers + warm lighting + natural materials + minimal countertop decor.

    For the entryway:

    Mirror + practical storage + one decorative surface + lighting + runner or natural texture.

    For a home office:

    Functional desk + comfortable chair + task lighting + artwork + organized storage + one or two personal objects.

    This formula creates structure while leaving room for your own style.

    Final Thoughts

    Creating an aesthetic home is not about making every room look perfect.

    It is about creating a space that feels beautiful, comfortable, intentional, and connected to the people who live there.

    Start with a color palette that makes you feel relaxed. Add natural materials to bring warmth. Layer textures to create depth. Use several sources of lighting to transform the atmosphere. Choose artwork that gives the walls personality. Add plants and organic details where they make sense.

    Most importantly, do not be afraid to leave empty space.

    A beautiful room needs breathing room.

    You do not need to decorate every corner.

    You do not need every trend.

    You do not need to replace everything you already own.

    Sometimes the most effective transformation comes from rearranging furniture, changing the lighting, adding a textured rug, replacing a few cushions, introducing warm wood, and removing unnecessary clutter.

    The strongest aesthetic homes usually feel collected rather than manufactured. They combine comfort with beauty, modern pieces with older objects, clean lines with soft textures, and stylish details with everyday functionality.

    Your home can be cozy without looking cluttered, elegant without feeling formal, stylish without becoming trendy, and beautiful without becoming impractical.

    The best aesthetic is ultimately the one that makes you want to stay.


  • 15 Wall Decor Ideas for Small Spaces That Maximize Style Without Clutter

    15 Wall Decor Ideas for Small Spaces That Maximize Style Without Clutter

    Small rooms can be some of the most beautiful spaces in a home when every design decision is intentional. The challenge is that limited square footage leaves less room for bulky furniture, oversized accessories, and unnecessary decoration. That is exactly why the walls become so important. Instead of allowing vertical space to remain empty, you can turn it into an elegant design feature while keeping the floor open and the room visually calm.

    If you are searching for wall decor ideas for small spaces that maximize style without clutter, the best approach is not to put more things on the walls. It is to choose the right pieces, use the available height intelligently, and create visual impact without overwhelming the room.

    In a small bedroom, living room, apartment, hallway, home office, dining area, or entryway, wall decor can perform several jobs at once. A large mirror can reflect light and create the impression of additional space. Floating shelves can provide display space without taking up floor area. Wall sconces can add atmosphere while replacing bulky table lamps. A narrow wall-mounted cabinet can provide storage where a traditional piece of furniture would make the room feel cramped.

    Current small-space design is increasingly focused on using vertical areas rather than simply adding smaller furniture. Designers are recommending taller shelving, vertical artwork, large-scale pieces, and wall-mounted solutions that encourage the eye to move upward. (Architectural Digest)

    Another important shift is the move away from decorating small spaces with countless tiny objects. A collection of small frames, miniature shelves, little signs, and unrelated accessories can quickly become visual noise. One large artwork, one sculptural mirror, or one carefully arranged picture ledge can often create considerably more impact.

    This does not mean that small rooms need to be completely minimalist. A small space can still have personality, color, pattern, vintage pieces, artwork, texture, and meaningful objects. The secret is editing. Every item should have a reason to be there.

    Think about your wall decor as part of the architecture of the room. Instead of asking, โ€œWhat can I put on this empty wall?โ€ ask, โ€œWhat can this wall do for the room?โ€

    Could it make the room appear taller?

    Could it reflect more natural light?

    Could it provide hidden storage?

    Could it create a focal point?

    Could it make an awkward corner useful?

    Could it display meaningful artwork without taking over the room?

    Could it add texture without adding physical bulk?

    Those questions lead to much more sophisticated decorating decisions.

    Another advantage of wall decor is that it allows you to make a small home feel more personalized without sacrificing valuable floor space. A carefully chosen piece of art can communicate your personality. A vintage mirror can introduce character. A picture ledge can display changing photographs and artwork. A wall-mounted cabinet can hide everyday necessities. A sculptural sconce can become both lighting and decoration.

    The ideas below are designed around that balance. Some are purely decorative, while others combine beauty and function. Several can also be adapted to rental apartments, bedrooms, kitchens, entryways, narrow hallways, and small living rooms.

    You do not need to use all fifteen ideas. Choose two or three that suit your room and repeat their colors, materials, or shapes throughout the space. This creates a cohesive interior rather than a wall covered with unrelated decorations.

    1. Use an Oversized Mirror to Make a Small Room Feel Larger

    One of the most effective wall decorating ideas for a small space is an oversized mirror.

    Mirrors are valuable because they provide decoration while also interacting with light and visual depth. A strategically positioned mirror can reflect a window, light fixture, artwork, or attractive part of the room, making the space feel more open.

    Current small-room design guidance continues to highlight reflective surfaces as a useful way to create an impression of greater space. (Homes and Gardens)

    Instead of using several tiny decorative mirrors, consider one substantial mirror that becomes the main feature of the wall.

    Choose the right shape

    The shape of the mirror can influence the personality of the room.

    A tall rectangular mirror works beautifully when you want to emphasize ceiling height. An arched mirror introduces softness. A round mirror creates contrast against furniture with straight lines. An irregular or organic-shaped mirror can provide an artistic focal point.

    For an elegant small living room, place a large mirror above a slim console.

    In a bedroom, position a tall mirror near the dresser or opposite a window.

    In an entryway, a large mirror can create a useful last-look station while visually expanding the narrow area.

    Make the mirror part of the design

    Avoid treating the mirror as an isolated object.

    Repeat its frame finish elsewhere in the room. For example, an aged-brass mirror can connect beautifully with brass lighting, while a dark wood frame can complement walnut furniture.
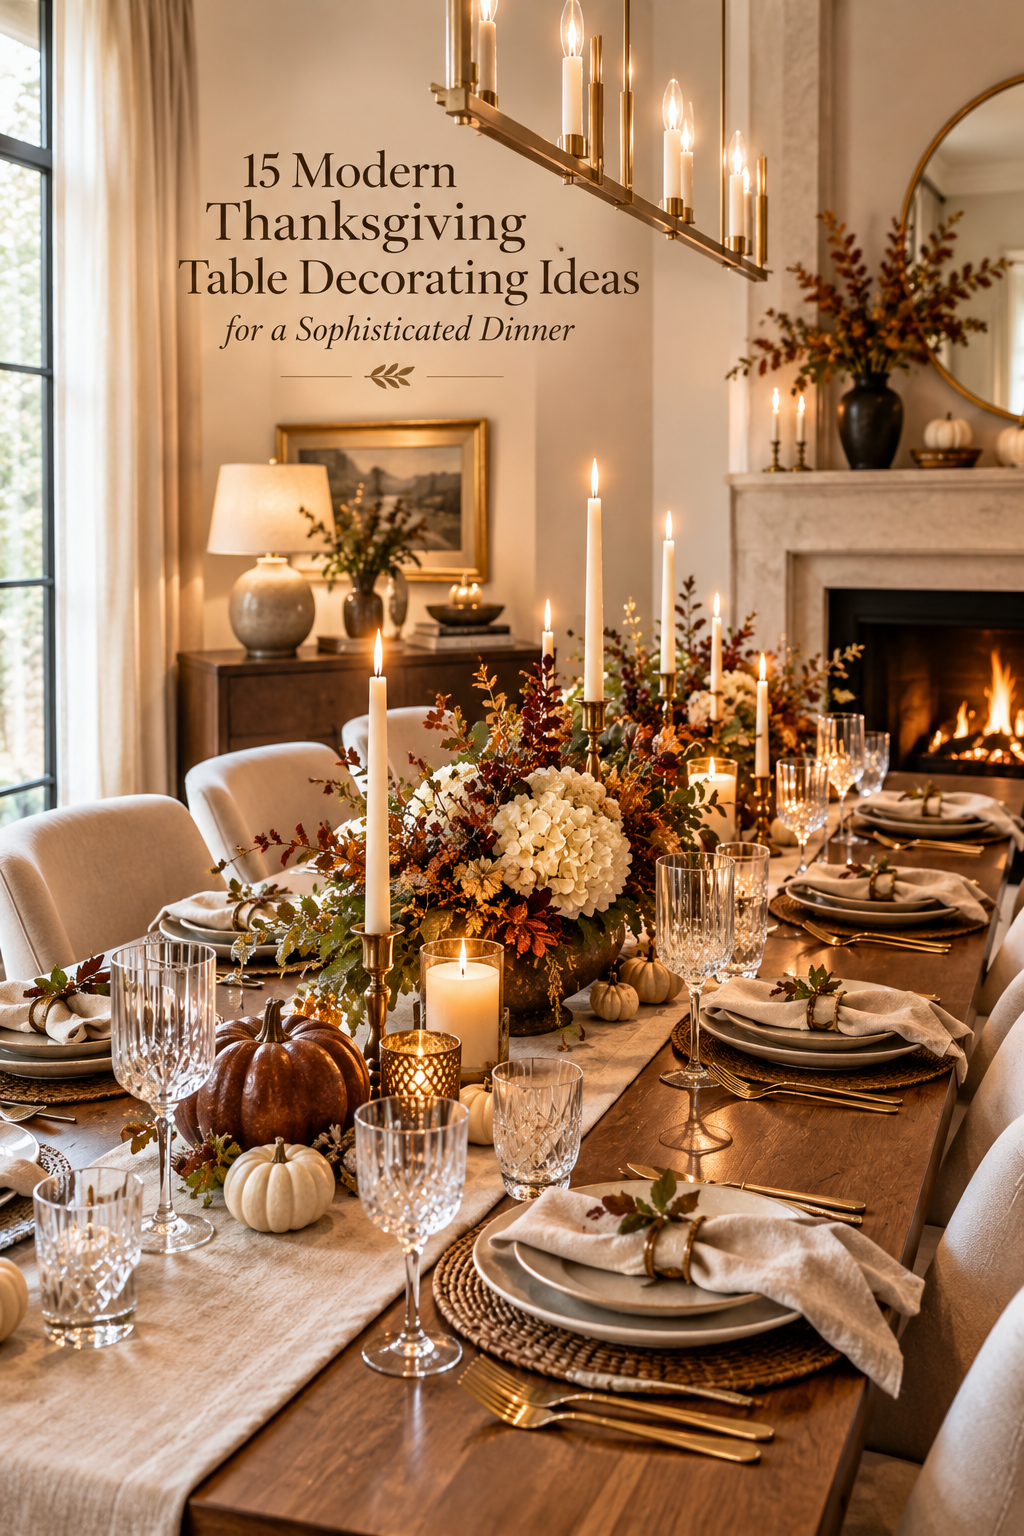
    If your room already contains many decorative details, choose a simple frameless or thin-framed mirror.

    If the room feels plain, a sculptural or antique-inspired frame can provide more personality.

    Avoid the mirror overload

    More mirrors do not automatically create more space.

    Too many reflective surfaces can make a small room feel visually confusing. One strong mirror positioned intentionally is usually more effective than covering every wall with reflections.

    The goal is to create depth, not visual distraction.

    2. Create a Minimalist Picture Ledge Instead of a Bulky Gallery Wall

    Picture ledges are an excellent alternative to traditional gallery walls, especially when you want flexibility without visual heaviness.

    A picture ledge is a narrow shelf designed to hold framed artwork, photographs, small objects, or decorative pieces. Because the artwork can simply rest on the ledge, you can change the arrangement without creating multiple holes in the wall.

    Design coverage in 2026 has specifically highlighted picture ledges as a more flexible, pared-back alternative to rigid gallery walls. (Homes and Gardens)

    Keep the composition edited

    For a small room, one or two narrow ledges may be enough.

    Use a combination of:

    • One larger framed print
    • Two smaller artworks
    • One photograph
    • One small ceramic object

    Leave empty sections of the ledge visible.

    That negative space keeps the display from feeling crowded.

    Use overlapping frames

    One of the advantages of a ledge is that frames can overlap slightly.

    Place the largest piece toward the back and smaller frames in front.

    This creates depth without requiring complicated wall arrangements.

    Coordinate the colors

    The easiest way to keep a picture ledge sophisticated is to limit the color palette.

    For example:

    Cream wall + black frames + sepia artwork + natural wood.

    Or:

    Warm beige wall + walnut frames + muted botanical artwork + ceramic accents.

    The pieces do not need to match exactly. They simply need to feel related.

    Use the ledge beyond artwork

    A picture ledge can also hold:

    • Small travel photographs
    • Postcards
    • Children’s artwork
    • Small mirrors
    • Pressed botanical prints
    • Meaningful objects

    This makes the wall display easy to update as your style changes.

    3. Decorate With One Large Statement Artwork

    Small rooms do not always require small artwork.

    In fact, one large artwork can sometimes make a compact room feel more sophisticated than a collection of tiny pieces.

    Architectural Digest’s recent small-space guidance specifically highlights oversized artwork as a way to draw the eye through a room and create a more immersive effect. (Architectural Digest)

    Why one large piece works

    A single artwork creates a clear visual focal point.

    Instead of the eye jumping between multiple small objects, it immediately understands where to look.

    This can make the room feel more organized.

    Choose artwork with depth

    You do not have to choose a completely neutral painting.

    Consider:

    • Abstract artwork
    • Oversized botanical artwork
    • Landscape photography
    • Vintage-inspired paintings
    • Monochrome photography
    • Textured canvas
    • Soft geometric artwork

    For a small neutral room, artwork can introduce a controlled accent color.

    For example, an otherwise cream and beige room could feature artwork containing muted olive, rust, charcoal, or dusty blue.

    Match the scale to the wall

    Large artwork should still be proportionate to the furniture beneath it.

    Above a sofa, the artwork should visually connect to the sofa rather than appearing like a tiny isolated rectangle.

    Above a bed, choose a piece wide enough to create a substantial focal point.

    Above a small console, a vertical artwork can work beautifully.

    Keep everything else quiet

    When using oversized artwork, you do not need five additional decorations on the same wall.

    Let the artwork breathe.

    That empty space around it is part of the composition.

    4. Install Floating Shelves for Style and Practical Storage

    Floating shelves are one of the most useful solutions when floor space is limited.

    They allow you to move storage and display upward while keeping the area beneath open.

    Current 2026 small-space coverage continues to highlight floating shelving because it provides storage and display without the visual weight of a bulky floor-standing unit. (Architectural Digest)

    Use fewer shelves

    Instead of covering an entire wall with shelves, start with two or three.

    A pair of long shelves can create a clean horizontal composition.

    Three narrow shelves stacked vertically can emphasize height.

    Style shelves with restraint

    Use a combination of practical and decorative items.

    For example:

    Top shelf:

    • One framed artwork
    • One ceramic vase
    • One small object

    Middle shelf:

    • A few books
    • One sculptural piece
    • One plant

    Bottom shelf:

    • A basket
    • A small stack of books
    • One decorative object

    Avoid filling every inch.

    Choose materials carefully

    Natural wood shelves work beautifully in warm interiors.

    White shelves can disappear into a light wall.

    Dark walnut shelves create a sophisticated contrast.

    Stone or marble-look shelves can create a more luxurious appearance.

    Use shelves where furniture would be too bulky

    Floating shelves work particularly well in:

    • Small kitchens
    • Home offices
    • Bedrooms
    • Narrow living rooms
    • Bathrooms
    • Entryways

    They can provide useful storage without reducing walking space.

    5. Use Vertical Wall Decor to Draw the Eye Upward

    When floor space is limited, take advantage of the room’s height.

    Vertical decorating can make walls appear taller and encourage the eye to move upward. Designers frequently recommend using vertical shelving, artwork, stripes, and tall decorative elements to maximize small spaces. (Architectural Digest)

    Try tall artwork

    Instead of a wide horizontal print, choose a vertical piece.

    This works particularly well beside:

    • A doorway
    • A narrow dresser
    • A reading chair
    • A small console
    • A compact desk

    Use vertical paneling

    Wood slats or narrow wall molding can emphasize height.

    Paint the treatment in a color close to the wall for a subtle appearance.

    For a dramatic effect, use a warm wood finish against a lighter wall.

    Consider vertical wallpaper

    Subtle stripes can visually elongate the wall.

    A narrow botanical pattern can achieve a similar effect without looking overly formal.

    Hang curtains high

    Although curtains are not traditional wall decor, they strongly influence how the wall is perceived.

    Mounting curtain hardware higher can visually extend the wall upward.

    Choose full-length panels that fall close to the floor.

    Keep the lower wall open

    The more visual weight you place at floor level, the smaller the room can feel.

    Use the upper wall strategically while allowing the lower portion to breathe.

    6. Add a Sculptural Wall Sconce for Beauty and Function

    Wall lighting is one of the smartest ways to combine decoration with functionality.

    A beautiful sconce can become artwork while providing useful illumination.

    This is particularly helpful in small spaces because it eliminates the need for a bulky floor lamp or large table lamp.

    Architectural Digest’s 2026 vertical-design guidance notes that sconces, particularly those that direct light upward, can help draw attention toward the height of a room. (Architectural Digest)

    Place sconces strategically

    Use them:

    • Beside a bed
    • Above a desk
    • On either side of artwork
    • Beside a bathroom mirror
    • Along a narrow hallway
    • Above a small reading chair

    Choose sculptural designs

    Look for:

    • Aged brass
    • Bronze
    • Ceramic
    • Ribbed glass
    • Opal glass
    • Matte black
    • Natural stone
    • Sculptural metal

    The fixture should complement your room’s existing finishes.

    Make lighting part of the artwork

    Instead of thinking of the sconce as merely functional, select one with a distinctive silhouette.

    A sculptural fixture can become the focal point of an otherwise simple wall.

    Use warm light

    Warm lighting helps prevent small rooms from feeling stark.

    Use dimmable fixtures where possible so you can adjust the atmosphere.

    A soft evening glow can make a compact room feel considerably more intimate.

    7. Try a Small-Scale Gallery Wall With a Cohesive Color Palette

    Although oversized artwork and picture ledges can be excellent alternatives to gallery walls, a gallery wall can still work beautifully in a small space when it is carefully edited.

    The problem is not necessarily the number of frames. The problem is visual inconsistency.

    Choose one theme

    You could create a gallery around:

    • Black-and-white photography
    • Botanical prints
    • Vintage landscapes
    • Family photographs
    • Abstract artwork
    • Travel memories

    A clear theme immediately creates cohesion.

    Repeat the frame style

    Matching frames are an easy way to make multiple pieces feel intentional.

    Alternatively, mix frames while keeping one common element such as color, material, or width.

    For example:

    Black + walnut frames.

    Or:

    Natural wood + cream mats.

    Keep the arrangement compact

    Do not spread tiny pieces across an enormous wall.

    Instead, create one concentrated composition.

    Leave generous negative space around the gallery.

    Use a consistent color palette

    If every artwork contains different bright colors, the wall can become visually overwhelming.

    Muted tones are especially effective in small spaces.

    Try cream, black, taupe, brown, olive, dusty blue, or muted terracotta.

    Add one unexpected element

    A small mirror, woven object, or sculptural piece can break the repetitive quality of framed artwork.

    Keep it to one or two unusual elements rather than turning the wall into a collection of everything you own.

    8. Create a Textured Accent Wall With Wallpaper or Limewash

    A small room can benefit from a dramatic wall treatment.

    You do not necessarily need to leave small spaces completely plain.

    Current small-space design commentary has pushed back against the idea that compact rooms must always use conservative decorating. Designers are increasingly using bold wallpaper, pattern, and richer treatments to give small rooms personality. (Architectural Digest)

    Try subtle textured wallpaper

    Consider:

    • Linen-look wallpaper
    • Grasscloth-inspired texture
    • Fine stripes
    • Small-scale botanical patterns
    • Tonal geometric patterns
    • Soft plaster-effect wallpaper

    The pattern should support the room rather than compete with everything else.

    Consider limewash

    A softly mottled limewash-style finish can create depth without adding physical objects.

    It works especially well in:

    • Bedrooms
    • Reading corners
    • Small dining rooms
    • Home offices

    Use one feature wall

    If the room already contains plenty of furniture, treat one wall as the focal point.

    The remaining walls can stay quieter.

    Match the treatment to your furniture

    A textured beige wall pairs beautifully with warm wood.

    A muted olive wall can work with cream upholstery.

    A soft clay wall can complement walnut and brass.

    A charcoal wall can provide a sophisticated backdrop for light artwork.

    9. Hang a Large Textile or Woven Wall Art Piece

    Wall textiles are an excellent way to introduce warmth and texture without adding bulky furniture.

    A woven wall hanging, textile artwork, vintage tapestry, or fabric panel can soften an otherwise hard wall.

    Recent design coverage has highlighted the renewed popularity of woven wall art and tapestries because they add warmth, texture, character, and even acoustic benefits. (Homes and Gardens)

    Choose one substantial textile

    Rather than hanging multiple small woven pieces, select one that has enough visual presence to anchor the wall.

    A large neutral textile can work beautifully in a minimalist bedroom.

    A colorful woven piece can become the focal point in a neutral living room.

    Consider the material

    Options include:

    • Wool
    • Cotton
    • Linen
    • Jute
    • Handwoven fibers
    • Macramรฉ
    • Vintage textiles

    Use textiles to soften modern rooms

    If your room contains a lot of glass, metal, or polished surfaces, woven wall decor introduces softness.

    It can also make minimalist rooms feel warmer and more lived-in.

    Keep surrounding decor simple

    A large textile already provides significant visual texture.

    Avoid placing several busy artworks around it.

    Let the material become the feature.

    10. Use Narrow Wall-Mounted Cabinets in Tight Spaces

    Wall-mounted cabinets are ideal when you need storage but do not have room for another piece of floor furniture.

    A shallow cabinet can store everyday objects while keeping them hidden.

    This is especially useful in compact bedrooms, bathrooms, kitchens, and entryways.

    Choose a shallow profile

    The cabinet should not project too far into the room.
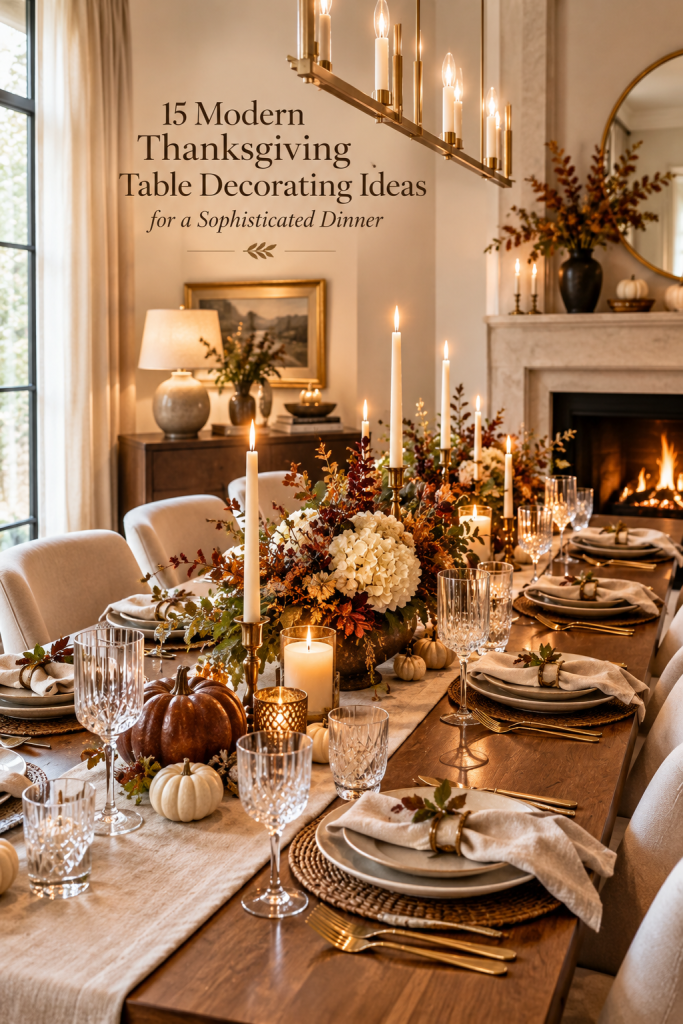
    Measure the available wall carefully before purchasing or installing anything.

    Hide visual clutter

    Use the cabinet for items that would otherwise remain visible.

    For example:

    Bedroom:

    • Accessories
    • Small electronics
    • Personal items

    Entryway:

    • Keys
    • Mail
    • Small bags

    Bathroom:

    • Toiletries
    • Towels
    • Beauty products

    Kitchen:

    • Small serving items
    • Pantry accessories
    • Everyday supplies

    Make the cabinet decorative

    The cabinet itself can become part of the design.

    Choose fluted wood, warm oak, walnut, painted cabinetry, cane, or a simple modern finish.

    Add attractive hardware in brass, bronze, or black.

    Keep the top lightly styled

    If the cabinet has a visible top, place only one or two objects there.

    A small vase or artwork is enough.

    The goal is concealed organization, not another cluttered display surface.

    11. Create a Slim Entryway Wall With Hooks and Decorative Art

    Small entryways often become cluttered because they have no obvious place for everyday belongings.

    A wall can solve this problem.

    Instead of adding a large console table, create a slim wall-mounted entry station.

    Build the composition

    Start with:

    • One mirror
    • Three or four hooks
    • One narrow shelf
    • One small artwork

    This creates a complete entryway without requiring much floor space.

    Choose attractive hooks

    Hooks do not have to look purely functional.

    Consider brass, black metal, natural wood, ceramic, or sculptural hooks.

    Add a narrow ledge

    A shallow ledge can hold:

    • Keys
    • Small tray
    • Candle
    • Tiny vase
    • Mail organizer

    Use the mirror as the focal point

    The mirror provides practical functionality while also reflecting light.

    This combination of mirror, hooks, ledge, and artwork is especially useful when there is no room for a traditional entry console. Architectural Digest has highlighted similar layered wall compositions as small-space solutions. (Architectural Digest)

    Keep the floor clear

    This is the biggest advantage.

    The wall performs several functions without creating another obstacle in the walking path.

    12. Decorate Around a Doorway or Window With Vertical Artwork

    Awkward wall areas around doors and windows are often ignored.

    Instead of leaving these narrow spaces blank, use them for tall, slim artwork.

    Use narrow proportions

    Choose artwork that fits the wall without crowding the doorway or window.

    A vertical botanical print, abstract painting, vintage poster, or framed textile can work beautifully.

    Create visual rhythm

    If you have two similar narrow wall spaces on either side of a doorway, consider placing related artwork on both sides.

    They do not have to be identical.

    The common color palette creates the connection.

    Use height strategically

    Position the artwork so that it guides the eye upward.

    This can make the room feel taller while also giving purpose to otherwise awkward wall space.

    Avoid overcrowding

    Leave breathing room around door frames, windows, and trim.

    Architectural features should remain visible.

    The artwork should enhance the architecture rather than compete with it.

    13. Use Architectural Molding for Elegant Wall Detail

    If you want your small space to look expensive without adding lots of objects, architectural wall detail can be a powerful solution.

    Panel molding, box molding, vertical trim, or simple wall battens can create depth without physically taking up room.

    Keep the color subtle

    One of the most sophisticated approaches is to paint the molding and wall the same color.

    The design becomes visible through shadows and texture rather than strong contrast.

    For example:

    • Cream wall + cream molding
    • Taupe wall + taupe molding
    • Soft gray + soft gray
    • Deep olive + deep olive
    • Warm white + warm white

    Use molding behind a bed

    A bedroom wall can instantly look more custom with simple panel molding around the headboard.

    Use it in a dining area

    A small dining wall can feel architectural with a few large rectangular panels.

    Add one artwork or mirror inside the central section.

    Use vertical battens

    Vertical wall battens can emphasize height.

    They work particularly well in compact rooms with low ceilings.

    Avoid overly complicated patterns

    Small spaces usually benefit from clean geometry.

    A simple panel design can feel more luxurious than an elaborate pattern covering every wall.

    14. Create a Personalized Memento Wall Without Visual Clutter

    Your home should not look like a showroom.

    Personal objects make a space feel meaningful, but displaying too many can create visual chaos.

    The solution is to create a deliberately edited memento wall.

    Choose a category

    Instead of displaying everything, choose one type of memory.

    For example:

    • Family photographs
    • Travel photographs
    • Children’s artwork
    • Vintage postcards
    • Collected botanical prints
    • Small inherited artwork

    Use consistent framing

    Matching frames create structure even when the contents are different.

    Black frames create a modern appearance.

    Natural wood frames feel warmer.

    Brass frames can create a more traditional look.

    Limit the number of pieces

    Choose the items that genuinely mean something.

    A wall containing six favorite photographs will usually feel more sophisticated than one containing twenty-five random pictures.

    Create breathing room

    Do not fill every available inch.

    Negative space gives personal collections a gallery-like quality.

    Rotate the display

    You do not have to display everything simultaneously.

    Store some pieces and rotate them seasonally or when your taste changes.

    This keeps the room fresh without adding more permanent wall clutter.

    15. Use One Beautiful Wall Composition Instead of Many Small Decorations

    Sometimes the best small-space wall decor idea is simply to create one complete composition.

    Instead of buying individual decorations for every empty section, design the entire wall as one visual arrangement.

    Combine complementary elements

    For example, a small living room could feature:

    • One large round mirror
    • One slim picture ledge
    • One sculptural wall sconce
    • Two framed artworks

    The pieces work together as a single composition.

    A bedroom could feature:

    • Oversized headboard
    • Two wall sconces
    • One large artwork
    • Minimal decorative accents

    An entryway could feature:

    • Tall mirror
    • Narrow ledge
    • Three hooks
    • One small artwork

    Repeat materials

    The easiest way to make a mixed wall composition feel intentional is to repeat materials.

    Use brass in the lighting and mirror frame.

    Use walnut in the shelf and furniture.

    Use cream and taupe in the artwork and textiles.

    Establish one focal point

    Not every element needs equal visual weight.

    Choose the main feature first.

    Everything else should support it.

    Leave negative space

    This is the most important rule.

    A sophisticated wall does not need to be completely filled.

    The empty areas allow the main pieces to stand out.

    How to Choose Wall Decor for a Small Room

    Before buying anything, consider five questions.

    What does the room need?

    Does the wall need decoration, storage, lighting, or a combination?

    If you need storage, a floating shelf or wall-mounted cabinet may be more useful than artwork.

    If the room feels dark, consider a mirror.

    If the wall feels plain, choose artwork or texture.

    What is the room’s focal point?

    Do not allow wall decor to compete with an existing focal point.

    If you already have a dramatic sofa, fireplace, or bed, choose wall decor that supports it.

    What colors already exist?

    Repeat colors that are already present.

    This makes even inexpensive wall decor feel more coordinated.

    How much visual weight can the room handle?

    A small room does not necessarily need tiny decor, but it does need balance.

    One large artwork can work beautifully.

    Five large artworks may not.

    Is the wall helping the room?

    Every piece should either add beauty, function, or both.

    If it does neither, it may not deserve the space.

    How to Decorate Small Walls Without Making Them Look Cluttered

    The secret is editing.

    Start by choosing one focal point.

    Then add one or two supporting elements.

    For example:

    Large mirror + small sconce

    Large artwork + picture light

    Floating shelf + three decorative objects

    Wall cabinet + one artwork

    Picture ledge + edited collection

    This creates a visual hierarchy.

    The eye knows what to look at first, second, and third.

    Avoid giving every object the same visual importance.

    Best Wall Decor Colors for Small Spaces

    Color can either calm a small room or make it feel busy.

    For a sophisticated small space, consider:

    Warm neutrals

    Cream, beige, taupe, oatmeal, and warm gray create a soft foundation.

    Natural wood

    Oak, walnut, and medium wood tones add warmth.

    Soft black

    Black frames, sconces, and hardware can create definition without requiring bright color.

    Muted green

    Olive and sage can bring an organic feeling.

    Dusty blue

    Soft blue works particularly well in bedrooms and bathrooms.

    Warm metallics

    Brass and aged bronze can provide a subtle luxury effect.

    Rather than introducing many unrelated colors, repeat two or three shades throughout the room.

    Wall Decor Ideas for Small Apartments

    Apartment walls can be especially challenging because floor space is limited and some renters cannot make permanent changes.

    If drilling is restricted, consider removable or lightweight solutions where appropriate and follow your lease requirements.

    Useful apartment-friendly approaches include:

    • Large lightweight mirrors
    • Removable wallpaper
    • Picture ledges where permitted
    • Leaning artwork when floor space allows
    • Slim floating-style shelves with appropriate installation
    • Framed textiles
    • Decorative removable hooks
    • Large artwork as a focal point

    If the apartment has plain white walls, warm wood frames, woven textures, and soft artwork can make it feel much more personal.

    Wall Decor Ideas for Small Bedrooms

    A small bedroom benefits from wall decor that performs more than one job.

    Wall sconces can provide bedside lighting.

    A picture ledge can replace multiple framed pieces.

    An oversized mirror can provide dressing functionality.

    A wall-mounted cabinet can provide storage.

    An upholstered or wood-paneled headboard can become the primary decorative wall.

    Keep the area around the bed particularly calm because excessive visual activity can make the room feel less restful.

    Wall Decor Ideas for Small Living Rooms

    In a small living room, the wall behind the sofa is often the most important decorative area.

    Consider:

    • One oversized artwork
    • A large mirror
    • Two picture ledges
    • A slim gallery wall
    • Wall sconces
    • A combination of artwork and lighting

    Do not automatically choose several tiny frames simply because the room is small.

    A substantial focal piece can actually make the room feel more intentional.

    Wall Decor Ideas for Small Entryways

    Entryways need to be both attractive and functional.

    If there is no room for a console, use the wall.

    A large mirror can sit above a narrow shelf.

    Hooks can hold everyday bags.

    A tiny ledge can collect keys.

    One small artwork can add personality.

    This creates an entryway moment without requiring a bulky piece of furniture.

    How to Make Small-Space Wall Decor Look Expensive

    Luxury is often about restraint.

    Choose fewer pieces with stronger visual impact.

    Use quality-looking materials such as:

    • Natural wood
    • Linen
    • Ceramic
    • Stone
    • Aged brass
    • Bronze
    • Glass
    • Textured paper
    • Woven fibers

    Repeat finishes throughout the room.

    Avoid covering every surface.
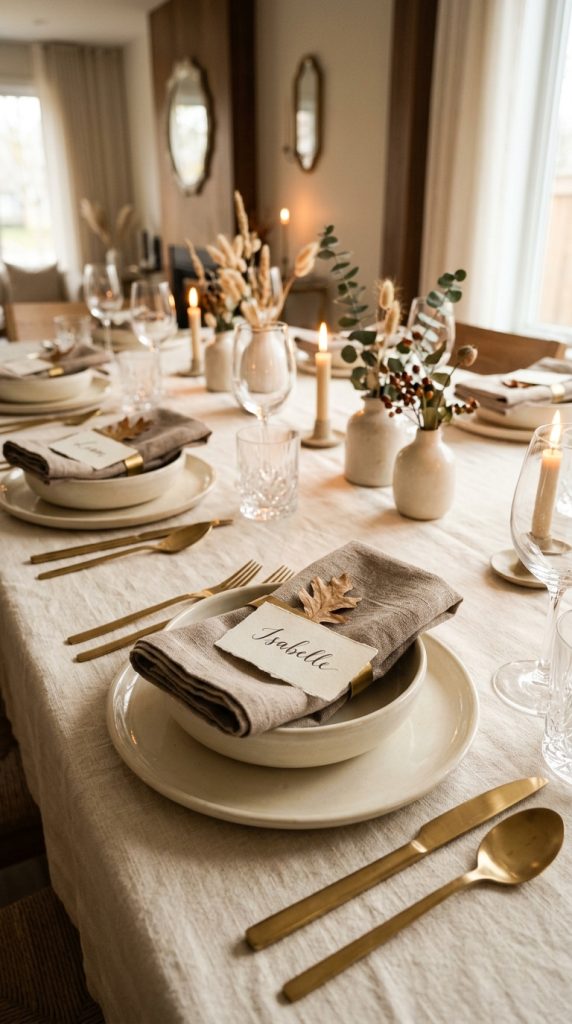
    Use large-scale artwork where appropriate.
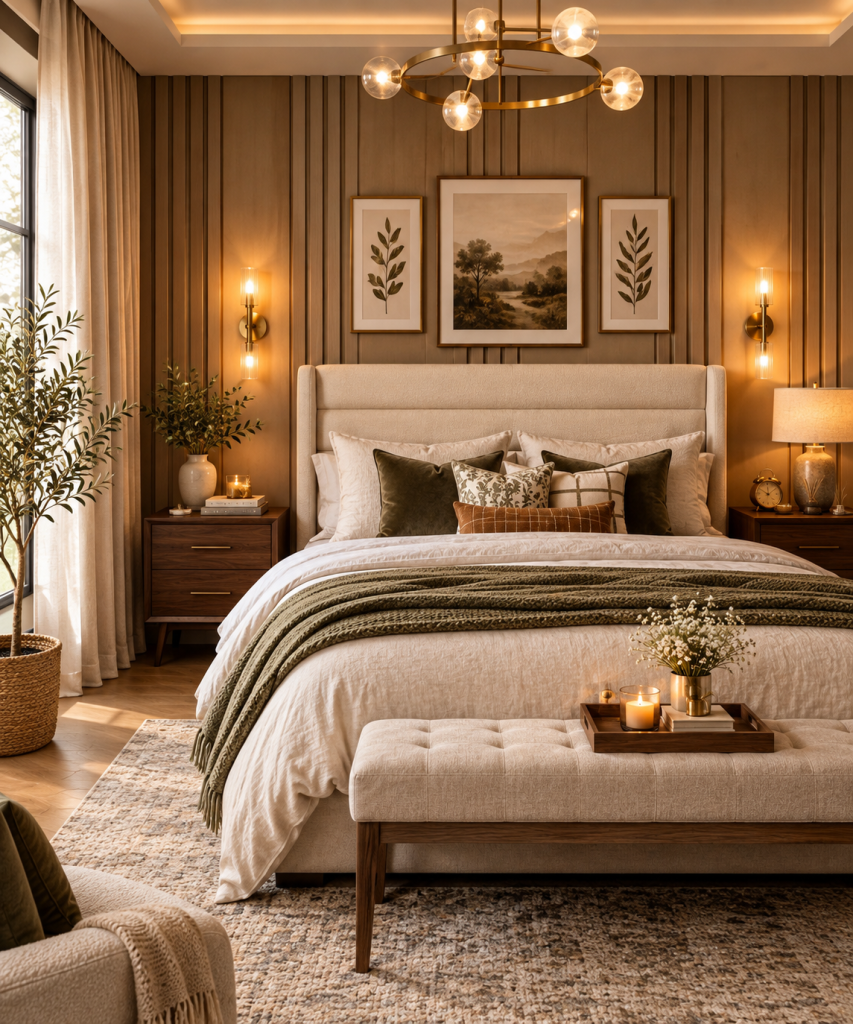
    Choose frames with substantial-looking profiles.

    Most importantly, keep everything intentional.

    A $30 artwork displayed beautifully can look more sophisticated than an expensive artwork surrounded by clutter.

    Common Wall Decor Mistakes in Small Spaces

    Filling every wall

    A room needs empty space.

    Blank walls can help decorative features stand out.

    Using too many tiny objects

    Small objects often create visual noise.

    Try grouping fewer, larger pieces.

    Ignoring scale

    Tiny artwork above a large sofa can look disconnected.

    Large furniture often requires larger wall decor.

    Blocking natural light

    Do not position bulky wall storage where it interferes with windows or natural light.

    Hanging everything too high

    Vertical decorating does not mean every artwork should touch the ceiling.

    Use the furniture below it to determine appropriate placement.

    Mixing too many frame finishes

    A carefully mixed collection can work, but too many unrelated frames can look chaotic.

    Ignoring functionality

    Wall decor should not interfere with doors, windows, switches, outlets, or walking paths.

    Decorating without a focal point

    If everything demands attention, nothing becomes the focal point.

    Choose one main feature.

    A Simple Formula for Clutter-Free Small-Space Walls

    If you are unsure where to begin, use this simple formula:

    1 major focal point + 1 functional element + plenty of negative space.

    For example:

    Bedroom:
    Large artwork + wall sconce + empty space

    Living room:
    Oversized mirror + picture ledge + open wall area

    Entryway:
    Mirror + hooks + narrow shelf

    Home office:
    Large artwork + floating shelf + organized accessories

    Dining area:
    Statement artwork + sculptural sconce + clean surrounding wall

    This formula creates enough visual interest without turning the wall into a storage dump.

    Final Thoughts

    Decorating a small space does not mean sacrificing personality, elegance, or creativity. In fact, limited square footage can encourage better design decisions because every element has to earn its place.

    The most successful wall decor ideas for small spaces combine beauty with intention. A mirror can make the room feel brighter and more open. A picture ledge can display artwork while remaining flexible. Floating shelves can provide storage without consuming floor space. Vertical artwork can emphasize height. Wall sconces can provide both lighting and decoration. A textured wall can create character without adding physical clutter.

    The biggest lesson is that small rooms do not necessarily need smaller decoration. They need better-proportioned decoration.

    One oversized artwork can create more impact than ten tiny prints. One sculptural mirror can do more for a room than several small decorative objects. One carefully styled shelf can provide both storage and personality.

    Current 2026 small-space design thinking increasingly supports this approach, with designers encouraging homeowners to use vertical space, reflective surfaces, large-scale artwork, flexible picture ledges, and wall-mounted storage rather than allowing valuable floor space to become crowded. (Homes and Gardens)

    The key is to create visual hierarchy.

    Choose one focal point.

    Support it with one or two complementary elements.

    Repeat a few colors or materials.

    Leave room around everything.

    And always consider what the wall can contribute beyond decoration.

    When you approach wall decor this way, even a compact apartment or small room can feel sophisticated, spacious, organized, and highly personal.

    Your goal is not to decorate every inch.

    Your goal is to make every chosen inch count.