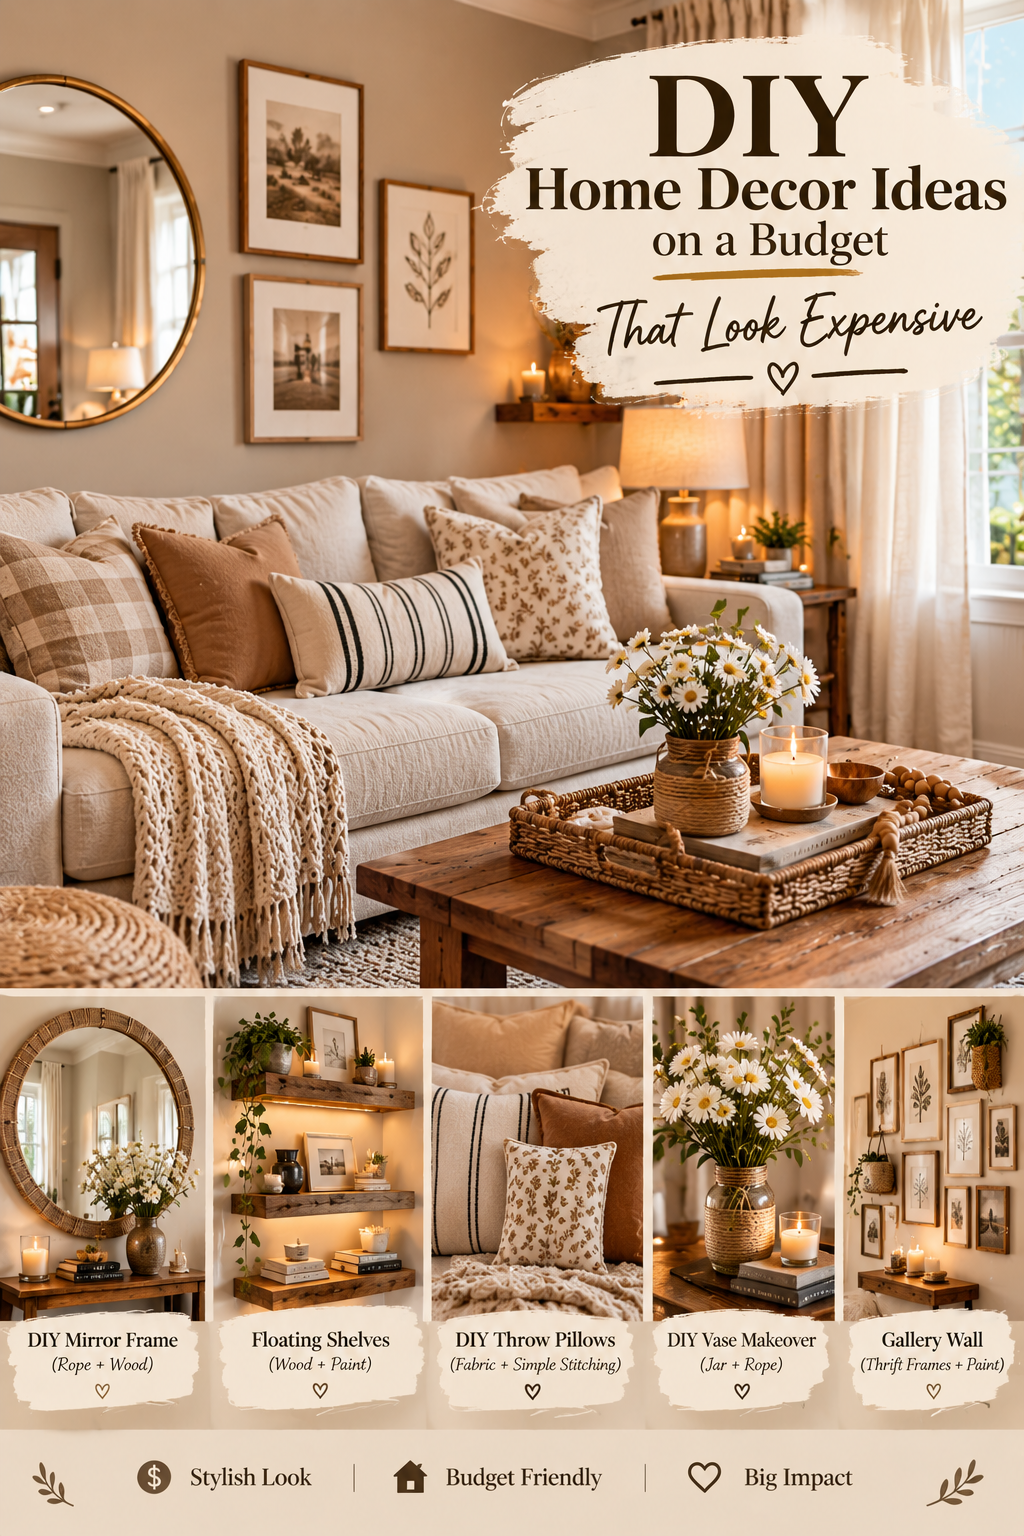
Creating a beautiful home does not have to mean spending thousands of dollars on designer furniture, luxury accessories, or expensive renovations. Some of the most impressive decorating transformations begin with ordinary materials, furniture you already own, thrifted finds, and a little creativity.
The secret behind expensive-looking home decor is rarely the actual price of an item. What makes a room appear polished is usually the combination of color, proportion, texture, lighting, arrangement, and restraint. A simple wooden table can look sophisticated when it is styled thoughtfully. An inexpensive mirror can become a beautiful focal point when it is given the right wall and surrounding accessories. Even an old cabinet can feel completely different after fresh paint and updated hardware.
That is why DIY home decor is such a useful approach for decorating on a budget. Instead of buying an entirely new room, you can transform individual elements yourself.
A DIY project can be as simple as painting a thrifted frame, creating your own oversized artwork, updating a lampshade, making decorative wall molding, refinishing a small table, sewing simple cushion covers, or turning ordinary containers into attractive storage.
The goal is not to make your home look homemade in a craft-project way. The goal is to use affordable materials to create pieces that feel intentional, sophisticated, and connected to the rest of your interior.
One of the most important principles is to avoid trying to make inexpensive materials imitate luxury materials too literally. A poorly finished faux-marble object may look less expensive than a simple handmade ceramic bowl. A realistic-looking plastic plant can sometimes feel less convincing than a small real plant in an inexpensive terracotta pot. A crowded shelf filled with cheap accessories can look less polished than three carefully chosen objects.
Recent interior-design advice similarly emphasizes warm earth tones, meaningful decor, mixed textures, vintage-inspired pieces, and layered lighting rather than relying on matching showroom-style furniture. (Better Homes & Gardens)
The same principle applies to DIY decorating.
You do not need more things.
You need better decisions.
A coordinated color palette can make inexpensive pieces feel connected. Good lighting can transform basic furniture. Texture can make simple materials feel richer. Oversized artwork can create a dramatic focal point. Clean edges and careful finishing can make a handmade project look professionally designed.
Before beginning any project, think about the overall feeling you want your home to have.
Maybe you love warm modern interiors with cream, walnut, and brass. Perhaps you prefer cozy earthy rooms with terracotta, olive green, and natural wood. You might prefer minimalist Scandinavian spaces, vintage-inspired interiors, organic modern decorating, or soft neutral rooms.
Choose a visual direction first.
Then make your DIY projects support it.
The following ideas are designed to help you decorate beautifully without overspending. Most can be adapted to different rooms, apartment sizes, decorating styles, and skill levels.
1. Create Oversized DIY Wall Art
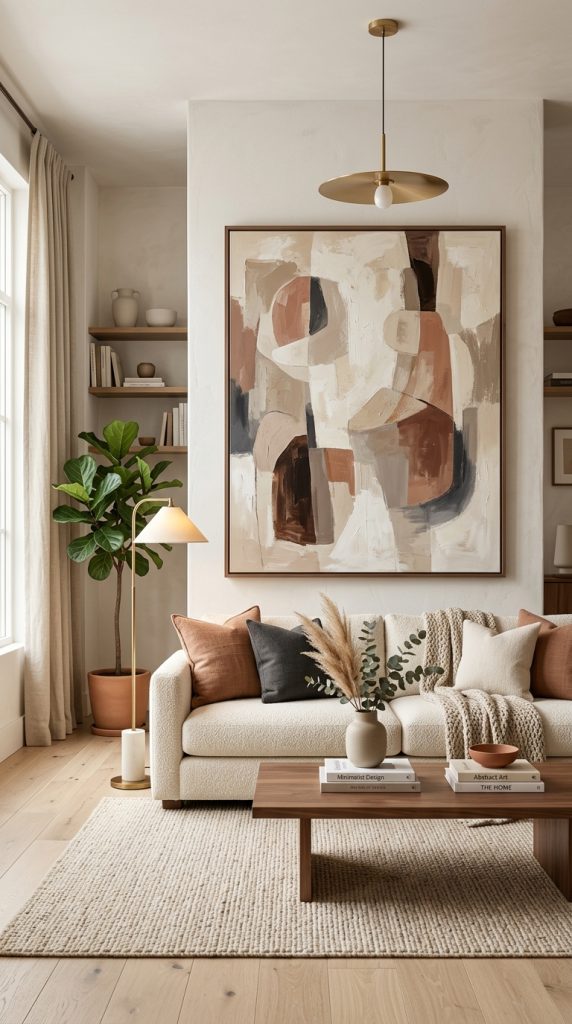
Large artwork can make a room feel dramatically more finished, but oversized art can also be surprisingly expensive when purchased from designer stores.
One of the easiest ways to recreate that visual impact on a budget is to make your own large-scale artwork.
The important word here is large.
Many inexpensive decorating projects fail because the artwork is too small for the wall. A tiny frame placed in the center of a large wall can make the room feel unfinished. A large, simple composition can have much more visual impact.
You do not need advanced painting skills.
For an abstract piece, you can create a sophisticated design using a limited color palette. Choose colors already present in your room, such as warm white, beige, taupe, brown, muted olive, charcoal, or terracotta.
Materials you can use
- Large blank canvas
- Acrylic paint
- Wide paintbrushes
- Small detail brush
- Painter’s tape
- Mixing palette
- Water container
- Optional texture paste
- Wooden frame or canvas floater frame
Start by deciding where the artwork will go.
If it will hang above a sofa, measure the wall and the furniture below it. The artwork should have enough presence to visually connect with the sofa without overwhelming the room.
Choose two or three main colors rather than using every shade available.
For example, a warm neutral living room could use ivory, mushroom beige, and chocolate brown.
Begin with the lightest color as the background.
Once dry, add large loose shapes. Avoid making every shape perfectly symmetrical. Slightly irregular forms often feel more artistic and sophisticated.
Add one darker color sparingly.
You might create a large curved brown shape in one corner and a thin charcoal line through part of the composition.
Do not cover every section of the canvas.
Negative space is part of the artwork.
If you want additional dimension, experiment with texture paste. A lightly textured surface can create shadows that make the artwork appear more substantial.
The frame can make an enormous difference.
A simple canvas can look more finished when placed inside a slim walnut, oak, black, or antique-brass-toned frame.
If a professional frame is outside your budget, create a simple wooden frame from trim pieces. Paint or stain the wood to coordinate with the room.
How to make DIY artwork look expensive
The most important factors are:
Scale: Make the artwork large enough for its location.
Palette: Use colors that already exist in the room.
Composition: Keep the design simple.
Frame: Give attention to the edges.
Placement: Hang it at a comfortable visual height.
Styling: Avoid surrounding it with too many competing decorations.
A large piece of simple artwork can often look more sophisticated than a wall filled with unrelated inexpensive prints.
This is especially useful in living rooms, bedrooms, dining areas, and entryways.
2. Transform an Old Furniture Piece With Paint and New Hardware

One of the most rewarding budget decorating projects is giving an old furniture piece a completely new identity.
Instead of buying a new console, nightstand, dresser, side table, or cabinet, look around your home first.
You may already have something that has good proportions but an outdated finish.
Thrift stores and secondhand marketplaces are also excellent places to find inexpensive furniture that can be transformed.
The key is to look beyond the current color.
A scratched brown cabinet might look unattractive in its current state but have excellent bones.
A dated nightstand may become beautiful with paint and modern hardware.
A plain wooden side table can become a sophisticated accent piece with sanding and staining.
Choose the right furniture
Look for:
- Solid construction
- Attractive proportions
- Useful storage
- Straight or interesting lines
- Drawers that open properly
- Doors that close correctly
- Surfaces that can be repaired
Avoid pieces with major structural damage unless you are comfortable with furniture repair.
Once you find the right piece, remove all hardware.
Clean the furniture thoroughly.
This step matters more than many beginners realize.
Dust, grease, and residue can interfere with paint adhesion.
Lightly sand the surface according to the type of finish you are working with.
Then repair visible imperfections.
Fill small holes or dents if necessary and sand them smooth.
Choose a sophisticated color.
Warm white, mushroom, taupe, muted olive, deep charcoal, warm brown, and soft black can all create an elevated appearance.
You do not need an extremely complicated paint technique.
A clean, even finish often looks more expensive than an intentionally distressed finish.
After the paint has cured properly, install new hardware.
This is where a relatively inexpensive furniture transformation can suddenly feel much more refined.
Choose hardware with a substantial appearance.
Brushed brass, aged bronze, matte black, antique brass, or simple wooden pulls can change the entire character of the furniture.
For a more modern look, use simple linear handles.
For a vintage-inspired room, try antique-style knobs.
For a soft organic interior, wooden pulls can work beautifully.
Style the finished furniture
Do not cover the entire surface with accessories.
Instead, create one intentional arrangement.
For example:
A large ceramic vase + two books + a small bowl.
Or:
A framed artwork + table lamp + small plant.
Leave some empty surface visible.
That negative space makes the furniture look more substantial and the styling more sophisticated.
3. Make a High-End Looking DIY Mirror Frame
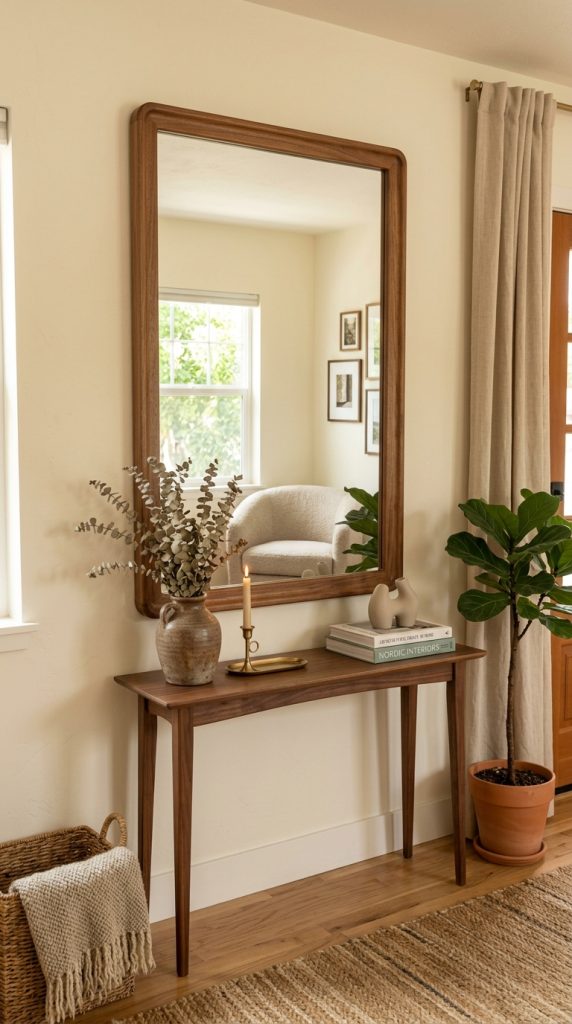
Mirrors are one of the easiest ways to add visual impact to a room.
They reflect light, create depth, and can act as decorative focal points.
However, decorative mirrors with beautiful frames can be expensive.
A simple mirror can become much more attractive when you create your own frame.
This project works especially well for:
- Entryways
- Bedrooms
- Living rooms
- Bathrooms
- Dining rooms
- Narrow hallways
Start with a basic mirror that has the right size and shape.
Large mirrors generally create more impact than tiny decorative mirrors, particularly in small spaces.
Measure the mirror carefully.
Choose the frame material based on your interior.
Natural wood creates an organic look.
Dark-stained wood creates a sophisticated modern appearance.
Gold-toned trim adds glamour.
Black creates contrast.
You can use simple wooden trim from a hardware store to build a frame around the mirror.
Cut the pieces carefully and join the corners.
If you do not have woodworking equipment, choose materials that can be assembled using accessible tools or consider having the pieces cut for you.
Sand the edges before finishing.
For a warm luxury aesthetic, stain the wood walnut or medium brown.
For a lighter Scandinavian look, use pale oak tones.
For a modern look, paint the frame charcoal or black.
If you want a metallic appearance, use a quality metallic finish rather than applying an excessive amount of glittery paint.
The final result should look restrained.
Place the mirror somewhere where it can reflect natural light or an attractive part of the room.
Avoid positioning it directly opposite clutter.
Make the mirror part of a larger composition
A beautiful mirror does not have to stand alone.
You can place a narrow console beneath it.
Add one ceramic vase and a small lamp.
Or pair the mirror with wall sconces.
In a bedroom, a framed mirror above a dresser can create a boutique-hotel feeling.
In an entryway, combine it with a slim shelf and a small tray for keys.
The mirror itself provides visual impact, so the surrounding styling can remain minimal.
4. Create DIY Decorative Wall Molding
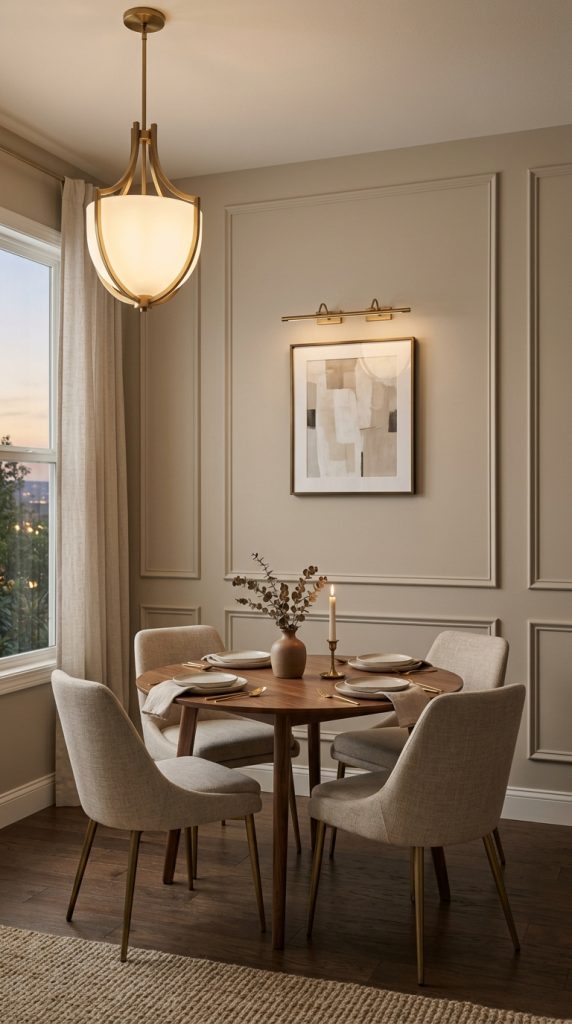
Architectural wall details can make a room feel much more expensive than it actually is.
One of the most effective examples is decorative wall molding.
You can create simple rectangular or square panels using affordable trim.
This project works particularly well in:
- Dining rooms
- Bedrooms
- Hallways
- Entryways
- Living rooms
The key is precision.
Measure the wall carefully before buying materials.
Decide how many panels you want and determine the spacing between them.
Use painter’s tape to map out the design before attaching anything.
This lets you see whether the proportions feel right.
For a sophisticated look, keep the design relatively simple.
You do not need complicated geometric patterns.
Classic rectangular molding can create an elegant architectural effect.
Once the trim is installed, fill any visible gaps or nail holes.
Sand the repaired areas.
Then paint the entire wall and molding the same color.
This tonal approach can be particularly beautiful.
Imagine a warm mushroom-beige wall with slightly raised molding in the same color.
The result is subtle during the day but becomes more dimensional when light moves across the wall.
For a dramatic bedroom, try deep olive, charcoal, chocolate brown, or muted navy.
For a soft living room, use warm white, cream, beige, or greige.
Why this DIY looks expensive
The luxury effect comes from architectural detail rather than expensive material.
Clean lines and consistent spacing create a custom appearance.
This is a perfect example of why craftsmanship matters more than price.
Take your time with measuring.
Do not rush the finishing.
A simple design installed carefully will look better than a complicated design with uneven spacing.
5. Make Custom Cushion Covers From Affordable Fabric
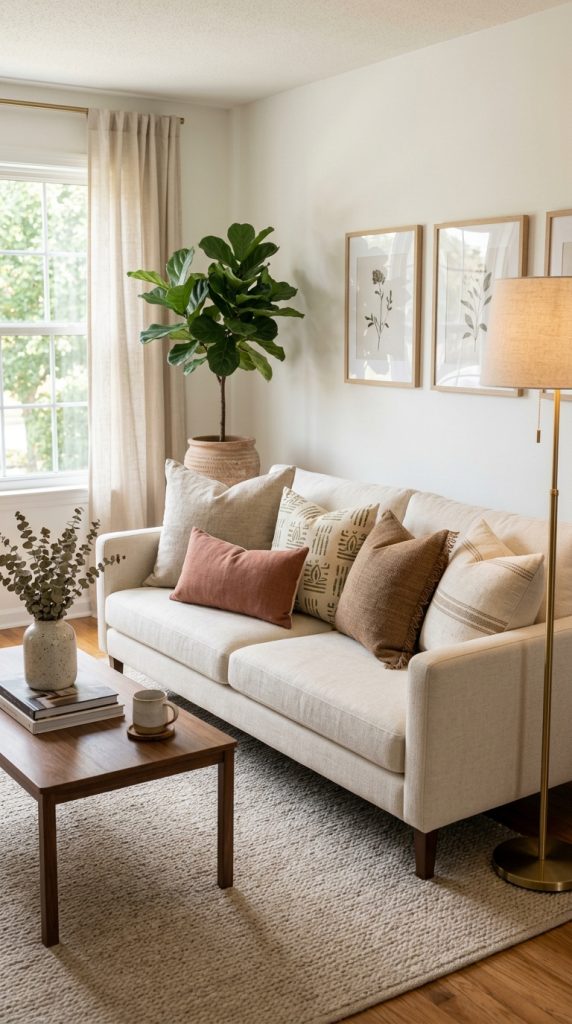
Textiles can completely change the appearance of a room.
Fortunately, they are also one of the easiest things to update without spending much money.
Instead of replacing your sofa or bed, create new cushion covers.
This is especially useful if the furniture itself is neutral.
A cream sofa can take on a completely different personality depending on the cushions.
For a warm modern aesthetic, use:
- Oatmeal
- Rust
- Caramel
- Olive
- Chocolate brown
- Cream
For a softer minimalist room:
- Ivory
- Beige
- Taupe
- Pale gray
- Muted sage
For a vintage-inspired room:
- Floral patterns
- Small-scale botanical prints
- Faded stripes
- Traditional-inspired patterns
You do not need every cushion to match.
In fact, mixing several coordinated textures usually looks more sophisticated.
Combine one plain linen-style fabric with a textured fabric and one subtle pattern.
Avoid using too many competing prints.
Simple DIY approach
Measure an existing cushion.
Use the dimensions to determine how much fabric you need.
If you are comfortable sewing, create a simple envelope-style cover.
This design is particularly beginner-friendly because it does not require a zipper.
For a more professional finish, use a hidden zipper.
Iron the fabric before cutting.
Keep your measurements accurate.
Straight seams make the final cushion look more polished.
Once finished, place the cushions on the sofa with different orientations.
Avoid arranging every cushion in a perfectly symmetrical row.
A relaxed arrangement can make the room feel more natural.
Add one throw blanket over the arm or corner of the sofa.
The combination of coordinated cushions and one soft throw can make an old sofa feel refreshed without replacing it.
6. Turn Thrifted Frames Into an Expensive-Looking Gallery Wall
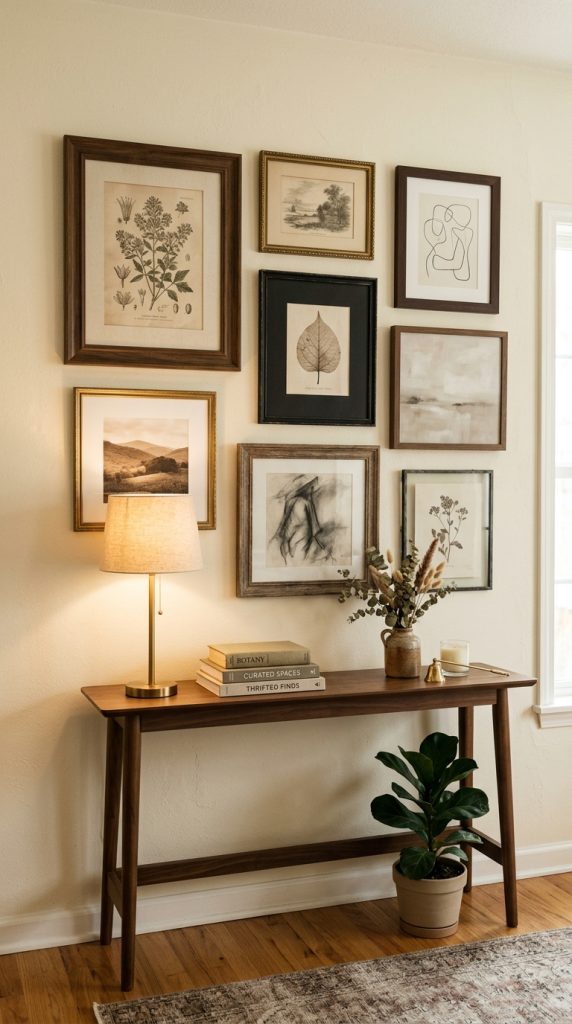
A gallery wall can create a strong focal point, but buying multiple matching frames can become expensive.
A better DIY approach is to collect inexpensive secondhand frames and transform them into one cohesive collection.
The trick is not to make every frame identical.
Instead, create consistency through color.
For example, collect frames in different shapes and sizes, then paint them all warm white.
Or use black.
Or warm walnut.
Or aged brass.
This makes mismatched frames feel intentionally collected.
You can also combine photographs, artwork, vintage-style prints, botanical illustrations, handwritten pieces, or meaningful personal images.
Before putting holes in the wall, arrange the frames on the floor.
Experiment with the composition.
Start with the largest frame.
Then build smaller pieces around it.
Maintain relatively consistent spacing.
Do not make every gap exactly identical if you want a relaxed collected look, but avoid extremely uneven placement.
Budget artwork ideas
You can use:
- Your own photography
- Free public-domain artwork
- Botanical illustrations
- Simple abstract paintings
- Children’s artwork
- Vintage postcards
- Black-and-white photography
- Personal travel photographs
- Printable line art
The frame is often what makes the collection feel expensive.
Use consistent matting where appropriate.
White or cream mats can give inexpensive prints a more refined appearance.
For a particularly sophisticated look, keep the artwork palette connected.
A gallery wall with cream, brown, black, olive, and muted rust will feel more cohesive than one containing every bright color.
7. Upgrade Basic Lamps Into Decorative Lighting

Lighting is one of the most powerful ways to make a room feel more sophisticated.
You do not necessarily need an expensive designer lamp.
You can transform a basic lamp by changing the shade, finish, placement, or surrounding styling.
Start with a secondhand or inexpensive lamp base.
Look for attractive shapes.
A sculptural base can look beautiful even if the original finish is outdated.
Clean the lamp thoroughly.
If the material is suitable, refresh it with an appropriate paint or finish.
Warm brass, aged bronze, matte black, cream, and stone-inspired finishes can all work well.
The lampshade is equally important.
A poorly proportioned shade can make an otherwise attractive lamp look cheap.
Choose a shade that has a balanced relationship with the base.
Fabric shades generally create a softer, more sophisticated glow than exposed bulbs.
Place the lamp somewhere that benefits from warm light.
A console.
A bedside table.
A sideboard.
A reading corner.
A shelf.
A small entryway table.
Layered lighting is consistently highlighted as a way to create a warmer and more polished interior, and current budget-decor guidance similarly recommends multiple light sources instead of relying on one harsh overhead fixture. (Home and Gardenes)
Use warm-toned bulbs suitable for the fixture.
Avoid making every light in the room equally bright.
The goal is to create layers.
One lamp might illuminate a reading area.
Another can highlight a console.
A small light can illuminate artwork or a dark corner.
DIY lamp upgrade
If the lamp base is attractive but the shade is outdated, replace only the shade.
If the shade is fine but the base looks dated, refresh the base.
If the entire lamp is inexpensive but structurally sound, combine both updates.
You may be surprised how different a basic lamp can look after these small changes.
8. Create a DIY Wood Coffee Table or Refresh an Existing One
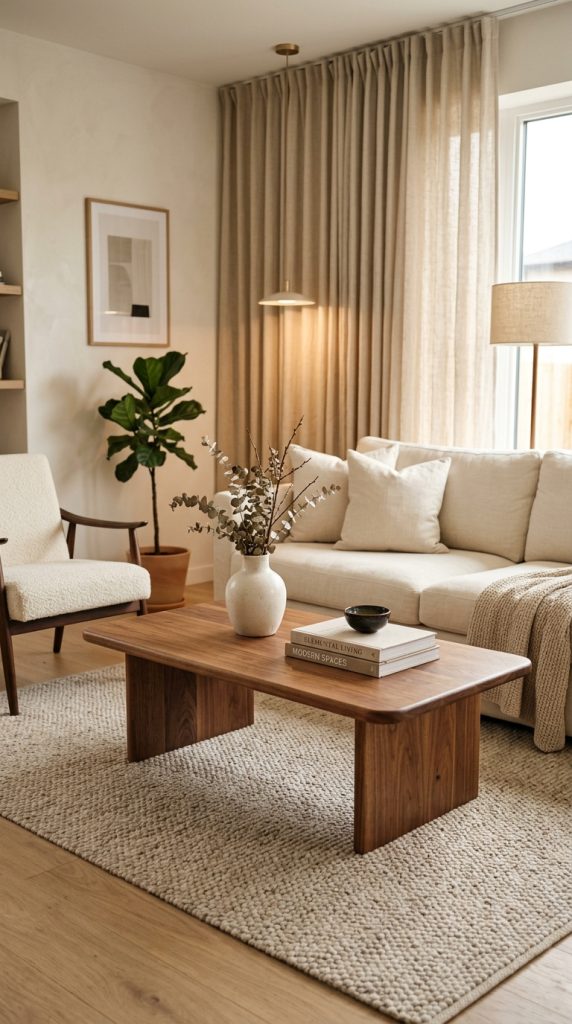
A coffee table often becomes the center of a living room.
Unfortunately, large stylish coffee tables can be expensive.
If you have basic woodworking skills, you can create a simple wooden coffee table from affordable materials.
You do not need a complicated design.
A thick wooden top with substantial legs can look beautiful.
For an organic-modern style, choose a warm wood finish.
For a more minimalist appearance, use a clean rectangular design.
For a softer room, a rounded or oval top can work beautifully.
If building furniture from scratch is beyond your skill level, transform an existing table instead.
Sand the surface.
Repair scratches.
Stain it a warmer tone.
Replace outdated legs if practical.
Or paint the base while leaving the top natural.
Once finished, style the table carefully.
This is where many people accidentally make budget furniture look more cluttered.
Do not cover the entire surface.
Create one main arrangement.
For example:
Two large books + a ceramic bowl + a small candle.
Or:
A low tray + one vase + a small sculptural object.
You can add a coffee table book if it genuinely fits the room.
Keep generous empty space around the arrangement.
This gives the table a more substantial visual presence.
A large table should not have twenty tiny decorations.
One thoughtful composition will generally look more expensive.
9. Make Affordable Storage Look Like Custom Built-Ins
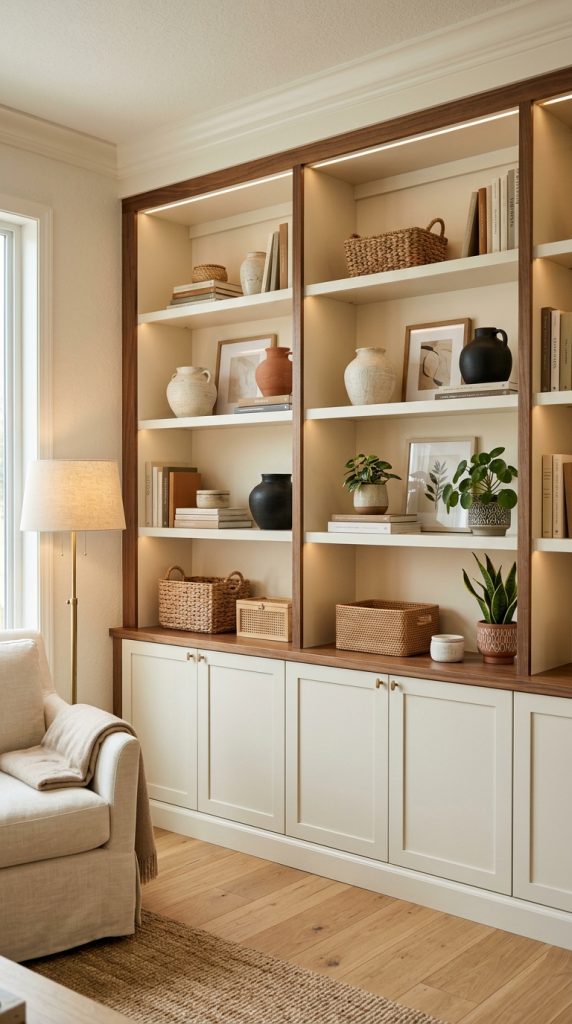
Storage does not have to be purely practical.
It can become part of the design.
One of the best budget decorating tricks is to make ordinary storage pieces look more intentional.
Start with inexpensive cube shelves, basic cabinets, baskets, or floating shelves.
Then unify them through color and hardware.
For example, basic white cabinets can be upgraded with:
- New handles
- Wood trim
- Decorative molding
- A fresh coat of paint
- Matching baskets
- Coordinated labels
You can also create a built-in appearance by placing several storage units together and framing them with trim.
Paint the entire arrangement the same color as the wall.
This creates a more architectural appearance.
If you are working with open shelves, avoid filling every section.
Mix storage with display.
Use attractive baskets for items you do not want visible.
Then leave some shelves open for books, artwork, ceramics, and plants.
This creates balance between practical storage and decoration.
Affordable basket makeover
Plain baskets can sometimes look inconsistent when several different styles are used together.
If you already own multiple baskets, consider creating visual consistency by grouping similar colors.
Natural woven baskets work beautifully with warm neutral interiors.
Black baskets can create contrast in a modern room.
Cream baskets can create a softer appearance.
You can also add simple fabric liners if appropriate.
The goal is not to hide every object.
The goal is to create a controlled visual environment.
When storage looks intentional, the entire room can feel more expensive.
10. Create a Luxury-Looking DIY Accent Wall
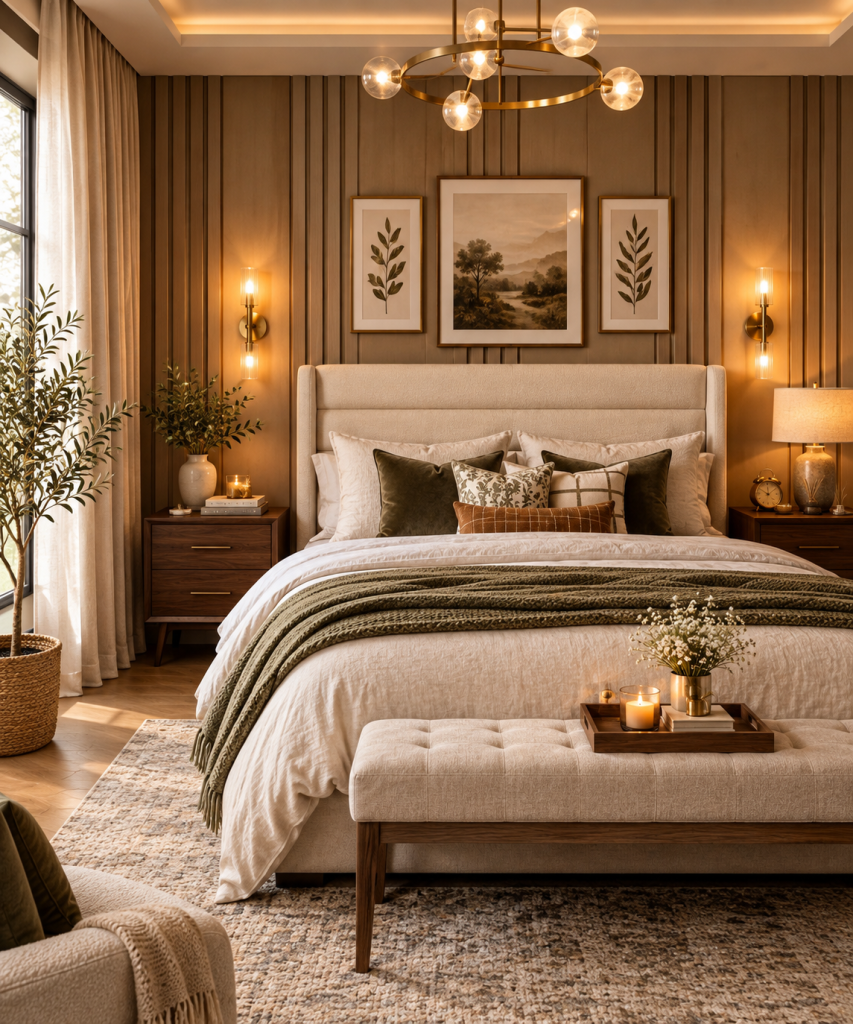
An accent wall can completely change the atmosphere of a room without requiring a full renovation.
The trick is choosing an accent that adds depth rather than simply adding another color.
There are several budget-friendly approaches.
Paint
The simplest option is paint.
Instead of choosing a bright accent color that may dominate the room, consider sophisticated shades such as:
- Warm mushroom
- Olive green
- Chocolate brown
- Charcoal
- Terracotta
- Deep taupe
- Muted clay
- Warm cream
A darker color behind a bed or sofa can create a strong focal point.
Painted arch
A painted arch is another relatively simple DIY project.
Use painter’s tape, a measuring method, and a carefully drawn curved line.
Paint inside the shape.
A large arch behind a console, chair, bed, or small desk can visually define the area.
Limewash-inspired effect
If you want more texture, experiment with a decorative paint technique that creates subtle movement.
The result should remain soft rather than heavily mottled.
Warm beige, mushroom, taupe, and soft clay shades work especially well.
Peel-and-stick wallpaper
Removable wallpaper can create an expensive-looking effect without permanent installation.
Choose a subtle pattern.
Textured-looking neutral wallpaper, botanical patterns, fine stripes, or understated geometric designs can create visual interest.
Avoid selecting a pattern simply because it is dramatic.
The design should support the rest of the room.
Wood slats or paneling
For a modern accent wall, narrow wood slats can create vertical rhythm.
This can make a room feel taller.
Use warm natural wood for an organic style or paint the slats to match the wall for a more subtle architectural appearance.
Make the accent wall look intentional
The wall should have a purpose.
Place it behind:
- A bed
- Sofa
- Dining table
- Desk
- Console
- Reading chair
Then keep the furniture and accessories relatively simple.
If the wall itself is the focal point, you do not need to cover it with many decorations.
How to Make DIY Decor Look More Expensive
The actual DIY project is only half the process.
Styling and finishing determine whether the result looks polished.
Use a limited color palette
Choose two or three main colors and one optional accent.
For example:
Cream + walnut + brass.
Or:
Beige + olive + natural wood.
Or:
Warm white + chocolate brown + terracotta.
Repeating colors throughout the room creates cohesion.
Focus on scale
Large rooms need appropriately sized furniture and artwork.
Small rooms benefit from carefully proportioned pieces.
Do not make every decorative item tiny simply because you are decorating on a budget.
A large DIY artwork can be more impactful than ten tiny pieces.
Prioritize texture
Texture creates visual richness.
Combine:
Wood + linen.
Ceramic + woven material.
Bouclé + metal.
Stone + cotton.
Glass + wood.
You do not need expensive materials to create contrast.
Improve the finishing
This may be the most important DIY principle.
Sand rough edges.
Clean paint lines.
Fill holes.
Iron fabric.
Use appropriate hardware.
Hide visible cords.
Keep glue residue off finished surfaces.
Take your time.
An inexpensive project with excellent finishing can look far more sophisticated than an expensive item with poor styling.
Leave empty space
Do not feel obligated to fill every shelf, wall, or tabletop.
Negative space allows the eye to rest.
It also makes the objects you do display feel more important.
DIY Home Decor Ideas for the Living Room
The living room is often the best place to begin because relatively small changes can create a noticeable transformation.
Start with the seating.
Instead of buying a new sofa, update the cushions and throw.
Then improve the coffee table.
Create one attractive centerpiece.
Add a DIY artwork or framed gallery wall.
Upgrade one lamp.
Add a large plant or a beautiful branch arrangement.
Then step back.
Do not continue adding things just because there is empty space.
Empty space can be intentional.
If the room still feels unfinished, look at lighting.
A floor lamp in a dark corner can make the entire space feel warmer.
A table lamp on a console can create another layer.
A picture light can draw attention to artwork.
These changes can have a surprisingly large impact.
DIY Home Decor Ideas for the Bedroom
Bedrooms benefit from soft textures and calm colors.
You can create an expensive-looking bedroom without changing the bed.
Start with bedding.
Use a coordinated palette and layer several textures.
Then update the bedside lighting.
Create a large artwork above the bed or make a simple upholstered headboard if your existing bed lacks one.
A DIY fabric headboard can become the focal point.
Use neutral fabric such as oatmeal, cream, beige, or warm gray.
Add simple bedside styling.
One lamp.
One book.
One ceramic object.
That may be enough.
If you have a plain dresser, upgrade the hardware.
Add a large mirror.
Style the top with one vase and a small tray.
Finish the room with full-length curtains and a soft rug.
The result can feel like a boutique-inspired retreat without replacing the major furniture.
DIY Home Decor Ideas for the Kitchen
Kitchen decorating should remain practical.
Do not add so many decorative pieces that countertops become difficult to use.
Instead, make everyday objects attractive.
Display a wooden cutting board.
Use ceramic containers for frequently used ingredients.
Place utensils in a beautiful crock.
Add a small plant.
Create a simple tray arrangement.
Update cabinet hardware.
Paint an old kitchen stool.
Add removable backsplash treatment if appropriate.
Under-cabinet lighting can also create a significant visual improvement.
Keep the lighting warm and soft for evening use while maintaining functional illumination for food preparation.
The combination of wood, ceramic, warm lighting, and clean surfaces can make an ordinary kitchen feel much more sophisticated.
DIY Home Decor Ideas for Small Spaces
Small spaces benefit from projects that improve both appearance and function.
Create floating shelves instead of bulky furniture.
Build a slim entryway shelf.
Frame one large artwork rather than filling the wall with tiny decorations.
Use a large mirror to reflect light.
Upgrade storage with matching baskets.
Paint a small accent wall.
Use wall-mounted lighting where appropriate.
Choose furniture with multiple purposes.
Most importantly, avoid clutter.
A small room can feel expensive when it has breathing room.
The expensive-looking effect often comes from editing rather than decorating more.
Mistakes That Can Make DIY Decor Look Cheap
Even a well-designed DIY project can look less polished if certain mistakes are made.
Adding too many decorations
More objects do not necessarily create more style.
Choose a few strong pieces.
Using too many colors
A room with ten unrelated colors can quickly feel chaotic.
Keep the palette controlled.
Ignoring scale
A tiny rug beneath large furniture can make the room feel disconnected.
A tiny artwork on a huge wall can look lost.
Poor finishing
Uneven paint, visible glue, rough edges, crooked frames, and unfinished surfaces can immediately reveal a DIY project.
Overusing faux luxury materials
You do not need to make everything look like marble, gold, or expensive stone.
Natural-looking affordable materials can be more convincing.
Using too much artificial greenery
A few realistic plants can add life, but excessive artificial greenery can make a room look staged.
Relying on one overhead light
Harsh lighting can make even beautiful furniture look less appealing.
Layer your lighting instead.
Decorating without a plan
Before starting a project, determine where it will go and how it will connect with the rest of the room.
A beautiful DIY piece can still look wrong if it has no relationship to the surrounding furniture.
How to Choose the Right DIY Projects for Your Home
You do not need to complete all ten projects.
Start with the area that bothers you most.
If the room feels empty, try oversized artwork.
If furniture looks dated, refresh one piece.
If the room feels cold, add textiles.
If the room feels flat, improve lighting.
If the walls feel unfinished, try molding or a gallery wall.
If the room feels cluttered, improve storage.
This approach saves money because you are solving an actual decorating problem rather than buying supplies simply because a project looks attractive online.
Before starting, ask yourself:
What does this room need?
More warmth?
Better storage?
A focal point?
More texture?
Better lighting?
More personality?
Once you know the answer, choose the DIY project that directly addresses it.
Final Thoughts
DIY home decor on a budget does not mean your home has to look inexpensive.
The most effective budget transformations focus on the things that make interiors feel polished: thoughtful proportions, cohesive colors, beautiful textures, layered lighting, clean finishes, and intentional styling.
You can create oversized artwork instead of buying expensive art.
You can transform a thrifted cabinet instead of purchasing a new console.
You can frame an ordinary mirror.
You can sew new cushion covers.
You can create wall molding.
You can upgrade lamps.
You can build or refinish a coffee table.
You can turn basic storage into something that looks custom.
And you can completely transform a room with a carefully planned accent wall.
The key is to avoid treating DIY as an excuse to add more things.
Instead, use it to create better things.
One beautifully finished project can change an entire room.
One large piece of artwork can establish a focal point.
One upgraded lamp can improve the evening atmosphere.
One freshly painted cabinet can make an outdated corner feel new.
One coordinated collection of cushions can refresh an old sofa.
One carefully designed accent wall can make a bedroom or living room feel architectural.
The most expensive-looking homes are not necessarily the homes with the highest budgets. They are often the homes where someone paid attention to the details.
Choose materials thoughtfully.
Keep your palette controlled.
Give your projects enough time to dry, cure, and finish properly.
Measure before cutting.
Sand before painting.
Style with restraint.
Leave some empty space.
Mix practical pieces with decorative ones.
And most importantly, make your home personal.
A beautiful home should not look like a copy of a showroom or a social-media image. It should feel like a place where real people live, relax, gather, and create memories.
When you combine creativity with thoughtful styling, even a small DIY project can create a surprisingly sophisticated result.
Leave a Reply