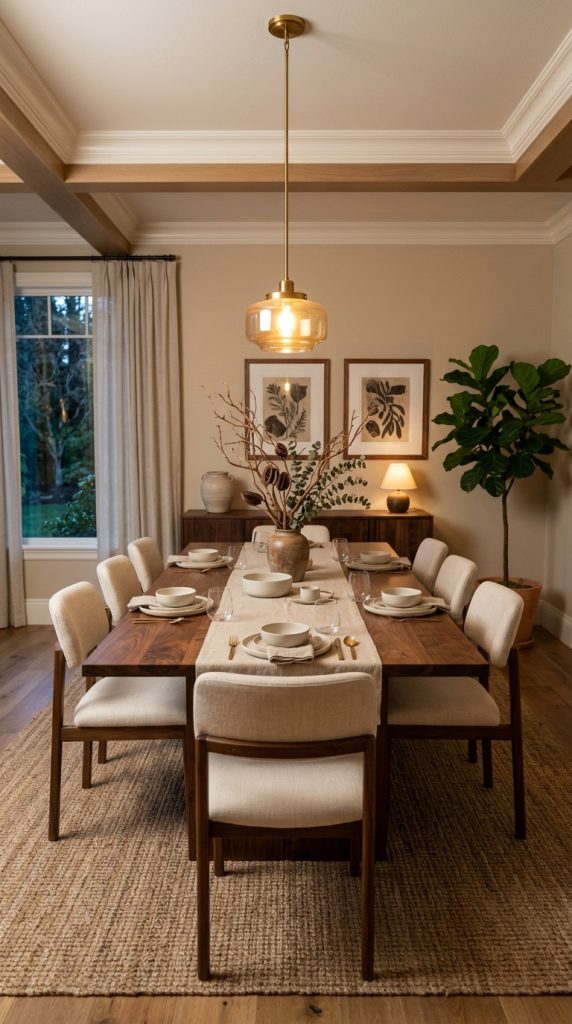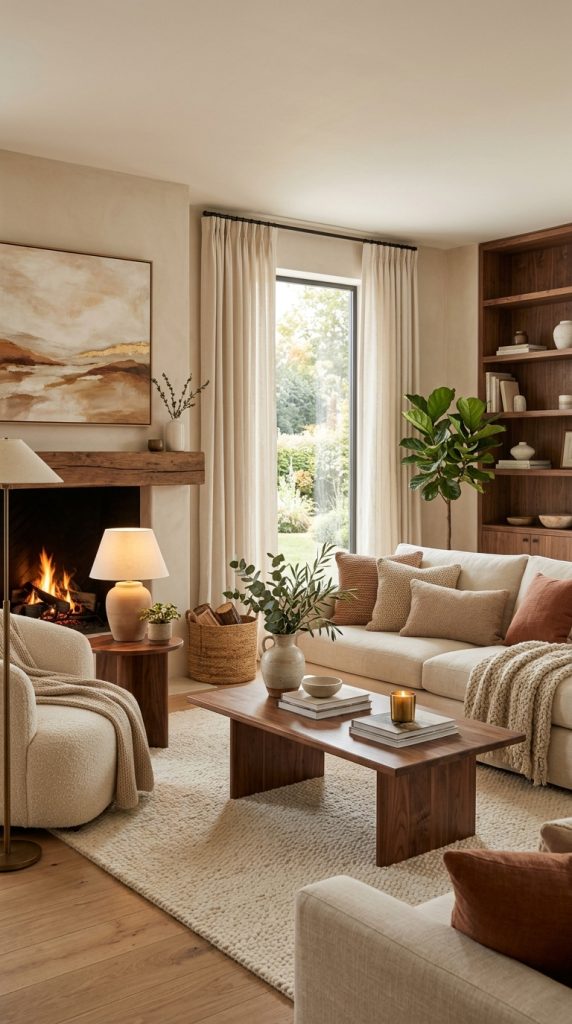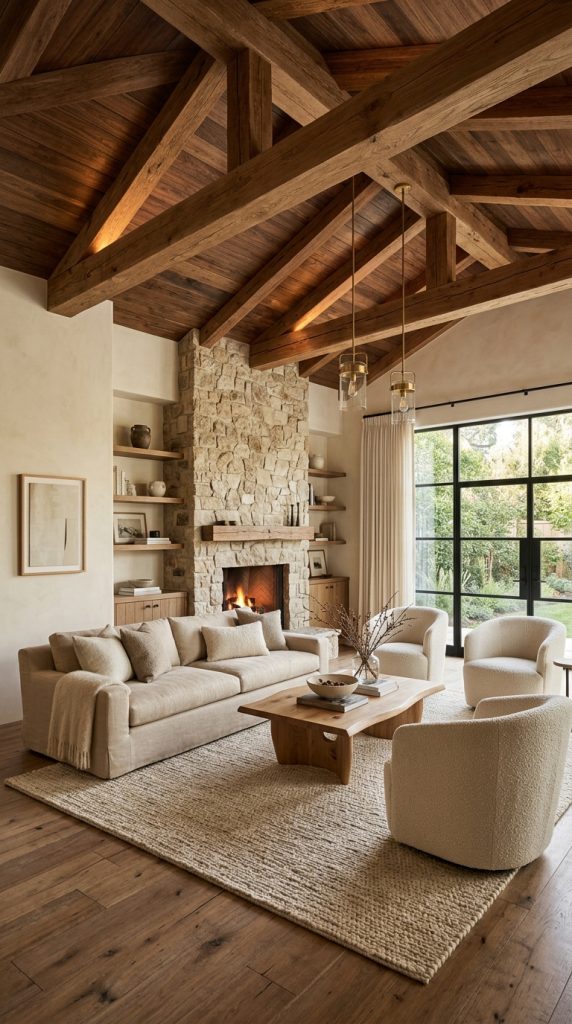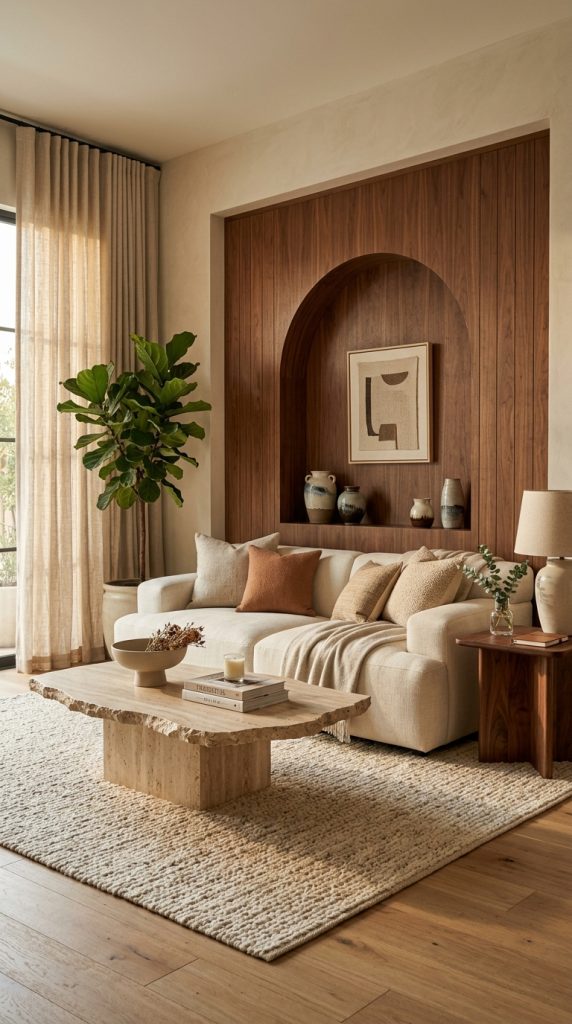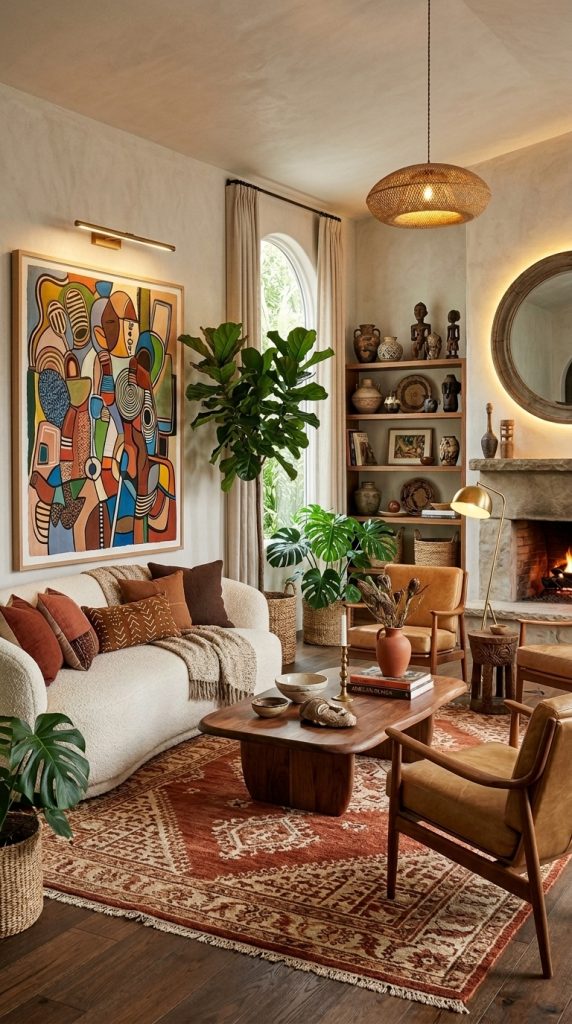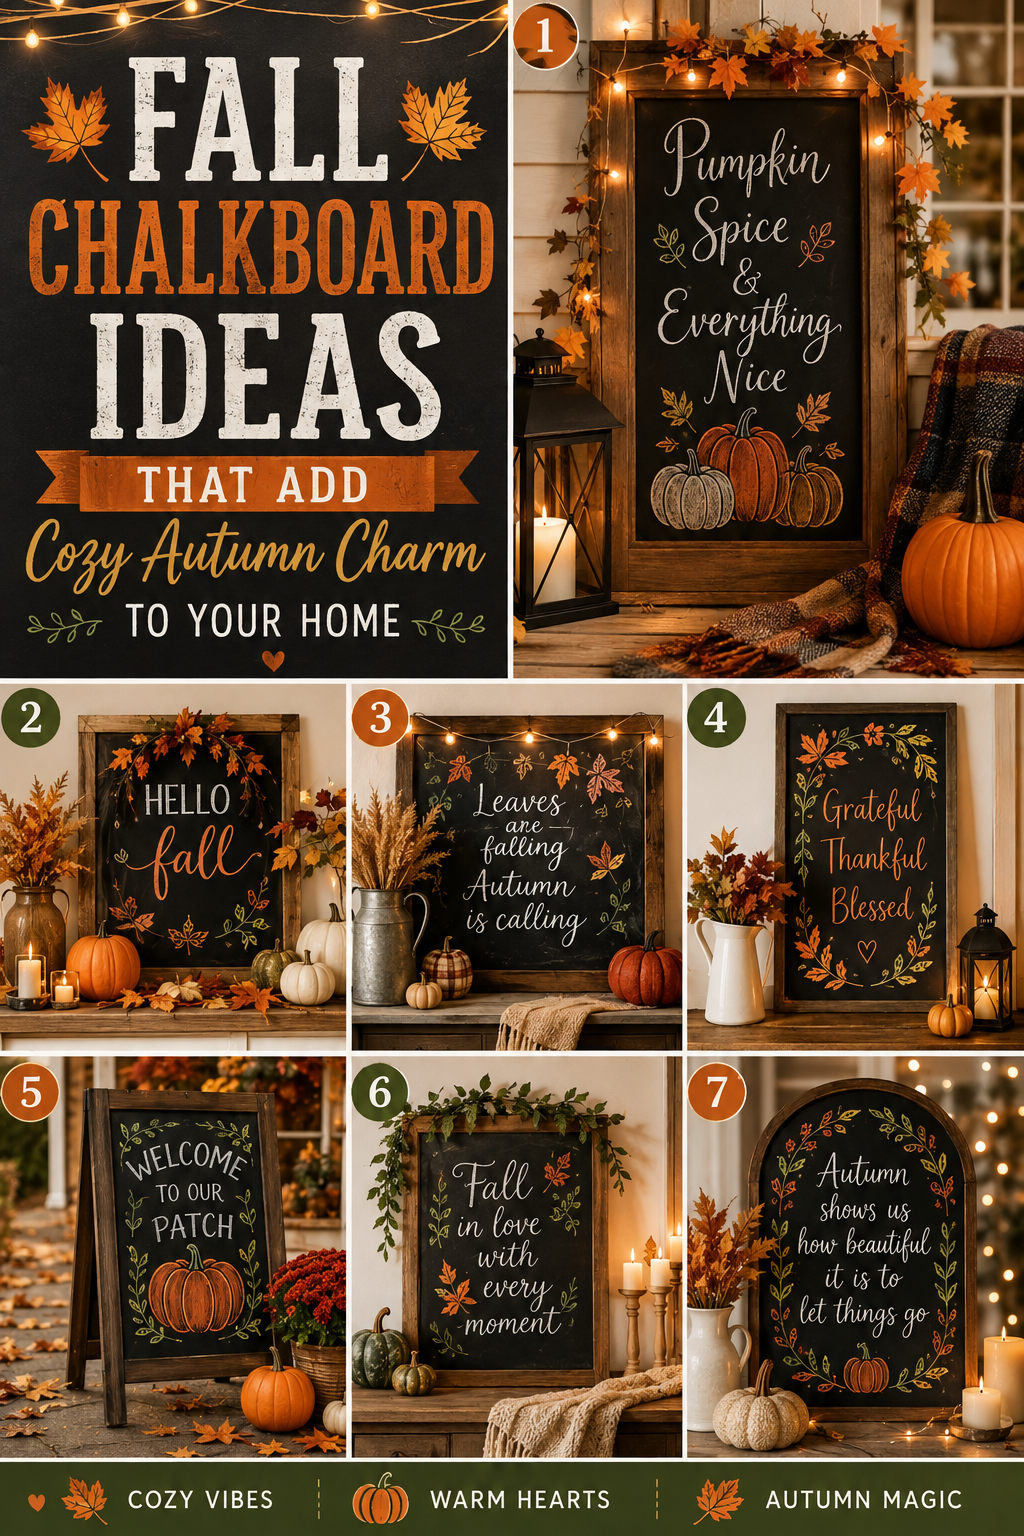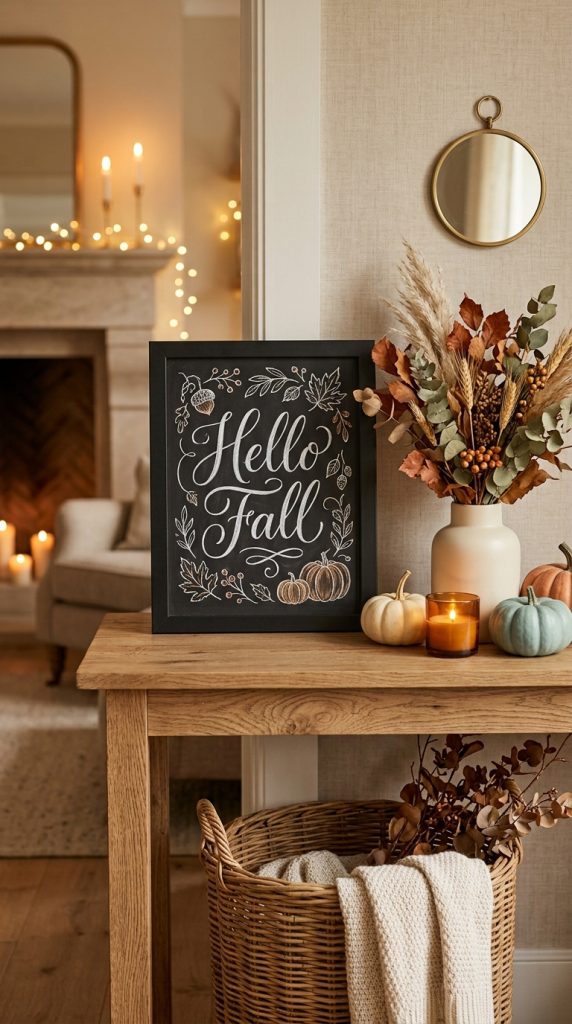
Author: admin

  • Dollar Store Fall Decor on a Budget

    Dollar Store Fall Decor on a Budget

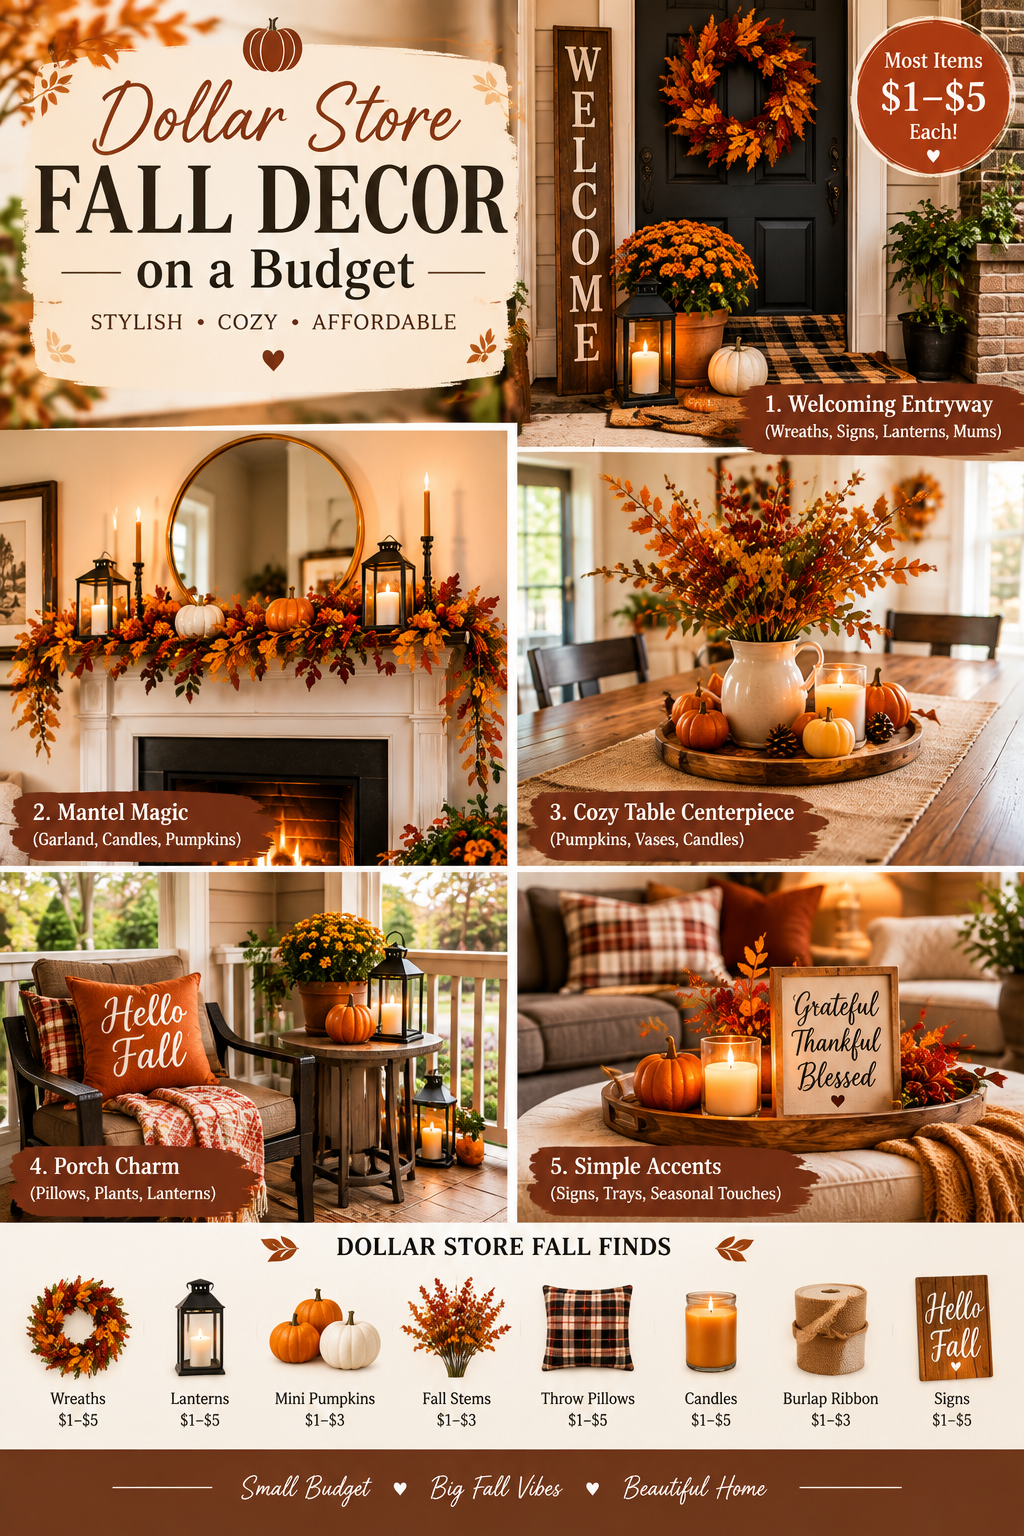
    Fall is one of the easiest seasons to decorate for because you do not need an expensive makeover to make your home feel warm, inviting, and seasonal. With a few inexpensive supplies from a dollar store, you can create beautiful fall decorations that look thoughtful, stylish, and surprisingly high-end. The secret is not how much you spend. It is how you combine colors, textures, lighting, and simple decorative pieces.
    Dollar store fall decor is especially useful when you want to refresh your home for autumn without spending a large amount of money. A few faux pumpkins, glass containers, candles, ribbons, baskets, wooden pieces, and artificial leaves can become the foundation for an entire seasonal decorating plan. With a little creativity, these inexpensive items can be transformed into centerpieces, entryway displays, mantel decorations, table arrangements, and cozy accents for bedrooms and living rooms.

    The most attractive budget fall decor usually follows a simple color palette. Instead of combining every autumn color at once, choose two or three main shades such as cream, warm brown, muted orange, rust, burgundy, or soft beige. Adding natural-looking textures such as wood, woven materials, linen, dried foliage, and ceramic finishes can make inexpensive decorations feel more sophisticated.

    Another important trick is to avoid overcrowding your space. You do not need dozens of decorations to create a seasonal atmosphere. A carefully styled tray, a small arrangement of pumpkins, a warm candle display, or a decorated entryway can have much more visual impact than a room filled with random fall accessories.

    These 10 dollar store fall decor ideas are designed to help you decorate beautifully while keeping your budget under control. Each idea includes practical materials, styling instructions, ways to make inexpensive items look more expensive, and tips for creating a cozy Pinterest-worthy autumn home.

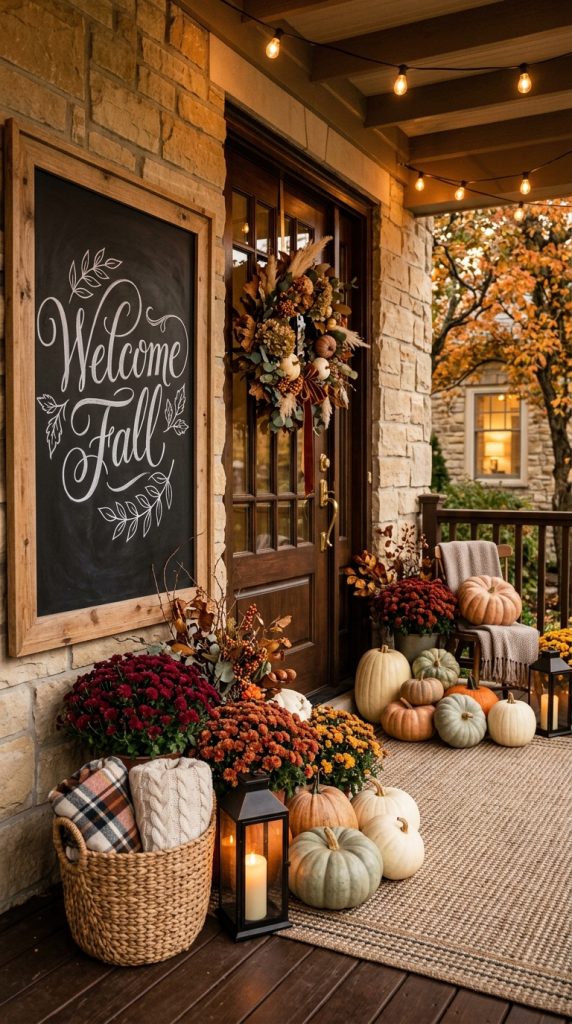
    1. Create an Elegant Dollar Store Pumpkin Display
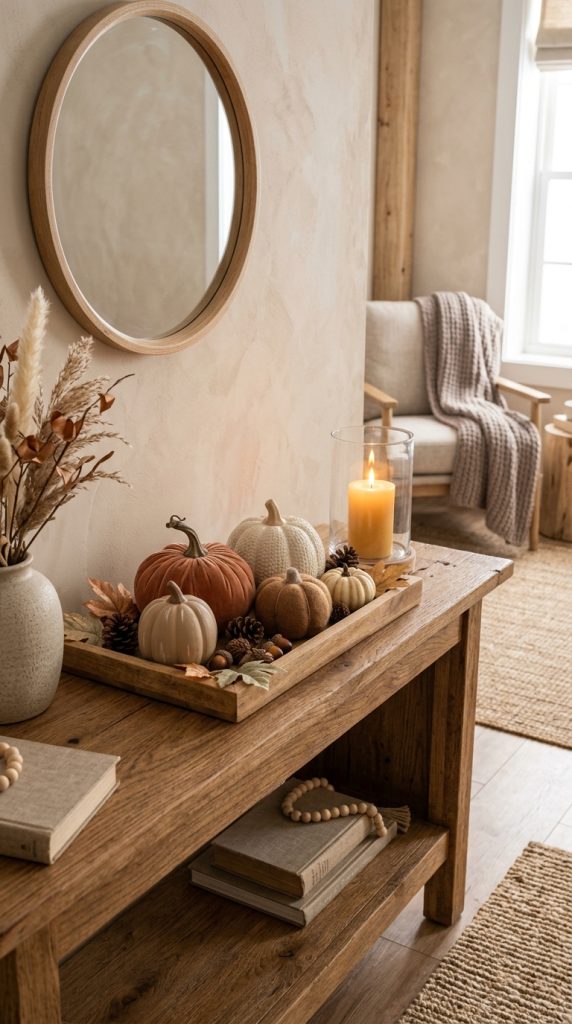
    Pumpkins are one of the easiest ways to bring an immediate fall feeling into your home. You do not need expensive ceramic or designer pumpkins to create a beautiful seasonal arrangement. Dollar store pumpkins can become surprisingly elegant when they are grouped together and styled with the right colors and textures.

    Start by looking for pumpkins in different sizes and shapes. If the available colors are too bright, do not worry. Inexpensive pumpkins can easily be transformed with paint. Cream, soft beige, muted terracotta, warm brown, dusty white, and sage-inspired neutral shades can create a more sophisticated appearance than traditional bright orange.

    For a simple arrangement, choose three to five pumpkins in different sizes. Place the largest pumpkin toward the back and use smaller pumpkins in front. This creates visual height and prevents the display from looking flat.

    You can create the display on a coffee table, console table, fireplace mantel, dining table, bookshelf, or kitchen counter. Add a small wooden tray underneath the pumpkins to give the arrangement a defined base.

    For additional texture, surround the pumpkins with artificial fall leaves, small pinecones, dried-looking stems, or a few pieces of faux foliage. Keep the greenery subtle. Too many artificial leaves can make the arrangement look overly busy.

    A ribbon can also transform inexpensive pumpkins. Wrap a narrow neutral ribbon around the stem or tie a small bow onto one pumpkin. Choose linen, burlap, velvet, or cotton ribbon in a muted autumn color.

    If you want an especially elegant look, use mostly cream and beige pumpkins with one or two muted rust pumpkins as accents. This keeps the arrangement seasonal while giving it a modern appearance.

    Another simple technique is to add a small handwritten or printed fall word to a wooden sign placed behind the pumpkins. Keep the wording minimal so the arrangement remains visually clean.

    You can also place pumpkins inside a shallow woven basket. Add a neutral fabric underneath them and allow a few faux leaves to extend naturally around the edges. This works beautifully on a porch, entryway table, or living room floor.

    The key to making dollar store pumpkins look expensive is consistency. Instead of displaying every color you find, choose a palette and repeat it throughout the arrangement.

    Materials You Can Use

    • Dollar store faux pumpkins
    • Acrylic or chalk-style paint
    • Small wooden tray
    • Faux autumn leaves
    • Pinecones
    • Neutral ribbon
    • Small basket
    • Wooden sign
    • Decorative twigs
    • Paintbrush

    How to Style It

    Begin with the largest pumpkin and place it slightly toward the back. Add medium pumpkins beside it and smaller pumpkins toward the front. Introduce a few leaves around the base, then add one small decorative object such as a candle or ceramic vase.

    Keep empty space around the arrangement so each piece can be seen clearly.

    This simple pumpkin display can become one of the most affordable fall decorations in your home while still looking polished enough for a beautiful Pinterest photograph.

    2. Turn Dollar Store Glass Jars Into Cozy Fall Candle Decor
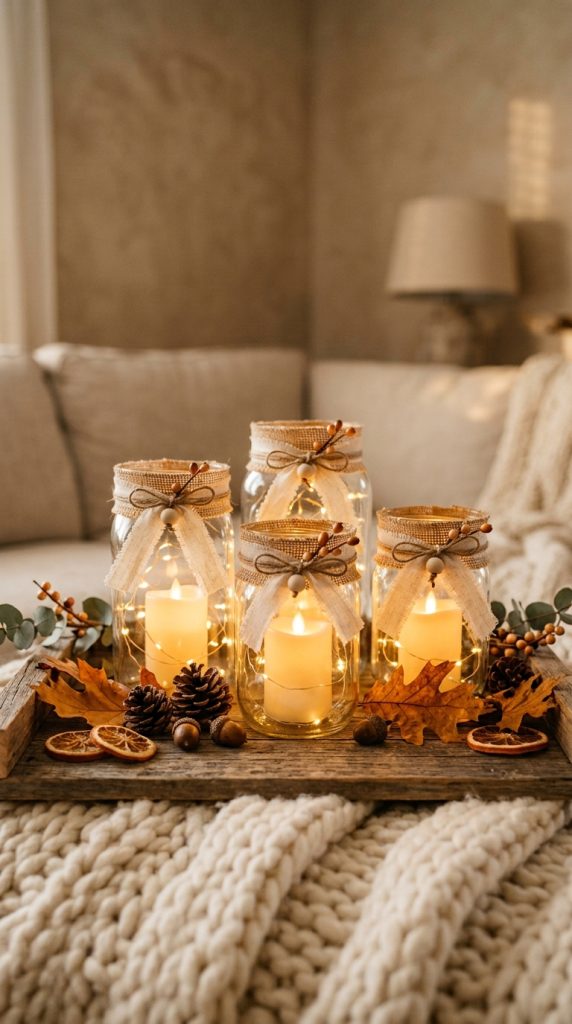
    Glass jars are among the most versatile inexpensive items you can find at a dollar store. With a little styling, ordinary jars can become beautiful fall candle holders that add warmth and atmosphere to your home.

    Look for clear glass jars, small vases, drinking glasses, or simple containers. Their exact shape does not matter as much as their ability to hold a candle or decorative element.

    For an easy fall project, place a battery-operated tea light inside each jar. Battery-operated candles are particularly useful because they are easy to arrange on tables, shelves, mantels, and other surfaces.

    To make the jars feel more seasonal, wrap a small piece of burlap, linen ribbon, or twine around the outside. You can secure it with a simple knot or a small decorative bow.

    Another option is to place artificial leaves around the bottom of the jar rather than covering the entire container. This creates a subtle autumn detail while keeping the glass visible.

    For a more sophisticated arrangement, use three jars of different heights. Place them together on a wooden tray and surround them with pinecones, miniature pumpkins, and a few dried-looking stems.

    Warm candlelight is especially important for fall decorating because it creates the cozy atmosphere people associate with autumn evenings. Instead of using harsh overhead lighting, place your candle arrangement near a lamp or on a side table where the glow can become part of the room’s overall lighting.

    You can also add seasonal color inside the jars. Fill the bottom with small decorative stones, faux acorns, dried-looking leaves, or decorative filler. Then place a battery-operated candle on top.

    For a farmhouse-inspired look, combine clear jars with wood and burlap. For a modern look, keep the jars completely clean and pair them with cream pumpkins and neutral ceramic pieces.

    If you are decorating a dining table, create a long arrangement by placing several small jars along the center. Add a few pumpkins between them, but leave enough space for plates and serving dishes.

    The beauty of this project is that the jars can remain useful after fall. Simply remove the seasonal ribbons and filler and reuse them as everyday vases, storage containers, or candle holders.

    Materials You Can Use

    • Dollar store glass jars
    • Battery-operated tea lights
    • Burlap or linen ribbon
    • Twine
    • Faux leaves
    • Small pinecones
    • Decorative filler
    • Wooden tray
    • Mini pumpkins

    Styling Tip

    Use warm white candlelight rather than very bright white LED light. A soft golden glow will make inexpensive materials appear warmer and more luxurious.

    For an especially attractive display, combine glass, wood, and soft fabric. These contrasting textures make a simple dollar store arrangement feel intentionally designed.

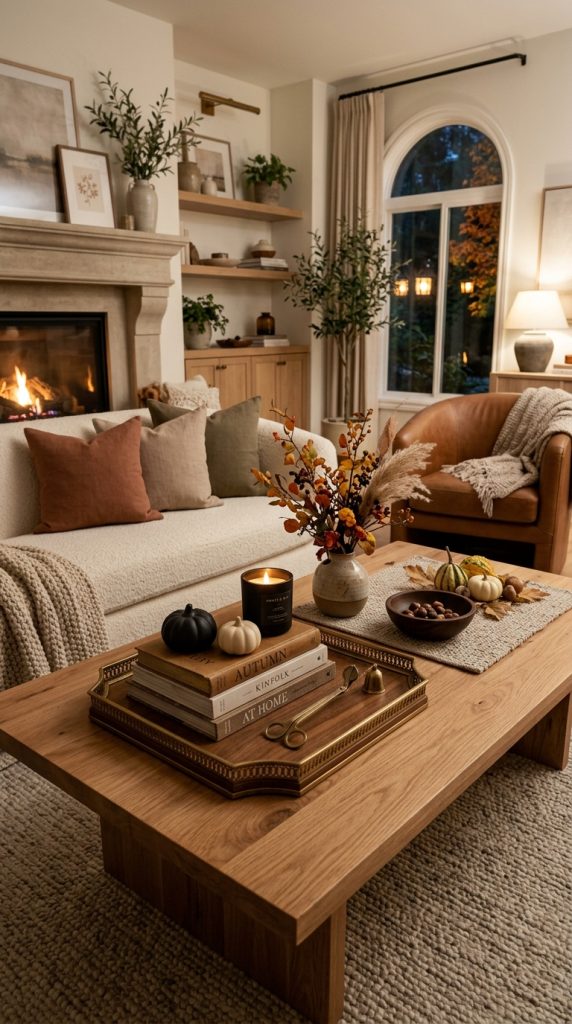
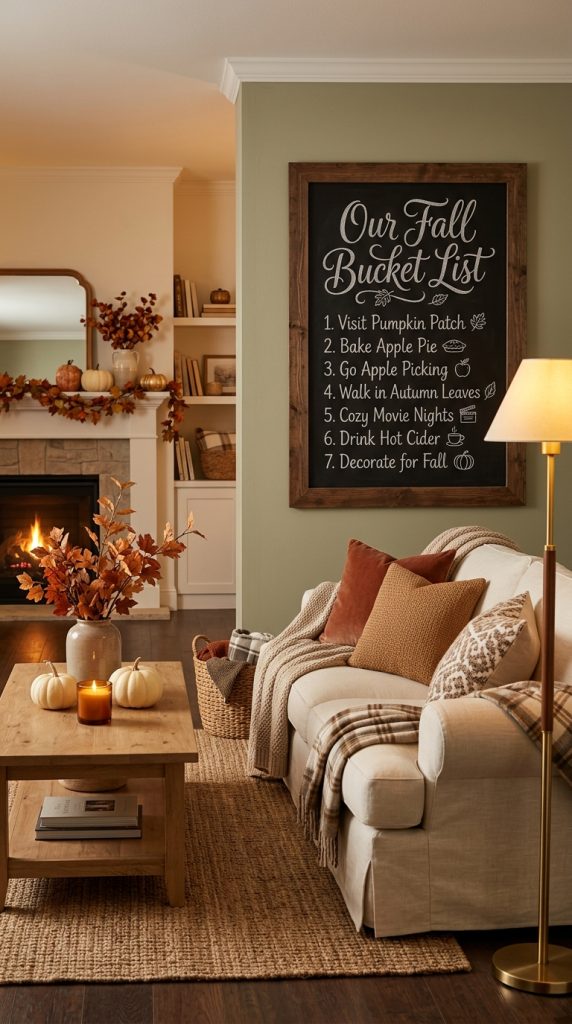
    3. Make a Budget-Friendly Fall Coffee Table Tray
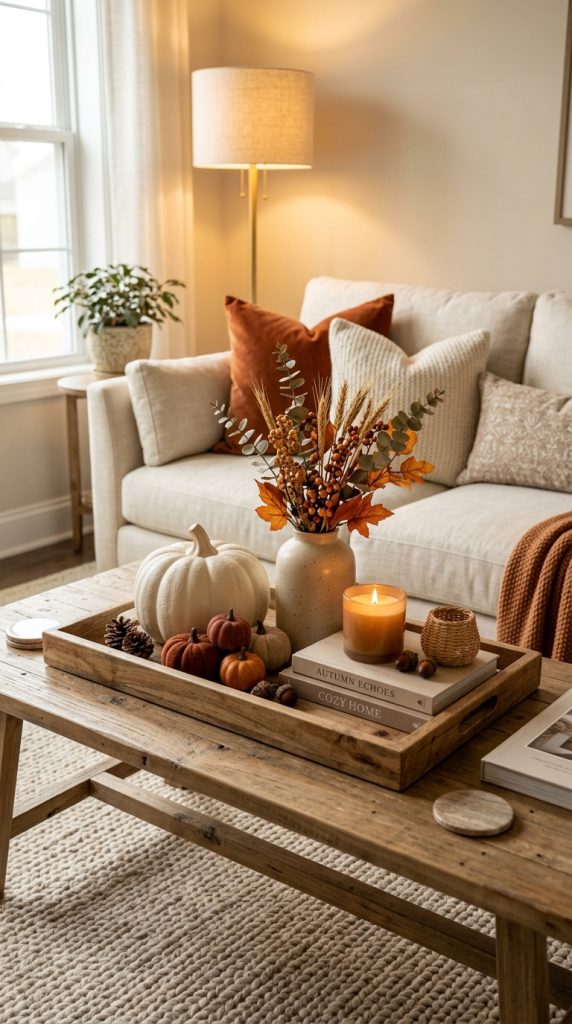
    A coffee table is one of the best places to create a small fall display because it immediately changes the feeling of the living room without requiring a complete seasonal makeover.

    The easiest way to decorate a coffee table on a budget is to start with a tray. A dollar store wooden tray, plastic tray with a wood-like finish, or simple basket can provide the foundation for your arrangement.

    The tray creates boundaries and makes several inexpensive items look like one coordinated centerpiece.

    Begin with one larger focal object. This could be a cream pumpkin, small vase, candle, or decorative jar. Then add two or three smaller objects around it.

    A small stack of neutral books can add height. If you do not have decorative books, use books you already own and turn the covers inward if you want a cleaner appearance.

    Add a small faux foliage arrangement inside a simple dollar store vase. Choose stems in muted brown, rust, burgundy, or warm neutral tones rather than overly bright artificial green.

    Next, introduce a candle. A neutral candle inside a glass container can provide both visual interest and a cozy seasonal feeling.

    Small pumpkins can fill empty areas of the tray. Use different sizes rather than placing identical pumpkins in a straight row.

    Texture is another important element. A woven coaster, small fabric napkin, wood bead strand, or miniature basket can add softness to the arrangement.

    The most important rule is to vary height. A beautiful coffee table arrangement usually includes something tall, something medium, and something low.

    For example, a vase can provide height, a pumpkin can create a medium focal point, and a candle can remain low.

    This creates a triangular visual composition that feels balanced.

    You can also use a thrifted tray or an old tray you already own instead of purchasing one. Give it a fresh coat of paint if necessary.

    Cream, warm brown, and muted orange make an especially attractive palette for this type of display.

    Avoid placing too many objects directly next to one another. Leaving small areas of visible tray between items helps the arrangement feel intentional instead of cluttered.

    Materials You Can Use

    • Dollar store tray or basket
    • Faux pumpkin
    • Small vase
    • Faux fall stems
    • Candle
    • Decorative books
    • Mini pumpkins
    • Small woven accessory
    • Neutral fabric

    How to Make It Look Expensive

    Choose fewer pieces and style them carefully. Expensive-looking decor is often about editing rather than adding.

    Instead of filling the entire tray, leave approximately one-third of the surface visually open. This creates breathing room and allows the main pieces to stand out.

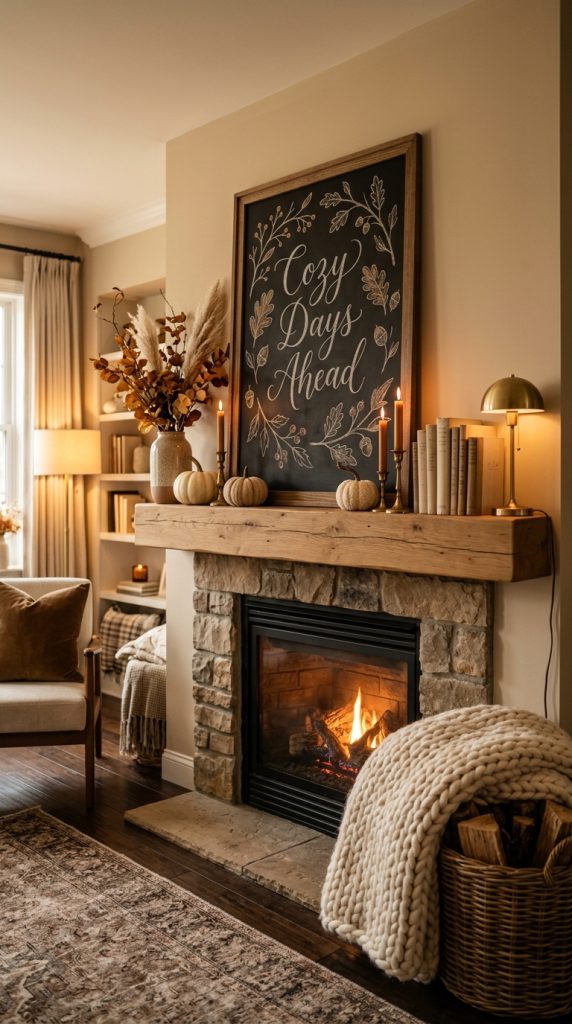
    4. Create a Beautiful Fall Mantel With Dollar Store Finds
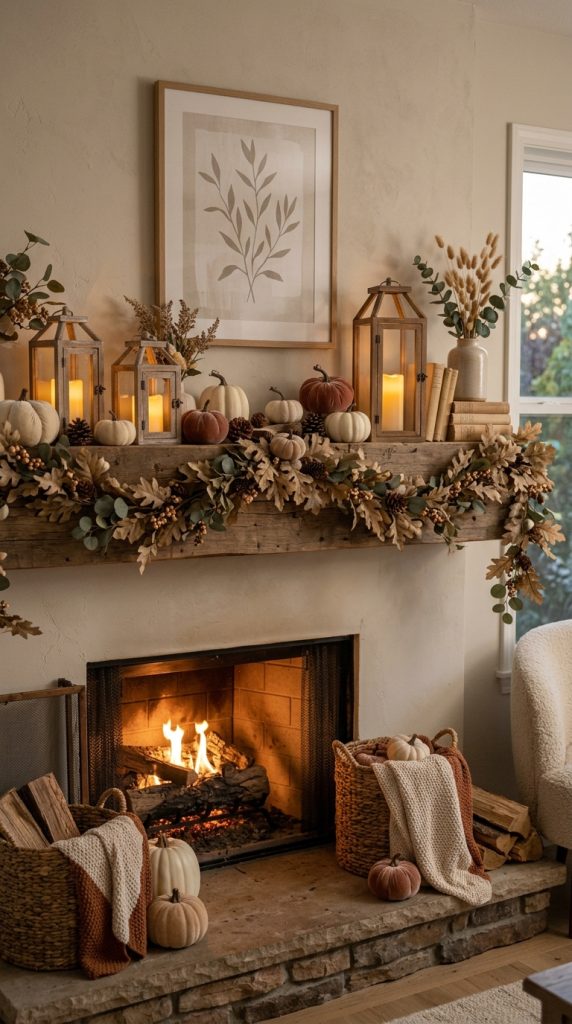
    A fireplace mantel can become a dramatic seasonal focal point, but you do not need expensive decorations to make it beautiful. Dollar store supplies can be arranged into a layered fall display that feels warm, sophisticated, and welcoming.

    Start with one large background element. This could be a simple framed print, mirror, wooden sign, or piece of neutral artwork you already own.

    Place your largest decorative elements toward the center or slightly off-center. This might be a large pumpkin, vase, or lantern.

    Next, add smaller pieces around it. Use miniature pumpkins, candles, faux foliage, pinecones, and simple ceramic containers.

    One of the best ways to create a professional-looking mantel is to vary height. Place taller objects toward the back and shorter objects toward the front.

    You can also drape a faux leafy garland across part of the mantel rather than covering the entire surface. Leaving sections exposed creates a more modern and elegant appearance.

    If your dollar store sells small lanterns, use one or two as architectural accents. Place a battery-operated candle inside and allow the warm glow to become part of the arrangement.

    A small wooden sign with a subtle autumn message can provide a focal point without overwhelming the display.

    For a neutral fall mantel, use cream pumpkins, warm wood, beige fabric, and brown foliage. For a traditional autumn mantel, introduce rust and muted orange.

    Do not mix too many strong colors. A controlled palette makes inexpensive pieces feel more cohesive.

    If your fireplace does not have a mantel, you can recreate the concept on a console table, bookshelf, or long floating shelf.

    Materials You Can Use

    • Dollar store pumpkins
    • Faux garland or leaves
    • Small lanterns
    • Battery-operated candles
    • Wooden sign
    • Small vases
    • Pinecones
    • Ribbon
    • Neutral artwork

    Styling Tip

    Create asymmetry rather than making both sides identical. A taller arrangement on one side and a lower cluster on the other often looks more natural and sophisticated.

    Use warm lighting in the evening to emphasize the autumn atmosphere.

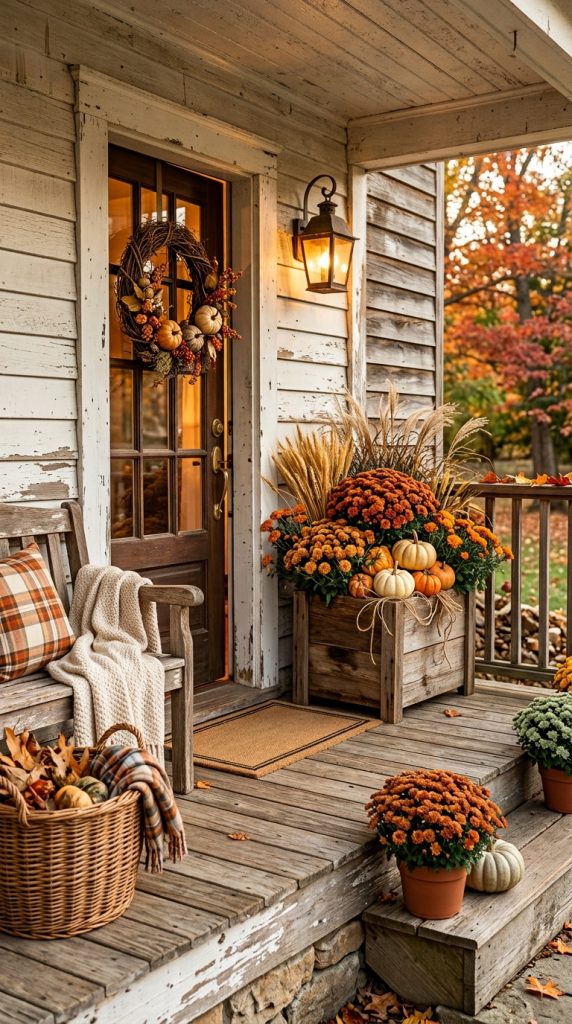
    5. DIY a Dollar Store Fall Wreath for Your Front Door
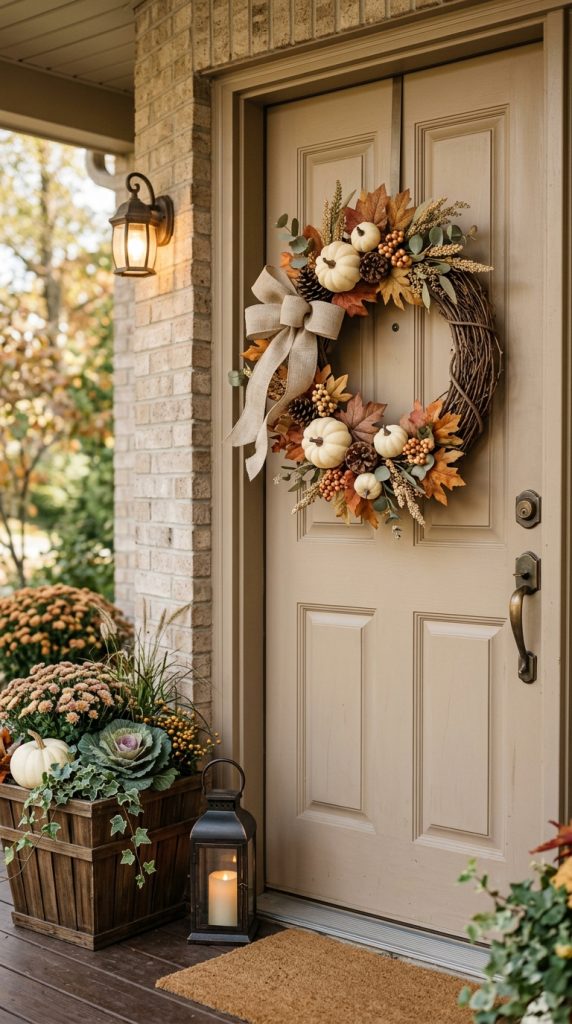
    A fall wreath instantly makes a home feel seasonal and welcoming. Fortunately, it is one of the easiest decorations to create using inexpensive dollar store materials.

    Start with a basic wreath form. Depending on what is available, you may find foam, grapevine-style, wire, or artificial greenery wreath bases.

    Add faux autumn leaves around the wreath. You do not need to cover every inch. A partially decorated wreath can actually look more modern and natural.

    Next, add a few small pumpkins, pinecones, berries, or faux autumn flowers.

    A large ribbon can become the finishing detail. Choose a wide ribbon in cream, rust, burgundy, brown, or muted plaid.

    Rather than creating a perfectly symmetrical wreath, arrange the decorations toward one side or along the lower portion of the wreath. This creates an elegant asymmetrical composition.

    For a modern neutral wreath, combine cream pumpkins with beige foliage and natural brown twigs.

    For a traditional fall wreath, combine muted orange pumpkins with rust leaves and warm brown ribbon.

    You can also create a minimalist wreath using only eucalyptus-style foliage, a few dried-looking stems, and one small wooden sign.

    When working with artificial materials, trim the stems carefully and bend them before attaching them. This helps the wreath look more natural instead of stiff.

    A simple wire, floral tape, or strong craft adhesive can help secure lightweight pieces.

    The wreath should be visible from a distance, so do not use too many tiny details.

    Materials You Can Use

    • Basic wreath form
    • Faux fall leaves
    • Mini pumpkins
    • Pinecones
    • Faux berries
    • Artificial flowers
    • Wide ribbon
    • Floral wire
    • Small wooden sign

    Budget Tip

    Buy a plain wreath base and reuse it for different seasons. After fall, remove the autumn pieces and transform the same base into a winter, spring, or summer wreath.

    This makes the project much more economical over time.

    6. Transform Dollar Store Baskets Into Rustic Fall Decor
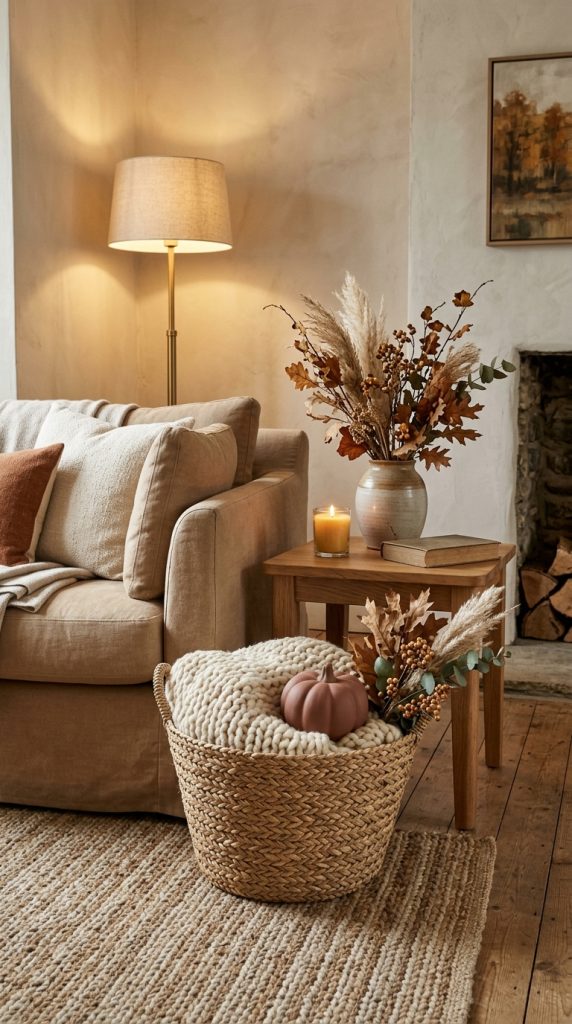
    Baskets are useful throughout the year, but they become particularly attractive during fall because their natural texture works beautifully with autumn colors.

    A simple dollar store basket can be transformed into a decorative fall container for pumpkins, blankets, pillows, foliage, or seasonal accessories.

    For a living room, place a basket beside the sofa and fill it with a soft cream or beige throw blanket. Add one small faux pumpkin on top or beside the basket.

    This creates a cozy corner without making the room feel overly decorated.

    You can also use a basket as a fall planter. Place a suitable faux plant or seasonal artificial arrangement inside it. If using a real plant, make sure the container protects the basket from water.

    For a dining area, use a shallow basket as a centerpiece. Add pumpkins, pinecones, faux foliage, and a small candle.

    Another option is to turn a basket into an entryway display. Place it beneath a console table and fill it with seasonal blankets, decorative pillows, or baskets within baskets for additional organization.

    If the basket color does not match your decor, you can sometimes change its appearance using paint or fabric.

    Burlap ribbon is another inexpensive way to personalize a basket.

    The combination of woven texture and warm fall colors makes this idea especially effective for farmhouse, rustic, cottage, and organic-modern homes.

    Materials You Can Use

    • Dollar store basket
    • Cream throw blanket
    • Faux pumpkins
    • Faux foliage
    • Pinecones
    • Ribbon
    • Decorative pillow
    • Small vase

    Styling Tip

    Do not fill the basket completely. A little negative space makes the arrangement look more relaxed and natural.

    A cream blanket casually folded over the edge can make a simple basket feel cozy and inviting.

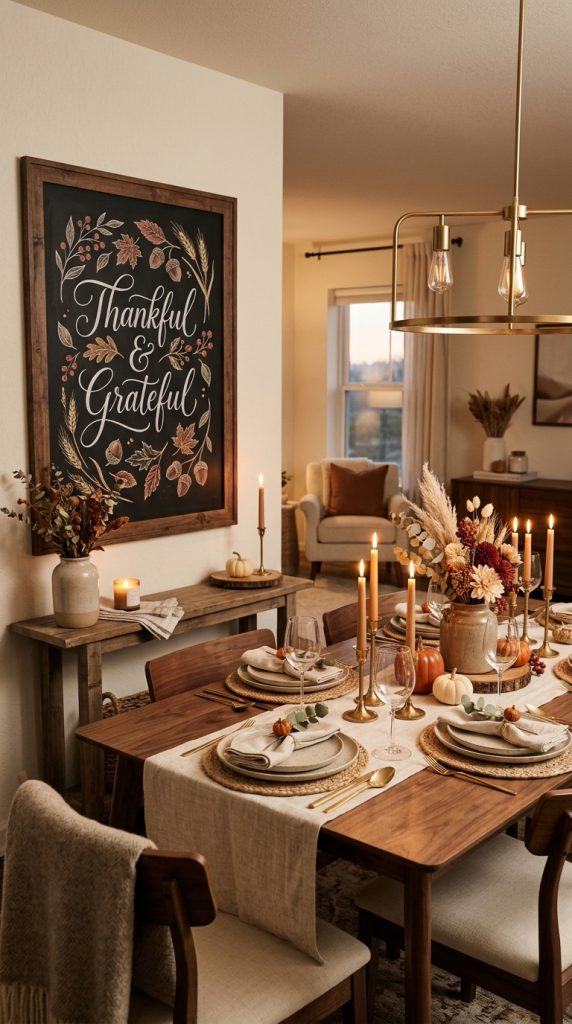
    7. Make a Budget Fall Table Centerpiece
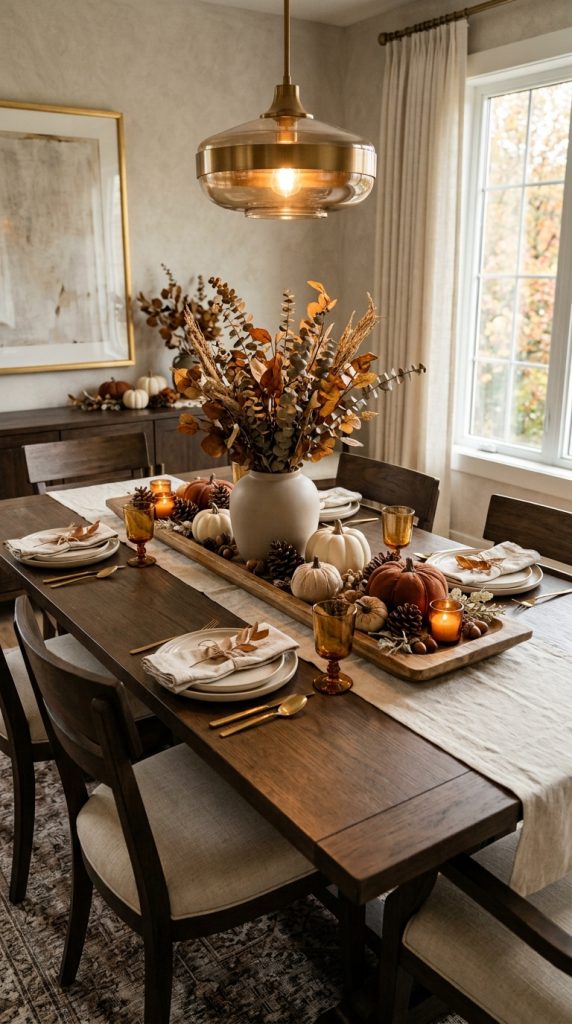
    You can create an attractive fall centerpiece for a dining table using only a handful of inexpensive supplies.

    Begin with a long tray, shallow basket, wooden board, or simple runner. This will create a visual foundation.

    Place a vase or jar in the center and fill it with faux autumn branches. If the branches are too tall, trim them so they sit naturally above the table.

    Surround the vase with pumpkins of different sizes. Cream and rust pumpkins create a sophisticated contrast.

    Add small candles between the pumpkins. Battery-operated candles are ideal if the centerpiece will remain on the table for extended periods.

    For additional texture, add pinecones and small pieces of faux foliage.

    You can also use a simple fall-colored ribbon around the vase.

    If your dining table is small, keep the centerpiece compact. A crowded centerpiece can make meals uncomfortable and make the entire dining room look cluttered.

    For larger tables, create a longer arrangement by repeating small clusters rather than making one enormous centerpiece.

    For example, use three small groups:

    • A vase and pumpkin cluster
    • A candle and pinecone cluster
    • A small pumpkin and foliage cluster

    The repeated elements create visual rhythm.

    Choose table linens that complement the arrangement. Cream or beige linen is especially versatile and allows the fall colors to stand out.

    Wooden chargers, neutral plates, and simple ceramic dishes can complete the look without requiring additional seasonal purchases.

    Materials You Can Use

    • Wooden tray
    • Faux branches
    • Glass jars
    • Mini pumpkins
    • Candles
    • Pinecones
    • Faux leaves
    • Neutral table runner
    • Ribbon

    Budget Tip

    Use everyday kitchen items as part of your centerpiece. A glass pitcher, ceramic bowl, cutting board, or serving tray can become a seasonal decorative element without costing anything extra.

    8. Decorate Your Fall Entryway for Less
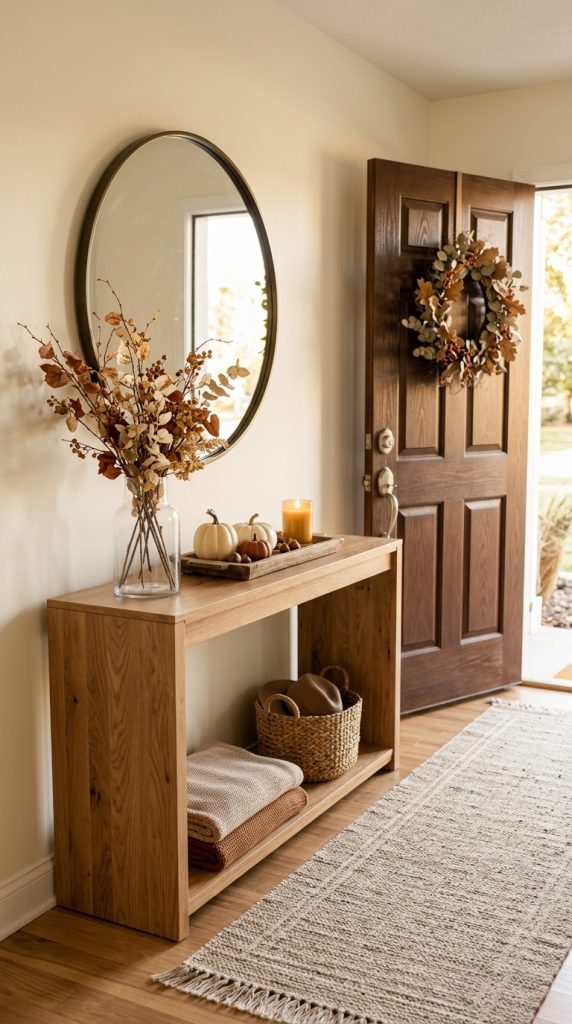
    The entryway is the first part of your home guests see, making it one of the most valuable places to add a small amount of seasonal decor.

    You do not need a large collection of decorations. A few well-placed dollar store items can create a warm and welcoming fall entrance.

    Start with a mirror or artwork as the main wall element. If you already have a mirror, simply decorate the surface underneath it.

    Place a small wooden tray or bowl on the entryway table. Add a few mini pumpkins, pinecones, or decorative acorns.

    A small vase filled with autumn stems can provide height.

    If you have an entryway bench, place a neutral cushion or folded blanket on it. Add a woven basket underneath for storage.

    A seasonal wreath on the front door can connect the outdoor entrance with the indoor decor.

    For a narrow entryway, avoid placing too many items on the console. One vase, three pumpkins, and a small candle may be enough.

    A runner rug in beige, brown, or muted rust can add warmth without introducing too much pattern.

    You can also add a small wooden fall sign, but keep the typography simple.

    Warm lighting can make a significant difference. A table lamp with a warm bulb or a small battery-operated lantern can make the entryway feel cozy during the evening.

    Materials You Can Use

    • Mini pumpkins
    • Glass vase
    • Faux fall stems
    • Wooden tray
    • Small candle
    • Woven basket
    • Neutral cushion
    • Fall wreath
    • Small wooden sign

    Styling Tip

    Keep the entryway functional. Seasonal decor should never make it difficult to place keys, shoes, bags, or other everyday items.

    The best entryway decor combines beauty with practicality.

    9. Create a Cozy Fall Bedroom With Small Budget Accents
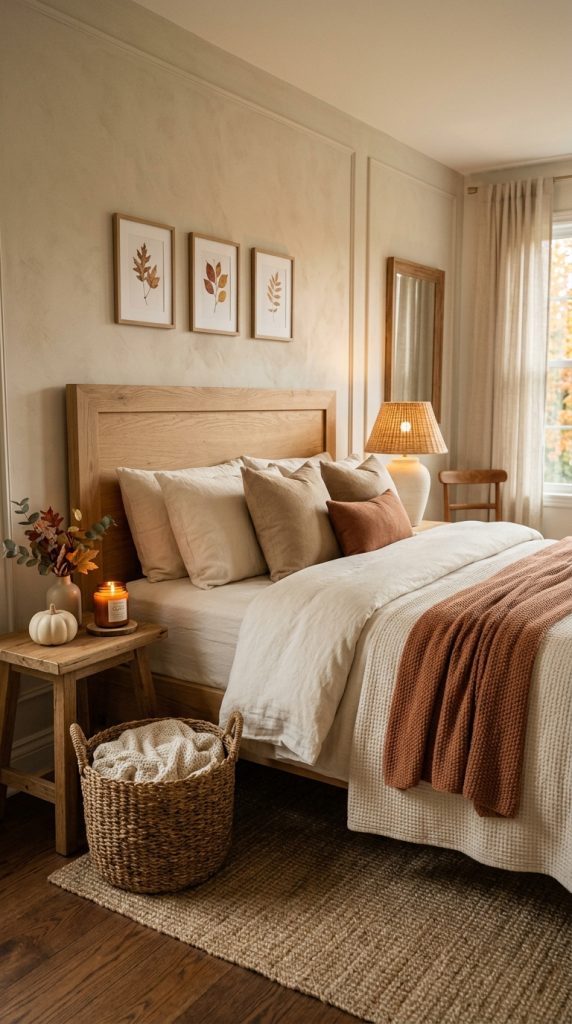
    Fall decorating does not have to stop in the living room. A few inexpensive changes can make a bedroom feel warmer and more comfortable for the season.

    Instead of purchasing a completely new bedding set, focus on small layers.

    Add a warm-colored throw blanket across the foot of the bed. Choose cream, caramel, rust, beige, warm brown, or muted burgundy.

    Add one or two decorative pillows in complementary textures.

    A dollar store basket can become a bedside storage accessory. Fill it with an extra blanket or pillow.

    For the nightstand, use a small glass jar with a battery-operated candle, a miniature pumpkin, or a small vase.

    You can also create a simple fall arrangement on a dresser. Use a small tray with a candle, ceramic container, faux leaves, and one decorative pumpkin.

    Keep the bedroom palette softer than the living room. Too many bright orange or red decorations can make a bedroom feel visually busy.

    Warm lighting is particularly effective in bedrooms. A bedside lamp with a warm bulb can create a relaxing evening atmosphere.

    If you have a mirror above the dresser, place a small seasonal arrangement beneath it.

    For an especially elegant bedroom, use cream bedding as the base and introduce fall colors through only a few accessories.

    This approach allows the room to feel seasonal without becoming overly themed.

    Materials You Can Use

    • Neutral throw blanket
    • Decorative pillow
    • Mini pumpkins
    • Small basket
    • Battery candle
    • Glass jar
    • Faux leaves
    • Small vase
    • Wooden tray

    Budget Tip

    Do not buy new bedding simply because the season has changed. Use your existing neutral bedding and change only the decorative layers.

    This can save a significant amount of money while still producing a completely different visual effect.

    10. Make Dollar Store Fall Decor Look Expensive

    The final idea is less about one particular craft and more about how you style all of your inexpensive fall decorations.

    Dollar store decor can look cheap when everything is displayed exactly as purchased. However, inexpensive pieces can look dramatically better when they are customized, grouped, layered, and coordinated.

    The first step is choosing a color palette.

    Instead of using bright orange, yellow, red, green, and purple together, select a controlled combination.

    For example:

    • Cream + warm brown + rust
    • Beige + burgundy + wood
    • White + muted orange + natural greenery
    • Caramel + cream + dark brown
    • Rust + ivory + brass-inspired accents

    Once you choose your palette, repeat those colors throughout the room.

    The second step is adding texture.

    Wood, glass, ceramic, linen, burlap, woven baskets, faux foliage, and soft textiles can make simple decorations feel more sophisticated.

    The third step is grouping.

    One pumpkin sitting alone on a table may look unfinished. Three pumpkins of different sizes placed beside a vase and candle can become a complete decorative vignette.

    The fourth step is varying height.

    Use books, trays, boxes, baskets, or risers to elevate certain objects.

    The fifth step is adding warm lighting.

    Warm lamps, candles, lanterns, and subtle string lights can completely change the appearance of inexpensive decorations.

    Lighting creates shadows and highlights textures, making simple materials appear more dimensional.

    Another important trick is to remove unnecessary packaging or overly bright decorative details. If a dollar store item looks too colorful or artificial, consider painting it.

    Matte finishes often look more sophisticated than glossy finishes.

    You can also replace inexpensive ribbons with higher-quality-looking fabric ribbon or natural twine.

    Do not underestimate the power of natural materials. A few real pinecones, branches, dried leaves, or small pieces of wood can make artificial decorations feel more grounded.

    Finally, remember that expensive-looking decor is rarely about having more. It is about having the right pieces in the right places.

    Materials You Can Use

    • Dollar store pumpkins
    • Paint
    • Wooden trays
    • Glass jars
    • Candles
    • Faux foliage
    • Baskets
    • Neutral ribbon
    • Pinecones
    • Wooden signs
    • Warm lighting
    • Existing home decor

    How to Make Dollar Store Fall Decor Look More Luxurious

    One of the biggest advantages of budget decorating is that you can experiment without worrying about damaging expensive pieces.

    Paint is one of the easiest ways to upgrade dollar store decor. Choose soft matte shades such as cream, beige, taupe, warm brown, terracotta, or muted rust.

    Avoid painting every object in a different color. Instead, create a coordinated collection.

    Another technique is layering.

    For example, rather than placing a pumpkin directly on a table, put it on a wooden tray. Add a vase behind it, a candle beside it, and a few pinecones around the base.

    This simple arrangement immediately feels more intentional.

    Scale is also important. Very tiny decorations can disappear in a large room. Combine small inexpensive objects with one larger existing item such as a mirror, vase, basket, lamp, or piece of artwork.

    You should also mix inexpensive seasonal pieces with everyday decor you already own.

    A dollar store pumpkin can look much more sophisticated beside a beautiful ceramic vase or wooden bowl you already have.

    This creates contrast between the seasonal and permanent elements.

    Best Fall Colors for Budget Decorating

    If you want your dollar store fall decor to look elegant, color selection matters.

    Cream is one of the most versatile colors because it softens traditional autumn shades.

    Warm brown adds depth and works beautifully with wood.

    Rust gives you the traditional autumn feeling without the brightness of intense orange.

    Burgundy adds richness and works particularly well in living rooms and dining rooms.

    Muted beige creates a calm neutral background.

    Warm terracotta can introduce color while still looking sophisticated.

    Natural green can be used in small amounts through foliage, but avoid overwhelming a fall display with bright artificial greenery.

    The most Pinterest-friendly combinations are usually warm, muted, and layered rather than extremely bright.

    Dollar Store Fall Decorating Mistakes to Avoid

    The first mistake is using too many decorations.

    When every shelf, table, wall, and corner is filled with seasonal objects, the room can quickly become visually overwhelming.

    The second mistake is mixing too many colors.

    Choose a palette and stay consistent.

    The third mistake is displaying everything exactly as purchased.

    Customization makes a huge difference. Paint, ribbon, baskets, trays, and small styling changes can transform inexpensive products.

    Another common mistake is ignoring lighting.

    Even beautiful decorations can look flat under harsh overhead lighting. Use warm lamps and soft candlelight to create atmosphere.

    Finally, do not sacrifice functionality.

    Decor should make your home more enjoyable, not make it difficult to walk around, sit down, eat, or use everyday surfaces.

    Final Thoughts on Dollar Store Fall Decor on a Budget

    Creating a beautiful fall home does not require a large decorating budget. With thoughtful styling, inexpensive dollar store finds can become charming seasonal accents that make your home feel warm, cozy, and welcoming.

    The most successful budget decorating approach is to focus on a few strong ideas rather than buying everything that catches your attention. A pumpkin display, warm candle arrangement, cozy coffee table tray, simple wreath, seasonal centerpiece, or decorated entryway can create a noticeable transformation without requiring a major investment.

    Choose a limited color palette, combine different textures, vary the height of your decorations, and add warm lighting whenever possible. These small details help inexpensive pieces look more intentional and sophisticated.

    Most importantly, make your fall decor work with the home you already have. Reuse trays, baskets, vases, books, blankets, and other everyday items. Mix dollar store decorations with pieces you already own. A few carefully selected seasonal accents can be enough to give your entire space a beautiful autumn atmosphere.

    With creativity and thoughtful styling, dollar store fall decor on a budget can look cozy, elegant, and completely Pinterest-worthyโ€”without making your wallet feel the difference.
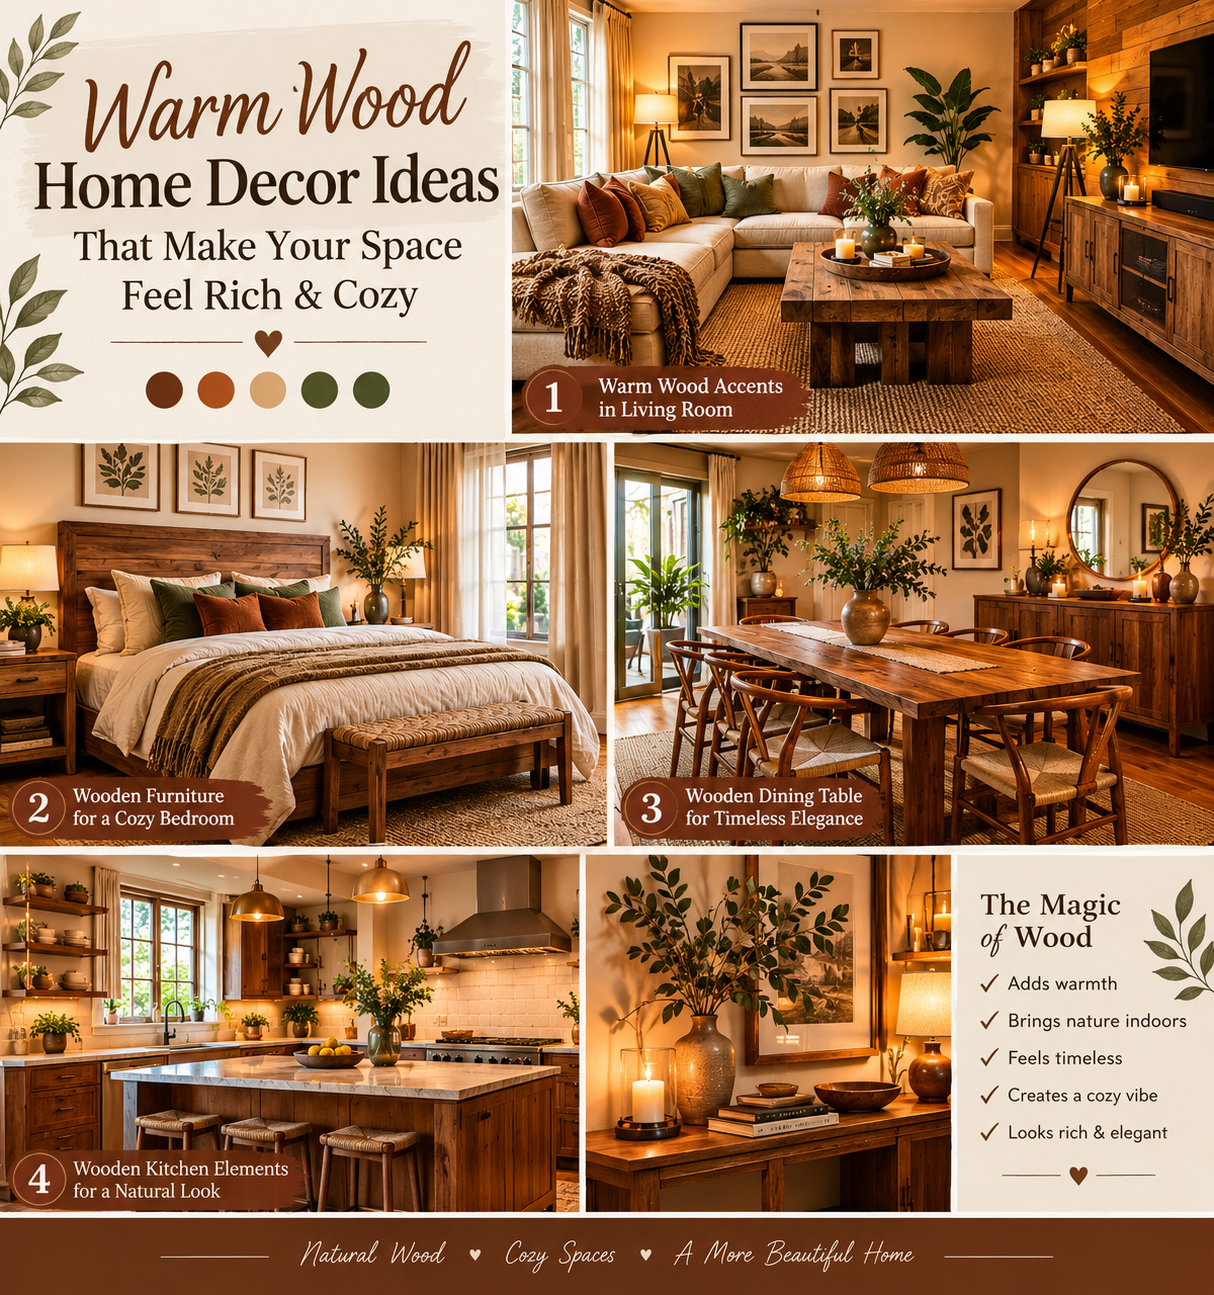
  • 15 Warm Wood Home Decor Ideas That Make Your Space Feel Rich & Cozy

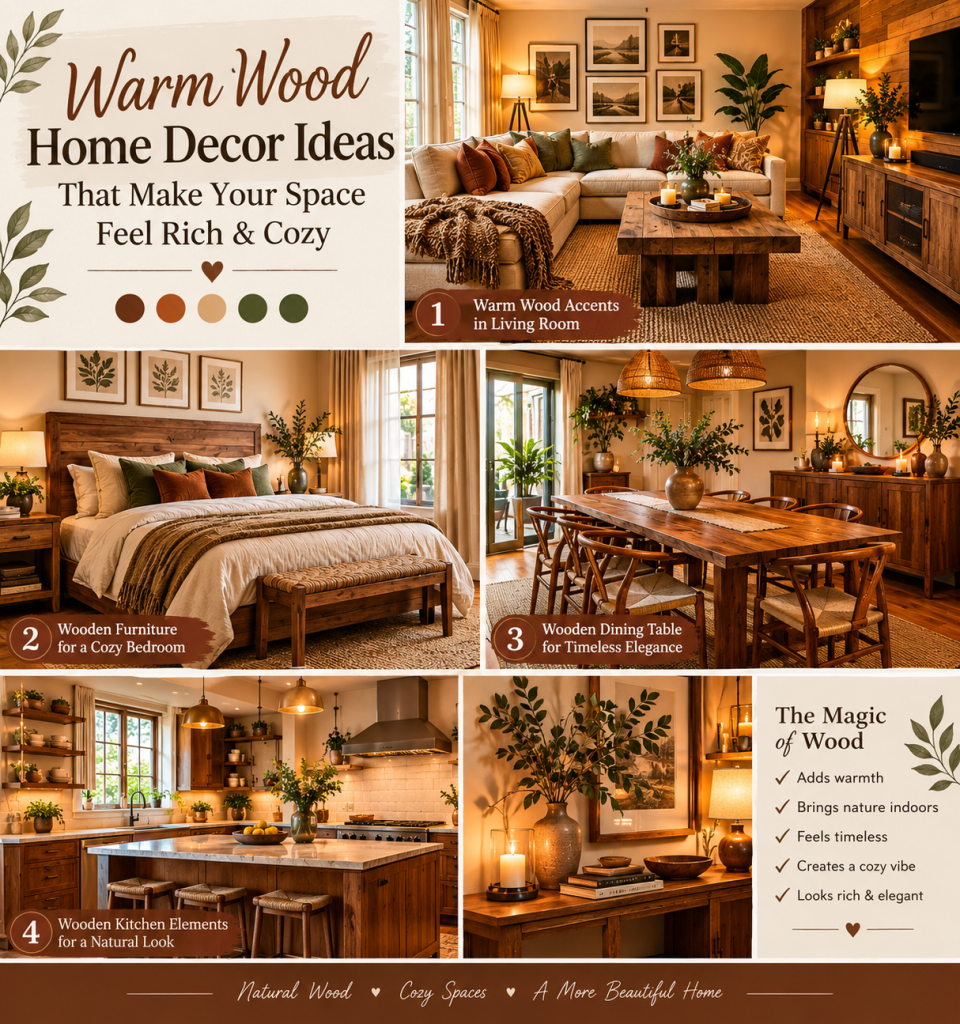
    15 Warm Wood Home Decor Ideas That Make Your Space Feel Rich & Cozy

    Warm wood has a special ability to make a home feel instantly more inviting. Whether it appears through a beautiful walnut coffee table, oak shelving, a wooden ceiling, a vintage cabinet, or a collection of smaller natural accessories, wood introduces warmth, texture, and character that can make even a simple room feel richer.

    In recent years, many interiors have moved away from extremely cold, stark, and overly minimalist spaces. Homeowners are increasingly looking for rooms that feel comfortable, natural, collected, and personal. Warm wood fits perfectly into this approach because it adds depth without requiring bright colors or excessive decoration.

    The beauty of warm wood is its versatility. It can look sophisticated in a luxury living room, relaxed in a farmhouse kitchen, earthy in an organic-modern bedroom, or dramatic in a traditional home library. It can also be paired with contemporary furniture, vintage accessories, natural stone, woven textures, linen, leather, greenery, and soft neutral colors.

    When used correctly, wood does more than simply provide a natural material. It becomes part of the emotional atmosphere of the room.

    A walnut table can make a living room feel grounded. Oak shelves can make a home office feel warm and approachable. Wooden cabinetry can give a kitchen a timeless quality. A carved wooden bench can make an entryway feel thoughtfully designed.

    However, adding wood does not mean filling every room with wooden furniture. Too much of the same wood tone can make a space feel heavy. The key is to create balance by combining different textures, finishes, fabrics, colors, and materials.

    Warm wood looks particularly beautiful alongside creamy whites, beige, taupe, camel, terracotta, olive green, charcoal, muted black, and soft brown. These colors allow the natural grain of the wood to remain the star while creating a comfortable, sophisticated palette.

    Texture is equally important. Pair smooth wood surfaces with boucle upholstery, linen curtains, woven baskets, wool rugs, ceramic accessories, stone surfaces, and soft throws. This contrast prevents the room from becoming visually flat.

    Lighting can also dramatically affect the appearance of wood. Warm evening illumination can bring out walnut, oak, and honey-colored finishes, making them appear deeper and more luxurious.

    Whether you are completely redesigning a room or simply looking for a few ways to make your existing home feel warmer, these fifteen warm wood decorating ideas offer practical ways to introduce richness and comfort without creating a cluttered appearance.

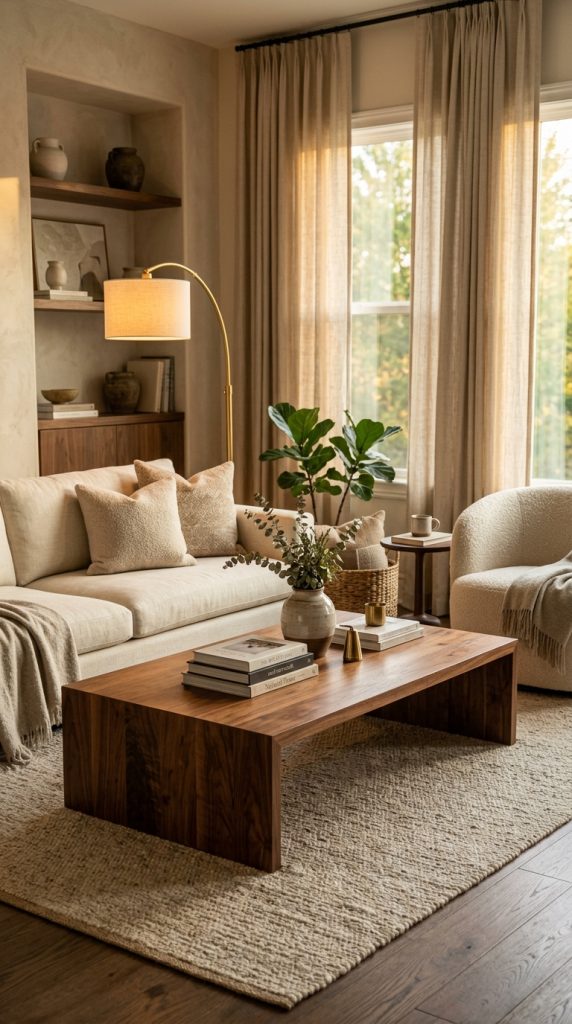
    1. Make a Warm Wood Coffee Table the Living Room Focal Point

    A beautiful wooden coffee table can completely change the character of a living room.

    Instead of choosing a table simply for function, select one with an interesting silhouette, visible grain, or sculptural shape. Walnut, oak, teak, and other warm-toned woods can create a strong natural focal point.

    Materials and Elements You Need

    • Warm wood coffee table
    • Cream or beige sofa
    • Neutral area rug
    • Decorative tray
    • Ceramic vase
    • Coffee-table books
    • Small plant
    • Textured cushions
    • Warm lighting

    Begin by choosing a coffee table that is proportional to your sofa and seating arrangement.

    A large living room can accommodate a substantial rectangular or oval table, while a smaller space may benefit from a compact round design.

    If the room already contains many straight lines, consider a round or organically shaped table to soften the appearance.

    Once the table is positioned, avoid covering the entire surface with accessories.

    Use a simple tray to group a few objects.

    For example, combine two coffee-table books with a ceramic vase and a small decorative bowl.

    The natural grain of the wood should remain visible.

    Pair the table with a soft cream sofa and a textured neutral rug. The contrast between the hard wooden surface and soft textiles creates an inviting atmosphere.

    Make the Wood Look More Luxurious

    Choose furniture with visible natural grain rather than a very glossy synthetic finish.

    A matte or satin finish often allows the material to look more natural and sophisticated.

    Add warm lighting nearby so the grain becomes more noticeable in the evening.

    A floor lamp positioned beside the sofa can create a soft pool of light across the table.

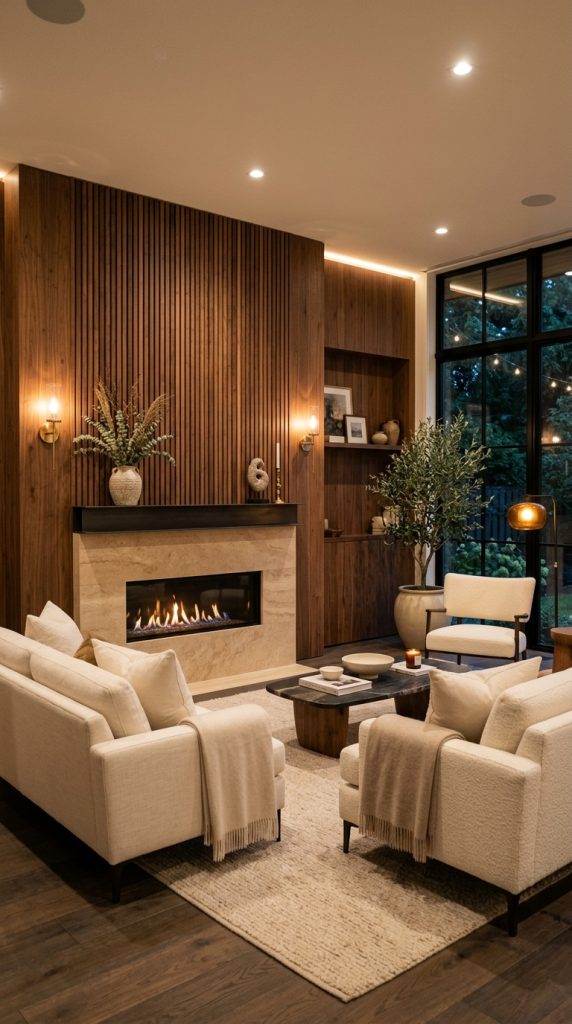
    2. Add Warm Wood Wall Paneling for Instant Character

    Wood wall paneling can make a room feel architectural, sophisticated, and cozy.

    It works particularly well behind a bed, television, fireplace, dining table, or home office desk.

    Materials and Elements You Need

    • Wood wall panels
    • Warm oak or walnut finish
    • Measuring tools
    • Appropriate installation materials
    • Neutral furniture
    • Wall lighting
    • Minimal artwork
    • Soft textiles

    Choose one wall rather than automatically covering the entire room.

    A single feature wall creates visual impact without making the space feel enclosed.

    Vertical wood slats can make ceilings appear taller, while horizontal paneling can visually emphasize the width of a room.

    For a modern home, simple vertical panels with narrow spacing can create a clean architectural appearance.

    For a more traditional environment, wider boards or reclaimed-looking wood can introduce character.

    Once the wall is installed, keep the surrounding furniture relatively simple.

    You do not need to cover the wood with artwork.

    Allow the grain and texture to become the primary feature.

    Cream upholstery, linen curtains, soft rugs, and muted accessories can prevent the wood from feeling too heavy.

    Add Lighting

    Wall sconces can emphasize the texture of wood paneling beautifully.

    Warm illumination creates subtle shadows between the panels, making the wall appear more dimensional.

    Always follow appropriate installation requirements and use suitable materials for your wall and electrical setup.

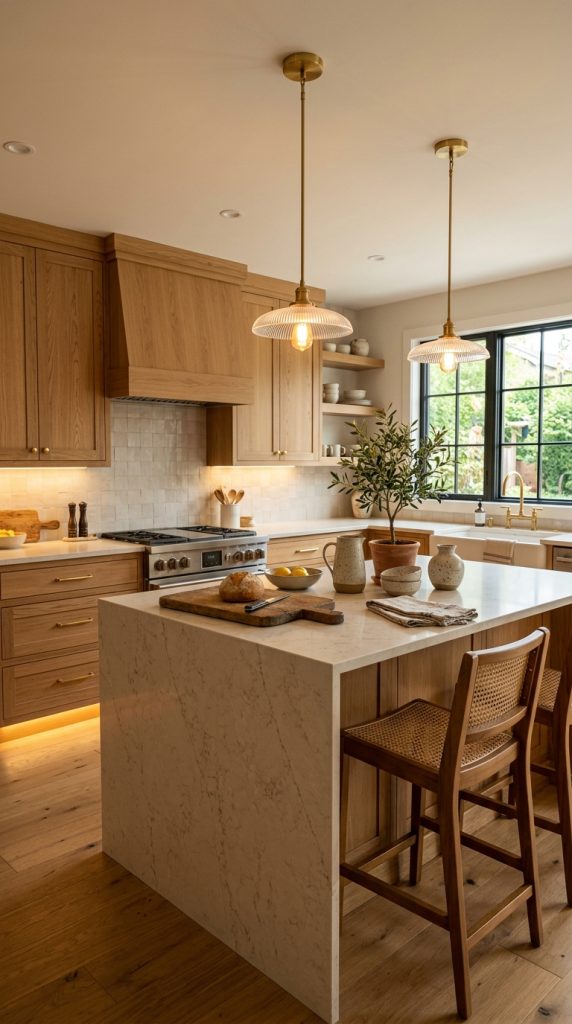
    3. Create a Warm Wood Kitchen With Natural Cabinets

    Warm wood cabinetry can give a kitchen an inviting and timeless appearance.

    Instead of relying entirely on white or gray cabinetry, introduce oak, walnut, or another warm wood finish.

    Materials and Elements You Need

    • Warm wood cabinets
    • Stone countertop
    • Neutral backsplash
    • Brass or matte hardware
    • Wooden cutting boards
    • Ceramic accessories
    • Natural textiles
    • Greenery
    • Warm pendant lights

    Start with the cabinetry because it will establish the room’s visual foundation.

    Light oak can create an airy Scandinavian or organic-modern kitchen.

    Walnut can create a deeper and more luxurious atmosphere.

    If full wood cabinetry feels too heavy, combine wood lower cabinets with light upper cabinets.

    Another option is to use wood on the kitchen island while keeping the perimeter cabinetry neutral.

    Natural stone countertops pair beautifully with wood because they introduce another organic texture.

    Choose hardware that complements the warmth of the cabinets. Aged brass, bronze, matte black, or understated metal finishes can all work.

    Add Simple Natural Decor

    Display wooden cutting boards against the backsplash.

    Add a ceramic bowl filled with fruit.

    Place a small plant near the window.

    Use linen kitchen towels instead of overly patterned textiles.

    These small additions reinforce the natural character without cluttering the counters.

    4. Use a Warm Wood Dining Table for a Cozy Gathering Space

    The dining table is one of the best places to introduce warm wood because it naturally becomes the social heart of a home.

    Materials and Elements You Need

    • Solid wood dining table
    • Upholstered or wooden dining chairs
    • Linen table runner
    • Ceramic dinnerware
    • Pendant light
    • Candles
    • Simple centerpiece
    • Natural centerpiece materials

    Choose a table with enough visual weight to anchor the room.

    A long farmhouse-style table can create a relaxed atmosphere, while a refined walnut table can feel more luxurious.

    The most important thing is to choose a finish that complements the rest of your home.

    Do not worry if the chairs do not match the table exactly.

    Mixing upholstered chairs with wooden chairs can create a more collected appearance.

    Style the Center

    Keep the dining table centerpiece relatively low.

    A ceramic vase filled with branches, dried foliage, or seasonal flowers can provide height without blocking conversation.

    Add a few candles for evening gatherings.

    A warm pendant light above the table can reinforce the wood’s natural color.

    The combination of wood, soft lighting, linen, and ceramics creates a dining room that feels welcoming rather than overly formal.

    5. Add Floating Wood Shelves for Warm Storage

    Floating shelves are an easy way to introduce warm wood without purchasing large pieces of furniture.

    They work in living rooms, kitchens, bathrooms, bedrooms, and home offices.

    Materials and Elements You Need

    • Wood floating shelves
    • Wall brackets or appropriate mounting system
    • Books
    • Ceramic objects
    • Small plants
    • Framed artwork
    • Baskets
    • Decorative bowls

    Choose shelves in a finish that complements existing furniture.

    Walnut works beautifully with cream and darker interiors.

    Oak is excellent for lighter spaces.

    Install the shelves at appropriate heights and ensure they are properly secured to support their intended load.

    Style Them Carefully

    Avoid filling every inch.

    Arrange books vertically in one section and horizontally in another.

    Add a ceramic vase beside one group.

    Place a small plant on another shelf.

    Leave some negative space.

    The empty areas are important because they allow the wood itself to remain visible.

    Why This Works

    Floating shelves provide useful storage while also creating warmth.

    They are particularly effective in minimalist homes where large furniture pieces might make the room feel crowded.

    6. Pair Warm Wood With Cream and Beige Textiles

    One of the easiest ways to make wood furniture feel luxurious is to surround it with soft neutral fabrics.

    Materials and Elements You Need

    • Cream sofa
    • Beige cushions
    • Linen curtains
    • Textured rug
    • Wool throw
    • Warm wood furniture
    • Boucle chair
    • Neutral artwork

    Wood can sometimes feel visually hard.

    Cream and beige fabrics soften it immediately.

    Imagine a walnut coffee table surrounded by a cream linen sofa, beige boucle chair, ivory rug, and soft linen curtains.

    The contrast creates a warm and sophisticated atmosphere.

    Layer the Textures

    Do not use exactly the same fabric everywhere.

    Combine linen with boucle.

    Combine wool with cotton.

    Combine smooth upholstery with woven baskets.

    The different textures create depth while keeping the color palette calm.

    Keep the Palette Cohesive

    Choose several neutral shades rather than one exact beige.

    Cream, ivory, oatmeal, taupe, camel, and warm gray can create subtle variation.

    This allows the wood to remain the strongest natural element in the room.

    7. Create a Warm Wood Bedroom With a Statement Headboard

    A wooden bed or statement headboard can make a bedroom feel grounded and luxurious.

    Materials and Elements You Need

    • Wooden headboard
    • Warm wood nightstands
    • Cream bedding
    • Linen duvet
    • Soft pillows
    • Bedside lamps
    • Neutral rug
    • Artwork
    • Small greenery

    Choose a headboard with enough visual presence to anchor the bed.

    A fluted wood headboard can create a contemporary appearance.

    A carved wood headboard can introduce traditional or handcrafted character.

    A simple oak panel can work beautifully in an organic-modern bedroom.

    Keep the bedding soft and neutral.

    Cream, oatmeal, beige, white, and warm gray are excellent companions to wood.

    Add bedside tables in a similar or slightly contrasting finish.

    Use Warm Lighting

    Place warm lamps on each nightstand.

    The combination of warm light and wood creates a particularly relaxing evening atmosphere.

    Avoid making the room too dark by balancing the deeper wood with light bedding and curtains.

    8. Add a Wooden Bench to the Entryway

    A wooden bench is both practical and decorative.

    It gives you somewhere to sit while putting on shoes while also introducing warmth to the entryway.

    Materials and Elements You Need

    • Wooden bench
    • Cushion
    • Woven basket
    • Mirror
    • Wall hooks
    • Runner rug
    • Small plant
    • Decorative bowl

    Choose a bench with a simple silhouette.

    Oak, walnut, teak, or reclaimed-looking wood can all work depending on your interior style.

    Add a thin upholstered cushion if you want extra comfort.

    Place baskets underneath for shoes, scarves, or other everyday items.

    Above the bench, install a mirror.

    The combination of mirror and wood creates an attractive focal point while also making the entryway feel brighter.

    Keep the Surface Simple

    Do not turn the bench into a storage pile.

    Instead, use one basket, one cushion, and perhaps a folded throw.

    The result should look organized and intentional.

    9. Mix Different Wood Tones Without Making the Room Feel Messy

    Using more than one wood finish can make an interior feel collected and sophisticated.

    The trick is to create relationships between the tones rather than choosing completely unrelated finishes.

    Materials and Elements You Need

    • Walnut furniture
    • Oak accessories
    • Medium-tone wood flooring
    • Wooden frames
    • Woven accessories
    • Neutral upholstery

    For example, you might combine a walnut coffee table with an oak bookshelf.

    The two finishes do not need to match exactly.

    Instead, repeat each tone at least twice.

    If you have a walnut table, introduce another walnut or dark-brown detail somewhere else.

    If you use light oak shelving, repeat that lighter wood through a frame or decorative object.

    Use Textiles to Connect Everything

    Neutral fabrics act as a visual bridge between different wood tones.

    Cream upholstery, beige rugs, linen curtains, and warm brown accessories can help the finishes feel intentional.

    Avoid Too Many Similar Pieces

    Three or four wood tones in one small room may become distracting.

    Keep the dominant wood finish clear and use other tones as supporting accents.

    10. Add a Warm Wooden Ceiling Detail

    Wood on the ceiling can create an unforgettable architectural feature.

    It is especially effective in bedrooms, living rooms, dining rooms, and rooms with high ceilings.

    Materials and Elements You Need

    • Wood ceiling boards or beams
    • Appropriate installation system
    • Neutral wall color
    • Simple furniture
    • Warm lighting
    • Natural textiles

    If a full wood ceiling feels too dramatic, use exposed beams instead.

    Wood beams can add character while allowing the ceiling itself to remain light.

    For a more contemporary design, narrow wood slats can create a modern architectural pattern.

    Balance the Room

    When the ceiling becomes a major feature, keep the walls and furniture relatively restrained.

    Use cream, white, beige, or warm gray walls.

    Avoid introducing too many competing patterns.

    The ceiling should remain the visual centerpiece.

    Lighting Matters

    Warm recessed lighting or carefully positioned fixtures can highlight the wood texture.

    The goal is to make the ceiling feel intentional rather than simply darker than the walls.

    11. Style a Warm Wood Home Office

    A wooden desk can make a home office feel more established, comfortable, and sophisticated.

    Materials and Elements You Need

    • Wooden desk
    • Comfortable upholstered chair
    • Wooden shelves
    • Desk lamp
    • Neutral rug
    • Storage baskets
    • Books
    • Green plant
    • Ceramic accessories

    Choose a desk with a substantial but manageable surface.

    Walnut can create a rich executive atmosphere.

    Oak can produce a lighter and more relaxed workspace.

    Place the desk near a window if possible to benefit from natural daylight.

    Add a comfortable chair in cream, camel, tan, or muted brown.

    Use floating shelves or a compact bookcase for storage.

    Keep office accessories organized in boxes, trays, or baskets.

    Make It Feel Less Corporate

    Add a plant.

    Display a few favorite books.

    Use ceramic containers instead of plastic organizers where practical.

    Include one piece of artwork.

    These small details can make your office feel like part of your home rather than a separate workplace.

    12. Combine Warm Wood With Natural Stone

    Wood and stone are both natural materials, so they often complement each other beautifully.

    Materials and Elements You Need

    • Warm wood furniture
    • Natural stone
    • Marble or travertine accessory
    • Neutral rug
    • Ceramic objects
    • Linen textiles
    • Greenery
    • Warm lighting

    A walnut table beside a travertine lamp creates an elegant contrast.

    Oak cabinetry paired with natural stone countertops can create a sophisticated kitchen.

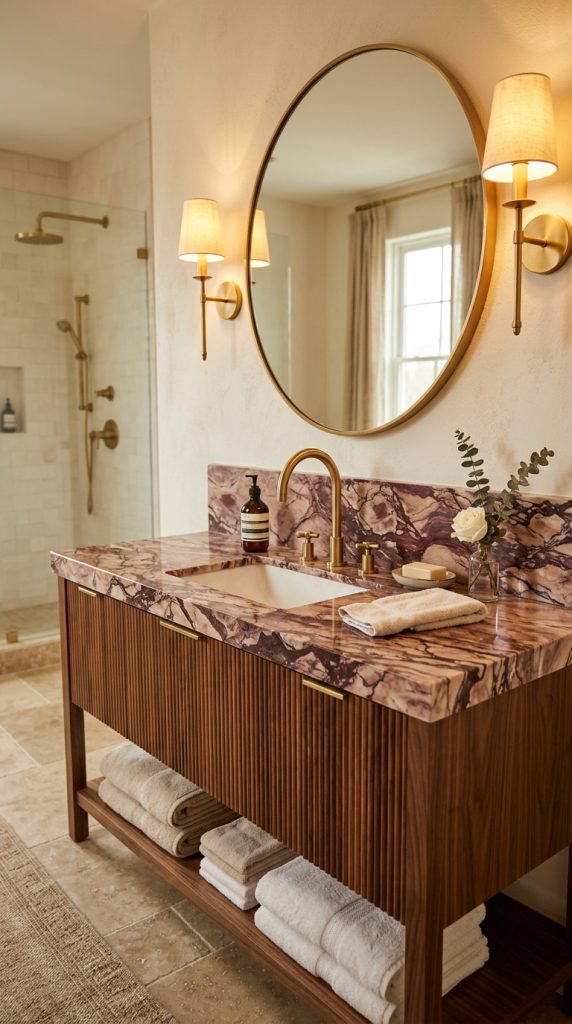
    A wooden vanity combined with stone surfaces can make a bathroom feel like a luxury retreat.

    Focus on Contrast

    Wood provides warmth and visual grain.

    Stone provides coolness, weight, and subtle variation.

    Together they create balance.

    If the wood is dark, consider lighter stone.

    If the wood is pale, a warmer or darker stone can add contrast.

    Keep Other Materials Simple

    Because both wood and stone have strong natural character, you do not need dozens of decorative materials.

    Use linen, ceramics, and greenery as supporting elements.

    13. Use Vintage Wooden Furniture for Character

    Vintage wooden furniture can add personality that new furniture sometimes lacks.

    An old wooden cabinet, antique console, writing desk, or carved bench can become a beautiful focal point.

    Materials and Elements You Need

    • Vintage wooden furniture
    • Neutral wall color
    • Modern lamp
    • Ceramic accessories
    • Artwork
    • Books
    • Greenery
    • Textured rug

    Look for pieces with interesting grain, carved details, aged finishes, or traditional craftsmanship.

    You do not need to create a completely vintage room.

    In fact, combining one older wooden piece with contemporary furniture often creates a more sophisticated result.

    For example, place an antique wooden console beneath a modern oversized mirror.

    Or combine a vintage wooden cabinet with a contemporary cream sofa.

    Do Not Over-Restore the Character

    Small imperfections can contribute to the charm.

    Scratches, subtle color variation, and visible grain can make a wooden piece feel authentic.

    If restoration is needed, prioritize preserving the piece’s character while making sure it is structurally sound and safe to use.

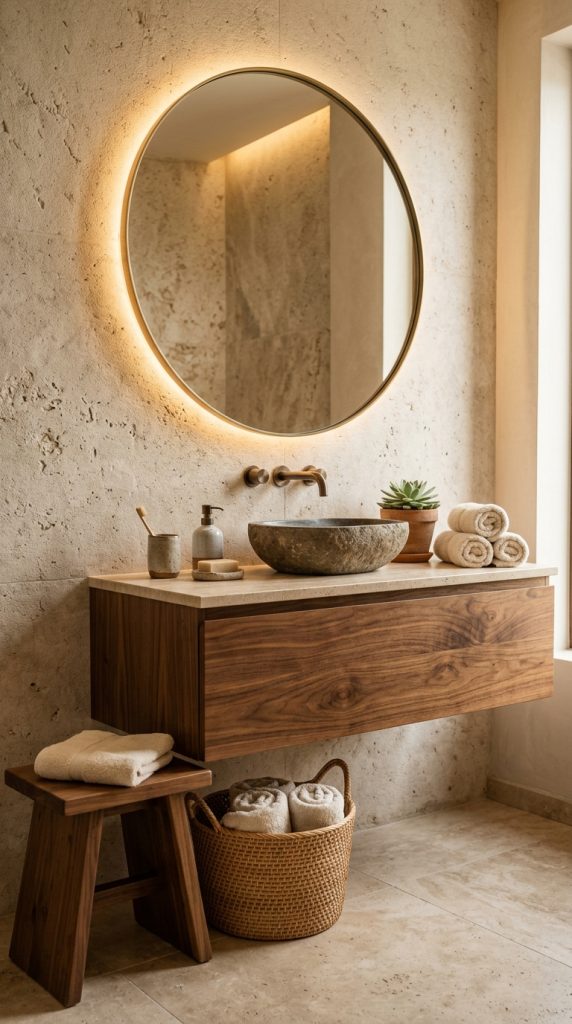
    14. Bring Warm Wood Into the Bathroom

    Wood can make a bathroom feel warmer and more spa-like.

    Materials and Elements You Need

    • Wood vanity
    • Natural stone or tile
    • Warm mirror lighting
    • Wooden stool
    • Woven basket
    • Neutral towels
    • Ceramic accessories
    • Small plant

    A warm wood vanity can immediately soften a bathroom dominated by hard tile and stone.

    Choose moisture-appropriate materials and finishes designed for bathroom use.

    Pair the vanity with cream, beige, stone, or softly patterned tile.

    A backlit mirror can add another layer of warmth.

    Use wooden accessories sparingly.

    A small stool or tray may be enough.

    Add Natural Textures

    Place folded neutral towels in a woven basket.

    Add a ceramic soap dispenser.

    Introduce a small plant that is appropriate for the bathroom’s light and humidity.

    The combination of wood, stone, soft textiles, and greenery can create a peaceful spa-inspired atmosphere.

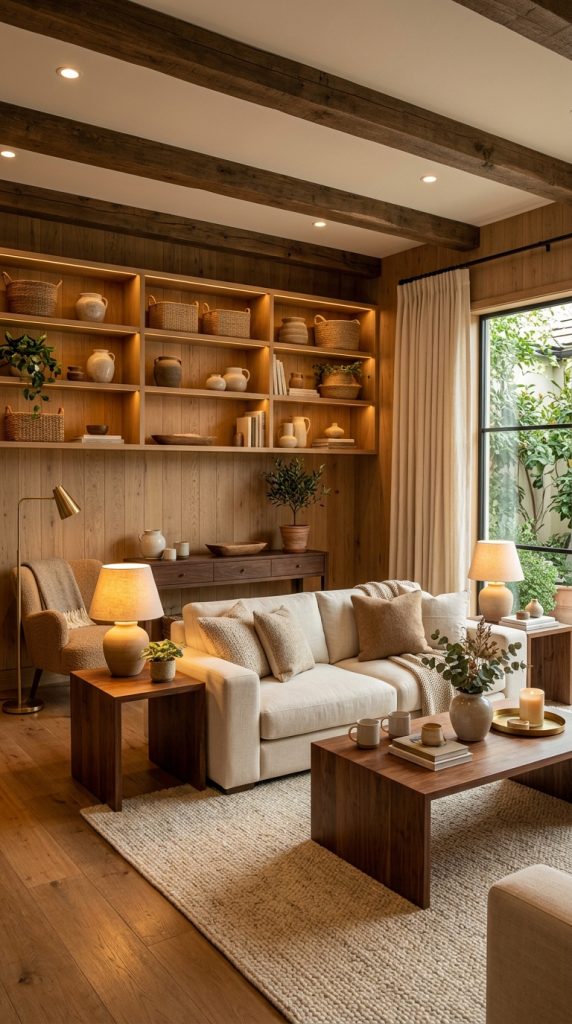
    15. Create a Rich and Cozy Wood-Layered Living Room

    For the ultimate warm wood interior, combine several wooden elements throughout one living room while keeping the rest of the design soft and balanced.

    Materials and Elements You Need

    • Warm wood coffee table
    • Wooden side tables
    • Wood console
    • Neutral sofa
    • Textured accent chair
    • Wooden shelving
    • Natural rug
    • Woven baskets
    • Ceramic accessories
    • Green plants
    • Warm lamps
    • Soft curtains

    Begin with one dominant wood tone.

    Walnut is excellent if you want a rich, luxurious appearance.

    Oak creates a lighter organic feeling.

    Then introduce smaller wooden elements throughout the room.

    A coffee table can anchor the seating arrangement.

    A wooden console can sit behind the sofa.

    A small side table can provide another layer.

    Wooden shelves can introduce vertical warmth.

    Soften Everything With Textiles

    Use a cream or oatmeal sofa.

    Add textured cushions in beige, camel, olive, or rust.

    Place a large woven or wool rug beneath the furniture.

    Add linen curtains to soften the windows.

    The room should feel warm but not heavy.

    Add Greenery

    Plants create a natural connection between the wooden furniture and the rest of the room.

    Choose a few larger plants rather than many tiny ones.

    A large leafy plant beside a wooden console can become a beautiful focal point.

    Finish With Warm Lighting

    Use multiple light sources.

    A floor lamp beside the sofa, table lamp on a console, and warm ceiling fixture can create a layered evening atmosphere.

    Avoid relying entirely on bright overhead lighting.

    The glow of warm lamps across natural wood surfaces can make the entire room feel richer and more inviting.

    How to Make Warm Wood Decor Look Expensive

    You do not necessarily need expensive furniture to create a luxurious appearance.

    Start with proportion.

    A few appropriately sized pieces often look more sophisticated than many small objects.

    Next, focus on texture.

    Wood becomes more luxurious when paired with linen, wool, boucle, leather, stone, and ceramics.

    Avoid overly shiny finishes if you want an organic, high-end appearance.

    Matte and natural-looking surfaces tend to emphasize the material’s character.

    Lighting is another major factor.

    Warm illumination can bring out the grain and depth of wooden furniture.

    Finally, keep the room edited.

    Luxury is often communicated through restraint.

    Allow your best wooden pieces to stand out.

    How to Decorate With Wood Without Making Your Home Feel Dark

    Dark wood can create a rich atmosphere, but too much of it can make a room feel visually heavy.

    Balance it with lighter surfaces.

    Use cream walls, light rugs, soft upholstery, linen curtains, and pale accessories.

    Introduce greenery for contrast.

    Mirrors can also help reflect light around the room.

    If your furniture is predominantly walnut or dark brown, avoid using dark finishes on every other surface.

    Let the wood become the grounding element while lighter colors provide visual relief.

    How to Mix Modern and Rustic Wood Decor

    You do not have to choose between modern and rustic design.

    A sophisticated home can combine both.

    Pair a clean-lined walnut coffee table with a vintage wooden stool.

    Combine modern oak shelving with an antique wooden cabinet.

    Place contemporary cream furniture around a rustic dining table.

    The key is to repeat materials and colors so the different styles feel connected.

    Modern furniture provides simplicity.

    Rustic pieces provide character.

    Together, they can create a home that feels collected rather than overly coordinated.

    How to Use Warm Wood in a Neutral Home

    Neutral interiors sometimes become too flat when every surface is the same color.

    Wood provides the texture and contrast needed to create depth.

    For a beige living room, add a walnut coffee table.

    For an all-white kitchen, introduce oak shelving or a wood island.

    For a cream bedroom, choose a natural wood bed.

    For a neutral entryway, use a wooden bench and mirror.

    The wood does not need to be dramatic.

    Even a few carefully selected pieces can completely change the feeling of the room.

    Final Thoughts

    Warm wood is one of the easiest materials to use when you want your home to feel richer, cozier, and more connected to nature.

    From statement furniture and architectural wall paneling to small shelves, vintage accessories, kitchen cabinetry, and bedroom details, there are countless ways to introduce it.

    The secret is balance.

    Let wood provide warmth while soft textiles provide comfort. Use stone and ceramics for contrast. Add greenery for freshness. Introduce neutral colors to keep the room calm. Then use warm lighting to bring everything together in the evening.

    You also do not need every wooden piece to match perfectly.

    A home can feel more interesting when different wood tones are carefully layered.

    Choose one dominant finish, repeat it throughout the room, and introduce contrasting tones in smaller amounts.

    Most importantly, choose pieces that you genuinely enjoy.

    A beautiful wooden table, an inherited cabinet, a handcrafted shelf, or a vintage bench can give your home a sense of character that goes far beyond following a decorating trend.

    Whether your style is modern, organic, traditional, rustic, Scandinavian, or luxury-inspired, warm wood can become the foundation for a home that feels welcoming and timeless.

    The result should not look overly decorated.

    It should feel rich, warm, natural, comfortable, and lived-inโ€”the kind of space where you naturally want to slow down, relax, and stay awhile.


  • 10 Classy Halloween Decorating Ideas for Home

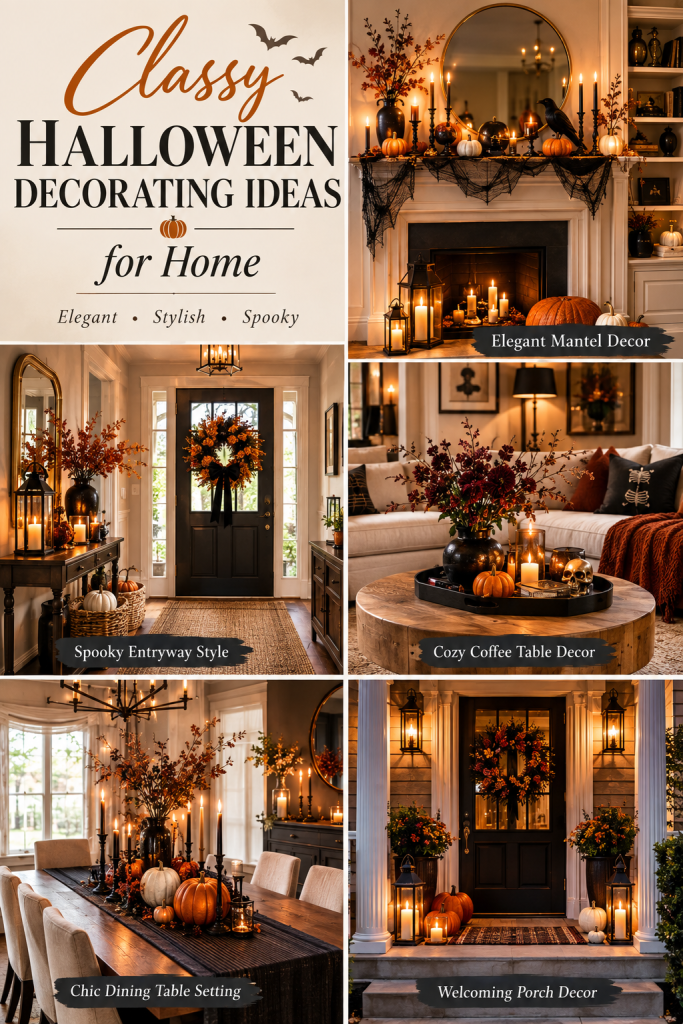
    10 Classy Halloween Decorating Ideas for Home

    Halloween decorating does not have to mean plastic skeletons, frightening faces, bright orange decorations, or a house covered from floor to ceiling in spooky accessories. If you prefer an elegant and sophisticated home, you can celebrate Halloween with decor that feels atmospheric, stylish, warm, and beautifully coordinated with your existing interior.

    Classy Halloween decorating is all about creating a subtle sense of mystery while maintaining a polished appearance. Instead of decorating every surface, focus on a few carefully chosen areas and use sophisticated colors, natural textures, vintage-inspired accessories, moody lighting, and seasonal details.

    A beautiful Halloween home can combine black taper candles with antique brass candlesticks, dark florals with cream pumpkins, velvet ribbons with vintage books, or matte black accessories with warm wood furniture. These combinations create a sophisticated seasonal atmosphere without making your home feel like a Halloween store.

    Color plays an especially important role. Traditional orange can certainly be included, but elegant Halloween decorating often relies on deeper and more muted shades. Think charcoal black, warm ivory, creamy white, espresso brown, deep burgundy, muted rust, antique gold, dusty green, and dark plum. These colors blend naturally with many home interiors and allow Halloween decorations to feel intentional rather than temporary.

    Texture is equally important. Velvet, linen, aged wood, ceramic, stone, brass, dried flowers, woven baskets, and natural branches can give seasonal decorations a luxurious appearance. Even simple pumpkins can look sophisticated when displayed in an attractive bowl or arranged with greenery and candlelight.

    Lighting can completely transform the atmosphere. During the day, your decorations may look simple and understated. In the evening, warm lamps, candles, lanterns, and soft accent lighting can make the same room feel dramatically more atmospheric.

    The secret to classy Halloween decor is editing. You do not need dozens of decorations. A beautiful centerpiece, an elegant mantel, a styled entryway, or a sophisticated front porch can have a stronger visual impact than an entire house filled with random seasonal objects.

    These ten classy Halloween decorating ideas are designed to help you create a home that feels festive without sacrificing elegance. Whether your style is modern, traditional, vintage, farmhouse, organic, or luxury-inspired, you can adapt these ideas to create a Halloween atmosphere that feels uniquely yours.

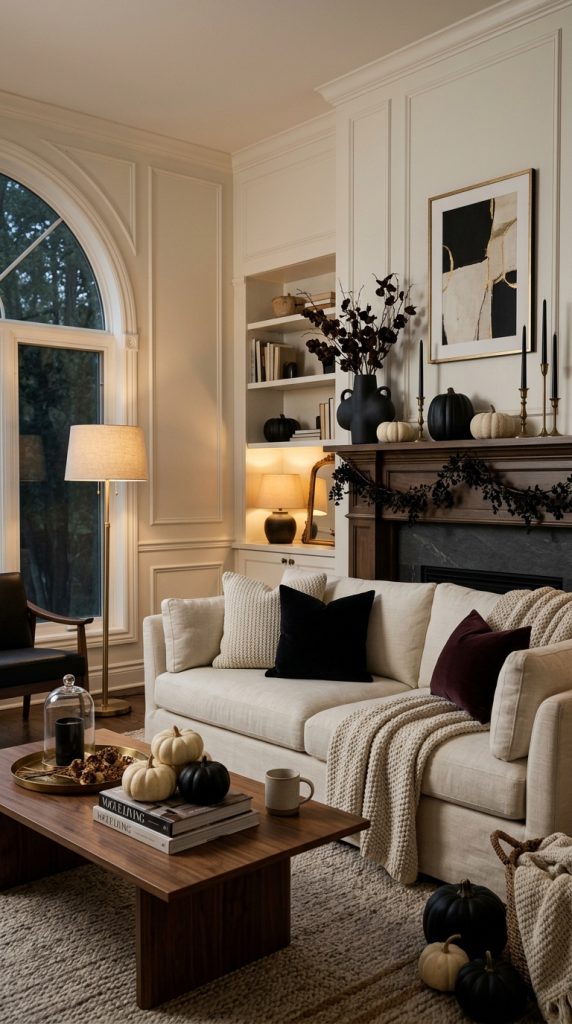
    1. Create an Elegant Black and Cream Halloween Color Palette

    One of the easiest ways to make Halloween decor look sophisticated is to replace the traditional bright orange-and-black combination with a softer black-and-cream palette.

    Materials and Elements You Need

    • Cream or ivory pumpkins
    • Matte black pumpkins
    • Black taper candles
    • Cream candles
    • Black ceramic vessels
    • Neutral throw pillows
    • Ivory textiles
    • Dark floral branches
    • Antique brass accessories
    • Black picture frames
    • Natural wood accents

    Start by choosing two or three primary colors for your seasonal decorating scheme.

    Black and cream make an especially elegant combination because the contrast is dramatic without feeling childish. You can then introduce a small amount of brown, brass, muted rust, or burgundy for warmth.

    Begin in a prominent area such as the living room console, fireplace mantel, dining table, or entryway.

    Arrange several cream pumpkins alongside a few matte black pumpkins. Avoid placing too many objects in a straight line. Instead, create groups with different heights.

    For example, place a larger cream pumpkin at the back, a smaller black pumpkin in front, and a tall candleholder beside them.

    Add dark foliage or dried branches to introduce height.

    If your furniture is already neutral, this color scheme will blend beautifully without requiring major changes.

    Why This Looks Classy

    The key is restraint.

    Rather than covering the room with Halloween symbols, use the colors associated with Halloween in a more sophisticated way.

    Matte black accessories can look architectural and modern. Cream pumpkins can feel almost sculptural. Brass details introduce warmth, while natural wood prevents the palette from becoming too stark.

    This approach works particularly well in modern, organic-modern, traditional, and minimalist homes.

    Styling Tip

    Repeat the same color combination throughout the room.

    If your console has black and cream decorations, repeat those colors on the coffee table or mantel.

    This creates visual consistency and makes the entire space look professionally styled.

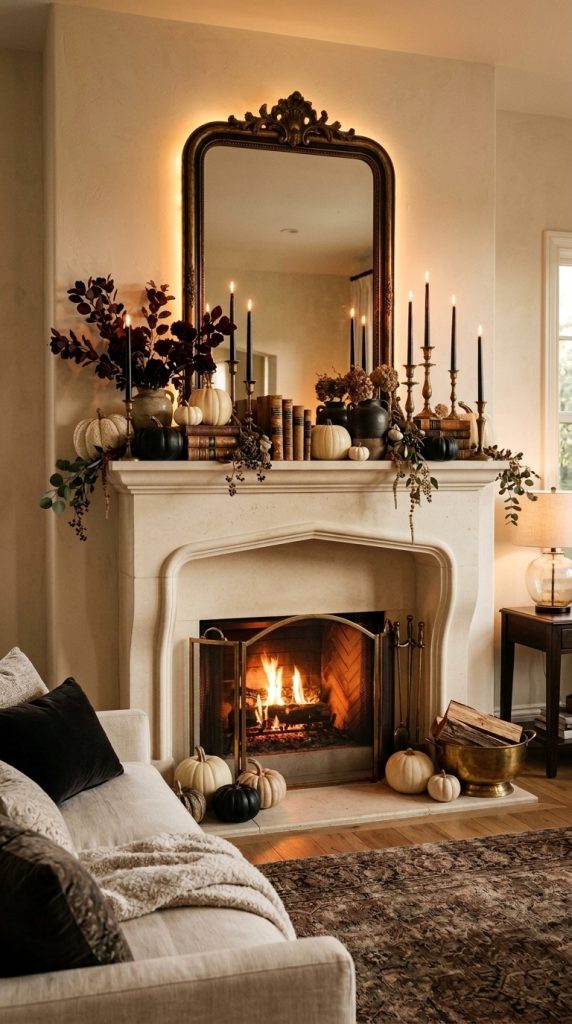
    2. Style a Sophisticated Halloween Fireplace Mantel

    The fireplace mantel is one of the best places to create an elegant Halloween focal point because it naturally draws attention.

    Materials and Elements You Need

    • Black taper candles
    • Brass candlesticks
    • Cream pumpkins
    • Dark pumpkins
    • Vintage-style frames
    • Dried branches
    • Dark florals
    • Garland
    • Vintage books
    • Small ceramic objects
    • Warm accent lighting

    Begin with a relatively simple foundation.

    If your mantel is already decorated with artwork or a mirror, do not remove everything. Instead, incorporate seasonal elements around your existing pieces.

    Place tall candlesticks toward one side of the mantel and balance them with a group of pumpkins on the opposite side.

    Use different heights to create movement.

    A tall vase filled with dark branches can provide vertical structure.

    Then place smaller pumpkins, vintage books, and ceramic accessories around the base.

    If you have a mirror above the mantel, warm candlelight reflected in the glass can create a beautiful evening effect.

    For a more dramatic look, choose deep burgundy flowers, dried hydrangeas, black foliage, or branches with an aged appearance.

    Avoid Overdecorating

    A classy mantel should have breathing room.

    One of the biggest mistakes with seasonal decorating is filling every inch of the mantel.

    Instead, allow portions of the surface to remain visible.

    Negative space makes decorative objects feel more intentional and expensive.

    Add Candlelight

    Candles are especially effective for Halloween because they naturally create an atmospheric mood.

    Use several candles at different heights rather than placing identical candles in a straight row.

    For safety, keep open flames away from curtains, dried materials, children, pets, and other flammable objects. Flameless candles can provide a similar atmosphere when open flames are not practical.

    The Final Look

    The finished mantel should feel like an elegant autumn display with a subtle Halloween influence.

    Think old-world library meets sophisticated fall decor, rather than a traditional haunted-house display.

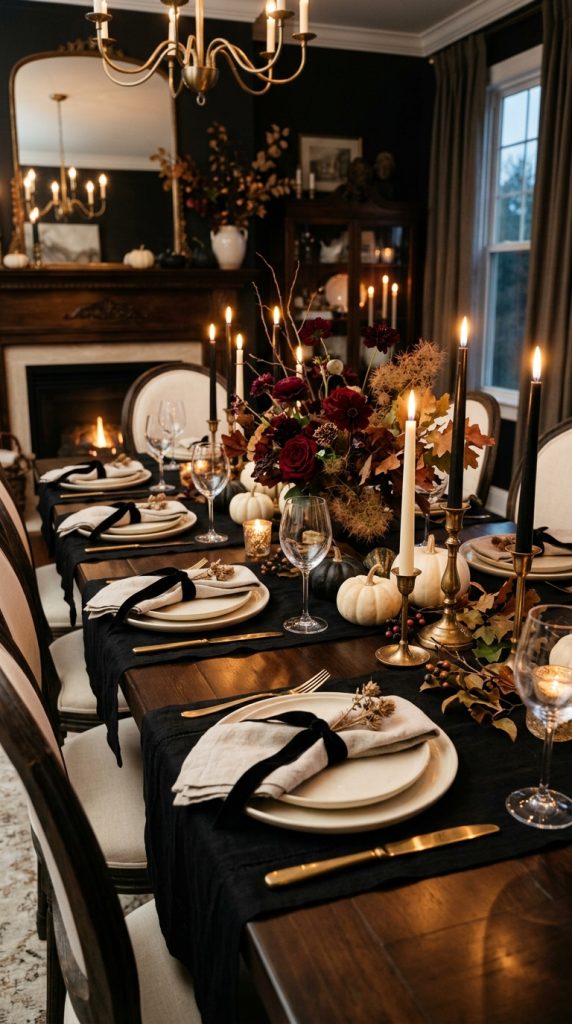
    3. Create a Luxury Halloween Dining Table

    A beautifully decorated dining table can make Halloween entertaining feel sophisticated and memorable.

    Materials and Elements You Need

    • Dark table runner
    • Linen napkins
    • Black or cream plates
    • Brass candleholders
    • Taper candles
    • Small pumpkins
    • Dried flowers
    • Dark glassware
    • Natural wood elements
    • Vintage-inspired serving pieces
    • Neutral placemats

    Begin with the table foundation.

    A dark linen runner can create an elegant backdrop, while cream or natural linen can produce a softer appearance.

    Choose dinnerware in black, cream, ivory, stone, or muted earthy colors.

    Instead of placing a large Halloween decoration in the center, create a low seasonal arrangement.

    Use a combination of miniature pumpkins, candles, dried branches, and flowers.

    Keep the centerpiece low enough that guests can comfortably see each other across the table.

    For an especially elegant look, use brass candlesticks with black or ivory taper candles.

    You can also introduce subtle Halloween details through napkin styling.

    A black velvet ribbon tied around a cream linen napkin can provide a sophisticated seasonal accent.

    Add Natural Materials

    Natural materials prevent Halloween decor from looking artificial.

    Use wood, stoneware, linen, dried foliage, ceramic pumpkins, and aged metal.

    These materials create visual depth while maintaining a timeless appearance.

    Create an Evening Atmosphere

    Turn down harsh overhead lighting and allow candlelight and warm lamps to create the mood.

    The combination of dark textiles, warm candlelight, neutral tableware, and subtle seasonal decorations can make an ordinary dining room feel incredibly atmospheric.

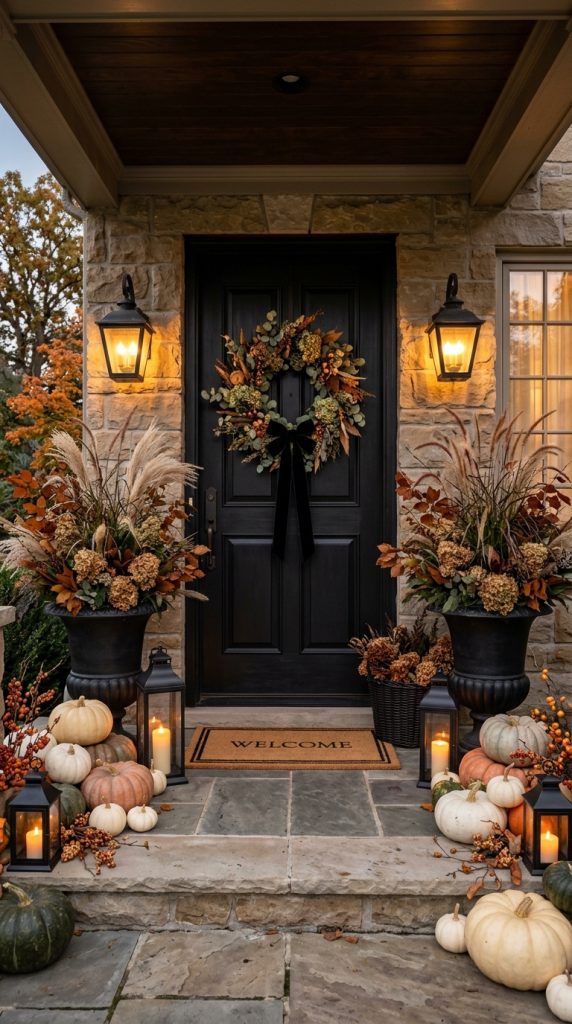
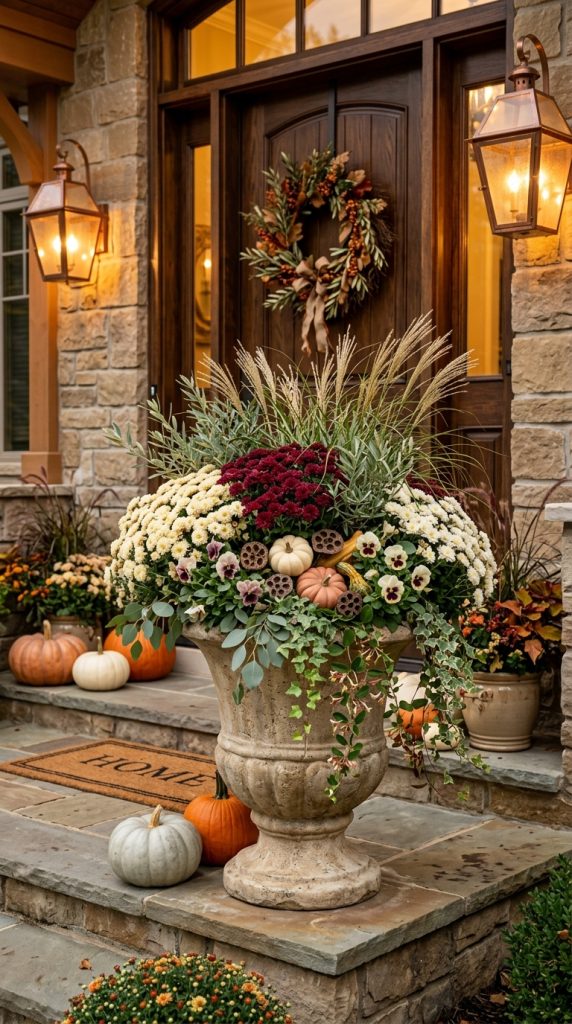
    4. Decorate the Front Porch With Elegant Halloween Style

    Your front porch is the first impression guests receive, so it deserves the same thoughtful styling as your interior.

    Materials and Elements You Need

    • Black planters
    • White or cream pumpkins
    • Muted orange pumpkins
    • Seasonal flowers
    • Dried branches
    • Lanterns
    • Black welcome mat
    • Wreath
    • Dark ribbon
    • Warm outdoor lighting
    • Natural baskets

    Begin by creating a symmetrical foundation if your porch layout allows it.

    Place large planters on either side of the front door.

    Fill them with seasonal flowers, ornamental grasses, branches, or other appropriate outdoor plants.

    Then add pumpkins around the base.

    Instead of using only bright orange pumpkins, combine cream, white, muted orange, and dark green varieties.

    This creates a more sophisticated autumn palette.

    A black wreath can become the focal point of the door.

    You can also use a natural dried wreath decorated with a dark velvet ribbon.

    Add Lanterns

    Lanterns are one of the easiest ways to make a Halloween porch feel elegant.

    Place them on the steps, beside planters, or near the doorway.

    Warm illumination will create a welcoming glow after sunset.

    If using candles outdoors, choose weather-appropriate options and follow safety precautions. Battery-operated lanterns are an excellent alternative.

    Keep the Porch Balanced

    Do not cover the entire entrance with decorations.

    Leave enough space for comfortable movement.

    The goal is to create an inviting seasonal entry rather than an obstacle course of Halloween decorations.

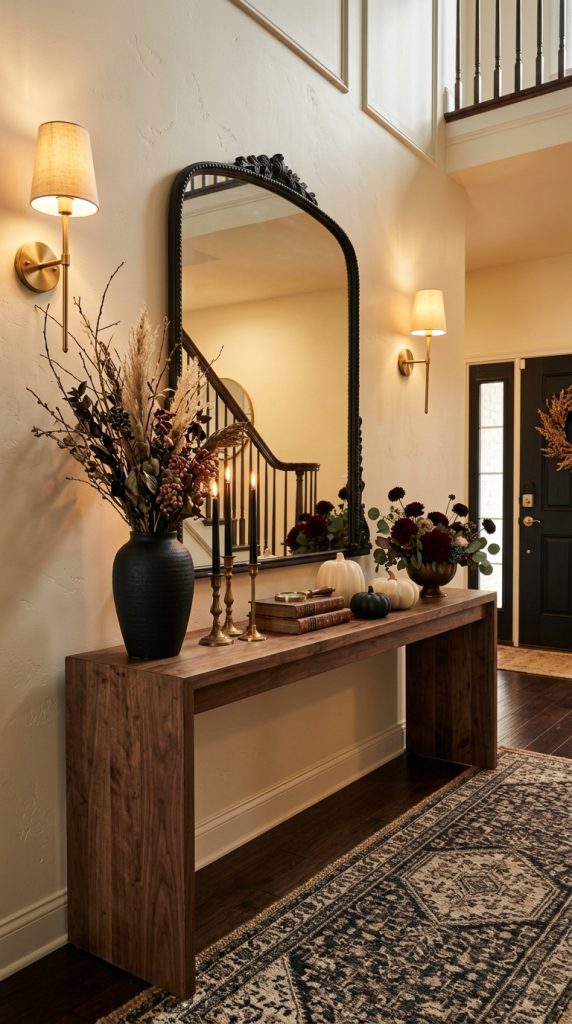
    5. Create an Elegant Halloween Entryway

    An entryway is perfect for subtle Halloween styling because it gives you an opportunity to introduce the season immediately when guests walk into your home.

    Materials and Elements You Need

    • Console table
    • Black or antique mirror
    • Cream pumpkins
    • Black ceramic vase
    • Dried branches
    • Candles
    • Vintage books
    • Small tray
    • Brass accessories
    • Seasonal artwork

    Start with your existing console table.

    Place a large mirror or artwork above it.

    Then create one decorative cluster on the surface.

    A tall vase filled with dark branches can provide height.

    Place a few cream pumpkins near the base.

    Add a black ceramic bowl or small vintage box.

    A stack of old-looking books can provide visual interest and reinforce a sophisticated library-inspired mood.

    Finish with one or two brass candleholders.

    Use a Limited Color Palette

    Keep the entryway to approximately three main colors.

    Black, cream, and brass are an excellent combination.

    If you want more warmth, add a small amount of brown or muted rust.

    Make It Functional

    Do not sacrifice the practical purpose of your entryway.

    Leave enough space for keys, bags, shoes, and daily essentials.

    A beautiful entryway should still function as an entryway.

    6. Use Moody Halloween Floral Arrangements

    Flowers can completely change the character of seasonal decor.

    Instead of relying on obvious Halloween decorations, create a sophisticated arrangement using dark and autumn-inspired flowers.

    Materials and Elements You Need

    • Dark burgundy flowers
    • Deep red foliage
    • Dried branches
    • Dried grasses
    • Black vase
    • Antique brass vessel
    • Cream flowers
    • Dried hydrangeas
    • Seasonal foliage
    • Floral shears

    Choose flowers in rich colors such as burgundy, deep plum, wine red, muted brown, or dark green.

    You can combine fresh and dried materials depending on how long you want the arrangement to last.

    Place the arrangement in a black ceramic vase, aged brass vessel, or vintage-inspired container.

    Do not make the arrangement perfectly symmetrical.

    A slightly organic shape will feel more sophisticated and natural.

    Add Subtle Halloween Details

    The arrangement itself does not need bats, skulls, or plastic decorations.

    The color, texture, and atmosphere can communicate the Halloween mood.

    Place it on a dining table, console, kitchen island, or fireplace mantel.

    Surround it with a few cream pumpkins and candles.

    Why Floral Decor Works

    Floral arrangements can remain beautiful throughout the autumn season.

    This means your Halloween decorations can transition naturally into Thanksgiving and general fall decorating.

    That makes the investment more practical.

    7. Create a Sophisticated Halloween Coffee Table

    Your coffee table can become a small seasonal vignette without overwhelming the living room.

    Materials and Elements You Need

    • Decorative tray
    • Small pumpkins
    • Black candle
    • Coffee-table books
    • Ceramic vase
    • Dried flowers
    • Brass object
    • Small bowl
    • Natural wood accessory

    Start with a large decorative tray.

    A tray gives the arrangement boundaries and prevents individual objects from looking scattered.

    Place two or three coffee-table books inside the tray.

    Then add a small ceramic pumpkin or cream pumpkin.

    Place a candle beside it.

    Finish with a small vase containing dried branches or seasonal flowers.

    Follow the Rule of Three

    Groups of three often create a naturally balanced appearance.

    For example:

    • Books
    • Pumpkin
    • Candle

    Or:

    • Vase
    • Pumpkin
    • Decorative bowl

    Vary the height and shape of each item.

    Keep It Usable

    The coffee table should still provide space for everyday use.

    Avoid filling the entire surface.

    Your family should be able to sit down, place a cup on the table, or move around the arrangement comfortably.

    8. Add Vintage Halloween Decor for an Old-World Look

    If you love traditional or vintage interiors, Halloween provides a perfect opportunity to create an old-world atmosphere.

    Materials and Elements You Need

    • Vintage books
    • Antique-style frames
    • Brass candlesticks
    • Dark wood accessories
    • Old-fashioned clocks
    • Black ceramic pieces
    • Dried flowers
    • Dark artwork
    • Velvet fabric
    • Aged-looking objects

    The goal is to make your decorations look collected rather than mass-produced.

    Use objects with visual history.

    Vintage books, antique-style brass accessories, dark wooden frames, old clocks, and traditional artwork can create an atmospheric library-inspired feeling.

    Place several books on a console or side table.

    Add brass candlesticks and dark floral arrangements.

    A velvet runner or cushion can introduce another layer of richness.

    Choose the Right Colors

    Deep brown, black, burgundy, muted green, cream, and antique brass work particularly well.

    These colors create a moody but elegant environment.

    Add Architectural Character

    If your home has traditional molding, paneling, hardwood floors, or other architectural details, let them become part of the decoration.

    You do not need to cover beautiful architecture with seasonal accessories.

    Instead, use Halloween decor to emphasize what is already there.

    9. Decorate With Elegant Halloween Candles and Lanterns

    Lighting can be one of the most powerful tools for creating an upscale Halloween atmosphere.

    Materials and Elements You Need

    • Black taper candles
    • Ivory candles
    • Brass candlesticks
    • Glass lanterns
    • Ceramic candleholders
    • Flameless candles
    • Hurricane vessels
    • Decorative trays

    Begin by identifying areas that feel visually flat after sunset.

    A console table, mantel, dining table, bookshelf, or fireplace area can benefit from additional warm illumination.

    Place candles at varying heights.

    Use tall taper candles alongside shorter candles to create visual movement.

    Black candles provide a dramatic Halloween reference, while cream candles soften the composition.

    Use Warm Lighting

    Avoid relying exclusively on bright overhead lighting.

    Instead, combine candlelight with table lamps, floor lamps, and warm accent lighting.

    This layered approach creates depth and makes your seasonal decorations feel more dramatic.

    Safety Matters

    Never leave burning candles unattended.

    Keep candles away from flammable materials, children, and pets, and use stable candleholders on heat-resistant surfaces.

    When appropriate, flameless candles are an excellent option.

    10. Create a Sophisticated Halloween Bedroom

    Halloween decorating does not have to stop in the living room. Your bedroom can also receive subtle seasonal touches without losing its peaceful character.

    Materials and Elements You Need

    • Dark velvet throw
    • Cream bedding
    • Black accent pillows
    • Warm bedside lamps
    • Small ceramic pumpkins
    • Dried branches
    • Dark floral arrangement
    • Vintage-style artwork
    • Neutral rug
    • Decorative tray

    Begin with your existing bedding rather than completely redesigning the room.

    Cream, ivory, beige, and warm gray bedding create a beautiful foundation.

    Add one or two darker accents through pillows or a throw.

    A deep burgundy, chocolate brown, charcoal, or black blanket can create a subtle seasonal mood.

    Place a small ceramic pumpkin on a nightstand or dresser.

    Add dried branches to a simple vase.

    Use Lighting to Create Atmosphere

    Warm bedside lamps can create a beautiful evening mood.

    If you have decorative sconces, use them to highlight artwork or architectural features.

    Avoid overly bright lighting because the bedroom should remain restful.

    Add One Dramatic Detail

    Instead of decorating the entire bedroom, choose one statement element.

    It could be:

    • A dark floral arrangement
    • A vintage-style mirror
    • A black velvet throw
    • A dramatic piece of artwork
    • A sculptural black vase

    One strong detail can create a much more sophisticated result than many small decorations.

    How to Make Halloween Decor Look Expensive

    You do not need an enormous budget to make Halloween decorations look luxurious.

    The first step is to limit your color palette.

    A coordinated color scheme immediately makes a room look more intentional.

    Next, focus on materials.

    Instead of buying many inexpensive plastic decorations, choose a few pieces made from ceramic, glass, metal, wood, linen, or fabric.

    Texture creates the impression of quality.

    Another important trick is to vary height.

    Place tall branches or candleholders behind smaller pumpkins and accessories.

    This creates depth.

    You should also avoid decorating every surface.

    Luxury interiors often rely on restraint.

    Give each decorative arrangement enough space to breathe.

    Finally, repeat materials throughout the room.

    If you use antique brass on your mantel, repeat a small amount of brass on the coffee table or dining table.

    This creates cohesion.

    How to Decorate for Halloween Without Making Your Home Look Scary

    If you love Halloween but dislike frightening decor, focus on atmosphere instead of horror.

    Use pumpkins, candles, dark florals, vintage books, moody colors, and autumn textures.

    Instead of skeletons and fake blood, create mystery through lighting and color.

    Black candles against a cream wall can feel dramatic without being frightening.

    Dark flowers in an antique vase can create a gothic-inspired atmosphere while remaining elegant.

    Muted pumpkins can provide the seasonal reference without overwhelming your interior.

    This approach is especially effective if you want decorations that work for family gatherings, dinner parties, or sophisticated entertaining.

    How to Combine Halloween and Fall Decor

    One of the smartest decorating strategies is to make your Halloween decorations work with your existing fall decor.

    Use natural materials such as:

    • Pumpkins
    • Dried flowers
    • Wood
    • Woven baskets
    • Branches
    • Linen
    • Ceramic
    • Brass
    • Seasonal foliage

    Then introduce Halloween through darker colors and atmospheric lighting.

    For example, a normal fall arrangement of cream pumpkins and dried foliage can become Halloween-inspired by adding black candles and dark burgundy flowers.

    This allows you to transition from early fall decorating into Halloween without completely changing your home.

    How to Keep Classy Halloween Decor From Becoming Cluttered

    The simplest rule is to decorate fewer areas more intentionally.

    Choose three to five major zones.

    For example:

    1. Front porch
    2. Entryway
    3. Fireplace mantel
    4. Dining table
    5. Coffee table

    Create a strong arrangement in each location.

    Do not feel pressured to decorate every shelf, cabinet, countertop, and wall.

    After styling each area, step back and look at the room as a whole.

    If everything competes for attention, remove a few objects.

    A sophisticated interior needs visual breathing room.

    Final Thoughts

    Classy Halloween decorating is about creating an atmosphere rather than filling your home with traditional Halloween symbols.

    With the right combination of black and cream colors, warm lighting, natural materials, vintage-inspired accessories, dark florals, elegant pumpkins, and carefully styled surfaces, you can create a Halloween home that feels sophisticated and inviting.

    The most successful approach is to begin with your home’s existing style.

    If your interior is modern, choose matte black accessories, sculptural pumpkins, clean arrangements, and minimal styling.

    If your home is traditional, incorporate brass candlesticks, dark wood, vintage books, rich textiles, and antique-inspired details.

    For an organic interior, use dried branches, natural pumpkins, woven materials, earthy colors, and soft candlelight.

    And if you love luxury decor, focus on rich textures, elegant vessels, sophisticated lighting, and a restrained palette.

    Remember that you do not need dozens of Halloween decorations to make an impact. A beautifully styled mantel, an atmospheric dining table, an elegant entryway, or a sophisticated front porch can completely transform your home.

    The secret is less clutter, better materials, thoughtful color, beautiful lighting, and intentional placement.

    When these elements work together, Halloween can feel less like a temporary holiday theme and more like a sophisticated seasonal layer within your home.

    Your goal is not to make every corner look spooky.

    Your goal is to make your home feel warm, mysterious, elegant, and unforgettable.


  • 15 Cozy Home Library & Reading Nook Ideas for Book Lovers

    15 Cozy Home Library & Reading Nook Ideas for Book Lovers

    A cozy home library or reading nook can transform even the smallest unused corner into a beautiful retreat for reading, relaxing, and escaping from everyday distractions. You do not need a huge room filled with floor-to-ceiling bookshelves to create a memorable library. With thoughtful furniture, warm lighting, comfortable seating, clever storage, and personal decorative touches, almost any space can become a book loverโ€™s dream.

    Todayโ€™s home library designs are also becoming more flexible. A reading nook can be created beneath a staircase, beside a bedroom window, inside a quiet hallway, in an unused corner of the living room, or even within a small apartment. The most successful spaces combine functionality with atmosphere. Books should be easy to reach, seating should encourage you to stay awhile, and lighting should make reading comfortable during both daytime and evening hours.

    The beauty of a home reading space is that it can reflect your personality. Some readers may prefer a traditional library with dark wood shelves, leather seating, and antique-inspired accessories. Others may love a light Scandinavian reading nook with pale wood, cream textiles, and minimal decor. A colorful maximalist library can feel artistic and energetic, while a warm neutral nook can create a peaceful environment for quiet reading.

    The key is to design around the experience you want.

    Think about where you naturally enjoy reading. Do you prefer sitting near a window with natural sunlight? Would you rather curl up in a deep armchair at night? Do you need shelves for a large book collection, or would a small basket and floating shelf be enough? Answering these questions before decorating helps you create a space that looks beautiful while remaining genuinely useful.

    Lighting is particularly important. A beautiful reading chair is not enough if the area is poorly illuminated. Combining natural daylight with a floor lamp, table lamp, wall sconce, or pendant can create a comfortable layered lighting scheme. Warm bulbs can also make wood, linen, leather, woven materials, and neutral colors feel especially inviting in the evening.

    Storage is another important consideration. Books should be organized in a way that makes them easy to find while also contributing to the visual character of the room. You can arrange books by color for a decorative appearance, organize them by genre or author for practicality, or combine horizontal and vertical stacks to create a more collected look.

    Comfort should never be sacrificed for appearance. Add a soft throw, supportive cushions, a footstool, or an ottoman if the space allows. A small side table gives you somewhere to place a cup of tea, reading glasses, a notebook, or your current book.

    Whether you have an entire room available or only a tiny corner, these cozy home library and reading nook ideas can help you create a space that feels personal, peaceful, and beautifully designed.

    1. Create a Cozy Window-Side Reading Nook

    A window-side reading nook is one of the most naturally inviting options for book lovers. Natural light makes reading more enjoyable during the day while giving the space a beautiful connection to the outdoors.

    Materials and Elements You Need

    • Comfortable armchair or lounge chair
    • Small side table
    • Floor lamp
    • Soft throw blanket
    • Decorative cushion
    • Small bookshelf or floating shelf
    • Indoor plant
    • Curtains or Roman shade
    • Area rug

    Start by identifying a window that receives comfortable daylight without creating excessive glare. Position your chair slightly beside the window rather than directly facing harsh sunlight.

    Choose a chair with enough depth to allow you to sit comfortably for an extended period. Cream boucle, linen, warm beige upholstery, leather, or textured fabric can all work beautifully.

    Place a compact side table within easy reach. Keep the surface relatively simple with a book, small lamp, ceramic mug, or decorative vase.

    For evening reading, add a floor lamp or adjustable reading lamp. This ensures the nook remains useful after sunset.

    A small bookshelf nearby can hold your favorite novels while a plant adds natural color.

    Complete the arrangement with a soft rug underneath the chair and a throw draped casually over one arm.

    The result should feel like a dedicated little retreat rather than furniture simply placed beside a window.

    2. Design a Floor-to-Ceiling Home Library

    If you have a large book collection, floor-to-ceiling shelving can transform an entire wall into a dramatic home library.

    Materials and Elements You Need

    • Built-in or modular bookshelves
    • Comfortable reading chair
    • Library ladder if appropriate
    • Warm lighting
    • Side table
    • Area rug
    • Decorative objects
    • Bookends
    • Artwork

    Begin by measuring the wall carefully before selecting your shelving system.

    Tall shelves maximize vertical space and create an impressive architectural feature. If you have particularly high ceilings, a library ladder can add both practicality and visual character, although it should be used safely and appropriately.

    Avoid filling every shelf from edge to edge. Leave some breathing room and mix books with a limited number of decorative objects.

    Try combining vertical rows with small horizontal stacks. This creates a more relaxed, collected appearance.

    Position a comfortable chair near the shelves rather than directly in front of them. Add a floor lamp beside it so the area functions as a dedicated reading station.

    For a sophisticated traditional library, consider walnut, oak, or dark-stained wood shelving. For a brighter contemporary room, white, cream, or natural oak shelving can work beautifully.

    3. Turn an Unused Corner Into a Reading Retreat

    You do not need a dedicated room to create a home library. An empty corner can become a charming reading nook with just a few carefully selected pieces.

    Materials and Elements You Need

    • Accent chair
    • Compact side table
    • Floor lamp
    • Small bookcase
    • Rug
    • Cushion
    • Throw
    • Plant
    • Artwork

    Start with the corner that receives the least traffic.

    Place the chair at a slight angle instead of pushing everything tightly against the walls. This can make the arrangement feel more intentional.

    Add a small round side table beside the chair. A narrow bookshelf can sit against the adjacent wall.

    Use a floor lamp to provide height and practical reading light.

    Because the space is small, avoid excessive decoration. Choose one artwork piece, one plant, and a few meaningful accessories.

    A textured rug can visually define the nook and separate it from the surrounding room.

    This idea works especially well in apartments, bedrooms, living rooms, and home offices where dedicated library space is limited.

    4. Build a Warm Traditional Library With Dark Wood

    For readers who love classic interiors, a dark wood library can create an atmosphere that feels timeless and sophisticated.

    Materials and Elements You Need

    • Dark wood bookshelves
    • Leather or fabric armchair
    • Wooden side table
    • Traditional floor lamp
    • Warm lighting
    • Persian-style or vintage-inspired rug
    • Brass accents
    • Framed artwork

    Use walnut, mahogany-inspired finishes, or other rich wood tones to establish the foundation.

    A leather reading chair can reinforce the traditional library feeling, while a textured fabric chair can make the room feel softer.

    Add brass or antique-inspired lighting fixtures for subtle character.

    Arrange books naturally instead of trying to make every shelf perfectly symmetrical. Mix in a few framed photographs, small sculptures, ceramics, or decorative boxes.

    A patterned rug can add warmth and visual depth.

    Keep the lighting soft and warm. Dark wood can look dramatic under harsh white lighting, while warmer illumination creates the intimate atmosphere associated with classic libraries.

    This style works especially well for dedicated home libraries, studies, and formal reading rooms.

    5. Create a Minimalist Scandinavian Reading Nook

    If you prefer calm interiors with less visual clutter, a Scandinavian-inspired reading nook can be both beautiful and practical.

    Materials and Elements You Need

    • Light wood chair
    • Cream or beige cushion
    • Small oak table
    • Simple bookshelf
    • Neutral rug
    • Soft floor lamp
    • Green plant
    • Linen throw

    Choose a restrained palette of white, cream, beige, light gray, and natural wood.

    The furniture should have simple silhouettes without excessive ornamentation.

    Place a comfortable chair beside a small wooden table. Add one soft cushion and a lightweight throw.

    Use open shelving to store books, but avoid overcrowding it.

    A single plant can introduce natural color without compromising the minimalist appearance.

    Lighting should remain soft and functional. A simple floor lamp with a fabric shade can provide warmth while maintaining the clean aesthetic.

    The goal is to make the space feel peaceful rather than empty.

    6. Create a Built-In Reading Nook Under a Window

    A built-in window seat can turn an architectural feature into one of the coziest reading areas in the house.

    Materials and Elements You Need

    • Built-in bench
    • Custom or fitted cushion
    • Throw pillows
    • Storage drawers
    • Wall shelves
    • Reading light
    • Curtains
    • Small books

    If you are renovating or working with a carpenter, consider incorporating storage underneath the bench.

    This hidden storage can hold extra books, blankets, magazines, or seasonal accessories.

    Choose a thick, comfortable seat cushion and layer several pillows along the back.

    Install a small wall sconce nearby so the nook remains useful after dark.

    Shelves above or beside the window can hold favorite books and decorative objects.

    Keep the window area visually light so natural daylight remains the main feature during the day.

    This design is especially effective in bedrooms, children’s reading areas, hallways with large windows, and dedicated libraries.

    7. Design a Moody and Dramatic Book Nook

    Dark colors can make a reading nook feel intimate, sophisticated, and especially inviting at night.

    Materials and Elements You Need

    • Deep-toned wall paint
    • Dark wood bookshelf
    • Comfortable upholstered chair
    • Warm floor lamp
    • Textured rug
    • Decorative books
    • Brass or aged-metal accents
    • Artwork

    Consider colors such as deep olive, charcoal, chocolate brown, navy, or muted burgundy.

    You do not necessarily need to paint the entire room. A single accent wall behind the bookshelf can establish the mood.

    Choose warm wood furniture to prevent the darker palette from feeling cold.

    Add warm lighting at multiple levels. A floor lamp beside the chair and a small lamp on a side table can create beautiful pools of light.

    Use textiles to soften the darker environment.

    A chunky throw and textured cushion can make the chair look inviting while providing additional comfort.

    Keep decorative objects intentional. A few brass accessories or vintage-inspired pieces can add sophistication without creating clutter.

    8. Make a Tiny Apartment Reading Nook

    Small apartments can still have beautiful reading spaces. The trick is to choose furniture that performs multiple functions without overwhelming the room.

    Materials and Elements You Need

    • Compact lounge chair
    • Narrow bookshelf
    • Small round table
    • Wall-mounted lamp
    • Floating shelves
    • Small rug
    • Basket
    • Cushion

    Look for narrow furniture that provides comfort without consuming too much floor space.

    A wall-mounted sconce can eliminate the need for a floor lamp.

    Floating shelves can store books vertically while keeping the floor open.

    Choose a small round table rather than a large rectangular one. The curved shape can make a compact area easier to navigate.

    A basket beside the chair can hold blankets and magazines.

    Keep the color palette light and cohesive to make the area feel visually larger.

    The most important rule is to avoid filling every available surface. A small reading nook benefits from visual simplicity.

    9. Create a Cozy Bohemian Reading Corner

    A bohemian reading nook is perfect if you love layers, texture, plants, and relaxed styling.

    Materials and Elements You Need

    • Rattan or woven chair
    • Patterned rug
    • Soft cushions
    • Throw blanket
    • Wooden side table
    • Woven basket
    • Indoor plants
    • Floor lamp
    • Books

    Begin with a comfortable natural-material chair such as rattan or woven wood.

    Layer a patterned rug underneath and add cushions in complementary earthy colors.

    Terracotta, cream, mustard, olive, rust, camel, and warm brown can work beautifully together.

    Add a woven basket for blankets and a large plant for natural texture.

    Books can be displayed on a low wooden shelf or stacked neatly beside the chair.

    Use warm lighting to reinforce the cozy atmosphere.

    Avoid making every item perfectly coordinated. Bohemian interiors look best when they feel collected gradually rather than purchased as a matching set.

    10. Build a Modern Home Library With Floating Shelves

    Floating shelves provide a streamlined alternative to traditional bookcases and work particularly well in contemporary homes.

    Materials and Elements You Need

    • Floating shelves
    • Comfortable modern chair
    • Small side table
    • Wall sconce
    • Neutral rug
    • Artwork
    • Decorative objects

    Arrange several shelves vertically on one wall.

    Keep enough spacing between shelves so books can be easily removed.

    Mix upright books with a few horizontal stacks to create visual rhythm.

    Leave sections of the shelving empty. Negative space keeps the arrangement from looking overcrowded.

    Below the shelves, position a comfortable chair and small table.

    A wall sconce can provide practical reading light while preserving floor space.

    For a polished modern look, choose simple furniture with clean lines.

    Natural oak, walnut, black, white, and warm neutral finishes can all create sophisticated combinations.

    11. Create a Cozy Reading Nook Beside the Fireplace

    A fireplace naturally creates a strong focal point, making the surrounding area ideal for reading.

    Materials and Elements You Need

    • Armchair
    • Ottoman
    • Floor lamp
    • Small table
    • Bookshelf
    • Soft rug
    • Throw
    • Decorative basket

    Place the reading chair at a comfortable distance from the fireplace and ensure furniture is positioned safely according to the fireplace type and manufacturer’s requirements.

    Add an ottoman for extra comfort.

    A side table should be close enough to hold a book and beverage without requiring you to reach too far.

    Position a floor lamp beside the chair for evening reading.

    Keep the fireplace area relatively uncluttered so it remains the visual centerpiece.

    Warm wood, cream textiles, natural stone, and earthy accessories can make the entire arrangement feel timeless.

    12. Turn a Staircase Area Into a Hidden Library

    The space beneath or beside a staircase is often overlooked, but it can become an incredibly useful mini-library.

    Materials and Elements You Need

    • Custom shelving
    • Compact chair
    • Wall-mounted light
    • Small side table
    • Storage baskets
    • Books
    • Decorative accessories

    Start by measuring the available space carefully.

    Custom shelving can follow the angle of the staircase and maximize otherwise unused space.

    If the area is narrow, use a slim chair rather than a large lounge chair.

    A wall-mounted lamp saves floor space and provides focused illumination.

    Use the shelves primarily for books and keep decorative accessories limited.

    If the staircase area is dark, lighter shelving and warm lighting can prevent it from feeling enclosed.

    This idea is particularly useful in houses where every square foot needs to serve a purpose.

    13. Create a Soft and Feminine Reading Nook

    A soft, elegant reading nook can combine comfortable furniture with delicate colors and luxurious textures.

    Materials and Elements You Need

    • Upholstered chair
    • Small marble or wood table
    • Soft rug
    • Decorative cushion
    • Throw
    • Table lamp
    • Flowers or greenery
    • Small bookshelf

    Choose a palette of cream, blush, beige, soft taupe, muted rose, or warm white.

    An upholstered armchair creates a comfortable focal point.

    Add a small table with a ceramic or glass lamp.

    Use a plush rug to make the space feel warmer underfoot.

    Instead of filling the nook with decorative accessories, select a few elegant pieces.

    A small vase of flowers or a simple plant can bring life to the area.

    The final look should feel refined and comfortable rather than overly decorative.

    14. Create a Reading Nook With a Built-In Bookshelf Wall

    A full bookshelf wall can combine storage and architecture while making books the central decorative feature.

    Materials and Elements You Need

    • Full-height shelving
    • Comfortable lounge chair
    • Reading lamp
    • Side table
    • Decorative objects
    • Rug
    • Artwork
    • Bookends

    Use the bookshelf as the primary visual backdrop.

    Arrange books according to how you naturally use them. If organization is your priority, sort by genre, author, or category.

    If visual impact matters more, create sections based on color and size.

    Mix horizontal and vertical arrangements.

    Leave some shelves partially empty for artwork, ceramics, plants, or sculptural accessories.

    Place a chair slightly away from the shelving to create a clear reading zone.

    A nearby lamp ensures the space remains functional.

    This approach works especially well when you want your book collection to become part of the room’s overall design.

    15. Create a Luxury Cozy Library Retreat

    For the ultimate book-lover’s space, combine comfortable seating, beautiful shelving, layered lighting, rich textures, and carefully selected accessories.

    Materials and Elements You Need

    • Large upholstered reading chair
    • Ottoman
    • Floor-to-ceiling shelving
    • Elegant side table
    • Floor lamp
    • Table lamp
    • Warm accent lighting
    • Large area rug
    • Curtains
    • Decorative objects
    • Indoor plants
    • Books

    Begin with one substantial and extremely comfortable reading chair.

    Choose a rich upholstery such as cream boucle, velvet, linen, leather, or another tactile fabric that suits the room.

    Place an ottoman in front of the chair so you can comfortably stretch out while reading.

    Install generous shelving around the space, but avoid making every surface completely full.

    Layer lighting throughout the room. Use a central fixture for general illumination, a floor lamp beside the chair, and a table lamp for softer ambient light.

    Add curtains to soften windows and improve the feeling of privacy.

    A large rug can visually connect the furniture while adding comfort and texture.

    Finish with meaningful accessories rather than excessive decoration. Favorite books, collected ceramics, framed artwork, a beautiful plant, and a small decorative box can make the space feel personal.

    The final result should feel like a private retreat rather than a showroom.

    How to Make Any Reading Nook Feel Cozier

    Regardless of which design you choose, several simple details can dramatically improve the atmosphere.

    Start with comfortable seating. A beautiful chair that becomes uncomfortable after fifteen minutes will not create a successful reading nook.

    Next, consider lighting. Natural daylight is wonderful, but every serious reading space should also have a dedicated artificial light source for evening use.

    Add texture through rugs, throws, cushions, curtains, and natural materials. Texture creates visual warmth even when your color palette is neutral.

    Keep books within easy reach. A small shelf, basket, side table, or nearby cabinet is usually enough.

    Finally, personalize the space. Include the books you genuinely love, artwork that means something to you, objects collected from travels, favorite plants, or family photographs.

    The best reading nooks do not simply look cozy in photographs. They make you want to sit down, open a book, and stay there.

    How to Choose the Right Lighting for a Reading Nook

    Good lighting should combine comfort and function.

    During the daytime, position your chair near a window whenever possible. However, avoid placing it where direct sunlight creates uncomfortable glare on the pages.

    For evening reading, use a dedicated reading lamp.

    A floor lamp works well beside larger chairs, while wall sconces are excellent for smaller spaces.

    Table lamps can create a softer atmosphere and are useful when you want multiple lighting levels.

    Warm bulbs generally work beautifully with cozy materials such as wood, linen, leather, rattan, cream textiles, and earthy colors.

    If possible, choose adjustable or dimmable lighting so you can change the brightness depending on whether you are reading, relaxing, or entertaining.

    How to Organize Books Beautifully

    Books are both functional objects and natural decorative elements.

    One approach is to organize books by subject or genre. This is the easiest system if you regularly search for specific titles.

    Another option is organizing books alphabetically by author.

    For a more decorative library, you can group books by color or size.

    However, you do not have to choose one method for the entire room. Combining practical organization with attractive styling can create the best balance.

    Use horizontal stacks occasionally to break up long rows of vertical books.

    Leave some empty space between groups.

    Add a small decorative object or plant to selected shelves.

    The goal is organization that feels intentional without looking overly rigid.

    How to Make a Small Reading Nook Feel Bigger

    Small reading spaces benefit from visual simplicity.

    Choose furniture with appropriate proportions rather than trying to squeeze oversized pieces into the area.

    Wall-mounted lighting can free up valuable floor space.

    Floating shelves can provide storage without making the room feel heavy.

    Use light colors if you want the nook to feel brighter and more open.

    Mirrors can also help reflect natural or artificial light.

    Most importantly, avoid unnecessary furniture. A comfortable chair, small table, lamp, and compact storage solution may be all you need.

    How to Make a Home Library Feel Personal

    Your home library should reflect the person who actually reads there.

    Instead of decorating entirely according to a trend, display books you genuinely enjoy.

    Add artwork that inspires you.

    Use a favorite chair or inherited furniture piece if you have one.

    Keep a small notebook nearby for thoughts, quotes, or reading lists.

    Add a soft blanket for colder evenings.

    You might even create a small shelf dedicated to favorite books or special editions.

    These personal details transform a generic reading corner into a space with character.

    Final Thoughts

    A cozy home library does not have to be large, expensive, or professionally designed. What matters most is creating an environment where books, comfort, lighting, and personal style work together.

    A simple chair beside a sunny window can become a beautiful reading nook. A staircase can become a hidden mini-library. An entire wall can be transformed into a dramatic bookshelf display. Even a small apartment corner can become a peaceful retreat with the right furniture and lighting.

    Focus first on comfort and functionality, then build the visual atmosphere around them.

    Choose warm textures, practical storage, comfortable seating, and layered lighting. Add only the decorative pieces that genuinely contribute to the mood or tell your story.

    Whether your dream space is a traditional dark-wood library, a minimalist Scandinavian corner, a bohemian reading retreat, or a luxurious private library, the possibilities are endless.

    The perfect reading nook is ultimately the one that makes you want to put your phone down, pick up your favorite book, settle into your chair, and enjoy a little uninterrupted time.


  • 10 Warm Earth-Tone Afrohemian Living Room Ideas

    10 Warm Earth-Tone Afrohemian Living Room Ideas

    A warm earth-tone Afrohemian living room brings together the relaxed spirit of bohemian decorating with natural materials, expressive textures, earthy colors, handcrafted details, and African-inspired visual influences. The result is a space that feels artistic and personal while remaining comfortable enough for everyday living. Rather than relying on a single decorating style, Afrohemian interiors celebrate a beautiful mixture of modern furniture, natural elements, woven textures, meaningful artwork, plants, and rich colors inspired by the earth.

    The most appealing feature of this style is its warmth. A neutral modern room can sometimes feel overly clean or impersonal, while a heavily decorated bohemian room can feel visually overwhelming. Afrohemian decorating creates a balance between these two extremes. It allows you to use patterns, artwork, baskets, textiles, and accessories while maintaining an intentional color palette and a comfortable sense of openness.

    Earth tones are particularly effective for this aesthetic because they naturally complement organic materials. Terracotta, rust, camel, caramel, chocolate brown, sand, cream, beige, muted olive, clay, and warm tan can be layered together without appearing disconnected. These shades also work beautifully with wood, rattan, jute, linen, leather, stone, and ceramic pieces.

    A warm earth-tone palette does not mean every object needs to be brown or orange. In fact, the room becomes much more sophisticated when neutral colors provide the foundation and deeper shades are introduced through carefully selected accents. A cream sofa can be combined with terracotta cushions, an olive plant, a walnut coffee table, a woven rug, and a chocolate-brown accent chair. Each element contributes warmth without competing for attention.

    Texture is equally important. Afrohemian rooms often feel beautiful because there is something interesting to discover everywhere you look. A woven basket may sit beside a linen sofa. A textured rug may cover the floor beneath a carved wooden coffee table. A handmade ceramic vase may sit alongside a sculptural object. These combinations create depth even when the overall color palette remains relatively simple.

    Plants also play an important role. Large leafy greenery can bring freshness to an earth-tone room while connecting the interior to the natural world. Palms, fiddle-leaf plants, rubber plants, olive trees, and other indoor greenery can all work beautifully depending on the available light and maintenance requirements.

    Wall decor can provide another opportunity to express the Afrohemian character of the space. African-inspired patterns, abstract artwork, woven baskets, handcrafted pieces, photography, masks, sculptures, and natural fiber wall hangings can create a powerful focal point. The goal should be thoughtful inspiration rather than turning the room into a collection of unrelated decorative objects.

    Lighting can completely change the atmosphere. Warm lamps, woven pendants, floor lamps, wall sconces, and subtle accent lighting help emphasize the rich colors and textures. Instead of using only one bright ceiling fixture, layer several sources of warm illumination throughout the room.

    Furniture should be comfortable and relatively simple. A modern cream sofa can easily become the foundation for a more expressive Afrohemian space. Natural wood furniture, cane chairs, rattan pieces, leather accents, and rounded silhouettes can soften the room and provide the organic character this style needs.

    Another advantage of an earth-tone Afrohemian living room is flexibility. You can create the look in a large house, a small apartment, a rental property, or a family room. You can also make it affordable by gradually introducing accessories instead of replacing everything at once.

    The most important principle is balance. Choose a few dominant colors, repeat natural materials, mix patterns carefully, and leave enough breathing room between decorative pieces. The result should feel collected, welcoming, and authentic rather than overly staged.

    The following ten ideas will show you how to build this look step by step, from choosing the color palette and furniture to adding textiles, artwork, plants, lighting, and personal accessories.

    1. Build the Room Around a Warm Earth-Tone Color Palette

    The easiest way to establish an Afrohemian living room is to begin with a carefully controlled earth-tone palette. Color creates the foundation for everything else, so choosing your shades before purchasing accessories can prevent the room from becoming visually chaotic.

    Start with one dominant neutral.

    Warm cream, ivory, beige, sand, or soft taupe works especially well. These colors can be used on the sofa, walls, curtains, or large rug.

    Next, introduce two or three earthy accent colors.

    Terracotta and rust are excellent choices because they add warmth. Camel and caramel create softness, while chocolate brown provides depth. Muted olive green can introduce a natural botanical element.

    Materials and Elements You Need

    • Cream or beige sofa
    • Terracotta cushions
    • Camel or tan textiles
    • Chocolate-brown accents
    • Olive-green plants
    • Natural wood furniture
    • Neutral rug
    • Earth-tone artwork
    • Ceramic accessories
    • Woven baskets

    Step-by-Step Styling

    Begin with the sofa.

    Choose cream, oatmeal, warm beige, or light taupe rather than a very cool gray.

    Add cushions in different earth tones.

    Use one terracotta cushion, one camel cushion, one patterned cushion, and one neutral textured cushion.

    The colors should appear elsewhere in the room.

    For example, if you use terracotta on the sofa, repeat a small amount of terracotta in artwork or pottery.

    Choose natural wood for the coffee table.

    The brown tones of the wood will connect naturally with the earth-tone textiles.

    Add an area rug with subtle geometric or tribal-inspired patterning.

    Keep the background relatively neutral.

    Finally, introduce plants to bring muted green into the palette.

    How to Keep the Palette Balanced

    Avoid using equal amounts of every color.

    Your room could follow a simple visual hierarchy:

    60% warm neutrals

    30% natural wood and secondary earth tones

    10% stronger accents such as rust, terracotta, or olive

    The percentages do not have to be exact. The principle is simply to let a few colors dominate while others act as accents.

    Why This Works

    A controlled palette makes the Afrohemian style feel sophisticated.

    You can include plenty of interesting textures and patterns without creating visual confusion because the colors remain connected.

    2. Use Natural Wood Furniture for Organic Warmth

    Natural wood is one of the strongest materials for creating an Afrohemian living room.

    It adds warmth, texture, and natural variation while providing a connection to handcrafted design.

    Instead of choosing furniture with highly glossy finishes, look for pieces that allow the natural grain of the wood to remain visible.

    Materials and Elements You Need

    • Natural oak coffee table
    • Walnut console
    • Wooden side tables
    • Carved wood accessories
    • Wooden shelves
    • Cane or wood accent chair
    • Neutral upholstery

    Choosing the Right Furniture

    A large wooden coffee table can become the center of the living room.

    Choose a simple silhouette if the room already contains patterned textiles.

    If you want a more expressive appearance, select a table with rounded edges, carved details, or an organically shaped top.

    A wooden console behind the sofa can provide additional storage and styling space.

    Side tables do not have to match perfectly.

    Afrohemian design often looks better when furniture feels collected over time.

    You might combine a round wooden table with a small carved stool or a cane side table.

    Step-by-Step Arrangement

    Start by positioning the sofa.

    Place the coffee table in front of it while leaving enough space for comfortable movement.

    Add an accent chair opposite or slightly angled toward the sofa.

    Place a small wooden side table beside the chair.

    Use the console behind the sofa or against another wall.

    Make sure the furniture arrangement supports conversation rather than simply pointing everything toward a television.

    Add Handcrafted Wood Details

    Small carved bowls, sculptures, trays, or decorative stools can reinforce the aesthetic.

    However, avoid filling every surface with wooden accessories.

    Repeat the material without overusing it.

    Why Natural Wood Works So Well

    Wood softens modern furniture.

    If you have a clean-lined cream sofa, adding a warm wood coffee table immediately introduces character.

    The natural grain also creates visual interest without requiring bright colors.

    3. Layer Woven Textures and Handmade Materials

    Texture is one of the defining characteristics of an inviting Afrohemian living room.

    You can create depth by combining several natural materials while keeping the color palette consistent.

    Materials and Elements You Need

    • Jute rug
    • Woven baskets
    • Rattan chair
    • Macramรฉ or woven wall hanging
    • Linen cushions
    • Cotton throw
    • Cane accessories
    • Seagrass storage
    • Handmade ceramics

    Start With the Floor

    A jute or natural-fiber rug creates a textured foundation.

    Choose a neutral tone so it does not compete with patterned cushions or artwork.

    If the room is large, consider layering a smaller patterned rug over the larger natural rug.

    This can create a relaxed bohemian appearance.

    Add Woven Storage

    Place a large woven basket beside the sofa.

    Use it to store blankets, pillows, magazines, or children’s items.

    This gives the room both texture and function.

    Introduce Rattan or Cane

    A rattan accent chair can provide a beautiful contrast against an upholstered sofa.

    If a large chair is not practical, use smaller cane or woven accessories.

    Add Linen

    Linen cushions and curtains soften the harder texture of wood and woven fibers.

    Choose natural shades such as:

    • Cream
    • Oatmeal
    • Beige
    • Sand
    • Warm white

    Keep Texture Varied

    Do not use only woven materials.

    Balance them with smooth ceramic, soft textiles, natural wood, and perhaps stone.

    The contrast makes each material more noticeable.

    Beginner Tip

    If you are decorating on a budget, begin with one woven basket, one textured rug, and two linen cushions.

    These three additions can make a noticeable difference without requiring a complete room makeover.

    4. Create a Statement Wall With Afrohemian-Inspired Artwork

    Wall decor can become the artistic heart of an Afrohemian living room.

    Instead of decorating every wall equally, choose one primary wall and make it the focal point.

    Materials and Elements You Need

    • Large framed artwork
    • African-inspired abstract prints
    • Woven baskets
    • Natural fiber wall hanging
    • Wooden frame
    • Neutral background art
    • Sculptural wall decor

    Choosing Artwork

    Look for artwork that complements the room’s palette.

    Earthy colors such as:

    • Terracotta
    • Burnt orange
    • Brown
    • Sand
    • Black
    • Cream
    • Olive

    can work beautifully.

    Abstract art inspired by landscapes, organic shapes, textiles, or natural forms can create a sophisticated appearance.

    If using culturally inspired artwork, choose pieces thoughtfully and respectfully, and consider supporting artists or makers connected to the traditions that inspire the work.

    Create a Gallery Arrangement

    You do not need ten pieces.

    Three to five carefully selected works can be enough.

    Place the largest artwork in the center.

    Add smaller pieces around it.

    Keep the spacing relatively consistent.

    Alternative: Woven Wall Display

    For a softer appearance, create a composition using woven baskets.

    Use baskets in slightly different sizes and textures.

    Keep the color palette within natural beige, brown, black, and cream.

    Avoid Overcrowding

    A statement wall needs breathing room.

    If the artwork is large and visually powerful, keep the furniture and accessories underneath it relatively simple.

    Why This Works

    Afrohemian decorating is naturally artistic.

    A thoughtfully chosen statement wall gives the room personality without requiring excessive accessories throughout the entire space.

    5. Add Earth-Tone Cushions, Throws, and Layered Textiles

    Textiles are one of the easiest ways to transform an existing living room.

    If you already own a neutral sofa, you do not need to replace it.

    Instead, use cushions and throws to introduce Afrohemian colors and patterns.

    Materials and Elements You Need

    • Linen cushions
    • Woven cushions
    • Patterned pillows
    • Cotton throw
    • Chunky knit blanket
    • Terracotta textiles
    • Rust-colored accent
    • Neutral base cushions

    Choose a Mix of Patterns

    Avoid making every cushion heavily patterned.

    Combine:

    One solid cream cushion

    One terracotta cushion

    One geometric patterned cushion

    One woven textured cushion

    One olive or camel accent

    This creates variation without becoming chaotic.

    Add a Throw

    Drape a soft cotton or woven throw over one corner of the sofa.

    Do not fold it perfectly.

    A relaxed placement makes the room feel more lived-in.

    Repeat the Colors

    If the cushions contain terracotta and olive, repeat those colors somewhere else.

    A terracotta vase and green plant can visually connect the seating area.

    Use Pattern Carefully

    African-inspired patterns can be beautiful, but one or two strong patterned textiles may be enough.

    The goal is to allow patterns to become accents rather than making the entire room visually busy.

    Seasonal Changes

    Textiles make it easy to refresh the room.

    During warmer months, use lightweight linen and cotton.

    During cooler months, introduce chunky throws, heavier woven cushions, and deeper rust and brown tones.

    This allows the same furniture to feel different throughout the year.

    6. Bring in Large Green Plants for a Natural Afrohemian Feel

    Plants can transform a warm earth-tone room by introducing life, movement, and natural color.

    They also work beautifully against neutral walls and wooden furniture.

    Materials and Elements You Need

    • Large indoor plant
    • Medium leafy plant
    • Woven planter
    • Ceramic planter
    • Wooden plant stand
    • Dried branches
    • Natural basket

    Choosing Plants

    Select plants according to the light available in your room.

    Large leafy varieties can create a dramatic focal point.

    A tall plant can fill an empty corner.

    A smaller plant can decorate a coffee table or console.

    Use Different Heights

    Place one tall plant on the floor.

    Add a medium plant on a wooden stand.

    Use a small plant on the console.

    This creates visual layers.

    Choose Natural Planters

    Woven baskets are particularly effective for larger plants.

    Terracotta pots work beautifully with the earth-tone palette.

    Ceramic planters can add a smoother contrasting texture.

    Avoid Turning the Room Into a Jungle

    A few strategically placed plants can be more effective than filling every corner.

    Leave enough space around the main furniture.

    Add Dried Botanicals

    Dried grasses or branches can provide texture without requiring regular maintenance.

    Place them in a large ceramic or clay vase.

    Their muted colors fit naturally with the earth-tone palette.

    Why Greenery Works

    The muted green of plants provides contrast against rust, terracotta, cream, and brown.

    It also reinforces the natural foundation of Afrohemian design.

    7. Combine Modern Furniture With Handcrafted Afrohemian Details

    A beautiful Afrohemian living room does not need every item to be traditional, rustic, or heavily patterned.

    One of the strongest approaches is to combine clean modern furniture with expressive handcrafted details.

    Materials and Elements You Need

    • Modern neutral sofa
    • Contemporary coffee table
    • Handmade pottery
    • Carved wood object
    • Woven basket
    • Textured artwork
    • Sculptural accessory
    • Natural stone object

    Start With Modern Foundations

    Choose simple furniture with clean lines.

    A cream sofa with a contemporary silhouette works particularly well.

    Add a modern rug or simple wooden table.

    Then introduce handcrafted elements.

    Place a handmade ceramic vase on the coffee table.

    Add a carved wooden bowl to the console.

    Use a woven basket near the sofa.

    Hang a handcrafted wall piece.

    Why Contrast Is Important

    If everything is rustic, the room can feel dated.

    If everything is sleek and modern, it may lack warmth.

    The contrast creates visual balance.

    Create a Curated Look

    Imagine the room as a collection gathered over time.

    Not every item needs to match.

    Instead, each object should complement the overall color palette and material story.

    Keep Decorative Groups Small

    On a coffee table, use:

    • One ceramic vase
    • One wooden bowl
    • One small plant
    • A couple of books

    This is enough.

    On the console, use:

    • Artwork
    • Vase
    • Small sculpture
    • Decorative tray

    Avoid covering the entire surface.

    The Result

    The room feels sophisticated but personal.

    This approach is particularly useful if you already own modern furniture and want to add Afrohemian character without replacing everything.

    8. Create a Cozy Afrohemian Reading Corner

    A small reading corner can add personality to a living room while making the space more functional.

    It does not require a large amount of floor space.

    Materials and Elements You Need

    • Accent chair
    • Small wooden side table
    • Floor lamp
    • Woven basket
    • Throw blanket
    • Cushion
    • Small plant
    • Books

    Choose the Chair

    A rattan, cane, leather, or textured fabric chair can work beautifully.

    For an earth-tone room, consider camel, tan, cream, or warm brown upholstery.

    Add a Wooden Side Table

    Choose a small table with a natural finish.

    Place a ceramic mug, small plant, or book on top.

    Add Warm Lighting

    A floor lamp beside the chair can create a beautiful evening reading atmosphere.

    Choose warm illumination rather than harsh bright light.

    A woven lampshade can create interesting shadows.

    Add a Basket

    Place a woven basket beside the chair.

    Use it for blankets.

    This adds both functionality and texture.

    Add a Small Rug

    A small textured rug can visually define the reading area.

    Choose one that relates to the larger living-room rug.

    Create Visual Connection

    Repeat one or two colors from the main seating area.

    For example, if the sofa contains terracotta cushions, add a small terracotta cushion to the reading chair.

    This makes the corner feel like part of the same room.

    Why This Idea Works

    A reading corner creates a sense of comfort.

    It also gives the living room a purpose beyond entertaining and television.

    The result feels more personal and lived-in.

    9. Add Warm Layered Lighting for Evening Ambiance

    Lighting is essential in an earth-tone Afrohemian room because it can enhance every natural material.

    The same room can look completely different under harsh overhead lighting compared with soft layered illumination.

    Materials and Elements You Need

    • Floor lamp
    • Table lamp
    • Pendant light
    • Wall sconce
    • Warm bulbs
    • Woven lampshade
    • Decorative lantern
    • Candles where appropriate

    Start With General Lighting

    Use your main room lighting to provide adequate visibility.

    Then add smaller sources around the room.

    Add a Floor Lamp

    Place it near the sofa or reading corner.

    A woven or natural-fiber shade can reinforce the aesthetic.

    Add a Table Lamp

    Place one on a console or side table.

    Choose ceramic, wood, stone, or textured materials.

    Use Pendant Lighting

    A woven pendant above the main seating area can become a sculptural feature.

    Make sure fixtures are correctly installed and appropriate for the room.

    Choose Warm Illumination

    Warm lighting generally complements:

    • Wood
    • Terracotta
    • Cream
    • Brown
    • Rust
    • Natural fibers

    It can make the room feel more intimate during the evening.

    Layer Instead of Overlighting

    You do not need every lamp turned on at maximum brightness.

    Use several softer sources.

    This creates depth and allows you to adjust the atmosphere according to the time of day.

    Final Touch

    If appropriate for your home, candles can provide additional warmth.

    Use safe placement and never leave open flames unattended.

    10. Create a Sophisticated Afrohemian Living Room With a Curated Finish

    The final idea brings everything together.

    A sophisticated Afrohemian living room should feel layered but not cluttered, expressive but not chaotic, and comfortable while still looking polished.

    Materials and Elements You Need

    • Neutral sofa
    • Natural wood coffee table
    • Earth-tone cushions
    • Textured rug
    • Woven baskets
    • Ceramic accessories
    • African-inspired artwork
    • Green plants
    • Warm lighting
    • Natural curtains
    • Decorative books
    • Sculptural objects

    Begin With the Foundation

    Use warm cream or beige as the primary color.

    Add natural wood for the main furniture pieces.

    Place a textured neutral rug underneath the seating arrangement.

    Build the Textile Layer

    Add cushions in:

    • Cream
    • Terracotta
    • Camel
    • Rust
    • Olive
    • Chocolate brown

    Mix patterns with solid colors.

    Add Artistic Elements

    Choose one large statement artwork or a carefully arranged gallery.

    Use pieces that complement the earth-tone palette.

    Introduce Natural Materials

    Add woven baskets, rattan, ceramic pottery, and carved wood.

    Do not introduce every material in equal amounts.

    Let wood and woven textures become the primary natural materials, with ceramics and stone acting as supporting elements.

    Add Greenery

    Place one large plant in an empty corner.

    Add one or two smaller plants around the room.

    Style the Coffee Table

    A beautiful arrangement might include:

    A handmade ceramic vase

    A wooden bowl

    A small plant

    Two decorative books

    Leave visible tabletop space.

    Style the Console

    Place one large artwork or mirror above it.

    Add a ceramic vase on one side.

    Place a wooden sculpture or small bowl on the other.

    Keep the middle relatively open.

    Add Warm Lighting

    Use a floor lamp beside the seating area and a warm table lamp on the console.

    If you have a pendant, allow it to provide a soft layer rather than making it the only source of light.

    The Final Editing Process

    Once everything is in place, walk around the room.

    Remove anything that looks unnecessary.

    If several objects have similar sizes, vary their heights.

    If one area looks visually heavy, remove an accessory.

    If a corner feels empty, add greenery or a small wooden stool rather than several small decorations.

    The goal is balance.

    How to Choose the Best Afrohemian Color Combination

    A successful earth-tone palette usually starts with warm neutrals.

    Consider:

    • Cream
    • Ivory
    • Beige
    • Sand
    • Taupe

    Then introduce:

    • Terracotta
    • Rust
    • Camel
    • Caramel
    • Chocolate brown

    Finally, use muted natural colors such as:

    • Olive
    • Sage
    • Deep green

    Black can also be used sparingly for contrast.

    For example, black picture frames can make earthy artwork stand out.

    How to Mix Patterns Without Making the Room Busy

    Pattern is beautiful in Afrohemian interiors, but too many competing patterns can quickly become overwhelming.

    Choose one dominant pattern.

    Then use smaller patterns around it.

    For example:

    Large patterned rug

    Solid terracotta cushion

    Small geometric cushion

    Plain cream cushion

    Textured woven cushion

    This gives the eye a place to rest.

    Keep the colors related even when the patterns are different.

    How to Make an Afrohemian Living Room Look Expensive

    You do not need expensive furniture.

    Focus on proportion and materials.

    Choose one or two large focal points instead of many small accessories.

    Use full-length curtains.

    Select appropriately sized rugs.

    Keep furniture proportional to the room.

    Use warm lighting.

    Add natural materials.

    Avoid excessive clutter.

    Choose fewer but more distinctive decorative objects.

    A handmade ceramic vase, large plant, natural wood table, and beautiful rug can create more visual impact than dozens of inexpensive decorations.

    Budget-Friendly Ways to Create the Style

    Start with what you already own.

    A neutral sofa can become the foundation.

    Add affordable cushions in terracotta and camel.

    Introduce a woven basket.

    Add a plant.

    Use a secondhand wooden table if appropriate.

    Look for handmade ceramics from local makers.

    Create artwork yourself using simple abstract earth-tone shapes.

    Rearrange furniture before buying new pieces.

    You may discover that changing the layout creates a completely different feeling.

    A Simple Budget Transformation

    First, remove unnecessary accessories.

    Second, rearrange the furniture.

    Third, introduce warm textiles.

    Fourth, add natural wood.

    Fifth, bring in greenery.

    Sixth, improve the lighting.

    Finally, add one strong artwork or decorative focal point.

    This sequence allows you to see the impact of each change.

    How to Keep the Afrohemian Style Authentic and Personal

    Afrohemian decorating should feel personal rather than like a showroom.

    Include objects that have meaning.

    Display travel finds, handmade pieces, books, family photographs, artwork, textiles, or objects that reflect your interests.

    If incorporating African-inspired decorative elements, choose them thoughtfully rather than using them simply as generic visual themes.

    Supporting artists, designers, and craftspeople from the cultures that inspire your decor can also make your choices more meaningful.

    The strongest interiors tell a story.

    Your living room should feel like your home, not a collection of trend-driven objects.

    Final Thoughts

    A warm earth-tone Afrohemian living room is an excellent choice if you want a space that feels cozy, artistic, natural, and sophisticated at the same time.

    The style works because it combines several qualities that are often difficult to balance.

    Modern furniture creates structure.

    Earth tones create warmth.

    Natural materials add texture.

    Plants bring life.

    Artwork adds personality.

    Handcrafted objects introduce character.

    Warm lighting creates atmosphere.

    The key is to combine these elements intentionally.

    Start with a warm neutral foundation such as cream, beige, or sand. Add natural wood furniture to introduce depth. Layer jute, linen, cotton, rattan, and woven textures. Bring in terracotta, rust, camel, and chocolate brown through cushions and accessories.

    Then create one or two artistic focal points.

    A large piece of Afrohemian-inspired artwork can anchor a wall. A woven basket arrangement can add texture. A sculptural ceramic piece can become the centerpiece of a coffee table.

    Do not forget greenery.

    One large leafy plant can transform an otherwise neutral room, while smaller plants can add detail to shelves and tables.

    Lighting should be soft and layered.

    Warm lamps and woven fixtures can make natural materials look even richer in the evening.

    Most importantly, resist the temptation to decorate every empty space.

    Afrohemian style can certainly be expressive, but it becomes more elegant when there is room for individual pieces to stand out.

    Think in layers.

    Begin with the architecture and large furniture.

    Add rugs and curtains.

    Introduce cushions and throws.

    Bring in wood and woven materials.

    Add artwork.

    Introduce greenery.

    Finish with a few meaningful accessories.

    Then step back and edit.

    Remove anything that does not contribute to the room.

    The result should feel comfortable enough for everyday life but beautiful enough to inspire you every time you walk into the room.

    Whether your living room is large or compact, you can adapt this style to suit your space.

    In a small apartment, focus on a neutral sofa, compact wood furniture, one textured rug, a few woven accessories, and strategically placed plants.

    In a larger home, you can create multiple seating zones, introduce larger artwork, use statement lighting, and experiment with layered rugs.

    You can also change the atmosphere seasonally without changing the foundation.

    During warmer months, emphasize cream, sand, olive, and lightweight linen.

    During fall and winter, bring in rust, terracotta, camel, chocolate brown, and heavier woven textiles.

    This flexibility makes the style practical as well as beautiful.

    Ultimately, the best warm earth-tone Afrohemian living room is not the one with the most decoration. It is the one where every element feels connected.

    The colors should work together.

    The textures should create depth.

    The furniture should feel comfortable.

    The artwork should have personality.

    The plants should bring freshness.

    The lighting should create warmth.

    And the decorative objects should tell a story.

    When these elements are balanced, you get a living room that feels naturally inviting, richly layered, and timeless โ€” a space that celebrates modern comfort while embracing natural materials, artistic expression, and warm earthy beauty.


  • 10 Fall Chalkboard Ideas That Add Cozy Autumn Charm to Your Home

    10 Fall Chalkboard Ideas That Add Cozy Autumn Charm to Your Home

    Fall is one of the most beautiful seasons for decorating a home. As the weather becomes cooler, warm colors, cozy textures, pumpkins, candles, dried flowers, and seasonal accessories begin to make their way into our living spaces. Among all the easy fall decorating projects, chalkboards are one of the simplest and most affordable ways to add seasonal personality without completely changing your existing decor.

    A beautiful fall chalkboard can transform an empty kitchen wall, entryway console, coffee station, fireplace mantel, dining area, or front porch into a charming autumn focal point. The best part is that you do not need expensive materials or professional artistic skills. With a chalkboard, chalk markers, a simple frame, and a little creativity, you can create a seasonal decoration that looks personal and inviting.

    Fall chalkboard decorating is also incredibly versatile. You can create a rustic farmhouse sign filled with hand-drawn pumpkins, a sophisticated neutral design with simple botanical illustrations, a cozy coffee-bar menu, a welcoming porch sign, or a meaningful Thanksgiving-inspired message. The possibilities are almost endless.

    For 2026, a particularly beautiful approach is to move beyond overly bright seasonal decorations and focus on more sophisticated autumn styling. Think warm cream, muted terracotta, caramel, deep brown, dusty olive, soft rust, and natural wood. These colors pair beautifully with chalkboard surfaces and make seasonal signs feel more elegant and integrated into the home.

    Another important trend is personalization. Instead of simply writing โ€œHappy Fall,โ€ consider creating a chalkboard that tells a small seasonal story. You could write a favorite fall drink recipe, create a handwritten autumn bucket list, display a harvest menu, or use a meaningful quote surrounded by simple leaves and pumpkins.

    The key is to avoid overcrowding. A chalkboard does not need to contain dozens of words or complicated drawings to look beautiful. Sometimes the most attractive design is a simple phrase surrounded by a few carefully placed leaves.

    The frame also plays an important role. A natural wood frame creates a farmhouse or rustic appearance, while a black frame feels more modern. A distressed frame can give the chalkboard a vintage character, while a clean thin frame works beautifully in contemporary interiors.

    Placement matters just as much as the design itself. A chalkboard positioned on a kitchen counter can become part of a coffee station. A large board in an entryway can welcome guests. A small board on a mantel can complement pumpkins and candles. A porch chalkboard can become an inviting seasonal greeting.

    You can also reuse the same chalkboard throughout the year. Once fall is over, erase the design and create a winter, Christmas, spring, or summer message. This makes chalkboards particularly useful for budget-conscious decorators.

    The following ten ideas explore different ways to use chalkboards throughout your home during autumn. Each idea includes practical styling suggestions, materials, placement recommendations, and simple ways to make your design look polished even if you are not confident in your drawing skills.

    1. Hello Fall Chalkboard With Pumpkins and Autumn Leaves

    A classic โ€œHello Fallโ€ chalkboard is one of the easiest ways to introduce autumn into your home. It is simple, recognizable, and can work with almost any decorating style.

    The secret to making this familiar idea look special is to focus on composition rather than adding too many decorations.

    Instead of filling the entire board with pumpkins, leaves, acorns, and words, create one clear focal point.

    Write โ€œHello Fallโ€ in the center using large hand-lettered text. Surround the lettering with a few illustrated leaves and small pumpkins.

    Materials You Need

    • Framed chalkboard
    • White chalk marker
    • Beige or muted orange chalk marker
    • Brown chalk marker
    • Pencil
    • Ruler
    • Small eraser or damp cloth
    • Optional autumn decorations

    Step-by-Step Design

    Start by cleaning the chalkboard surface.

    Before drawing directly onto it, lightly sketch your layout using a regular piece of chalk.

    Place the main phrase in the center.

    Make โ€œFallโ€ slightly larger than โ€œHelloโ€ so it becomes the visual focal point.

    Draw a few simple leaves around the corners.

    You do not need realistic botanical drawings. Simple curved leaves with visible veins can look beautiful.

    Add two or three small pumpkins near the bottom.

    Use different sizes so the composition feels natural.

    How to Display It

    Place the chalkboard on a kitchen counter beside a small pumpkin arrangement.

    It can also sit on an entryway console with a wooden bowl, dried leaves, and a warm table lamp.

    For a fireplace mantel, lean the chalkboard against the wall rather than hanging it.

    This creates a relaxed layered appearance.

    How to Make It More Elegant

    Use mostly white lettering.

    Introduce only small amounts of muted terracotta or brown.

    Pair the chalkboard with natural wood, cream textiles, and dried flowers.

    This prevents the decoration from looking overly bright or childish.

    2. Cozy Fall Kitchen Chalkboard

    The kitchen is one of the most natural places for a fall chalkboard because seasonal food and drinks are such an important part of autumn.

    A kitchen chalkboard can combine decoration and function.

    Instead of creating a board that only displays a seasonal phrase, turn it into a charming autumn kitchen menu.

    Materials You Need

    • Medium or large chalkboard
    • White chalk marker
    • Brown chalk marker
    • Optional muted orange marker
    • Wooden frame
    • Small decorative hooks if mounting
    • Seasonal kitchen accessories

    What to Write

    You could create a simple menu-style design featuring:

    โ€œFall Kitchenโ€

    โ€œPumpkin Breadโ€

    โ€œApple Cinnamon Oatmealโ€

    โ€œWarm Apple Ciderโ€

    โ€œPumpkin Spice Latteโ€

    โ€œFreshly Bakedโ€

    The exact wording is completely customizable.

    Design Structure

    Write the title at the top.

    Use smaller lettering for the seasonal menu items.

    Separate each section with a small leaf, dot, or decorative line.

    Add a simple pumpkin illustration in one corner.

    Keep enough empty space around the lettering.

    Kitchen Styling

    Place the chalkboard beside a coffee maker or baking station.

    Surround it with a wooden cutting board, ceramic mug, small pumpkin, and a vase containing dried stems.

    Use warm lighting if the kitchen has a pendant or under-cabinet lights.

    The combination of chalkboard lettering and natural kitchen materials creates an inviting autumn atmosphere.

    Beginner-Friendly Trick

    If handwriting is difficult, print your desired lettering on paper.

    Rub chalk over the back of the paper.

    Place it against the chalkboard and trace the letters.

    Then remove the paper and strengthen the lines with chalk marker.

    This simple transfer technique can help create much cleaner lettering.

    3. Elegant Neutral Fall Chalkboard

    Not every fall decoration needs to use bright orange.

    An elegant neutral chalkboard is perfect for homes decorated with cream, beige, brown, taupe, and natural wood.

    This design is particularly attractive if your existing decor has a modern, minimalist, or organic aesthetic.

    Materials You Need

    • Black chalkboard
    • White chalk marker
    • Beige chalk marker if available
    • Natural wood frame
    • Pencil
    • Small botanical stencil if desired

    Color Palette

    Use:

    • Warm white
    • Cream
    • Soft beige
    • Taupe
    • Brown
    • Muted olive
    • Light terracotta

    The black chalkboard provides enough contrast for the lighter tones.

    Design Idea

    Write a simple phrase such as:

    โ€œAutumn Blessingsโ€

    or

    โ€œGather & Give Thanksโ€

    Use elegant handwritten lettering.

    Surround the phrase with delicate branches, tiny leaves, and a few small berries.

    Avoid drawing large pumpkins everywhere.

    The simplicity makes the board feel sophisticated.

    Where to Display It

    A neutral fall chalkboard looks beautiful above a console table.

    Place it beside a ceramic vase filled with dried branches.

    Add a small stack of neutral books and a woven basket underneath.

    You can also place it on a bedroom dresser for a quieter seasonal touch.

    Why It Works

    Neutral fall decorating allows the seasonal feeling to blend with your existing interior instead of dominating it.

    This is particularly useful if you prefer year-round decor that does not require major seasonal changes.

    4. Fall Coffee Bar Chalkboard

    A fall coffee station can become one of the coziest corners of your kitchen.

    A chalkboard makes the coffee bar feel intentional while giving you an opportunity to introduce autumn lettering and illustrations.

    Materials You Need

    • Small or medium chalkboard
    • White chalk marker
    • Coffee mugs
    • Wooden tray
    • Coffee jars
    • Cinnamon sticks
    • Small pumpkin
    • Seasonal napkins
    • Warm light

    Chalkboard Ideas

    Write:

    โ€œAutumn Coffee Barโ€

    You can add a small menu underneath.

    For example:

    โ€œPumpkin Spiceโ€

    โ€œCinnamon Latteโ€

    โ€œMaple Coffeeโ€

    โ€œHot Apple Ciderโ€

    โ€œCozy Morningsโ€

    Keep the menu short.

    Styling the Coffee Station

    Place the coffee machine on one side.

    Arrange mugs on hooks or a small shelf.

    Place coffee beans or grounds in attractive glass containers.

    Add cinnamon sticks to a small ceramic bowl.

    Place a miniature pumpkin near the chalkboard.

    Use a wooden tray to visually group smaller items.

    Lighting

    Warm lighting is especially important here.

    A small lamp or warm under-cabinet lighting can make the coffee station feel inviting in the evening.

    If you have a nearby pendant light, allow it to provide soft illumination rather than using extremely bright overhead lighting.

    Extra Detail

    Draw a tiny steaming mug on the chalkboard.

    It does not need to be perfect.

    Simple line art often looks more charming than highly detailed illustrations.

    5. Rustic Farmhouse Fall Chalkboard

    For a farmhouse-inspired home, a rustic chalkboard can create an especially welcoming autumn focal point.

    This design works beautifully with reclaimed wood, galvanized containers, baskets, plaid textiles, and pumpkins.

    Materials You Need

    • Distressed wood-framed chalkboard
    • White chalk
    • Brown chalk marker
    • Muted orange chalk marker
    • Small pumpkin illustrations
    • Dried wheat or grass
    • Wooden accessories

    Suggested Message

    Try something warm and simple such as:

    โ€œWelcome Autumnโ€

    โ€œGather Hereโ€

    โ€œHarvest Seasonโ€

    or

    โ€œHome Sweet Fallโ€

    Design Style

    Use slightly imperfect lettering.

    A farmhouse chalkboard does not need to look like professionally printed typography.

    Add hand-drawn wheat stalks around the edges.

    Place small pumpkins near the bottom.

    Use curved decorative lines around the main message.

    Decorate Around the Board

    Place the chalkboard on a wooden console.

    Add a galvanized metal bucket filled with dried grasses.

    Place two or three pumpkins beside it.

    Add a woven basket underneath.

    Use a plaid throw nearby if the chalkboard is in a living room.

    Keep It Natural

    The most successful farmhouse fall displays rely on natural materials.

    Do not use too many plastic decorations.

    Wood, metal, dried plants, ceramic pieces, and fabric create a more authentic appearance.

    6. Fall Porch Welcome Chalkboard

    A porch chalkboard is a beautiful way to welcome guests during autumn.

    It can be particularly effective when positioned near the front door with pumpkins, mums, lanterns, and a seasonal wreath.

    Materials You Need

    • Large outdoor-suitable chalkboard or protected framed board
    • Chalk marker appropriate for the board
    • Weather-resistant frame
    • Pumpkins
    • Mums or seasonal flowers
    • Lantern
    • Outdoor rug
    • Small stool or stand

    Message Ideas

    Keep the main message short:

    โ€œWelcome Fallโ€

    โ€œHello Autumnโ€

    โ€œFall Starts Hereโ€

    โ€œWelcome to Our Cozy Homeโ€

    A short message is easier to read from a distance.

    Placement

    Lean the chalkboard against the wall beside your front door.

    Alternatively, place it on a decorative easel.

    Make sure it is positioned where it will not obstruct the entrance.

    Create a Layered Porch Display

    Place the chalkboard behind a group of pumpkins.

    Add mums in large planters.

    Place a lantern beside the arrangement.

    Use different pumpkin sizes to create height variation.

    Color Coordination

    For a sophisticated porch, combine:

    • Cream pumpkins
    • Muted orange pumpkins
    • Burgundy accents
    • Green foliage
    • Natural wood
    • Warm brown

    This creates a richer appearance than using only bright orange.

    Practical Consideration

    If the porch is exposed to rain or humidity, choose a board and writing material suitable for outdoor conditions and protect the artwork appropriately.

    7. Thankful and Grateful Chalkboard

    Autumn is also a season associated with gratitude, family, gathering, and meaningful traditions.

    A โ€œThankful & Gratefulโ€ chalkboard can bring a more emotional and personal quality to your fall decorating.

    Materials You Need

    • Medium chalkboard
    • White chalk marker
    • Warm beige marker
    • Small botanical illustrations
    • Natural wood frame
    • Seasonal vase

    Main Design

    Write:

    โ€œThankful & Gratefulโ€

    in the center.

    Underneath, you can add a short sentence about family, home, friendship, or gratitude.

    Surround the lettering with delicate leaves.

    Make It Personal

    Instead of using a generic message, consider writing something meaningful to your household.

    For example, you could create a small list of things your family appreciates.

    This makes the chalkboard more than a decoration.

    It becomes part of your seasonal traditions.

    Dining Room Placement

    A thankful chalkboard works especially well in a dining room.

    Place it near the dining table.

    Decorate the table with:

    • Linen napkins
    • Wooden chargers
    • Neutral plates
    • Small pumpkins
    • Candles
    • Dried flowers

    The chalkboard can become part of the overall Thanksgiving-inspired tablescape.

    Why It Works

    Personal decorations tend to make a home feel more welcoming.

    Instead of focusing entirely on visual beauty, this idea introduces meaning into the space.

    8. Autumn Quote Chalkboard With Botanical Drawings

    If you prefer simple decorating, an autumn quote chalkboard can be the perfect choice.

    Instead of covering the board with seasonal illustrations, choose one meaningful phrase and let it remain the main feature.

    Materials You Need

    • Framed chalkboard
    • White chalk marker
    • Pencil
    • Leaf stencil if desired
    • Eraser
    • Natural wood accessories

    Choosing the Quote

    Select a short phrase that creates an emotional autumn feeling.

    Examples include:

    โ€œCozy Days Aheadโ€

    โ€œAutumn Is Callingโ€

    โ€œGather Togetherโ€

    โ€œSlow Down & Enjoyโ€

    โ€œHello Cozy Seasonโ€

    The shorter the phrase, the easier it is to create a visually balanced design.

    Design the Border

    Draw a few delicate leaves around the edges.

    You could create:

    • Oak leaves
    • Maple leaves
    • Small branches
    • Acorns
    • Berries
    • Tiny pumpkins

    Do not put decorations around every inch of the border.

    Leave sections of empty space.

    Display

    Place the board on a fireplace mantel.

    Add a few candles, cream pumpkins, dried foliage, and a natural wood bowl.

    The chalkboard should complement the other objects rather than compete with them.

    Modern Version

    For a contemporary home, use a simple black frame and very clean lettering.

    For a farmhouse home, use distressed wood.

    For an organic home, pair the board with natural stone, ceramics, and greenery.

    9. Harvest Market Chalkboard

    A harvest-market-inspired chalkboard can give your kitchen or dining room a charming seasonal character.

    Think of an old-fashioned autumn farm stand with apples, pumpkins, herbs, flowers, and homemade goods.

    Materials You Need

    • Large chalkboard
    • White chalk marker
    • Brown or muted orange marker
    • Pencil
    • Wooden frame
    • Small illustrations

    Main Heading

    Write something like:

    โ€œAutumn Harvestโ€

    Then create small sections underneath.

    You could include:

    โ€œPumpkinsโ€

    โ€œApplesโ€

    โ€œFresh Breadโ€

    โ€œCiderโ€

    โ€œSeasonal Flowersโ€

    Decorative Elements

    Draw small illustrations of apples, pumpkins, wheat, and leaves around the lettering.

    Use simple line drawings.

    You do not need advanced artistic ability.

    Create a Market Display

    Place the chalkboard behind a kitchen counter.

    Surround it with baskets of apples, small pumpkins, a loaf of bread, ceramic containers, and dried flowers.

    Use a wooden cutting board as a background layer.

    Color Palette

    Keep the colors earthy.

    Use:

    • White
    • Cream
    • Rust
    • Brown
    • Muted green

    Avoid too many bright colors.

    This gives the design a more sophisticated vintage appearance.

    Why It Works

    The harvest-market concept combines seasonal decorating with a sense of nostalgia.

    It can make a kitchen feel warm, traditional, and lived-in.

    10. Cozy Autumn Bucket List Chalkboard

    For a fun and personal fall decorating idea, create an autumn bucket-list chalkboard.

    Instead of simply displaying a seasonal greeting, use the board to list activities you want to enjoy throughout the season.

    Materials You Need

    • Large chalkboard
    • White chalk marker
    • Colored chalk markers
    • Pencil
    • Small seasonal illustrations
    • Wood frame

    Bucket List Ideas

    Your list could include:

    โ€œVisit a pumpkin patchโ€

    โ€œBake apple pieโ€

    โ€œMake homemade ciderโ€

    โ€œHave a cozy movie nightโ€

    โ€œTake a fall walkโ€

    โ€œDecorate the porchโ€

    โ€œEnjoy a bonfireโ€

    โ€œDrink hot chocolateโ€

    โ€œVisit a farmers marketโ€

    Choose activities that are meaningful to you.

    Design the Board

    Place โ€œOur Fall Bucket Listโ€ at the top.

    Create a numbered list underneath.

    Draw a tiny leaf beside each item.

    Use a small pumpkin or acorn illustration at the bottom.

    Where to Put It

    The kitchen, family room, or entryway can work well.

    A family room placement makes the board easy for everyone to see and add ideas.

    Make It Interactive

    Leave a little blank space at the bottom.

    As the season progresses, family members can add new activities.

    You can check off completed activities using chalk.

    Why This Is a Great Idea

    This turns seasonal decorating into an experience.

    Instead of simply looking beautiful, the chalkboard encourages you to actually enjoy the season.

    How to Choose the Right Chalkboard Size

    The size of your chalkboard should depend on where you intend to display it.

    A small board works well for:

    • Coffee stations
    • Kitchen counters
    • Shelves
    • Small entryways
    • Bathroom counters

    A medium board is ideal for:

    • Console tables
    • Dining rooms
    • Kitchen walls
    • Bedroom dressers

    A large board works well for:

    • Fireplaces
    • Large entryways
    • Porches
    • Dining areas
    • Empty feature walls

    Do not choose a board simply because it is large.

    The proportions should match the furniture around it.

    A tiny board on a huge wall can look lost, while an enormous board on a narrow console can feel overwhelming.

    How to Make Chalkboard Lettering Look Professional

    You do not need perfect handwriting.

    The key is consistency.

    First, lightly sketch the lettering.

    Use a ruler to establish horizontal guidelines.

    Keep the spacing between words relatively even.

    Make your main phrase larger than supporting text.

    Use two lettering styles at most.

    For example, combine a simple handwritten script with clean uppercase letters.

    Avoid using too many different fonts.

    Transfer Method

    If you want extremely clean lettering, create the design on paper first.

    Place chalk on the back of the paper.

    Position the paper on the chalkboard.

    Trace the design.

    Remove the paper.

    Then redraw the transferred lines with a chalk marker.

    This is one of the easiest methods for beginners.

    How to Style a Fall Chalkboard Without Making It Cluttered

    A common mistake is trying to use every autumn symbol at once.

    You do not need pumpkins, leaves, acorns, apples, wheat, candles, quotes, and flowers all around one board.

    Choose a primary theme.

    For example:

    Pumpkins + โ€œHello Fallโ€

    Coffee + seasonal menu

    Leaves + autumn quote

    Harvest + market list

    Thanksgiving + gratitude

    Then build the design around that theme.

    Leave empty space.

    Negative space helps the lettering remain readable and gives the entire design a more sophisticated appearance.

    Best Colors for Fall Chalkboard Decor

    Traditional white chalk looks beautiful against black.

    However, subtle color can make the design more interesting.

    Consider using:

    • Warm white
    • Cream
    • Muted orange
    • Terracotta
    • Rust
    • Brown
    • Dusty olive
    • Soft beige

    Use color sparingly.

    White should generally remain the primary lettering color, while earthy tones can highlight leaves, pumpkins, or decorative details.

    Where to Display Fall Chalkboards

    There are many places where a chalkboard can become part of your autumn decor.

    Kitchen

    Use it for seasonal menus, coffee bars, or recipes.

    Entryway

    Create a welcoming autumn greeting.

    Living Room

    Place it near a console or fireplace.

    Dining Room

    Use a gratitude or harvest message.

    Bedroom

    Display a soft seasonal quote.

    Porch

    Create a welcoming fall sign.

    Coffee Station

    Create a seasonal drink menu.

    The best location is one where the board is visible but does not interfere with everyday movement.

    How to Make Fall Chalkboard Decor Look Expensive

    You do not need expensive materials to make a chalkboard look sophisticated.

    Start with the frame.

    A beautiful natural wood frame can immediately elevate a basic chalkboard.

    Next, focus on the lettering.

    Clean, well-spaced lettering looks more polished than complicated drawings.

    Then consider the surrounding decor.

    Pair the chalkboard with natural materials such as:

    • Wood
    • Wicker
    • Linen
    • Ceramic
    • Stone
    • Dried flowers

    Use warm lighting.

    Keep the arrangement balanced.

    Finally, remove unnecessary items.

    A simple display with three beautiful accessories often looks more expensive than a crowded arrangement with fifteen objects.

    Budget-Friendly Fall Chalkboard Decorating

    One reason chalkboards are so useful for seasonal decorating is that they can be reused.

    You can purchase one quality chalkboard and change the design every season.

    Instead of buying new seasonal signs every year, simply erase the existing design.

    Use the same board for:

    Spring messages

    Summer signs

    Fall quotes

    Halloween designs

    Thanksgiving greetings

    Winter and Christmas messages

    This makes chalkboards an excellent choice for budget-friendly home decorating.

    You can also make your own board using a wood frame and chalkboard paint, provided the materials are appropriate for the surface and intended use.

    Final Thoughts

    Fall chalkboards are a simple way to make your home feel warmer, more personal, and more seasonal without spending a fortune.

    Whether you prefer rustic farmhouse decor, elegant neutral interiors, cozy cottage style, modern minimalism, or traditional autumn decorating, there is a chalkboard idea that can fit naturally into your home.

    The most important thing is not to make the design complicated.

    A simple phrase surrounded by a few leaves can be incredibly beautiful.

    A small coffee menu can make a kitchen feel instantly more seasonal.

    A gratitude message can create a meaningful dining-room focal point.

    A porch welcome sign can make guests feel invited before they even walk through the door.

    A fall bucket list can turn a decoration into a family tradition.

    When designing your chalkboard, begin with the location and the overall style of your home. Then choose a message that supports that atmosphere.

    For a modern home, keep the lettering clean and the illustrations minimal.

    For a farmhouse home, use distressed wood, wheat illustrations, pumpkins, and warm earthy details.

    For a neutral organic home, choose cream lettering, delicate botanical drawings, natural wood, and muted autumn colors.

    For a cozy kitchen, turn the board into a seasonal coffee or harvest menu.

    For a family room, create an autumn bucket list that everyone can participate in.

    And for a porch, choose a short welcoming message that can be read easily from outside.

    Remember that beautiful fall decorating is not about adding as many seasonal objects as possible. It is about creating a feeling.

    Warm lighting, natural textures, autumn colors, meaningful messages, and a few carefully selected seasonal details can make a home feel incredibly inviting.

    A chalkboard gives you the freedom to change that feeling throughout the season.

    You can start September with โ€œHello Fall,โ€ transition into October with a cozy autumn quote, and finish the season with โ€œThankful & Grateful.โ€

    That flexibility is what makes chalkboard decorating so appealing.

    With just one board and a little creativity, you can create a seasonal feature that feels personal, beautiful, and completely unique to your home.

    So choose your favorite fall phrase, gather your chalk markers, add a few natural autumn details, and create a chalkboard that makes your home feel a little cozier every time you see it.


  • 10 Organic Modern Home Decor Ideas for a Warm and Stylish Home

    10 Organic Modern Home Decor Ideas for a Warm and Stylish Home

    Organic modern home decor has become one of the most appealing ways to create a home that feels sophisticated without feeling cold. It combines the clean lines and simplicity of modern design with the warmth, texture, and natural beauty of organic materials. The result is a space that feels calm, welcoming, timeless, and effortlessly stylish.

    Unlike some modern decorating styles that rely heavily on stark white walls, glossy surfaces, sharp furniture, and minimal accessories, organic modern interiors introduce softness through natural wood, linen, stone, woven materials, greenery, earthy colors, and tactile fabrics. The style is modern enough to feel polished but comfortable enough to feel lived in.

    One of the best things about organic modern decorating is that you do not need to completely redesign your home to achieve the look. Small changes can make a significant difference. Replacing a synthetic-looking accessory with a handmade ceramic vase, adding a chunky woven throw, introducing natural wood furniture, changing harsh lighting to warm illumination, or layering neutral textures can immediately make a room feel more organic.

    The color palette is also important. Organic modern homes typically use colors inspired by nature. Warm white, ivory, beige, taupe, sand, oatmeal, camel, soft brown, muted olive, clay, and earthy gray can all work beautifully. These colors create a peaceful background while allowing natural materials to become the visual focus.

    Texture is another defining feature. A room decorated entirely in one neutral color can feel flat if every surface has the same finish. Organic modern design solves this by layering different textures. A linen sofa can be paired with a woven rug, a wooden coffee table, a stone vase, a boucle chair, and a knitted throw. Although the colors may be similar, the different textures create depth.

    Plants are also an important part of this aesthetic. Greenery adds life to neutral interiors and reinforces the connection with nature. Large leafy plants can fill an empty corner, while smaller plants can decorate shelves, consoles, and coffee tables.

    Lighting should be warm and layered rather than overly bright. Natural sunlight is ideal during the day, while warm floor lamps, table lamps, wall sconces, and pendant lights can create a cozy atmosphere at night.

    Organic modern decorating is also about restraint. The goal is not to fill every surface with accessories. Instead, choose a smaller number of meaningful or beautiful objects and give them room to breathe.

    The following 10 ideas will help you bring organic modern style into your home in a practical and approachable way. Whether you are decorating a living room, bedroom, dining area, entryway, or small apartment, these ideas can be adapted to different spaces and budgets.

    1. Create a Warm Neutral Organic Modern Living Room

    The living room is one of the easiest places to introduce organic modern design because it naturally combines furniture, textiles, lighting, artwork, and decorative accessories.

    Start by creating a warm neutral foundation.

    Instead of relying on pure white, consider shades such as warm ivory, creamy beige, oatmeal, soft taupe, or light greige. These colors make the room feel softer and work beautifully with natural materials.

    Materials and Elements You Need

    • Neutral sofa
    • Natural wood coffee table
    • Textured area rug
    • Linen or cotton cushions
    • Woven basket
    • Ceramic vase
    • Neutral artwork
    • Greenery
    • Warm floor or table lamp
    • Natural wood accessories

    How to Create the Look

    Begin with the sofa.

    A cream, beige, oatmeal, or warm gray sofa provides an excellent foundation. Choose a silhouette with relatively clean lines rather than extremely ornate details.

    Next, add a natural wood coffee table.

    Look for visible wood grain and an organic shape. A rounded or slightly irregular tabletop can soften the geometric appearance of a modern sofa.

    Add a large textured rug underneath the furniture.

    The rug should help visually connect the seating area rather than simply sit underneath the coffee table.

    Layer cushions in different fabrics.

    For example, combine linen, cotton, boucle, and knitted textures while keeping the colors within the same neutral family.

    Place a woven basket beside the sofa.

    Use it to store blankets, magazines, or other everyday items.

    Finally, introduce greenery.

    A large plant placed beside the sofa can create height and bring natural color into the neutral room.

    Why This Works

    The combination of modern furniture and natural materials creates the balance that defines organic modern style.

    The furniture provides structure.

    The wood adds warmth.

    The textiles provide softness.

    The greenery introduces life.

    The result feels sophisticated without looking overly decorated.

    2. Add Natural Wood as the Main Design Feature

    Natural wood is one of the most effective ways to bring organic warmth into a modern interior.

    Modern rooms can sometimes feel visually hard because they contain many straight lines and smooth surfaces. Wood immediately introduces warmth and natural variation.

    Materials and Elements You Need

    • Oak or walnut furniture
    • Wooden coffee table
    • Wood console
    • Wooden shelving
    • Natural wood stools
    • Woven accessories
    • Neutral textiles
    • Ceramic objects

    How to Use Wood

    You do not need wood everywhere.

    Choose one or two major wooden pieces and allow them to become focal points.

    A large oak coffee table can completely change the feeling of a neutral living room.

    In a dining room, a solid wood dining table can become the central feature.

    In a bedroom, a natural wood bed frame can create warmth against cream bedding.

    In an entryway, a simple wooden console can provide both function and character.

    Choose Natural Finishes

    Avoid overly glossy finishes if you want an organic appearance.

    Matte or lightly finished wood tends to feel more natural.

    Visible knots, grain variations, and subtle imperfections can make the furniture feel more authentic.

    Pairing Wood With Neutrals

    Natural wood works beautifully with:

    • Cream
    • Ivory
    • Beige
    • Taupe
    • Soft gray
    • Olive
    • Terracotta
    • Warm brown

    For a lighter organic modern room, use pale oak.

    For a richer atmosphere, choose walnut or medium-toned wood.

    Beginner Tip

    If replacing furniture is outside your budget, introduce smaller wood accents.

    A wooden stool, tray, picture frame, bowl, or side table can still make a noticeable difference.
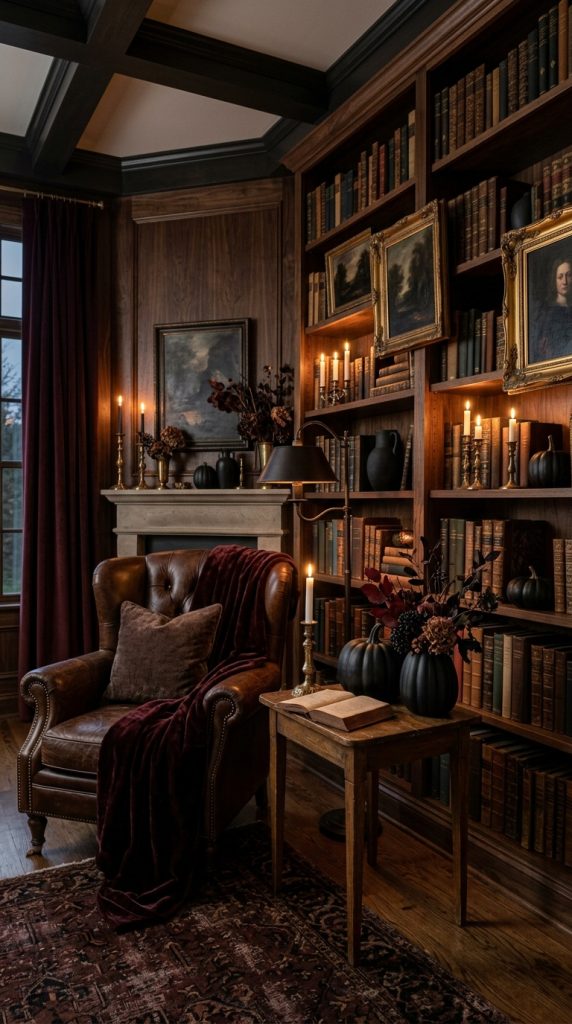
    3. Layer Natural Textures for a Cozy Look

    Organic modern design is not only about color. Texture is one of the most important elements.

    Imagine a room where everything is beige but every object has the same smooth finish. It may look coordinated, but it can also feel flat.

    Layering textures solves this problem.

    Materials to Use

    • Linen
    • Cotton
    • Boucle
    • Wool
    • Jute
    • Rattan
    • Woven baskets
    • Natural wood
    • Stone
    • Handmade ceramics

    How to Layer Textures

    Start with your largest textile.

    An area rug establishes the foundation.

    Choose a natural-looking rug with subtle variation.

    Next, introduce soft upholstery.

    A linen or cotton sofa works beautifully.

    Then add cushions.

    Mix at least three different textures.

    For example, use:

    • Linen cushion
    • Chunky knitted cushion
    • Boucle accent cushion

    Add a woven basket near the seating area.

    Place a ceramic vase on the coffee table.

    Finish with a soft throw casually draped across the sofa.

    Keep the Colors Controlled

    You can use many textures without creating visual chaos if the colors remain coordinated.

    For example:

    Cream sofa

    Beige rug

    Oatmeal throw

    Taupe cushions

    Natural wood table

    Warm white ceramics

    The room will have plenty of visual interest without requiring bright colors.

    Why Texture Matters

    Texture makes a neutral room feel warm.

    It also creates the relaxed, tactile quality associated with organic interiors.

    When designing an organic modern room, ask yourself:

    โ€œWhat can I touch?โ€

    If the answer is mostly smooth surfaces, introduce more textiles, woven materials, and natural finishes.

    4. Design an Organic Modern Bedroom

    An organic modern bedroom should feel peaceful, comfortable, and uncluttered.

    The bedroom is particularly suited to this style because neutral colors and natural materials naturally create a relaxing environment.

    Materials and Elements You Need

    • Upholstered or natural wood bed
    • Linen bedding
    • Neutral duvet
    • Wooden nightstands
    • Woven rug
    • Ceramic lamps
    • Warm lighting
    • Minimal artwork
    • Greenery
    • Woven basket

    Start With the Bed

    The bed should remain the focal point.

    Choose neutral bedding in cream, beige, oatmeal, or soft gray.

    Layer the bed with different fabrics.

    Use a duvet, quilt, throw, and several pillows rather than relying on one flat layer.

    Add Natural Wood

    Wooden nightstands or a wood bed frame can introduce warmth.

    Choose pieces with simple silhouettes.

    Avoid overly ornate furniture.

    Lighting

    Use warm bedside lamps.

    Ceramic or textured lamps can reinforce the organic feeling.

    Instead of extremely bright overhead lighting, rely on multiple warm sources whenever possible.

    Decorate the Walls Carefully

    A single large neutral artwork can be more effective than many small pieces.

    Consider abstract artwork inspired by natural landscapes, stone formations, branches, or subtle earthy shapes.

    Add Greenery

    A small plant on the nightstand or a larger plant in an empty corner can add freshness.

    Keep the number of plants controlled so the bedroom remains calm.

    5. Create a Minimal Organic Modern Entryway

    The entryway sets the tone for the rest of your home.

    An organic modern entryway should feel welcoming, functional, and visually calm.

    Materials and Elements

    • Wooden console
    • Round mirror
    • Ceramic vase
    • Branches or greenery
    • Woven basket
    • Neutral runner
    • Warm lamp
    • Small decorative tray

    How to Style It

    Place a wooden console against the wall.

    Choose a simple design with clean lines.

    Hang a large round mirror above it.

    The curved shape of the mirror softens the straight lines of the console.

    Add a ceramic vase with natural branches.

    Place a small tray on the console for keys and everyday items.

    Add a woven basket underneath.

    Use it for shoes, umbrellas, scarves, or other items.

    Add a Runner

    A neutral woven runner can introduce texture.

    Choose a subtle pattern or natural variation rather than a bold geometric design.

    Lighting

    A small table lamp with warm illumination can make the entryway feel much more welcoming in the evening.

    Keep It Uncluttered

    The organic modern style works best when surfaces are intentionally edited.

    Instead of covering the console with accessories, select three or four beautiful pieces.

    The negative space around them is part of the design.

    6. Use Stone and Ceramic Accessories

    Natural stone and handmade-looking ceramics are excellent ways to add organic character without making major furniture changes.

    Materials and Elements

    • Stone vase
    • Ceramic bowls
    • Clay vessels
    • Travertine tray
    • Marble accent
    • Handmade pottery
    • Neutral sculptures

    How to Use Them

    Start with one large sculptural object.

    A stone vase can become the focal point of a coffee table.

    Add a small ceramic bowl nearby.

    Place a candle or small decorative object inside it.

    On a console, combine a ceramic vase with a wooden tray and a simple piece of artwork.

    Choose Imperfect Shapes

    Organic modern design benefits from objects that look handmade or naturally formed.

    Look for:

    • Uneven edges
    • Matte surfaces
    • Natural variation
    • Rounded shapes
    • Subtle texture

    Perfectly identical objects can make a room feel overly manufactured.

    Avoid Overdecorating

    You do not need a large collection.

    One beautiful ceramic vase can have more impact than ten small decorative pieces.

    The goal is to create a curated environment.

    7. Bring in Earthy Colors Through Small Accents

    Organic modern interiors are often neutral, but that does not mean they must be completely colorless.

    Earth-inspired accent colors can add depth.

    Colors to Consider

    • Olive green
    • Terracotta
    • Clay
    • Camel
    • Warm brown
    • Muted rust
    • Dusty beige
    • Soft ochre

    How to Introduce Color

    Start small.

    Use an olive cushion on a cream sofa.

    Add a terracotta vase to a wooden console.

    Use a muted rust throw at the end of a bed.

    Choose a camel leather accent chair.

    Add warm brown artwork.

    Why Earthy Colors Work

    These colors are naturally compatible with wood, stone, linen, and greenery.

    They create warmth without disrupting the calm appearance of the room.

    The 80/20 Approach

    A useful approach is to keep approximately 80 percent of the room neutral and use the remaining 20 percent for earthy accents.

    This does not need to be exact.

    The principle is simply to allow the natural neutrals to remain dominant.

    Seasonal Flexibility

    Earthy accents can also change with the seasons.

    Use lighter beige and soft green during spring and summer.

    Introduce terracotta, rust, and deeper brown during fall.

    Use warm cream and camel during winter.

    The base of the room can remain unchanged.

    8. Create a Cozy Organic Modern Dining Area

    The dining room is another perfect place to combine modern simplicity with natural materials.

    Materials and Elements

    • Solid wood dining table
    • Upholstered dining chairs
    • Woven pendant
    • Neutral rug
    • Ceramic centerpiece
    • Linen table runner
    • Natural branches
    • Warm lighting

    Start With the Table

    A solid wood table should be the main feature.

    Choose a simple silhouette.

    Round tables work beautifully in smaller dining areas, while rectangular tables can create a more traditional arrangement.

    Choose Soft Seating

    Instead of choosing chairs that are entirely hard and visually heavy, introduce upholstery.

    Cream, beige, taupe, or light brown fabrics work well.

    Add a Woven Pendant

    A woven or natural-fiber pendant above the table can create texture and visual warmth.

    Make sure the fixture is properly suited to the space and installed safely.

    Keep the Centerpiece Simple

    Place a ceramic vase in the middle of the table.

    Fill it with branches or seasonal greenery.

    Avoid extremely elaborate floral arrangements.

    The organic modern look is more relaxed.

    Add a Rug

    A neutral rug underneath the table can define the dining area.

    Choose a durable material that suits the amount of use and cleaning required.

    9. Transform a Small Apartment With Organic Modern Style

    Organic modern design is particularly effective in small spaces because it relies on simplicity and natural materials rather than excessive decoration.

    Materials and Elements

    • Compact wood furniture
    • Neutral sofa
    • Round coffee table
    • Woven basket
    • Wall mirror
    • Linen curtains
    • Small plants
    • Neutral rug
    • Warm lighting

    Choose Furniture Carefully

    Avoid filling a small apartment with oversized furniture.

    Choose pieces that provide function without visually overwhelming the room.

    A compact wooden coffee table with rounded edges can work better than a large rectangular table.

    Use Mirrors

    A large mirror can reflect light and create the perception of additional space.

    Choose a simple round or softly curved frame.

    Keep Window Treatments Light

    Linen or lightweight neutral curtains can soften the room while allowing natural light to enter.

    Use Vertical Space

    Wall-mounted shelves can provide storage without taking up floor space.

    Decorate them with a small number of carefully selected objects.

    Add Plants Strategically

    One large plant in a corner can be more effective than many tiny plants scattered around the apartment.

    Keep walkways clear.

    Focus on Quality Over Quantity

    Small spaces benefit enormously from editing.

    Every object should either serve a purpose or contribute something meaningful to the overall aesthetic.

    10. Create a Warm Organic Modern Home With Layered Lighting

    Lighting can completely change an organic modern interior.

    Even a beautifully decorated room can feel cold if the lighting is harsh.

    The goal is to create layers of warm illumination.

    Lighting Elements

    • Table lamps
    • Floor lamps
    • Wall sconces
    • Pendant lights
    • Recessed lighting
    • Candles where appropriate
    • Under-cabinet lighting

    Start With Ambient Lighting

    General lighting should illuminate the room without feeling overly intense.

    Warm-toned lighting can make beige, cream, wood, and stone appear richer.

    Add Task Lighting

    Task lighting is useful for reading corners, desks, kitchen counters, and bedside areas.

    Choose fixtures that provide enough illumination for the activity.

    Add Accent Lighting

    Accent lighting can highlight:

    • Artwork
    • Plants
    • Architectural details
    • Shelving
    • Decorative objects

    Use Warm Light

    For living spaces where you want a cozy atmosphere, warmer color temperatures are generally more comfortable.

    The exact lighting choice should still depend on the room’s purpose.

    Why Lighting Completes Organic Modern Decor

    Natural materials look particularly beautiful under soft, warm illumination.

    Wood gains depth.

    Stone becomes more dimensional.

    Linen looks softer.

    Ceramics develop subtle shadows.

    This is why lighting should be considered part of the decorating plan rather than something added at the very end.

    How to Choose an Organic Modern Color Palette

    A successful organic modern palette usually begins with a warm neutral.

    Choose one dominant background color.

    Examples include:

    • Warm white
    • Cream
    • Ivory
    • Beige
    • Taupe
    • Greige

    Then add natural materials.

    Wood introduces brown.

    Plants introduce green.

    Stone introduces gray or beige.

    Ceramics can introduce subtle clay tones.

    Finally, add one or two earthy accent colors.

    This creates a palette that feels connected to nature.

    How to Mix Modern and Organic Elements

    The style works because of contrast.

    A sleek modern sofa can be paired with a rough wooden table.

    A clean-lined console can be decorated with an imperfect ceramic vase.

    A modern black light fixture can hang above a rustic wood table.

    A smooth stone countertop can be paired with woven stools.

    Do not make every object rustic.

    Do not make every object perfectly modern.

    The combination creates character.

    Common Organic Modern Decorating Mistakes

    One common mistake is using too much beige without enough texture.

    If every item is the same color and finish, the room may feel dull.

    Another mistake is adding too many natural materials at once.

    Wood, rattan, jute, stone, bamboo, wicker, and unfinished materials can become overwhelming if every object uses a different texture.

    Choose a few primary materials and repeat them.

    Another mistake is overcrowding.

    Organic modern interiors need breathing room.

    Do not fill every shelf, wall, and tabletop.

    Finally, avoid making everything look perfectly coordinated.

    Natural interiors are more appealing when there is subtle variation.

    How to Make Organic Modern Decor Look Expensive

    You do not necessarily need expensive furniture.

    Instead, focus on proportion, texture, and editing.

    Choose one beautiful focal point.

    Keep the color palette consistent.

    Use large-scale artwork rather than many tiny pieces.

    Choose curtains that reach the floor.

    Use appropriately sized rugs.

    Add warm lighting.

    Mix textures.

    Hide unnecessary clutter.

    Use natural materials wherever practical.

    A simple room with excellent proportions and thoughtful materials often looks more sophisticated than an expensive room filled with too many decorative objects.

    Budget-Friendly Organic Modern Decorating

    You can create this style gradually.

    Start with textiles.

    Replace colorful or mismatched cushions with neutral linen or cotton options.

    Add a textured throw.

    Introduce a woven basket.

    Add a ceramic vase.

    Bring in one plant.

    Then consider larger changes.

    Replace a small coffee table with a natural wood version.

    Add a neutral rug.

    Update lighting.

    Rearrange furniture to create more breathing room.

    You do not have to purchase everything at once.

    The organic modern aesthetic actually works well with gradual decorating because it favors a collected and intentional appearance.

    Final Thoughts

    Organic modern home decor is about creating a balance between simplicity and warmth.

    It combines the clean structure of modern design with the natural beauty of wood, stone, linen, ceramics, woven materials, plants, and earthy colors.

    The style does not require perfection.

    In fact, small imperfections can make the room feel more authentic.

    A slightly irregular ceramic vase, visible wood grain, softly textured linen, natural stone variation, or handwoven basket can give a modern room character.

    If you are beginning from scratch, start with the largest elements.

    Choose a warm neutral color palette.

    Select simple furniture.

    Introduce natural wood.

    Add a textured rug.

    Layer soft textiles.

    Bring in greenery.

    Then finish the room with ceramics, woven accessories, artwork, and warm lighting.

    If you already have a furnished home, focus on smaller changes.

    Swap cold accessories for natural materials.

    Add a wooden tray.

    Place a woven basket beside the sofa.

    Replace harsh lighting with warmer lamps.

    Introduce a few neutral cushions.

    Add greenery.

    Remove unnecessary clutter.

    These small adjustments can gradually shift the atmosphere of the entire room.

    The most beautiful organic modern homes also understand the importance of negative space. Empty space is not wasted space. It allows furniture, artwork, plants, and decorative objects to stand out.

    Instead of asking what else you can add, occasionally ask what you can remove.

    That simple change in perspective can make a room feel calmer and more sophisticated.

    Whether you live in a large house, a small apartment, or a compact studio, organic modern decorating can create a home that feels peaceful, welcoming, and timeless.

    The style is flexible enough to adapt to different budgets and personal tastes. You can make it minimalist, cozy, luxurious, rustic, contemporary, or slightly traditional while keeping the same basic foundation.

    Most importantly, choose materials and objects that make your home feel comfortable to you.

    Organic modern design is not about following a rigid set of rules.

    It is about creating a thoughtful relationship between modern simplicity and natural warmth.

    When those two qualities are balanced successfully, the result is a home that feels beautiful without trying too hard โ€” polished enough to look sophisticated, but comfortable enough to truly live in.


  • 15 Red Marble Bathroom Ideas for a Bold & Luxurious Look

    15 Red Marble Bathroom Ideas for a Bold & Luxurious Look

    Red marble is one of the most dramatic materials you can introduce into a bathroom. With its rich veining, deep crimson tones, natural movement, and luxurious stone texture, red marble can instantly transform an ordinary bathroom into a sophisticated statement space. While neutral marble such as white, beige, or gray is often associated with timeless bathroom design, red marble offers something completely different: personality, warmth, drama, and undeniable visual impact.

    A red marble bathroom does not have to feel overwhelming. The secret is balance. Because red marble already provides a strong visual statement, the rest of the bathroom should support it rather than compete with it. Warm brass hardware, soft cream walls, dark wood cabinetry, sculptural lighting, elegant mirrors, and carefully selected accessories can all help create a cohesive interior.

    Red marble can also work with several different decorating styles. In a traditional bathroom, it can create an old-world European atmosphere. In a contemporary bathroom, it can become a bold architectural feature. In a glamorous space, polished red marble paired with brass and crystal-inspired lighting can feel exceptionally luxurious. Even a small powder room can benefit from red marble because a compact space allows you to embrace dramatic design without needing large quantities of material.

    There are also many ways to use red marble. You can cover an entire feature wall, create a marble vanity backsplash, use it around a bathtub, install it as flooring, or simply introduce a small marble accent. If a full marble bathroom is outside your budget, a smaller application can still create the same visual effect.

    The color of the surrounding materials matters enormously. Cream and ivory can soften intense red tones. Black creates a dramatic and sophisticated combination. Dark walnut introduces warmth and traditional character. Brass adds a glamorous golden contrast. Chrome and polished nickel create a cooler contemporary appearance.

    Lighting is equally important. Natural light can reveal the subtle variations within marble, while warm artificial lighting can make red stone appear deeper and richer. Layered lighting from sconces, pendant lights, recessed fixtures, and under-vanity illumination can highlight the texture of the marble and make the room feel more expensive.

    When designing with red marble, remember that natural stone is the star of the room. Rather than filling the bathroom with numerous decorative objects, choose fewer high-quality pieces. A sculptural mirror, elegant faucet, beautiful towels, and a simple vase may be enough.

    The following 15 ideas explore different ways to use red marble in a bathroom, from dramatic full-wall applications to subtle vanity accents. Whether you are planning a complete renovation or simply looking for inspiration for a future project, these ideas can help you create a bathroom that feels bold, sophisticated, warm, and luxurious.

    1. Full Red Marble Feature Wall

    One of the most dramatic ways to use red marble is to make an entire bathroom wall the focal point.

    Instead of covering every surface, select one major wall and allow the natural stone to dominate the design. This approach gives you the luxury of a statement material without making the entire room feel visually heavy.

    Choose a red marble with interesting veining. Deep burgundy, wine, crimson, and rust-red tones can all work beautifully depending on the overall style of the bathroom.

    Materials and Elements

    • Red marble slabs
    • Minimal vanity
    • Brass or brushed-gold faucet
    • Large mirror
    • Wall sconces
    • Neutral flooring
    • Cream or beige accessories

    How to Style It

    Install the marble behind the vanity or bathtub so it becomes the immediate focal point.

    Keep the vanity relatively simple. A floating walnut vanity can be particularly beautiful because the warm wood balances the intensity of the stone.

    Choose a large mirror with a simple frame.

    Add two elegant wall sconces on either side.

    Keep accessories minimal.

    Why It Works

    A full feature wall creates a strong visual statement while allowing the rest of the bathroom to remain relatively calm.

    This is particularly effective in medium and large bathrooms where there is enough wall area for the marble pattern to be appreciated.

    For a more sophisticated result, use large slabs with fewer grout lines. Continuous stone makes the bathroom feel more architectural and luxurious.

    2. Red Marble Vanity With Brass Fixtures

    If you love the look of red marble but do not want to cover large areas, use it as the centerpiece of the vanity.

    A red marble countertop can immediately transform a simple bathroom cabinet into a luxury feature.

    Materials and Elements

    • Red marble countertop
    • Wood or cream vanity cabinet
    • Brass faucet
    • Brass cabinet handles
    • Undermount or vessel sink
    • Large mirror
    • Warm lighting

    Styling Steps

    Start with a simple vanity cabinet.

    Choose walnut, dark brown, cream, or muted beige for the cabinetry.

    Install a red marble countertop.

    Select a faucet with warm brass or antique-gold tones.

    Repeat the brass finish in the cabinet hardware and mirror frame.

    Add soft neutral towels.

    Creating Balance

    Because the countertop is visually strong, keep the backsplash simple if possible.

    A plain warm-toned wall can provide enough contrast.

    For a particularly luxurious appearance, choose marble with subtle gold, cream, or brown veining.

    The result is bold without becoming excessive.

    This idea also works beautifully in smaller bathrooms because you can introduce the personality of red marble without covering an entire room.

    3. Red Marble Shower Walls

    A red marble shower can turn an everyday bathroom routine into a luxurious experience.

    Using the stone inside the shower creates a dramatic enclosure that immediately draws attention.

    Materials and Elements

    • Red marble wall slabs
    • Waterproof shower system
    • Frameless glass enclosure
    • Brass shower fixtures
    • Built-in shower niche
    • Neutral flooring
    • Minimal accessories

    How to Design It

    Use red marble across the main shower walls.

    Choose large-format slabs to minimize grout lines.

    Create a recessed niche using the same marble.

    Install warm brass shower fixtures.

    Use clear frameless glass so the marble remains visible from the rest of the bathroom.

    Lighting

    Install waterproof recessed lighting above the shower.

    If possible, combine it with ambient lighting outside the shower.

    The light should highlight the natural movement of the marble without creating harsh glare.

    Design Tip

    Avoid combining several highly patterned materials in the same area.

    Let the marble remain the star.

    A neutral floor and simple glass enclosure are enough to complete the design.

    4. Red Marble and Cream Bathroom

    Red marble can become surprisingly elegant when paired with soft cream.

    Cream acts as a visual buffer that prevents the red from feeling too intense.

    Color Palette

    Use:

    • Deep red marble
    • Warm cream
    • Ivory
    • Beige
    • Antique brass
    • Natural wood

    How to Create the Look

    Use red marble on one wall or around the vanity.

    Choose cream-colored walls or cabinetry.

    Add a warm beige floor.

    Use antique brass fixtures.

    Introduce cream towels and accessories.

    Why the Combination Works

    Red and cream create a warm, sophisticated contrast.

    Unlike bright white, cream has a warmer undertone that works naturally with the earthy qualities of stone.

    This style is ideal for traditional, transitional, European-inspired, and luxury bathrooms.

    For additional softness, introduce natural wood through the vanity or a small stool.

    Keep decorative objects simple.

    The finished room should feel layered and warm rather than overly decorated.

    5. Red Marble Powder Room

    A powder room is one of the best places to experiment with bold marble.

    Because the space is usually smaller and does not require a large shower or bathtub, you can use dramatic materials without needing enormous quantities.

    Materials and Elements

    • Red marble wall
    • Compact vanity
    • Decorative mirror
    • Brass faucet
    • Pendant light
    • Small artwork
    • Neutral flooring

    How to Style It

    Consider covering the vanity wall in red marble.

    Use a floating vanity to allow more of the stone to remain visible.

    Choose a sculptural mirror.

    Add a dramatic pendant or wall sconces.

    Keep the countertop relatively uncluttered.

    Why It Works

    A powder room can function almost like a jewel box.

    You do not need to worry about creating a relaxing spa environment in the same way you might in a master bathroom.

    Instead, embrace drama.

    Dark red marble, brass, dramatic lighting, and a beautiful mirror can create an unforgettable guest bathroom.

    6. Red Marble Around a Freestanding Bathtub

    A freestanding bathtub already creates a strong focal point. Surrounding it with red marble can make the entire bathing area feel like a luxury retreat.

    Materials and Elements

    • Freestanding bathtub
    • Red marble feature wall
    • Red marble floor or platform
    • Brass tub filler
    • Sculptural pendant
    • Minimal stool
    • Soft towels

    Design Approach

    Position the bathtub against a red marble feature wall.

    Allow the marble pattern to extend behind the tub.

    Use a freestanding brass or dark-metal tub filler.

    Hang a sculptural pendant above or near the bathtub, ensuring appropriate bathroom safety requirements.

    Add a small wooden stool for towels.

    Creating a Spa Atmosphere

    Use warm neutral textiles.

    Avoid excessive decoration.

    Add subtle greenery if the lighting and humidity conditions suit the plant.

    Use warm lighting rather than very cool white bulbs.

    The goal is to make the red marble feel luxurious and calming rather than theatrical.

    7. Dramatic Red Marble Floor

    Red marble does not always have to go on the walls.

    A red marble floor can create an incredible foundation for the entire bathroom.

    Materials and Elements

    • Red marble floor tiles or slabs
    • Neutral wall finish
    • Cream vanity
    • Brass fixtures
    • Large mirror
    • Soft lighting

    How to Balance It

    Because the floor is visually strong, keep the walls lighter.

    Cream, warm white, pale beige, or very subtle stone finishes can work beautifully.

    Use simple furniture.

    Avoid heavily patterned wallpaper or additional dramatic stone.

    Tile Selection

    Large-format tiles create a contemporary appearance.

    Smaller marble tiles can produce a more traditional look.

    If using natural stone, pay attention to the surface finish and suitability for wet areas. A bathroom floor needs appropriate slip resistance and installation for its intended use.

    Visual Effect

    A red marble floor creates the impression of a custom-designed luxury interior.

    It is especially effective when paired with a floating vanity that allows more floor area to remain visible.

    8. Red Marble With Dark Wood Vanity

    For a warm and sophisticated bathroom, combine red marble with dark wood.

    This pairing creates a rich, traditional atmosphere while still feeling luxurious.

    Materials and Elements

    • Red marble
    • Dark walnut vanity
    • Brass fixtures
    • Cream sink
    • Large mirror
    • Warm wall lighting
    • Neutral textiles

    Why It Works

    Both wood and red marble have naturally warm undertones.

    The wood softens the hardness of the stone while the marble adds luxury to the cabinetry.

    Choose a simple vanity design rather than highly ornate cabinetry.

    The natural grain of walnut provides enough visual texture.

    Styling

    Use brass hardware to connect the two materials.

    Choose cream towels and neutral accessories.

    A large mirror can reflect light and prevent the darker materials from making the room feel too enclosed.

    This design works particularly well in traditional, transitional, and boutique-hotel-inspired bathrooms.

    9. Red Marble and Black Luxury Bathroom

    For maximum drama, combine red marble with black.

    This is a bold combination that can create a sophisticated, almost cinematic bathroom.

    Color Palette

    • Burgundy or crimson marble
    • Matte black
    • Dark gray
    • Brass
    • Cream accents

    How to Use It

    Use red marble on the vanity wall or shower.

    Introduce matte-black cabinetry or fixtures.

    Add brass accents sparingly.

    Use cream towels or accessories to create contrast.

    Lighting Is Essential

    A black-and-red bathroom can feel too dark if it lacks adequate lighting.

    Use several layers:

    • Ceiling lighting
    • Vanity lighting
    • Accent lighting
    • Natural light where available

    Warm illumination can make the marble appear rich and dimensional.

    Important Rule

    Do not use too many decorative colors.

    The combination of red, black, brass, and cream is already powerful.

    Allow the materials to create the visual interest.

    10. Red Marble Backsplash With Sculptural Mirror

    If you want a smaller red marble feature, consider using it as a vanity backsplash.

    This gives you a luxurious detail without requiring extensive stone installation.

    Materials and Elements

    • Red marble backsplash
    • Simple vanity
    • Sculptural mirror
    • Brass faucet
    • Warm sconces
    • Neutral wall
    • Ceramic accessories

    How to Style It

    Choose a red marble slab that extends across the vanity wall.

    Install a large mirror above it.

    Select a simple mirror frame so the stone remains visible.

    Add elegant sconces.

    Keep the vanity countertop mostly clear.

    Creating a Boutique-Hotel Appearance

    Use high-quality towels.

    Choose a small ceramic soap dispenser.

    Add a beautiful tray.

    Place one small vase with greenery or flowers.

    Avoid overcrowding.

    This restrained styling allows the marble to create most of the luxury.

    11. Red Marble With Gold and Brass Details

    Red marble and gold are naturally dramatic together.

    The combination can create a glamorous bathroom reminiscent of a luxury hotel or classic European interior.

    Materials and Elements

    • Red marble
    • Brass faucet
    • Brass mirror frame
    • Brass cabinet hardware
    • Gold-toned lighting
    • Cream accessories
    • Crystal-style glass details

    How to Style It

    Use red marble as the primary architectural material.

    Introduce brass through fixtures and hardware.

    Do not add gold to every object.

    Two or three repeated brass elements are usually enough.

    Lighting

    Warm lighting works especially well.

    When light reflects off brass and polished marble, the surfaces gain additional depth.

    Choose fixtures with elegant silhouettes rather than overly ornate shapes.

    The result should feel luxurious but controlled.

    12. Modern Red Marble Bathroom

    Red marble can also work beautifully in contemporary spaces.

    The secret is to simplify everything around it.

    Materials and Elements

    • Large-format red marble
    • Floating vanity
    • Frameless glass
    • Minimal faucet
    • Large mirror
    • Recessed lighting
    • Simple hardware

    Design Approach

    Use large slabs with dramatic veining.

    Pair them with a floating vanity in a neutral finish.

    Use frameless glass around the shower.

    Choose minimal hardware.

    Avoid unnecessary accessories.

    Why It Works

    Modern interiors benefit from strong materials.

    The marble becomes the decorative feature while the architecture remains clean.

    A floating vanity also creates more visual space beneath the cabinet, which can make the bathroom feel larger.

    For a contemporary appearance, choose red marble with bold natural movement and pair it with simple geometric shapes.

    13. Traditional European-Inspired Red Marble Bathroom

    For an old-world appearance, combine red marble with traditional architectural details.

    This style can feel elegant, romantic, and timeless.

    Materials and Elements

    • Red marble
    • Paneled cabinetry
    • Brass fixtures
    • Traditional mirror
    • Decorative sconces
    • Natural stone flooring
    • Vintage-inspired accessories

    How to Create the Look

    Use red marble around the vanity.

    Choose a paneled vanity in cream or dark wood.

    Add traditional brass faucets.

    Select a large mirror with a classic frame.

    Use decorative sconces with warm light.

    Accessories

    Consider:

    • Ceramic containers
    • Framed artwork
    • Linen towels
    • Small flowers
    • Decorative tray

    Do not make everything look perfectly matched.

    A collected appearance creates more authenticity.

    14. Small Bathroom With Red Marble Accents

    You do not need a huge bathroom to use red marble.

    In fact, small spaces can benefit significantly from one carefully chosen dramatic accent.

    Materials and Elements

    • Small red marble vanity top
    • Red marble niche
    • Neutral walls
    • Simple vanity
    • Brass faucet
    • Large mirror
    • Warm lighting

    Smart Placement

    Use red marble in one or two locations.

    For example, install it on the vanity countertop and shower niche.

    Keep everything else neutral.

    Make the Room Feel Larger

    Use a large mirror.

    Choose a floating vanity.

    Keep the floor visually simple.

    Use glass shower panels rather than heavy framed enclosures when practical.

    Avoid excessive accessories.

    The goal is to create a strong focal point while maintaining visual openness.

    15. Ultimate Red Marble Luxury Bathroom

    For the most dramatic interpretation, combine several red marble elements while maintaining careful balance.
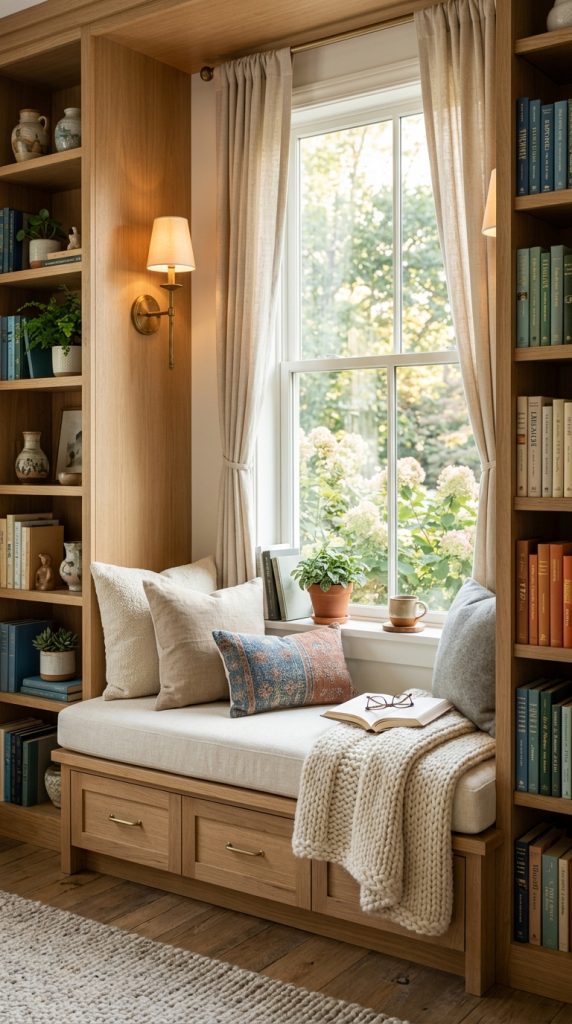
    This could include a red marble vanity wall, shower wall, bathtub surround, and selected flooring.

    The key is not simply using more marble. It is using the material intentionally.
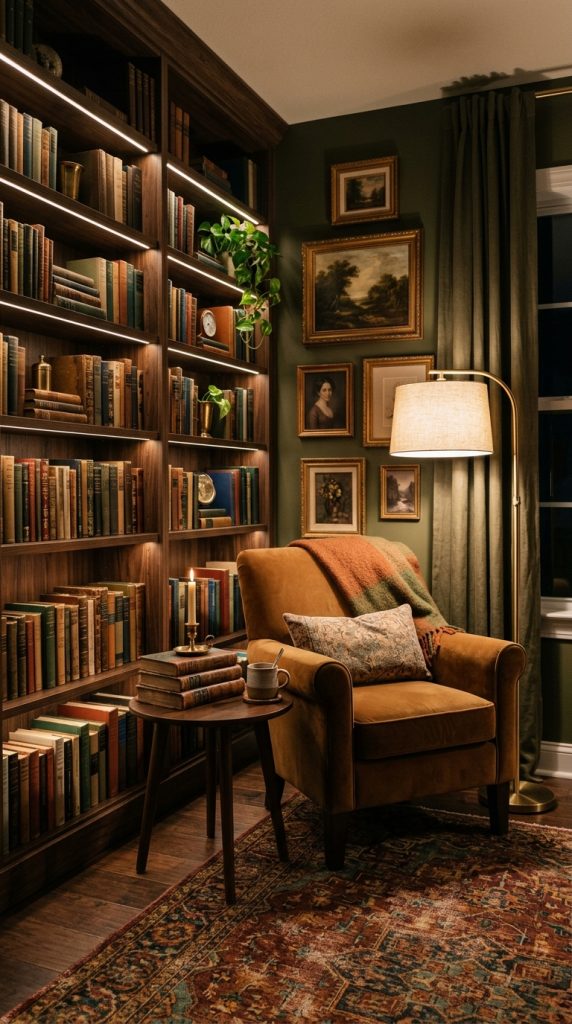
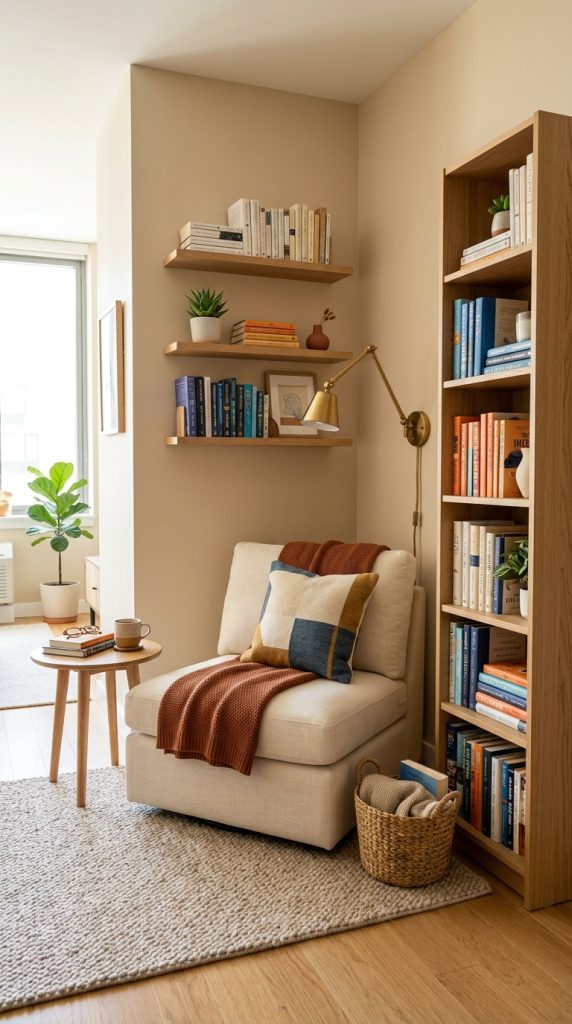
    Materials and Elements

    • High-quality red marble
    • Floating or sculptural vanity
    • Freestanding bathtub
    • Brass fixtures
    • Large mirror
    • Warm architectural lighting
    • Neutral towels
    • Minimal accessories

    Design the Room as One Composition

    Instead of treating every wall independently, think about the bathroom as a single visual experience.
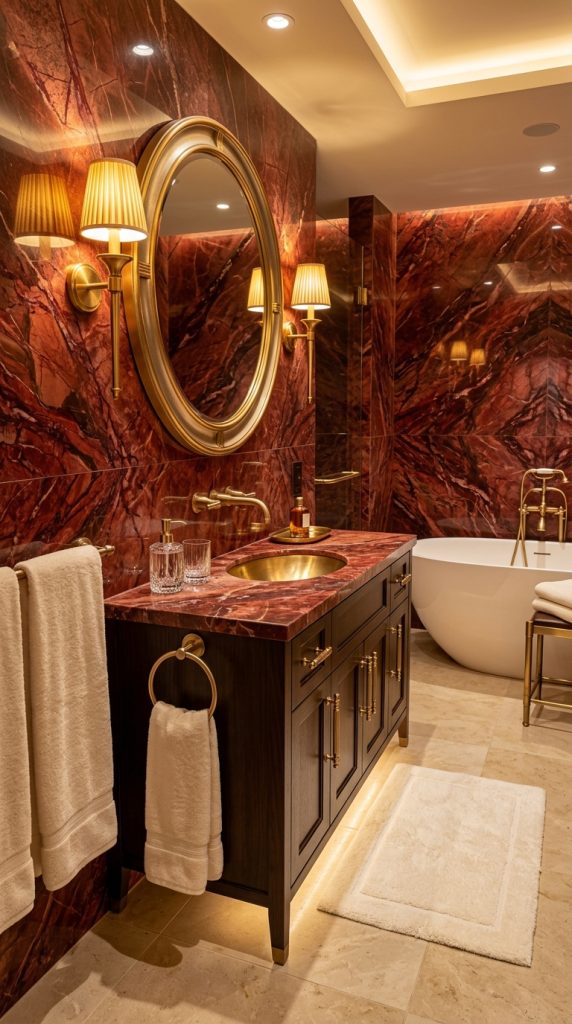
    Use matching or complementary marble throughout.

    Choose slabs with veining that can be visually aligned where possible.

    Keep cabinetry simple.

    Use brass as the primary metal finish.

    Add cream, beige, or soft brown textiles.

    Lighting Strategy

    Use layered lighting.

    Install bright enough task lighting around the vanity.

    Add ambient ceiling lighting.

    Use accent lighting to highlight the marble.

    Consider concealed lighting beneath floating cabinetry.

    Final Styling

    Place neatly folded towels on a stool or open shelf.

    Add one small vase or plant where appropriate.

    Use attractive containers for everyday bathroom products.

    Keep countertops mostly clear.

    The result should feel like a luxury boutique hotel: dramatic, sophisticated, warm, and carefully considered.

    How to Choose the Right Red Marble

    Not every red marble looks the same.

    Some varieties are deep burgundy.

    Others have brighter red backgrounds.

    Some contain white or cream veins, while others include dramatic dark patterns.

    Before selecting the stone, view a large sample rather than relying only on a small tile.

    Look at it under the actual lighting conditions of your bathroom.

    Consider the Veining

    Subtle veining creates a quieter appearance.
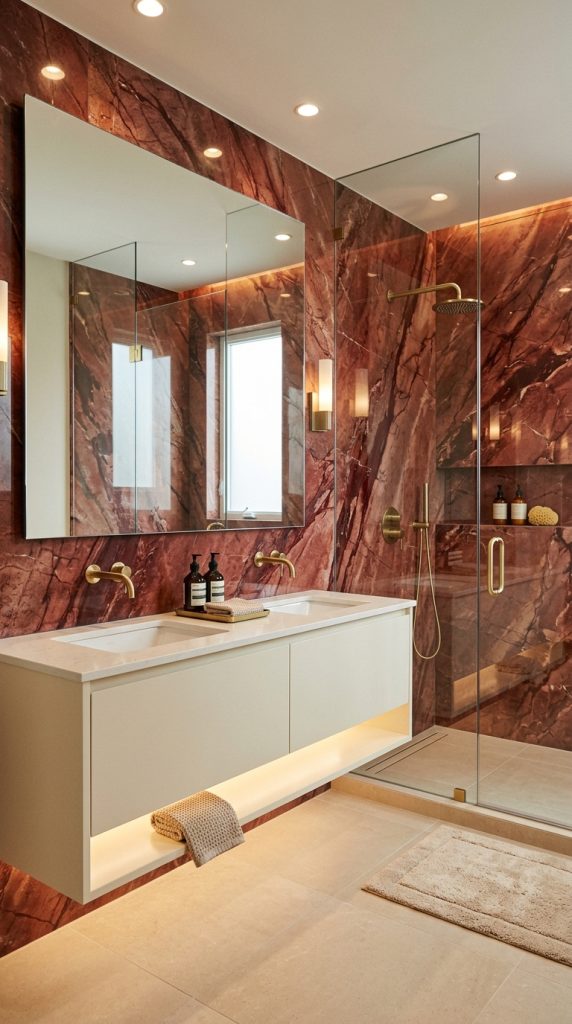
    Strong veining produces a dramatic statement.

    If your bathroom is small, extremely busy stone may overwhelm the space.
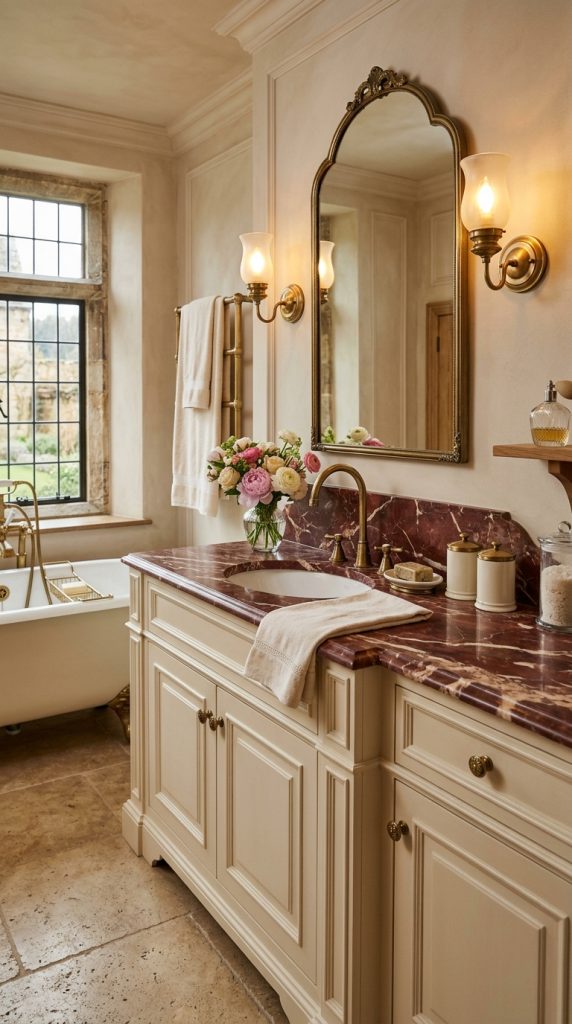
    In a larger bathroom, dramatic veining can become a spectacular focal point.

    Best Colors to Pair With Red Marble

    Red marble works particularly well with several neutral and metallic finishes.

    Cream

    Softens the intensity of red.

    Beige

    Creates a warm, earthy combination.

    Black

    Creates dramatic contrast.

    Walnut

    Adds natural warmth.

    Brass

    Introduces luxury and golden contrast.

    Olive Green

    Can create a sophisticated organic palette when used carefully.

    White

    Provides maximum contrast but can feel sharper than cream.

    Choose the supporting color based on the atmosphere you want to create.
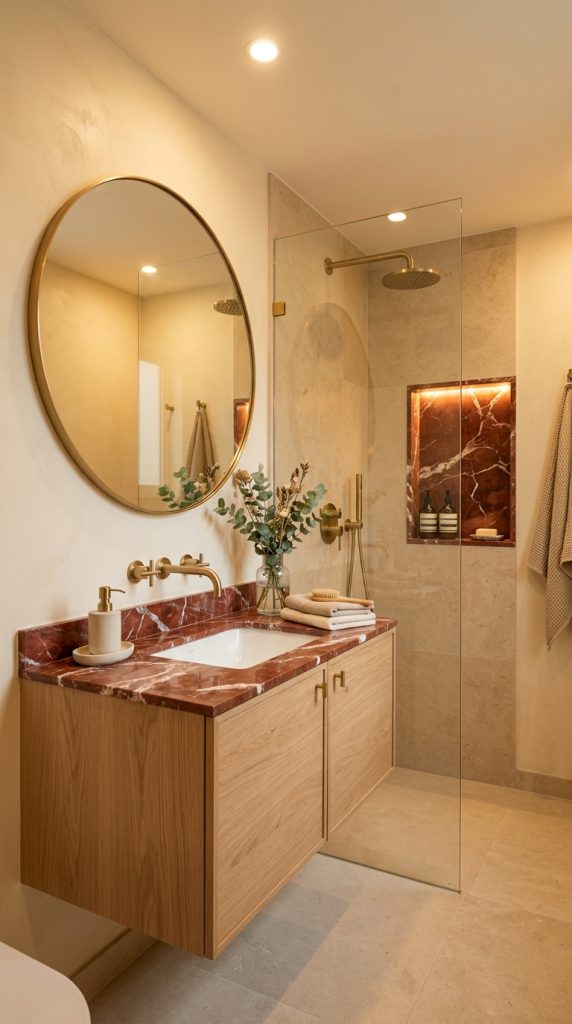
    How to Make Red Marble Feel Elegant Instead of Overwhelming

    The biggest mistake with dramatic materials is adding too many other dramatic elements.

    If the marble is bold, simplify the furniture.

    If the vanity is sculptural, use a simple mirror.

    If the lighting is dramatic, keep the accessories understated.

    Think of the bathroom as a hierarchy.

    The marble should be the main character.

    The fixtures should support it.

    The accessories should finish the story.

    This approach creates luxury through restraint rather than excess.

    Lighting Tips for a Red Marble Bathroom

    Lighting can completely change how red marble appears.

    Warm lighting tends to emphasize its rich red and brown undertones.

    Cooler lighting can make the stone appear more dramatic and sometimes more intense.

    Use multiple light sources rather than depending on one ceiling fixture.

    A well-designed bathroom might include:

    • Vanity sconces
    • Ceiling lighting
    • Shower lighting
    • Accent lighting
    • Under-vanity lighting

    Make sure all bathroom lighting is appropriate for its location and installed according to applicable electrical and safety requirements.

    Accessories That Work With Red Marble

    Because red marble is visually strong, accessories should generally be simple.

    Good choices include:

    • Cream towels
    • Brass trays
    • Glass containers
    • Natural wood stools
    • Ceramic vases
    • Minimal artwork
    • Neutral bath mats
    • Small greenery

    Avoid introducing many unrelated patterns.

    Instead, repeat the colors already present in the room.

    For example, if the marble contains cream and brown veining, use cream towels and walnut accessories.

    Final Thoughts

    Red marble can transform a bathroom from ordinary to unforgettable.

    Its deep color, natural movement, and luxurious texture make it ideal for homeowners who want a space with personality and visual drama.

    The key to using it successfully is balance.

    You do not necessarily need red marble everywhere.

    A single vanity countertop, shower wall, backsplash, or floor can create an impressive focal point.

    If you love bold interiors, you can take the design further with multiple marble surfaces, brass fixtures, dark wood, dramatic lighting, and a freestanding bathtub.

    For a softer interpretation, combine red marble with cream, beige, natural wood, and warm lighting.

    For a contemporary appearance, pair large-format red marble slabs with floating cabinetry, frameless glass, and minimal fixtures.

    For traditional elegance, introduce paneled cabinetry, brass hardware, classic mirrors, and decorative sconces.

    For a glamorous bathroom, combine red marble with brass and carefully layered warm lighting.

    For a small powder room, embrace the drama and let the marble become the main feature.

    Ultimately, the most successful red marble bathrooms are not simply luxurious because they use expensive materials. They are luxurious because every element has been chosen with intention.

    The marble establishes the personality.

    The vanity provides function.

    The lighting reveals the stone.

    The fixtures add refinement.

    The accessories provide softness.

    And the overall composition creates a bathroom that feels cohesive rather than crowded.

    If you are planning your own red marble bathroom, begin by deciding where you want the strongest focal point. From there, build the rest of the room around that feature.

    Choose complementary materials, keep the color palette controlled, prioritize good lighting, and allow the natural beauty of the marble to remain visible.

    With thoughtful planning, red marble can create a bathroom that feels bold, elegant, timeless, and genuinely luxurious โ€” a space that looks beautiful today while still having the character to remain memorable for years to come.


  • 15 Gorgeous Fall Planter Ideas With Mums, Pumpkins & Seasonal Flowers

    15 Gorgeous Fall Planter Ideas With Mums, Pumpkins & Seasonal Flowers

    Fall is one of the most beautiful seasons for decorating the outside of your home. As temperatures become cooler and summer flowers begin to fade, porches, patios, balconies, and entryways can be transformed with rich seasonal colors, cozy textures, pumpkins, mums, foliage, and beautiful autumn flowers. One of the easiest ways to create this seasonal transformation is with fall planters.

    Fall planters are versatile, affordable, and surprisingly easy to create. You do not need a large garden or professional gardening experience to make a stunning seasonal container. A single oversized planter filled with colorful mums can make a front entrance feel welcoming, while a collection of smaller pots can add autumn charm to a balcony or patio.

    The beauty of fall container gardening comes from layering. Instead of planting one flower variety by itself, combine flowers, foliage, grasses, trailing plants, and decorative pumpkins to create depth and movement. Tall plants provide height, fuller flowers create the main focal point, and trailing greenery softens the edges of the container.

    Mums are particularly popular for autumn planters because they naturally provide abundant blooms in colors such as orange, burgundy, yellow, bronze, cream, white, and purple. They can be used alone for a simple arrangement or combined with other seasonal elements for a much richer display.

    Pumpkins are another essential fall decorating element. Miniature pumpkins can be tucked between flowers, placed around the base of containers, or arranged inside large planters. White pumpkins create an elegant neutral look, while orange pumpkins produce a classic autumn appearance. Mini gourds can add additional color and texture.

    Seasonal flowers also make it possible to create different styles. Pansies can introduce delicate color, ornamental kale can add unusual foliage, and ornamental grasses can provide movement. Creeping plants can spill over the edges of containers and make arrangements appear fuller.

    The most beautiful fall planters also consider the architecture of the home. A traditional brick house might look wonderful with terracotta pots and orange mums. A modern home might suit black planters filled with cream flowers and muted greenery. A farmhouse porch can be decorated with galvanized containers, wooden crates, pumpkins, and warm-colored mums.

    You also do not need to spend a fortune. Existing pots can be refreshed with seasonal plants. Thrifted baskets can hold nursery pots. Wooden boxes can become rustic planters. Even a simple container can look expensive when the plants are arranged thoughtfully.

    Before creating a fall planter, consider where it will be placed, how much sunlight the area receives, how frequently you can water it, and whether the plants you choose have similar growing requirements. A beautiful planter should also remain healthy throughout the season.

    The following 15 ideas are designed to help you create attractive autumn planters for your front porch, entryway, patio, balcony, steps, or garden. Each idea combines practical planting advice with seasonal styling so you can create a display that looks beautiful from the moment guests arrive.

    1. Classic Mums and Pumpkin Planter

    A classic combination of mums and pumpkins is one of the easiest ways to create an instantly recognizable fall planter. It works with almost every decorating style and can be adapted to both large and small containers.

    The key to making this simple idea look sophisticated is to use different sizes and colors rather than filling the planter with identical flowers.

    Materials You Need

    • Large outdoor planter
    • Orange or bronze mums
    • Mini pumpkins
    • Small gourds
    • Potting soil
    • Slow-release fertilizer
    • Optional trailing greenery
    • Gardening gloves
    • Small hand trowel

    How to Create It

    Begin by choosing a sturdy planter with drainage holes.

    Fill the container with high-quality potting mix suitable for container plants.

    Place the mum toward the center or slightly toward the back of the container.

    If you are using a larger planter, consider adding two or three mum plants together to create a fuller appearance.

    Tuck miniature pumpkins around the flowers.

    Place smaller gourds between the pumpkins to create additional visual interest.

    If you want a softer appearance, add a trailing plant around the outer edge.

    Choosing Colors

    For a traditional fall appearance, use orange, bronze, and golden-yellow mums.

    For a more elegant display, choose cream mums with white pumpkins and a few muted green gourds.

    For a dramatic porch, burgundy mums combined with orange pumpkins create rich autumn contrast.

    Styling Tip

    Create two matching planters and place one on each side of your front door.

    Symmetrical containers immediately make an entryway feel more polished.

    For an asymmetrical look, use one large planter on one side and several smaller pots on the other.

    2. Elegant White Pumpkin and Cream Mum Planter

    If you love neutral home dรฉcor, you do not have to use bright orange to make your planters look like fall.

    Cream mums and white pumpkins can create a sophisticated autumn arrangement that feels soft, elegant, and timeless.

    Materials You Need

    • Large cream or neutral planter
    • White or cream mums
    • White mini pumpkins
    • Beige or tan gourds
    • Ornamental grass
    • Potting soil
    • Decorative moss
    • Gardening tools

    How to Create It

    Choose a large planter in a neutral material such as stone, ceramic, concrete, or textured fiberglass.

    Place the tallest foliage toward the back.

    Position cream mums toward the center.

    Add small white pumpkins around the flowers.

    Tuck a few tan gourds between the plants.

    Finish the arrangement with decorative moss around exposed soil.

    Why It Looks Elegant

    The neutral palette allows texture to become the main feature.

    The soft petals of the mums contrast beautifully with the smooth surface of pumpkins and the delicate movement of ornamental grass.

    This arrangement works especially well with:

    • White homes
    • Modern houses
    • Minimalist porches
    • Neutral patios
    • Farmhouse exteriors
    • Contemporary entryways

    Extra Styling Idea

    Add a natural jute doormat, woven basket, wooden bench, or warm lantern nearby.

    The combination of cream, natural wood, and greenery creates a beautiful organic fall entrance.

    3. Rustic Wooden Box Fall Planter

    Wooden containers can create a warm farmhouse-inspired fall display.

    A rustic wooden box works particularly well when you want your planter to feel casual and natural rather than formal.

    Materials You Need

    • Wooden planter box
    • Orange mums
    • Ornamental grass
    • Mini pumpkins
    • Small gourds
    • Trailing greenery
    • Potting soil
    • Drainage material if needed

    How to Create It

    Choose a weather-resistant wooden box.

    Make sure excess water can drain away.

    Place ornamental grasses toward the back.

    Add mums toward the middle.

    Place pumpkins and gourds toward the front.

    Allow trailing greenery to spill slightly over the sides.

    Creating Depth

    The planter should have three basic layers.

    Back: Tall grasses or foliage.

    Middle: Mums and fuller flowers.

    Front: Pumpkins, smaller plants, and trailing greenery.

    This arrangement prevents everything from appearing at the same height.

    Where to Use It

    Place the box:

    • Along porch steps
    • Under a window
    • Beside a front door
    • Along a patio wall
    • Near an outdoor bench

    Several wooden boxes arranged at different heights can create a beautiful rustic display.

    4. Fall Planter With Ornamental Kale

    Ornamental kale can introduce dramatic texture and unusual foliage into a fall container.

    Its large, layered leaves create a beautiful contrast with delicate flowers.

    Materials You Need

    • Medium or large planter
    • Ornamental kale
    • Purple or burgundy mums
    • Small pumpkins
    • Decorative grass
    • Potting soil

    How to Arrange It

    Place the ornamental kale toward the center or front of the container.

    Add mums behind or beside it.

    Use ornamental grass to provide height.

    Tuck one or two miniature pumpkins near the edge.

    Color Combination

    Try combining:

    • Purple kale
    • Burgundy mums
    • Cream pumpkins
    • Green foliage

    This creates a sophisticated autumn palette.

    For a brighter arrangement, combine green-and-white kale with yellow mums and orange pumpkins.

    Why It Works

    The unusual foliage becomes a visual focal point.

    Unlike traditional flower-heavy containers, this arrangement relies on leaves, texture, and shape.

    It is especially beautiful when paired with a simple neutral porch because the planter itself becomes the main decorative feature.

    5. Tall Front Door Fall Planters

    Tall planters can dramatically improve a home’s entrance.

    They create height around the doorway and make the front faรงade feel more balanced.

    Materials You Need

    • Two tall planters
    • Mums
    • Ornamental grasses
    • Trailing plants
    • Mini pumpkins
    • Potting soil
    • Fertilizer

    How to Create the Arrangement

    Place tall ornamental grasses toward the back.

    Add full mums around the middle.

    Allow a trailing plant to spill over the edge.

    Place a few small pumpkins at the base of the plants.

    Create a matching arrangement in the second container.

    Best Placement

    Position one planter on each side of the front door.

    Make sure the containers are proportional to the doorway.

    Very small planters can disappear beside a large entrance.

    Likewise, oversized containers can overwhelm a narrow doorway.

    Design Tip

    Use matching containers but allow the plants to have subtle differences.

    For example, both planters can contain bronze mums and grasses while one has a few extra cream pumpkins.

    This keeps the arrangement coordinated without making it look overly artificial.

    6. Colorful Fall Flower Planter

    Fall does not have to mean brown and orange.

    You can create a vibrant planter using several autumn colors.

    Materials You Need

    • Large container
    • Yellow mums
    • Orange mums
    • Burgundy flowers
    • Purple pansies
    • Ornamental grass
    • Mini pumpkins
    • Potting soil

    How to Create It

    Choose one dominant flower color.

    For example, yellow mums can become the main focal point.

    Add orange mums around them.

    Use burgundy or purple flowers as accents.

    Add ornamental grass to create movement.

    Finish with a few miniature pumpkins.

    Color Balance

    Avoid using every fall color equally.

    Choose one dominant color, two supporting colors, and one small accent.

    For example:

    Dominant: Golden yellow

    Supporting: Orange and burgundy

    Accent: Cream

    This produces a more polished result than mixing many colors without a plan.

    Where It Works

    A colorful planter looks particularly beautiful on a neutral porch or against dark exterior walls.

    The flowers become a strong seasonal focal point.

    7. Rustic Galvanized Bucket Planter

    Galvanized metal containers are perfect for rustic and farmhouse fall decorating.

    Their slightly industrial appearance contrasts beautifully with soft flowers and natural pumpkins.

    Materials You Need

    • Galvanized bucket or tub
    • Bronze mums
    • Cream mums
    • Ornamental grass
    • Mini pumpkins
    • Gourds
    • Potting mix
    • Drainage solution

    Preparation

    If the bucket does not have drainage holes, make sure it is suitable for planting and provide appropriate drainage.

    Fill it with container potting mix.

    Position the tallest plants toward the center or back.

    Add mums around the main plants.

    Place pumpkins toward the front.

    Styling the Bucket

    You can leave the metal natural for an authentic farmhouse appearance.

    Alternatively, pair it with a wooden crate or rustic sign.

    Place several buckets together in different sizes.

    This creates a casual fall garden display.

    Best Color Palette

    Use:

    • Cream
    • Bronze
    • Muted orange
    • Sage green
    • Natural metal

    This palette looks particularly beautiful with weathered wood.

    8. Pumpkin-Filled Planter With Cascading Flowers

    For a dramatic fall planter, combine pumpkins with flowers that spill over the edges.

    This creates a fuller, more layered appearance.

    Materials You Need

    • Wide planter
    • Mums
    • Creeping greenery
    • Mini pumpkins
    • Small gourds
    • Ornamental grass
    • Potting soil

    How to Arrange It

    Place the tallest grass toward the back.

    Add mums in the middle.

    Plant trailing greenery near the edges.

    Tuck small pumpkins between the flowers.

    Let the greenery cascade naturally over the planter.

    Why Cascading Plants Help

    Trailing plants soften the hard edges of containers.

    They also make a planter look larger and more established.

    The combination of upright flowers, rounded pumpkins, and cascading foliage creates three-dimensional depth.

    Styling Tip

    Do not cover every inch of the planter.

    A little visible soil is fine when the plants are still establishing themselves.

    As the season progresses, the flowers and greenery will naturally fill the container.

    9. Moody Burgundy and Deep Green Fall Planter

    For an elegant and dramatic autumn display, use darker colors.

    Deep burgundy flowers and rich green foliage can make a planter feel luxurious.

    Materials You Need

    • Black or dark planter
    • Burgundy mums
    • Deep green foliage
    • Ornamental grass
    • Dark purple pansies
    • Cream pumpkins
    • Potting mix

    How to Style It

    Use a dark container as the foundation.

    Place burgundy mums in the center.

    Add deep green foliage around them.

    Introduce purple or burgundy pansies.

    Place one or two cream pumpkins for contrast.

    Why Cream Matters

    If everything is dark, the arrangement can lose definition.

    Cream pumpkins create contrast and help individual plants stand out.

    Perfect Setting

    This style looks beautiful beside:

    • Black doors
    • Dark siding
    • Brick walls
    • Stone entryways
    • Wood exteriors

    Add warm lanterns nearby for an especially dramatic evening appearance.

    10. Fall Planter With Pansies and Mini Pumpkins

    Pansies are a beautiful choice when you want smaller flowers with plenty of color.

    They can be combined with mums and pumpkins to create a charming layered container.

    Materials You Need

    • Medium planter
    • Pansies
    • Small mums
    • Mini pumpkins
    • Ornamental grass
    • Potting soil
    • Small decorative stones

    Arrangement

    Place ornamental grass in the back.

    Add mums in the center.

    Use pansies toward the front.

    Tuck miniature pumpkins between the flowers.

    Color Ideas

    Try:

    Purple pansies + yellow mums + cream pumpkins

    or

    Burgundy pansies + orange mums + natural gourds

    For a softer display:

    Cream flowers + pale yellow pansies + white pumpkins

    Beginner-Friendly Benefit

    Pansies can help fill gaps between larger plants.

    They are particularly useful when a planter looks sparse.

    As the plants grow, the entire container becomes fuller and more colorful.

    11. Elegant Black Planter With Orange Mums

    Black planters create a beautiful contrast against bright autumn flowers.

    This is a simple way to give a traditional fall display a modern appearance.

    Materials You Need

    • Matte black planter
    • Orange mums
    • Cream flowers
    • Ornamental grass
    • White mini pumpkins
    • Natural wood accent

    How to Create It

    Choose a tall matte black planter.

    Place orange mums in the center.

    Add cream flowers around them.

    Use ornamental grass for height.

    Place one or two white pumpkins near the base.

    Why Black Works

    Black provides a strong neutral background.

    It makes bright flowers look more vibrant.

    It also works beautifully with modern exterior architecture.

    For a polished entrance, use two matching black planters.

    Add warm lighting around the doorway to soften the contrast.

    12. Fall Porch Planter With Lanterns and Mums

    Sometimes the planter becomes even more beautiful when combined with nearby dรฉcor.

    Lanterns are particularly effective because they introduce warm light and complement the autumn flowers.

    Materials You Need

    • Large planter
    • Mums
    • Mini pumpkins
    • Ornamental grass
    • Lantern
    • Flameless candle
    • Woven basket
    • Fall foliage

    How to Style It

    Create the planter using mums, grasses, and pumpkins.

    Place a lantern beside the container.

    Use a flameless candle for safe outdoor ambiance where appropriate.

    Add a woven basket nearby with a seasonal blanket if the porch is covered and protected from weather.

    Create a Complete Scene

    Instead of decorating only the planter, create a small autumn vignette.

    Use:

    Planter + lantern + basket + doormat

    This creates a more complete entryway.

    Evening Effect

    Warm light from the lantern can make the autumn colors appear richer after sunset.

    This is particularly attractive for homes where the front porch is frequently used in the evening.

    13. Small Balcony Fall Planter

    You do not need a large porch to enjoy seasonal container gardening.

    A balcony can become an autumn retreat with a few compact planters.

    Materials You Need

    • Small containers
    • Compact mums
    • Pansies
    • Mini pumpkins
    • Small ornamental grass
    • Lightweight potting mix
    • Balcony-safe plant stands

    How to Arrange Them

    Use several small containers instead of one oversized planter.

    Place taller plants toward the back.

    Put smaller flowers in front.

    Use mini pumpkins as decorative accents.

    Arrange containers at different heights if the space and safety conditions allow.

    Space-Saving Tip

    Use vertical plant stands or railing planters that are appropriate for your balcony.

    Keep pathways clear.

    Make sure containers are securely positioned and that drainage does not create problems for neighbors or the building.

    Styling

    Use coordinated pots.

    Cream, terracotta, charcoal, or natural stone colors work beautifully.

    A few matching containers can make even a small balcony feel intentionally designed.

    14. Farmhouse Fall Planter With Wheat and Mums

    Dried wheat creates instant autumn character and pairs beautifully with mums.

    This arrangement is especially suited to farmhouse and rustic homes.

    Materials You Need

    • Rustic wooden or ceramic planter
    • Bronze mums
    • Dried wheat
    • Ornamental grass
    • Small pumpkins
    • Gourds
    • Natural twine
    • Potting mix

    How to Create It

    Place tall wheat stems toward the back.

    Add mums around the middle.

    Place small pumpkins near the front.

    Add ornamental grass between the flowers.

    Tie a simple natural twine bow around the container if desired.

    Color Palette

    Use:

    • Golden wheat
    • Bronze
    • Cream
    • Warm orange
    • Natural brown
    • Soft green

    The result feels warm, nostalgic, and welcoming.

    Placement

    This planter looks especially beautiful beside a wooden bench or farmhouse-style front door.

    It can also be placed near porch steps with matching containers on either side.

    15. Luxury Fall Planter With Layered Seasonal Flowers

    For the final idea, create a luxurious layered planter that combines several seasonal elements into one sophisticated composition.

    Instead of relying on pumpkins alone, combine flowers, foliage, grasses, and carefully selected decorative accents.

    Materials You Need

    • Large high-quality planter
    • Cream or burgundy mums
    • Ornamental grass
    • Seasonal foliage
    • Pansies
    • Mini pumpkins
    • Decorative branches
    • Quality potting soil
    • Fertilizer

    Create Three Layers

    The first layer should provide height.

    Use ornamental grass or tall foliage toward the back.

    The second layer should provide fullness.

    Use mums as the primary flowering element.

    The third layer should soften the edges.

    Use pansies or trailing plants toward the front.

    Add miniature pumpkins between the plants.

    Choose a Sophisticated Palette

    For a luxurious appearance, try:

    Cream + burgundy + muted green + natural brown

    or:

    White + terracotta + olive green + warm beige

    Avoid too many competing colors.

    Add Surrounding Dรฉcor

    Place the planter beside a beautiful front door.

    Add a natural fiber doormat.

    Use warm lanterns nearby.

    Place a small pumpkin or two around the base.

    The result should feel like a carefully designed autumn entrance rather than simply a collection of plants.

    How to Choose the Best Plants for Fall Planters

    Before purchasing plants, consider your growing conditions.

    Think about:

    • Amount of sunlight
    • Temperature
    • Container size
    • Drainage
    • Watering needs
    • Wind exposure
    • Available space

    Plants with similar environmental requirements are generally easier to maintain together.

    Mums usually become the main seasonal flower in many autumn containers, but you can combine them with foliage plants, grasses, pansies, and other suitable seasonal plants depending on your climate.

    Always check the plant tag for sunlight, watering, and temperature requirements.

    How to Make Fall Planters Look Fuller

    A common beginner mistake is placing one small plant in a very large container.

    The planter can look empty.

    Instead, think about height, width, and texture.

    Use a tall plant or grass in the back.

    Place fuller flowers in the center.

    Add smaller or trailing plants near the edge.

    Then use decorative pumpkins or gourds to fill visual gaps.

    This creates a fuller appearance without relying entirely on flowers.

    How to Keep Fall Planters Looking Beautiful

    Water according to the requirements of your plants rather than following a fixed schedule.

    Check the soil before watering.

    Remove spent blooms when appropriate.

    Trim damaged foliage.

    Rotate containers occasionally if plants are receiving uneven light.

    Protect containers from extreme weather when necessary.

    Do not allow water to remain trapped in containers without proper drainage.

    Healthy plants naturally make a seasonal planter look much more attractive.

    How to Decorate Around Fall Planters

    A beautiful planter can become even more impactful when it is part of a larger outdoor vignette.

    For a front porch, combine:

    • Fall planter
    • Woven doormat
    • Lantern
    • Small pumpkins
    • Wooden bench

    For a rustic porch:

    • Wooden crate
    • Galvanized bucket
    • Mums
    • Pumpkins
    • Dried wheat

    For a modern porch:

    • Tall black planter
    • Cream mums
    • White pumpkins
    • Simple lantern
    • Minimal doormat

    The surrounding dรฉcor should support the planter rather than compete with it.

    How to Create a Symmetrical Fall Entryway

    Symmetry is one of the easiest ways to make a front entrance look polished.

    Place matching planters on both sides of the door.

    Use the same container style.

    Choose similar plant combinations.

    For example, both containers can include bronze mums, ornamental grass, and cream pumpkins.

    You can still create slight natural differences between the plants.

    Symmetrical planters are especially effective for formal architecture.

    How to Create an Asymmetrical Fall Display

    If you prefer a relaxed, modern, or organic appearance, try asymmetry.

    Use one large planter on one side of the entrance and several smaller containers on the other.

    Vary the heights.

    Use different container shapes while maintaining a consistent color palette.

    This approach feels more casual and natural.

    It works especially well with cottage, organic modern, and rustic homes.

    Budget-Friendly Fall Planter Decorating

    You do not need expensive containers or rare plants.

    Start with pots you already own.

    Refresh them with seasonal flowers.

    Use small pumpkins from inexpensive seasonal displays.

    Repurpose wooden boxes as decorative containers where suitable.

    Use dried branches from your garden if they are safe and appropriate.

    Thrift stores can also be useful for finding baskets, wooden crates, ceramic containers, and decorative accessories.

    Spend most of your budget on healthy plants and quality potting soil rather than unnecessary decorative accessories.

    Final Thoughts

    Fall planters are one of the easiest ways to bring the beauty of autumn to your home.

    You can create a traditional display with orange mums and pumpkins, an elegant arrangement with cream flowers and white pumpkins, a rustic farmhouse planter with wooden boxes and dried wheat, or a dramatic modern container with burgundy flowers and black planters.

    The most important thing is to think in layers.

    Start with height.

    Add fullness.

    Soften the edges.

    Then introduce seasonal decorations such as pumpkins, gourds, dried branches, and natural textures.

    Think about color carefully.

    You do not need every traditional autumn color in one container. A simple palette often creates a more sophisticated result.

    Cream and beige can create an elegant neutral planter.

    Orange and bronze can create a classic autumn display.

    Burgundy and deep green can create a dramatic arrangement.

    Terracotta and olive can create an organic, earthy appearance.

    When decorating your front porch, remember that the planter should complement the architecture of your home.

    Tall planters can frame a large doorway.

    Small containers can add charm to an apartment balcony.

    Wooden boxes can enhance a farmhouse porch.

    Black planters can make a modern home feel more sophisticated.

    Galvanized containers can create rustic charm.

    And beautiful seasonal flowers can bring all of these styles to life.

    Whether you are decorating one small container or creating an entire fall porch display, these ideas can help you create a welcoming outdoor space that feels warm, seasonal, and thoughtfully designed.

    Most importantly, do not be afraid to experiment.

    Move your pumpkins around.

    Combine different flower colors.

    Try a new container.

    Add a little greenery.

    Change the arrangement as the plants grow.

    Fall decorating is about creating a feeling of warmth and abundance, and a beautiful planter can capture that feeling in a surprisingly small amount of space.

    With mums, pumpkins, seasonal flowers, foliage, grasses, and a little creativity, even the simplest porch can become a gorgeous autumn welcome for everyone who arrives at your home.


  • Antique Bar Cart Decor ideas

    Antique Bar Cart Decor ideas

    An antique bar cart can be much more than a place to store bottles and glassware. With the right styling, it can become one of the most beautiful decorative features in a living room, dining room, kitchen, home office, or entertaining area. Its vintage character, warm finishes, elegant details, and old-world charm make it especially appealing for anyone who loves timeless interiors.

    Whether your bar cart is a genuine antique, a thrifted vintage find, or a modern piece designed to look old-fashioned, thoughtful styling can completely transform its appearance. The secret is to create a balance between beauty and function. A bar cart should look collected and sophisticated without appearing overcrowded.

    Antique-inspired interiors are especially beautiful when they combine different materials and textures. Brass, aged wood, glass, crystal, marble, ceramic, linen, and polished metal can work together to create a luxurious atmosphere. You can also introduce small decorative details such as vintage books, framed artwork, flowers, candles, trays, and miniature plants.

    One of the easiest ways to make an antique bar cart look expensive is to create visual layers. Instead of placing everything directly on one shelf, use trays, books, bowls, and stands to create different heights. Tall glassware can be positioned toward the back, while smaller decorative pieces can sit toward the front. This creates depth and makes the arrangement much more visually interesting.

    Color is equally important. You do not need dozens of colors to create an elegant vintage display. A restrained palette of antique brass, amber, cream, brown, black, clear glass, and muted green can make the cart feel sophisticated. If your cart has a warm wooden finish, earthy colors can enhance its character. If it has a brass or gold finish, cream and glass accessories can make it feel brighter and more luxurious.

    You can also style an antique bar cart even if you do not want to use it for alcohol. This is particularly useful for homes where the cart is primarily decorative. It can become a coffee station, tea station, dessert cart, plant display, book cart, or seasonal decorating feature.

    The most important rule is to make the cart feel connected to the rest of your home. Its colors, materials, and decorative style should complement the surrounding furniture rather than look like an isolated object.

    Below are ten beautiful antique bar cart decorating ideas that can help you create a display that feels elegant, warm, practical, and timeless.

    1. Classic Brass Antique Bar Cart

    A classic brass bar cart is one of the easiest pieces to style because its warm metallic finish naturally creates an elegant focal point. Brass has a timeless quality that works beautifully with vintage, traditional, transitional, and even modern interiors.

    The key is to avoid making the cart look like a crowded collection of objects. Instead, select a few beautiful pieces and arrange them carefully.

    Materials and Things You Need

    • Brass or brass-finish antique bar cart
    • Glass decanter
    • Crystal or vintage-style glasses
    • Decorative tray
    • Small ceramic bowl
    • Vintage book
    • Small vase
    • Fresh or dried flowers
    • Candle

    Step-by-Step Styling

    Begin by placing a decorative tray on the lower shelf or upper surface of the cart. A tray helps visually group smaller objects and prevents the arrangement from looking scattered.

    Place the largest item toward the back. A glass decanter works beautifully because it provides height and catches the light.

    Arrange several glasses beside it. Avoid lining every glass up perfectly. A slightly relaxed arrangement feels more natural.

    Add a small stack of vintage books underneath a decorative object to introduce height.

    Place a small vase with flowers on the opposite side.

    Finish with one candle or small ceramic accessory.

    How to Make It Look Expensive

    Keep the color palette restrained. Clear glass, brass, cream, amber, and natural brown create a luxurious vintage appearance.

    If the cart already has a strong brass finish, avoid adding too many gold accessories. Let the cart itself provide most of the metallic detail.

    This approach works especially well when the bar cart is positioned against a neutral wall or near a classic piece of artwork.

    2. Vintage Cocktail-Inspired Bar Cart

    For a more authentic old-world atmosphere, create a bar cart inspired by classic cocktail lounges.

    This style works particularly well with dark wood, antique brass, crystal glassware, and vintage accessories.

    Materials and Things You Need

    • Dark wood or brass bar cart
    • Vintage-style cocktail shaker
    • Crystal glasses
    • Glass decanter
    • Small serving tray
    • Cocktail spoon
    • Vintage books
    • Framed artwork
    • Small lamp or candle

    Styling Steps

    Start with the cocktail shaker and decanter as your main functional pieces.

    Place the shaker toward one side of the upper shelf.

    Position the decanter toward the opposite side to create visual balance.

    Arrange two or three glasses between them.

    Add a stack of vintage books underneath one decorative item.

    Place a small framed artwork or vintage-inspired print behind the cart if the wall allows.

    Create an Old-World Feeling

    Choose accessories that appear slightly aged rather than perfectly new.

    Amber-colored glass, antique brass, dark wood, and crystal details work particularly well.

    Do not fill every section of the cart.

    A little empty space makes the display feel more sophisticated.

    This style is especially beautiful in a library, dining room, formal living room, or cozy entertaining area.

    3. Antique Bar Cart as a Coffee Station

    You do not need to use an antique bar cart for cocktails. Transforming it into a coffee station is an excellent way to make the piece useful every day.

    The vintage structure of the cart can create a charming contrast with modern coffee equipment.

    Materials and Things You Need

    • Antique bar cart
    • Coffee maker
    • Ceramic mugs
    • Coffee canister
    • Wooden tray
    • Sugar bowl
    • Small spoon
    • Coffee beans
    • Small plant

    How to Arrange It

    Place the coffee machine toward the back of the upper shelf if the cart is large and stable enough.

    Put mugs on one side.

    Use a beautiful ceramic or glass container for coffee beans.

    Add a small bowl for sugar or other coffee additions.

    Place spoons inside a small ceramic container.

    Use the lower shelf for additional mugs, coffee supplies, napkins, or decorative baskets.

    Add Vintage Character

    Choose ceramic mugs with slightly traditional shapes.

    A wooden tray can soften the metallic appearance of the cart.

    A small plant or vase can add freshness.

    For a particularly beautiful display, use cream ceramics, warm wood, clear glass, and brass accessories.

    This creates a coffee station that feels functional but also looks like part of the room’s dรฉcor.

    4. Romantic Floral Antique Bar Cart

    Flowers can completely change the personality of an antique bar cart.

    A floral arrangement introduces softness and color against hard materials such as brass, glass, or dark wood.

    Materials and Things You Need

    • Antique bar cart
    • Vintage vase
    • Fresh or dried flowers
    • Glassware
    • Decorative tray
    • Candle
    • Small ceramic object
    • Vintage book

    Styling Steps

    Choose a beautiful vase as your main focal point.

    Fill it with flowers that complement the colors already present in your room.

    For a soft romantic appearance, use cream, dusty rose, muted peach, or pale lavender flowers.

    For an autumn-inspired arrangement, choose dried grasses, rust-colored foliage, and warm brown stems.

    Place the vase toward one side of the cart.

    Balance it with a decanter or stack of books on the opposite side.

    Add a few glasses in front.

    Finish with one candle.

    Keep It Elegant

    Avoid using a massive floral arrangement that hides the cart.

    The cart itself should remain visible.

    If the cart has beautiful brass detailing or curved handles, make sure your decorations do not cover those features.

    The result should feel romantic, vintage, and collected rather than overly formal.

    5. Moody Dark Antique Bar Cart

    A dark, dramatic bar cart can create a sophisticated atmosphere, especially in rooms with deep wood furniture or darker wall colors.

    This approach is ideal for creating a cozy evening interior.

    Materials and Things You Need

    • Dark wood bar cart
    • Amber glassware
    • Brass accessories
    • Dark ceramic vase
    • Vintage books
    • Candleholders
    • Dried branches
    • Decorative tray

    Step-by-Step Styling

    Begin with a dark or antique wooden tray.

    Place an amber glass decanter toward the back.

    Add brass candleholders nearby.

    Arrange dark or clear glasses in front.

    Use a small ceramic vase with dried branches to add height.

    Place a few vintage books on the lower shelf.

    Add one or two candles.

    Color Palette

    Use:

    • Espresso brown
    • Black
    • Antique brass
    • Amber
    • Cream
    • Deep green

    These colors create a rich and intimate atmosphere.

    Important Styling Tip

    Dark interiors need contrast.

    Add a few cream or clear glass pieces so the cart does not disappear into the surrounding dรฉcor.

    Warm lighting is particularly important with this style. Soft lamp light or candlelight can make the brass and amber glass glow beautifully.

    6. Minimalist Antique Bar Cart

    If you prefer minimalist dรฉcor, you can still enjoy the character of an antique bar cart.

    The trick is to let the furniture itself become the decoration.

    Instead of filling the cart with accessories, choose only a few carefully selected pieces.

    Materials and Things You Need

    • Antique bar cart
    • One glass decanter
    • Two or three glasses
    • Ceramic vase
    • One small floral arrangement
    • Simple tray

    How to Style It

    Place the decanter toward the back.

    Arrange two or three glasses beside it.

    Add a small vase on the opposite side.

    Place a simple tray underneath one grouping.

    Leave plenty of empty space.

    Why This Works

    Antique furniture often has beautiful craftsmanship.

    Decorative rails, wheels, brass edges, carved wood, and aged finishes can provide enough visual interest on their own.

    Adding too many accessories can hide those details.

    Minimalist antique styling is particularly useful in modern homes where you want vintage character without creating a heavily traditional appearance.

    Use cream, clear glass, warm wood, brass, and soft beige for a clean but timeless result.

    7. Antique Bar Cart With Books and Collectibles

    An antique bar cart can also function as a miniature display cabinet for books and meaningful objects.

    This is perfect if you want your cart to feel personal rather than purely decorative.

    Materials and Things You Need

    • Antique bar cart
    • Vintage books
    • Small framed photograph
    • Decorative box
    • Ceramic object
    • Glassware
    • Brass accessory
    • Small plant

    Styling Steps

    Place several books on the lower shelf.

    Stack them horizontally rather than standing every book vertically.

    Place a small decorative object on top of the stack.

    On the upper shelf, add a few functional pieces such as glasses and a decanter.

    Include one personal collectible, framed photograph, or travel souvenir.

    Add a small plant or vase for freshness.

    Make It Feel Collected

    Do not use objects that all look brand new.

    Mixing old and new pieces creates the feeling that the bar cart has evolved over time.

    A vintage book next to a modern ceramic vase can look particularly sophisticated.

    Choose objects that have different heights and textures.

    This prevents the arrangement from appearing flat.

    8. Small Antique Bar Cart for Apartment Living

    A small antique bar cart can be an excellent decorating solution for apartments and compact homes.

    Because it is mobile and relatively narrow, it can provide storage without requiring a large piece of furniture.

    Materials and Things You Need

    • Compact bar cart
    • Small tray
    • Two or three glasses
    • Mini decanter
    • Small vase
    • Candle
    • Compact basket

    How to Style It

    Keep the upper shelf relatively simple.

    Place a small tray in the center.

    Add a miniature vase with greenery.

    Position a small decanter and a few glasses beside it.

    Use the lower shelf for additional supplies.

    A compact basket can hide less attractive objects.

    Placement Ideas

    You can place the cart:

    • Beside a dining table
    • Near a sofa
    • In an unused corner
    • Beside a kitchen cabinet
    • Near a reading chair

    Because it can be moved, it is also useful when entertaining guests.

    Make a Small Cart Look Bigger

    Use clear glass and light colors.

    Avoid oversized accessories.

    Keep the surrounding floor area uncluttered.

    A mirror placed behind the cart can also make the arrangement feel more visually significant.

    9. Seasonal Antique Bar Cart Decor

    One of the most versatile things about an antique bar cart is that you can redecorate it throughout the year.

    Instead of keeping exactly the same arrangement, introduce seasonal details.

    Spring

    Use:

    • Fresh flowers
    • Soft green leaves
    • Cream ceramics
    • Light-colored glassware

    Summer

    Try:

    • Citrus-inspired colors
    • Greenery
    • Light wood
    • Clear glass
    • Fresh flowers

    Fall

    Use:

    • Mini pumpkins
    • Dried leaves
    • Amber glass
    • Rust-colored flowers
    • Wooden bowls

    Winter

    Try:

    • Evergreen branches
    • Pinecones
    • Warm candles
    • Brass accessories
    • Deep green accents

    Styling Rule

    Do not completely cover the cart with seasonal dรฉcor.

    Keep its original character visible.

    For example, during autumn, a few small pumpkins and dried branches can be enough.

    During winter, a simple evergreen arrangement and warm candleholders can transform the cart without making it look like a holiday display.

    This approach allows one antique bar cart to become a changing decorative feature throughout the year.

    10. Luxurious Antique Bar Cart Styling

    For a truly elegant appearance, combine antique details with sophisticated materials.

    This style is perfect for formal dining rooms, elegant living rooms, home libraries, and entertaining spaces.

    Materials and Things You Need

    • Antique brass or dark wood bar cart
    • Crystal decanter
    • Crystal glasses
    • Brass tray
    • Marble accessory
    • Vintage books
    • Ceramic vase
    • Fresh flowers
    • Candleholders

    How to Create the Look

    Begin with a beautiful brass or marble tray.

    Place the decanter toward the back.

    Arrange crystal glasses beside it.

    Add a stack of vintage books on the lower shelf.

    Place a small marble or ceramic accessory on the books.

    Add a floral arrangement to the opposite side.

    Finish with brass candleholders.

    The Luxury Formula

    The combination of:

    Crystal + brass + marble + wood + flowers

    creates a sophisticated appearance without requiring excessive decoration.

    Keep the palette restrained.

    Cream, antique gold, dark brown, clear glass, and muted greenery are enough.

    Lighting Matters

    Place the bar cart somewhere that receives warm ambient lighting.

    A nearby table lamp, wall sconce, or soft overhead light can highlight the reflective surfaces.

    When the light catches crystal and brass, the cart becomes a beautiful evening focal point.

    How to Choose the Right Antique Bar Cart

    Before decorating, consider the style and finish of your cart.

    Brass

    Brass creates warmth and works beautifully with traditional and glamorous interiors.

    Wood

    Wood creates a more rustic and collected appearance.

    Dark Wood

    Dark wood is ideal for moody, vintage, traditional, and library-inspired spaces.

    Glass

    Glass shelves make the cart feel lighter and work especially well in smaller rooms.

    Mixed Materials

    Wood combined with brass or glass can create a particularly timeless appearance.

    Choose a cart that complements your existing furniture instead of trying to make it completely different from everything else.

    How to Make an Antique Bar Cart Look Expensive

    You do not need expensive accessories to create an elegant display.

    Focus on a few principles.

    Use Fewer Objects

    A crowded cart can look inexpensive.

    Choose fewer, better-looking pieces.

    Add Height

    Use vases, decanters, books, and candleholders to create layers.

    Mix Textures

    Combine glass, brass, wood, ceramic, marble, and textiles.

    Use a Tray

    A tray instantly makes small objects look more organized.

    Add Something Organic

    Flowers, greenery, dried branches, or seasonal foliage can soften hard materials.

    Repeat Colors

    If your cart has brass details, repeat brass somewhere else in the room.

    If you use amber glass on the cart, introduce a warm brown or caramel accent nearby.

    This creates visual connection.

    How to Decorate an Antique Bar Cart Without Alcohol

    An antique bar cart does not have to function as a traditional drinks station.

    You can use it as:

    • Coffee station
    • Tea station
    • Dessert display
    • Plant stand
    • Book display
    • Candle display
    • Seasonal decoration
    • Dining-room storage
    • Decorative serving station

    For a coffee station, use mugs, coffee containers, spoons, and a small plant.

    For a dessert cart, add cake stands, ceramic plates, napkins, and decorative bowls.

    For a plant display, use several small plants at different heights.

    This flexibility makes antique bar carts especially useful in modern homes.

    Final Thoughts

    An antique bar cart can bring personality, history, and elegance into almost any room.

    The most beautiful arrangements are not necessarily the most elaborate. They are carefully balanced displays where every object contributes something to the overall design.

    Start with the bar cart itself.

    Look at its finish, shape, hardware, shelves, and vintage details.

    Then choose accessories that enhance rather than hide those characteristics.

    Use glassware for sparkle, brass for warmth, wood for texture, ceramics for softness, books for personality, and flowers or greenery for natural beauty.

    Remember that your bar cart does not have to remain permanently styled in one way. Change it with the seasons, refresh the flowers, replace accessories, or transform it into a coffee station when you want something different.

    For a classic look, keep the palette simple with brass, glass, cream, brown, and muted green.

    For a romantic appearance, introduce flowers and candlelight.

    For a moody atmosphere, combine dark wood, amber glass, brass, and warm lighting.

    For a modern home, keep the arrangement minimal and allow the antique furniture to provide most of the character.

    Most importantly, make the cart feel like it belongs in your home.

    An antique bar cart should not simply look like a collection of beautiful objects. It should feel useful, intentional, personal, and connected to the room around it.

    With thoughtful styling, even a small vintage cart can become a memorable focal point that makes your home feel warmer, more sophisticated, and full of character.