Author: admin

  • Luxury Bedroom Decorating Ideas for a Cozy & Sophisticated Retreat

    Luxury Bedroom Decorating Ideas for a Cozy & Sophisticated Retreat

    A luxury bedroom should feel like more than a beautiful room. It should feel like a private retreat where you can slow down, relax, and enjoy a sense of comfort at the end of the day. The most successful luxury bedrooms are not necessarily the largest or most expensive. Instead, they combine thoughtful proportions, beautiful materials, layered textures, warm lighting, and carefully selected furniture to create an atmosphere that feels polished without becoming cold.

    For 2026, luxury bedroom design is increasingly centered on quiet elegance and comfortable sophistication. Rather than filling a room with flashy accessories, designers are creating spaces where quality, texture, and atmosphere do most of the work. Upholstered beds, warm woods, soft neutral palettes, sculptural lighting, layered bedding, natural stone, oversized curtains, and subtle metallic accents can make an ordinary bedroom feel remarkably elevated.

    The goal is also to maintain livability. A bedroom should not look like a showroom that is too perfect to use. It should have softness, practical storage, comfortable seating, accessible lighting, and enough personality to feel connected to the people who live there.

    Whether you have a spacious primary bedroom or a smaller room, the following ideas can help you create a cozy and sophisticated retreat. Each approach has its own visual identity, allowing you to choose elements that suit your existing home rather than copying an entire design.Luxury Bedroom Decorating Ideas for a Cozy & Sophisticated Retreat is explained in these ideas.

    1. Create a Sophisticated Neutral Bedroom With Layered Textures

    Neutral colors are one of the easiest ways to create a luxury bedroom because they provide a calm foundation while allowing texture and material quality to become the main focus.

    Instead of decorating the entire room in plain white, build a layered neutral palette using several related shades.

    Think about:

    • Warm ivory
    • Soft beige
    • Oatmeal
    • Taupe
    • Mushroom
    • Warm gray
    • Caramel
    • Chocolate brown

    The secret is not simply choosing neutral colors. It is combining them in different materials.

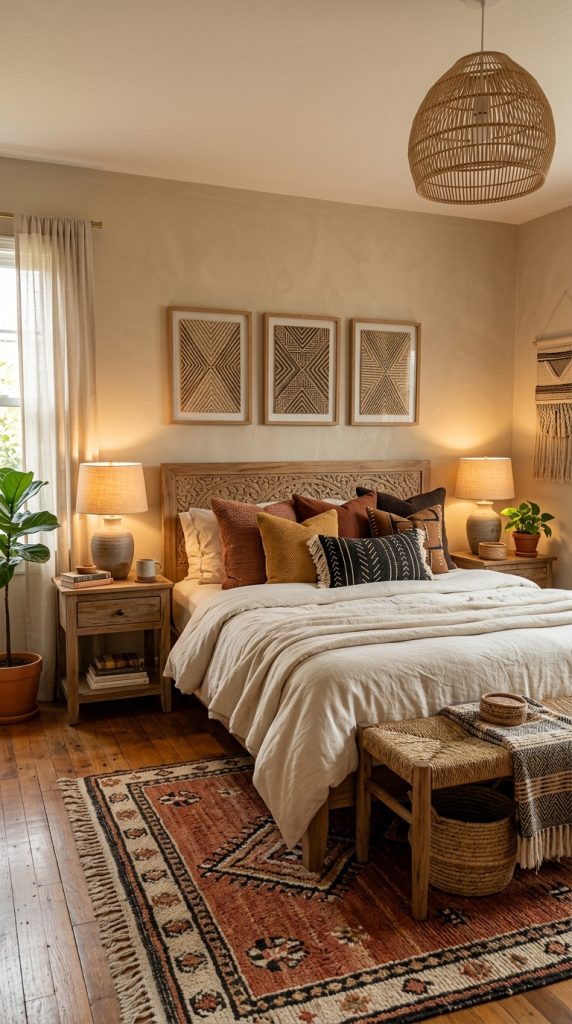
    For example, an ivory upholstered bed can be paired with beige linen bedding, a taupe throw, cream boucle cushions, a warm wooden nightstand, and a textured rug.

    Although the colors are similar, the different surfaces prevent the room from looking flat.

    Start With the Bed

    The bed should be the visual anchor of a luxury bedroom.

    An upholstered headboard immediately creates softness and visual importance.

    For a sophisticated appearance, consider:

    • Tall upholstered headboards
    • Channel tufting
    • Soft rounded edges
    • Linen upholstery
    • Velvet upholstery
    • Boucle upholstery
    • Natural woven upholstery

    A tall headboard can make the ceiling appear higher while giving the bed a hotel-inspired appearance.

    If your room is smaller, avoid choosing a headboard that is excessively wide or visually heavy. The proportions should match the room.

    Layer the Bedding

    Luxury bedding is rarely about one expensive duvet.

    Instead, the appearance comes from layering.

    Begin with high-quality sheets.

    Add a duvet or quilt.

    Then introduce a folded blanket or throw near the bottom of the bed.

    Finish with several pillows arranged in decreasing sizes.

    You can mix:

    • Crisp cotton
    • Linen
    • Velvet
    • Quilted fabrics
    • Soft woven materials

    Avoid making every textile identical.

    The contrast creates visual depth.

    Introduce Warm Wood

    A neutral room can sometimes feel too pale.

    Warm wood solves that problem.

    Use walnut, oak, or medium-toned wood for nightstands, benches, shelving, or a dresser.

    The wood introduces natural character while balancing soft textiles.

    Add a Textured Rug

    A large rug placed beneath the bed can make the room feel more cohesive.

    Ideally, the rug should extend far enough beyond the bed to provide a soft landing area.

    Neutral rugs with subtle patterns can add interest without overwhelming the room.

    Use Soft Lighting

    Lighting is especially important in neutral bedrooms because it creates the warmth that color alone may not provide.

    Use several sources instead of relying entirely on a ceiling fixture.

    Consider:

    • Bedside lamps
    • Wall sconces
    • A floor lamp
    • Pendant lighting
    • Accent lighting

    Place lights at appropriate places, especially warm bedside lighting on both sides of the bed and subtle ambient illumination throughout the room.

    Avoid extremely cool white bulbs because they can make beige and cream materials appear flat or gray.

    Finish With Minimal Accessories

    Do not fill every surface.

    A nightstand might only need a lamp, a small book, and one decorative object.

    The simplicity allows the textures to remain visible.

    The finished bedroom should feel quiet, warm, and expensive without appearing excessive.

    2. Design a Warm Wood Luxury Bedroom

    If you want a bedroom that feels sophisticated but grounded, make warm wood one of the primary design elements.
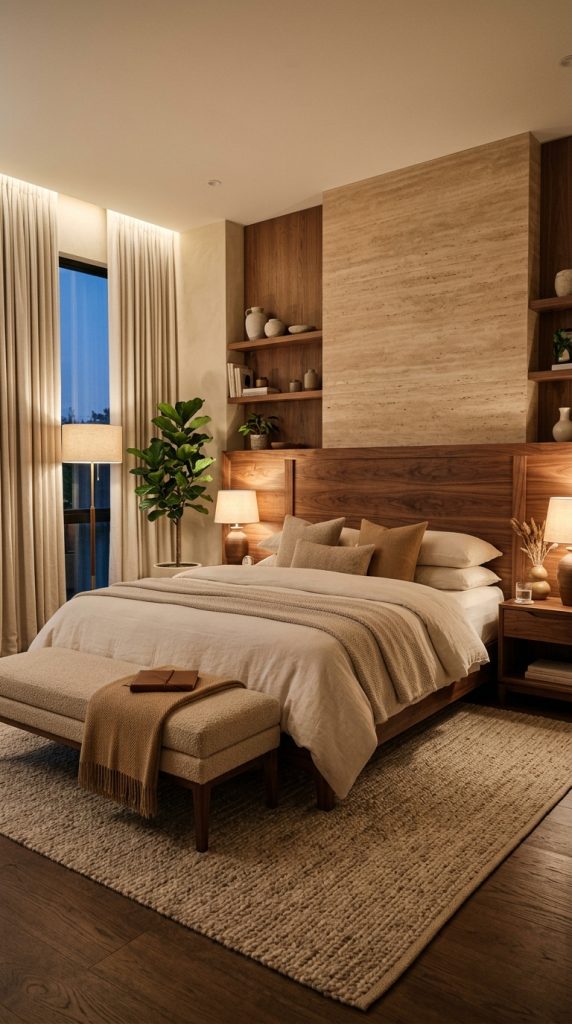
    Wood brings natural warmth into a bedroom and can prevent luxury interiors from becoming overly formal.

    For this approach, focus on walnut, oak, teak, or other warm-toned finishes.

    Choose a Statement Wooden Bed

    A wooden bed can become a beautiful focal point.

    Look for clean architectural lines rather than highly ornate designs.

    A large wooden headboard can create an impressive visual feature without requiring artwork above the bed.

    You can choose:

    • Vertical wood slats
    • Wide wood panels
    • Natural oak
    • Walnut veneer
    • Ribbed wood
    • Curved wood

    The finish should complement the existing flooring and furniture.

    Balance Wood With Soft Fabrics

    Too much wood can make the bedroom feel visually heavy.

    Balance it with soft textiles.

    Use:

    • Cream bedding
    • Beige curtains
    • Boucle cushions
    • Linen duvet covers
    • Soft wool rugs

    This creates contrast between hard and soft materials.

    Add a Wooden Bench

    A bench at the foot of the bed is both practical and decorative.

    A simple upholstered bench with wooden legs can add another layer of sophistication.

    It also provides a convenient place to sit while getting ready.

    Add Natural Stone

    Warm wood looks beautiful with stone.

    Consider a small stone side table, marble tray, travertine lamp base, or stone decorative object.

    You do not need a large stone installation.

    Small touches can be enough.

    Use Earthy Colors

    A warm wood bedroom works particularly well with:

    • Cream
    • Sand
    • Camel
    • Terracotta
    • Olive
    • Taupe
    • Chocolate

    These shades reinforce the natural character of the room.

    Keep Accessories Intentional

    Use a few sculptural objects rather than many small decorations.

    For example, a ceramic vase on a dresser can have more visual impact than a collection of ten unrelated pieces.

    Add Warm Evening Lighting

    Place lights at appropriate places, including bedside lamps, wall sconces, and a soft floor lamp in a reading corner.

    Warm illumination will emphasize the wood grain and make the room feel especially cozy at night.

    This style is ideal for anyone who wants a bedroom that feels luxurious without being overly glamorous.

    3. Create a Boutique-Hotel Bedroom at Home

    One of the most effective ways to make a bedroom feel luxurious is to borrow design principles from high-end boutique hotels.

    The key is not copying a hotel room exactly.

    Instead, focus on the elements that make hotel bedrooms feel comfortable, organized, and sophisticated.

    Make the Bed the Star

    Choose a substantial bed with a large upholstered headboard.

    The headboard should visually anchor the wall.

    For a boutique appearance, consider a headboard that extends wider than the mattress.

    Use Symmetry

    Symmetry creates an immediate sense of order.

    Place matching or visually balanced nightstands on both sides of the bed.

    Then add similar lamps.

    You can still introduce small differences in accessories while maintaining overall balance.

    Layer the Bedding

    Use several layers.

    A possible arrangement could include:

    1. Fitted sheet
    2. Flat sheet
    3. Duvet
    4. Folded blanket
    5. Decorative cushions
    6. Accent pillows

    Choose fabrics that feel comfortable rather than purely decorative.

    Add Full-Length Curtains

    Curtains can dramatically improve a bedroom.

    Install them high and wide enough to frame the windows.

    Floor-length curtains can make the ceiling feel taller.

    Choose:

    • Linen
    • Cotton blend
    • Velvet
    • Heavy woven fabric

    For a sophisticated appearance, use curtains in a shade slightly darker or lighter than the walls.

    Add a Large Rug

    A generous rug beneath the bed helps unify the room.

    A subtle geometric or organic pattern can provide sophistication without competing with the bedding.

    Introduce a Seating Area

    If space allows, add a small chair and side table near a window.

    This creates a secondary zone within the bedroom.

    It can become a reading corner, morning coffee area, or quiet place to relax.

    Add Hotel-Inspired Lighting

    Layer the lighting carefully.

    Use bedside lamps for reading.

    Use accent lighting for atmosphere.

    Use a ceiling fixture for general illumination.

    Place lights at appropriate places so that no single light source has to illuminate the entire room.

    The final effect should be polished but still comfortable.

    4. Add Elegant Velvet for a Rich and Cozy Retreat

    Velvet can instantly make a bedroom feel richer because its surface catches light differently from cotton, linen, or wood.
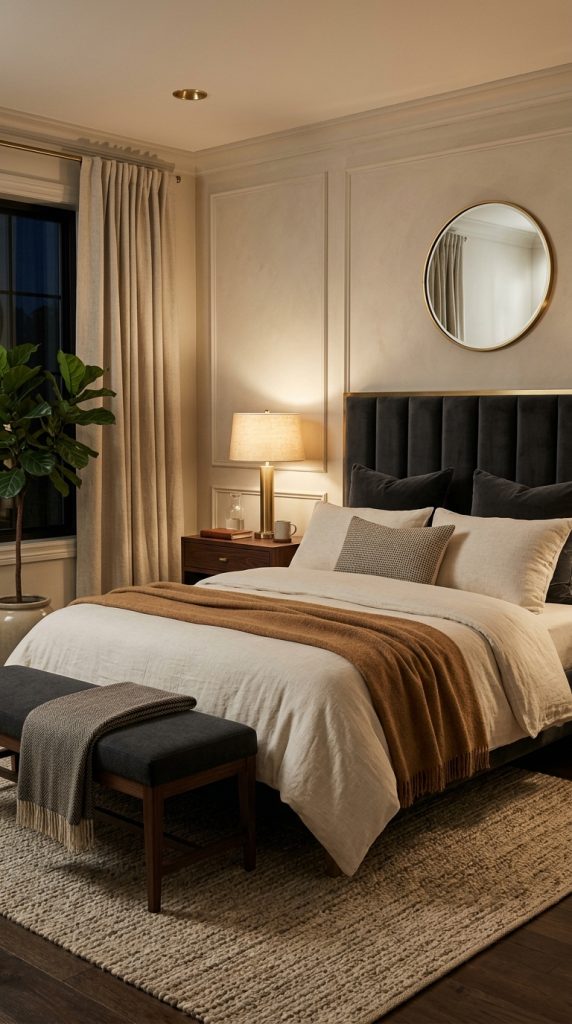
    However, the goal is not to cover everything in velvet.

    Use it strategically.

    Choose One Main Velvet Feature

    A velvet headboard is one of the most effective options.

    Deep colors such as:

    • Forest green
    • Burgundy
    • Chocolate
    • Navy
    • Charcoal

    can create dramatic sophistication.

    If you prefer a lighter bedroom, choose:

    • Warm beige
    • Taupe
    • Dusty rose
    • Cream

    Pair Velvet With Linen

    Velvet becomes more interesting when paired with a contrasting fabric.

    Use linen bedding against a velvet headboard.

    The relaxed texture of linen prevents the room from looking overly formal.

    Add a Velvet Bench

    If the headboard is not velvet, use a velvet bench at the foot of the bed.

    This provides a luxurious accent without dominating the entire room.

    Introduce Brass

    Velvet and warm metals can work beautifully together.

    Consider:

    • Brass bedside lamps
    • Brass handles
    • A small brass tray
    • Aged brass wall sconces

    Choose brushed or aged finishes for a softer appearance.

    Use Darker Colors Carefully

    If you use a dark velvet headboard, balance it with lighter bedding and walls.

    For example:

    Charcoal headboard + cream bedding + warm wood + beige rug

    This keeps the room sophisticated without becoming too dark.

    Add Soft Lighting

    Velvet looks particularly beautiful under warm evening light.

    Place lights at appropriate places, especially beside the bed and near accent furniture.

    Use warm bulbs and diffused shades to prevent harsh highlights.

    Avoid Excessive Glamour

    Velvet does not need crystal chandeliers, mirrored furniture, and metallic accessories everywhere.

    One or two luxurious materials can be enough.

    The strongest luxury bedrooms often combine one dramatic material with many quiet supporting elements.

    5. Create a Cozy Luxury Bedroom With a Fireplace-Inspired Focal Point

    A fireplace can transform a bedroom into an especially inviting retreat.

    If your home already has a fireplace, make it a central design feature.

    If you do not have one, you can create a similar architectural focal point with a mantel-style feature, textured wall, or carefully designed media area.

    Use Natural Materials

    A stone or plaster fireplace can introduce architectural character.

    For a softer luxury aesthetic, consider:

    • Limestone
    • Travertine
    • Plaster
    • Light marble
    • Textured stone

    Choose a finish that works with your room rather than following a trend blindly.

    Keep the Mantel Simple

    Place only a few carefully selected objects.

    For example:

    • Large ceramic vase
    • Small artwork
    • Sculptural object
    • Candle
    • Dried branches

    Do not cover the entire mantel.

    Position the Bed Thoughtfully

    If the architecture allows it, orient the bed so that the fireplace is visible from the sleeping position.

    This creates a strong focal relationship between the bed and fireplace.

    Use a Cozy Seating Area

    Place an armchair near the fireplace.

    Add a small side table and soft throw.

    This can transform an unused corner into a comfortable retreat.

    Use Warm Textiles

    Layer:

    • Wool
    • Linen
    • Boucle
    • Cotton
    • Velvet

    The combination creates a tactile atmosphere.

    Create Evening Ambiance

    Place lights at appropriate places, such as a floor lamp near the chair, bedside lamps, and subtle accent lighting around the fireplace.

    If using candles, place them safely away from curtains and bedding.

    The goal is to create a peaceful evening atmosphere rather than excessive decorative lighting.

    6. Create a Modern Luxury Bedroom With Sculptural Lighting

    Lighting can become artwork in a luxury bedroom.
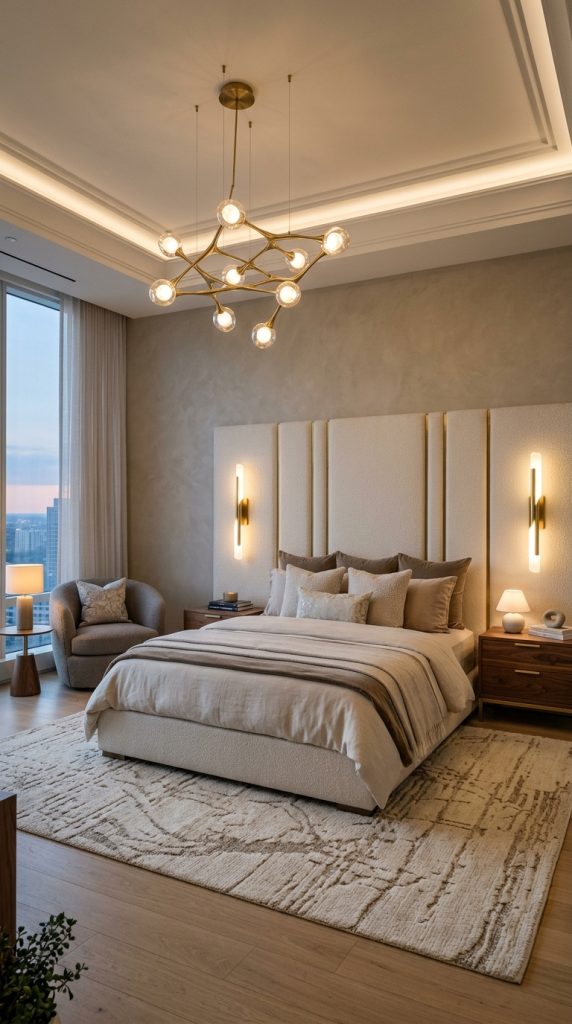
    Instead of treating lighting as something purely functional, choose fixtures that contribute to the room’s design.

    Choose a Statement Ceiling Fixture

    A sculptural chandelier or pendant can create a dramatic focal point.

    Look for designs with:

    • Curved forms
    • Soft geometric shapes
    • Textured glass
    • Matte metal
    • Warm brass
    • Sculptural silhouettes

    The fixture should be appropriately scaled to the room.

    Add Bedside Wall Sconces

    Wall sconces can free up nightstand space.

    They also create a symmetrical appearance.

    Install them at a practical height for reading.

    Use Decorative Table Lamps

    If you prefer table lamps, select sculptural ceramic, stone, glass, or metal bases.

    A beautiful lamp can function almost like a piece of art.

    Add Floor Lighting

    A floor lamp can create a cozy reading area.

    Position it beside an armchair or near a corner that needs additional illumination.

    Choose Warm Bulbs

    Warm lighting is especially effective in bedrooms.

    It creates a relaxing atmosphere and works beautifully with:

    • Cream
    • Beige
    • Brown
    • Wood
    • Brass
    • Taupe

    Layer the Lighting

    A sophisticated bedroom should have different lighting levels.

    You might use:

    Ceiling fixture โ†’ general illumination

    Bedside lamps โ†’ reading

    Floor lamp โ†’ seating area

    Accent light โ†’ artwork or architectural feature

    Soft ambient light โ†’ evening atmosphere

    Place lights at appropriate places rather than simply adding more fixtures.

    The objective is flexibility.

    You should be able to create bright functional lighting in the morning and soft atmospheric lighting at night.

    7. Design a Luxury Bedroom With an Elegant Statement Wall

    A statement wall can make a bedroom look custom-designed without requiring a complete renovation.

    The wall behind the bed is usually the strongest location because it naturally functions as the room’s focal point.

    Try Architectural Wall Panels

    Wall paneling can add sophistication.

    Options include:

    • Vertical panels
    • Traditional molding
    • Fluted panels
    • Upholstered panels
    • Wood slats

    Choose a design that matches the architecture of your home.

    Use Textured Wallpaper

    A subtle wallpaper can create depth.

    Consider:

    • Linen-look wallpaper
    • Grasscloth-inspired texture
    • Soft geometric patterns
    • Abstract organic patterns
    • Subtle metallic details

    Avoid extremely busy designs if you want the room to feel calm.

    Create a Plaster-Look Wall

    A textured plaster finish can provide an organic luxury appearance.

    Soft beige, ivory, mushroom, or warm gray can work beautifully.

    Add Artwork

    Instead of a statement wall treatment, you can create impact with oversized artwork.

    One large piece can often look more luxurious than several tiny frames.

    Choose artwork with colors that complement your bedding.

    Consider the Headboard

    Do not forget the relationship between the statement wall and headboard.

    If the wall is heavily textured, choose a simpler headboard.

    If the wall is simple, the headboard can become more dramatic.

    Add Appropriate Lighting

    Place lights at appropriate places, particularly bedside sconces or subtle accent lighting that highlights the statement wall.

    Avoid lighting that creates harsh glare.

    Keep the Rest of the Room Quiet

    When one wall becomes the focal point, simplify the surrounding decor.

    This creates visual hierarchy.

    The bedroom will feel designed rather than decorated randomly.

    8. Create a Soft Cream and Warm Brown Luxury Retreat

    For a bedroom that feels exceptionally cozy, combine creamy whites with warm brown.

    This combination has a timeless quality and works across many design styles.

    Start with warm cream walls.

    Then introduce brown through furniture and accessories.

    Use Warm Brown Furniture

    Walnut nightstands, a dark oak dresser, or a brown upholstered bench can anchor the room.

    Avoid choosing too many unrelated wood tones.

    Try to keep the finishes within a similar warmth level.

    Choose Cream Bedding

    Cream bedding keeps the room light.

    Layer different textures rather than different colors.

    For example:

    • Cotton sheets
    • Linen duvet
    • Quilted coverlet
    • Boucle cushions
    • Woven throw

    Add Brown Accents

    Introduce brown through:

    • Throw blankets
    • Cushions
    • Leather chair
    • Wooden frame
    • Ceramic accessories

    Add a Textured Rug

    A cream or beige rug with subtle brown variation can connect the room together.

    Use Curtains

    Floor-length curtains in warm beige can make the room feel softer.

    Layer sheer curtains with heavier panels if privacy and light control are important.

    Add Natural Accessories

    A ceramic vase, wooden bowl, stone lamp, or dried branches can add organic character.

    Keep the quantity limited.

    Warm the Room With Lighting

    Place lights at appropriate places, especially bedside lamps with fabric shades, a floor lamp near the seating area, and gentle ambient lighting.

    Warm light against cream and brown materials creates an especially inviting evening atmosphere.

    This style is ideal if you want luxury that feels calm rather than dramatic.

    9. Create a Small Luxury Bedroom That Feels Spacious

    Luxury is not limited to large bedrooms.
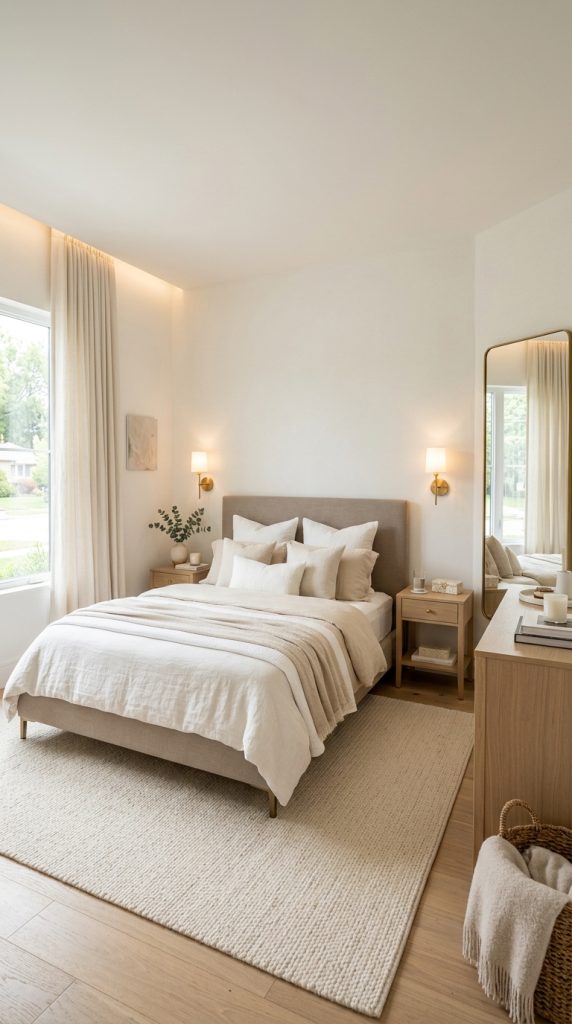
    A small room can feel remarkably sophisticated when every piece is carefully selected.

    The most important principle is to avoid filling the room simply because there is space available.

    Choose the Right Bed

    A large headboard can create luxury, but an oversized bed can make a small room feel cramped.

    Choose proportions carefully.

    An upholstered headboard with a slim profile can provide elegance without consuming too much visual space.

    Use Wall-Mounted Lighting

    Wall sconces are particularly useful in small bedrooms.

    They free up bedside table space.

    You can then use smaller nightstands.

    Choose Furniture With Storage

    A storage bed or narrow dresser can provide practical function.

    Luxury should not come at the expense of organization.

    Use Mirrors Strategically

    A large mirror can make the room feel more open.

    Place it where it reflects natural light or an attractive part of the room.

    Avoid positioning it where it creates visual confusion.

    Use One Large Rug

    A small rug floating in the middle of the room can make the space feel fragmented.

    A properly sized rug beneath the bed can visually unify the room.

    Keep the Palette Light

    Cream, beige, soft taupe, and warm white can help maintain visual openness.

    You can still introduce darker accents through wood, lighting, or small accessories.

    Use Curtains Correctly

    Hang curtains close to the ceiling and allow them to fall to the floor.

    This can make the room feel taller.

    Layer Lighting

    Place lights at appropriate places, particularly wall sconces beside the bed and a small ambient lamp elsewhere in the room.

    Avoid relying on one bright overhead light.

    Keep Surfaces Clear

    A small room benefits enormously from visual simplicity.

    Choose only the objects you genuinely love.

    The result can feel more luxurious than a larger bedroom filled with unnecessary furniture.

    10. Create an Ultimate Cozy & Sophisticated Bedroom Retreat

    The final approach combines many of the most successful luxury bedroom principles into one cohesive design.
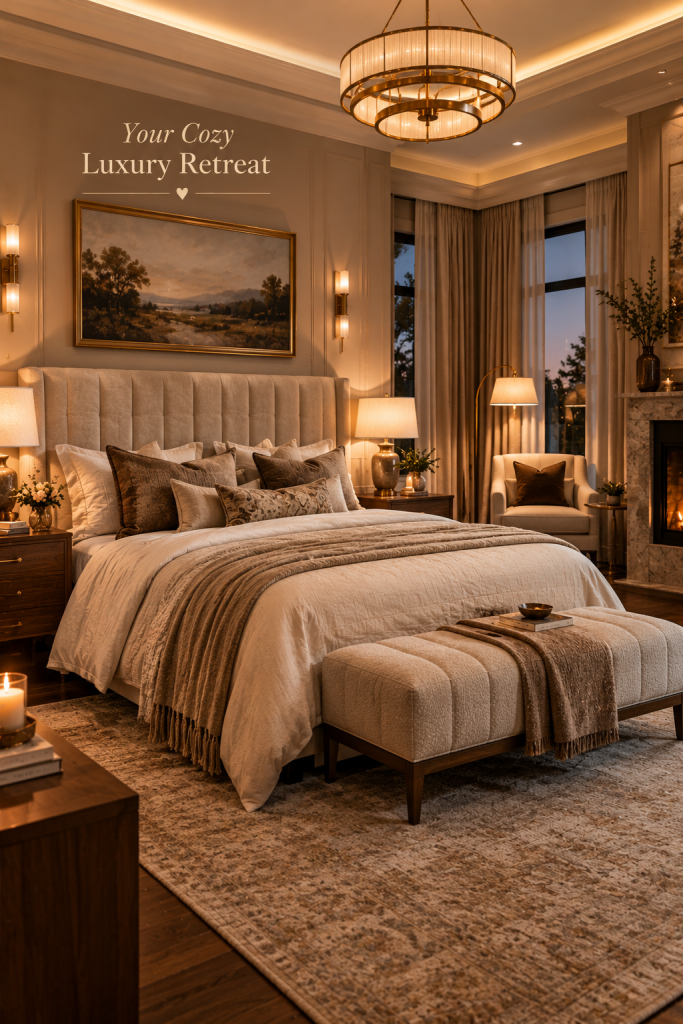
    The objective is not to use every possible luxury element.

    Instead, combine carefully chosen features that work together.

    Start With a Strong Foundation

    Choose a warm neutral palette.

    Cream, beige, taupe, warm brown, and muted charcoal provide a timeless foundation.

    Use one darker shade for contrast.

    Invest in the Bed

    The bed should be the most comfortable and visually important element.

    Choose a quality mattress and comfortable bedding.

    Then add a substantial headboard.

    A tall upholstered headboard can create a sophisticated focal point.

    Layer Different Textures

    Use several materials without overwhelming the room.

    For example:

    Linen + velvet + boucle + wood + ceramic + glass + metal

    Each texture contributes something different.

    Add Warm Wood

    Use warm wood for:

    • Nightstands
    • Dresser
    • Bench
    • Accent table
    • Decorative objects

    Wood adds depth and prevents the room from feeling sterile.

    Introduce One Luxurious Material

    Choose one material to make the room feel special.

    It might be:

    • Velvet
    • Marble
    • Brass
    • Natural stone
    • Boucle
    • Handmade ceramic

    You do not need all of them.

    Create a Comfortable Seating Area

    If the room allows, add an armchair.

    Pair it with a small side table and floor lamp.

    This transforms the bedroom into a retreat rather than simply a place to sleep.

    Add Oversized Curtains

    Full-length curtains can dramatically improve the atmosphere.

    Choose soft neutral fabric with enough weight to create beautiful folds.

    Add Art

    Use one large piece above a dresser or a carefully selected piece near the seating area.

    Art should support the room’s palette.

    Style the Nightstands

    Keep them functional.

    A good arrangement might include:

    • Lamp
    • Book
    • Small ceramic object
    • Water glass or carafe

    Avoid filling every available surface.

    Create a Layered Lighting Plan

    Lighting is what brings the entire bedroom together.

    Use:

    • Ceiling fixture
    • Bedside lamps
    • Wall sconces
    • Floor lamp
    • Accent lighting

    Place lights at appropriate places according to how the room is used.

    The bedroom should have enough lighting for practical activities while remaining capable of becoming soft and atmospheric at night.

    Add Soft Evening Details

    A folded throw at the foot of the bed can make the room feel inviting.

    A candle on a dresser can introduce gentle ambiance when used safely.

    A textured rug can make the first step out of bed more comfortable.

    Fresh flowers or a small branch arrangement can add a natural finishing touch.

    Keep the Bedroom Personal

    The final step is often the most important.

    Luxury should not eliminate personality.

    Include a few objects that mean something to you.

    A favorite book.

    A meaningful artwork.

    A vintage lamp.

    A beautiful photograph.

    A handmade ceramic piece.

    These personal details keep the bedroom from feeling like a generic luxury hotel.

    How to Choose a Luxury Bedroom Color Palette

    Before purchasing furniture and accessories, choose your primary palette.

    This prevents the bedroom from becoming visually disconnected.

    Cream and Warm Beige

    Best for a calm, timeless retreat.

    Combine cream walls with beige bedding, warm wood, and brass accents.

    Taupe and Brown

    Ideal for a richer atmosphere.

    Use taupe walls, brown furniture, cream textiles, and warm lighting.

    Charcoal and Cream

    Perfect for sophisticated contrast.

    Use charcoal selectively so the bedroom does not become too dark.

    Olive and Beige

    Excellent for an organic luxury bedroom.

    Pair muted olive with warm wood and cream.

    Burgundy and Cream

    Ideal for a dramatic romantic bedroom.

    Use burgundy through velvet cushions, a throw, or an accent chair.

    Soft Gray and Warm Wood

    A sophisticated contemporary combination.

    Choose warm gray rather than an overly cool gray.

    How to Make a Bedroom Look Luxurious on a Budget

    Luxury design does not require replacing everything.

    Start with the elements that have the greatest visual impact.

    Upgrade the Bedding

    A beautifully made bed can transform the entire room.

    Choose coordinated neutral bedding and add layers.

    Improve the Lighting

    Replace harsh bulbs with warm illumination.

    Add a pair of matching lamps if possible.

    Add Full-Length Curtains

    Curtains can make the room appear taller and more polished.

    Use Oversized Artwork

    One large affordable artwork can have more impact than many small decorative pieces.

    Add a Large Rug

    A properly sized rug can visually connect the furniture.

    Declutter

    This costs nothing but can dramatically improve the room.

    Remove unnecessary objects from surfaces.

    Introduce One Luxury Accent

    Choose one focal material.

    A velvet bench, marble tray, sculptural lamp, or beautiful ceramic vase can elevate the entire space.

    Use Matching Hardware

    Updating dresser handles or nightstand hardware can create a more cohesive appearance.

    Luxury Bedroom Lighting Guide

    Lighting deserves special attention because it changes how every other element looks.

    A room with beautiful furniture can still feel uncomfortable if the lighting is too harsh.

    Ambient Lighting

    This provides general illumination.

    A ceiling fixture can serve this purpose.

    Task Lighting

    Bedside lamps and sconces are useful for reading.

    Accent Lighting

    Use accent lights to highlight artwork, architectural details, or a decorative feature.

    Decorative Lighting

    A sculptural chandelier or pendant can function as a visual statement.

    Warm Lighting

    For evening use, warm illumination generally creates a more relaxing bedroom atmosphere.

    Place lights at appropriate places instead of concentrating every source in one area.

    How to Arrange Furniture for a Luxury Look

    Furniture placement can be just as important as the furniture itself.

    Begin with the bed.

    It should usually have a strong relationship with the main wall.

    Then add nightstands.

    Make sure there is enough room to comfortably access both sides of the bed.

    If possible, create a clear pathway between the bed and the bedroom entrance.

    Place a dresser where it does not interfere with movement.

    If you have space, add a chair or bench to create a separate relaxation zone.

    Do not push every piece of furniture against a wall simply because the room allows it.

    Sometimes a small amount of breathing space around furniture makes the room feel much more intentional.

    How to Avoid Making a Luxury Bedroom Look Overdecorated

    One of the biggest mistakes in luxury decorating is assuming that more decoration automatically creates more luxury.

    Usually, the opposite is true.

    Luxury depends on visual control.

    If you have a dramatic headboard, simplify the bedding.

    If you have a statement chandelier, avoid adding several competing ceiling features.

    If the wallpaper is patterned, choose calmer furniture.

    If you have a large artwork, let it breathe.

    Use negative space intentionally.

    A few beautiful objects are more effective when they have room around them.

    Final Thoughts

    Creating a luxury bedroom is ultimately about designing an environment that feels beautiful, comfortable, calm, and intentional.

    The most sophisticated bedrooms do not depend on a single expensive piece. They succeed because multiple details work together.

    A beautiful bed establishes the focal point.

    Layered bedding introduces softness.

    Warm wood adds natural depth.

    Velvet or boucle creates tactile luxury.

    A large rug makes the room feel grounded.

    Full-length curtains soften the architecture.

    Artwork adds personality.

    A carefully chosen chair creates a private retreat within the room.

    And layered warm lighting transforms the entire atmosphere after sunset.

    For a timeless approach, start with warm neutrals and natural textures.

    For a richer look, introduce walnut, chocolate brown, burgundy, or deep olive.

    For a modern luxury aesthetic, combine clean architectural forms with sculptural lighting and minimal accessories.

    For a cozy hotel-inspired retreat, prioritize an exceptional bed, layered bedding, symmetry, soft curtains, and multiple lighting sources.

    And if your bedroom is small, remember that luxury is still possible. Choose furniture carefully, use vertical space, keep surfaces uncluttered, and allow a few high-impact pieces to become the focus.

    The most important thing is to design the room around how you want to feel, not simply how you want the room to photograph.

    A luxury bedroom should make you want to stay there.

    It should feel soft in the morning, peaceful in the afternoon, and warm and intimate in the evening.

    It should have enough organization to feel calm but enough personality to feel like home.

    For 2026, that balance between refinement and comfort is what makes a luxury bedroom truly successful.

    You do not need to fill the room with expensive objects.

    Instead, choose fewer pieces, make them work together, layer natural and luxurious materials, control the color palette, and pay close attention to lighting.

    When every element has a purpose, even a relatively simple bedroom can feel remarkably sophisticated.

    The result is not just a stylish bedroom.

    It is a private retreat designed for rest, comfort, and everyday luxury.
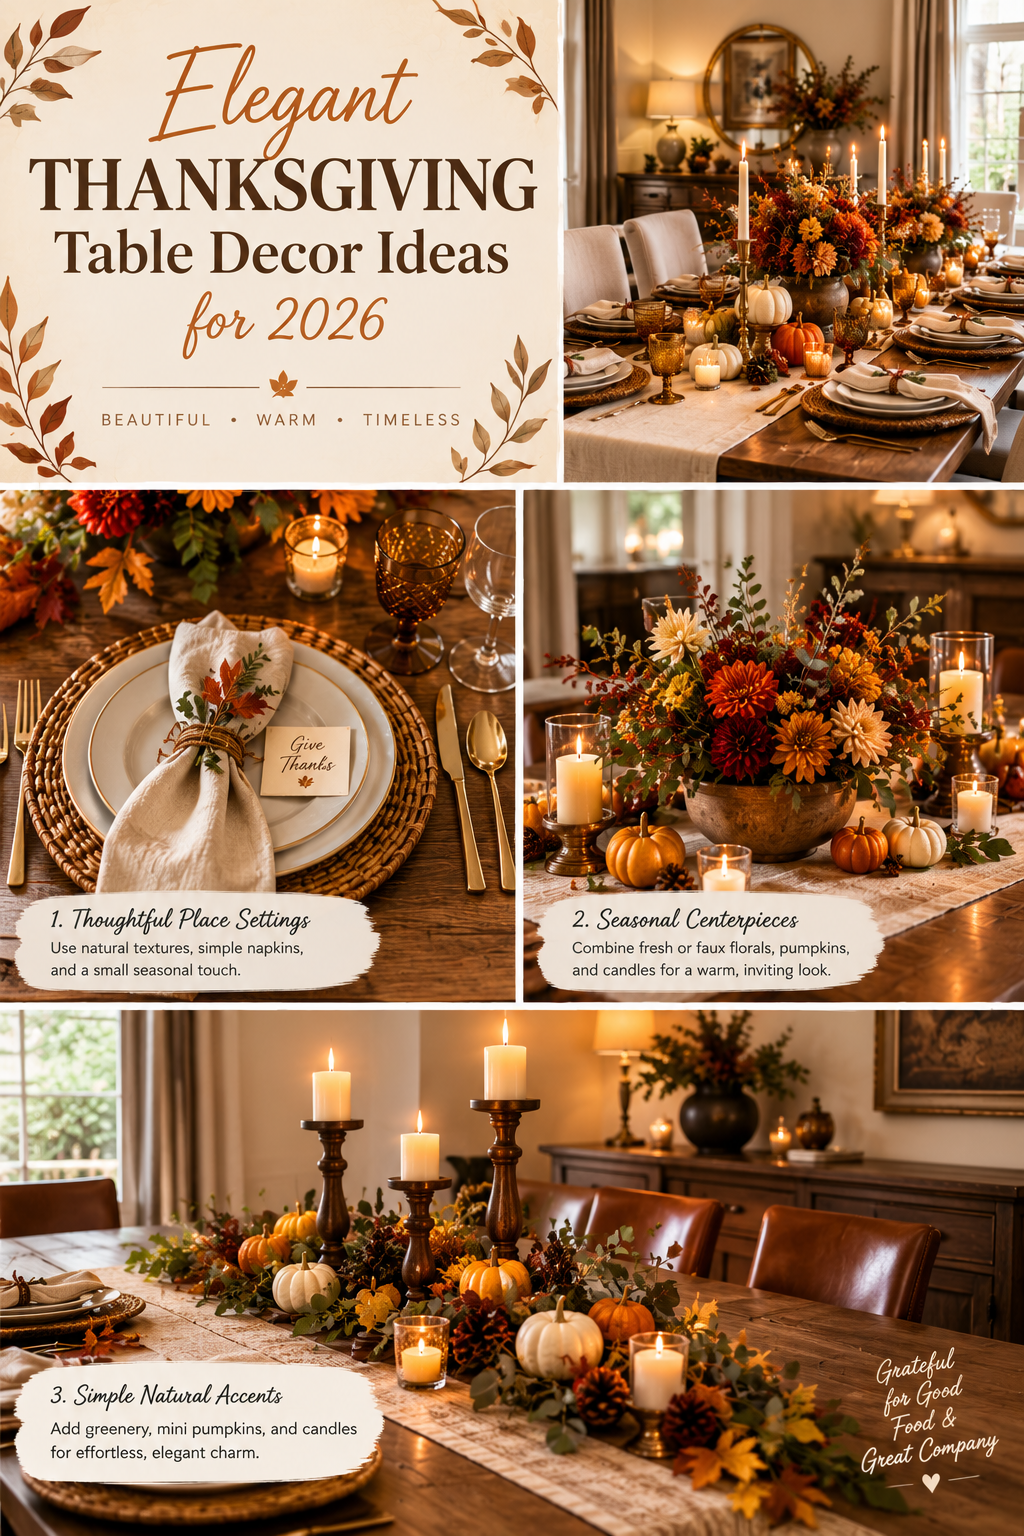

  • Elegant Thanksgiving Table Decor Ideas for 2026

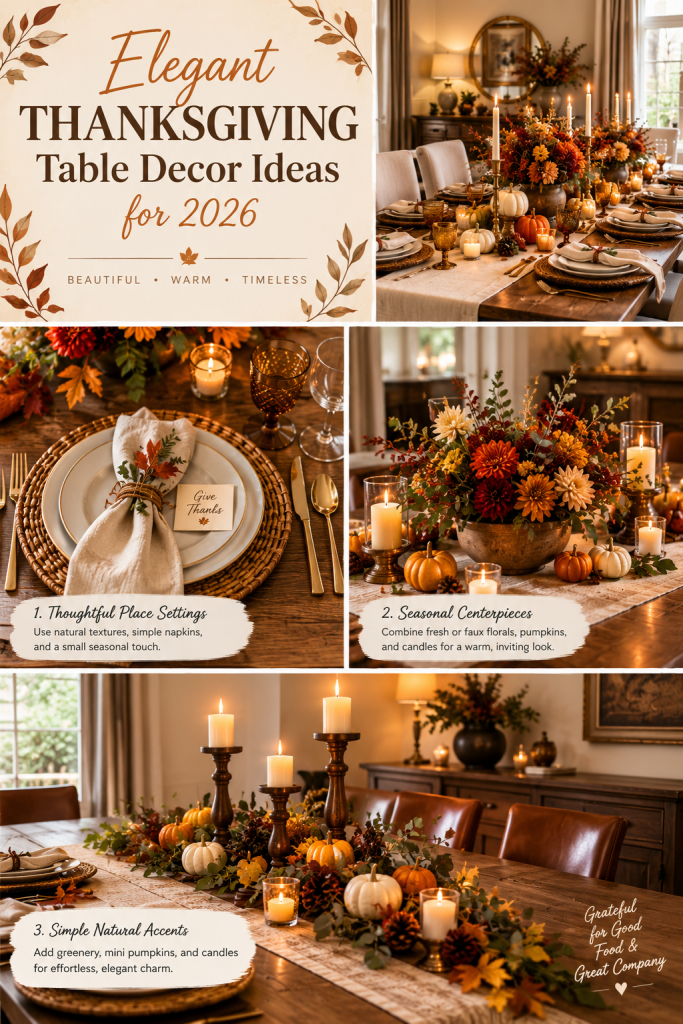
    Elegant Thanksgiving Table Decor Ideas for 2026

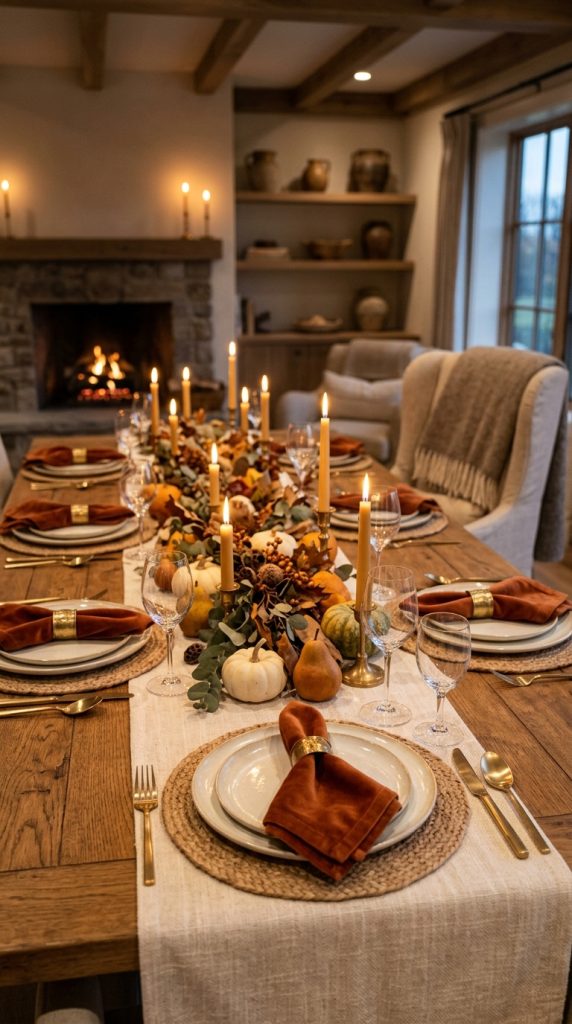
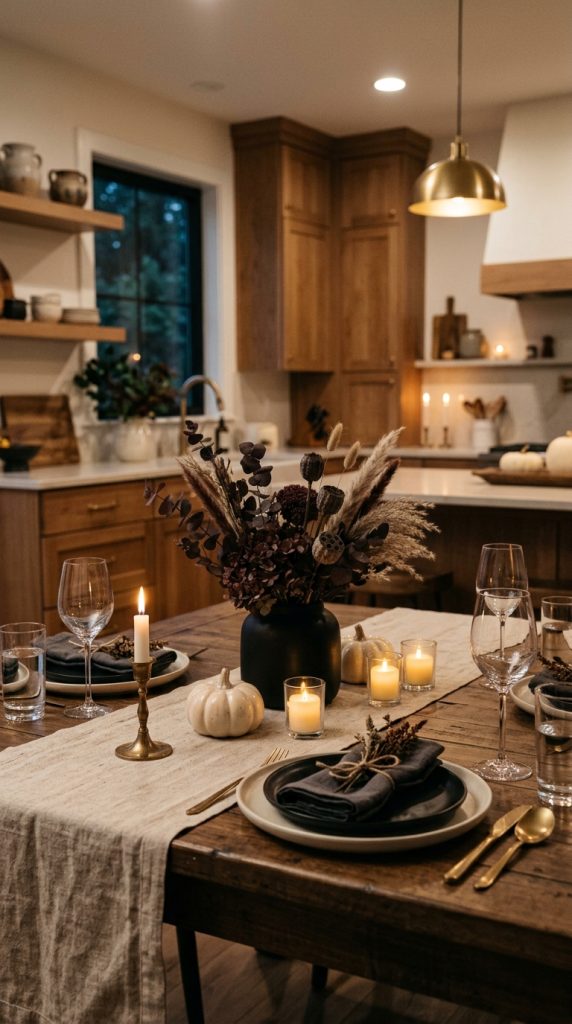
    Thanksgiving is one of those occasions when the table becomes more than a place to eat. It becomes the visual heart of the celebrationโ€”a gathering point for family, friends, conversation, gratitude, and the comforting feeling of being together.

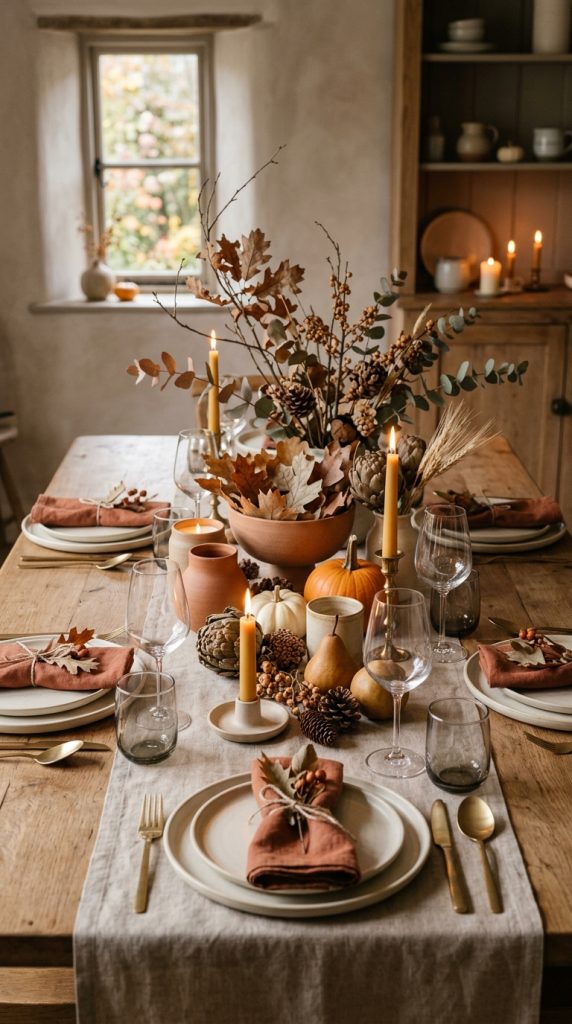
    For 2026, elegant Thanksgiving table decorating is moving toward a more refined and personal approach. Instead of filling the table with every traditional autumn decoration, the goal is to create a thoughtfully layered tablescape where every element has a purpose. Natural textures, sophisticated autumn colors, beautiful dinnerware, soft candlelight, seasonal produce, vintage-inspired details, and understated centerpieces can work together to create a table that feels festive without looking overdecorated.

    The best part is that an elegant Thanksgiving table does not have to look formal or expensive. You can create a luxurious appearance by focusing on texture, proportion, color coordination, and thoughtful placement.

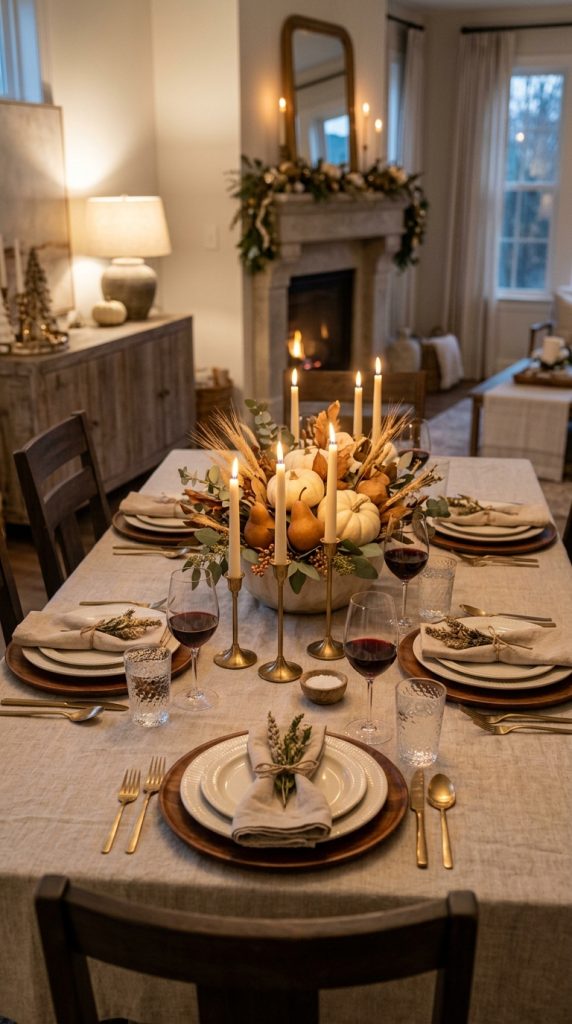
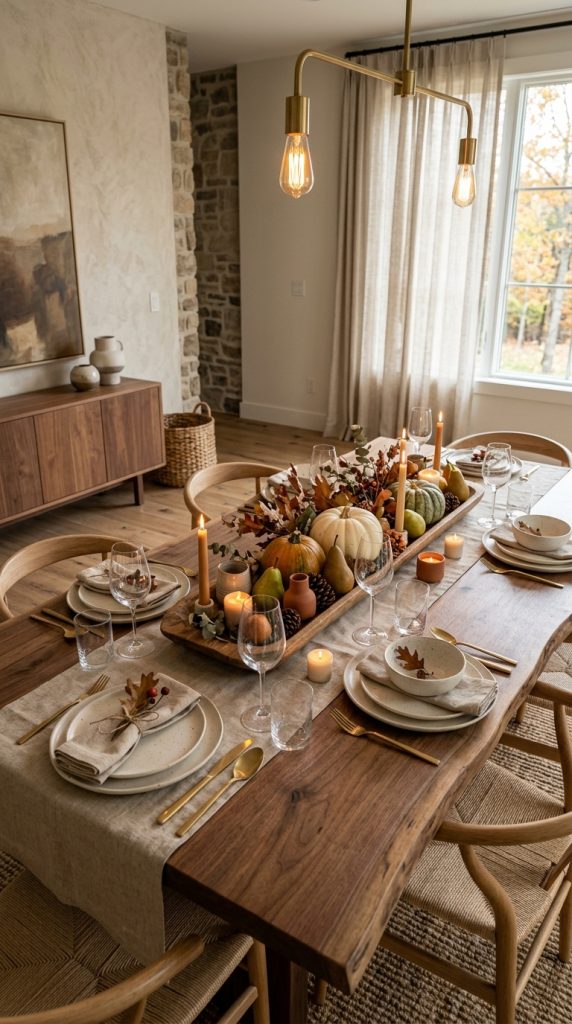
    A simple linen tablecloth can establish the foundation. Beautiful plates can add structure. A few seasonal branches can create height. Candles can introduce warmth. Small pumpkins, pears, figs, or pomegranates can provide seasonal character without making the table feel like a Halloween display.

    The following 15 Thanksgiving table decor ideas are designed to help you create a beautiful, welcoming tablescape for 2026. Each idea offers a different design direction, so you can choose the look that best matches your home and entertaining style.

    1. Create a Warm Neutral Thanksgiving Tablescape

    A warm neutral Thanksgiving table is an excellent choice if you love elegant interiors with a calm, timeless appearance.

    Instead of relying heavily on bright orange and red, build the tablescape around cream, beige, taupe, warm brown, soft caramel, and subtle muted gold.

    Begin with a natural linen tablecloth or runner. Linen immediately gives the table a relaxed but sophisticated appearance because its texture adds visual interest without requiring a complicated pattern.

    Layer neutral dinnerware over the table linen.

    Cream or ivory plates work particularly well. If your dishes have a slightly irregular handmade appearance, even better. Handmade-looking ceramics can make the table feel warm and personal instead of overly formal.

    Add Warm Wood

    A wooden serving board or natural wood charger can introduce an earthy element.

    Choose wood with visible grain rather than highly polished finishes. The natural variation adds character.

    You could place a wooden serving board in the center of the table with:

    • Pears
    • Small pumpkins
    • Dried foliage
    • Bread
    • Candles

    The arrangement should remain relatively low so guests can easily see one another.

    Use Beige and Brown Napkins

    Fold linen napkins simply and place them either on top of each plate or beside the forks.

    Warm taupe, cinnamon, oatmeal, or caramel napkins can add subtle seasonal color.

    Introduce Metallic Details

    A few brushed brass elements can make the neutral palette feel more elevated.

    Consider brass:

    • Candlesticks
    • Flatware
    • Napkin rings
    • Small serving bowls

    Avoid using too much shiny metallic decoration.

    Matte or brushed finishes generally create a softer appearance.

    Finish With Candlelight

    Warm candlelight is especially beautiful against neutral materials.

    Use several small candleholders spaced along the center rather than one enormous centerpiece.

    Place lights at appropriate places, especially warm candle-style illumination and subtle ambient lighting around the dining area, to create a welcoming evening atmosphere.

    The finished table should feel luxurious but relaxedโ€”perfect for a Thanksgiving meal where comfort matters as much as appearance.

    2. Use Burnt Orange and Burgundy for a Sophisticated Autumn Look

    If you want a Thanksgiving table that feels unmistakably seasonal, combine traditional autumn colors with more sophisticated tones.

    Instead of bright orange, choose burnt orange.

    Then introduce burgundy, deep rust, warm brown, and cream.

    This palette feels rich without becoming overly colorful.

    Start with a cream or natural linen tablecloth.

    Add a burnt-orange runner through the center.

    For dinnerware, choose cream or white plates.

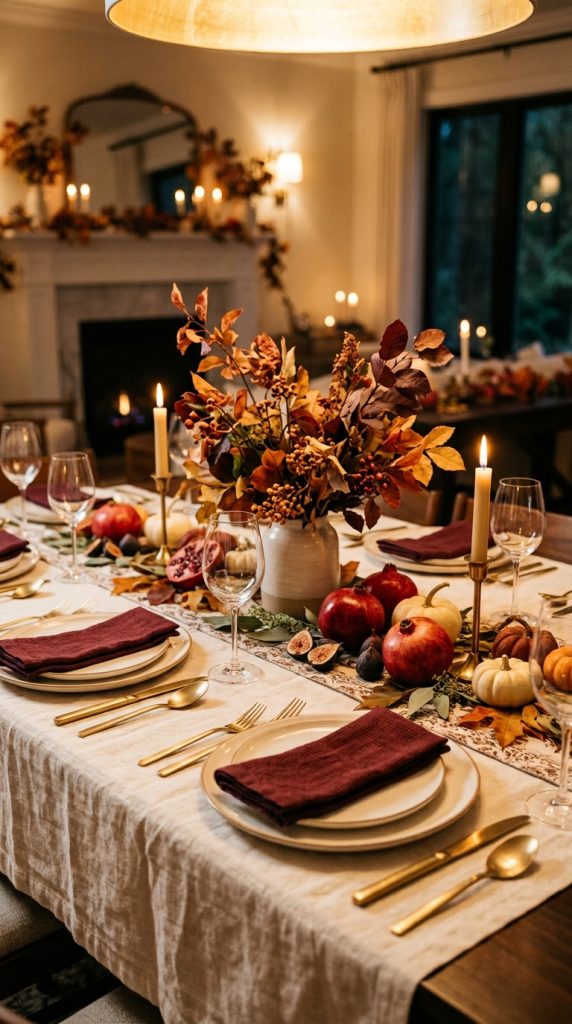
    Then introduce burgundy napkins.

    Build the Centerpiece With Seasonal Foliage

    Use a collection of autumn branches rather than an enormous floral arrangement.

    Branches with muted orange, rust, brown, or burgundy leaves can create natural height.

    Arrange them loosely in a ceramic vase.

    Avoid making the arrangement perfectly symmetrical.

    A slightly organic shape feels more natural.

    Add Small Seasonal Fruits

    Pomegranates can be particularly effective because their deep red color works beautifully with burgundy and rust.

    Scatter a few around the centerpiece or place them in a shallow bowl.

    You can also incorporate pears or figs.

    Add Gold Carefully

    Brushed gold flatware or a few gold-toned candleholders can enhance the richness of the palette.

    Keep metallic accents limited.

    The goal is warmth rather than sparkle.

    Layer the Lighting

    Warm lighting makes burgundy and burnt orange look deeper and richer.

    Place lights at appropriate places, such as warm candles along the table and soft ambient lamps in the surrounding dining area.

    This creates a beautiful evening Thanksgiving atmosphere.

    3. Design an Elegant Thanksgiving Tablescape With White Pumpkins

    White pumpkins are an easy way to make Thanksgiving decor feel sophisticated.

    They provide seasonal character while fitting naturally into neutral, modern, farmhouse, traditional, and contemporary interiors.

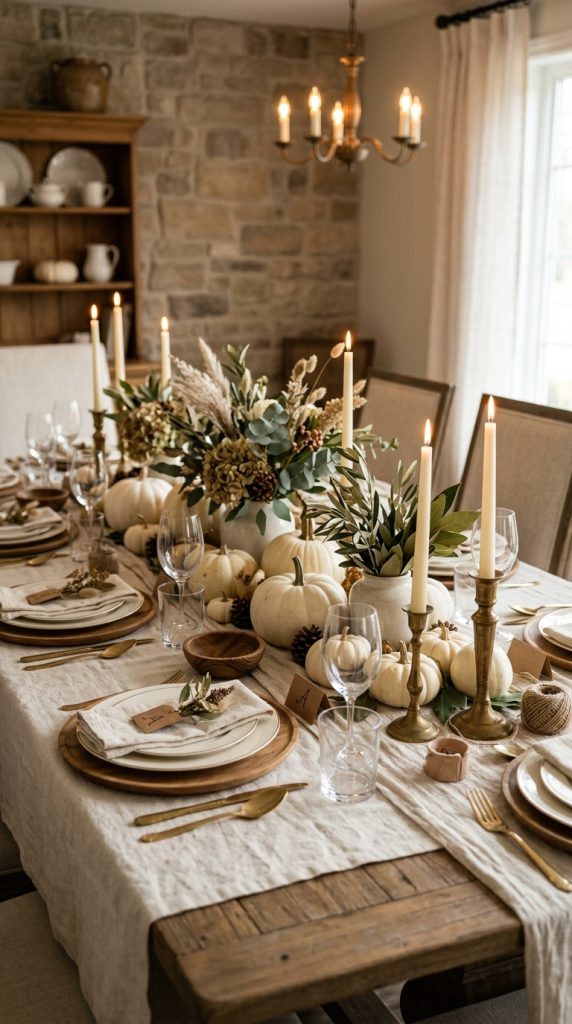
    Start with a cream linen tablecloth.

    Use white or ivory dinnerware.

    Then create a centerpiece using different sizes of white pumpkins.

    Mix Pumpkin Shapes

    Do not use pumpkins that all look identical.

    Combine:

    • Small round pumpkins
    • Mini pumpkins
    • Flat pumpkins
    • Slightly elongated varieties

    The variation makes the arrangement feel natural.

    Add Greenery

    Introduce a small amount of muted greenery.

    Olive branches, eucalyptus, or subtle autumn foliage can work well.

    Avoid excessive greenery if you want the table to remain elegant and uncluttered.

    Add Brown Elements

    White pumpkins can sometimes look too stark.

    Introduce warm brown through wooden chargers, woven napkin rings, or a natural wood serving board.

    Use Cream Candles

    Cream taper candles can reinforce the soft palette.

    Place them in brass or dark metal holders for contrast.

    Add Texture

    Texture becomes especially important when the colors are restrained.

    Combine:

    • Linen
    • Ceramic
    • Wood
    • Glass
    • Metal

    The different surfaces prevent the table from looking flat.

    The final effect is seasonal but sophisticated, making white pumpkins an excellent choice for an elegant 2026 Thanksgiving table.

    4. Try a Modern Organic Thanksgiving Table

    Modern organic decorating continues to be a beautiful direction for Thanksgiving because it combines clean design with natural warmth.

    This approach is ideal if your dining room already includes natural wood, neutral upholstery, stone, linen, or minimalist furniture.

    Begin with a natural wood dining table.

    If the tabletop is beautiful, you may not need a full tablecloth.

    Instead, use a simple linen runner.

    Choose Handmade-Looking Ceramics

    Use plates and bowls in:

    • Ivory
    • Sand
    • Warm gray
    • Beige
    • Cream

    Slightly imperfect edges can add personality.

    Create a Low Centerpiece

    Use a long wooden tray.

    Fill it with:

    • Pears
    • Small pumpkins
    • Dried leaves
    • Ceramic vessels
    • A few candles

    Keep everything relatively low.

    This allows the centerpiece to decorate the table without interrupting conversation.

    Add Stone or Ceramic Elements

    A stoneware serving bowl can become part of the centerpiece.

    A textured ceramic vase filled with a few branches can also work.

    Keep Colors Natural

    Avoid introducing too many seasonal colors.

    Instead, allow the materials to communicate the season.

    Brown wood, cream ceramics, dried foliage, and warm candlelight already create a Thanksgiving feeling.

    Lighting Matters

    Place lights at appropriate places, particularly warm candles along the center and subtle ambient lighting around the dining room.

    The final table should look contemporary, warm, and organic rather than overly rustic.

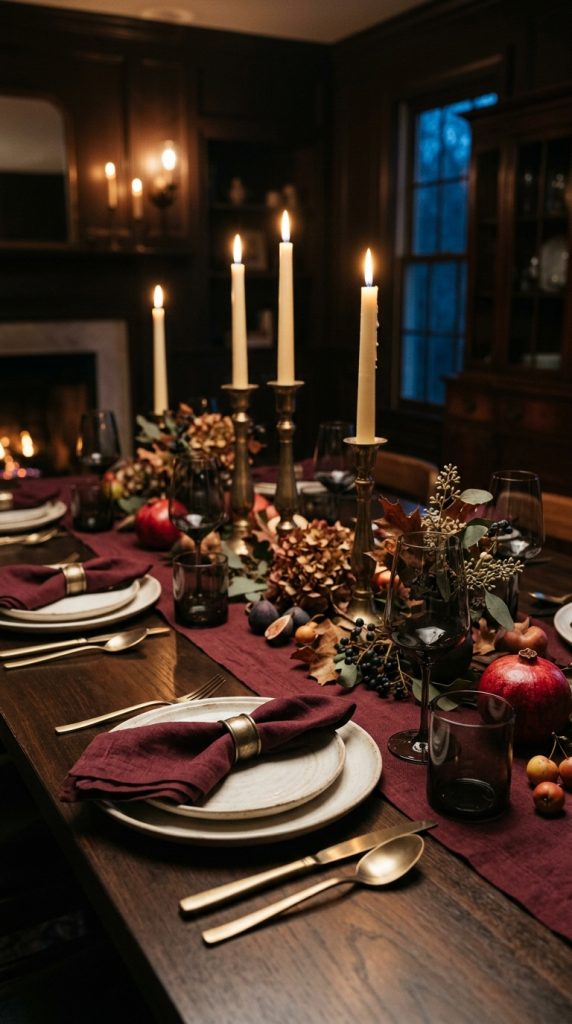
    5. Create a Moody Burgundy Thanksgiving Tablescape

    For a more dramatic Thanksgiving dinner, build the table around deep burgundy.

    Burgundy creates an intimate and luxurious atmosphere, especially in the evening.

    Pair it with chocolate brown, charcoal, cream, antique brass, and muted rust.

    Start With Dark Napkins

    If you already own neutral table linens, you do not need to replace everything.

    Simply add burgundy linen napkins.

    This can immediately transform the appearance of the table.

    Add Dark Glassware

    Smoked or amber glassware can add depth.

    You do not need an entire matching collection.

    Even a few vintage-inspired glasses can create character.

    Choose Antique Brass

    Brass candleholders look especially beautiful against burgundy.

    Use different heights for visual rhythm.

    Add Seasonal Foliage

    Choose foliage in:

    • Deep red
    • Burgundy
    • Brown
    • Rust
    • Muted green

    Avoid highly saturated artificial colors.

    Use Cream to Balance the Darkness

    Cream plates or a neutral tablecloth can prevent the table from becoming too heavy.

    The contrast between light dinnerware and deep burgundy accents creates sophistication.

    Create Evening Ambiance

    Place lights at appropriate places, using warm candlelight along the table and gentle surrounding illumination.

    The result is romantic, intimate, and especially suitable for an evening Thanksgiving dinner.

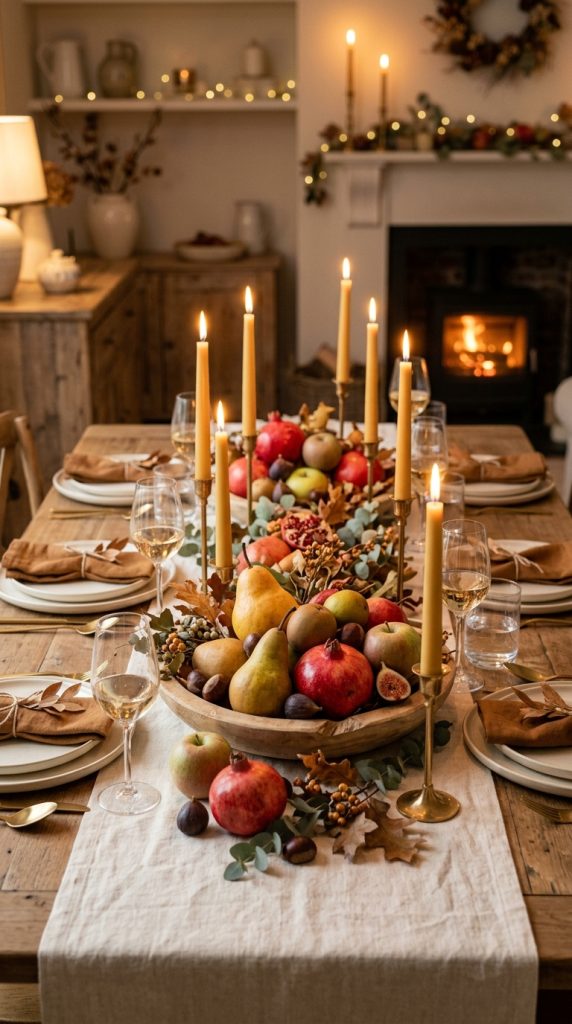
    6. Style a Thanksgiving Table With Pears and Seasonal Fruit

    You do not have to use pumpkins to make a Thanksgiving table feel seasonal.

    Fresh fruit can create a more elegant and unexpected centerpiece.

    Pears are particularly beautiful because their natural color works with neutral autumn palettes.

    Choose a mixture of green and golden pears.

    Place them in a low wooden bowl or ceramic serving dish.

    Add Apples

    Muted red or golden apples can provide another layer of color.

    Avoid using too many.

    A curated arrangement will look more sophisticated.

    Include Pomegranates

    Pomegranates bring rich color and texture.

    Their deep red skin works beautifully with:

    • Burgundy
    • Rust
    • Cream
    • Brown
    • Brass

    Add Dried Foliage

    Place a few dried branches around the fruit.

    This creates height without requiring a large floral arrangement.

    Use Natural Linen

    A beige or oatmeal runner works particularly well.

    The relaxed texture contrasts beautifully with glossy fruit.

    Add Candles

    Place candles around the fruit arrangement.

    Do not position them where they could interfere with serving dishes.

    Place lights at appropriate places so the warm glow catches the fruit and creates subtle highlights across the table.

    This idea feels abundant, seasonal, and elegant without relying heavily on traditional Thanksgiving decorations.

    7. Create a Vintage Thanksgiving Table With Antique Details

    If you love vintage interiors, Thanksgiving provides the perfect opportunity to bring out antique-inspired pieces.

    This table can feel as though it belongs in a beautiful old family home where traditions have been celebrated for generations.

    Begin with vintage-style dinnerware.

    Floral china, ivory plates, or traditional patterns can work beautifully.

    Use Mismatched Plates

    Your plates do not necessarily have to match perfectly.

    A carefully coordinated collection of different patterns can create a charming collected appearance.

    Keep the color palette consistent.

    Cream, brown, faded green, muted blue, and burgundy work well.

    Add Antique Brass

    Use vintage-style brass candlesticks.

    Slight variations in shape can make the table feel authentic.

    Use Old-Fashioned Glassware

    Colored glass or vintage-style goblets can introduce another layer.

    Create a Floral Centerpiece

    Instead of a modern structured arrangement, use loose seasonal flowers and foliage.

    Think about:

    • Dried hydrangeas
    • Autumn leaves
    • Small chrysanthemums
    • Dried grasses
    • Branches

    Add Handwritten Place Cards

    Simple handwritten cards can make each guest feel special.

    Use cream cardstock and a classic handwritten style.

    Keep the Table Comfortable

    Even though the look is vintage, the table should not feel fragile or untouchable.

    Use washable linens where practical.

    Choose serving pieces that can actually be used during dinner.

    The final result should feel nostalgic, personal, and welcoming.

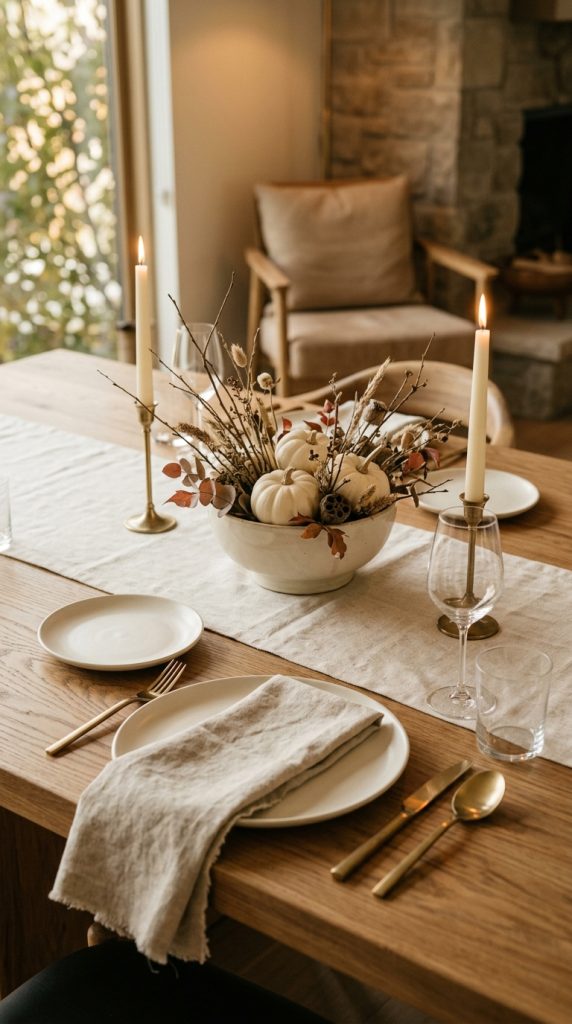
    8. Make a Minimalist Thanksgiving Tablescape

    Elegant Thanksgiving decorating does not always mean adding more.

    A minimalist table can be extremely beautiful when every element is carefully selected.

    Start with a clean wooden table.

    Add a simple linen runner.

    Then choose one centerpiece.

    For example, a long ceramic bowl filled with white pumpkins and dried branches.

    Keep Dinnerware Simple

    Use plain cream or white plates.

    Avoid elaborate patterns.

    Choose One Accent Color

    Pick one seasonal accent.

    You might choose:

    • Rust
    • Olive
    • Burgundy
    • Brown
    • Terracotta

    Use that color only through napkins or small accessories.

    Reduce Decorative Objects

    Instead of five different types of centerpieces, choose one.

    Instead of several types of tableware, keep the place setting simple.

    Add Texture

    Minimalism should not mean everything is smooth.

    Combine linen with ceramic and wood.

    These textures create warmth without adding visual clutter.

    Use Soft Lighting

    Place lights at appropriate places, especially a few warm candles spaced evenly along the center.

    The soft glow will add atmosphere while maintaining the minimalist appearance.

    This is an excellent option for people who prefer modern, calm, Pinterest-worthy interiors.

    9. Design a Rustic-Luxe Thanksgiving Table

    Rustic and elegant styles can work beautifully together.

    The key is to combine rustic materials with refined details.

    Start with a natural wood table.

    Allow some of the wood grain to remain visible.

    Add a linen runner in cream, beige, or warm taupe.

    Use Woven Chargers

    Woven chargers can introduce natural texture.

    Place cream dinnerware over them.

    Add Velvet Napkins

    This is where the luxurious element enters.

    Choose rust, burgundy, olive, or chocolate brown velvet napkins.

    Add Brass Flatware

    Brushed brass flatware can elevate the rustic foundation.

    Create a Seasonal Centerpiece

    Use a long wooden board or shallow tray.

    Add pumpkins, pears, dried foliage, and candles.

    Keep the arrangement loose.

    Add One Dramatic Floral Element

    A small vase of dried flowers can provide height.

    Choose muted autumn tones rather than bright arrangements.

    Layer Warm Lighting

    Place lights at appropriate places, including warm candles along the table and subtle lighting around the dining area.

    The result should feel like an elegant country dinner rather than a heavily decorated rustic event.

    10. Use Black and Cream for a Modern Elegant Thanksgiving

    Black and cream create a striking Thanksgiving table for homeowners who prefer contemporary design.

    This palette is especially effective when your dining room already includes black furniture, dark accents, or modern architecture.

    Start with a cream tablecloth.

    Use black dinner plates or black chargers.

    Then add cream napkins.

    Introduce Natural Wood

    Without a natural element, black and cream can sometimes feel too formal.

    Add a wooden centerpiece tray or wooden serving board.

    Add Muted Seasonal Color

    You can introduce a small amount of rust or brown.

    For example, use a few dried branches or miniature pumpkins.

    Keep these accents restrained.

    Add Aged Brass

    Black looks particularly sophisticated with brass.

    Use brass candleholders or flatware.

    Create Contrast With Texture

    Combine smooth ceramics with:

    • Linen
    • Wood
    • Dried foliage
    • Textured glass

    Use Warm Lighting

    Place lights at appropriate places, especially warm candles along the table and a softly illuminated dining area.

    Warm light will soften the black elements and make the table feel inviting rather than stark.

    11. Create a Thanksgiving Table Inspired by Nature

    Bring the beauty of the outdoors directly onto your Thanksgiving table.

    This idea works especially well for people who prefer organic and understated decorating.

    Instead of buying numerous decorative items, collect inspiration from natural materials.

    Use Branches

    A few beautiful branches can become the main centerpiece.

    Choose branches with interesting shapes.

    Place them in a large ceramic vase.

    Add Seasonal Leaves

    Arrange a small amount of foliage around the base.

    Do not cover the entire table.

    Add Pinecones

    A few natural pinecones can introduce texture.

    Choose clean, dry pieces and arrange them selectively.

    Add Seasonal Fruit

    Pears, apples, figs, or pomegranates can make the centerpiece feel abundant.

    Use Natural Linen

    A flax-colored linen runner creates a beautiful base.

    Choose Earthy Dinnerware

    Stoneware in cream, beige, brown, or soft gray works naturally with this style.

    Add Candlelight

    Place lights at appropriate places, especially warm candles around the natural centerpiece.

    The flickering light will emphasize the textures of branches, leaves, wood, and ceramics.

    The final result feels connected to autumn without becoming overly themed.

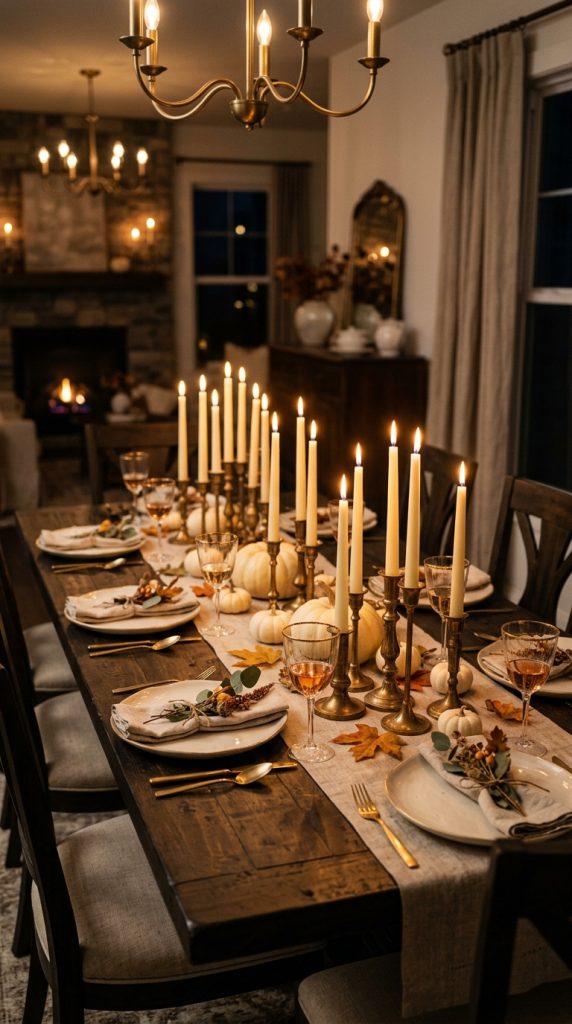
    12. Style an Elegant Thanksgiving Table With Candles and Taper Holders

    Sometimes lighting can become the main decorative element.

    A candle-focused Thanksgiving table can look incredibly elegant.

    Choose traditional taper candles.

    Cream, ivory, taupe, muted orange, burgundy, or deep brown can work depending on your color palette.

    Mix Candleholder Heights

    Use several different heights.

    This creates movement across the table.

    Choose a Cohesive Material

    Aged brass is excellent for traditional interiors.

    Black metal works for gothic or modern tables.

    Ceramic holders can create a softer organic appearance.

    Keep the Centerpiece Low

    Let the candleholders provide vertical interest.

    Surround them with small seasonal details such as:

    • Dried leaves
    • Mini pumpkins
    • Pears
    • Small branches

    Avoid Excessive Decoration

    If you use many candles, you do not need many other objects.

    The candlelight itself creates drama.

    Coordinate the Place Settings

    Keep dinnerware relatively simple.

    This allows the candles to remain visually important.

    Place lights at appropriate places throughout the dining area so the table is warmly illuminated without relying entirely on ceiling lighting.

    For safety, use suitable holders and keep candles away from fabrics, foliage, and areas where guests will reach frequently. Flameless candle options can also create a similar visual effect.

    13. Create an Elegant Thanksgiving Farmhouse Table

    Farmhouse Thanksgiving decor can be elegant when it avoids excessive signs, overly rustic objects, and too many themed accessories.

    Start with a wooden table.

    If you have a reclaimed or distressed table, let its character remain visible.

    Add a cream linen runner.

    Choose Simple Dinnerware

    White or cream plates are ideal.

    Add natural woven chargers.

    Use Seasonal Foliage

    Create a loose centerpiece using:

    • Eucalyptus
    • Dried grasses
    • Autumn leaves
    • Olive branches
    • Small seasonal flowers

    Add Ceramic Pumpkins

    A few ceramic pumpkins can provide subtle seasonal character.

    Choose cream, brown, or muted terracotta.

    Use Wooden Serving Boards

    A large wooden board can hold bread, fruit, or appetizers while also functioning as part of the table styling.

    Keep Textiles Soft

    Linen napkins in oatmeal, beige, rust, or olive can bring warmth.

    Add Warm Illumination

    Place lights at appropriate places, especially warm candles along the centerpiece and soft ambient lighting in the dining room.

    The finished table should feel relaxed, practical, and beautiful enough for a special holiday gathering.

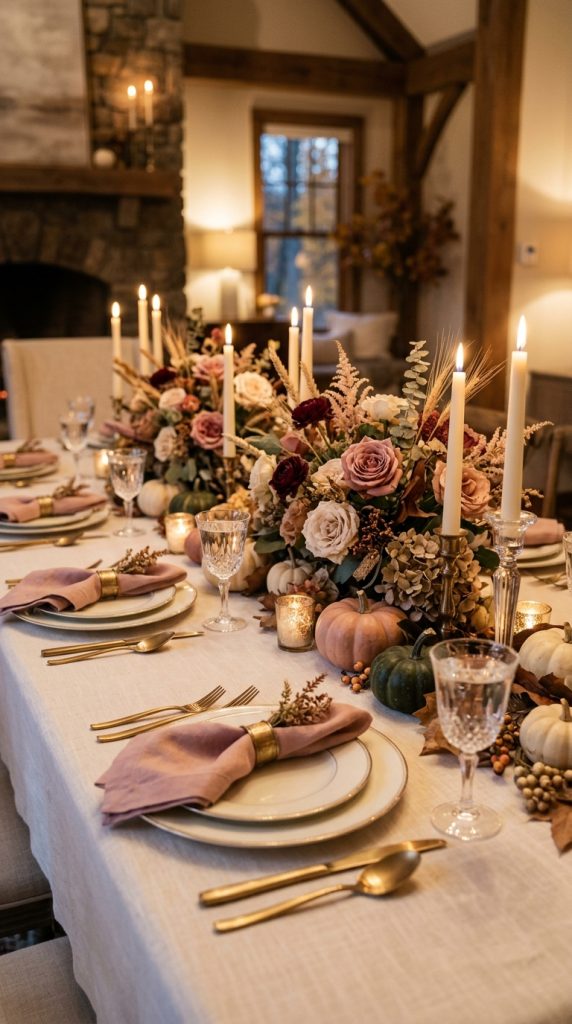
    14. Create a Romantic Thanksgiving Table With Florals and Soft Colors

    For a softer Thanksgiving atmosphere, use romantic colors and delicate seasonal flowers.

    This style works particularly well for intimate Thanksgiving dinners.

    Choose a palette of:

    • Cream
    • Dusty rose
    • Muted peach
    • Burgundy
    • Soft brown
    • Warm beige

    Use a Floral Centerpiece

    Instead of traditional bright autumn arrangements, choose flowers in muted tones.

    Combine them with dried foliage.

    A loose arrangement will feel more natural.

    Use Soft Linen

    A blush-beige or cream linen tablecloth creates a gentle foundation.

    Add Elegant Place Settings

    Layer a charger, dinner plate, and smaller plate.

    Place a folded linen napkin on top.

    Add a Small Seasonal Detail

    A miniature pear, dried leaf, or tiny pumpkin at each place setting can make the table feel personalized.

    Use Glass Candleholders

    Clear or lightly tinted glass allows candlelight to become part of the visual design.

    Keep Lighting Warm

    Place lights at appropriate places, using warm candles and soft surrounding illumination.

    The result should feel intimate, elegant, and romantic without losing the Thanksgiving connection.

    15. Create a Luxurious Thanksgiving Tablescape With Layered Textures

    If you want your 2026 Thanksgiving table to feel especially rich and sophisticated, focus on layering textures rather than simply adding more decorations.

    This approach works because texture creates depth.

    Begin with a linen tablecloth.

    Add woven or wooden chargers.

    Place ceramic dinnerware over them.

    Use linen or velvet napkins.

    Then introduce glassware.

    Finally, add metal through flatware or candleholders.

    Each material contributes something different.

    Layer the Table Foundation

    A beautiful table might include:

    Natural linen โ†’ woven charger โ†’ ceramic plate โ†’ linen napkin โ†’ elegant flatware โ†’ textured glassware

    This creates a sophisticated place setting without excessive decoration.

    Build a Textured Centerpiece

    Use a long low arrangement.

    Combine:

    • Dried foliage
    • Small pumpkins
    • Pears
    • Ceramic vessels
    • Wooden elements
    • Candles

    The centerpiece should feel collected rather than perfectly coordinated.

    Add Velvet

    Velvet napkins are particularly effective if you want a luxurious appearance.

    Choose burgundy, rust, chocolate brown, or olive.

    Add Antique Metal

    Aged brass candleholders can provide warmth.

    Do not use too many metallic objects.

    A few pieces are enough.

    Introduce Natural Elements

    Wood and dried foliage prevent the table from feeling overly formal.

    They also reinforce the autumn theme.

    Create Evening Atmosphere

    Lighting becomes the finishing layer.

    Place lights at appropriate places, including warm candles across the table, subtle table or floor lighting around the dining area, and gentle ambient illumination that allows the textures to remain visible.

    The result is an elegant Thanksgiving table that feels rich without appearing excessive.


    How to Choose the Best Thanksgiving Table Color Palette for 2026

    Choosing a color palette before decorating can make the entire tablescape easier to coordinate.

    Instead of buying individual decorations and hoping they work together, select three to five colors first.

    Warm Neutral

    Cream + beige + caramel + brown + muted gold

    Perfect for timeless, organic interiors.

    Classic Autumn

    Burnt orange + rust + cream + brown + burgundy

    Ideal if you want a recognizable Thanksgiving atmosphere.

    Moody Elegant

    Burgundy + charcoal + cream + espresso + antique brass

    Excellent for evening dinners.

    Natural Organic

    Olive + beige + cream + brown + terracotta

    Beautiful for modern organic interiors.

    Modern Contrast

    Black + cream + wood + muted rust + brass

    Ideal for contemporary homes.

    Romantic

    Cream + dusty rose + burgundy + beige + muted peach

    Great for intimate gatherings.


    How to Make a Thanksgiving Table Look Expensive Without Spending a Fortune

    An expensive-looking table is usually more about coordination than price.

    You do not need designer dinnerware or a massive floral arrangement.

    Instead, focus on a few important areas.

    First, keep your color palette consistent.

    Second, mix textures.

    Third, vary heights carefully.

    Fourth, avoid excessive decoration.

    Fifth, use warm lighting.

    You can also make inexpensive items look more sophisticated by combining them with natural materials.

    For example, inexpensive pumpkins can look beautiful when placed on a wooden tray with linen and candles.

    Simple white plates can look elegant when paired with woven chargers and cloth napkins.

    A basic glass vase can become a centerpiece when filled with beautiful branches.


    How to Set an Elegant Thanksgiving Place Setting

    A beautiful place setting does not have to be complicated.

    Start with your charger.

    Place the dinner plate on top.

    If you are serving multiple courses, add the appropriate smaller plate or bowl.

    Place the napkin neatly.

    Arrange flatware in a practical order.

    Add the glassware above and to the right of the plate.

    Finally, add a small decorative element if desired.

    A tiny pumpkin, pear, dried leaf, or handwritten name card can personalize the setting.

    Avoid placing large decorations directly in front of guests.

    The table needs to remain functional.


    How to Create a Pinterest-Worthy Thanksgiving Table

    Pinterest-friendly tablescapes usually have several characteristics in common.

    They have a clear focal point.

    They use a cohesive color palette.

    They contain several textures.

    They have natural-looking styling.

    They avoid excessive clutter.

    And they use beautiful lighting.

    When photographing your table, natural daylight can reveal the details of linen, ceramics, wood, and foliage.

    For evening photographs, warm lighting can create a more intimate atmosphere.

    Keep the camera angle slightly above table height so the viewer can see both the place settings and centerpiece.

    A vertical composition is especially useful for Pinterest.


    Common Thanksgiving Table Decorating Mistakes to Avoid

    Even a beautiful idea can lose its impact if the table becomes too crowded.

    Too Many Centerpieces

    Choose one main centerpiece rather than several competing arrangements.

    Decorations That Are Too Tall

    Guests should be able to see one another.

    Too Many Colors

    Three to five coordinated colors are usually enough.

    Excessive Matching

    Everything does not have to come from the same collection.

    Mixing materials often creates more personality.

    Too Much Orange

    Orange is beautiful, but using it everywhere can make the table feel overly themed.

    Use burnt orange or rust selectively.

    Ignoring Practicality

    Remember that Thanksgiving involves serving food, passing dishes, and moving around the table.

    Leave functional space.

    Harsh Lighting

    Bright overhead lighting can flatten the atmosphere.

    Use layered warm illumination when appropriate.


    Final Thoughts

    Elegant Thanksgiving table decor for 2026 is less about following one specific trend and more about creating a table that feels intentional, warm, sophisticated, and personal.

    You can achieve that feeling with a neutral palette and natural textures, or you can create something more dramatic with burgundy, charcoal, dark wood, and antique brass.

    White pumpkins can provide a clean seasonal touch.

    Pears and pomegranates can create an unexpected centerpiece.

    Vintage china can bring family traditions into the design.

    Natural branches can add height and movement.

    Velvet napkins can introduce luxury.

    Linen can soften the entire arrangement.

    Wood can make the table feel grounded.

    And warm lighting can bring everything together once the sun goes down.

    The most important thing is not to decorate every available inch.

    Instead, give your table room to breathe.

    Let beautiful materials speak for themselves.

    A textured linen runner can be more effective than an elaborate table covering. A few carefully chosen pumpkins can look more sophisticated than a large collection. A simple ceramic vase filled with seasonal branches can create a stronger focal point than an oversized floral arrangement.

    For a timeless Thanksgiving table, begin with cream, beige, natural wood, and warm brown.

    For a classic autumn appearance, introduce burnt orange, rust, and burgundy.

    For a sophisticated evening gathering, experiment with deep burgundy, charcoal, espresso, cream, and aged brass.

    For a modern organic table, allow linen, ceramic, wood, stone, and dried foliage to create most of the visual interest.

    And for a luxurious tablescape, focus on layered textures, beautiful place settings, velvet accents, elegant glassware, and warm candlelight.

    Above all, remember that Thanksgiving is about gathering together. The table should look beautiful, but it should also feel welcoming.

    Leave enough room for serving dishes.

    Keep the centerpiece low enough for conversation.

    Choose comfortable textiles.

    Use decorations that do not interfere with dinner.

    And create lighting that makes people want to sit, relax, talk, and stay a little longer.

    The most memorable Thanksgiving tables are rarely the ones with the most decorations. They are the ones where every elementโ€”from the linen napkin to the candlelightโ€”feels thoughtfully chosen.

    That is what makes an elegant Thanksgiving tablescape feel special.

    For 2026, embrace natural materials, sophisticated autumn colors, vintage touches, warm lighting, seasonal produce, and intentional simplicity. Combine those elements with your own style, and you can create a Thanksgiving table that feels beautiful in photographs and even better when everyone gathers around it.


  • Vintage Halloween Living Room Decor Ideas With Antique, Gothic & Cozy Details

    Vintage Halloween Living Room Decor Ideas With Antique, Gothic & Cozy Details

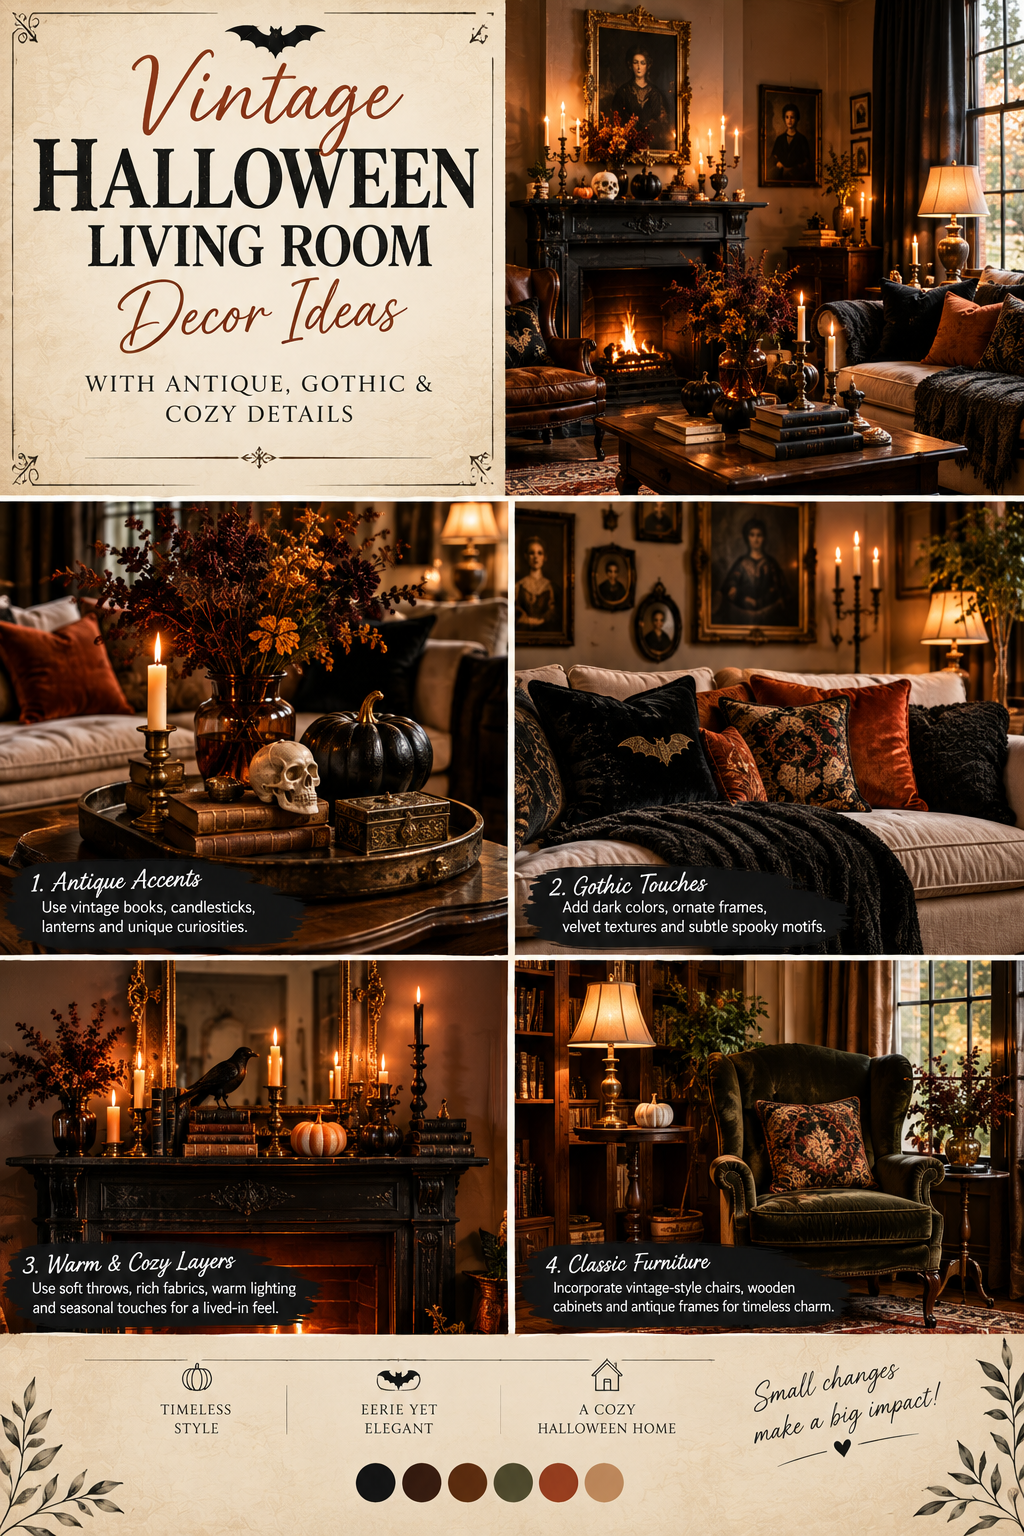
    Vintage Halloween decorating has a completely different feeling from bright, playful Halloween decor. Instead of relying on plastic skeletons, cartoon pumpkins, and overwhelming orange decorations, vintage Halloween style creates an atmosphere that feels mysterious, romantic, nostalgic, and slightly dramatic.

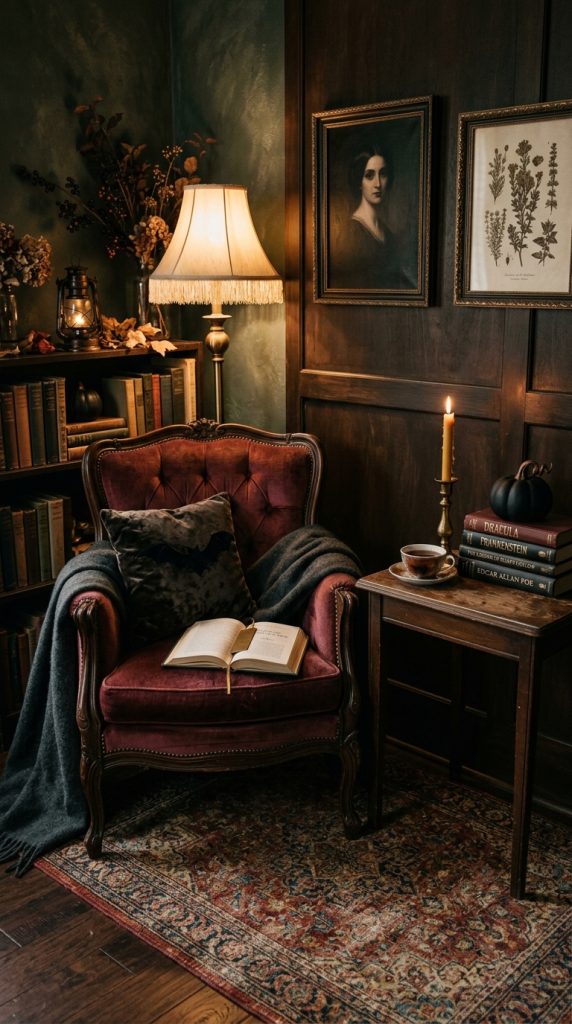
    Imagine an old-world living room filled with antique-looking furniture, dark wood, aged brass, vintage portraits, velvet cushions, distressed picture frames, old books, dried branches, candlelight, and a few carefully chosen pumpkins. The room feels as though it belongs to another era while still being comfortable enough for modern everyday living.

    This decorating style combines several beautiful influences. Vintage interiors contribute aged materials, traditional furniture, antique accessories, and nostalgic details. Gothic design introduces darker colors, dramatic silhouettes, arches, ornate frames, black accents, and mysterious artwork. Cozy decorating keeps the room inviting through soft textiles, warm lighting, layered cushions, rugs, throws, and natural textures.

    The secret is balance.

    A vintage Halloween living room should feel atmospheric without becoming a haunted-house set. The decorations should enhance the existing room instead of hiding it. One antique mirror can be more effective than ten plastic decorations. A dark velvet cushion can create more atmosphere than a shelf full of Halloween figurines. A few black taper candles can communicate the season without making the room look theatrical.

    This makes vintage Halloween decorating especially attractive for homeowners who want something elegant and Pinterest-worthy.

    You can work with a neutral living room, a traditional interior, a modern home, or even a small apartment. The style can be adapted according to how dramatic you want the final result to feel.

    For a subtle interpretation, use cream, brown, charcoal, and muted black with a few autumn accents. For a stronger gothic appearance, introduce burgundy, deep plum, black, dark wood, antique gold, and dramatic artwork.

    Below are 15 ideas for creating a warm, sophisticated, and unforgettable vintage Halloween living room.

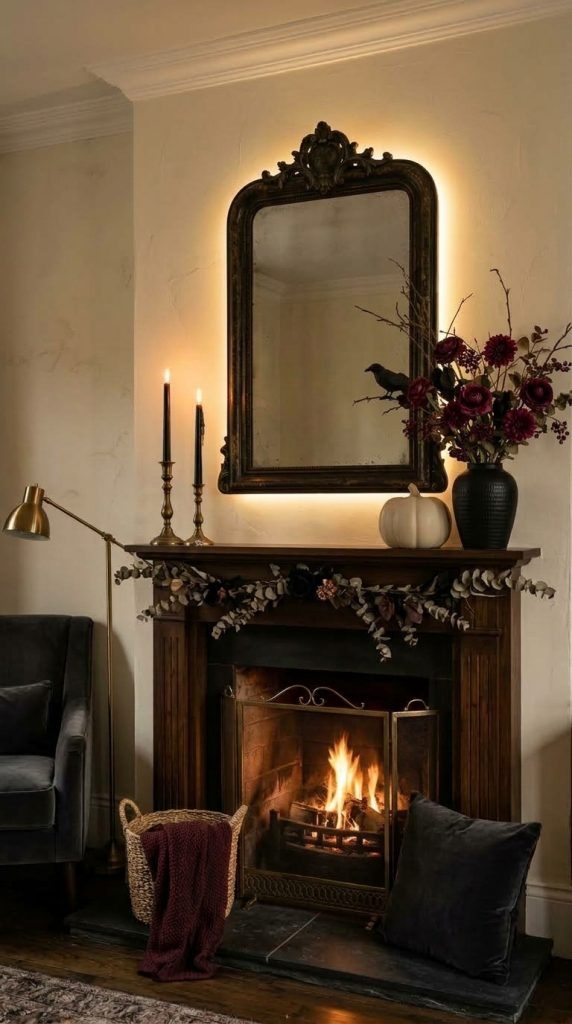
    1. Create a Moody Vintage Halloween Fireplace

    A fireplace naturally becomes the perfect focal point for vintage Halloween decorating.

    If your living room already has a fireplace, use it as the architectural foundation of your seasonal design rather than decorating every surface in the room.

    Start with the mantel.

    Instead of placing a large collection of Halloween objects across it, create a layered arrangement that looks as though it belongs naturally in an old historic home.

    An antique-style mirror can become the central feature.

    Choose a frame with aged gold, dark wood, black, or distressed detailing. The frame should have enough visual character to feel vintage without overwhelming the mantel.

    Underneath the mirror, place a small collection of objects at different heights.

    For example, you could use two black candlesticks, an old-looking ceramic vessel, a small dark pumpkin, and a stack of vintage-style books.

    The arrangement should feel slightly asymmetrical.

    Add Dried Branches

    A tall vase filled with dried branches can bring an autumnal feeling without using artificial Halloween decorations.

    Choose branches with interesting silhouettes.

    Their shadows become particularly beautiful when illuminated at night.

    You can also add dried grasses or muted autumn foliage in rust, brown, and burgundy.

    Use the Fireplace Hearth

    The hearth should not be forgotten.

    Place two or three pumpkins near one side rather than creating a symmetrical row.

    Choose muted colors such as:

    • Charcoal
    • Cream
    • Dusty orange
    • Deep brown
    • Faded green

    This creates a vintage appearance.

    Create Warm Evening Lighting

    The fireplace area should become especially atmospheric after sunset.

    Place lights at appropriate places, such as warm table lamps nearby, subtle mantel lighting, or safe candle-style illumination around the fireplace.

    The lighting should highlight the mirror, artwork, and decorative objects without making the entire room excessively bright.

    Keep the Rest of the Room Quiet

    Because the fireplace is the focal point, avoid decorating every wall.

    A simple sofa, neutral rug, and a few autumn cushions will allow the mantel to remain visually important.

    The final effect should feel like an elegant old-world living room preparing for Halloween rather than a themed party room.

    2. Decorate With Antique-Style Portraits

    Vintage portraits are one of the easiest ways to introduce gothic Halloween character.

    A living room wall featuring traditional portrait artwork can instantly create a mysterious atmosphere.

    The trick is to choose artwork that looks sophisticated.

    Avoid cartoonish Halloween prints.

    Instead, look for portraits with:

    • Dark backgrounds
    • Traditional clothing
    • Dramatic lighting
    • Ornate frames
    • Muted colors
    • Classical compositions

    You can create a single statement portrait above a console or sofa.

    Alternatively, create a small gallery of different antique-style frames.

    Mix Portrait Sizes

    A large central portrait surrounded by smaller artwork creates a collected appearance.

    The frames do not need to match.

    In fact, slightly different frames often make the arrangement feel more authentically vintage.

    Use dark wood, aged gold, black, or distressed frames.

    Add a Gothic Element

    One dark decorative frame can provide contrast against lighter artwork.

    A black frame around a faded portrait is particularly effective.

    Keep the Furniture Simple

    If the wall artwork is dramatic, choose relatively simple furniture underneath.

    A cream sofa or dark wood console gives the artwork enough visual space.

    Add Soft Textiles

    Introduce a velvet cushion or throw nearby.

    This connects the dramatic artwork with the cozy character of the living room.

    The result is mysterious but still comfortable.

    3. Use Black Velvet for Instant Gothic Elegance

    Black velvet is one of the most effective materials for creating an elegant Halloween atmosphere.

    Its texture absorbs light while creating subtle highlights.

    This makes it much richer than flat black fabric.

    You can introduce velvet without replacing major furniture.

    Start with cushions.

    Two black velvet cushions on a cream or beige sofa can immediately create contrast.

    Add one muted burgundy or rust cushion for warmth.

    Try a Velvet Throw

    A black or deep-plum velvet throw draped casually across an accent chair can create a luxurious vintage feeling.

    Do not fold everything perfectly.

    A relaxed arrangement makes the room feel lived-in.

    Use Velvet Curtains

    If your room already has dark curtains, velvet can make the atmosphere more dramatic.

    For smaller spaces, however, heavy curtains can sometimes make the room feel smaller.

    In that case, use velvet through smaller accessories instead.

    Combine Velvet With Wood

    Velvet becomes particularly beautiful when paired with dark wood.

    A wooden coffee table beside a velvet chair creates an old-world combination.

    Add Brass

    A small amount of aged brass can prevent the room from becoming visually flat.

    Try a brass candlestick, lamp base, or decorative frame.

    The contrast between black velvet and warm metal creates a sophisticated Halloween palette.

    4. Build a Gothic Antique Gallery Wall

    A gallery wall can become the artistic centerpiece of a vintage Halloween living room.

    Instead of using only Halloween artwork, combine traditional and mysterious pieces.

    You could include:

    • Antique-style portraits
    • Botanical illustrations
    • Old architectural drawings
    • Black-and-white photography
    • Gothic-inspired artwork
    • Vintage mirrors
    • Ornate frames

    This makes the display feel like permanent home decor rather than temporary Halloween decoration.

    Start With One Large Piece

    Choose a large artwork as the anchor.

    Then build outward.

    Place smaller frames around it.

    The arrangement should feel intentionally collected rather than perfectly symmetrical.

    Add One Mirror

    A small antique mirror can break up the artwork.

    It also reflects candlelight and lamps, adding depth to the room.

    Use Muted Colors

    The artwork does not need to be entirely black.

    Cream, sepia, brown, faded green, burgundy, and gray can all work beautifully.

    These colors feel aged and atmospheric.

    Avoid Overfilling

    Leave enough wall visible between pieces.

    The goal is a curated gallery rather than a wall completely covered in decorations.

    5. Style an Antique Coffee Table With Vintage Halloween Details

    The coffee table is an excellent location for a small seasonal arrangement.

    Because it is at the center of the seating area, even a simple vignette can have a strong visual effect.

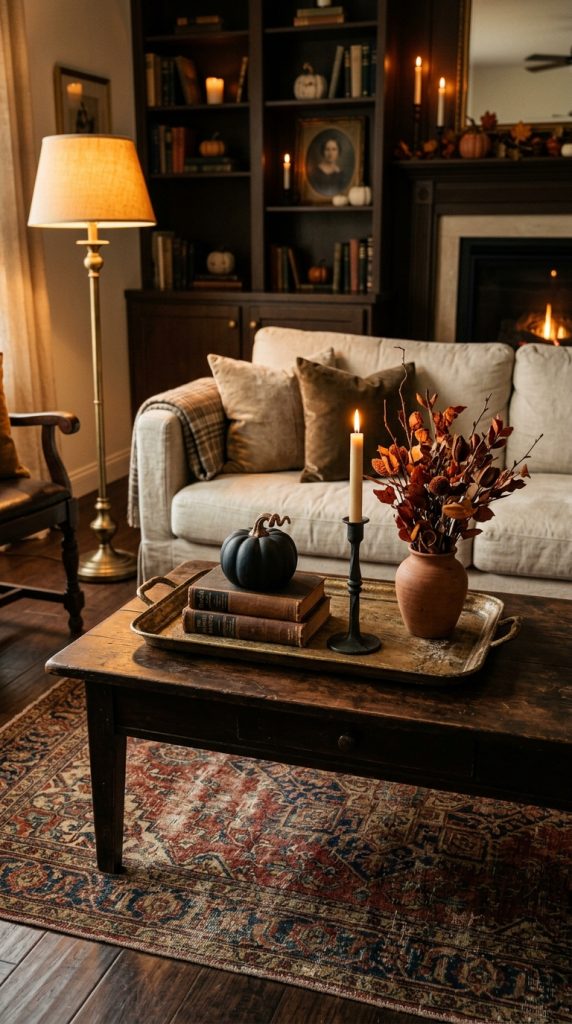
    Start with an antique-looking tray.

    Wood, aged brass, dark metal, or distressed finishes can work well.

    Place a few objects inside.

    A good arrangement might include:

    • One small matte-black pumpkin
    • A vintage-style candle holder
    • A small ceramic vase
    • Two old-looking books
    • A dried autumn branch

    Create Different Heights

    Place the books underneath one object.

    Let the vase provide additional height.

    Keep the pumpkin lower.

    This creates visual layering.

    Use a Bowl for Small Pumpkins

    Instead of scattering miniature pumpkins around the table, place them inside a vintage bowl.

    This creates organization while maintaining the seasonal theme.

    Leave Empty Space

    The coffee table still needs to function.

    People should be able to place a cup or book on it.

    A smaller arrangement often looks more elegant than a large centerpiece.

    Make It Feel Collected

    The objects should not look as though they were purchased as one matching Halloween set.

    Mix textures and materials.

    That is what gives vintage decor its personality.

    6. Add an Antique Mirror as the Main Halloween Feature

    An antique mirror can create an incredible Halloween atmosphere without being obviously seasonal.

    Choose a mirror with a decorative frame.

    Aged gold, dark wood, black, or distressed finishes are especially effective.

    Place it above a console, fireplace, or behind the main seating area.

    Why Mirrors Work

    Mirrors reflect:

    • Candlelight
    • Lamps
    • Artwork
    • Architectural details
    • Decorative branches

    This makes the room feel deeper and more atmospheric.

    Create a Small Console Arrangement

    Under the mirror, place only a few objects.

    For example:

    A tall ceramic vase on one side.

    A black candle holder on the other.

    A small stack of vintage books in the center.

    This creates a balanced but relaxed arrangement.

    Add a Gothic Detail

    A small black decorative object can introduce the Halloween element.

    It could be a dark ceramic pumpkin, ornate candlestick, or sculptural object.

    You do not need obvious Halloween signage.

    The mirror itself creates the mood.

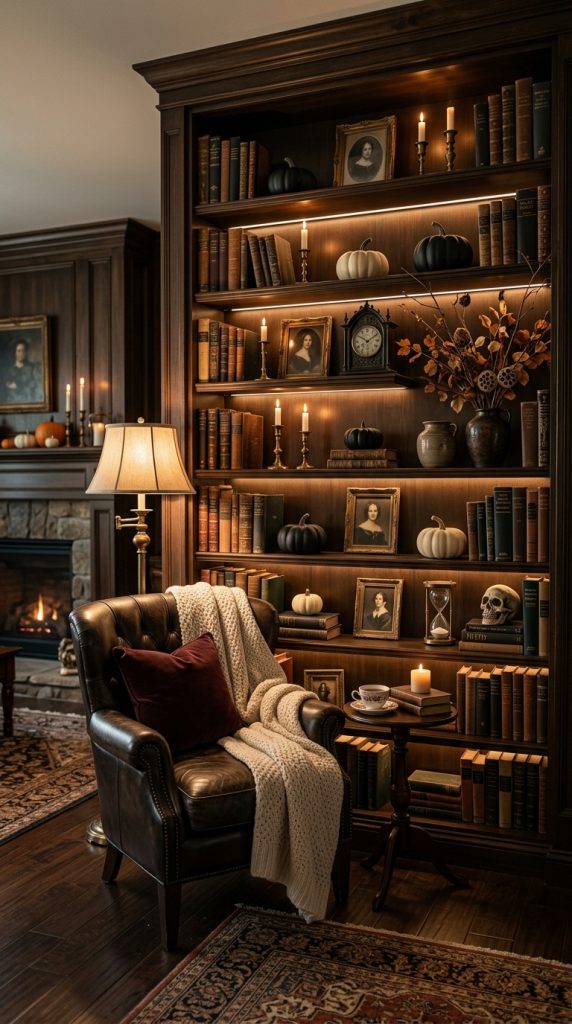
    7. Create a Vintage Halloween Bookshelf

    Bookshelves are perfect for this decorating style because books already have an old-world quality.

    If you have built-in shelves, begin by removing a few everyday objects.

    You do not need to completely empty the shelves.

    Instead, create several small seasonal moments.

    Stack Books Horizontally

    Turn a few vintage-style books horizontally.

    Place a small ceramic pumpkin or candle holder on top.

    This creates height.

    Display Books Vertically

    Use books with neutral, brown, black, cream, or faded covers.

    If your existing collection has colorful modern covers, group them together rather than scattering them throughout the Halloween display.

    Add Natural Elements

    Small dried branches can soften the dark palette.

    Place them in a simple ceramic vase.

    Introduce Antique Objects

    A brass candlestick, old frame, decorative box, or small vintage clock can add personality.

    Avoid Filling Every Shelf

    Bookshelves look better when they have breathing room.

    Empty spaces create contrast.

    The result should feel like an old library touched by Halloween rather than a Halloween store display.

    8. Use Muted Pumpkins Instead of Bright Orange

    Traditional bright orange pumpkins can be beautiful, but they are not always ideal for vintage gothic interiors.

    For a sophisticated look, consider muted pumpkin colors.

    Cream pumpkins work beautifully against dark furniture.

    Black pumpkins create a stronger gothic mood.

    Dusty orange pumpkins maintain the traditional Halloween feeling while appearing softer.

    Deep green pumpkins can add an earthy vintage quality.

    Brown pumpkins work especially well with antique wood.

    Mix Sizes

    Use one medium pumpkin as the main piece and surround it with one or two smaller pumpkins.

    Avoid creating a large collection.

    Combine Different Materials

    Ceramic pumpkins can be mixed with natural pumpkins.

    Velvet pumpkins can introduce softness.

    Matte finishes often look more sophisticated than glossy artificial decorations.

    Place Pumpkins Strategically

    Good locations include:

    • Fireplace hearth
    • Coffee table
    • Console
    • Bookshelf
    • Side table
    • Empty corner

    Do not place pumpkins randomly around the room.

    Every decoration should have a reason for being there.

    9. Create a Cozy Gothic Reading Corner

    A reading corner is ideal for combining the cozy and gothic sides of Halloween decorating.

    Choose an existing accent chair.

    A dark green, brown, burgundy, charcoal, or cream chair can work beautifully.

    Add a soft throw.

    Then introduce a small side table.

    Use a Vintage Lamp

    A traditional lamp with a fabric shade can create a warm pool of light.

    Place lights at appropriate places, especially beside the reading chair, so the corner remains functional while creating a cozy evening atmosphere.

    Add Books

    Stack a few books on the side table.

    Choose titles that you genuinely enjoy rather than using books purely as decoration.

    Add a Small Halloween Detail

    One black candle holder, dark ceramic pumpkin, or dried branch arrangement can be enough.

    Add a Rug

    A small vintage-style rug can visually define the reading area.

    Persian-inspired patterns in muted burgundy, brown, cream, and charcoal can work particularly well.

    The result should feel like a private corner in an old library.
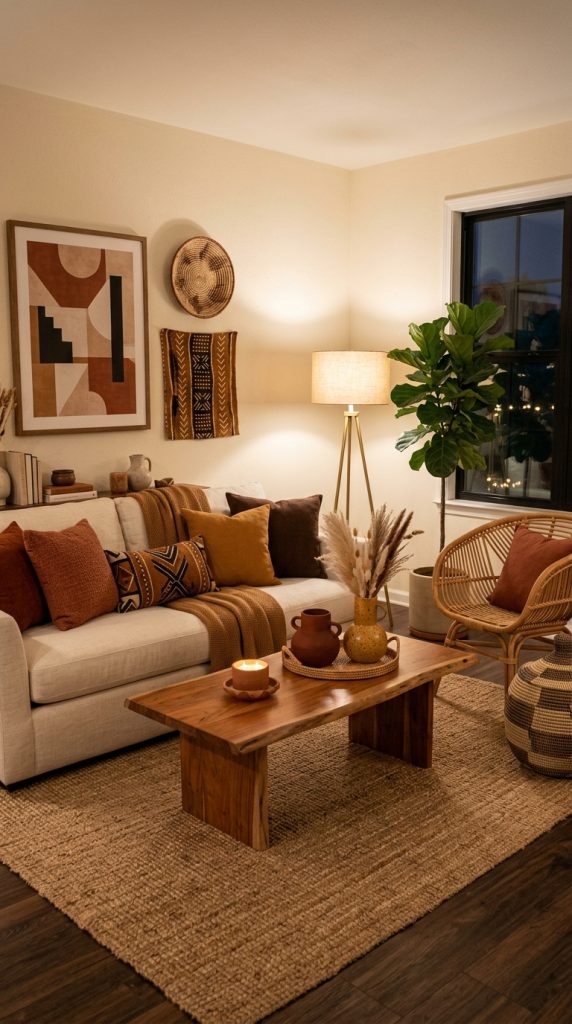
    10. Introduce Dark Wood Furniture

    Dark wood is one of the strongest materials for creating an antique Halloween atmosphere.

    A dark walnut, mahogany, or espresso-toned coffee table can immediately make a room feel richer.

    You do not need to replace every piece of furniture.

    One dark wooden item can be enough.

    Try a Vintage Side Table

    Place one beside a cream sofa or upholstered chair.

    The contrast creates depth.

    Use a Dark Wood Console

    A console behind the sofa can become a seasonal display surface.

    Decorate it with an antique mirror, ceramic vase, and a few dark accents.

    Mix Wood With Light Upholstery

    This prevents the room from becoming too dark.

    Cream upholstery provides contrast.

    Add Brass Hardware

    A small amount of aged brass can enhance the antique feeling.

    Look for warm, slightly muted metal rather than highly polished gold.

    Keep the Wood Visible

    Do not cover beautiful furniture with too many decorative objects.

    The grain and craftsmanship should remain visible.

    11. Create a Candlelit Gothic Atmosphere

    Candles can transform a vintage Halloween living room more effectively than almost any other accessory.

    They introduce movement through flickering light and create a nostalgic atmosphere.
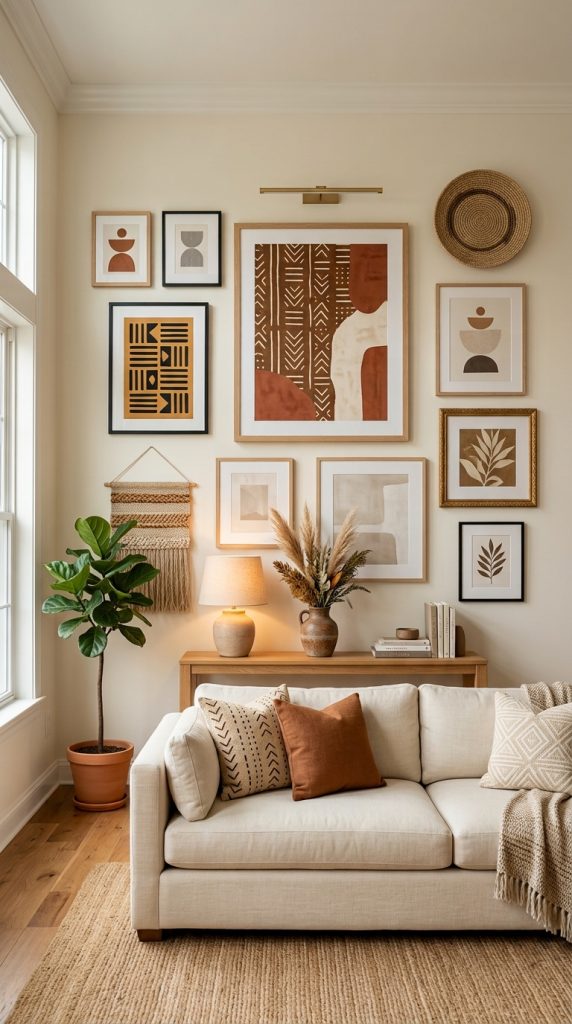
    For safety, use appropriate candle holders and consider flameless LED candles where open flames are unsuitable.

    Choose Traditional Candle Holders

    Black metal, aged brass, dark wood, or antique-style ceramic holders can work beautifully.

    Use different heights.

    This creates visual rhythm.

    Group Candles Carefully

    Instead of scattering individual candles everywhere, create one intentional grouping.

    A mantel, coffee table, or console is ideal.

    Use Warm Illumination

    Place lights at appropriate places, combining warm table lamps, floor lamps, and safe candle-style lighting so the room has multiple gentle light sources rather than one harsh overhead light.

    Let Shadows Become Part of the Decor

    A dark room with carefully placed lighting can create beautiful shadows across textured walls, artwork, and furniture.

    Do not make the room completely dark.

    You want mystery without sacrificing comfort.

    12. Decorate With Dried Autumn Branches

    Dried branches are a beautiful alternative to overly obvious Halloween decorations.

    Their shapes create a slightly wild, mysterious appearance.

    Place tall branches inside a vintage ceramic or glass vase.

    The arrangement can sit on:

    • Fireplace mantel
    • Console table
    • Side table
    • Corner stand

    Choose the Right Colors

    Brown branches are naturally appropriate.

    You can also use muted burgundy foliage, faded rust leaves, or dried grasses.

    Avoid overly bright artificial foliage if you want a vintage appearance.

    Create Dramatic Shadows

    Position the arrangement near a warm lamp.

    Place lights at appropriate places so the branches cast subtle shadows against the wall.

    This can make a simple arrangement feel much more dramatic.

    Keep the Vase Simple

    If the branches are visually strong, use a relatively simple vase.

    Aged ceramic, dark glass, or terracotta can work well.

    13. Mix Burgundy, Plum, and Charcoal

    A vintage Halloween palette does not have to rely on black and orange.

    Deep colors can create a much more sophisticated atmosphere.

    Try combining:

    • Burgundy
    • Plum
    • Charcoal
    • Espresso brown
    • Cream
    • Antique gold

    Use Burgundy Through Textiles

    A burgundy velvet cushion can immediately warm a neutral sofa.

    A patterned throw can add another layer.

    Introduce Plum Carefully

    Plum works beautifully in traditional interiors.

    Use it in one or two places rather than making the entire room purple.

    Balance Dark Colors With Cream

    Cream prevents the room from feeling too heavy.

    A cream sofa, rug, curtains, or ceramic accessory can provide visual relief.

    Add Warm Metal

    A small amount of antique brass can connect the colors.

    The overall result feels romantic, autumnal, and gothic without becoming gloomy.

    14. Create a Haunted Antique Library Feeling

    If you want a more dramatic Halloween living room, transform one area into a miniature antique library.
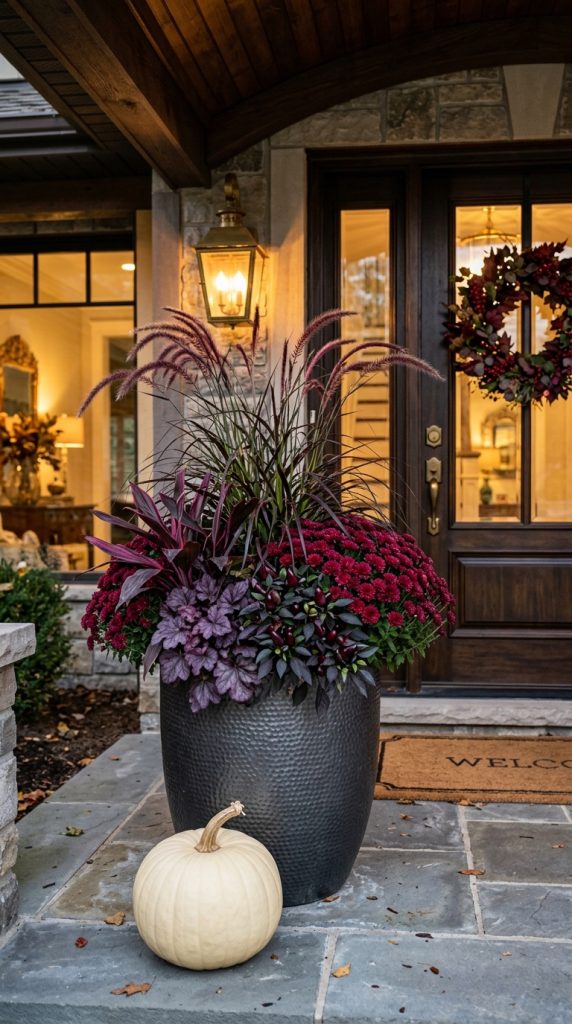
    You do not need a complete renovation.

    Start with books.

    Use a dark wooden bookcase or existing shelving.

    Arrange books with a mixture of vertical and horizontal stacks.

    Add a traditional reading lamp.

    Place lights at appropriate places, especially a warm desk or floor lamp near the reading area, with additional subtle illumination on the shelves.

    Add Vintage Artwork

    A small portrait or old botanical print can make the bookshelf feel established.

    Add a Decorative Globe

    An antique-style globe can create an old-world scholarly feeling.

    Use a Leather Accent

    A brown leather chair or ottoman can reinforce the library atmosphere.

    Add a Small Halloween Detail

    Place one dark pumpkin or black candle holder among the books.

    That tiny detail is enough to establish the seasonal theme.

    Create Cozy Layers

    Add a soft throw to the chair.

    Place a rug underneath.

    Keep the area warm and inviting.

    The finished space should feel like a mysterious reading room from another era rather than a traditional Halloween display.
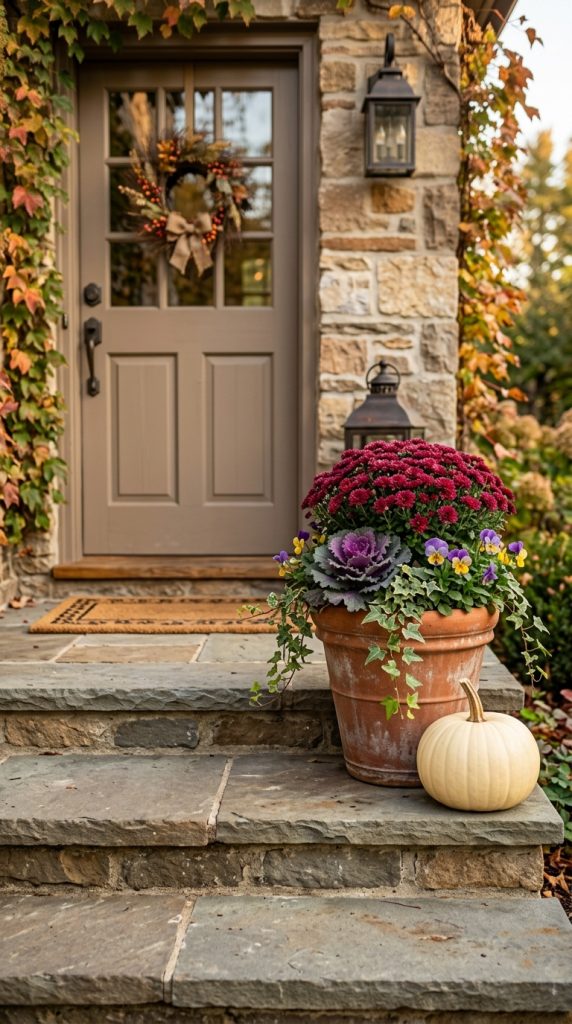
    15. Combine Vintage, Gothic, and Cozy Details Into One Signature Living Room
    The final approach combines the strongest elements of the previous ideas into one carefully curated space.

    Start with a comfortable neutral sofa.

    Cream, beige, taupe, or warm gray provides a flexible foundation.

    Add dark wood through the coffee table or side tables.

    Introduce black velvet cushions.

    Place one burgundy throw over an accent chair.

    Then create a strong focal point.

    This could be an antique mirror, vintage portrait, or fireplace.

    Add a Vintage Artwork Moment

    Choose one large piece of artwork rather than covering every wall.

    An aged portrait with an ornate frame can immediately establish the atmosphere.

    Build a Fireplace Vignette

    If you have a fireplace, use the mantel to combine several elements.

    Place the artwork or mirror centrally.

    Add black candlesticks.

    Introduce a small cream pumpkin.

    Place dried branches in a dark ceramic vase.

    Keep the arrangement asymmetrical.

    Style the Coffee Table

    Use a vintage tray.

    Place two old-looking books underneath a small ceramic object.

    Add one dark pumpkin.

    Leave enough space for everyday use.

    Introduce Textiles

    Use velvet, linen, wool, or cotton.

    The combination of different textures makes the room feel comfortable rather than theatrical.

    Add a Vintage Rug

    A faded Persian-style or traditional patterned rug can bring together burgundy, brown, cream, charcoal, and muted rust.

    It also helps connect modern furniture with antique accessories.

    Create Evening Atmosphere

    Lighting should be one of the final layers.

    Place lights at appropriate places, including a warm floor lamp beside the sofa, table lamps on side tables or consoles, subtle picture lighting for artwork, and safe candle-style illumination around the fireplace.

    Avoid relying only on overhead lighting.

    The goal is a room that changes character after sunset.

    During the day, it feels like a beautiful vintage living room.

    At night, the darker colors, candlelight, shadows, and antique details give it a subtle Halloween atmosphere.

    How to Choose the Right Vintage Halloween Color Palette

    The color palette determines how dramatic the room will feel.

    For a softer vintage appearance, combine:

    Cream + warm brown + faded orange + antique gold

    For a gothic appearance:

    Black + charcoal + burgundy + deep brown

    For a romantic Halloween atmosphere:

    Cream + plum + burgundy + aged gold

    For an earthy vintage style:

    Terracotta + olive + brown + cream

    You do not need to use all these colors.

    Choose a dominant neutral and two or three supporting colors.

    This creates visual consistency.

    How to Make Halloween Decor Look Vintage Instead of Modern

    The materials you choose have a huge influence on the final appearance.

    Plastic decorations tend to create a contemporary party-store appearance.

    Instead, choose materials such as:

    • Wood
    • Ceramic
    • Glass
    • Brass
    • Velvet
    • Linen
    • Wrought iron
    • Natural fibers

    Matte surfaces generally look more sophisticated than shiny finishes.

    Distressed textures can also create the impression of age.

    How to Mix Antique Furniture With Modern Pieces

    You do not need a completely antique living room.

    In fact, mixing old and new often creates a more interesting result.

    Try placing a modern cream sofa beside an antique wooden side table.

    Use a contemporary floor lamp next to a vintage chair.

    Hang an antique-style mirror above a modern console.

    Place traditional artwork above a contemporary sofa.

    The contrast makes both styles more noticeable.

    How to Keep Vintage Halloween Decor From Looking Cluttered

    The easiest way to prevent clutter is to create focal points.

    Choose three or four major areas:

    1. Fireplace
    2. Coffee table
    3. Gallery wall
    4. Reading corner

    Decorate those areas intentionally.

    Leave other surfaces relatively simple.

    You can also use the rule of visual hierarchy.

    One large item should attract attention first.

    Two or three medium items should support it.

    Small accessories should provide finishing details.

    If everything is equally dramatic, nothing becomes the focal point.

    Best Vintage Halloween Materials to Use

    Materials can communicate the style even without obvious Halloween symbols.

    Velvet

    Perfect for cushions, throws, curtains, and accent chairs.

    Aged Brass

    Ideal for lamps, candlesticks, frames, and small accessories.

    Dark Wood

    Excellent for coffee tables, consoles, bookshelves, and side tables.

    Ceramic

    Use dark, cream, brown, or terracotta ceramic vessels.

    Glass

    Amber glass and smoked glass can create a beautiful vintage appearance.

    Linen

    Use linen cushions, curtains, and upholstery to soften darker elements.

    Woven Materials

    Natural baskets and textured fibers can introduce warmth and prevent the room from feeling too gothic.

    Small Living Room Version

    A small living room can still achieve this look.

    Choose only a few statement pieces.

    An antique mirror can visually expand the room.

    A dark velvet cushion can provide the gothic detail.

    One small pumpkin can introduce Halloween.

    A vintage-style rug can add character.

    Use wall-mounted lighting or compact table lamps where possible.

    Avoid large decorative furniture that blocks the walkway.

    The smaller the room, the more important editing becomes.

    Apartment-Friendly Vintage Halloween Decor

    Renters can achieve the style without painting walls or changing permanent fixtures.

    Use removable artwork.

    Add cushions.

    Place a vintage mirror against a wall instead of mounting it.

    Use a small side table.

    Add a decorative tray.

    Introduce pumpkins and dried branches.

    Change the lighting with warm-toned lamps.

    These small changes can transform the atmosphere without permanent alterations.

    Budget-Friendly Vintage Halloween Ideas

    Vintage-inspired decorating does not require expensive antiques.

    Thrift stores can be excellent places to find:

    • Old frames
    • Wooden trays
    • Ceramic vases
    • Brass candle holders
    • Small mirrors
    • Side tables
    • Books
    • Decorative boxes

    You can also create a vintage appearance by combining inexpensive pieces thoughtfully.

    For example, a simple secondhand frame can look dramatically different when paired with a muted portrait print.

    A basic ceramic vase can become more atmospheric when filled with dried branches.

    A plain cream sofa can look completely transformed with two velvet cushions and a dark throw.

    Final Thoughts

    Vintage Halloween living room decor is beautiful because it focuses on atmosphere rather than obvious decoration.

    You do not need a room full of ghosts, skeletons, plastic spiders, and bright orange accessories.

    Instead, you can create the feeling of Halloween through color, texture, lighting, artwork, furniture, and carefully chosen seasonal accents.

    An antique mirror can become the centerpiece.

    A dark velvet cushion can introduce gothic elegance.

    A faded portrait can create mystery.

    Dried branches can add an autumnal silhouette.

    A few muted pumpkins can bring in the Halloween season without overwhelming the room.

    Warm lamps and safe candle-style lighting can completely change the atmosphere after sunset.

    The most successful approach is to combine these elements with your existing furniture rather than trying to turn the entire living room into a Halloween display.

    Think of the room as an old, comfortable interior that has gradually developed a mysterious autumn personality.

    Use cream and brown when you want warmth.

    Use black and charcoal when you want gothic drama.

    Add burgundy and plum for richness.

    Bring in terracotta and faded orange for traditional autumn character.

    Use aged brass and dark wood to establish the antique feeling.

    Then soften everything with velvet, linen, wool, and warm lighting.

    Most importantly, edit your decorations.

    A beautiful vintage Halloween living room does not need dozens of objects.

    It needs the right objects in the right places.

    A single antique-style portrait can be more memorable than a wall covered with Halloween signs.

    One dark velvet chair can create more atmosphere than an entire collection of themed furniture.

    A carefully styled fireplace can become the visual heart of the room.

    And a few warm lights can make the entire space feel completely different once evening arrives.

    Whether you prefer subtle vintage Halloween decorating or a deeper gothic aesthetic, the goal is the same: create a living room that feels mysterious, elegant, warm, nostalgic, and genuinely comfortable.

    That combination makes vintage Halloween decor especially appealing for Pinterest because it offers something beyond traditional seasonal decorating.

    It looks beautiful in photographs.

    It feels achievable in a real home.

    And it allows Halloween to become part of the home’s existing personality rather than temporarily taking it over.

    Start with one focal point, build around it with antique textures and autumn colors, add a few gothic details, and finish with warm layered lighting.

    The result can be a living room that feels like a cozy old-world retreatโ€”with just enough Halloween mystery to make it unforgettable.


  • 15 Afrobohemian Home Decor Ideas for a Warm, Colorful & Stylish Home

    15 Afrobohemian Home Decor Ideas for a Warm, Colorful & Stylish Home

    Afrobohemian home decor brings together the warmth of natural materials, the creativity of bohemian interiors, and the richness of African-inspired colors, patterns, artwork, and craftsmanship. The result is a home that feels personal, expressive, welcoming, and full of character.

    Unlike highly coordinated decorating styles where every item is expected to match, Afrobohemian interiors are allowed to tell a story. A woven basket can sit beside a contemporary painting. A vintage wooden table can be paired with a modern cream sofa. Terracotta ceramics can share a shelf with sculptural objects, while colorful textiles add personality to an otherwise neutral room.

    The beauty of this style comes from curated contrast.

    You can combine earthy neutrals with rich colors, organic materials with artistic patterns, modern furniture with vintage accessories, and minimalist architectural spaces with expressive decorative details.

    Afrobohemian decor also works beautifully for people who want a colorful home without making it feel chaotic. Instead of adding color to every surface, you can create a strong neutral foundation and introduce personality through textiles, artwork, ceramics, rugs, baskets, lighting, and carefully selected statement pieces.

    Natural materials are particularly important. Wood, rattan, cane, jute, woven fibers, clay, stone, linen, and cotton help create the grounded quality that makes the style feel warm rather than overly decorative.

    Color also plays an important role. Terracotta, rust, ochre, mustard, caramel, chocolate brown, cream, burnt orange, deep green, burgundy, and warm beige can create a beautiful palette. Brighter colors can be added through artwork and textiles when you want a more energetic look.

    The following 15 ideas explore different ways to bring Afrobohemian style into your home, whether you are decorating an entire house or simply updating one room.

    1. Create a Warm Earth-Tone Afrobohemian Living Room

    The living room is one of the best places to introduce Afrobohemian style because it gives you plenty of opportunities to combine furniture, textiles, artwork, lighting, and accessories.

    Begin with a warm neutral foundation.

    A cream, beige, caramel, or light-brown sofa can provide a calm background for more expressive decorative pieces.

    Instead of choosing a sofa with a highly complicated pattern, let the furniture remain relatively simple.

    Then introduce personality through cushions and throws.

    Terracotta, burnt orange, mustard, rust, chocolate brown, and ochre work beautifully against cream upholstery.

    For example, a cream linen sofa could be styled with one rust-colored cushion, one geometric patterned cushion, and one deep brown cushion.

    This creates variation without making the sofa look overloaded.

    Choose a Natural Coffee Table

    A natural wood coffee table is an excellent centerpiece for this style.

    Look for furniture with visible grain, rounded edges, sculptural legs, or a slightly handcrafted appearance.

    The coffee table does not need to be perfectly polished.

    Small imperfections can actually add character.

    Place a simple ceramic bowl, a woven tray, or one sculptural object on the table rather than covering the entire surface.

    Add an Organic Rug

    A textured rug can visually connect the seating area.

    Jute, wool, cotton, or natural-fiber rugs work particularly well.

    If you want more color, choose a rug featuring restrained geometric patterns in earth tones.

    Avoid using several competing patterns in the same area.

    If the rug is bold, keep the cushions simpler.

    Bring in African-Inspired Artwork

    Artwork can become the most expressive part of an Afrobohemian living room.

    Choose contemporary artwork influenced by African geometry, landscapes, portraits, abstract forms, tribal-inspired patterns, or earthy color combinations.

    The artwork should feel authentic to your overall aesthetic rather than looking like a collection of unrelated decorations.

    A large statement artwork above the sofa can often have more impact than many small pieces.

    Finish With Natural Accessories

    Use a woven basket for blankets.

    Add one ceramic vase.

    Place a small sculptural object on a side table.

    If you want greenery, choose a plant that complements the space rather than filling every corner.

    The goal is a living room that feels collected and artistic while still being comfortable enough for everyday life.

    2. Design a Colorful Afrobohemian Accent Wall

    If your home is mostly neutral, an accent wall can introduce the Afrobohemian aesthetic without requiring a complete room makeover.

    The easiest colors to work with are warm, earthy shades.

    Consider:

    • Terracotta
    • Clay
    • Burnt sienna
    • Warm caramel
    • Deep olive
    • Muted ochre
    • Chocolate brown

    A terracotta wall can instantly create warmth.

    It also provides a beautiful background for cream furniture, natural wood, woven accessories, and dark artwork.

    Use Artwork as the Main Feature

    Rather than decorating the wall with dozens of objects, choose one large artwork.

    An abstract African-inspired painting can combine several colors already present in the room.

    This creates a natural connection between the wall and the furniture.

    Try a Textured Wall

    If painting is not an option, introduce texture through a large woven wall piece.

    A circular woven design can soften a modern room.

    A large textile can also create visual warmth behind a sofa or console.

    Keep Furniture Simple

    When the wall is strong, the furniture does not need to compete.

    A cream sofa or natural wood console can allow the accent wall to become the focal point.

    This is particularly useful if you love colorful interiors but are worried about going too far.

    The wall becomes the main color statement while the rest of the room remains balanced.

    3. Build an Afrobohemian Gallery Wall

    An Afrobohemian gallery wall can turn an ordinary wall into a highly personal feature.

    The key is to combine artwork and textures rather than simply hanging identical frames.

    You might include:

    • Abstract African-inspired artwork
    • Geometric prints
    • Botanical illustrations
    • Portrait artwork
    • Woven wall baskets
    • Textile art
    • Small sculptural pieces

    Choose a visual connection between them.

    For example, several pieces could share terracotta, cream, ochre, and brown.

    Mix Frame Styles

    Wooden frames work particularly well with the style.

    You can also combine dark frames with natural wood.

    The combination gives the gallery wall a collected appearance.

    Avoid Perfect Symmetry

    A slightly relaxed arrangement often feels more bohemian.

    You can create one larger central artwork and arrange smaller pieces around it.

    Before putting holes in the wall, lay everything on the floor and experiment with the arrangement.

    Add One Three-Dimensional Piece

    A woven basket or sculptural wall object can make the gallery wall more interesting.

    It creates depth that flat artwork cannot provide.

    Keep the Surrounding Area Calm

    A gallery wall is already visually active.

    Place it above a simple sofa or console rather than next to another heavily decorated feature wall.

    This allows the artwork to remain the star.

    4. Layer Natural Woven Textures

    Natural woven materials are one of the easiest ways to create warmth in an Afrobohemian home.

    They introduce texture without requiring bright colors.

    Rattan, cane, jute, seagrass, sisal, and other natural fibers can be incorporated through furniture and accessories.

    Try a rattan accent chair beside a cream sofa.

    Add a woven basket near the chair.

    Use a jute-style rug underneath the seating area.

    Then introduce one woven wall decoration.

    The repetition of texture creates a cohesive look.

    Use Woven Baskets Functionally

    Woven baskets are not just decorative.

    Use them for:

    • Blankets
    • Toys
    • Magazines
    • Towels
    • Laundry
    • Extra cushions

    Functional decor tends to make a home feel more natural because the objects actually serve a purpose.

    Add Cane Furniture

    A cane-front cabinet or rattan chair can become a beautiful statement piece.

    Pair it with solid wood rather than using woven furniture everywhere.

    The contrast keeps the room visually interesting.

    Combine Textures

    Do not use only one woven texture.

    Combine smooth ceramic with rough jute.

    Pair linen with rattan.

    Use polished wood alongside woven fibers.

    This creates depth without needing excessive decoration.

    5. Create a Colorful Afrobohemian Bedroom

    The bedroom should feel calm enough for relaxation while still expressing personality.

    A warm neutral foundation works particularly well.

    Start with cream, beige, or natural linen bedding.

    Then introduce stronger colors through cushions and a throw.

    Terracotta, rust, mustard, caramel, deep brown, and muted burgundy are excellent choices.

    Choose a Textured Headboard

    A woven, cane, rattan, or natural wood headboard can immediately establish the aesthetic.

    If you already have a simple upholstered headboard, you can achieve the same effect through surrounding decor.

    Place woven artwork above the bed.

    Add warm wood nightstands.

    Use ceramic lamps.

    Layer the Bedding

    Do not make every layer patterned.

    Use one patterned cushion as the visual statement.

    Surround it with solid-colored cushions.

    A rust throw at the foot of the bed can connect the bedding to the rest of the room.

    Add Warm Bedside Lighting

    Choose lamps with ceramic, wood, or woven bases.

    Warm lighting makes the earthy palette feel softer at night.

    Keep the Bedroom Restful

    The bedroom does not need as many decorative objects as a living room.

    A few meaningful pieces can create more impact than a crowded collection.

    Think:

    Texture first, color second, accessories last.

    This keeps the room expressive but peaceful.

    6. Style an Afrobohemian Dining Room

    The dining room is an excellent place to use darker wood and richer colors.

    A substantial wooden dining table can serve as the foundation.

    Choose chairs in a contrasting material.

    For example, pair a dark wood table with woven or cane chairs.

    This combination creates a relaxed, collected atmosphere.

    Choose Statement Lighting

    A large woven pendant above the table can become the defining feature.

    Its natural texture works beautifully with wood.

    At night, the warm light passing through the woven shade can create interesting shadows.

    Style the Dining Table

    Avoid covering the entire table with decoration.

    Instead, use a simple centerpiece.

    A long ceramic vessel filled with dried branches can work beautifully.

    Alternatively, use several small clay vessels.

    Add Color Through Table Linens

    If the room is primarily neutral, introduce color through napkins or a table runner.

    Mustard, rust, ochre, burgundy, and terracotta are excellent options.

    A subtle geometric pattern can reinforce the Afrobohemian aesthetic.

    Add Artwork

    A large abstract artwork or textured wall hanging can complete the dining area.

    Choose something that connects with the colors already present in the room.

    The result should feel warm, artistic, and inviting rather than formal.

    7. Transform the Entryway With Afrobohemian Style

    The entryway is the first impression of your home.

    It does not need to be large to make a statement.

    A narrow natural wood console can provide a practical foundation.

    Above it, hang a round mirror with a woven or wooden frame.

    This creates both function and texture.

    Add a Woven Basket

    Place one basket underneath the console.

    It can hold:

    • Shoes
    • Scarves
    • Bags
    • Everyday accessories

    This keeps the entrance organized while adding natural texture.

    Add a Ceramic Vessel

    A terracotta or handmade-looking ceramic vase can introduce warmth.

    Fill it with dried branches if you want height.

    Choose a Runner

    A narrow runner in warm earth tones can make the entryway feel more finished.

    Geometric patterns can add visual personality.

    Keep the Walkway Open

    An entryway needs to remain easy to walk through.

    Choose slim furniture and avoid placing decorative objects directly in the path.

    This makes the area attractive without compromising practicality.

    8. Create a Cozy Afrobohemian Reading Nook

    A reading nook does not require an entire room.

    An unused corner beside a window can become a beautiful retreat.

    Start with a comfortable chair.

    A caramel leather chair, cream upholstered chair, or woven lounge chair can work beautifully.

    Add a small side table.

    Choose natural wood or a sculptural ceramic table.

    Add a Floor Lamp

    A floor lamp provides practical reading light while also adding height.

    Choose a fixture with a warm shade or natural material.

    Add a Small Rug

    A textured rug can visually define the nook.

    It makes the chair feel like part of a dedicated space rather than a random piece of furniture.

    Add Books

    Books naturally add personality.

    Stack two or three on the side table.

    Avoid creating an oversized decorative stack that cannot be used.

    Add One Artistic Element

    A small woven wall piece or framed abstract artwork above the chair can complete the corner.

    The result should feel intimate and personal.

    This is an excellent place to experiment with richer Afrobohemian colors because the space is small.

    A mustard cushion or rust throw can become the accent.

    9. Bring Afrobohemian Style Into the Kitchen

    The kitchen does not need to be completely remodeled to achieve an Afrobohemian look.

    You can introduce the aesthetic through accessories and materials.

    Wooden cutting boards are an easy starting point.

    Display a few beautiful boards against the backsplash.

    Add terracotta or brown ceramic vessels.

    Use woven baskets for storage.

    Style Open Shelving

    If your kitchen has open shelving, display a mixture of:

    • Cream ceramics
    • Brown pottery
    • Wooden bowls
    • Terracotta pieces
    • Woven containers

    Do not fill every shelf.

    Leave some open space.

    This keeps the display intentional.

    Add Textile Accents

    A patterned kitchen towel can introduce color.

    Choose a geometric design with rust, mustard, cream, or brown.

    A small runner can also add warmth if the kitchen layout allows it.

    Use Natural Materials

    Wood, clay, woven fibers, stone, and linen work naturally in kitchens.

    They create an organic quality that complements Afrobohemian style.

    Add a Statement Pendant

    If you are updating lighting, a woven pendant above an island or breakfast area can create a strong visual feature.

    Make sure lighting fixtures are appropriately installed and positioned safely away from heat and moisture.

    10. Design a Warm Afrobohemian Bathroom

    Bathrooms are often overlooked when decorating, but even a small bathroom can carry the aesthetic.

    Start with warm neutral colors.

    Cream, beige, stone, and warm brown provide a calm background.

    Then add natural textures.

    A woven basket can hold towels.

    A wooden stool can provide both function and visual warmth.

    Choose Earthy Accessories

    Terracotta soap dishes, ceramic containers, or small pottery pieces can introduce color.

    Use only a few.

    Bathroom surfaces become cluttered easily.

    Add a Textured Mirror

    A round mirror with a woven, wood, or natural frame can become the main feature above the vanity.

    It introduces character without taking up floor space.

    Use Rich Towels

    Choose towels in:

    • Rust
    • Caramel
    • Ochre
    • Deep brown
    • Cream

    You can change the atmosphere of the bathroom simply by changing the textiles.

    Add Spa-Like Lighting

    Warm lighting works especially well with natural textures.

    Use appropriate bathroom-rated fixtures and keep decorative materials away from water exposure where necessary.

    The finished room should feel earthy and relaxing.

    11. Decorate a Sun-Filled Afrobohemian Living Space

    Natural light can make Afrobohemian colors look particularly beautiful.

    If your home has large windows, use light linen or cotton curtains to soften the sunlight.

    Keep the furniture relatively simple.

    A cream sofa can act as a blank canvas.

    Then build color around it.

    Try adding:

    • Rust cushions
    • Mustard throw
    • Caramel chair
    • Terracotta pottery
    • Brown wooden table

    Use Sunlight as Part of the Design

    Do not block beautiful natural light with excessive furniture.

    Keep the area near the windows open.

    This allows the room to feel larger and brighter.

    Add Organic Shapes

    Afrobohemian interiors benefit from curved forms.

    A rounded coffee table, circular mirror, curved chair, or arched lamp can soften the room.

    This creates contrast with rectangular furniture.

    Introduce Greenery Carefully

    One or two plants can complement the earthy palette.

    Choose plants based on the actual light conditions of your room.

    The purpose is to add life, not create an indoor jungle.

    12. Make Statement Lighting a Major Design Feature

    Lighting can become artwork in an Afrobohemian interior.

    A large woven pendant is particularly effective because it combines form, texture, and function.

    Place it above:

    • A dining table
    • Kitchen island
    • Living room seating
    • Entryway
    • Reading area

    Choose the Right Scale

    A very small pendant may disappear in a large room.

    An oversized fixture can become a beautiful statement.

    However, it should remain proportionate to the room and furniture.

    Layer Different Materials

    A woven pendant can be paired with:

    • Brass table lamps
    • Ceramic lamps
    • Wooden floor lamps
    • Black metal accents

    This creates material contrast.

    Use Warm Bulbs

    Warm illumination complements earth tones.

    At night, the woven shade can cast beautiful patterns across the surrounding surfaces.

    Keep Other Decor Restrained

    If your light fixture is dramatic, let it be the focal point.

    You do not need another oversized decorative object directly beneath it.

    13. Create an Afrobohemian Outdoor Patio

    The Afrobohemian aesthetic works beautifully outdoors because it naturally incorporates wood, woven materials, earthy colors, and relaxed textiles.

    Start with comfortable outdoor seating.

    Choose:

    • Natural wood
    • Woven furniture
    • Rattan-inspired pieces
    • Neutral outdoor upholstery

    Then add cushions in rust, terracotta, mustard, or deep brown.

    Use Outdoor Rugs

    A patterned outdoor rug can visually define the seating area.

    Choose a durable material designed for outdoor use.

    Add Lanterns

    Woven or metal lanterns can provide evening atmosphere.

    Use outdoor-rated lighting products and position them safely.

    Add Ceramic Planters

    Terracotta planters are a natural match for the style.

    Mix different sizes rather than creating a row of identical pots.

    Use Natural Textures

    Wood, clay, woven materials, stone, and textiles create a relaxed outdoor environment.

    The goal is to make the patio feel like an extension of the interior.

    14. Create a Minimal Afrobohemian Corner

    Afrobohemian does not have to mean maximalist.

    You can create a minimalist interpretation using only a few strong pieces.

    Choose one empty corner.

    Place a natural wood console or stool there.

    Above it, hang one large woven wall piece.

    Add a terracotta vase.

    Then stop.

    That may be all the space needs.

    Focus on Shape

    When there are fewer objects, shape becomes more important.

    Choose sculptural ceramics.

    Look for curved baskets.

    Use furniture with interesting natural forms.

    Focus on Material

    A simple room can feel rich when the materials have character.

    Combine:

    • Rough ceramic
    • Smooth wood
    • Woven fiber
    • Linen
    • Stone

    The contrast creates depth.

    Use One Strong Color

    Instead of many colorful accessories, choose one dominant accent.

    Terracotta is an excellent option.

    It can appear in the artwork, vase, cushion, or rug.

    Leave Plenty of Empty Space

    Negative space is especially important in minimalist Afrobohemian decorating.

    The empty area around the objects allows each piece to be appreciated.

    This approach is perfect for anyone who loves the style but dislikes heavily decorated rooms.

    15. Create a Rich, Colorful Afrobohemian Living Space

    For the final idea, bring several elements together to create a more expressive interpretation of the style.

    Begin with a warm neutral foundation.

    Then introduce richer colors gradually.

    A cream sofa can be layered with rust, mustard, deep brown, burgundy, and ochre cushions.

    A patterned rug can bring several of those colors together.

    Natural wood furniture provides warmth.

    A rattan chair adds texture.

    Then introduce artwork.

    This is where you can be more adventurous.

    Choose large contemporary artwork inspired by African patterns, landscapes, people, abstract shapes, or vibrant color combinations.

    Use Color Strategically

    Color does not have to appear everywhere.

    You might use:

    Terracotta in the rug.

    Mustard in the cushions.

    Burgundy in the artwork.

    Deep brown in the furniture.

    This creates a visual relationship between the elements.

    Add Sculptural Ceramics

    Ceramics can introduce artistic personality.

    Choose unusual shapes rather than filling shelves with generic accessories.

    One large sculptural vase can create a stronger impression than multiple small objects.

    Mix Old and New

    This is one of the most appealing aspects of Afrobohemian decorating.

    Pair a modern sofa with a vintage wooden table.

    Combine contemporary artwork with a traditional woven basket.

    Use modern lighting above a rustic dining table.

    These contrasts make the home feel collected over time.

    Create a Personal Collection

    The best Afrobohemian interiors do not look like they were purchased from one store.

    They feel personal.

    Include objects that have meaning to you.

    Travel-inspired pieces, handmade ceramics, artwork, books, textiles, vintage finds, and family pieces can all contribute to the story of the home.

    How to Choose the Right Afrobohemian Color Palette

    Color is one of the defining characteristics of the style, but there is no single required palette.

    A warm neutral foundation is usually a good starting point.

    Consider:

    • Cream
    • Beige
    • Sand
    • Camel
    • Warm white
    • Natural brown

    Then choose two or three stronger colors.

    Terracotta and Cream

    This combination feels warm and organic.

    It works particularly well in living rooms, bedrooms, and kitchens.

    Mustard and Chocolate Brown

    This palette creates a richer atmosphere.

    It is especially attractive with natural wood.

    Rust and Burgundy

    These colors create a dramatic, sophisticated look.

    Use them through cushions, artwork, rugs, or textiles.

    Ochre and Deep Green

    This combination feels earthy and vibrant.

    It works particularly well when natural wood and plants are already present.

    How to Mix Patterns Without Making the Room Chaotic

    Patterns are useful in Afrobohemian interiors, but they need a little structure.

    If you choose a strongly patterned rug, keep the sofa relatively simple.

    Then use smaller-scale patterns in the cushions.

    You can also repeat one geometric shape throughout the room.

    For example, if the artwork contains diamonds or triangles, introduce a smaller version of the same visual language through a cushion or rug.

    The patterns do not need to match exactly.

    They simply need to feel related.

    How to Use African-Inspired Decor Thoughtfully

    African-inspired decor can bring beautiful visual depth to a home.

    However, thoughtful curation is important.

    Instead of filling the room with stereotypical motifs, choose contemporary artwork, textiles, baskets, ceramics, sculpture, and patterns that genuinely appeal to you.

    Whenever possible, learn about the origin and craftsmanship of pieces you purchase.

    Handcrafted objects can bring an especially meaningful quality to the room.

    The goal is to create a home that celebrates artistic influence rather than treating cultural elements as generic themes.

    Best Materials for Afrobohemian Interiors

    Natural materials are central to the look.

    Wood

    Use wood for:

    • Tables
    • Shelves
    • Cabinets
    • Benches
    • Cutting boards

    Visible grain adds warmth.

    Rattan and Cane

    These materials work beautifully for:

    • Chairs
    • Cabinets
    • Headboards
    • Baskets
    • Lighting

    Jute and Natural Fibers

    These can appear in:

    • Rugs
    • Baskets
    • Placemats
    • Wall decor

    Ceramic and Clay

    Terracotta and handmade-looking ceramics add earthy color and sculptural texture.

    Linen and Cotton

    These materials are particularly useful for curtains, bedding, cushions, and throws.

    Their relaxed appearance suits the bohemian side of the aesthetic.

    How to Make Afrobohemian Decor Feel Sophisticated

    A colorful home can still feel luxurious.

    The difference is usually in editing.

    Instead of filling every surface, choose fewer pieces with stronger visual impact.

    Use quality-looking materials.

    Create a consistent color story.

    Mix textures.

    Introduce artwork.

    And allow the architecture of the room to remain visible.

    Luxury does not necessarily come from expensive objects.

    It often comes from proportion, balance, lighting, and thoughtful styling.

    Budget-Friendly Afrobohemian Decorating Ideas

    You do not need to replace your entire furniture collection.

    Start with accessories.

    A new rug can dramatically change a room.

    A few cushions can introduce color.

    A woven basket can add texture.

    A large piece of artwork can establish the theme.

    You can also search thrift stores and secondhand marketplaces for:

    • Wooden furniture
    • Vintage baskets
    • Ceramic vessels
    • Brass accessories
    • Old frames
    • Side tables

    A piece with a little age can actually make the room feel more authentic.

    Final Thoughts

    Afrobohemian home decor is ultimately about creating a home that feels warm, artistic, expressive, and personal.

    It does not require every room to be filled with color.

    It does not require every object to match.

    And it certainly does not require a large decorating budget.

    Start with materials that feel natural.

    Bring in warm earth tones.

    Introduce meaningful artwork.

    Use woven textures.

    Layer textiles.

    Mix contemporary pieces with vintage finds.

    Let color appear through cushions, rugs, ceramics, and artwork.

    Most importantly, choose pieces that tell your story.

    A cream sofa with a terracotta cushion can become the foundation of a beautiful living room.

    A woven pendant can transform a dining area.

    A collection of handmade-looking ceramics can bring warmth to a kitchen.

    A rattan chair can create the perfect reading corner.

    A simple terracotta vase can completely change a neutral console.

    These small decisions can gradually transform an ordinary interior into a space with depth and personality.

    The most successful Afrobohemian interiors feel collected rather than decorated.

    They look as though the pieces have been gathered over time because they are beautiful, useful, meaningful, or interesting.

    That is what makes this style so appealing.

    It gives you permission to experiment with color, texture, pattern, craftsmanship, and individuality while still creating a home that feels comfortable and sophisticated.

    Whether you prefer a quiet neutral interpretation or a richer, more colorful version, Afrobohemian decor can adapt to your personality.

    Start with one room.

    Choose a warm foundation.

    Add natural materials.

    Introduce one memorable piece of artwork.

    Layer a few rich colors.

    Then step back and edit.

    The goal is not to fill your home.

    The goal is to create a space where every chosen element contributes something.

    That balance between warmth, color, culture-inspired artistry, natural texture, and relaxed bohemian comfort is what gives Afrobohemian interiors their distinctive characterโ€”and makes them so beautiful for a modern home.


  • Halloween Kitchen Decorating Ideas for a Subtle Spooky Look

    Halloween Kitchen Decorating Ideas for a Subtle Spooky Look

    Halloween decorating does not have to mean turning your kitchen into a haunted house.

    If you love the atmosphere of Halloween but prefer an elegant, cozy, and sophisticated home, a subtle spooky kitchen may be exactly what you are looking for.

    The kitchen is already one of the busiest rooms in the house. Countertops need to remain functional, cabinets need to open easily, and cooking areas need to stay clear. Because of this, Halloween decorations can quickly become overwhelming if too many objects are added.

    The better approach is to introduce Halloween through color, texture, lighting, small seasonal accents, and carefully selected decorative pieces.

    Instead of filling every surface with skeletons and plastic spiders, imagine a warm neutral kitchen with a few matte-black pumpkins, a dark floral arrangement, vintage candle holders, subtle bat silhouettes, and soft golden lighting.

    The result is unmistakably Halloween, but it still feels like a beautiful kitchen.

    A subtle spooky aesthetic works particularly well with modern, farmhouse, vintage, organic modern, traditional, and neutral kitchens. You can adapt the ideas to your existing style rather than completely changing the room for one holiday.

    The key is to create an atmosphere.

    Think:

    Warm light.

    Dark accents.

    Natural textures.

    Muted autumn colors.

    A few mysterious details.

    Plenty of breathing room.

    You can also make the decorations work with your existing fall decor. Pumpkins, dried branches, candles, dark foliage, wood, woven baskets, and warm textiles can transition naturally from autumn into Halloween.

    Below are 10 elegant Halloween kitchen decorating ideas designed to give your kitchen a subtle spooky look while keeping it practical, beautiful, and uncluttered.

    1. Create a Black-and-Cream Halloween Kitchen

    One of the easiest ways to create a sophisticated Halloween atmosphere is to build your kitchen around a simple black-and-cream palette.

    Instead of using bright orange everywhere, use black as the Halloween accent and allow your existing neutral kitchen colors to remain the foundation.

    This approach works especially well in kitchens with:

    • White cabinets
    • Cream cabinets
    • Light wood
    • Marble countertops
    • Beige walls
    • Natural stone
    • Black hardware

    Start by introducing a few matte-black decorative elements.

    A small black ceramic pumpkin on the countertop can immediately create a Halloween feeling.

    Add another black accent on an open shelf.

    Then introduce cream or ivory pumpkins to soften the look.

    The contrast between black and cream creates a sophisticated visual effect.

    Keep the Countertop Functional

    One of the biggest mistakes when decorating a kitchen is allowing seasonal decorations to take over useful workspace.

    Instead, create one small vignette.

    For example, place a wooden cutting board against the backsplash.

    In front of it, add:

    • One matte-black pumpkin
    • One small cream pumpkin
    • A dark ceramic vase
    • A few dried branches

    This creates a strong focal point without consuming the entire countertop.

    Add Warm Lighting

    Lighting can make the black-and-cream palette feel much more atmospheric.

    Use warm under-cabinet lighting or a small lamp in a safe location.

    If you use candles, keep them away from cabinets, curtains, paper decorations, and other flammable materials. Battery-operated candles are often an easier choice for a kitchen vignette.

    Warm golden light against black accents creates a subtle mysterious mood.

    Add One Spooky Detail

    For a stronger Halloween identity, add one small detail.

    A tiny black bat silhouette on the wall can work.

    A vintage-style black frame with a mysterious botanical print can also create the right feeling.

    You do not need a giant Halloween sign.

    Why This Look Works

    Black and cream are timeless colors.

    After Halloween, remove the spooky details and keep the neutral autumn decor.

    This makes the decoration more versatile and reduces seasonal clutter.

    2. Style the Countertop With a Minimal Halloween Vignette

    If you do not want to decorate the entire kitchen, concentrate on one area.

    A countertop vignette is one of the easiest ways to introduce Halloween without changing the room.

    Choose a small section of countertop.

    This might be:

    • Beside the coffee maker
    • Near the sink
    • Next to the stove
    • At the end of an island
    • Beside a backsplash

    Place a decorative tray or wooden board there.

    Then create a small composition.

    Try:

    Black ceramic vase + dried branches + cream pumpkin + black candle holder.

    Or:

    Wooden tray + three mini pumpkins + dark mug + warm candlelight.

    Or:

    Black vase + burgundy foliage + small antique-style frame+burgundy flowers.

    The goal is to create one intentional grouping rather than scattered decorations.

    Use Different Heights

    A successful vignette usually benefits from different heights.

    For example:

    • Tall: branches
    • Medium: vase
    • Low: pumpkins

    This creates visual movement.

    If everything is the same height, the arrangement can look flat.

    Use a Tray

    A tray is particularly useful because it visually connects the individual objects.

    It also allows you to move the decorations easily when you need the countertop for cooking.

    Keep the Palette Controlled

    Choose two or three colors.

    For a sophisticated look:

    Black + cream + warm brown.

    For a richer Halloween mood:

    Black + burgundy + antique gold.

    For a traditional appearance:

    Black + muted orange + cream.

    Avoid Too Many Small Objects

    A collection of tiny Halloween decorations may look cute individually but chaotic when grouped together.

    Instead, use fewer larger pieces.

    One beautiful black vase can have more impact than five small plastic decorations.

    3. Add Dark Floral Arrangements for a Moody Touch

    Flowers are an excellent way to bring Halloween atmosphere into the kitchen without using obvious Halloween decorations.

    Instead of bright seasonal flowers, choose darker colors.

    Think:

    • Deep burgundy
    • Plum
    • Rust
    • Dark red
    • Dusty purple
    • Deep green

    Place the arrangement in a black, charcoal, brown, or antique-style vase.

    For an especially atmospheric look, use dried flowers and branches.

    Dried arrangements have a naturally autumnal appearance and can remain attractive throughout the season.

    Create a Simple Kitchen Arrangement

    Choose a medium-sized vase.

    Add several tall branches.

    Then mix in a few dried flowers.

    Allow the stems to remain slightly loose rather than creating a perfectly symmetrical bouquet.

    The slightly wild shape creates a mysterious feeling.

    Place the arrangement:

    • On the kitchen island
    • At the end of the countertop
    • On a dining table near the kitchen
    • On an open shelf

    Add One Pumpkin

    Place a single cream or black pumpkin next to the vase.

    This small detail immediately connects the arrangement to Halloween.

    Use Existing Fall Flowers

    You do not necessarily need flowers specifically marketed as Halloween decor.

    A dark autumn bouquet can create the same atmosphere.

    This is another way to save money.

    Make It Elegant

    Avoid bright artificial flowers with obvious plastic textures.

    Natural-looking dried stems, preserved foliage, or high-quality faux botanicals tend to create a more sophisticated appearance.

    Why This Look Works

    The dark floral arrangement creates mood without making the kitchen feel themed.

    It can also transition beautifully into late fall.

    4. Decorate Open Shelves With Subtle Halloween Accents

    Open shelves are ideal for seasonal decorating because they naturally display objects.

    But they can also become cluttered quickly.

    The solution is to change only a few pieces.

    You do not need to remove everything from your shelves.

    Instead, identify two or three objects that can be replaced temporarily.

    For example, replace a normal vase with a black ceramic vase.

    Add one small black pumpkin beside a stack of neutral bowls.

    Place a dark vintage-inspired frame behind a few cream dishes.

    Use Your Existing Kitchenware

    You can often create a Halloween look without buying dedicated decorations.

    Black mugs can become part of the display.

    Dark ceramic bowls can create contrast.

    Wooden cutting boards add warmth.

    Brown glass bottles can create a vintage atmosphere.

    Cream dishes provide balance.

    Create Repetition

    Repeat one accent color.

    If you use black on the first shelf, repeat a small amount of black on the second shelf.

    This creates cohesion.

    Do Not Fill Every Gap

    Leave open space.

    Open shelving already creates visual activity because the dishes are visible.

    Too many Halloween decorations will make the shelves look crowded.

    Try a Three-Object Group

    For one section, use:

    Black vase + cream pumpkin + dried branch.

    For another:

    Black mug + small cookbook stack + dark candle holder.

    This creates subtle seasonal styling.

    Why This Look Works

    Your kitchen still looks like a kitchen.

    The Halloween theme is integrated into the existing decor instead of sitting on top of it.

    5. Create a Cozy Halloween Coffee Station

    A coffee station is one of the easiest places to introduce seasonal decorating.

    Because coffee stations are naturally small, you can decorate them without overwhelming the kitchen.

    Start with your existing coffee machine.

    Then place a small tray beside it.

    Add two or three seasonal items.

    For example:

    • Matte-black mug
    • Small cream pumpkin
    • Black ceramic container
    • Warm LED candle
    • Small dried branch

    You can also use a black or dark-brown coffee canister.

    Add a Small Halloween Sign

    If you want a little text, choose something understated.

    A small framed phrase can work better than a large sign.

    For example, use a simple seasonal phrase in an elegant serif font.

    Keep the sign small enough that it does not become the focal point.

    Add Seasonal Mugs

    A black mug with a subtle bat or pumpkin detail can bring Halloween into the space without adding another decorative object.

    If you do not want themed mugs, plain black or cream mugs work beautifully.

    Use a Wooden Tray

    A wooden tray creates warmth.

    Place your coffee supplies on the tray and add one small pumpkin.

    This makes the entire station look intentional.

    Keep It Functional

    Do not place decorations where they interfere with:

    • Coffee machine controls
    • Electrical cords
    • Hot surfaces
    • Water reservoirs
    • Steam outlets

    Keep decorations away from heat and moisture.

    Why This Look Works

    The coffee station is already a natural focal point.

    You are simply giving it a seasonal update.

    6. Use Black Candles and Warm Lighting

    Lighting may be the most effective way to create a spooky atmosphere without adding many decorations.

    A kitchen with normal bright overhead lighting can feel completely different under warm, layered illumination.

    Start by reducing the visual dependence on harsh overhead lighting when appropriate.

    Then use existing fixtures such as:

    • Pendant lights
    • Under-cabinet lights
    • Table lamps in safe locations
    • Wall sconces
    • Battery candles

    Choose warm illumination.

    A warm amber glow complements:

    • Black
    • Brown
    • Burgundy
    • Cream
    • Wood
    • Brass
    • Terracotta

    Use Black Candle Holders

    Instead of covering the kitchen with Halloween figurines, place two or three elegant black candle holders on an island or dining table.

    Choose different heights.

    This creates a subtle dramatic effect.

    Use Battery Candles

    Battery-operated candles are particularly convenient in kitchens.

    They can provide the appearance of candlelight while avoiding an open flame.

    Follow the manufacturer’s instructions and keep any lighting products away from water and heat.

    Add Brass

    Black and brass create an elegant combination.

    Try black candle holders with subtle brass details.

    Or use an antique brass tray beneath your candles.

    Create an Evening Mood

    Imagine the kitchen after sunset.

    The countertops are softly illuminated.

    The pendant lights provide a warm glow.

    A small group of black candles creates additional light.

    A few pumpkins sit quietly on the island.

    This feels Halloween-inspired without looking like a Halloween store.

    Why This Look Works

    You are creating atmosphere rather than adding clutter.

    The same lighting strategy can also work throughout autumn and winter.

    7. Add Tiny Bat Silhouettes to Cabinets or Walls

    If you want something unmistakably Halloween but still subtle, use small bat silhouettes.

    You do not need hundreds.

    A few carefully placed bats can be enough.

    Choose black paper or lightweight removable decorations.

    Place them near:

    • The upper wall
    • Above the cabinets
    • Around a doorway
    • Near open shelving
    • Above a coffee station

    Create a Flying Pattern

    Instead of placing bats randomly, arrange them as if they are flying upward.

    Use larger silhouettes near the starting point and smaller ones farther away.

    This creates movement.

    Keep Them Away From Cooking Areas

    Avoid placing paper decorations directly above stoves or other heat-producing appliances.

    Keep them away from flames and hot surfaces.

    Use a Minimal Quantity

    Three to seven bats can be enough depending on the kitchen size.

    If you have a tiny kitchen, even three may be sufficient.

    Combine With Neutral Decor

    Black bats look particularly attractive against:

    • White walls
    • Cream cabinets
    • Pale gray
    • Beige
    • Light wood

    Create a Small Corner

    You could place three bats above a small black vase.

    This creates a tiny Halloween moment without changing the whole room.

    Why This Look Works

    Bats are instantly recognizable as Halloween decor, but their simple silhouette makes them easy to integrate into sophisticated interiors.

    8. Create an Elegant Halloween Kitchen Island Centerpiece

    The kitchen island is naturally one of the strongest focal points in the room.

    Instead of covering it with multiple decorations, create one beautiful centerpiece.

    A long wooden or stone tray can act as the foundation.

    Add:

    • Three pumpkins
    • One dark vase
    • Dried branches
    • A small candle
    • One natural decorative element

    Keep the arrangement low enough that people can still see across the island.

    Use the Rule of Three

    Three main objects can create a balanced composition.

    For example:

    Tall vase + medium pumpkin + small pumpkin.

    The height variation makes the centerpiece more visually interesting.

    Try an Asymmetrical Arrangement

    Do not necessarily place everything directly in the middle.

    A slightly off-center arrangement can feel more relaxed and designer-like.

    For example, place the tall vase toward one side and two pumpkins toward the other.

    Use a Neutral Base

    If the kitchen already has strong colors, use a simple wooden or stone tray.

    This keeps the Halloween accents from becoming overwhelming.

    Choose Pumpkins Carefully

    Try:

    • Matte black
    • Cream
    • Muted orange
    • Deep green
    • Burgundy

    Avoid using every available color.

    A cohesive palette is much more elegant.

    Add Texture

    Texture makes a simple centerpiece look richer.

    Combine:

    • Wood
    • Ceramic
    • Glass
    • Dried foliage
    • Linen
    • Stone

    This creates visual depth.

    Keep It Practical

    If you use your island for food preparation, choose a centerpiece that can be moved easily.

    A tray is perfect because you can lift the entire arrangement and relocate it when necessary.

    9. Give Your Kitchen Table a Moody Halloween Makeover

    If your kitchen has a breakfast table or dining area, this is another excellent place to create a subtle Halloween atmosphere.

    Instead of decorating every countertop, make the table the main seasonal area.

    Start with a neutral table runner.

    Choose:

    • Cream linen
    • Warm beige
    • Charcoal
    • Natural brown

    Then add a simple centerpiece.

    A black ceramic vase filled with dried branches can become the main focal point.

    Surround it with a few small pumpkins.

    Add Dark Dinnerware

    If you already have black plates, bowls, or mugs, this is the perfect time to use them.

    You do not need a complete Halloween dinnerware collection.

    Even a few black pieces mixed with cream dishes can create an elegant contrast.

    Use Natural Materials

    Add:

    • Linen napkins
    • Wooden chargers
    • Woven placemats
    • Dried leaves
    • Natural branches

    These textures soften the dark colors.

    Add Warm Lighting

    A few battery-operated candles can create a beautiful evening table.

    Place them safely away from anything flammable.

    Keep the Centerpiece Low

    People should still be able to see across the table.

    Use a low arrangement or position taller branches toward one end rather than directly in the center.

    Add One Spooky Detail

    A small black spider on a napkin ring or a tiny bat on a place card can add Halloween personality.

    Keep it subtle.

    Why This Look Works

    The table becomes a seasonal experience without requiring every kitchen surface to be decorated.

    10. Create a Vintage, Spooky-but-Elegant Kitchen

    For the most sophisticated version of subtle Halloween decorating, combine Halloween with vintage-inspired styling.

    Imagine an old-world kitchen with:

    • Dark wood
    • Antique brass
    • Aged ceramics
    • Amber glass
    • Dried branches
    • Black accents
    • Warm candlelight

    This creates a mysterious atmosphere without obvious Halloween symbols.

    Use Antique-Looking Accessories

    Look for objects with character.

    For example:

    • Vintage-style candle holders
    • Aged brass tray
    • Dark ceramic pitcher
    • Old wooden cutting board
    • Amber glass bottle
    • Antique-style frame

    You do not necessarily need genuine antiques.

    Thrifted pieces can work beautifully.

    Add Black Pumpkins

    Place two or three matte-black pumpkins on a wooden surface.

    The contrast between old-world textures and modern Halloween accents creates a sophisticated look.

    Use Dark Florals

    Add burgundy flowers or dried branches to a dark ceramic vase.

    This makes the kitchen feel atmospheric without using obvious Halloween props.

    Introduce Warm Brass

    Black and brass are particularly effective together.

    Use brass through:

    • Cabinet hardware
    • Lighting
    • Trays
    • Small decorative pieces

    Do not add brass everywhere.

    A few details are enough.

    Create a Moody Corner

    You could style one open shelf or countertop corner with:

    Black vase + dried branches + antique brass candle holder + cream pumpkin.

    That is enough.

    Why This Look Works

    The design feels seasonal without being temporary.

    Once Halloween is over, remove the pumpkin and any spooky details.

    The remaining vintage-inspired decor can continue into late autumn.

    How to Decorate a Small Kitchen for Halloween Without Clutter

    Small kitchens require a different approach.

    Do not try to decorate every surface.

    Choose one or two areas.

    The best options are usually:

    • One countertop corner
    • The kitchen island
    • Open shelves
    • Coffee station
    • Dining table

    Use vertical surfaces for small decorations.

    A few bats on the wall can provide Halloween atmosphere without using countertop space.

    Choose multifunctional decor whenever possible.

    A decorative tray can hold everyday items and seasonal pieces.

    A black ceramic vase can hold flowers and also serve as the main Halloween accent.

    A fall pumpkin can remain after Halloween.

    How to Make Halloween Kitchen Decor Look Expensive

    The easiest way to create an upscale appearance is to reduce visual noise.

    Choose fewer decorations.

    Then make each one count.

    Use a Controlled Color Palette

    Try:

    Black + cream + wood.

    Or:

    Black + burgundy + brass.

    Or:

    Charcoal + beige + muted orange.

    Choose Matte Finishes

    Matte-black ceramics and pumpkins tend to look more sophisticated than shiny plastic decorations.

    Use Natural Textures

    Wood, linen, ceramic, stone, dried branches, and woven materials add richness.

    Create Groups

    Three coordinated objects often look more intentional than many individual objects scattered around the room.

    Repeat Colors

    If you use black on the island, repeat a little black on the shelves.

    If you use brass in the centerpiece, repeat it in the lighting or hardware.

    This creates cohesion.

    Budget-Friendly Halloween Kitchen Decorating

    You do not need a large shopping budget.

    Start by using things you already own.

    Search your home for:

    • Black mugs
    • Wooden trays
    • Glass jars
    • Vases
    • Candles
    • Baskets
    • Cutting boards
    • Neutral linens
    • Dark dishes
    • Existing fall pumpkins

    Then buy only a few seasonal additions.

    For example:

    Black cardstock + three pumpkins + one ribbon + battery candles.

    That can be enough to transform a kitchen.

    DIY Black Pumpkins

    If you already have inexpensive faux pumpkins, repainting them can give them a completely different appearance.

    Choose a suitable paint for the material and allow it to cure properly according to the manufacturer’s instructions.

    Matte black is particularly effective.

    DIY Bat Wall

    Black paper can become inexpensive bat silhouettes.

    Use removable mounting materials suitable for your wall finish.

    DIY Dark Floral Arrangement

    Collect suitable fallen branches or purchase inexpensive dried stems.

    Place them in a dark vase.

    The result can look much more expensive than it costs.

    How to Combine Halloween With Fall Decor

    One of the smartest approaches is to create decor that works for both seasons.

    Instead of buying Halloween-specific items that will be removed immediately after October 31, choose pieces that can transition.

    Good transitional elements include:

    • Cream pumpkins
    • Burgundy flowers
    • Dried branches
    • Wood
    • Black vases
    • Warm lanterns
    • Neutral textiles
    • Brass accents

    Then add a few temporary Halloween details:

    • Bats
    • Spiders
    • Black pumpkins
    • Ghost accents
    • Halloween artwork

    When Halloween ends, simply remove those few pieces.

    Your kitchen still looks beautiful for the rest of autumn.

    Common Halloween Kitchen Decorating Mistakes

    A subtle Halloween kitchen depends on restraint.

    Too Many Decorations

    The kitchen already contains appliances, dishes, utensils, and cooking supplies.

    Adding too many seasonal objects can make it feel chaotic.

    Blocking Counter Space

    Never sacrifice essential workspace just for decoration.

    Use corners, trays, shelves, and vertical surfaces.

    Ignoring Heat and Water

    Keep paper, fabric, candles, and other flammable decorations away from heat-producing appliances and open flames.

    Keep decor away from sinks and areas where it could become wet.

    Mixing Too Many Colors

    Orange, purple, green, red, black, and white all together can overwhelm a small space.

    Choose a limited palette.

    Using Only Plastic Decorations

    Plastic can be useful, but mixing it with wood, ceramic, glass, linen, and natural materials creates a more sophisticated result.

    Making Everything Obviously Halloween

    You do not need a skeleton on every shelf.

    Sometimes a black pumpkin and warm lighting create a stronger atmosphere.

    How to Create a Subtle Spooky Kitchen at Night

    A Halloween kitchen can look completely different after dark.

    During the day, focus on:

    • Neutral colors
    • Dark accents
    • Textures
    • Natural materials

    At night, focus on:

    • Warm lighting
    • Shadows
    • Candlelight
    • Dark silhouettes

    Turn on under-cabinet lighting.

    Use a warm pendant light.

    Add a few battery-operated candles.

    Let the darker decorations create subtle contrast.

    You want the kitchen to feel cozy and mysterious rather than frightening.

    Final Thoughts

    Halloween kitchen decorating does not need to be dramatic to be beautiful.

    In fact, a subtle spooky kitchen can often feel more sophisticated than one filled with oversized decorations.

    The secret is to create atmosphere rather than clutter.

    Start with your existing kitchen.

    Look at its colors, materials, lighting, and architecture.

    Then introduce a few Halloween elements that complement those features.

    A black-and-cream palette can create an elegant foundation.

    A small countertop vignette can provide a seasonal focal point.

    Dark flowers can add mystery without obvious Halloween imagery.

    Open shelves can receive a few carefully selected accents.

    A coffee station can become a cozy seasonal corner.

    Warm lighting and black candle holders can transform the atmosphere after sunset.

    Tiny bat silhouettes can make the theme unmistakable without overwhelming the room.

    A kitchen island centerpiece can bring everything together.

    And a vintage-inspired arrangement can create a sophisticated, old-world Halloween feeling.

    The most important rule is simple:

    Decorate less, but style better.

    Instead of buying twenty Halloween decorations, choose a few beautiful pieces and arrange them intentionally.

    Use black, cream, burgundy, warm brown, brass, and muted orange rather than every Halloween color.

    Combine ceramic, wood, glass, linen, stone, and dried botanicals.

    Keep countertops functional.

    Leave open space.

    Use lighting to create mood.

    And let your kitchen remain a kitchen.

    The result should feel like Halloween has quietly entered the room rather than completely taken it over.

    Whether your style is modern, farmhouse, vintage, minimalist, organic modern, or traditional, these subtle Halloween decorating ideas can help you create a kitchen that feels warm, mysterious, elegant, and perfectly seasonal.

    And when Halloween is over, you can remove the bats, spooky accents, and black pumpkins while leaving the beautiful autumn elements behind.

    That is what makes subtle Halloween decorating so appealing: it gives you the magic of the season without sacrificing the comfort, beauty, and functionality of your home.


  • 15 Small Bathroom Storage Ideas to Maximize Space

    15 Small Bathroom Storage Ideas to Maximize Space

    A small bathroom can be one of the most challenging rooms in the home to organize. There may be barely enough floor space for the essentials, yet you still need somewhere to keep towels, toiletries, skincare products, cleaning supplies, toilet paper, hair tools, and everyday bathroom necessities.

    The good news is that a small bathroom does not have to feel cramped or permanently messy.

    The secret is to stop thinking only about the floor.

    When floor space is limited, the walls, doors, corners, cabinet interiors, and even the space above the toilet can become valuable storage areas. With the right combination of shelves, baskets, hooks, organizers, drawers, and clever vertical solutions, a tiny bathroom can hold much more than you might expect.

    The best small bathroom storage ideas do more than simply add places to put things. They also make everyday routines easier.

    Instead of digging through a crowded cabinet every morning, you can give frequently used products a designated home. Instead of allowing towels to pile on a chair or countertop, you can create an attractive hanging system. Instead of letting bottles take over the shower floor, you can move them onto a wall-mounted organizer.

    Good organization also makes a small bathroom appear larger.

    A clear countertop creates visual breathing room. Matching baskets reduce visual noise. Floating shelves keep the floor open. Vertical storage draws the eye upward instead of making the room feel wider and more crowded.

    You also do not need a major renovation to make a difference.

    Many of these ideas can be completed using affordable organizers, existing furniture, adhesive hooks, baskets, small shelves, and simple DIY solutions. If you are renting, several options can also be adapted without making permanent changes, provided the products and mounting methods are appropriate for your walls.

    Whether your bathroom is a tiny apartment bathroom, a narrow guest bathroom, a compact powder room, or a small family bathroom, these ideas can help you make the most of every available inch.

    1. Install Floating Shelves Above the Toilet

    The wall above the toilet is often one of the most underused areas in a small bathroom.

    Because this space is usually empty, adding floating shelves can instantly create useful storage without taking up valuable floor space.

    This is especially helpful when your bathroom does not have a large vanity or built-in storage cabinet.

    A simple arrangement of two or three floating shelves can hold a surprising number of essentials.

    Use the shelves for items such as:

    • Rolled hand towels
    • Extra toilet paper
    • Small baskets
    • Decorative containers
    • Skincare products
    • Spare soap
    • Small plants
    • Candles
    • Bathroom accessories

    The key is to avoid turning the shelves into another clutter zone.

    Instead of placing every bathroom product directly on the shelf, use attractive baskets or containers to group smaller items.

    For example, one woven basket can hold extra toilet paper while another can contain spare hand towels.

    This makes the storage look intentional.

    Choose the Right Shelf Style

    For a warm and natural bathroom, try light wood shelves with woven baskets.

    For a modern bathroom, choose simple white or black floating shelves.

    For a luxurious look, consider shelves with warm wood and subtle brass brackets.

    If your bathroom is extremely small, choose shelves that are relatively shallow.

    You do not need a very deep shelf for towels or toilet paper.

    A shallow shelf keeps the wall storage useful without making the toilet area feel visually crowded.

    Create a Balanced Arrangement

    You can install three shelves directly above the toilet, or use two shelves and leave some open wall space between them.

    Another option is to place a small shelf above the toilet and a second one slightly higher.

    Keep heavier items on the lower shelf and lighter decorative pieces toward the top.

    Make It Pinterest-Worthy

    Use a limited color palette.

    For example:

    White towels + natural wood + beige baskets + small greenery.

    This creates a clean and sophisticated appearance.

    Instead of filling the shelves with brightly colored product packaging, transfer frequently used items into neutral containers where practical.

    The result is both functional and attractive.

    2. Use a Slim Rolling Cart Between the Toilet and Vanity

    One of the smartest solutions for an extremely small bathroom is a narrow rolling storage cart.

    The advantage is that it can fit into awkward spaces that traditional cabinets cannot use.

    Look for a slim cart that is narrow enough to fit between the toilet and vanity, beside the bathtub, or in another unused gap.

    The cart can provide several levels of storage.

    Use the different shelves for different categories.

    For example:

    Top shelf: Everyday skincare and toiletries

    Middle shelf: Haircare and beauty supplies

    Bottom shelf: Toilet paper, cleaning supplies, or extra towels

    Because the cart has wheels, you can move it when cleaning or when you need access to the plumbing.

    Why Rolling Carts Work So Well

    A small gap may not seem useful.

    But when you multiply a few inches across three or four shelves, you can gain a surprising amount of storage.

    This is especially useful in rental apartments where you cannot install permanent cabinetry.

    Keep It Organized

    Do not simply throw everything onto the shelves.

    Use small containers inside the cart.

    One container can hold hair accessories.

    Another can hold skincare products.

    Another can hold extra soap.

    This prevents the cart from becoming messy.

    Choose a Stylish Cart

    Instead of choosing purely based on utility, consider the bathroom’s design.

    A white metal cart works well in a bright minimalist bathroom.

    A black cart looks attractive in a modern or industrial bathroom.

    A wood-and-metal cart can add warmth to a neutral bathroom.

    If the cart remains visible, treat it like part of the decor.

    3. Add an Over-the-Door Organizer

    The back of the bathroom door is valuable real estate.

    Most people see the door as an entrance and exit but forget that the back surface can provide significant storage.

    An over-the-door organizer can create multiple pockets for small bathroom necessities.

    Use it for:

    • Hairbrushes
    • Hair ties
    • Skincare
    • Makeup
    • Travel-size toiletries
    • Cleaning products
    • Extra toilet paper
    • Small towels
    • Personal-care accessories

    This is particularly useful if your vanity drawers are already full.

    Why Door Storage Is Ideal for Small Bathrooms

    It uses vertical space without taking away floor space.

    It also keeps many small items hidden from the main view when the door is closed.

    If you have a bathroom shared by several people, assign different pockets or sections to different categories.

    This can make mornings much easier.

    For a More Attractive Look

    Choose an organizer with neutral fabric, clear pockets, or a simple structured design.

    If the organizer will be visible frequently, avoid one with too many bright colors or visual patterns.

    A neutral organizer will blend into the bathroom.

    Important Consideration

    Make sure the organizer is compatible with your door and does not interfere with closing.

    Also check that the weight of stored items is appropriate for the organizer and door hardware.

    4. Turn the Side of the Vanity Into Vertical Storage

    The side of a bathroom vanity is often completely unused.

    If your vanity has an exposed side, you can use that surface for narrow storage.

    Install slim hooks, rails, or small baskets designed for appropriate wall mounting.

    This area can hold:

    • Hand towels
    • Washcloths
    • Hair tools
    • Small baskets
    • Cleaning brushes
    • Toiletry bags

    If you have a very narrow bathroom, even two or three hooks can make a noticeable difference.

    Use Hooks for Everyday Items

    Hooks are particularly useful because they make items easy to grab.

    Instead of folding a hand towel and stacking it somewhere, hang it directly on the side of the vanity.

    You can also hang a small toiletry pouch.

    Add a Narrow Basket

    A slim basket attached appropriately to the vanity side can hold products that would otherwise sit on the countertop.

    This is a great solution for renters if you can use a suitable removable mounting system.

    Keep the Countertop Clear

    The more storage you move vertically, the less you need to keep on the countertop.

    This is one of the easiest ways to make a small bathroom look larger.

    5. Install a Wall-Mounted Shower Organizer

    The shower is one of the areas where clutter becomes particularly noticeable.

    Shampoo, conditioner, body wash, facial cleanser, razors, sponges, and other products can quickly accumulate around the bathtub or shower floor.

    A wall-mounted shower organizer can bring order to the space.

    Choose an organizer with separate compartments.

    Assign each section a purpose.

    For example:

    • Hair products
    • Body products
    • Facial products
    • Shaving supplies

    If several people share the bathroom, consider assigning different shelves to different users.

    Make the Shower Look Cleaner

    Instead of displaying multiple colorful bottles, you can use matching refillable containers if the products and container materials are compatible.

    A consistent set of bottles creates a much calmer appearance.

    Label them clearly so everyone knows what is inside.

    Choose a Corner Organizer

    If wall space is limited, a corner organizer can be particularly effective.

    The corner is otherwise difficult to use.

    A tiered corner shelf can create several levels of storage while maintaining the shower’s usable space.

    Think About Drainage

    Any shower organizer should allow water to drain properly.

    Avoid designs that trap water around bottles.

    Keeping storage dry and clean will make maintenance much easier.

    6. Use the Space Under the Sink More Efficiently

    The cabinet beneath the sink is often one of the messiest storage areas in a small bathroom.

    Plumbing pipes take up some of the space, while bottles and cleaning supplies get pushed toward the back.

    Instead of treating the cabinet as one large storage box, divide it into zones.

    Use:

    • Stackable bins
    • Pull-out baskets
    • Small drawers
    • Sliding organizers
    • Adjustable shelves
    • Narrow containers

    The goal is to make everything accessible.

    Create Categories

    You might create one bin for cleaning supplies.

    Another can hold extra soap.

    Another can store personal-care products.

    A separate container can hold backup toiletries.

    This prevents products from becoming mixed together.

    Use the Cabinet Door

    The inside of the cabinet door can also become useful storage.

    Depending on the cabinet and mounting system, you can add small organizers for:

    • Sponges
    • Brushes
    • Gloves
    • Small cleaning tools
    • Hair accessories

    This creates storage in an area that is normally ignored.

    Avoid Overfilling

    The temptation with under-sink storage is to fill every available space.

    But if you cannot remove something easily, the organization is not working.

    Leave enough space to access plumbing and clean the cabinet.

    7. Add a Narrow Ladder Shelf for Towels

    A ladder shelf is an attractive way to add vertical storage without requiring a large cabinet.

    Its narrow footprint makes it especially useful in small bathrooms.

    Lean a ladder-style shelf against an appropriate wall and use the different levels for towels and accessories.

    The bottom levels can hold baskets.

    The upper levels can hold folded towels or decorative items.

    Style It Beautifully

    Try:

    • White towels
    • Beige baskets
    • Light wood
    • Small greenery
    • Neutral ceramic containers

    This creates a spa-inspired appearance.

    You can also use a dark wood ladder shelf for a warmer bathroom.

    Keep the Floor Open

    Because the ladder is narrow, it provides vertical storage while using relatively little floor area.

    However, make sure it is stable and properly secured when necessary.

    This is especially important in homes with children or where the shelf could be bumped.

    Use It Near the Shower

    A ladder shelf near the shower can hold clean towels.

    Keep the lowest basket for less frequently used supplies.

    The upper shelves can remain decorative.

    8. Install Hooks Instead of Traditional Towel Bars

    Traditional towel bars can take up more wall space than you realize.

    Hooks are often more efficient in a small bathroom.

    A single horizontal row of hooks can hold several towels while occupying relatively little width.

    You can also place hooks behind the bathroom door.

    Use Different Hooks for Different Purposes

    Install one hook for each person’s bath towel.

    Add smaller hooks for:

    • Hand towels
    • Washcloths
    • Robes
    • Hair towels

    This prevents towels from being thrown over furniture or left on the floor.

    Choose Attractive Hardware

    Because hooks are visible, choose hardware that complements your bathroom.

    For example:

    Modern bathroom: matte black hooks

    Traditional bathroom: brushed brass hooks

    Farmhouse bathroom: wood or antique-style hooks

    Minimalist bathroom: simple white hooks

    Small hardware changes can make a surprisingly big difference.

    Use Vertical Space

    Instead of installing hooks in one long horizontal line, consider a vertical arrangement if wall width is limited.

    Three hooks stacked vertically can fit into a narrow strip of wall.

    This is especially useful beside a vanity or shower.

    9. Create a Built-In Look With Recessed Wall Shelves

    If you are renovating your bathroom, recessed shelving can be one of the most effective long-term storage solutions.

    A recessed niche uses space inside the wall rather than projecting into the bathroom.

    This is especially valuable in small showers.

    A recessed shower niche can store:

    • Shampoo
    • Conditioner
    • Body wash
    • Soap
    • Razors
    • Skincare products

    Because the shelves are built into the wall, they do not reduce walking or showering space.

    Think About Placement

    Place the niche where it is comfortable to reach.

    For a shower, consider the height of the people using it.

    For a vanity wall, a recessed niche can display towels or decorative objects.

    Make It a Design Feature

    Storage does not have to look purely functional.

    You can finish the niche with attractive tile.

    Try a contrasting material inside the niche to create a focal point.

    For example:

    • White bathroom + warm stone niche
    • Beige bathroom + textured tile
    • Marble-look bathroom + darker niche
    • Neutral bathroom + handmade-look tile

    Renovation Consideration

    Because recessed niches involve modifying walls, they require proper planning.

    Before cutting into a wall, confirm plumbing, electrical, structural, waterproofing, and local building requirements with an appropriate professional.

    For a shower niche, correct waterproofing is particularly important.

    10. Use a Mirrored Medicine Cabinet for Hidden Storage

    A mirror and storage cabinet can perform two jobs at once.

    Instead of installing a simple mirror and then searching for another place to store medicines and toiletries, choose a mirrored medicine cabinet designed for bathroom use.

    The mirror helps the bathroom feel open.

    The cabinet provides hidden storage.

    This combination is ideal for small bathrooms.

    What to Store Inside

    Use it for products you reach for regularly:

    • Skincare
    • Toothpaste
    • Dental supplies
    • Small grooming products
    • Medicines where appropriate
    • Contact-lens supplies
    • Small beauty products

    Keep medicines stored safely and according to their labels and local guidance.

    Organize the Shelves

    Use small clear containers or shelf risers.

    Group similar items.

    For example:

    Daily skincare

    Dental care

    First-aid supplies

    Small grooming items

    This prevents the medicine cabinet from becoming another chaotic storage space.

    Keep the Countertop Minimal

    Once everyday items have a home inside the mirrored cabinet, you can remove much of the visual clutter from the sink area.

    This makes the bathroom feel instantly more spacious.

    11. Use Attractive Baskets to Hide Bathroom Clutter

    Baskets are one of the simplest ways to organize a small bathroom while improving its appearance.

    They are especially useful for items that are necessary but visually unattractive.

    Use baskets for:

    • Extra toilet paper
    • Towels
    • Hair products
    • Cleaning supplies
    • Extra toiletries
    • Guest supplies

    Choose Baskets That Fit Your Style

    For a warm bathroom, try woven baskets.

    For a minimalist bathroom, choose simple fabric or wire baskets.

    For a modern bathroom, use structured baskets in neutral colors.

    Label Them

    If several baskets look similar, labels can make everything easier to find.

    For example:

    Towels

    Toiletries

    Cleaning

    Extra Supplies

    Labels are particularly helpful in family bathrooms.

    Use Baskets on Shelves

    Instead of placing ten individual items on an open shelf, place them inside one basket.

    This reduces visual noise.

    It also makes cleaning easier.

    You can remove the basket, wipe the shelf, and put it back.

    Avoid Oversized Baskets

    A large basket may look attractive but can waste valuable space.

    Choose a size that matches the storage area.

    In a small bathroom, several smaller baskets can sometimes be more useful than one giant basket.

    12. Add a Slim Cabinet Between the Toilet and Wall

    If you have a narrow gap between the toilet and another wall or piece of furniture, consider using a slim freestanding cabinet.

    This is particularly useful when the space is too narrow for conventional furniture.

    A tall, narrow cabinet can provide several shelves.

    Use it for:

    • Toilet paper
    • Towels
    • Toiletries
    • Cleaning products
    • Extra soap
    • Guest supplies

    Choose a Vertical Design

    The taller the cabinet, the more storage you can gain without consuming much floor width.

    But make sure the cabinet does not make the bathroom difficult to navigate.

    Measure carefully before purchasing.

    Use Doors to Hide Clutter

    A closed cabinet can be particularly useful in a small bathroom because it visually hides products.

    Choose a cabinet with a simple front.

    White cabinetry can blend into a light bathroom.

    Natural wood can create warmth.

    Dark cabinetry can add contrast.

    Make It Feel Built In

    If the cabinet matches the bathroom’s colors and finishes, it can appear more intentional.

    Place a small decorative object on top if there is enough clearance.

    Avoid turning the top into another storage pile.

    13. Turn an Empty Corner Into a Storage Station

    Corners are often difficult to use, but they can become excellent storage areas with the right furniture.

    A corner shelf or triangular shelving unit can transform an empty corner into useful storage.

    This is especially effective in bathrooms with:

    • Empty corners beside the vanity
    • Space beside the bathtub
    • Wide corners near the door
    • Unused areas beside a shower

    Create a Vertical Corner

    A tall corner shelf can hold several levels of storage.

    Place frequently used items at eye level.

    Use lower shelves for baskets.

    Use the highest shelf for decorative pieces or backup supplies.

    Style With Purpose

    For example:

    Top: Small plant or decorative vase

    Middle: Rolled towels

    Lower: Basket of toiletries

    Bottom: Extra toilet paper

    This combines storage with decor.

    Use a Corner Shower Shelf

    If the corner is inside the shower, choose a waterproof organizer specifically designed for wet areas.

    This keeps bottles off the floor.

    Why Corners Matter

    Small bathrooms often have very little open wall space.

    Corners give you an opportunity to add storage without taking over the main walls.

    14. Create a Hidden Hair-Tool Storage Station

    Hair dryers, curling irons, straighteners, brushes, and styling products can create significant clutter.

    Instead of keeping them on the countertop, create a dedicated hair-tool station.

    One solution is to use a suitable heat-resistant organizer designed for bathroom hair tools.

    Another option is a cabinet organizer that keeps cords contained and tools separated.

    Organize by Frequency

    Keep everyday tools at the easiest-to-reach level.

    Store occasional-use tools higher or farther back.

    Use cord-management solutions designed for the equipment.

    Do not store hot styling tools in a way that creates a fire or heat hazard. Follow the manufacturer’s instructions and allow heated devices to cool completely before storing them.

    Use the Cabinet Door

    The inside of a vanity cabinet door can be useful for small hair accessories.

    You can store:

    • Hair ties
    • Clips
    • Brushes
    • Combs
    • Small styling products

    Keep the Countertop Clear

    A bathroom countertop covered with hair tools immediately makes a small room feel smaller.

    Moving them into one organized station creates a much cleaner appearance.

    15. Build a Multi-Purpose Storage Wall

    If you want the biggest possible transformation, combine several storage ideas into one organized wall.

    A storage wall does not necessarily require a full renovation.

    You can create the effect with:

    • Floating shelves
    • Hooks
    • Baskets
    • Narrow cabinets
    • A mirrored cabinet
    • Small wall organizers

    The idea is to assign every section of the wall a purpose.

    For example:

    Upper area: Decorative shelf

    Middle area: Everyday toiletries

    Lower area: Towels and baskets

    Side area: Hooks

    This creates a complete vertical storage system.

    Keep the Design Cohesive

    Use similar finishes throughout.

    For example:

    Light wood + white + beige + brushed brass

    or

    Black + white + warm wood

    or

    Cream + natural wood + woven baskets

    A consistent palette makes several different storage products appear like one coordinated system.

    Leave Breathing Room

    Do not cover the entire wall with objects.

    Leave some empty space between shelves and storage pieces.

    The goal is to maximize storage without creating visual overload.

    This is especially important in a small bathroom.

    How to Maximize Every Inch of a Tiny Bathroom

    The biggest mistake people make when organizing a small bathroom is focusing only on obvious storage.

    Instead, look at every surface.

    Ask yourself:

    Can this wall hold a shelf?

    Can the back of this door hold an organizer?

    Can this cabinet door hold hooks?

    Can this corner hold a narrow shelf?

    Can the gap beside the vanity hold a rolling cart?

    Can the space above the toilet be used?

    Can a mirror also provide hidden storage?

    Once you start looking vertically, a small bathroom suddenly offers many more possibilities.

    Keep the Countertop as Clear as Possible

    A crowded countertop makes a bathroom look smaller.

    Try to keep only the things you use every day.

    For example:

    • Soap dispenser
    • Toothbrush holder
    • One small decorative item

    Everything else can go into drawers, cabinets, baskets, or shelves.

    This creates visual breathing room.

    If you have many skincare products, consider keeping only your daily routine on the counter.

    Store backup products elsewhere.

    Use Matching Containers for a Cleaner Look

    Bathroom products often come in packaging with many different colors and labels.

    This can make even a well-organized shelf look messy.

    Matching containers can create a more cohesive appearance.

    You might use neutral containers for:

    • Cotton pads
    • Cotton swabs
    • Bath salts
    • Small accessories
    • Hair ties

    Transparent containers are also useful because you can see what is inside.

    However, always label containers clearly when the contents could be confused with another product.

    Declutter Before Buying Storage

    One of the most important steps is also the cheapest.

    Declutter first.

    Remove products that are:

    • Empty
    • Expired
    • Duplicates
    • No longer used
    • Damaged
    • Unnecessary

    You may discover that you need much less storage than you thought.

    Do not buy an organizer simply because it looks attractive.

    First decide what you actually need to store.

    Then choose the storage solution based on those items.

    Store Items According to Frequency of Use

    The easiest way to organize a bathroom is to place things according to how often you use them.

    Everyday Items

    Keep these at eye level or within easy reach.

    Examples include:

    • Toothpaste
    • Face wash
    • Moisturizer
    • Soap
    • Hairbrush

    Weekly Items

    These can go in drawers or baskets.

    Examples include:

    • Hair treatments
    • Face masks
    • Nail-care supplies

    Backup Items

    Store these higher or farther away.

    Examples include:

    • Extra shampoo
    • Spare toilet paper
    • Backup soap
    • Extra cleaning products

    This simple system prevents daily essentials from getting buried underneath rarely used items.

    Use Vertical Storage Whenever Possible

    In a small bathroom, vertical space is often more valuable than horizontal space.

    A tall narrow shelf can hold several levels of supplies while occupying only a small amount of floor area.

    Vertical storage can include:

    • Ladder shelves
    • Tall cabinets
    • Floating shelves
    • Wall hooks
    • Door organizers
    • Hanging baskets

    Look upward before adding more furniture.

    Make Small Bathrooms Feel Larger With Visual Simplicity

    Organization is not only about capacity.

    It is also about perception.

    A bathroom can physically contain many items but still feel spacious if those items are visually organized.

    Use:

    • Light colors
    • Matching containers
    • Clear surfaces
    • Simple shelves
    • Consistent materials
    • Hidden storage
    • Open floor space

    Avoid placing large decorative objects everywhere.

    One small plant can add life.

    One beautiful vase can add personality.

    One attractive basket can provide texture.

    You do not need dozens of accessories.

    Choose Storage That Matches Your Bathroom Style

    Storage should look like it belongs in the room.

    Modern Small Bathroom

    Use:

    • Matte black
    • White
    • Glass
    • Clean-lined shelves
    • Minimal baskets

    Warm Minimalist Bathroom

    Use:

    • Light oak
    • Beige
    • Cream
    • Woven baskets
    • Soft textiles

    Farmhouse Bathroom

    Use:

    • Rustic wood
    • Galvanized metal
    • Woven baskets
    • Neutral towels

    Luxury Bathroom

    Use:

    • Marble-look surfaces
    • Warm wood
    • Brushed brass
    • Glass containers
    • Soft neutral textiles

    When storage matches the room, practical organization becomes part of the decor.

    Budget-Friendly Small Bathroom Organization

    You do not need to remodel your bathroom to improve storage.

    Start with inexpensive solutions.

    Use Existing Jars

    Clean glass jars can hold:

    • Cotton balls
    • Cotton swabs
    • Hair accessories

    Reuse Small Baskets

    Move baskets from another room if they fit your bathroom.

    Add Simple Hooks

    A few strategically placed hooks can solve towel and robe storage problems.

    Use a Tension Rod

    A properly installed tension rod in an appropriate location can create hanging space for lightweight items.

    Do not overload it.

    Add Stackable Bins

    Stackable containers allow you to use vertical space inside cabinets.

    Repurpose a Small Tray

    A decorative tray can group everyday countertop products.

    Instead of five products scattered around the sink, place them together on one tray.

    The result immediately looks more intentional.

    How to Organize a Small Bathroom Vanity

    Start by removing everything.

    Clean the drawers and cabinet.

    Then divide products into categories.

    For example:

    Dental care

    Skincare

    Haircare

    Beauty

    Cleaning

    Backups

    Place everyday products in the easiest-to-reach areas.

    Use drawer dividers for small items.

    Use bins for larger categories.

    Do not leave large empty gaps inside drawers.

    Use organizers that make use of the available height.

    But avoid filling every inch.

    You need enough space to remove items easily.

    How to Organize a Tiny Guest Bathroom

    Guest bathrooms should feel simple and welcoming.

    You do not need to store every personal product in the open.

    Keep a small basket with:

    • Fresh hand towels
    • Extra toilet paper
    • Hand soap
    • Travel-size toiletries
    • Tissues

    Place it somewhere easy for guests to find.

    Keep the countertop mostly clear.

    A small vase, candle, or plant can provide decoration without taking up too much space.

    How to Organize a Small Family Bathroom

    A family bathroom needs stronger systems because several people may use the same products.

    Give everyone a designated space.

    For example:

    • One drawer per person
    • One basket per person
    • Different shelf sections
    • Labeled containers

    Children’s products should be stored safely and appropriately.

    Keep potentially dangerous products and medications inaccessible to children.

    The simpler the system, the more likely everyone is to maintain it.

    How to Keep a Small Bathroom Organized Long-Term

    Creating an organized bathroom is one thing.

    Keeping it organized is another.

    The best system is one that is easy to maintain.

    Try a five-minute reset at the end of the day.

    Put products back where they belong.

    Hang towels.

    Clear the countertop.

    Return toilet paper and supplies to their storage area.

    Once a week, quickly check for empty containers.

    Once a month, remove products you no longer need.

    This prevents clutter from building up.

    Final Thoughts

    A small bathroom does not have to mean small storage.

    The key is to use space creatively and intentionally.

    Instead of relying entirely on a traditional vanity, look at the walls, doors, corners, cabinet interiors, and unused areas above fixtures.

    Floating shelves can transform the wall above the toilet.

    A slim rolling cart can use an awkward gap.

    An over-the-door organizer can turn an unused door into a storage station.

    Hooks can replace bulky towel bars.

    A mirrored medicine cabinet can combine two essential functions.

    Baskets can hide everyday clutter.

    A ladder shelf can turn a narrow wall into vertical storage.

    A shower organizer can keep bottles off the floor.

    And a thoughtfully designed storage wall can bring several solutions together into one cohesive system.

    The most important principle is to organize vertically before adding more floor furniture.

    When floor space is limited, every inch matters.

    Think upward.

    Think about hidden areas.

    Think about the back of doors.

    Think about the inside of cabinets.

    Think about corners.

    Most importantly, think about how you actually use the bathroom.

    The best storage system is not necessarily the one with the most shelves.

    It is the one that makes your daily routine easier.

    Keep everyday products within reach.

    Move backup supplies out of the way.

    Group similar items together.

    Use baskets and containers to control visual clutter.

    Choose storage pieces that complement your bathroom’s style.

    And leave enough open space for the room to breathe.

    With a little creativity, even the smallest bathroom can become organized, functional, and beautiful.

    Whether you are working with a tiny apartment bathroom or simply trying to make a compact guest bathroom more practical, these 15 small bathroom storage ideas can help you maximize every inch without sacrificing style.

    A well-organized bathroom should not feel like a storage room.

    It should feel calm, clean, and easy to use.

    And sometimes, all it takes is one empty wall, one forgotten corner, or one narrow gap to create the extra storage your bathroom has been missing.


  • Easy Halloween Front Porch Decor Ideas on a Budget

    Easy Halloween Front Porch Decor Ideas on a Budget

    Halloween is the perfect excuse to give your front porch a completely different personality for the season. But decorating for Halloween does not mean you need to spend a fortune on giant inflatables, expensive props, or dozens of decorations that will sit in storage for the rest of the year.

    With a few inexpensive supplies, some creativity, and thoughtful styling, you can turn an ordinary front porch into a spooky, welcoming Halloween entrance without blowing your budget.

    The secret is not how much decoration you use. It is how you arrange it.

    A simple black wreath, a few pumpkins, warm lantern lights, and a swarm of DIY paper bats can create more visual impact than a porch packed with random Halloween decorations. Current Halloween porch inspiration continues to show how simple elements such as bats, pumpkins, lanterns, wreaths, ghosts, and layered lighting can create a dramatic entrance without requiring an expensive setup. (Martha Stewart)

    The best part is that many of these ideas can be made using inexpensive craft supplies or things you already have at home.

    You can reuse:

    • Old cardboard
    • Black paper
    • White sheets
    • Mason jars
    • Empty glass bottles
    • Existing planters
    • Wooden crates
    • Old baskets
    • Twine
    • Ribbon
    • Battery-operated candles
    • Faux pumpkins
    • Branches from the yard
    • Existing outdoor lanterns

    For a sophisticated look, choose a limited color palette. Black and cream can feel elegant and mysterious. Black, orange, and warm brown create a traditional Halloween atmosphere. Burgundy, black, and antique gold can make the porch feel more luxurious.

    Another important trick is to create one main focal point.

    Your front door is naturally the strongest focal point, so start there. Then build outward using smaller decorations on the floor, steps, railing, or walls.

    Here are 10 easy Halloween front porch decor ideas that are affordable, beginner-friendly, and perfect for creating a Pinterest-worthy entrance.

    1. Create a Spooky DIY Bat Swarm Around the Front Door

    One of the easiest ways to make a huge visual impact for very little money is to create a swarm of black bats flying around your front door.

    You do not need expensive decorations.

    All you need is black cardstock, construction paper, thin cardboard, or another lightweight material suitable for your weather conditions.

    The idea is simple.

    Cut bats in several different sizes and arrange them so they appear to be flying upward from one side of the door.

    This creates movement and makes the entrance feel much more dramatic.

    Instead of placing the bats randomly, create a visual path.

    Start with a few larger bats near the lower part of the door.

    Gradually use smaller bats as they move upward.

    You can curve the swarm toward the top corner of the door or porch wall.

    This creates the illusion that the bats are flying away.

    For even more depth, gently fold the wings upward along the body so that the bats are not completely flat.

    HGTV has used a similar concept with varying-size cardstock bats, noting that the arrangement looks more effective when the bats travel in the same general direction.

    What You Need

    • Black cardstock or cardboard
    • Scissors
    • Pencil
    • Bat template
    • Removable adhesive or mounting putty
    • Optional black felt for more durable bats

    You can create your own bat template by drawing one simple bat and then tracing it repeatedly.

    Make three sizes.

    For example:

    • Large bats for the bottom
    • Medium bats around the center
    • Small bats near the top

    This gives the display perspective.

    Make It Look More Expensive

    Do not cover the entire porch with bats.

    Keep the swarm concentrated around the door.

    This creates a stronger focal point.

    You can also place two simple black lanterns on either side of the entrance.

    Inside the lanterns, use warm battery-operated candles.

    The combination of black bats and warm golden light creates an elegant spooky atmosphere.

    Budget Tip

    Instead of buying plastic bats, use black cardboard from packaging you already have.

    You can even paint recycled cardboard black if necessary.

    This project can cost almost nothing.

    Safety Tip

    If attaching decorations directly to your door, use removable adhesive appropriate for the door’s finish and keep hinges, handles, locks, and weather seals clear. HGTV specifically recommends making sure bats do not interfere with door operation.

    2. Make a Budget-Friendly Pumpkin Staircase

    If your front porch has steps, use them as part of your Halloween decoration.

    A staircase naturally creates different levels, making it perfect for a layered pumpkin display.

    You do not need dozens of pumpkins.

    Choose a mixture of sizes.

    Place the largest pumpkins toward the bottom and medium or small pumpkins higher up.

    You can mix:

    • Traditional orange pumpkins
    • White pumpkins
    • Black-painted pumpkins
    • Small gourds
    • Mini pumpkins
    • Faux pumpkins

    The mixture makes the display look more collected and intentional.

    Instead of placing one pumpkin in the exact center of every step, vary the positioning.

    For example, place a cluster toward the side of one step and move the next cluster slightly toward the opposite side.

    This creates movement while keeping the stairs usable.

    Add Plants

    If you already have fall mums or potted plants, incorporate them into the display.

    A large planter can anchor the bottom of the staircase.

    Smaller pumpkins can surround it.

    This is much more affordable than purchasing a complete Halloween decoration set.

    Add Warm Lighting

    Place small battery-operated lanterns or LED candles near selected pumpkin groups.

    Warm light makes pumpkins glow beautifully at night.

    Avoid using too many lights.

    Two or three strategically positioned lights can be enough.

    Budget Trick

    You do not have to buy all new pumpkins.

    Use existing fall pumpkins and transform a few with black or cream paint.

    A combination of natural orange pumpkins and two or three painted pumpkins can look much more sophisticated than buying a matching set.

    Keep the Steps Safe

    Never allow pumpkins, cords, lanterns, or decorations to obstruct the walking path.

    The staircase should remain comfortable and safe for guests and trick-or-treaters.

    3. Turn an Inexpensive Wreath Into an Elegant Halloween Door

    A wreath is one of the easiest ways to decorate a front door because it immediately creates a focal point.

    But Halloween wreaths can become expensive.

    Instead of buying a specialized wreath, start with an inexpensive grapevine wreath or even an existing wreath you already own.

    Then transform it with inexpensive materials.

    For a classic spooky look, wrap the wreath with black ribbon.

    Add:

    • Black faux leaves
    • Small plastic spiders
    • Dried branches
    • Black feathers
    • A small skull
    • Burgundy ribbon
    • Artificial dark flowers

    For an elegant look, keep the decorations minimal.

    You might use a black grapevine wreath with one large black ribbon and a few dried branches.

    For a more traditional Halloween appearance, add small orange pumpkins and black spiders.

    A Black-and-Gold Version

    If you want something more sophisticated, use:

    Black + antique gold + cream.

    Add a few gold-painted mini pumpkins.

    Place one small black bow at the bottom.

    Then hang the wreath in the center of the door.

    This gives the porch a Halloween feel without looking childish.

    Make It Budget-Friendly

    Dollar-store craft supplies can work extremely well for this type of project.

    You can purchase an inexpensive wreath base and upgrade it rather than buying a finished designer wreath.

    A small amount of black spray paint can also transform inexpensive plastic or foam decorations.

    Current budget DIY inspiration frequently uses simple dollar-store pumpkins, black paint, ribbons, and craft materials to create more elevated Halloween displays.

    4. Make Floating Ghosts From Old White Sheets

    Nothing says Halloween quite like a ghost.

    And homemade ghosts are one of the cheapest decorations you can make.

    You can create them from old white sheets, pillowcases, inexpensive white fabric, or even white tablecloths.

    The basic concept is extremely simple.

    Create a rounded shape at the top.

    Use an old pillow, crumpled paper, or lightweight material to create the head.

    Tie a piece of string or ribbon around the neck.

    Then let the fabric hang naturally.

    For the face, you can use black felt, fabric, or washable marker depending on the material.

    Make the Ghosts Look Elegant

    Instead of creating cartoon-like ghosts with huge expressions, use simple black eyes.

    A minimalist ghost can look surprisingly sophisticated.

    Create three ghosts in different sizes.

    Hang one near the door.

    Hang another slightly farther away.

    Then place the smallest one near the porch railing.

    This creates depth.

    Create a Floating Effect

    Use thin fishing line or another appropriate hanging material so the support is less noticeable.

    At night, illuminate the ghosts gently with warm outdoor lighting.

    Avoid harsh bright lights.

    A soft glow makes the ghosts appear mysterious.

    Budget Version

    Use materials you already own.

    Old pillowcases can work beautifully for small hanging ghosts.

    White sheets can create larger ghosts.

    You can also use leftover fabric from another project.

    Keep It Simple

    Do not combine floating ghosts with every Halloween theme.

    If ghosts are your main focal point, let them stand out.

    A few pumpkins and warm lights are enough to finish the porch.

    5. Create a Dollar-Store Pumpkin Display That Looks Expensive

    Cheap pumpkins do not have to look cheap.

    The secret is changing their color and grouping them thoughtfully.

    Instead of using brightly colored plastic pumpkins exactly as they come, transform them.

    Matte black paint is one of the easiest ways to create a more expensive appearance.

    You can also use:

    • Cream
    • Charcoal
    • Deep burgundy
    • Soft beige
    • Muted metallic gold

    A group of matte black pumpkins can look surprisingly elegant.

    Place three pumpkins together:

    • One large
    • One medium
    • One small

    Then add one dried branch or small faux stem.

    This simple arrangement can become the focal point of a porch table, bench, or step.

    Create a Pumpkin Stack

    Stack three faux pumpkins vertically.

    Use the largest on the bottom.

    Place the medium pumpkin in the middle.

    Finish with the smallest pumpkin on top.

    Secure them appropriately so the stack remains stable.

    Paint all three pumpkins matte black.

    Then add a single cream or gold accent.

    This creates a dramatic Halloween statement without requiring many decorations.

    Mix Black and Cream

    For an elegant Halloween porch, combine:

    Black pumpkins + cream pumpkins + natural wood.

    This palette works especially well with neutral homes.

    Why This Works

    A cohesive color palette makes inexpensive decorations feel more intentional.

    Instead of having ten unrelated decorations, you have one clear design direction.

    Current design advice also favors restrained palettes and curated displays over excessive novelty pieces.

    6. Make Mason Jar Halloween Lanterns

    Lighting can completely transform a Halloween porch.

    You do not need expensive outdoor lighting.

    Mason jars or recycled glass jars can become simple Halloween lanterns.

    Clean the jars thoroughly.

    Then add battery-operated LED tea lights.

    You can leave the glass clear for a simple glowing effect.

    Or decorate the outside.

    Try:

    • Black ribbon
    • Small spider stickers
    • Black paper silhouettes
    • Orange tissue paper
    • Twine
    • Mini Halloween labels

    For an elegant look, keep the glass mostly clear and use black ribbon around the top.

    Place three jars together.

    Use different sizes if possible.

    Create a Porch Table Display

    Place the lanterns on a small outdoor table or wooden crate.

    Surround them with:

    • Two small pumpkins
    • A few dried leaves
    • One black vase
    • A small branch

    This creates a miniature Halloween vignette.

    Use Warm Light

    Warm white LEDs generally create a more sophisticated atmosphere than extremely bright colored lights.

    If you want a traditional Halloween mood, add a small amount of orange lighting elsewhere.

    But keep the main lighting warm.

    Budget Benefit

    If you already have jars at home, this project can cost almost nothing.

    It is also reusable.

    After Halloween, remove the Halloween accents and continue using the jars as ordinary outdoor lanterns.

    7. Create a Spooky Porch Corner With a Wooden Crate

    You can create an attractive Halloween display without purchasing a large prop.

    Find a wooden crate.

    You can use:

    • A fruit crate
    • An old storage box
    • A thrifted wooden box
    • A simple unfinished crate

    Turn it upside down if you need a stand.

    Then build a small Halloween vignette around it.

    Place a lantern on top.

    Add a black-painted pumpkin.

    Place a smaller pumpkin beside it.

    Add dried branches in a simple vase.

    You can also place a small skeleton or black crow decoration on the crate.

    Layer the Heights

    The most important thing is creating different heights.

    For example:

    Tall: dried branches

    Medium: lantern

    Low: pumpkins

    This gives the display visual depth.

    Add a Chair or Bench

    If you already have a porch chair, place the crate beside it.

    Add a dark throw blanket.

    Place one pumpkin on the seat if the chair is purely decorative.

    Alternatively, keep the chair functional and use the crate as the decorative element beside it.

    Make It Look Expensive

    Choose natural materials.

    Wood, dried branches, pumpkins, black metal, and warm light naturally create a sophisticated Halloween atmosphere.

    You do not need plastic decorations everywhere.

    This approach also fits the broader 2026 preference for natural textures and curated seasonal displays.

    8. Add a Simple Spider Web Display Without Making It Messy

    Spider webs are an easy Halloween decoration, but they can quickly make a porch look messy.

    The trick is placement and restraint.

    Instead of covering the entire porch, choose one area.

    Good options include:

    • Around the door frame
    • Across one porch railing
    • Around a single column
    • Behind a small Halloween vignette

    Stretch the web material carefully so it looks thin and irregular rather than like a thick white blanket.

    Then add several black spiders.

    Use different sizes.

    Place the larger spiders near the center.

    Use smaller spiders toward the edges.

    This creates a more natural appearance.

    Combine With Black Bats

    You can create a strong black-and-white Halloween theme by pairing:

    White spider web + black bats + black pumpkins.

    This is especially attractive against a light-colored front door.

    Keep the Door Usable

    Do not cover:

    • Door handles
    • Hinges
    • Locks
    • Doorbell
    • House numbers

    The porch should remain functional.

    Avoid Overdoing It

    One webbed section is usually enough.

    A common mistake is covering every surface.

    That can make the porch look chaotic rather than spooky.

    9. Make a Budget Halloween Porch With Lanterns and Pumpkins

    If you prefer a more elegant Halloween style, skip the scary props completely.

    Build the entire porch around lanterns and pumpkins.

    This is particularly effective if your home already has a warm neutral exterior.

    Place two lanterns beside the front door.

    Inside each lantern, use a battery-operated candle.

    Then create a small pumpkin grouping underneath or beside each lantern.

    Use different sizes.

    For example:

    • Large cream pumpkin
    • Medium orange pumpkin
    • Small black pumpkin

    This creates a beautiful color balance.

    Add one simple black wreath to the door.

    Then place a neutral doormat underneath.

    That may be all you need.

    Add One Spooky Detail

    If you still want the porch to clearly feel like Halloween, add one detail.

    For example:

    • Small black bats
    • A black spider
    • A miniature skull
    • Black ribbon
    • A small skeleton hand

    One spooky detail can be more effective than ten.

    Why This Idea Works

    It creates a Halloween porch that can transition easily from Halloween into the broader fall season.

    After Halloween, remove the black bats or spooky accents.

    The pumpkins, lanterns, wreath, and warm lighting can remain.

    This makes your budget work harder.

    10. Create a Complete Halloween Porch Using What You Already Have

    If you want the cheapest possible Halloween porch makeover, start by shopping your own house.

    Before buying anything, walk around your home and collect items that could work outdoors.

    Look for:

    • Black vases
    • Wooden crates
    • Baskets
    • Lanterns
    • Blankets
    • Chairs
    • Trays
    • Glass jars
    • Plant pots
    • Candles
    • Artificial branches
    • Old picture frames

    Then add a few inexpensive Halloween-specific elements.

    You might only need:

    • A few pumpkins
    • Black cardstock
    • One roll of ribbon
    • Battery tea lights
    • Small plastic spiders

    Arrange everything around one focal point.

    For example, start with your front door.

    Add a simple wreath.

    Create a bat swarm above it.

    Place two existing planters on either side.

    Add pumpkins around the base.

    Then add warm lantern light.

    You now have a complete Halloween porch without purchasing an entire collection.

    Use the Three-Level Rule

    Try to create three visual levels.

    High: wreath, hanging ghost, bats, or hanging decoration

    Middle: door, lanterns, wreath, wall decoration

    Low: pumpkins, plants, crates, baskets

    This makes the porch feel layered and professionally styled.

    Repeat Your Colors

    Choose three main colors.

    For example:

    Black + cream + orange

    or

    Black + burgundy + antique gold

    or

    Black + white + warm brown

    Repeat those colors throughout the porch.

    This is one of the easiest ways to make inexpensive decorations look cohesive.

    How to Decorate a Small Front Porch for Halloween

    A small porch does not need fewer ideas.

    It simply needs smarter placement.

    Use vertical surfaces.

    Hang bats on the wall.

    Put a wreath on the door.

    Hang one small ghost.

    Use a narrow planter beside the door.

    Instead of spreading decorations across the floor, build upward.

    A small porch can look crowded very quickly, so avoid placing too many objects near the entrance.

    One wreath, a few pumpkins, and one lantern grouping may be enough.

    If you have stairs, use the steps instead of the narrow area immediately in front of the door.

    This allows you to create a layered display without blocking the entrance.

    How to Make Cheap Halloween Decor Look Expensive

    The biggest secret is not the price of the decoration.

    It is the presentation.

    A cheap plastic pumpkin sitting by itself may look inexpensive.

    But a matte-black pumpkin grouped with a cream pumpkin, wooden crate, dried branches, and warm lighting can look much more sophisticated.

    Here are a few tricks.

    Choose a Limited Color Palette

    Too many colors can make a Halloween porch look chaotic.

    Choose two or three dominant colors.

    Use Matte Finishes

    Matte black often looks more sophisticated than shiny plastic.

    You can transform inexpensive decorations with suitable paint.

    Group Similar Objects

    Three pumpkins usually look better together than one pumpkin in five different places.

    Three lanterns can create a stronger display than one lantern surrounded by random decorations.

    Create Height

    Use crates, stools, planters, and baskets to raise decorations.

    Add Warm Lighting

    Lighting makes almost everything look better.

    A warm glow can make simple decorations feel intentional.

    Leave Empty Space

    Do not decorate every square inch.

    Empty space allows the main decorations to stand out.

    Current design guidance similarly recommends cohesive palettes and curated natural elements rather than overloaded seasonal displays. (The Spruce)

    Easy Halloween Color Schemes for a Budget Porch

    Choosing your colors before shopping can prevent unnecessary purchases.

    Classic Halloween

    Black + orange + cream

    Perfect for a traditional Halloween look.

    Elegant Halloween

    Black + cream + antique gold

    Ideal for a sophisticated porch.

    Moody Halloween

    Black + burgundy + charcoal

    Creates a dramatic, romantic atmosphere.

    Natural Halloween

    Black + brown + muted orange + wood

    Perfect for farmhouse and rustic homes.

    Minimal Halloween

    Black + white + warm wood

    Great for modern homes.

    Common Halloween Porch Decorating Mistakes to Avoid

    A budget porch can look expensive when it is thoughtfully styled, but several mistakes can quickly make it feel cluttered.

    Using Too Many Themes

    Do not combine ghosts, witches, skeletons, spiders, pumpkins, graveyards, inflatables, signs, and bats all at once.

    Choose one main theme.

    Covering Everything With Fake Webs

    A little webbing creates atmosphere.

    Too much can look messy.

    Using Too Many Bright Colors

    Neon green, bright purple, orange, red, and yellow together can become visually overwhelming.

    Choose a controlled palette.

    Blocking the Door

    Your entrance still needs to function.

    Keep the door, walkway, stairs, and house numbers visible.

    Buying Everything New

    Before shopping, look around your home.

    You probably already own useful baskets, planters, lanterns, crates, jars, and furniture.

    Making Every Decoration the Same Size

    Different sizes create depth.

    Mix large, medium, and small pieces.

    Ignoring Lighting

    A porch may look beautiful during the day but flat at night.

    Warm battery candles, lanterns, and subtle string lights can completely change the atmosphere.

    How to Build a Halloween Porch on a Very Small Budget

    If your budget is extremely limited, start with just five things.

    1. One focal decoration

    A wreath or pumpkin display.

    2. Three pumpkins

    Use different sizes.

    3. One warm light source

    A lantern or several LED tea lights.

    4. DIY bats

    Use black paper or recycled cardboard.

    5. One natural element

    Branches, dried leaves, a plant, or a wooden crate.

    These five elements can create an attractive Halloween porch without requiring a shopping spree.

    Start with what you already have.

    Then spend money only where it will create the biggest visual difference.

    How to Make Your Halloween Porch Pinterest-Worthy

    If you want your porch to look especially attractive in photos, think about composition.

    Your front door should usually be the visual anchor.

    Place your largest decoration close to it.

    Then create smaller layers moving outward.

    Use warm lighting to create atmosphere.

    Keep the color palette consistent.

    Avoid unnecessary signs.

    And leave some breathing room.

    A Pinterest-worthy porch does not need to be packed with decorations.

    It needs to have a strong visual story.

    For example:

    Black wreath โ†’ bat swarm โ†’ warm lanterns โ†’ pumpkins โ†’ dried foliage.

    Everything supports the same theme.

    Another successful combination could be:

    Cream pumpkins โ†’ black lanterns โ†’ black wreath โ†’ burgundy foliage โ†’ warm lighting.

    The goal is to make someone understand the design immediately when they see the photograph.

    Final Thoughts

    Creating a beautiful Halloween front porch does not have to be expensive or complicated.

    The best budget decorations are often the simplest ones.

    A few pumpkins can create a seasonal foundation.

    A homemade wreath can become the focal point.

    Paper bats can transform a plain door.

    An old white sheet can become a spooky ghost.

    Mason jars can become glowing lanterns.

    A wooden crate can become a stylish Halloween display stand.

    And warm lighting can make everything feel more atmospheric.

    The most important thing is to decorate with intention.

    Choose a color palette.

    Pick one main focal point.

    Layer your decorations from high to low.

    Use inexpensive materials creatively.

    And avoid filling every available space.

    Current Halloween decorating inspiration continues to show that DIY bats, pumpkins, ghosts, lanterns, wreaths, and simple layered displays can create a strong porch transformation without a large budget.

    For a classic look, try orange pumpkins, black bats, and warm lanterns.

    For an elegant porch, choose black, cream, antique gold, and subtle lighting.

    For a spooky atmosphere, use black paper bats, white ghosts, dark branches, and shadows.

    For a farmhouse look, combine wooden crates, pumpkins, dried foliage, lanterns, and natural textures.

    And for a tiny porch, concentrate on vertical decorations and one strong focal point.

    You do not need a huge porch.

    You do not need expensive decorations.

    You simply need a few thoughtful elements arranged beautifully.

    With these easy Halloween front porch decor ideas, you can create a welcoming, spooky, and Pinterest-worthy entrance that looks far more expensive than it actually is.


  • Fall Container Garden Ideas for Front Porches, Patios & Steps

    Fall Container Garden Ideas for Front Porches, Patios & Steps

    Fall is one of the most beautiful seasons for container gardening. As summer flowers begin to fade, cooler temperatures create the perfect opportunity to refresh your front porch, patio, entryway, and steps with rich seasonal colors, beautiful foliage, ornamental grasses, pumpkins, and cool-weather flowers.

    You do not need a huge garden to create an impressive fall display. Even a small front step can become a beautiful seasonal focal point with one well-designed planter. A patio can be transformed with a pair of large containers, while a wide porch can accommodate several layered pots in different heights.

    The most successful fall containers combine color, texture, height, and movement. Mums are an obvious favorite, but they are not your only choice. Pansies, violas, ornamental cabbage, ornamental kale, asters, sedums, grasses, coral bells, peppers, and other cool-season plants can make a container feel fuller and more interesting.

    A useful design principle is the thriller, filler, spiller method. The thriller provides height and drama, the filler creates fullness and color, and the spiller trails over the edge of the container. This structure helps a planter look balanced rather than like several unrelated plants placed in the same pot.

    Fall is also a wonderful time to combine living plants with seasonal accents. A few pumpkins or gourds around a planter can add autumn character without overwhelming the flowers. Current outdoor decorating trends are also moving toward more natural, curated displays instead of excessive plastic decorations, making plants, pumpkins, wood, lanterns, and natural textures especially effective.

    Here are 10 beautiful fall container garden ideas that can work on front porches, patios, entry steps, balconies, and other outdoor spaces.

    1. Classic Mums, Pumpkins & Ornamental Grass Planter

    If you want a traditional fall container that immediately feels warm and welcoming, start with the classic combination of mums, pumpkins, and ornamental grass.

    This arrangement works particularly well beside a front door because it provides both height and strong seasonal color.

    Choose a large container in a neutral material such as:

    • Black
    • Charcoal
    • Stone
    • Terracotta
    • Cream
    • Weathered gray
    • Dark bronze

    A large container gives you enough room to create layers without making the plants look crowded.

    Begin with one tall ornamental grass positioned toward the back or center of the pot. Purple fountain grass can provide dramatic burgundy foliage, while other ornamental grasses can create a softer green or golden effect depending on your climate and availability.

    The grass becomes your thriller.

    Next, add one or two mums.

    Choose a color that complements your home’s exterior.

    Traditional combinations include:

    • Orange and bronze
    • Burgundy and gold
    • White and rust
    • Yellow and deep red
    • Cream and burgundy

    Mums create the main burst of seasonal color and work beautifully as the filler.

    Around the front edge, add a few smaller plants or trailing foliage.

    Pansies and violas are excellent cool-season choices, and trailing plants can soften the edge of the container. Pansies can also provide color after some summer plants have faded.

    Then add two or three small pumpkins around the base.

    Do not bury the planter under pumpkins.

    A few carefully positioned pumpkins will look more sophisticated than a huge pile.

    For an elegant front porch, try a palette of cream pumpkins, white mums, burgundy foliage, and dark grass.

    For a traditional autumn appearance, use orange pumpkins, bronze mums, golden grass, and rustic containers.

    If you are placing two planters beside your front door, make them symmetrical.

    Use matching containers and similar plant combinations.

    Symmetry creates an instant sense of order and makes even a small entryway look more polished.

    If your doorway is narrow, use one large statement container instead of two.

    A single impressive planter can have more impact than several small pots.

    How to Create It

    Start by making sure your container has drainage holes.

    Use a quality potting mix suitable for containers.

    Place your tallest plant first.

    Then position the mums around it.

    Finally, add smaller plants around the edges.

    Water thoroughly after planting so the root balls settle into the soil.

    Keep the container watered according to your plants’ needs, remembering that containers can dry out faster than garden beds.

    For colder weather, monitor nighttime temperatures and protect or move containers when necessary according to the plants and container materials you are using.

    Why This Idea Works

    This combination gives you almost everything a fall container needs:

    Height + flowers + foliage + seasonal accents.

    It is traditional, welcoming, and easy for beginners.

    2. Elegant Neutral Fall Container With White Mums

    Fall decorating does not have to mean bright orange.

    If your home has a modern, farmhouse, Scandinavian, or neutral exterior, a cream-and-white fall container can look incredibly elegant.

    Start with a large black, charcoal, stone, or natural terracotta planter.

    Use white or cream mums as your primary flower.

    The pale flowers create a beautiful contrast against dark containers.

    Then add foliage in muted green, silver, or dusty tones.

    Silver-leaved plants can create a soft transition between the flowers and the container.

    For additional texture, add ornamental kale or cabbage.

    Their large rosette-shaped leaves provide visual interest even when flowers are not the main focus. Ornamental kale and cabbage are particularly useful in cool-season containers because their foliage can remain attractive as temperatures fall.

    Add a small cream pumpkin at the base.

    You can also place one natural dried branch into the soil for height.

    The goal is to keep the palette restrained.

    Think:

    Cream + white + sage + silver + natural brown.

    This creates an elegant fall display without the traditional bright autumn colors.

    It is particularly beautiful against:

    • White siding
    • Gray stone
    • Dark brick
    • Natural wood
    • Black doors
    • Modern neutral exteriors

    If your porch has several containers, repeat the same palette rather than changing the color scheme for every pot.

    Repetition creates cohesion.

    For example, place a large white-mum container near the door and two smaller matching containers along the steps.

    You could also use cream pumpkins instead of orange ones.

    This gives you an autumn look that feels sophisticated rather than overly seasonal.

    How to Style It

    Use one large white mum as the main focal point.

    Add ornamental cabbage or kale around it.

    Then soften the edge with a trailing plant where appropriate.

    Finish with one or two cream-colored pumpkins.

    Avoid adding too many accessories.

    The beauty of this planter comes from the plants themselves.

    Why This Idea Works

    Neutral fall containers are incredibly versatile.

    They work with many architectural styles and can remain attractive from early fall through the transition toward winter.

    3. Rich Burgundy & Jewel-Tone Porch Planter

    If you want your front porch to feel dramatic and luxurious, use deep autumn colors instead of the traditional orange-and-yellow palette.

    A burgundy container can include:

    • Deep red mums
    • Purple foliage
    • Burgundy ornamental peppers
    • Dark grasses
    • Purple-leaved coral bells
    • Deep-toned pansies

    The result is rich and sophisticated.

    Start with a dark container.

    Black, charcoal, or deep brown works particularly well.

    Add a tall grass or upright foliage as your thriller.

    Then place burgundy mums around the center.

    Add one or two plants with contrasting foliage.

    For example, a deep purple plant beside a red-burgundy mum creates subtle variation without introducing too many colors.

    Then add a few dark red or burgundy ornamental peppers if they are suitable for your climate.

    Ornamental peppers can add unusual color and glossy texture to fall containers. They are among the plants frequently recommended as alternatives or additions to traditional mums.

    Finish the display with a few small pumpkins in cream or muted orange.

    Do not use bright orange if you want a sophisticated appearance.

    Instead, choose muted shades.

    A cream pumpkin against burgundy flowers can look especially beautiful.

    This type of container works wonderfully beside dark doors.

    It also pairs beautifully with brass lanterns.

    Place one warm LED lantern near the planter during evening hours.

    The warm glow will make the burgundy foliage look even richer.

    Color Palette

    A strong palette for this arrangement is:

    Burgundy + plum + deep green + cream + dark brown.

    Another option is:

    Wine red + purple + charcoal + muted orange.

    Why This Idea Works

    Deep colors make a container look luxurious and create a more dramatic curb appeal than traditional bright autumn colors.

    It is particularly attractive for homeowners who want fall decor that feels elegant rather than rustic.

    4. Small Fall Container Garden for Front Steps

    You do not need a large porch to create a beautiful fall container garden.

    A small front step can look just as attractive with one or two compact containers.

    The key is choosing plants that fit the scale of the space.

    A giant planter may make a narrow step feel crowded.

    Instead, use medium-sized pots.

    Choose a simple combination of:

    • One compact mum
    • One ornamental kale
    • Several pansies
    • One trailing plant

    Place the tallest element toward the back.

    The mum provides the main flower color.

    The ornamental kale adds structure.

    Pansies provide small blooms around the base.

    The trailing plant softens the container edge.

    If the step is very narrow, use one container on one side rather than blocking the walkway.

    For wider steps, use two matching containers on opposite sides of the entrance.

    A small pumpkin can sit beside each pot.

    This creates symmetry without consuming much space.

    You can also use a vertical arrangement.

    Place a smaller planter on a sturdy plant stand behind a lower pot.

    This creates the appearance of a larger display without requiring a large floor footprint.

    Another option is to use a narrow rectangular planter box.

    A long window-box-style container can hold several fall plants while remaining relatively narrow.

    This works especially well on:

    • Apartment entrances
    • Townhouse steps
    • Small porches
    • Narrow patios
    • Balcony entrances

    Budget Tip

    You do not need five different plants.

    One mum plus two complementary foliage plants can be enough.

    Instead of buying lots of varieties, focus on making the arrangement look full.

    Why This Idea Works

    Small spaces benefit from simplicity.

    A carefully proportioned planter can make a tiny entrance feel intentionally decorated rather than crowded.

    5. Rustic Wooden Box Fall Container

    For a farmhouse or rustic outdoor space, replace the traditional round planter with a wooden box.

    A weathered wooden crate, window box, or rustic rectangular container can create a completely different appearance.

    Choose plants with contrasting textures.

    For example:

    • Burgundy mums
    • Ornamental cabbage
    • Golden foliage
    • Pansies
    • Trailing greenery

    Because the container is rectangular, you can create a beautiful layered arrangement from back to front.

    Place the tallest plants toward the back.

    Use medium-height flowers in the center.

    Place low or trailing plants toward the front.

    This is essentially the thriller-filler-spiller method adapted to a rectangular container.

    Add a few small gourds between the plants.

    The wooden container itself becomes part of the seasonal decoration.

    Choose natural wood rather than painting it bright orange.

    The combination of natural wood and autumn foliage creates a warm, organic appearance.

    You can place the box:

    • Beside a front door
    • Under a window
    • Along a patio wall
    • Beside outdoor seating
    • On a wide stair landing

    For a more sophisticated version, combine white flowers with burgundy foliage and natural wood.

    For a classic rustic look, use orange mums, golden foliage, and brown gourds.

    Maintenance Tip

    Make sure the container has adequate drainage.

    Wooden planters can retain moisture depending on their construction, so drainage is essential.

    Use a suitable potting mix and avoid leaving the container sitting permanently in standing water.

    Why This Idea Works

    The wooden box gives you both the planter and the decorative container in one piece.

    It feels seasonal without needing additional signs or artificial decorations.

    6. Fall Hanging Basket With Pansies & Trailing Foliage

    If floor space is limited, look upward.

    A hanging basket can provide a beautiful fall garden without taking up porch or patio floor space.

    Start with a basket that is large enough to hold several plants.

    A larger hanging basket generally provides more room for roots and soil and can be easier to maintain than a tiny basket. One current guide recommends baskets around 16โ€“20 inches for fuller fall displays, while also emphasizing appropriate lining and drainage.

    Choose a central upright plant as your thriller.

    Good possibilities depend on your climate and local availability.

    You could use:

    • Ornamental kale
    • Heather
    • Compact grasses
    • Upright foliage

    Then add colorful pansies or violas.

    These become your fillers.

    Finally, add trailing foliage around the edge.

    The spiller creates the graceful shape that makes a hanging basket feel abundant.

    For a classic fall palette, use:

    Purple + yellow + burgundy + green.

    For a softer appearance:

    Cream + lavender + sage + silver.

    For a dramatic look:

    Burgundy + deep purple + charcoal + muted orange.

    Hang the basket near the front door or beside a seating area.

    You can also place two matching hanging baskets on either side of a porch.

    Make sure the hanging hardware is secure and appropriate for the weight of the watered basket.

    Watering Tip

    Hanging baskets can dry out more quickly because they are exposed to air on all sides.

    Check the soil regularly rather than assuming rainfall is enough.

    Why This Idea Works

    Hanging baskets add vertical interest and allow you to create a lush fall display even when your porch has almost no floor space.

    7. Modern Fall Planter With Ornamental Grasses

    If you prefer modern outdoor design, create a fall container around ornamental grasses rather than making mums the main focus.

    Grasses create movement.

    When the wind passes through them, the container feels alive.

    Choose a tall grass as the main architectural element.

    Depending on your climate, ornamental grasses can provide different colors and textures, including green, bronze, burgundy, and golden tones.

    Purple fountain grass is particularly dramatic when paired with autumn colors, although its hardiness varies by region.

    Surround the grass with lower plants.

    You could use:

    • Burgundy mums
    • Ornamental kale
    • Sedum
    • Pansies
    • Heuchera
    • Small ornamental peppers

    Then use one or two small pumpkins outside the container.

    The goal is a clean, modern composition.

    Avoid overcrowding.

    A large black planter with one tall burgundy grass and a few cream flowers can be more attractive than a pot filled with ten different plant varieties.

    This design works especially well with:

    • Modern homes
    • Contemporary porches
    • Minimalist patios
    • Black doors
    • Gray siding
    • Concrete steps

    Use simple containers.

    Matte black, charcoal, concrete-look, or dark gray planters create a sophisticated foundation.

    Add warm outdoor lighting nearby.

    A simple lantern or subtle warm light can make the grass silhouette beautiful after sunset.

    Why This Idea Works

    Modern fall containers rely on shape and texture rather than excessive decoration.

    The movement of grass adds personality without requiring many accessories.

    8. Pollinator-Friendly Fall Container With Asters & Sedum

    If you want your fall container to be beautiful and beneficial to wildlife, consider using plants beyond traditional mums.

    Native asters can be particularly valuable for pollinators, and current gardening guidance highlights them as an alternative to mums for fall displays.

    Asters can provide beautiful flowers in shades such as:

    • Purple
    • Lavender
    • Pink
    • White

    Combine them with sedum for contrasting texture.

    Sedum can provide sturdy foliage and flower heads that remain interesting as the season progresses.

    Add ornamental grasses or another upright plant for height.

    Then finish the container with a few natural elements.

    Instead of plastic Halloween decorations, use:

    • Small pumpkins
    • Pinecones
    • Dried seed heads
    • Natural branches

    This keeps the arrangement attractive while supporting a more natural outdoor aesthetic.

    If you want an even stronger pollinator display, research plants that are native to your specific region.

    Native species can offer ecological benefits that vary significantly by location.

    This is especially important because not every plant sold as a fall favorite is equally useful to local wildlife.

    Design Formula

    Try:

    Tall grass + asters + sedum + natural pumpkin.

    Or:

    Asters + ornamental kale + trailing foliage.

    The combination of flowers and foliage gives the container depth.

    Why This Idea Works

    You get seasonal beauty without relying entirely on traditional fall flowers.

    It is an excellent option for gardeners who want their porch to look beautiful while thinking about pollinators and local ecology.

    9. Symmetrical Twin Planters for the Front Door

    If you want your home entrance to look instantly polished, symmetrical planters are one of the easiest design choices.

    Place one large container on each side of the front door.

    Use matching containers.

    Then use identical or nearly identical plant combinations.

    This could be:

    • Orange mums
    • Ornamental kale
    • Purple grass
    • Pansies

    Or something more elegant:

    • White mums
    • Silver foliage
    • Burgundy kale
    • Cream pumpkins

    The symmetry creates a formal frame around the entrance.

    It works particularly well on:

    • Wide porches
    • Double doors
    • Large entryways
    • Brick homes
    • Colonial-style homes
    • Traditional houses

    If the doorway is already visually busy, keep the planters simple.

    If the doorway is plain, you can make the containers more dramatic.

    A good rule is to repeat colors from the house.

    For example, if your front door is black, use black containers.

    If your exterior has warm brick, use terracotta or dark brown.

    If your home is white, almost any fall palette will work.

    Add Seasonal Accents Carefully

    You can place one small pumpkin at the base of each planter.

    Do not create a pile.

    A pair of pumpkins on each side can be enough.

    You can also add a small lantern.

    But keep the plants as the main focal point.

    Why This Idea Works

    Symmetry creates visual balance and makes the front entrance feel professionally designed.

    It also makes decorating easier because you can repeat the same formula on both sides.

    10. Layered Fall Containers Along the Steps

    If you have several front steps, use them as a natural stage for a layered fall garden.

    Instead of placing identical pots in a straight line, vary their heights and sizes.

    For example:

    Top step: Large planter with tall grass and mums.

    Middle step: Medium planter with kale, pansies, and foliage.

    Lower step: Smaller container with trailing plants.

    Add a few pumpkins between the containers rather than placing them all together.

    This creates a flowing arrangement.

    You can repeat one main color throughout.

    For example:

    • Burgundy mums
    • Cream pumpkins
    • Purple kale
    • Green foliage

    The repeated colors make the entire staircase feel connected.

    You can also use different containers while keeping the plants within the same palette.

    Try:

    • One large black urn
    • One galvanized metal planter
    • One terracotta pot
    • One wooden box

    The plants become the visual connection.

    This approach is especially useful when you want your porch to look abundant without buying dozens of decorative objects.

    Safety Matters

    Do not allow containers to block the walking path.

    Keep stairs clear and make sure pots are stable.

    Avoid placing lightweight containers where strong wind could knock them over.

    If you use electrical lighting, make sure outdoor-rated equipment is used appropriately.

    Why This Idea Works

    The steps naturally create different levels, allowing you to build a layered garden without installing anything permanent.

    How to Choose the Right Container for Fall

    The container itself is part of the design.

    A beautiful plant combination can still look wrong if the pot is too small or visually incompatible with the house.

    For fall, popular choices include:

    • Terracotta
    • Ceramic
    • Stone-look containers
    • Fiberglass
    • Resin
    • Metal
    • Wooden boxes

    If your container will remain outdoors through freezing weather, choose a material appropriate for your climate.

    Drainage is essential.

    A container without adequate drainage can leave roots sitting in excess water and can also create problems when temperatures fall.

    One current fall planter guide recommends using containers with drainage holes and choosing materials that can handle outdoor temperature changes.

    The Best Fall Container Plant Combinations

    You do not need to use every fall plant in one pot.

    Instead, choose combinations with different heights and textures.

    Classic

    Mums + ornamental kale + pansies + pumpkin

    Elegant

    White mums + silver foliage + ornamental cabbage + cream pumpkin

    Rustic

    Orange mums + grasses + pansies + gourds

    Dramatic

    Burgundy mums + purple grass + dark foliage + cream pumpkin

    Pollinator-Friendly

    Asters + sedum + ornamental grass + natural branches

    Modern

    Tall grass + one strong flowering plant + simple foliage + one pumpkin

    The best combination depends on your local climate, sunlight, and expected frost.

    Use the Thriller, Filler & Spiller Method

    The thriller-filler-spiller method is one of the easiest ways to design a professional-looking container.

    Thriller

    This is your tallest plant.

    Examples include:

    • Ornamental grass
    • Upright kale
    • Heather
    • Tall foliage

    Filler

    This creates volume.

    Examples include:

    • Mums
    • Pansies
    • Asters
    • Ornamental cabbage
    • Coral bells

    Spiller

    This grows over the edge.

    Examples can include:

    • Trailing foliage
    • Creeping plants
    • Trailing pansies or violas where suitable

    This formula creates visual movement from top to bottom.

    Instead of seeing a flat collection of plants, your eye travels through the entire arrangement.

    How to Care for Fall Containers

    Fall containers may require less frequent watering than summer containers because temperatures are cooler, but they still need regular attention.

    Check the soil rather than watering automatically.

    If the top layer feels dry and the plants require moisture, water thoroughly.

    Make sure excess water can drain away.

    Deadheading flowers can encourage continued blooming for some plants.

    Remove damaged foliage as needed.

    If temperatures are expected to fall significantly below what your plants can tolerate, consider moving containers to a protected location.

    This is especially important for plants that are only lightly frost tolerant.

    Some fall plants tolerate cool temperatures very well, while others are damaged by freezing temperatures. Your local climate and the exact plant variety matter.

    How to Make Fall Containers Look Expensive

    You do not need expensive planters or dozens of plants.

    Instead, focus on composition.

    Choose one strong color palette.

    Repeat it across your containers.

    Use different textures.

    Combine:

    • Smooth ceramic
    • Rough wood
    • Soft foliage
    • Spiky grass
    • Round pumpkins
    • Small flowers

    This creates visual richness without requiring many different items.

    Natural materials can also make seasonal displays feel more sophisticated. Current design advice increasingly favors real plants, natural textures, heirloom-style pumpkins, lanterns, and curated arrangements over excessive novelty decorations.

    Another trick is to use fewer but larger containers.

    One large planter often looks more intentional than six tiny pots scattered randomly.

    If you want a budget-friendly display, reuse your existing summer containers.

    Remove plants that are finished, refresh the soil where appropriate, and introduce fall plants.

    This can dramatically reduce the cost of seasonal gardening.

    You can also reuse decorative elements from previous years.

    A pumpkin does not need to be placed inside the planter.

    Sometimes putting it beside the container creates a much better composition.

    Final Thoughts

    Fall container gardening is one of the easiest ways to transform a front porch, patio, or set of steps for the season.

    You do not need a large garden.

    You do not need expensive landscaping.

    And you do not have to fill every available space with decorations.

    Start with the container.

    Choose plants that suit your climate and light conditions.

    Build your arrangement around height, fullness, and trailing texture.

    Then introduce a few seasonal details such as pumpkins, gourds, lanterns, or natural branches.

    Mums remain a classic choice, but fall offers a much wider range of possibilities. Pansies, ornamental kale, ornamental cabbage, asters, sedums, grasses, coral bells, and other cool-season plants can create displays with more texture and longer seasonal interest.

    For a classic porch, choose mums, pumpkins, and ornamental grasses.

    For an elegant entrance, try white flowers, silver foliage, and cream pumpkins.

    For a dramatic display, use burgundy, purple, and deep green.

    For a small step, keep the container compact and let the plants do the work.

    For a large porch, use matching containers or layered groups to create a stronger focal point.

    And if you want your fall garden to do more than simply look beautiful, consider incorporating native asters and other plants that can support local pollinators.

    The most successful fall container gardens feel intentional.

    They use seasonal color without becoming overwhelming.

    They combine plants with different shapes and textures.

    They make the entrance feel warm and welcoming.

    And most importantly, they allow you to enjoy the beauty of autumn even if your outdoor space is only a few steps, a tiny patio, or a small front porch.

    With the right container, a thoughtful plant combination, and a few simple seasonal accents, every outdoor space can have its own beautiful little fall garden.


  • Small Pantry Organization Ideas to Maximize Every Inch of Space

    Small Pantry Organization Ideas to Maximize Every Inch of Space

    A small pantry can be one of the hardest spaces in the kitchen to keep organized. There may be plenty of food, but somehow there never seems to be enough room for everything. Cereal boxes become stacked towers, cans disappear behind bags, spices get pushed into dark corners, and items you know you bought seem to vanish completely.

    The good news is that you do not need a huge walk-in pantry to create an organized and functional storage space. The secret is to stop thinking only about the floor area and start thinking about every available inch of height, depth, door space, corners, and shelf space.

    A well-organized small pantry should make everyday life easier. You should be able to see what you have, quickly grab what you need, and return items to their proper place without having to reorganize the entire pantry every time you shop.

    Before buying containers, baskets, or expensive storage systems, start by measuring the pantry and removing unnecessary items. Professional organizing advice consistently recommends decluttering first because adding more organizers to an overcrowded pantry can simply create another layer of clutter.

    The following 10 small pantry organization ideas will help you maximize every inch while creating a pantry that looks clean, attractive, and easy to maintain.

    1. Use Adjustable Shelving to Maximize Vertical Space

    One of the biggest problems in a small pantry is wasted vertical space.

    Many pantry shelves are installed with large gaps between them. This may look spacious at first, but it often means that several inches of usable space are sitting completely empty above your food containers.

    Adjustable shelving is one of the most effective ways to solve this problem.

    Instead of having one shelf with cereal boxes standing underneath a huge empty gap, you can add another shelf or adjust the existing shelves so that each level matches the height of the items you actually store.

    Start by measuring the height of your pantry from floor to ceiling.

    Then measure the height of your most frequently stored items.

    Think about:

    • Cereal boxes
    • Pasta containers
    • Canned goods
    • Snack bags
    • Baking supplies
    • Jars
    • Bottles
    • Small appliances
    • Food storage containers

    The goal is not to make every shelf exactly the same height.

    Instead, create different shelf heights based on the categories you need to store.

    For example, cereal boxes might need a taller section while canned goods can use a much shorter space. Baking containers may require medium-height shelves, while small snack bins can fit into compact spaces.

    This allows you to use vertical space instead of leaving large empty gaps.

    If your pantry has a very high ceiling, reserve the highest shelves for items you rarely use. Holiday baking supplies, specialty serving pieces, extra paper products, and occasional appliances can live higher up.

    Everyday foods should remain between approximately waist and eye level so they are easy to reach.

    If you cannot install permanent shelving, freestanding shelf risers can provide a similar effect. These small platforms allow you to create a second level inside an existing shelf.

    For example, instead of placing cans in one flat row, place a riser toward the back. You can then put smaller cans underneath or in front while still keeping labels visible.

    The same approach works for jars, sauces, spices, and small containers.

    Another clever option is a narrow rolling cart if you have unused vertical space beside or near the pantry. A slim cart can hold oils, sauces, baking supplies, or snacks while remaining easy to move.

    The important thing is to think vertically.

    A small pantry may not have much floor space, but it often has far more vertical storage potential than you realize.

    Budget tip: Before purchasing an expensive custom shelving system, try inexpensive shelf risers or adjustable organizers. They can dramatically increase usable space without remodeling.

    Best for: Narrow closets, reach-in pantries, cabinet pantries, and kitchens with tall unused shelves.

    2. Create Dedicated Pantry Zones

    One of the simplest ways to make a small pantry feel larger is to stop treating it as one giant storage area.

    Instead, divide it into clear zones.

    A zone is simply a designated area for a particular category of food or kitchen supplies.

    For example, you could create:

    • Breakfast zone
    • Baking zone
    • Snack zone
    • Pasta and grains zone
    • Canned food zone
    • Cooking essentials zone
    • Beverage zone
    • Backstock zone

    The exact categories should depend on your household.

    If your family eats cereal and oatmeal every morning, the breakfast zone should be easy to reach.

    If you bake frequently, flour, sugar, baking powder, chocolate chips, and decorating supplies should live together.

    The goal is to organize the pantry around how you actually use your kitchen, rather than simply arranging objects according to their shape.

    Place frequently used items at eye level.

    Less frequently used products can go on higher or lower shelves.

    Heavy items should generally be stored lower and securely, while lightweight items can be placed higher.

    This approach also makes grocery shopping easier.

    When similar products are grouped together, you can quickly see what you already have.

    For example, if all your pasta is stored in one clear bin, you can immediately see whether you need spaghetti or penne before buying another package.

    Without zones, pantry items often migrate into empty spaces.

    A half-used bag of rice gets placed beside cereal because there happens to be room. A box of crackers gets pushed behind the flour. A can of tomatoes ends up on the snack shelf.

    Over time, the pantry becomes difficult to understand.

    Zones prevent this.

    You can even label each shelf.

    Simple labels such as Breakfast, Snacks, Baking, Pasta, and Cans are enough.

    You do not need elaborate labels on every individual item.

    The most important thing is that everyone in the household knows where things belong.

    This is especially helpful for children. A clearly labeled snack bin can allow them to choose snacks without opening every pantry door and moving everything around.

    A zone system also makes restocking easier.

    When you return from grocery shopping, you do not have to search for where everything belongs. You already have a designated location.

    Recent pantry organization advice similarly recommends organizing around routines and categories rather than simply filling containers for visual appeal.

    Budget tip: Use inexpensive baskets, cardboard boxes covered with decorative paper, or existing containers as temporary zone bins.

    Best for: Families, busy kitchens, small closets, and pantries that frequently become messy after grocery shopping.

    3. Turn the Pantry Door Into Extra Storage

    The pantry door is often one of the most overlooked storage opportunities in a small kitchen.

    Think of the inside of the door as an extra wall.

    You can use it for lightweight items that would otherwise consume valuable shelf space.

    An over-the-door organizer can hold:

    • Spices
    • Snack packets
    • Sauce packets
    • Small baking supplies
    • Foil
    • Plastic wrap
    • Sandwich bags
    • Measuring tools
    • Small jars
    • Tea
    • Coffee accessories

    The key is to choose items that are relatively lightweight and frequently used.

    Before installing anything, measure the door and check how much clearance exists between the door and the pantry shelves.

    This is extremely important.

    An organizer that is too deep may prevent the door from closing or cause stored items to collide with the shelves.

    Choose a narrow organizer for a small pantry.

    Tiered baskets are particularly useful because they allow you to see the contents instead of creating another hidden storage layer.

    You can also use small adhesive hooks on the inside of the door for lightweight items such as measuring spoons or reusable shopping bags, provided the surface and product are suitable for the load.

    For a more permanent solution, a slim wall-mounted rack can provide even more storage.

    If your pantry door has a flat interior surface, you could also create a simple magnetic storage area for small metal items.

    Another inexpensive idea is to use a hanging pocket organizer.

    These organizers are usually associated with bedrooms or closets, but the smaller pockets can work well for lightweight pantry supplies.

    The advantage of door storage is that it adds capacity without taking away shelf space.

    This makes it particularly valuable in extremely narrow pantries.

    However, avoid turning the door into a second cluttered pantry.

    Keep the contents limited to items that benefit from quick access.

    The door should support your organization system rather than become another dumping zone.

    Budget tip: Look for inexpensive over-the-door shoe organizers or narrow hanging organizers that can be repurposed for lightweight pantry items.

    Best for: Narrow pantries, apartment kitchens, cabinet pantries, and renters who cannot remodel.

    4. Use Clear Stackable Containers for Dry Goods

    Packaging can take up more space than the food inside it.

    Large cereal boxes, floppy bags, half-empty pasta packages, and irregular flour bags can create a surprising amount of wasted space.

    Clear containers can solve several problems at once.

    They make the contents visible, allow you to stack similar items, and create more consistent shapes.

    Good candidates for containers include:

    • Rice
    • Pasta
    • Flour
    • Sugar
    • Oats
    • Cereal
    • Lentils
    • Beans
    • Crackers
    • Baking ingredients

    However, you do not need to transfer every food item into a container.

    Selective decanting is often more practical.

    Focus on foods that you purchase regularly and that benefit from being stored in uniform containers.

    For example, if your pantry contains several types of pasta, matching containers can make the shelf much easier to navigate.

    Choose containers based on your pantry dimensions.

    This is extremely important.

    Do not buy a large container set first and then try to force it into your pantry.

    Measure the shelf width, depth, and vertical clearance first.

    The outside dimensions of the container matter more than its advertised capacity.

    Stackable rectangular containers are often more efficient than round ones because they use shelf space with fewer gaps.

    Clear containers also make it easier to monitor quantities.

    When you can see that your rice container is nearly empty, you know it is time to add rice to the shopping list.

    But remember to preserve important food information.

    If you transfer food out of its original packaging, keep relevant cooking, allergy, ingredient, lot, and date information available. Label the container clearly and follow appropriate storage instructions for the particular food.

    For long-term dry goods, use clean, dry, food-safe containers with appropriate seals.

    Do not pour new food into a container without checking what remains at the bottom.

    Use the older food first and clean the container as needed before refilling.

    This simple habit keeps your storage system more hygienic and prevents old food from getting forgotten.

    Budget tip: You do not need a matching designer container set. Start with three or four high-use foods and expand gradually.

    Best for: Dry goods, narrow shelves, families who buy pantry staples regularly, and anyone who wants better visibility.

    5. Add Tiered Risers for Cans and Jars

    Cans are some of the easiest pantry items to organize badly.

    Because cans are short, they often get pushed toward the back of deep shelves where they become almost impossible to see.

    A tiered shelf riser changes this.

    Instead of placing cans in one flat row, the riser creates multiple levels.

    This allows the labels of the cans behind to remain visible.

    For example, a three-level riser can display:

    • Tomato products
    • Beans
    • Soups
    • Vegetables
    • Coconut milk
    • Tuna
    • Sauces

    The most frequently used cans should be placed at the easiest-to-reach level.

    Heavier canned goods can go on lower shelves.

    You can also create a dedicated canned-food zone.

    Group similar items together rather than mixing every type of can.

    For example, place tomatoes together, beans together, and soups together.

    This reduces visual clutter.

    Another useful strategy is to rotate your stock.

    When you buy new cans, place them behind older cans rather than in front.

    This helps you use older products first.

    A small pantry can also benefit from narrow can dispensers if you purchase large quantities of canned food.

    However, measure carefully before buying one.

    A large organizer can actually waste space if your pantry is narrow.

    Sometimes two small risers are more useful than one large unit.

    You can also use a tiered riser for jars of spices, sauces, and spreads.

    If you have deep shelves, consider combining a riser with a pull-out bin.

    The riser keeps the labels visible while the bin allows you to remove the entire group when needed.

    This is particularly useful when you have many small jars.

    Budget tip: Simple acrylic, wire, or bamboo shelf risers can create multiple levels without changing the shelving itself.

    Best for: Cans, jars, sauces, spices, and small pantry products.

    6. Make Deep Shelves Easier With Pull-Out Bins and Baskets

    Deep shelves can create some of the biggest organization problems in a small pantry.

    The front looks organized while the back becomes a hidden storage area.

    You might know something is there, but reaching it requires moving five other things first.

    Pull-out bins solve this problem.

    Instead of reaching into the back of the shelf, you pull the entire bin toward you.

    This turns a deep shelf into an accessible drawer.

    Use one bin for each category.

    For example:

    Bin 1: Snacks

    Bin 2: Baking supplies

    Bin 3: Pasta

    Bin 4: Breakfast foods

    Bin 5: Backstock

    This system works especially well for small bags and packages that are difficult to stack neatly.

    Choose bins with handles or an open front so you can easily pull them forward.

    Do not make the bins too heavy.

    If a container becomes difficult to lift or slide, you are less likely to use the system correctly.

    Another option is a pull-out drawer system installed directly into the pantry.

    This can be particularly effective for deep cabinet-style pantries.

    Pull-out systems are increasingly recommended for deep kitchen storage because they prevent items from becoming buried at the back.

    For a budget version, use inexpensive baskets or plastic bins that fit the shelf width.

    Label each one clearly.

    If you have a very deep shelf, you can use one bin toward the back for backstock and keep daily-use products toward the front.

    The important thing is to avoid creating two completely unorganized rows.

    Every part of the shelf should have a purpose.

    If something is rarely used, it can occupy the back.

    If something is used every day, keep it at the front.

    Budget tip: Before buying expensive pull-out hardware, test the system with inexpensive baskets. If it works well for your routine, consider upgrading later.

    Best for: Deep pantry shelves, cabinet pantries, snack storage, and backstock.

    7. Use Lazy Susans for Awkward Corners

    Corners are often the most frustrating part of a small pantry.

    Bottles disappear behind one another. Small jars become impossible to reach. You may end up removing half the shelf just to grab one item.

    A lazy Susan can make these areas much easier to use.

    Because it rotates, you can bring the item you need toward you instead of reaching behind everything.

    Lazy Susans are especially useful for:

    • Oils
    • Vinegar
    • Sauces
    • Condiments
    • Small jars
    • Spreads
    • Baking extracts
    • Drink syrups

    However, they are not ideal for every pantry.

    A round turntable placed on a narrow rectangular shelf can actually waste valuable corner space.

    Measure the shelf before purchasing one.

    Choose the smallest size that comfortably fits the products you want to store.

    You can also use separate turntables for different categories.

    For example, one could hold sauces while another holds baking supplies.

    Avoid putting too many unrelated products on one spinner.

    If the turntable contains oils, spices, jars, and cans all together, it becomes difficult to understand.

    Instead, give each rotating tray one clear purpose.

    You can label the tray itself or the shelf area around it.

    For tall bottles, choose a turntable with a raised edge.

    This helps prevent bottles from sliding off when the unit rotates.

    Lazy Susans can also be helpful on upper shelves where reaching the back is difficult.

    But always make sure the shelf is strong enough for the weight of the products.

    Budget tip: You only need one or two turntables to transform difficult areas. Do not buy one for every shelf.

    Best for: Corners, deep shelves, bottles, sauces, and small jars.

    8. Create a Dedicated Snack Station

    If snacks are one of the main reasons your pantry becomes messy, give them their own zone.

    A snack station can save an enormous amount of space because individual packages no longer need to be scattered throughout the pantry.

    Choose one shelf or pull-out bin.

    Place commonly eaten snacks together.

    For example:

    • Granola bars
    • Crackers
    • Popcorn
    • Cookies
    • Nuts
    • Fruit snacks
    • Small packets
    • Lunchbox snacks

    Use one or two open bins rather than many small containers.

    An open-front basket allows family members to see what is available without pulling everything out.

    For children, place the snack bin at a reachable height.

    This allows them to choose from one designated location rather than searching through the entire pantry.

    You can label it simply:

    Snacks

    or divide it into:

    Everyday Snacks

    and

    Lunchbox Snacks

    The exact system should match your household.

    A snack station also makes grocery shopping easier.

    You can see when the bin is becoming empty and know what needs to be replenished.

    If you buy large multipacks, separate only what you need for immediate use and keep the remaining stock in a designated backstock area.

    This prevents your daily-use shelf from becoming overloaded.

    For a visually appealing pantry, choose one consistent basket style.

    Natural woven baskets can create a warm look, while clear bins provide maximum visibility.

    White bins create a clean minimalist appearance.

    You do not need to spend a lot.

    Even inexpensive plastic bins can look attractive when they are arranged consistently and labeled neatly.

    Budget tip: Repurpose sturdy shoe boxes or small cardboard boxes by covering them with neutral paper or contact paper.

    Best for: Families with children, lunchbox preparation, snack-heavy households, and busy kitchens.

    9. Use the Floor and Lowest Shelves for Heavy or Bulky Items

    The floor of a pantry is often treated as wasted space.

    But with the right system, it can become one of the most useful storage zones.

    The key is not to simply place random bags and boxes on the floor.

    Instead, create a specific purpose for the lowest area.

    Good floor-level storage items include:

    • Bulk rice
    • Large flour bags
    • Bottled drinks
    • Extra paper products
    • Large cooking appliances
    • Refill packages
    • Pet food, if stored appropriately
    • Large storage containers

    Use a sturdy basket, rolling cart, or low bin to keep these products contained.

    A rolling cart can be particularly useful in a narrow pantry.

    You can pull it forward when needed and push it back when finished.

    For a very small pantry, choose a slim cart that fits the available clearance.

    If you have children, avoid placing heavy items where they could fall or become difficult to handle.

    Use the lowest shelves for products that are heavy but frequently needed.

    For example, a large bag of rice may be safer and easier to access from a lower shelf than from an overhead shelf.

    You can also use the floor for a small step stool, provided there is enough clearance.

    A folding step stool can help you safely access upper shelves without taking up too much space.

    Another useful strategy is to reserve the very top shelf for rarely used items and the bottom area for heavy items.

    This creates a logical weight distribution.

    Do not stack extremely heavy objects high simply because there is room.

    Your organization system should improve accessibility and safety, not just increase capacity.

    Budget tip: A simple sturdy basket can turn an unattractive floor pile into a clean storage zone.

    Best for: Bulk purchases, large packages, appliances, drinks, and heavy pantry items.

    10. Build a Simple System That Stays Organized

    The final and perhaps most important small pantry organization idea is to create a system you can actually maintain.

    A pantry can look perfect immediately after organizing day.

    The real challenge is keeping it organized two weeks later.

    The solution is to make your system simple enough that putting something away takes only a few seconds.

    Every item should have a clear home.

    When you return from grocery shopping, do not simply place new items wherever there is an empty space.

    Instead, rotate older products forward and place newer products behind them.

    This is often called a first-in, first-out approach.

    It helps you use older items before newer ones and makes it easier to see what you already have.

    Do a quick pantry reset once a week.

    You do not need to remove everything.

    Simply:

    • Return misplaced items
    • Combine duplicate open packages when appropriate
    • Move older products forward
    • Check low-stock items
    • Wipe obvious spills
    • Straighten bins
    • Remove empty packaging

    This may take only five to ten minutes.

    You can also keep a small shopping list or inventory note near the pantry.

    When something runs low, add it immediately.

    This helps prevent accidental duplicate purchases.

    Overbuying is one of the reasons pantries become overcrowded. Current organizing experts specifically recommend reducing unnecessary stockpiling and keeping track of what you already have.

    Another important rule is to avoid buying storage containers simply because they look beautiful.

    First determine what problem you are solving.

    Do you need visibility?

    Choose clear containers.

    Do you need accessibility?

    Choose pull-out bins.

    Do you need more vertical space?

    Choose shelf risers.

    Do you need corner access?

    Choose a turntable.

    Do you need category separation?

    Choose baskets or bins.

    The storage solution should follow the problem.

    This prevents you from spending money on organizers that ultimately make the pantry less functional.

    Finally, remember that your pantry does not have to look exactly like a professional organizing photograph.

    It needs to work for your household.

    If open bins work better than perfectly matching containers, use open bins.

    If original packaging is easier for you, keep it.

    If labels are helpful, label.

    If labels become another chore, keep the system simpler.

    The best pantry is not the one that looks perfect for one photograph.

    It is the one that remains easy to use every day.

    How to Organize a Small Pantry From Scratch

    If your pantry is currently overflowing, do not try to reorganize it shelf by shelf while everything remains inside.

    Start completely fresh.

    Remove everything.

    Place food on a nearby table, counter, or clean surface.

    Then divide everything into broad categories.

    You might have:

    Breakfast

    Snacks

    Baking

    Canned goods

    Pasta and grains

    Cooking ingredients

    Drinks

    Backstock

    Miscellaneous

    Now check what you actually have.

    Remove empty packages and deal appropriately with food that is expired or no longer usable.

    For unopened food that you know you will not use, consider donating it where appropriate.

    Then clean the shelves.

    This is the perfect time to measure.

    Record:

    • Shelf width
    • Shelf depth
    • Shelf height
    • Door clearance
    • Corner dimensions
    • Floor clearance

    Take photographs of the empty pantry before shopping for organizers.

    This gives you a visual reference when comparing products.

    Only after measuring should you purchase storage accessories.

    This approach prevents one of the most common organization mistakes: buying containers first and discovering later that they do not fit.

    The Best Small Pantry Layout for Maximum Efficiency

    A practical small pantry can be divided vertically.

    Eye-Level Zone

    Use this area for everyday items.

    Examples include:

    • Cereal
    • Coffee
    • Snacks
    • Pasta
    • Frequently used ingredients

    These should be the easiest things to reach.

    Lower Zone

    Use lower shelves for heavier products.

    Examples:

    • Cans
    • Large jars
    • Rice
    • Flour
    • Bulk packages

    Upper Zone

    Reserve the highest shelves for occasional items.

    Examples:

    • Holiday baking supplies
    • Specialty ingredients
    • Extra serving pieces
    • Rarely used appliances

    Door Zone

    Use the door for small lightweight products.

    Examples:

    • Spices
    • Wraps
    • Snack packets
    • Small jars
    • Measuring tools

    Floor Zone

    Use the floor for large or heavy products that need stability.

    This layout creates a natural flow and prevents you from placing everyday items in inconvenient locations.

    Small Pantry Organization Mistakes to Avoid

    One of the biggest mistakes is trying to fit too much into the pantry.

    More storage does not automatically mean better organization.

    If you own more food than the pantry can comfortably hold, adding another basket may only hide the problem.

    Another mistake is purchasing oversized containers.

    Large containers can look beautiful but may consume more space than the original packaging.

    Always consider the actual footprint.

    Another common mistake is putting frequently used items on high shelves.

    If you use something every morning, it should not require a step stool.

    Avoid creating deep rows of food without a way to access the back.

    If you cannot see or reach something, it is effectively wasted storage.

    Do not overuse turntables either.

    They are useful for certain shapes and locations but can waste space on narrow rectangular shelves.

    Finally, avoid organizing purely for appearance.

    Your pantry should be beautiful, but functionality comes first.

    How to Make a Small Pantry Look Beautiful

    A functional pantry can also be attractive.

    You do not need a luxury renovation.

    Start by choosing one simple visual direction.

    For example:

    Warm and Natural:
    Wood, woven baskets, cream labels, glass containers, warm lighting.

    Modern Minimalist:
    Clear containers, white bins, black labels, simple shelving.

    Soft Neutral:
    Cream baskets, light wood, glass jars, beige labels.

    Modern Farmhouse:
    Wooden crates, woven baskets, black labels, glass jars.

    Keep the visual system consistent.

    If you use clear containers, use them selectively and keep labels consistent.

    If you use baskets, choose similar colors or materials.

    Add lighting if the pantry is dark.

    Rechargeable LED shelf lights can make a huge difference because they illuminate areas that are otherwise difficult to see.

    Good lighting is especially valuable in small pantries because it makes every shelf more usable. Current pantry design advice also highlights integrated or rechargeable lighting as a practical upgrade for darker storage areas.

    Final Thoughts

    A small pantry does not have to feel cramped, chaotic, or impossible to maintain.

    The key is to stop thinking only about the amount of shelf space you have and start looking at the unused vertical, door, corner, depth, and floor space.

    Adjustable shelving can capture vertical space.

    Labeled zones can make the pantry easier to understand.

    Door organizers can create an extra storage surface.

    Clear containers can make dry goods easier to see.

    Tiered risers can make cans visible.

    Pull-out bins can solve deep-shelf problems.

    Lazy Susans can make awkward corners accessible.

    Snack stations can control small packages.

    Lower shelves and floor bins can handle bulky products.

    And a simple weekly reset can keep the entire system working.

    Most importantly, you do not need to buy everything at once.

    Start with the biggest problem in your pantry.

    If cans are impossible to see, add a riser.

    If snacks are taking over, create a snack bin.

    If the back of the shelf is disappearing, use pull-out baskets.

    If vertical space is wasted, add a shelf riser.

    If the door is empty, turn it into storage.

    Small changes can create a surprisingly large improvement.

    The goal is not simply to make your pantry look organized.

    The goal is to make every inch work harder while making everyday cooking, grocery shopping, and meal preparation easier.

    With the right layout and a few thoughtful storage solutions, even the smallest pantry can become a clean, efficient, attractive part of your kitchen.


  • Spooky but Elegant Halloween Home Decor Ideas on a Budget

    Spooky but Elegant Halloween Home Decor Ideas on a Budget

    Halloween decorating does not have to mean filling your home with bright orange plastic pumpkins, oversized skeletons, or decorations that look like they came straight from a party store. If you love a beautiful, sophisticated interior, you can create a Halloween atmosphere that feels mysterious and spooky while still looking warm, stylish, and inviting.

    The secret is to decorate with mood instead of clutter. Think soft candlelight, charcoal black, warm brass, cream, deep burgundy, muted rust, dark wood, dried branches, vintage-inspired accessories, and a few carefully selected Halloween details. Current 2026 decorating trends are also moving toward this more refined approach, with velvet pumpkins, dark florals, black taper candles, amber glass, and moody natural colors replacing excessive novelty decorations.

    The best part is that you do not need a large budget to achieve this look. A few inexpensive materials, some pieces you already own, and a little creative styling can completely transform your living room, entryway, dining area, bedroom, or fireplace.

    Below are 10 spooky but elegant Halloween home decor ideas on a budget that can help you create a Pinterest-worthy home without spending a fortune.

    1. Create a Moody Black and Brass Candle Display

    One of the easiest ways to make Halloween decor feel elegant is to focus on lighting rather than buying lots of themed decorations.

    A beautiful collection of black candles immediately creates a mysterious Halloween atmosphere. Instead of placing one candle randomly on a table, create a layered candle display using different heights, shapes, and holders.

    Start with a simple tray, wooden board, thrifted serving plate, or even a decorative plate you already have. Add three to seven candleholders in different heights. Black taper candles work especially well, but cream, burgundy, dark brown, and charcoal candles can also create a sophisticated look.

    If you do not already own candleholders, look around thrift stores or discount shops for inexpensive brass, gold, bronze, or black holders. They do not have to match perfectly. In fact, slightly different vintage-style holders can make the arrangement feel more collected and expensive.

    Place the candle display on a coffee table, console table, fireplace mantel, dining table, or entryway.

    For a more dramatic effect, add a small black vase filled with dried branches beside the candles. The branches create height while the candlelight creates warmth and shadows.

    If you have children or pets, use flameless LED candles instead of open flames. Warm flickering LED candles can provide a similar atmosphere while being safer for busy households.

    The color combination is important. Instead of using bright Halloween orange, combine:

    • Matte black
    • Warm brass
    • Cream
    • Deep burgundy
    • Dark brown
    • Muted rust

    This restrained palette makes inexpensive pieces look much more sophisticated.

    You can also place a few old books underneath one or two candleholders to create different heights. Wrap a thin black ribbon around the books for a subtle seasonal detail.

    The goal is not to cover the entire table. Leave plenty of empty space around the arrangement.

    Budget tip: You can create this entire display using thrifted candleholders, inexpensive candles, an old tray, and books you already own.

    Why it works: Candlelight creates the spooky atmosphere without requiring obvious Halloween decorations. It feels mysterious, warm, romantic, and sophisticated at the same time.

    2. Style a Small Group of Elegant Pumpkins

    Pumpkins are one of the easiest ways to introduce Halloween into your home, but the styling makes all the difference.

    Instead of buying a large collection of brightly colored pumpkins, choose just three to five pumpkins in sophisticated colors.

    Try:

    • Cream
    • Matte black
    • Burnt orange
    • Terracotta
    • Burgundy
    • Dark green
    • Warm beige

    Muted pumpkin colors are especially useful because they can transition from Halloween into the rest of autumn without making your home feel overly themed. Designers and current fall decorating coverage increasingly favor earthy, natural colors instead of overly bright seasonal shades.

    You do not even need expensive decorative pumpkins. Visit a discount store, dollar store, craft shop, or thrift store and look for inexpensive pieces that can be painted.

    A $2 or $3 orange pumpkin can become much more elegant with a coat of matte black, cream, taupe, or muted terracotta paint.

    For an especially luxurious look, paint several pumpkins in the same color but use different finishes. For example, combine:

    • One matte black pumpkin
    • One satin black pumpkin
    • One cream pumpkin
    • One small brass-colored pumpkin

    Place them together on a coffee table, mantel, entryway console, bookshelf, or dining table.

    To make the arrangement more sophisticated, add one natural element such as dried eucalyptus, wheat, bare branches, or dried flowers.

    You can also place the pumpkins on top of a wooden tray or stack one or two on a pile of neutral books.

    Avoid scattering tiny pumpkins throughout the entire room. One carefully styled group will usually have more visual impact.

    For a spooky touch, add a tiny black raven figurine, antique-style key, dark candle, or small skull next to the pumpkins.

    The trick is to keep the Halloween detail subtle.

    Budget tip: Paint inexpensive pumpkins rather than buying designer versions. Matte spray paint or craft paint can completely change their appearance.

    Why it works: A small group of carefully coordinated pumpkins gives you seasonal impact without making your home feel crowded.

    3. Turn a Thrifted Vase Into a Spooky Floral Arrangement

    Flowers do not have to be colorful and cheerful during Halloween.

    Dark, dried, and sculptural branches can create a dramatic centerpiece for very little money.

    Start with a vase you already own. If you do not have one, look for an inexpensive ceramic vase at a discount store or thrift shop. Black, cream, brown, smoked glass, and antique-looking finishes work especially well.

    Fill the vase with:

    • Dried branches
    • Dried grasses
    • Wheat
    • Pampas stems
    • Dark artificial flowers
    • Bare twigs
    • Dried seed pods

    For a more Halloween-specific appearance, choose branches with an unusual silhouette. Tall, twisting branches can create beautiful shadows against a wall.

    You can also spray-paint inexpensive branches matte black.

    Place the arrangement on an entryway console or dining table.

    For a more dramatic Halloween look, add two or three small black bats around the branches. Keep them limited. A few tiny silhouettes will look much more elegant than covering the entire wall.

    Another option is to add a black ribbon around the vase.

    If your vase is plain, place it on a small wooden tray with a candle and one cream pumpkin.

    The result becomes a complete vignette:

    Tall branches + vase + candle + pumpkin.

    This simple formula can make an inexpensive display feel professionally styled.

    Dried botanicals are especially useful because they do not need to be thrown away after Halloween. Natural textures and dried plants are also currently being favored for more sophisticated fall decorating.

    For an even cheaper version, collect suitable fallen branches from your own outdoor space where appropriate, clean them thoroughly, and let them dry before styling.

    Budget tip: Use branches instead of expensive floral arrangements. The branches provide height, drama, and texture for almost no cost.

    Why it works: The arrangement feels slightly gothic without becoming childish or overly themed.

    4. Make an Elegant Halloween Mantel With Five Pieces

    If you have a fireplace, the mantel is one of the best places to create a dramatic Halloween focal point.

    But you do not need a giant Halloween garland covering every inch of the mantel.

    Instead, try a simple five-piece formula.

    Use:

    1. One dark mirror or framed artwork
    2. Two candleholders
    3. One pumpkin
    4. One vase or branch arrangement
    5. One small Halloween accent

    Start with a large mirror or piece of artwork in the center.

    A black frame works beautifully, but you can also use an existing gold, brass, wood, or vintage frame.

    Place two candleholders on either side.

    Use slightly different heights to create visual interest.

    Add one elegant pumpkin near the center or side.

    Then introduce a natural element such as dried branches or dark flowers.

    Finally, add one small Halloween accent. This could be:

    • A small skull
    • A raven
    • A black cat
    • A vintage-style Halloween sign
    • A small antique-looking book
    • A miniature haunted house

    Do not add all of them.

    The beauty comes from restraint.

    If you do not have a fireplace, use the same arrangement on:

    • A floating shelf
    • Bookshelf
    • Console table
    • TV cabinet
    • Dining room sideboard

    For extra atmosphere, use warm LED candles.

    Warm lighting is particularly effective because it softens inexpensive materials and creates the dramatic shadows associated with Halloween.

    You can also make a simple mantel garland yourself using dried branches, black ribbon, and a few inexpensive faux leaves.

    Avoid using too many different colors.

    A palette of black, cream, brass, and one dark accent color will immediately look more sophisticated.

    Budget tip: Use your existing mirror, books, vases, and candleholders. Purchase only one or two Halloween-specific pieces.

    Why it works: The display looks intentional instead of like a collection of random seasonal decorations.

    5. Create a Haunted-Looking Entryway for Less

    Your entryway gives guests their first impression, making it the perfect place for a subtle Halloween statement.

    You do not need to decorate the entire porch or hallway.

    Start with your existing console table, entryway bench, or small shelf.

    Place a black or dark vase on one side.

    Fill it with tall branches or dried stems.

    On the other side, add a small stack of books with a cream or black pumpkin on top.

    Between them, place a small candle or warm LED lantern.

    For an extra spooky detail, add a vintage-style framed picture.

    You can find inexpensive printable artwork featuring:

    • Ravens
    • Moths
    • Old botanical illustrations
    • Haunted houses
    • Dark florals
    • Vintage portraits

    Print the artwork at home and place it inside a frame you already own.

    This is one of the easiest ways to make seasonal decor look expensive.

    You can also create a simple black ribbon bow and attach it to the vase or basket.

    If you have a mirror above the console, place a few small removable bat silhouettes around the frame.

    Keep them concentrated on one side rather than covering the entire mirror.

    For the floor, place a simple woven basket containing a neutral throw blanket.

    This adds texture and makes the entryway feel cozy rather than frightening.

    A warm table lamp or lantern completes the atmosphere.

    The important thing is to avoid too many small objects.

    A clean entryway with three or four strong decorative elements will feel much more sophisticated than a surface covered with Halloween figures.

    Budget tip: Change the artwork and lighting rather than buying expensive furniture. These two details can completely change the mood.

    Why it works: Guests immediately notice the seasonal atmosphere without being overwhelmed by Halloween decorations.

    6. Give Your Coffee Table a Dark Romantic Halloween Makeover

    Your coffee table does not need to become a Halloween display packed with pumpkins and skulls.

    Instead, create one elegant centerpiece.

    Start with a wooden, black, marble-look, or neutral tray.

    Inside the tray, place:

    • One dark candle
    • One cream pumpkin
    • One small vase
    • A few dried stems
    • One decorative book

    Use varying heights.

    The book provides a base, the vase creates vertical height, and the pumpkin creates a low visual anchor.

    For a darker look, use a black ceramic vase and burgundy dried flowers.

    For a softer look, use cream pumpkins, beige ceramics, and one black candle.

    You can also place a small antique-style brass object inside the tray.

    If you want something more obviously Halloween-inspired, add a tiny ceramic skull.

    The key is to use one spooky object rather than ten.

    This approach keeps the room elegant while still making the Halloween theme obvious.

    For texture, add a velvet or linen throw over the sofa nearby.

    Deep burgundy, charcoal, brown, cream, and muted rust work particularly well.

    You can also change two regular pillow covers to black or burgundy velvet-style covers. This is often cheaper than purchasing completely new seasonal pillows.

    Current design advice similarly favors using a few intentional accessories, textured fabrics, trays, dried flowers, and warm colors rather than excessive literal Halloween decorations.

    Budget tip: Instead of buying a Halloween coffee table set, combine everyday objects you already own with one inexpensive seasonal item.

    Why it works: The display feels like a sophisticated autumn arrangement with a mysterious Halloween twist.

    7. Create a Budget Gothic Gallery Wall

    A gallery wall can instantly make Halloween decor feel artistic instead of commercial.

    The best part is that you can create one almost entirely from items you already have.

    Start with several frames.

    They do not need to match perfectly.

    Black, dark wood, brass, antique gold, and brown frames can work together beautifully.

    Now replace the artwork temporarily with inexpensive Halloween-inspired prints.

    Ideas include:

    • Black-and-white botanical illustrations
    • Raven artwork
    • Vintage moth prints
    • Gothic architecture
    • Old-fashioned portraits
    • Moon illustrations
    • Dark floral artwork
    • Haunted house sketches

    If you do not want to spend money on artwork, create your own simple designs using free or inexpensive printable graphics.

    Black-and-white artwork is particularly useful because it looks sophisticated and can be reused every year.

    Arrange the frames either symmetrically or in a relaxed gallery layout.

    If you rent your home, use removable hanging strips or display the frames on a shelf instead of making holes in the wall.

    For a stronger Halloween effect, place a single black bat silhouette or dried branch arrangement near the gallery.

    Do not add too many Halloween symbols.

    Let the artwork create the atmosphere.

    You can also place a small table underneath the gallery wall with a black vase and warm lamp.

    The lighting will make the artwork look even more dramatic at night.

    Budget tip: Reuse your existing frames and change only the printable artwork.

    Why it works: Instead of looking like temporary Halloween decor, the wall resembles a curated collection of vintage artwork.

    8. Make a Spooky but Elegant Dining Table

    Halloween is an excellent opportunity to create a dramatic dining table without spending much.

    Start with a neutral tablecloth or runner.

    Black, charcoal, deep burgundy, brown, cream, or natural linen all work beautifully.

    Add a centerpiece made from a wooden tray or shallow bowl.

    Inside it, place three pumpkins in different sizes.

    Use muted colors rather than bright orange.

    Then add a few candles.

    Black taper candles in brass or antique-style holders create an especially elegant effect.

    For inexpensive place settings, use your everyday plates.

    You do not need Halloween plates.

    Instead, add black cloth napkins, dark ribbon, or a small seasonal accent.

    For example, tie a thin black ribbon around each napkin.

    You could also place one small dried leaf, twig, or miniature pumpkin on every plate.

    For glassware, amber or smoked glass creates a beautiful moody atmosphere if you already own it.

    Otherwise, use your normal glasses.

    The centerpiece should remain low enough that guests can see across the table.

    If you want more height, place taller candles toward the center but keep the arrangement balanced.

    A few warm LED candles around the room will complete the look.

    You can even add a small bowl of dark chocolates or candy as the final Halloween detail.

    The result should feel like an elegant autumn dinner party with a mysterious Halloween mood.

    Budget tip: Do not buy a new dinnerware collection. Change the atmosphere through candles, napkins, pumpkins, and lighting.

    Why it works: Everyday dishes become Halloween-ready through styling rather than expensive seasonal purchases.

    9. Create a Cozy Halloween Bedroom With Small Changes

    Halloween decor does not have to stop at the living room.

    Your bedroom can become a cozy, slightly mysterious retreat using just a few inexpensive changes.

    Start with your existing bedding.

    You do not need Halloween-themed sheets.

    Instead, introduce one or two darker textures.

    A charcoal throw, burgundy blanket, black pillow cover, or warm brown cushion can instantly change the mood.

    Place two small pumpkins on the nightstand.

    Choose cream, black, or muted rust.

    Add a warm lamp beside the bed.

    The soft light will make the darker colors feel cozy rather than gloomy.

    For a subtle spooky touch, place a small black ceramic object, vintage-style frame, or tiny raven figurine on the nightstand.

    You can also create a simple dried branch arrangement in a small vase.

    Keep it low if it sits near the bed so that it does not become visually distracting.

    Another inexpensive idea is to change your wall artwork temporarily.

    A black-and-white moon illustration, dark botanical print, or vintage portrait can instantly make the bedroom feel more atmospheric.

    If you want an especially luxurious appearance, add velvet pillow covers.

    You do not need to buy many.

    One or two velvet textures can provide enough richness.

    The color palette should remain controlled:

    Cream + charcoal + burgundy + warm brown + black.

    This makes the room feel like a sophisticated autumn bedroom rather than a Halloween party room.

    Budget tip: Focus on textiles and lighting. Pillow covers and throws can completely transform the room without requiring new furniture.

    Why it works: The bedroom remains calm and comfortable while incorporating just enough spooky character for the season.

    10. Make Cheap Halloween Decor Look Expensive

    The final idea is less about one specific decoration and more about how you style everything.

    Even inexpensive Halloween pieces can look luxurious if they are presented correctly.

    The first rule is to limit your color palette.

    Choose three to five colors and repeat them throughout the home.

    For example:

    Black + cream + brass + burgundy + warm brown

    or

    Charcoal + rust + beige + dark wood + antique gold

    Avoid combining every traditional Halloween color at once.

    The second rule is to use fewer decorations.

    A single large pumpkin display can have more visual impact than fifteen tiny objects.

    The third rule is to create height.

    Use books, trays, candleholders, boxes, cake stands, and vases to create different levels.

    The fourth rule is to introduce texture.

    Use:

    • Velvet
    • Linen
    • Woven baskets
    • Wood
    • Ceramic
    • Brass
    • Glass
    • Dried botanicals

    These materials make a room feel layered and sophisticated.

    The fifth rule is lighting.

    Turn off harsh overhead lighting when possible and use table lamps, floor lamps, lanterns, and warm LED candles.

    The glow creates atmosphere and helps inexpensive decor appear richer.

    Finally, leave empty space.

    Do not feel like every shelf, table, wall, and corner needs Halloween decorations.

    Elegant decorating depends heavily on visual balance.

    One black vase on an empty console can look more expensive than ten decorations scattered across it.

    This approach also makes your decor more reusable. Many of the same pieces can remain in your home throughout fall and transition easily into Thanksgiving or winter decorating.

    That is one of the biggest advantages of choosing sophisticated Halloween decor instead of disposable novelty pieces.

    How to Choose a Budget-Friendly Elegant Halloween Color Palette

    Color is one of the easiest ways to make inexpensive decorations look sophisticated.

    Instead of relying on bright orange and neon purple, try deeper, more natural colors.

    Some beautiful combinations include:

    Black + Cream + Brass

    This is one of the easiest palettes for an elegant Halloween look. Use black candles, cream pumpkins, brass candleholders, and warm lighting.

    Charcoal + Burgundy + Warm Brown

    This combination creates a dark romantic atmosphere. It works particularly well in living rooms and bedrooms.

    Rust + Cream + Dark Wood

    This is ideal if you want Halloween decor that transitions naturally into fall.

    Black + Terracotta + Antique Gold

    This palette feels dramatic without becoming too dark.

    Cream + Black + Deep Plum

    This is especially beautiful for bedrooms, dining rooms, and sophisticated tablescapes.

    Current fall design advice is increasingly favoring earthy tones such as burnt orange, burgundy, sage, deep green, brown, and cream over harsh seasonal colors.

    How to Make Dollar-Store Halloween Decor Look High-End

    You do not have to spend a lot of money to create a designer-inspired Halloween home.

    Start with inexpensive basic objects.

    Look for:

    • Glass jars
    • Small trays
    • Candleholders
    • Plastic pumpkins
    • Ceramic vases
    • Picture frames
    • Baskets
    • Ribbon
    • Artificial branches
    • Small figurines

    Then transform them.

    Matte black paint can make inexpensive objects look dramatically more sophisticated.

    Cream paint can turn colorful pumpkins into neutral seasonal accents.

    A little antique-gold paint can add warmth to basic accessories.

    Black ribbon can make almost any vase, basket, wreath, or centerpiece feel more seasonal.

    You can also combine inexpensive pieces with one or two items that you already own.

    For example, place a $2 pumpkin on an expensive-looking wooden tray you already have.

    Add a candle from your everyday collection.

    Place a thrifted brass candleholder beside it.

    Suddenly the arrangement feels much more expensive than the individual objects actually cost.

    Common Halloween Decorating Mistakes to Avoid

    The biggest mistake is using too many decorations.

    When every surface is covered, individual pieces lose their visual impact.

    Another mistake is using too many unrelated colors.

    A controlled palette makes your home feel cohesive.

    Avoid relying entirely on plastic decorations.

    A few inexpensive plastic pieces can work, but balance them with natural textures such as wood, dried branches, linen, ceramic, and glass.

    Another common mistake is ignoring lighting.

    Even beautiful Halloween decorations can look disappointing under harsh white overhead lighting.

    Use warm lamps and candles whenever possible.

    Finally, avoid buying something simply because it says โ€œHalloween.โ€

    Ask whether the piece actually fits your home.

    A beautiful black vase, brass candleholder, velvet pillow, or cream pumpkin may be much more useful than a large novelty decoration because you can use it throughout the year.

    Final Thoughts

    Creating a spooky Halloween home does not require a huge budget or a house full of traditional decorations.

    The most beautiful approach is often the simplest.

    Choose a restrained color palette, add warm lighting, introduce a few dark and mysterious accents, and let texture do the rest.

    A cluster of black candles, a few muted pumpkins, dried branches, a dark vase, vintage-inspired artwork, and warm brass accents can completely transform an ordinary room.

    The key is intentional styling rather than quantity.

    Instead of asking, โ€œHow many Halloween decorations can I fit into this room?โ€ ask, โ€œWhat one or two details will create the strongest atmosphere?โ€

    That small change in thinking can help you create a home that feels spooky, cozy, elegant, and Pinterest-worthy without overspending.

    And because most of these ideas rely on reusable piecesโ€”candles, trays, vases, books, textiles, brass accents, dried botanicals, and neutral pumpkinsโ€”you can bring them back year after year.

    Your Halloween home does not have to look like a haunted party store.

    It can look like a beautiful, moody autumn home with just enough mystery to make everyone want to stay a little longer.