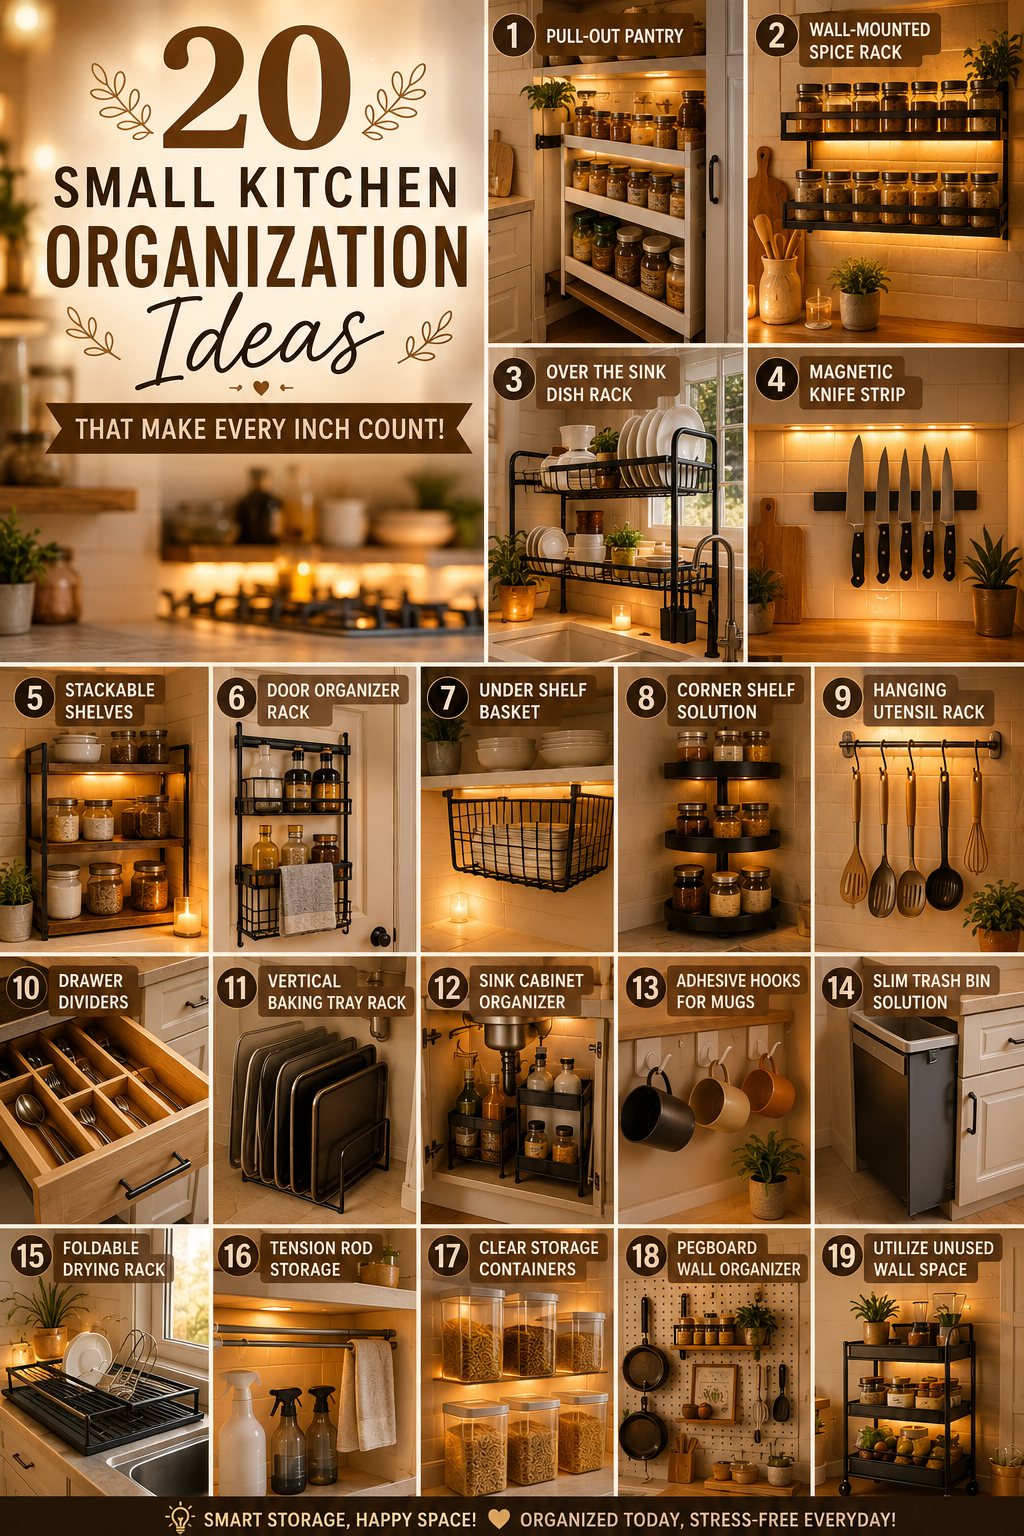
Small kitchens can be challenging to organize, especially when you have limited cabinets, narrow countertops, tiny drawers, and more cooking essentials than available storage space. But a small kitchen does not have to feel cramped, cluttered, or difficult to use. With the right organization strategies, even the smallest kitchen can become functional, beautiful, efficient, and surprisingly spacious. The secret is to stop thinking only about the storage you already have and start looking at every unused area as a potential storage opportunity.
When organizing a small kitchen, every inch matters. The space above cabinets, the inside of cabinet doors, the sides of cabinets, empty wall areas, corners, drawers, countertops, and even the area underneath the sink can all become useful. Instead of trying to squeeze everything into existing cabinets, you can create additional storage by using vertical space, hidden organizers, stackable containers, hooks, baskets, shelves, and multifunctional accessories.

One of the biggest problems in a small kitchen is countertop clutter. When too many appliances, containers, utensils, and food packages are left on the counter, the entire room immediately looks smaller. Keeping countertops as clear as possible creates an instant feeling of space. This does not mean everything needs to disappear into a cabinet. Frequently used items can remain visible if they are grouped together intentionally on trays or organized stations.
Another important principle is accessibility. An organization system is only successful if you can actually use it every day. If something you use frequently is hidden behind five other items, you will probably stop putting it away correctly. The best small kitchen organization ideas make everyday objects easy to reach while keeping less frequently used items in higher or harder-to-access areas.
Vertical organization is one of the most powerful solutions for small kitchens. Many kitchens have unused wall space above countertops or between cabinets and appliances. Installing a narrow shelf, rail, pegboard, or series of hooks can turn an empty wall into useful storage without taking away valuable floor or counter space.
Cabinet interiors also deserve attention. A cabinet that appears full may actually contain a lot of wasted vertical space. Stackable shelves can create a second level for plates, bowls, cups, and cans. Pull-out organizers can make deep cabinets easier to access. Dividers can separate baking trays, cutting boards, lids, and pans.
The inside of cabinet doors is another frequently overlooked area. Small racks or adhesive organizers can hold measuring spoons, cleaning supplies, spices, wraps, or other lightweight items. This hidden storage is especially useful in tiny kitchens because it adds capacity without changing the main layout.
Drawers can also become much more efficient with simple dividers. Instead of allowing utensils to become mixed together, divide them into categories. Create sections for cooking utensils, cutlery, measuring tools, gadgets, and miscellaneous items. Deep drawers can hold pots, pans, containers, or larger kitchen tools when organizers are used correctly.
The pantry is another area where organization can dramatically improve a small kitchen. You do not necessarily need a walk-in pantry. A single cabinet or narrow shelf can become a functional mini pantry when food categories are grouped and containers are used efficiently.
Clear containers can be useful for dry ingredients because they allow you to see what you have at a glance. However, organization should not become unnecessarily complicated. You do not need to transfer every product into matching containers. Use containers where they genuinely improve visibility, freshness, accessibility, or space.
Corners are also valuable. A corner cabinet can often become one of the least convenient spaces in the kitchen because items get pushed toward the back. Lazy Susans, rotating trays, corner shelves, and pull-out systems can make these awkward areas much easier to use.
The area underneath the sink is another storage opportunity. Cleaning products, cloths, sponges, trash bags, and other supplies can be organized with stackable bins or pull-out containers. The key is to make sure the storage system fits around the plumbing and allows you to access everything easily.
Small kitchens also benefit from multifunctional furniture. A rolling cart can provide extra storage and preparation space while remaining movable. A slim island can create additional workspace. A storage bench can combine seating and hidden storage in a larger kitchen nook.
Even the refrigerator can be organized more efficiently. Clear bins can group similar foods, while turntables can make sauces and condiments easier to reach. Refrigerator organization reduces wasted food and prevents items from becoming lost at the back.
The aesthetic side of organization matters too. An organized kitchen does not have to look sterile. You can combine practical storage with warm materials, attractive containers, wooden accessories, woven baskets, neutral labels, and coordinated colors. This creates the clean, cozy kitchen aesthetic that works particularly well for Pinterest.
However, organization should always come before decoration. Before buying new baskets and containers, remove items you no longer use. A small kitchen cannot become truly organized if it is still holding unnecessary objects. Decluttering is often the first and most affordable step.
Another helpful strategy is to group things according to how you use them rather than simply where they fit. Keep coffee supplies together, baking ingredients together, cooking utensils near the cooking area, and everyday dishes near the dishwasher or preparation zone. This creates a kitchen workflow that saves time.
You should also consider frequency. Everyday items should be stored at comfortable heights. Occasionally used appliances can be moved to higher cabinets. Seasonal equipment can be stored in less accessible areas. This simple adjustment can make a small kitchen feel much easier to use.
The twenty ideas below are designed to help you maximize every available inch while keeping your kitchen attractive and functional. Some ideas require inexpensive organizers, while others can be done using items you already own. Whether you live in a tiny apartment, rental home, studio, or compact family kitchen, these solutions can be adapted to your available space.
The goal is not to make your kitchen look perfectly staged all the time. The goal is to create an organization system that makes daily life easier. When everything has a logical place, cleaning becomes faster, cooking becomes less stressful, and the entire kitchen feels more spacious.
1. Use the Inside of Cabinet Doors
The inside of a cabinet door is one of the most overlooked storage areas in a small kitchen. Because this surface normally remains hidden when the cabinet is closed, it allows you to create additional storage without visually crowding the room.
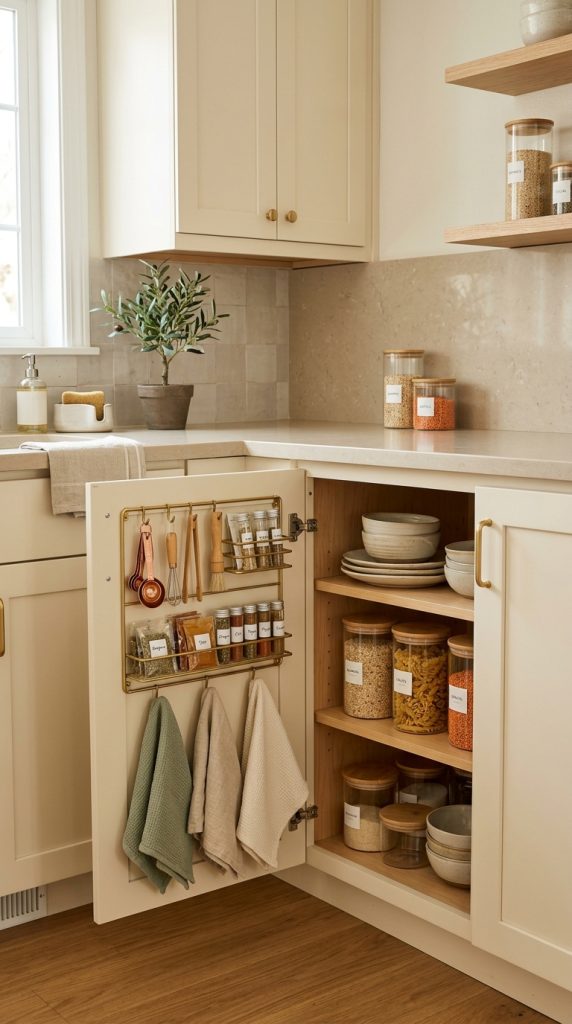
Depending on the size and strength of the cabinet door, you can use adhesive organizers, slim racks, hooks, or small baskets. These can hold lightweight items such as measuring spoons, kitchen towels, spice packets, wraps, cleaning cloths, or small utensils.
Before installing anything, measure the door and check how much clearance is available when the cabinet closes. You do not want an organizer to interfere with shelves or stored items.
Materials and Things to Use
- Adhesive storage racks
- Slim door baskets
- Small hooks
- Measuring spoon organizer
- Kitchen towel hooks
- Removable adhesive strips
- Labels
Step-by-Step
- Empty the cabinet door area.
- Measure the available space.
- Decide what lightweight items need a home.
- Choose a slim organizer.
- Install it securely.
- Test the cabinet door before filling it.
- Group similar items together.
- Remove anything that prevents the door from closing properly.
This idea is especially useful for renters because removable organizers can sometimes provide extra storage without permanent changes.
2. Install a Slim Wall Shelf
Unused wall space can become valuable storage in a small kitchen. A narrow shelf above a countertop, beside a cabinet, or on another suitable wall can hold items that would otherwise occupy precious counter space.

Use shelves for spices, mugs, small jars, cookbooks, oils, or attractive everyday kitchenware. If the shelf is positioned near the cooking area, keep frequently used items within easy reach.
Materials and Things to Use
- Narrow wall shelf
- Wall brackets
- Screws and appropriate anchors
- Small jars
- Ceramic containers
- Cookbooks
- Mugs
- Small baskets
Step-by-Step
- Identify an unused wall.
- Check that the location is practical and safe.
- Measure the available width.
- Choose a narrow shelf.
- Install it securely according to the wall type.
- Group items by purpose.
- Keep heavier objects on appropriately supported shelves.
- Leave some open space for a clean appearance.
For a Pinterest-friendly kitchen, use coordinated containers and ceramics rather than filling the shelf with miscellaneous packaging.
3. Organize Under the Kitchen Sink
The cabinet beneath the sink can become a chaotic storage area because plumbing takes up valuable space. Instead of stacking cleaning products randomly, use storage bins and adjustable organizers designed to work around the pipes.
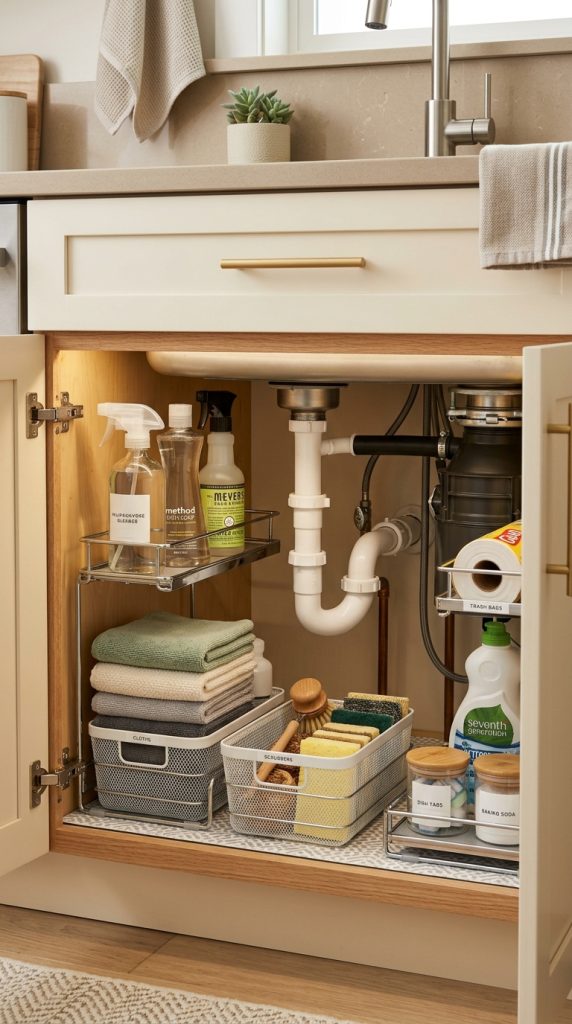
A two-level shelf can create additional vertical storage. Pull-out bins can make products at the back easier to reach.
Materials and Things to Use
- Stackable shelf
- Pull-out basket
- Small storage bins
- Cleaning cloth container
- Spray bottle holder
- Trash-bag dispenser
- Labels
Step-by-Step
- Remove everything from under the sink.
- Check for leaks or moisture.
- Group cleaning supplies.
- Discard empty or unnecessary products.
- Add a shelf around the plumbing.
- Use bins for smaller items.
- Keep frequently used supplies toward the front.
- Leave enough room to access the pipes.
Avoid storing items that could be damaged by potential leaks. Keep the area easy to inspect.
4. Add a Pull-Out Organizer to Deep Cabinets
Deep cabinets often create wasted space because items at the back become difficult to reach. A pull-out organizer can solve this problem by allowing the entire storage section to slide forward.
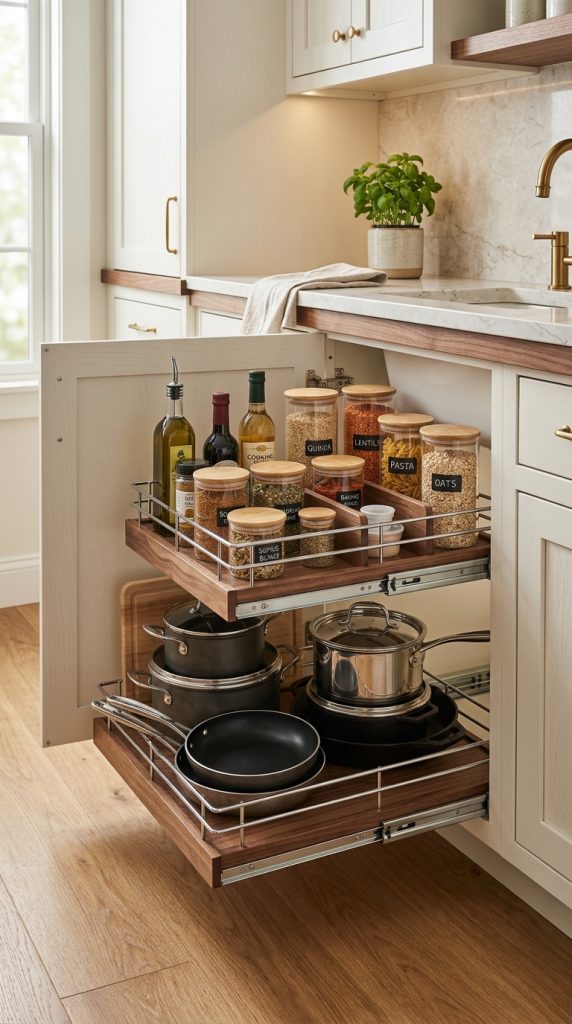
These organizers are particularly useful for pots, pans, food containers, bottles, and cleaning supplies.
Materials and Things to Use
- Pull-out cabinet organizer
- Measuring tape
- Storage bins
- Dividers
- Labels
Step-by-Step
- Measure cabinet width, depth, and height.
- Choose an organizer that fits correctly.
- Remove unnecessary items.
- Install the pull-out system according to instructions.
- Group similar items.
- Place frequently used items toward the easiest-access area.
- Avoid overloading the mechanism.
The biggest benefit is visibility. Instead of reaching blindly into the back of the cabinet, you can pull the storage toward you.
5. Use Stackable Shelves Inside Cabinets
Many kitchen cabinets have significant vertical space between shelves. Stackable shelf risers create additional levels and allow you to store plates, bowls, cups, cans, and containers more efficiently.

Instead of stacking everything into one unstable pile, create smaller organized levels.
Materials and Things to Use
- Stackable cabinet shelves
- Shelf risers
- Plates
- Bowls
- Cups
- Food containers
Step-by-Step
- Measure the cabinet interior.
- Identify unused vertical space.
- Choose appropriately sized risers.
- Place taller items underneath or beside them.
- Group similar dishes together.
- Keep everyday items at comfortable heights.
This is one of the simplest ways to increase cabinet capacity without remodeling.
6. Create a Vertical Cutting Board and Baking Sheet Station
Cutting boards, baking sheets, trays, and cooling racks are often difficult to store because they are wide and awkward. Instead of stacking them horizontally, store them vertically.
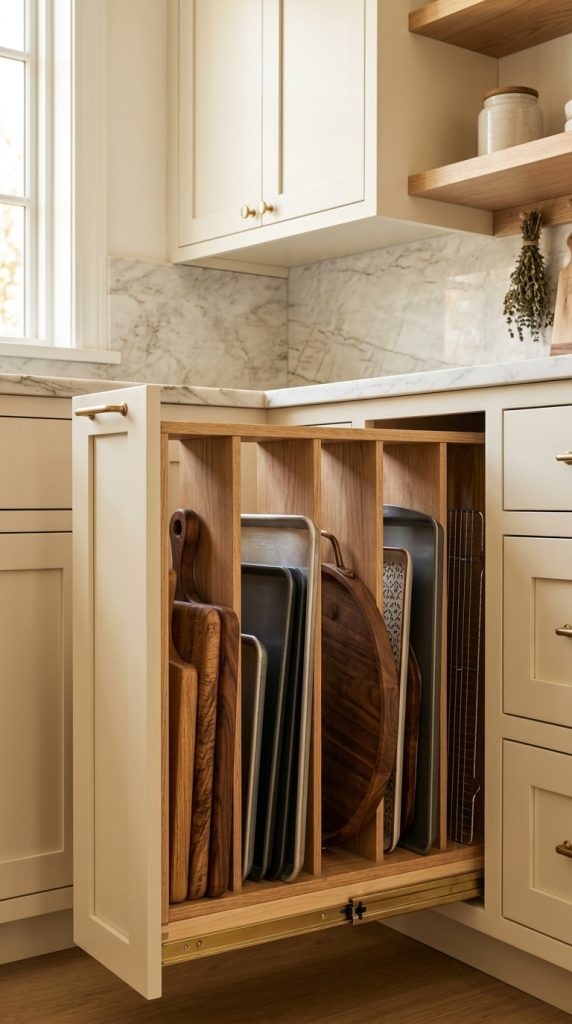
A simple divider system can keep each item upright and separated.
Materials and Things to Use
- Vertical divider rack
- Tension dividers
- Narrow cabinet organizer
- Cutting boards
- Baking sheets
- Serving trays
Step-by-Step
- Choose a suitable cabinet.
- Measure the available height and width.
- Install a divider system.
- Place boards and trays vertically.
- Group similar items.
- Keep frequently used pieces toward the front.
Vertical storage makes it much easier to remove one item without disturbing the rest.
7. Turn a Small Corner Into a Spice Station
Spices can quickly take over cabinets and become difficult to find. A dedicated spice station makes cooking faster and keeps small containers organized.

A narrow drawer, wall rack, cabinet door rack, or tiered shelf can work.
Materials and Things to Use
- Spice rack
- Tiered shelf
- Small jars
- Labels
- Drawer organizer
- Rotating tray
Step-by-Step
- Remove all spices.
- Check expiration dates.
- Group similar spices.
- Choose the storage method that fits your kitchen.
- Arrange spices so labels are visible.
- Place frequently used spices closest to your cooking area.
For a clean aesthetic, use simple labels and matching containers where practical.
8. Use a Rolling Kitchen Cart
A rolling cart can add storage and workspace without requiring permanent construction. This makes it particularly useful for renters and very small kitchens.

Choose a narrow cart that fits beside the refrigerator, against a wall, or in another unused area.
Materials and Things to Use
- Slim rolling cart
- Storage baskets
- Hooks
- Wooden tray
- Kitchen towels
- Food containers
Step-by-Step
- Measure the available floor space.
- Select a narrow cart.
- Decide what category it will store.
- Use baskets on lower levels.
- Keep heavier items toward the bottom.
- Use the top surface for frequently used items.
- Move the cart when extra preparation space is needed.
A cart can become a coffee station, baking station, produce station, or general pantry extension.
9. Organize Kitchen Drawers With Dividers
Kitchen drawers become much more efficient when every category has its own section. Instead of placing all utensils together, divide them into groups.

A drawer organizer can create separate areas for forks, spoons, knives, measuring tools, cooking utensils, and small gadgets.
Materials and Things to Use
- Adjustable drawer dividers
- Cutlery organizer
- Small bins
- Labels
- Utensil trays
Step-by-Step
- Empty the drawer.
- Remove duplicates.
- Group similar objects.
- Measure the drawer.
- Install dividers.
- Assign each section a category.
- Place frequently used items toward the easiest-access area.
Avoid keeping utensils you never use simply because they fit in the drawer.
10. Use the Space Above Kitchen Cabinets
If there is a gap above your kitchen cabinets, it can become useful storage for items you do not use every day.
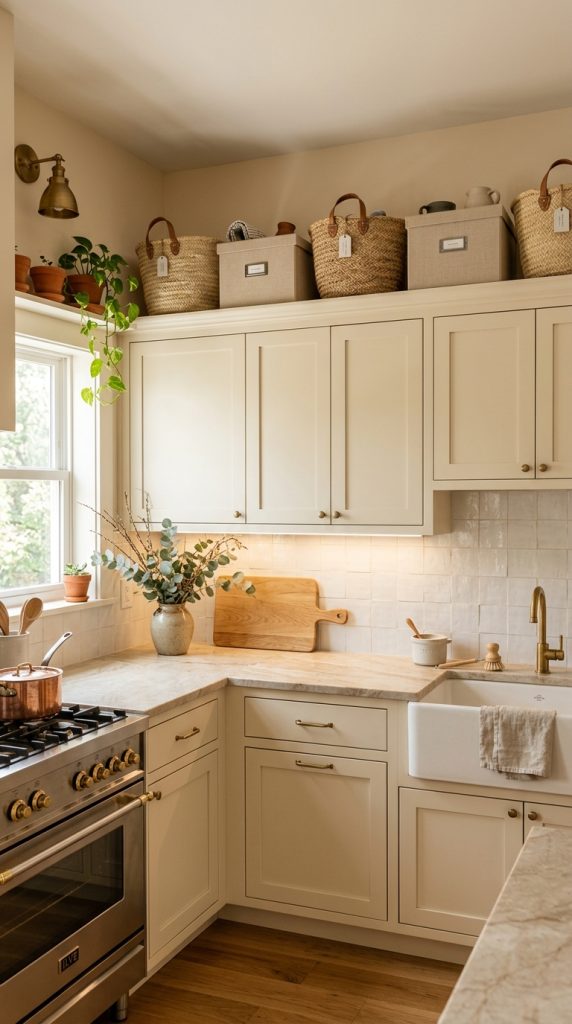
Because this area is higher and harder to access, reserve it for seasonal dishes, serving pieces, special appliances, or backup supplies.
Materials and Things to Use
- Lidded storage boxes
- Woven baskets
- Clear containers
- Labels
- Step stool
Step-by-Step
- Measure the available height.
- Choose matching storage boxes or baskets.
- Group items by category.
- Label the containers.
- Store rarely used objects.
- Keep the area visually tidy.
Avoid storing heavy objects in difficult-to-reach positions.
11. Add Hooks to Unused Walls
Hooks are inexpensive, versatile, and perfect for small kitchens. They can hold mugs, utensils, towels, aprons, measuring cups, or lightweight baskets.
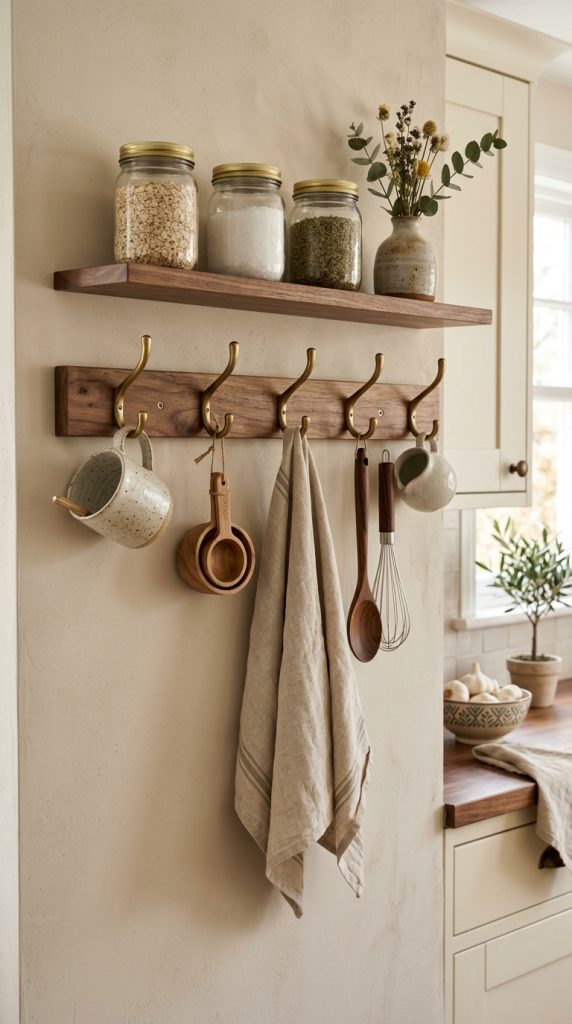
A row of hooks beneath a shelf can create an attractive and practical storage zone.
Materials and Things to Use
- Wall hooks
- Adhesive hooks
- Mug hooks
- Rail system
- Small baskets
- Kitchen towels
- Measuring cups
Step-by-Step
- Find an unused wall or underside of a shelf.
- Determine what needs to be stored.
- Choose suitable hooks.
- Install them securely.
- Group similar objects together.
- Keep heavy items on appropriately rated hardware.
Hooks are particularly useful because they turn vertical surfaces into storage without taking up counter space.
12. Create a Dedicated Coffee and Tea Station
Instead of spreading coffee, tea, mugs, sugar, and accessories throughout the kitchen, create one compact station.
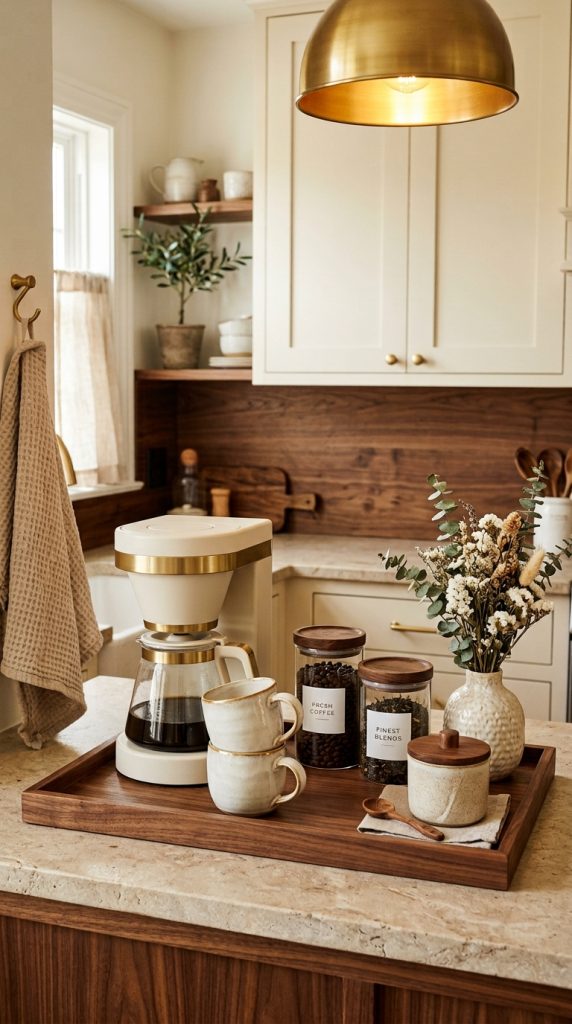
Use a tray to keep everything visually grouped. If counter space is extremely limited, a narrow shelf or rolling cart can work instead.
Materials and Things to Use
- Wooden tray
- Coffee maker
- Mugs
- Glass jars
- Tea containers
- Sugar container
- Small spoon
- Storage basket
Step-by-Step
- Choose a convenient location.
- Remove unrelated objects.
- Place a tray.
- Group coffee and tea supplies.
- Add your most-used mugs.
- Store backup supplies elsewhere.
- Keep the station easy to clean.
This creates organization while also becoming an attractive decorative feature.
13. Use Clear Containers for Pantry Staples
Clear containers can make a small pantry easier to manage because you can immediately see how much of an ingredient remains.
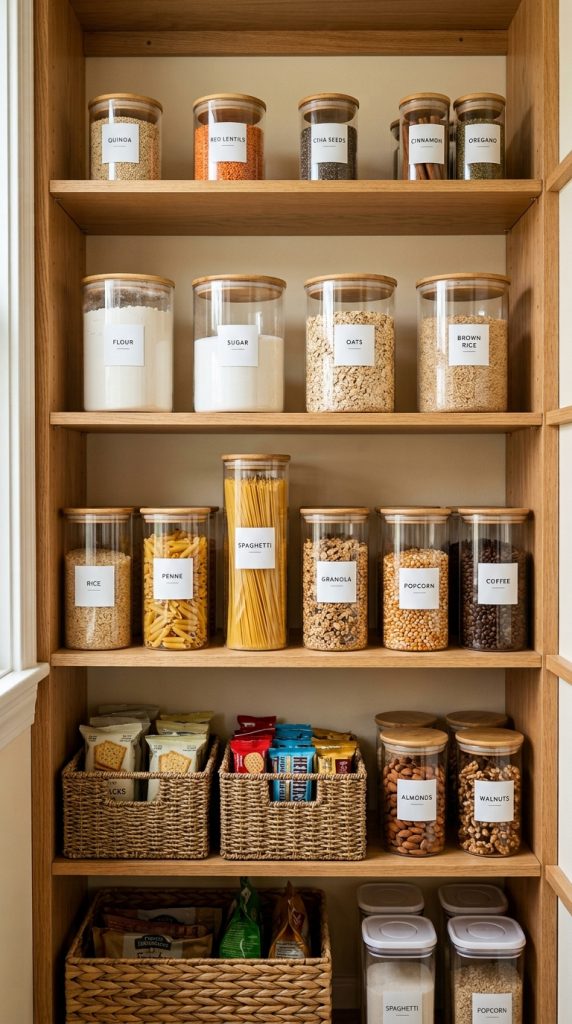
Use them selectively for foods that benefit from visible storage.
Materials and Things to Use
- Clear airtight containers
- Glass jars
- Simple labels
- Shelf risers
- Baskets
Step-by-Step
- Group pantry items.
- Remove expired products.
- Choose suitable containers.
- Transfer appropriate dry goods.
- Label containers if helpful.
- Arrange containers by frequency of use.
- Use baskets for smaller packages.
Do not feel obligated to transfer every item. The goal is efficiency, not creating extra work.
14. Organize the Refrigerator With Bins
A refrigerator can become surprisingly spacious when foods are grouped into categories. Clear bins make it easier to pull out an entire category rather than searching through individual items.
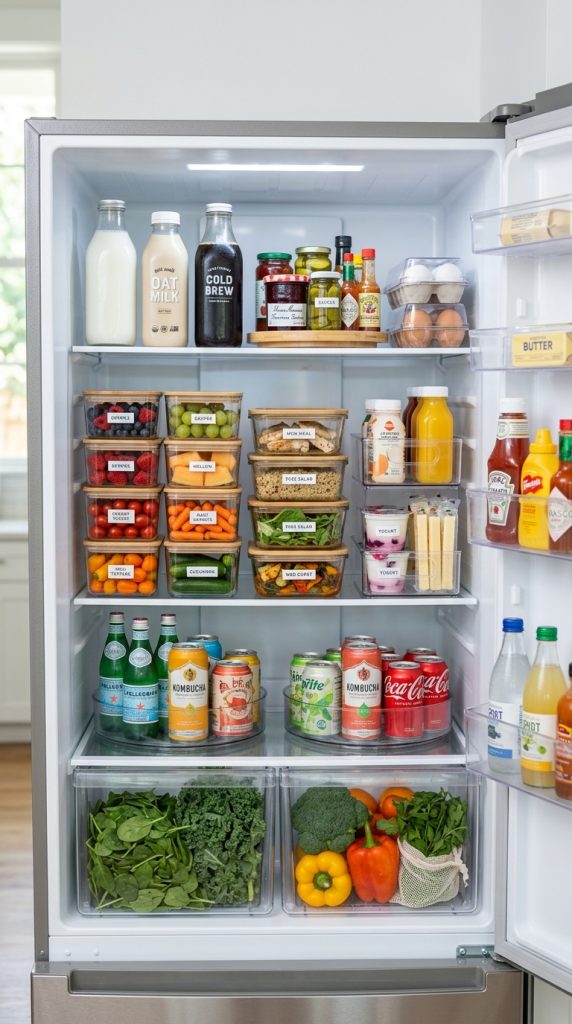
For example, one bin can hold breakfast items, another snacks, and another sauces or condiments, depending on your household needs.
Materials and Things to Use
- Clear refrigerator bins
- Turntable
- Egg organizer
- Bottle organizer
- Labels
Step-by-Step
- Remove refrigerator contents.
- Clean shelves and drawers.
- Group similar foods.
- Discard expired items.
- Assign bins to categories.
- Place frequently used items where they are easiest to reach.
- Keep raw and ready-to-eat foods appropriately separated.
A well-organized refrigerator can also help reduce food waste because forgotten ingredients become easier to see.
15. Use a Lazy Susan for Awkward Corners
Corner cabinets and deep shelves can waste space because objects at the back become difficult to reach. A rotating lazy Susan solves this problem by bringing items toward you.
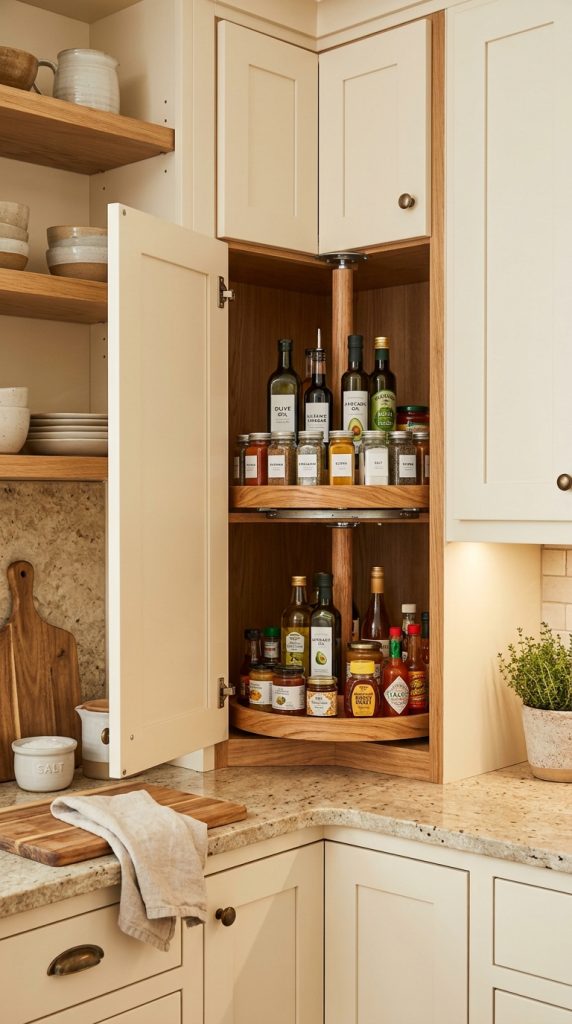
They are particularly useful for sauces, oils, spices, jars, and small pantry items.
Materials and Things to Use
- Lazy Susan
- Round storage containers
- Labels
- Small baskets
Step-by-Step
- Identify a difficult-to-reach cabinet or shelf.
- Measure the available space.
- Choose an appropriately sized rotating tray.
- Group similar items.
- Place smaller items toward the center.
- Rotate the tray to access everything easily.
Avoid overloading the tray because too much weight can make rotation difficult.
16. Store Pots and Pans Vertically
Pots and pans can consume an enormous amount of cabinet space when stacked together. Vertical dividers can separate them and make individual pieces easier to remove.
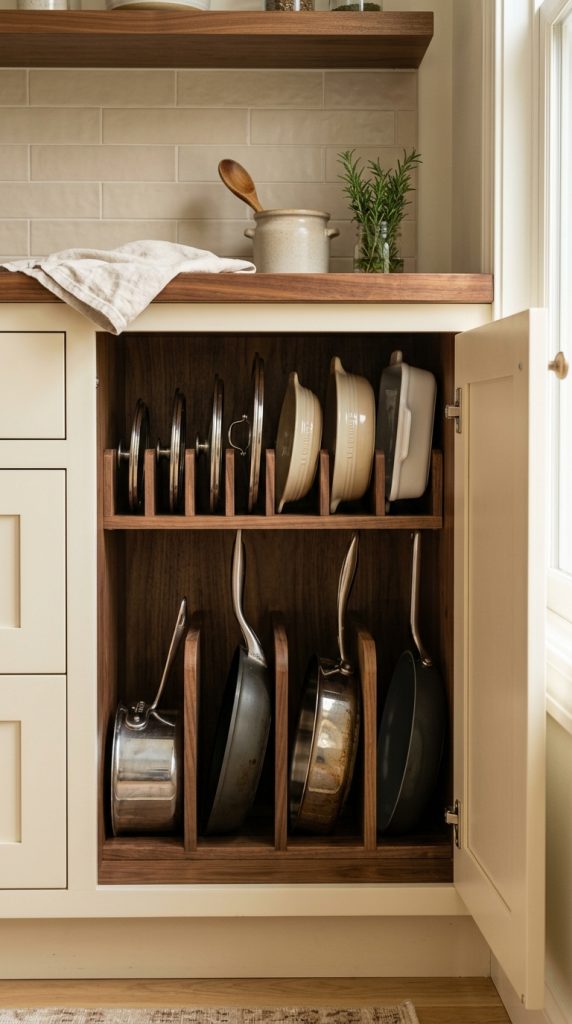
Another option is using a suitable wall or rail system for frequently used pans, provided the installation is secure and the location is safe.
Materials and Things to Use
- Pan dividers
- Vertical rack
- Cabinet organizer
- Wall rail
- Hooks
Step-by-Step
- Remove pots and pans.
- Keep only the pieces you regularly use.
- Choose a storage location.
- Install dividers or an appropriate rack.
- Store larger items securely.
- Keep frequently used pans easiest to reach.
Vertical organization can dramatically reduce the frustration of digging through heavy stacks.
17. Use the Side of a Cabinet for Extra Storage
The side of a cabinet can provide valuable vertical storage if it is exposed and positioned safely. Narrow rails, hooks, baskets, or magnetic systems can hold lightweight kitchen tools.
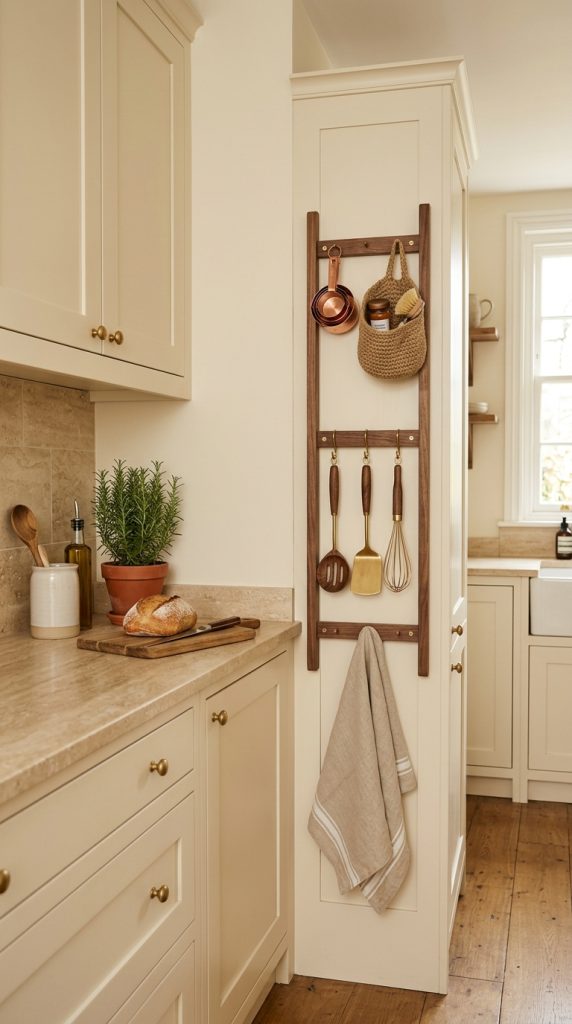
This is particularly useful in narrow kitchens where there is little wall space.
Materials and Things to Use
- Narrow hooks
- Magnetic strips where appropriate
- Slim basket
- Rail
- Measuring cups
- Kitchen towels
- Lightweight utensils
Step-by-Step
- Identify an exposed cabinet side.
- Check that it is suitable for mounting.
- Measure the available area.
- Choose a slim storage system.
- Install it securely.
- Store lightweight items.
Keep the design visually simple so the side of the cabinet does not become cluttered.
18. Create a Hidden Appliance Storage Zone
Small appliances can quickly overwhelm countertops. Instead of keeping every appliance visible, create a dedicated appliance cabinet or storage zone.

Keep only the appliances you use frequently on the counter. Store less frequently used equipment elsewhere.
Materials and Things to Use
- Cabinet shelf
- Appliance riser
- Pull-out shelf
- Storage basket
- Labels
- Cable organizer
Step-by-Step
- List your kitchen appliances.
- Identify how frequently each one is used.
- Keep everyday appliances accessible.
- Store occasional appliances in cabinets.
- Organize cables.
- Use shelves or pull-out systems where helpful.
If an appliance is extremely heavy, make sure the shelf or cabinet can safely support it.
19. Use a Pegboard for Flexible Kitchen Storage
A pegboard can turn an empty wall into a customizable organization system. Hooks and small shelves can be rearranged whenever your storage needs change.

This is useful for utensils, measuring cups, small pans, baskets, and other lightweight kitchen tools.
Materials and Things to Use
- Pegboard
- Hooks
- Small shelves
- Pegboard baskets
- Measuring cups
- Lightweight utensils
Step-by-Step
- Choose a suitable wall.
- Measure the available area.
- Install the pegboard securely.
- Add hooks and shelves.
- Group similar objects.
- Keep frequently used items at comfortable heights.
- Adjust the arrangement as needed.
A pegboard can also add personality to the kitchen when coordinated with the existing decor.
20. Create a Complete Small-Kitchen Organization System
The final and most powerful idea is to combine several strategies into one complete organization system. Instead of treating every cabinet and drawer separately, organize the entire kitchen according to how you actually use it.
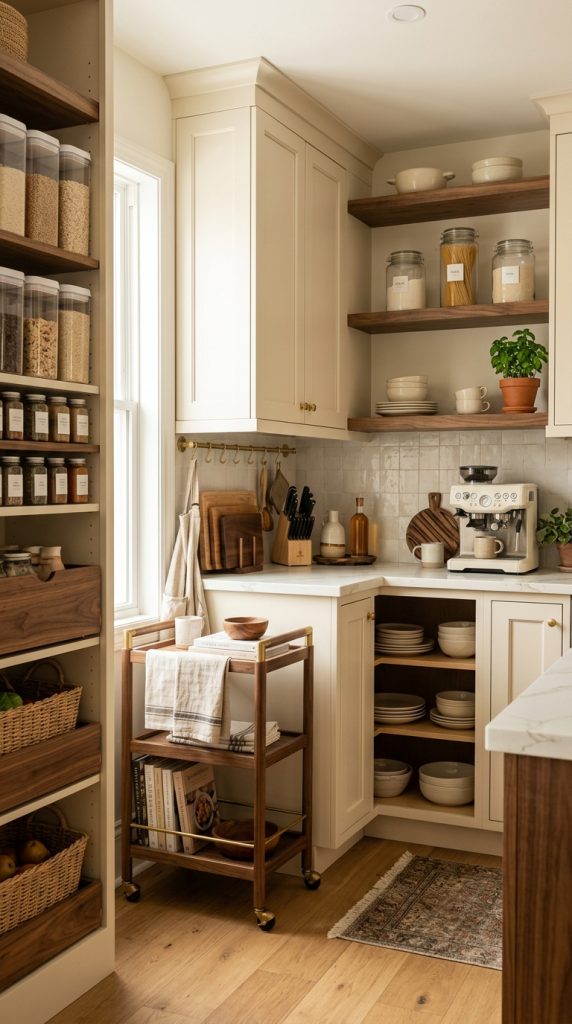
Start by decluttering. Remove expired food, duplicate utensils, broken objects, and appliances you never use.
Then divide the kitchen into functional zones. Create a cooking zone, preparation zone, coffee or beverage zone, cleaning zone, food-storage zone, and dish-storage zone.
Store everyday items close to where they are used. Cooking utensils should be near the cooking area. Plates should be accessible near the dishwasher or dining area. Cleaning supplies should stay beneath or near the sink. Coffee supplies should be grouped together.
Use vertical storage wherever possible. Add hooks, shelves, cabinet-door organizers, and dividers.
Materials and Things to Use
- Cabinet organizers
- Drawer dividers
- Stackable shelves
- Clear containers
- Woven baskets
- Hooks
- Wall shelves
- Lazy Susans
- Pull-out organizers
- Rolling cart
- Labels
- Trays
Step-by-Step Complete Organization Plan
- Remove everything from one storage zone at a time.
- Declutter unnecessary items.
- Group remaining items by category.
- Identify how frequently each category is used.
- Assign storage based on frequency.
- Use vertical space.
- Add organizers only where they solve a specific problem.
- Label containers if useful.
- Keep countertops as clear as practical.
- Test the system for several days.
- Move items that are difficult to access.
- Review the kitchen regularly.
The most important part of this system is flexibility. Your kitchen organization should adapt to your lifestyle rather than forcing you to follow a complicated system.
If you cook frequently, your cooking tools should be extremely accessible. If you bake only occasionally, baking supplies can occupy a higher cabinet. If you drink coffee every morning, create a convenient coffee station. If you rarely use specialty appliances, store them out of the way.
This personalized approach makes organization sustainable.
Final Thoughts
A small kitchen does not need to feel small. When you learn to use vertical space, hidden surfaces, cabinet interiors, awkward corners, deep drawers, wall areas, and underused storage zones, the available space can become much more functional.
The most important first step is always decluttering. Before buying organizers, look at what you already own and ask whether every item deserves valuable kitchen space. Removing duplicates and unused objects can sometimes create more room than an expensive storage system.
After decluttering, organize by category and frequency of use. Everyday items should be easy to reach, while occasional items can be stored higher or farther away.
Then begin adding organization tools strategically. Cabinet risers, drawer dividers, hooks, shelves, lazy Susans, pull-out organizers, baskets, and clear containers can all make a difference when they are used to solve specific problems.
Remember that organization should also support the visual style of your kitchen. Matching containers, natural wood, woven baskets, neutral labels, ceramic pieces, and warm textures can create an aesthetic that feels organized without becoming cold.
The best small kitchen is not necessarily the one with the most storage products. It is the one where everything has a logical place and everyday tasks feel easy.
If you want to transform your kitchen gradually, start with the five areas that usually create the biggest improvement: countertops, cabinets, drawers, pantry storage, and under-sink space. Once those areas are under control, move toward vertical walls, refrigerator storage, awkward corners, and hidden areas.
A well-organized kitchen can save time, reduce clutter, make cleaning easier, and help you enjoy cooking more. Most importantly, it can make a compact kitchen feel calm, spacious, and beautifully intentional.
For Pinterest, these organization ideas are particularly valuable because they solve real problems while also creating visually satisfying spaces. Before-and-after organization concepts, small-space storage solutions, aesthetic pantry ideas, cabinet hacks, and countertop organization can all become highly save-worthy content when presented clearly.
The ultimate goal is simple: make every inch count without making your kitchen feel crowded.
Leave a Reply