
Introduction
A warm and aesthetic kitchen is one of the most inviting spaces you can create in your home. Unlike decorating styles that focus only on appearance, a warm kitchen combines beauty with comfort, functionality, organization, and personality. It should be a place where you genuinely enjoy preparing meals, having morning coffee, gathering with family, or simply spending time at the end of a long day. The right combination of warm colors, natural materials, soft lighting, beautiful storage, and carefully chosen accessories can transform even a basic kitchen into a cozy and Pinterest-worthy space.
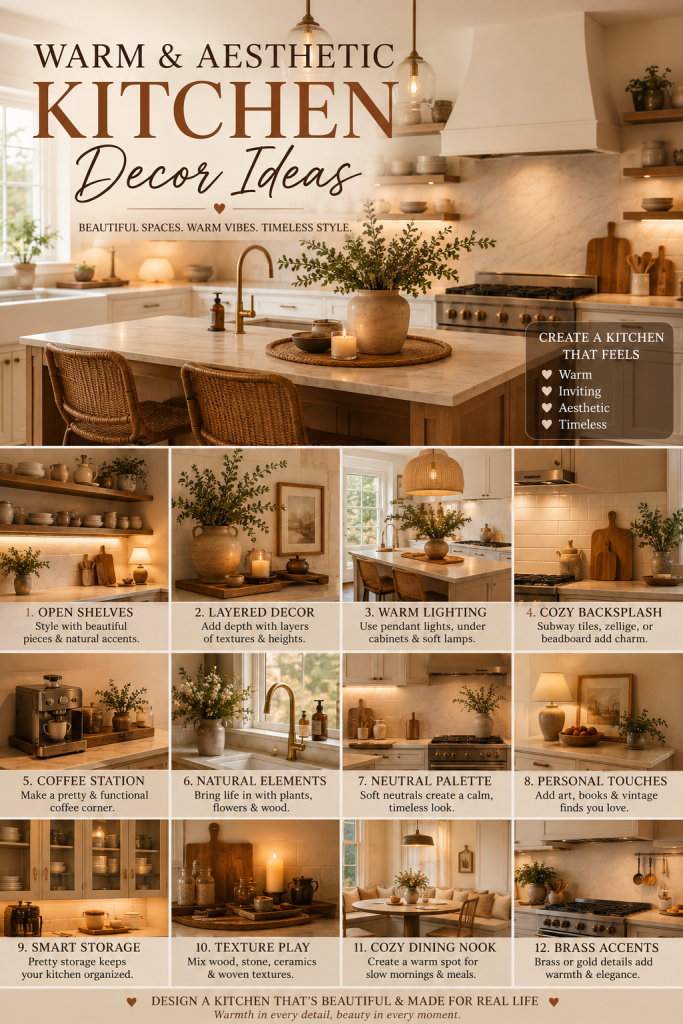
The good news is that creating a warm aesthetic kitchen does not necessarily require a renovation. You do not have to replace your cabinets, install expensive countertops, or purchase designer appliances. Often, the biggest transformation comes from small decorative changes. Adding a wooden cutting board, displaying attractive ceramic dishes, changing kitchen textiles, organizing countertops, introducing warm lighting, or creating a dedicated coffee corner can completely change how the room feels.
Color is one of the most important elements. Cool whites and stark gray tones can sometimes make kitchens feel clinical, especially when combined with bright overhead lighting. Warm neutrals create a much softer atmosphere. Think creamy white, ivory, beige, taupe, caramel, walnut brown, warm gray, muted terracotta, soft tan, and subtle earthy shades. These colors can be introduced through accessories rather than permanent features, making them ideal for renters and homeowners alike.
Natural materials are another major part of the warm aesthetic. Wood is especially useful because it immediately introduces warmth into modern kitchens. Wooden cutting boards, bowls, trays, stools, shelves, and utensils can create visual softness against white cabinets or stone countertops. Woven baskets, rattan accessories, linen-style textiles, ceramic pieces, and glass containers add additional layers of texture.
The secret is not simply adding more objects. A beautiful kitchen needs balance. Too many decorative pieces can make countertops look crowded and make everyday cooking difficult. Instead, choose a few meaningful focal points and allow empty space around them. A large wooden board leaning against the backsplash can often have more visual impact than a dozen small decorations.
Lighting deserves special attention because it can completely change the atmosphere. A kitchen with beautiful decor can still feel cold under harsh white lighting. Warm pendant lights over an island, under-cabinet lighting, soft lamps, and carefully positioned decorative lights can create a comfortable evening environment. You can even make a rental kitchen feel dramatically different with rechargeable lighting solutions that do not require permanent electrical work.
Storage can also become part of the aesthetic. Instead of hiding everything, display attractive everyday objects while organizing less attractive items. Glass jars can hold dry ingredients, woven baskets can hide packets and miscellaneous items, and wooden trays can group coffee supplies. When everything has a visual home, the kitchen naturally feels calmer.
Open shelving is another opportunity for decorating. Rather than treating shelves as extra storage space that must be completely filled, think of them as curated displays. Combine ceramic plates, bowls, mugs, wooden boards, glass jars, cookbooks, and one or two decorative objects. Vary the heights and leave empty areas between groups. This gives the shelves an intentional designer appearance.
Textiles can make an enormous difference as well. A textured runner can soften hard kitchen floors, while linen-style towels and neutral fabric accessories can introduce warmth. Choose washable materials for areas that receive frequent spills. Practicality should always be considered alongside appearance.
Plants and natural elements can also add life to the kitchen. A small herb corner near a suitable window can be both beautiful and functional. Fresh fruit in a wooden bowl creates natural color without looking overly decorative. Dried branches can provide height and texture when fresh plants are not practical.
For a truly aesthetic result, think about repetition. If you use walnut wood on the countertop, repeat a similar tone in a cutting board, stool, tray, or shelf. If you introduce muted terracotta through a towel, repeat the shade in a ceramic bowl or mug. Repeated colors make separate objects feel like part of the same design.
This approach is especially valuable for Pinterest because cohesive spaces are visually satisfying. A strong Pinterest image should have one obvious focal point, a clear color story, attractive textures, realistic styling, and enough visual interest to make viewers stop scrolling. A kitchen should look aspirational but still attainable.
The ten ideas below are designed to help you create exactly that kind of space. Each idea can stand alone, or you can combine several to create a complete kitchen transformation. They are practical, beginner-friendly, budget-conscious, and flexible enough to work with modern, farmhouse, vintage, Scandinavian, transitional, or contemporary interiors.
1. Create a Warm Neutral Kitchen With Natural Wood

A warm neutral kitchen is one of the easiest and most timeless ways to create an aesthetic space. The style works particularly well if your existing kitchen has white, cream, beige, or light-colored cabinets because natural wood accessories can immediately make the room feel warmer.
The first step is to establish a simple color palette. Choose three to five shades that work together. A beautiful combination is warm white, cream, beige, walnut brown, and muted caramel. If you want a slightly more colorful appearance, introduce a small amount of terracotta.
Once your palette is established, remove unnecessary objects from the countertop. A warm aesthetic kitchen should not feel crowded. Keep the appliances and items you use daily, but consider storing everything else.
Now introduce natural wood. Place one or two wooden cutting boards vertically against the backsplash. Add a wooden bowl or tray nearby. Wooden utensils can be displayed in a ceramic container rather than hidden inside a drawer.
The contrast between smooth countertops and natural wood creates visual interest. If your kitchen has glossy cabinets, wood can soften the overall appearance. If your kitchen already has wooden cabinetry, choose accessories that complement rather than compete with the existing tones.
Ceramics can add another layer. Choose cream, ivory, beige, or warm gray pieces. A ceramic utensil holder, bowl, vase, or pitcher can make the countertop look curated.
Materials and Things to Use
- Natural wooden cutting boards
- Wooden bowl
- Wooden utensils
- Cream ceramic vase
- Ceramic utensil holder
- Wooden tray
- Neutral kitchen towels
- Beige or cream runner
- Glass storage jars
- Warm lighting
Step-by-Step Styling
- Clear unnecessary countertop clutter.
- Select three to five coordinated colors.
- Add one large wooden cutting board.
- Introduce a wooden bowl or tray.
- Add cream or neutral ceramics.
- Display attractive utensils in one container.
- Add one textured textile.
- Introduce warm lighting.
- Leave empty space around the main arrangement.
One common mistake is adding too many wooden objects. The purpose of natural wood is to provide warmth, not to turn the kitchen into a wood showroom. Choose different shapes and sizes and give each piece enough breathing room.
Another mistake is mixing too many colors. A warm kitchen usually looks more expensive when the palette is restrained. You can always introduce small seasonal colors later through towels, flowers, mugs, or ceramics.
For Pinterest styling, photograph the kitchen from a slightly angled viewpoint that captures the countertop, cabinets, lighting, and one clear decorative focal point. The composition should feel bright enough to reveal details but remain warm and cozy.
2. Create a Cozy and Aesthetic Coffee Station
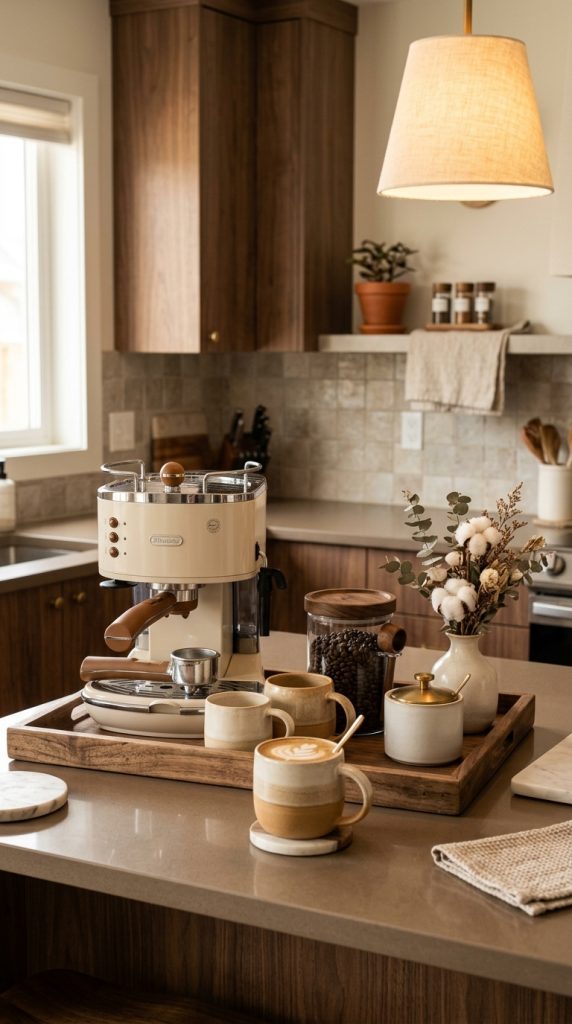
A kitchen coffee station is both practical and decorative, making it one of the most save-worthy ideas for Pinterest. It gives you a dedicated area for your morning routine while creating a visually attractive corner that can be changed seasonally.
Start by choosing the location. A section of countertop near an electrical outlet is ideal. If you have a small kitchen, do not sacrifice valuable preparation space. A narrow corner is enough.
Use a wooden or ceramic tray to visually define the coffee station. This is important because a tray prevents several small objects from appearing randomly scattered across the counter.
Place the coffee machine or coffee maker at the back if space allows. In front or beside it, arrange your favorite mugs. Cream, beige, brown, or handmade-looking ceramic mugs create a warm appearance.
Use glass containers for coffee beans, sugar, tea, or other dry ingredients. Matching containers immediately make the space look more organized.
A small ceramic vase can add softness. If you have a suitable location, use a small natural arrangement. Avoid adding too many decorative objects because the station should remain functional.
You can also add a small wooden sign or framed artwork if you like personalized decor, but keep written elements minimal if your goal is a clean Pinterest aesthetic.
Materials and Things to Use
- Wooden or ceramic tray
- Coffee maker
- Ceramic mugs
- Glass coffee container
- Sugar container
- Small spoon
- Ceramic vase
- Wooden accessory
- Small artwork
- Warm lamp or lighting
Step-by-Step Styling
- Choose a small dedicated countertop area.
- Remove unnecessary objects.
- Place a tray as the foundation.
- Position the coffee maker.
- Arrange two to four attractive mugs.
- Add matching glass containers.
- Introduce one ceramic or wooden accessory.
- Add warm lighting if appropriate.
- Keep enough space for comfortable use.
The most beautiful coffee stations often look like they belong naturally in the kitchen. Avoid creating a display that is so decorative that you cannot use it.
If you want to change the look seasonally, keep the foundation neutral and change only small details. During autumn, you might add a cinnamon-colored mug. During winter, use cream textiles. During spring, introduce softer colors.
This makes the coffee station a long-term decorating feature rather than a temporary trend.
For a Pinterest image, make the coffee station the main focal point. Use soft natural light during the day or warm ambient lighting for an evening aesthetic. Include enough surrounding kitchen detail to give viewers context.
3. Transform the Kitchen With Warm Layered Lighting
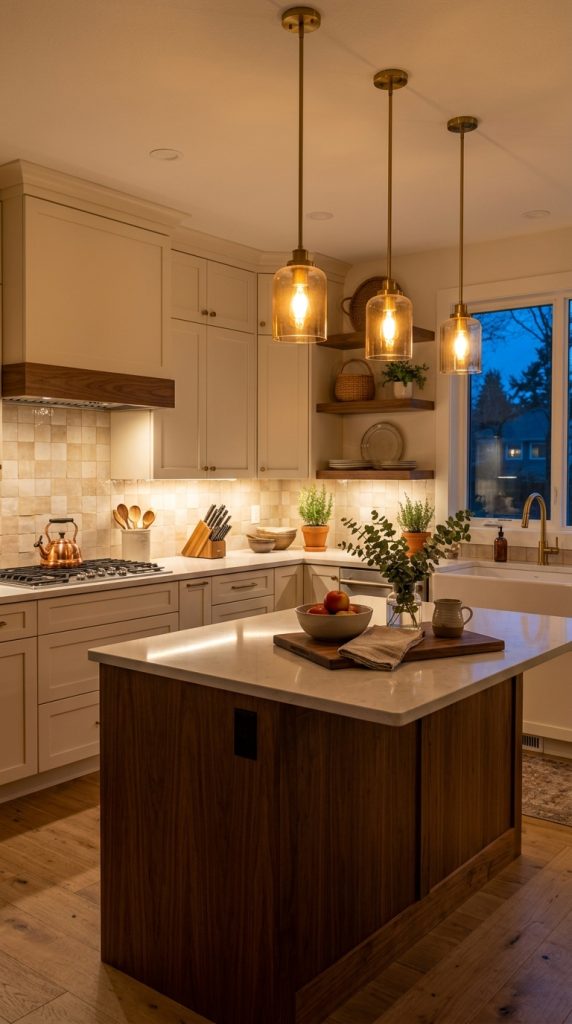
Lighting is one of the most powerful tools for creating a warm kitchen. You can have beautiful cabinets, countertops, accessories, and furniture, but if the lighting is too harsh, the entire space may feel cold.
The goal is to create layers rather than depending on one ceiling fixture.
Begin with your main overhead lighting. If the fixture is extremely cool or harsh, consider warmer bulbs where compatible with your fixtures. Warm white lighting can create a more comfortable atmosphere.
Next, introduce task lighting. Under-cabinet lights are particularly useful because they illuminate countertops while also creating a beautiful glow after dark.
If you have a kitchen island, pendant lights can become an important design feature. Choose fixtures that complement your overall style. Natural woven shades can add warmth, while simple glass or metal fixtures can create a more modern aesthetic.
Small lamps can also work in larger kitchens or open-plan spaces, provided they are positioned safely away from water and cooking areas. A compact lamp can make a kitchen feel connected to a nearby living area.
Materials and Things to Use
- Warm LED bulbs
- Under-cabinet lighting
- Rechargeable cabinet lights
- Pendant lights
- Small table lamp
- Decorative lantern
- Dimmer where compatible
- Candles for safe decorative use
Step-by-Step Lighting Plan
- Identify the darkest areas.
- Improve the main lighting if necessary.
- Add under-cabinet illumination.
- Use pendant lights over an island if available.
- Add a small decorative lamp in an appropriate dry location.
- Keep light temperatures visually consistent.
- Use dimmable lighting where possible.
- Create softer evening illumination.
Avoid mixing extremely cool blue lighting with warm yellow lighting unless there is a deliberate design reason. Inconsistent lighting can make the kitchen feel visually disconnected.
The ideal warm kitchen should be functional during the day and atmospheric at night.
For Pinterest, lighting is especially important. Warm evening lighting can make an ordinary kitchen look luxurious and inviting. However, make sure the image is not so dark that viewers cannot see the decor. The best visual balance is soft, warm, and detailed.
4. Style Open Shelves Like a Designer
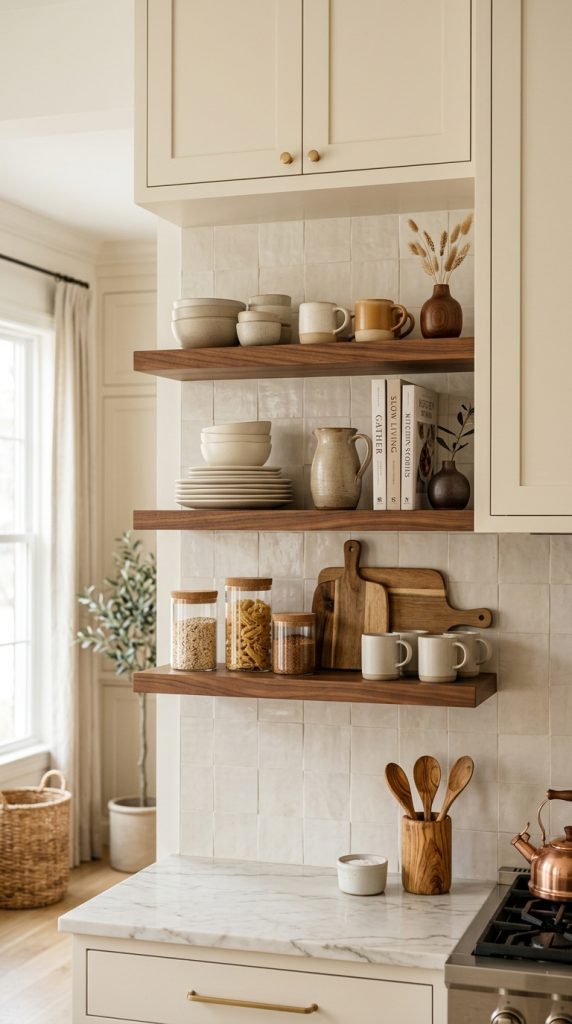
Open shelves can be one of the most attractive features in an aesthetic kitchen, but they need careful styling. If shelves become storage for every random item, they can quickly make the kitchen feel messy.
Treat open shelving as a curated display.
Start by selecting your main materials. A combination of cream ceramics, natural wood, clear glass, and a small amount of earthy color works beautifully.
Place the largest pieces first. A wooden cutting board can lean vertically against the wall. Stack a few ceramic plates beside it. Add bowls on top of the stack.
Next, introduce mugs. Place several together rather than scattering them across the shelf.
Glass jars can provide visual transparency and keep ingredients accessible. Cookbooks can be stacked horizontally or positioned vertically.
Materials and Things to Use
- Ceramic plates
- Ceramic bowls
- Neutral mugs
- Wooden cutting boards
- Glass jars
- Cookbooks
- Ceramic pitcher
- Small vase
- Decorative bowl
- Small framed artwork
Step-by-Step
- Remove everything from the shelves.
- Group items by color and material.
- Place large objects first.
- Add stacked plates and bowls.
- Arrange mugs together.
- Introduce wooden boards for height.
- Add glass jars.
- Include one or two decorative pieces.
- Leave intentional empty space.
Varying heights is extremely important. If everything is the same height, the shelf can appear flat.
Use the rule of visual grouping. Instead of placing one plate, one mug, one bowl, and one jar repeatedly, create small collections. A stack of plates, three mugs, and a vase can form one visual group.
Avoid overcrowding. Empty space makes the displayed objects more noticeable.
If you have very small shelves, reduce the number of objects. The goal is not to demonstrate how much storage you have but to create a beautiful composition.
5. Design a Cozy Kitchen Island Focal Point

A kitchen island naturally attracts attention, so it should be styled intentionally. However, the island must remain functional. It should still provide enough room for preparing food, serving meals, and completing everyday tasks.
Start with one large tray. The tray provides a visual boundary and makes it easier to move the arrangement when you need the entire island.
Add a ceramic vase as the tallest object. Next to it, place a bowl filled with fresh fruit. You can also add a wooden cutting board or a small serving dish.
If the island is large, divide the surface into two visual areas rather than placing everything in the center. For example, one side can hold a decorative arrangement while the opposite side remains completely open for preparation.
Materials and Things to Use
- Large wooden tray
- Ceramic vase
- Fresh fruit bowl
- Wooden cutting board
- Ceramic serving bowl
- Small cookbook
- Natural wood accessory
- Warm pendant lighting
Step-by-Step
- Clear the island.
- Decide how much working space must remain available.
- Choose one main focal arrangement.
- Add the tallest object first.
- Place a bowl or tray beside it.
- Introduce one wooden element.
- Keep the rest of the island open.
- Check the arrangement from different angles.
Fresh fruit is particularly useful because it adds natural color without feeling like artificial decoration.
If your kitchen has a small island, keep the arrangement very simple. A vase and bowl may be all you need.
The island should look styled but not staged. A completely empty island can feel sterile, while an overcrowded one becomes impractical.
For Pinterest, photograph the island at an angle that also shows the pendant lights and surrounding cabinetry. This creates depth and makes the image feel like a complete kitchen rather than a close-up of one surface.
6. Add Natural Textures With Wood, Woven Pieces, and Ceramics
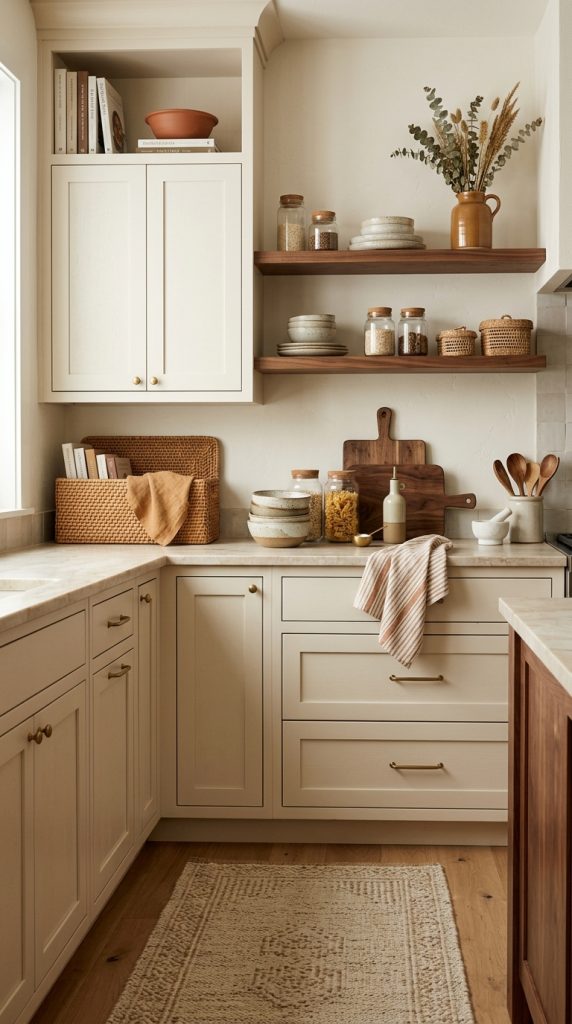
Warmth often comes from texture rather than color. A kitchen can use a neutral palette and still feel rich if different materials are layered thoughtfully.
Wood provides warmth. Woven baskets provide softness. Ceramic adds handmade character. Glass introduces transparency. Linen-style textiles add subtle softness.
Start by choosing one piece from each category rather than purchasing many accessories.
A wooden bowl can sit beside a smooth ceramic vase. A woven basket can hold kitchen towels. A textured runner can soften the floor.
Materials and Things to Use
- Wooden bowl
- Natural cutting boards
- Woven basket
- Ceramic vase
- Ceramic bowls
- Glass jars
- Textured runner
- Linen-style towels
- Woven placemats
- Wooden utensils
Step-by-Step
- Identify areas that feel visually cold.
- Add natural wood.
- Introduce one woven item.
- Add ceramic pieces.
- Use glass for storage.
- Add a soft textile.
- Repeat one or two materials elsewhere.
The key is contrast. Smooth ceramic looks more interesting next to rough wood. Clear glass looks beautiful beside woven textures.
Avoid using too many competing patterns. If your backsplash is highly patterned, choose simpler accessories.
Texture is especially valuable for neutral kitchens because it creates visual depth without requiring strong colors.
A warm aesthetic kitchen should feel appealing not only because it looks beautiful but because viewers can almost imagine touching the materials. This tactile quality is one reason natural textures perform so well in interior photography.
7. Create a Beautiful and Organized Kitchen Pantry
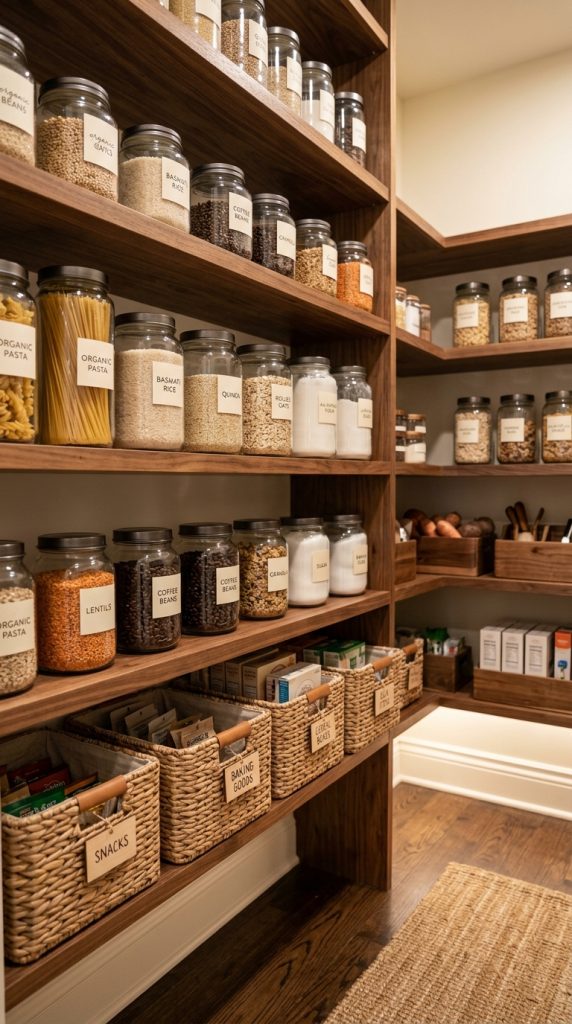
Organization can be decorative when it is approached intentionally. A beautiful pantry makes everyday cooking easier while creating the clean, satisfying aesthetic that performs well on Pinterest.
Begin by removing expired or unnecessary items. Then group similar ingredients together.
Glass jars are useful for dry goods because they allow you to see what is inside. Use containers that are practical for your household and suitable for food storage.
Woven baskets are useful for packaging that you do not want displayed individually. They can hold snacks, packets, baking supplies, or other small items.
Materials and Things to Use
- Glass storage jars
- Airtight containers
- Woven baskets
- Wooden bins
- Simple labels
- Shelf risers
- Small trays
- Storage boxes
Step-by-Step
- Empty one pantry section at a time.
- Check expiration dates.
- Group similar ingredients.
- Select suitable storage containers.
- Transfer appropriate dry goods.
- Add simple labels where useful.
- Place frequently used items at accessible heights.
- Use baskets for miscellaneous packaging.
- Leave small amounts of visual breathing room.
Do not transfer every food item into matching containers simply for appearance. Organization should remain practical.
A pantry can look beautiful without becoming complicated. The strongest aesthetic usually comes from consistency.
Use similar containers, repeat materials, and avoid excessive labels or decorative signs.
For Pinterest imagery, an organized pantry should look satisfying but realistic. Include enough variation to show that it is a working kitchen rather than a showroom.
8. Add a Cozy Breakfast Nook
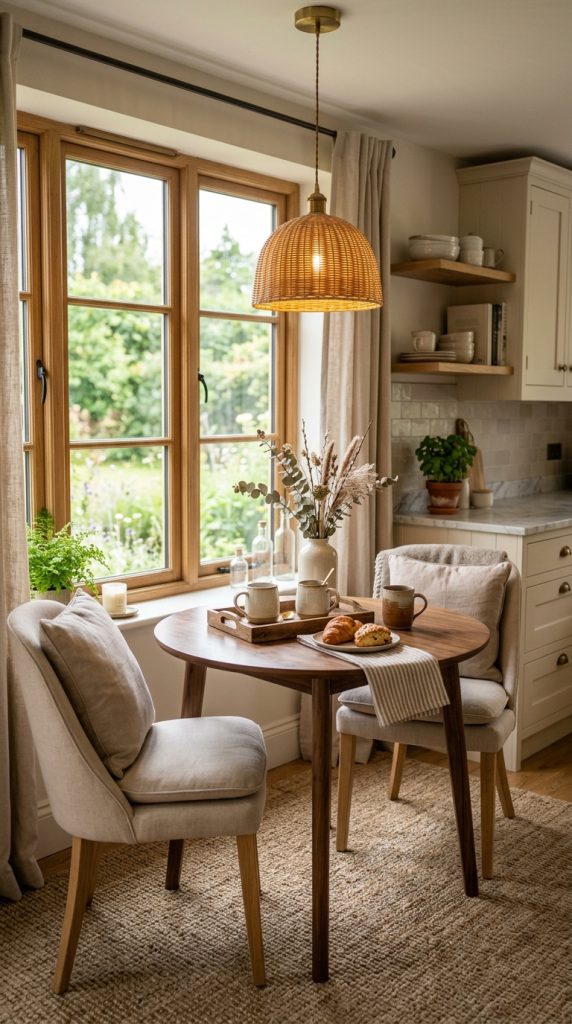
If your kitchen has a small unused corner, turn it into a breakfast nook. This can add personality while making the kitchen more functional.
A round table is often ideal for small spaces because its shape allows easier movement around the edges. Choose a natural wood table for warmth or a neutral table for a softer appearance.
Comfortable chairs are essential. Add cushions if the chairs are hard.
A small rug can define the dining area and create visual separation from the kitchen. Choose a washable or easy-care material if possible.
Materials and Things to Use
- Small round dining table
- Comfortable chairs
- Neutral cushions
- Small rug
- Ceramic vase
- Wooden tray
- Warm pendant light
- Simple artwork
- Ceramic mugs
Step-by-Step
- Measure the available space.
- Choose furniture that leaves comfortable walking room.
- Position the table near natural light if possible.
- Add comfortable seating.
- Introduce a small rug.
- Style the table with one centerpiece.
- Add suitable warm lighting.
- Keep the area uncluttered.
The breakfast nook should feel like an extension of the kitchen rather than a separate room.
A ceramic vase with dried stems can become a simple centerpiece. A wooden tray with mugs can add a practical decorative detail.
This space can serve multiple purposes. It can become a breakfast area, work corner, homework station, or place for evening tea.
For Pinterest, focus on the relationship between the table, chairs, lighting, and surrounding kitchen. A cozy breakfast nook is most attractive when viewers can imagine themselves using it.
9. Make a Small Kitchen Look Warm and Expensive

Small kitchens can be extremely attractive when decoration is carefully controlled. The biggest mistake is trying to add too much.
Begin by removing anything that does not need to remain on the countertop. Then identify one or two focal areas.
Use light warm colors to keep the room visually open. Cream, ivory, beige, and light wood can make the kitchen feel spacious while still providing warmth.
Vertical storage is especially useful. Open shelves, wall hooks, rails, and cabinets can move items away from the countertop.
Materials and Things to Use
- Light wooden cutting board
- Small ceramic vase
- Glass storage jars
- Compact wooden tray
- Neutral kitchen towel
- Small woven basket
- Warm lighting
- Simple runner
- Wall shelf
Step-by-Step
- Declutter countertops.
- Select a limited color palette.
- Add one wooden element.
- Introduce matching storage containers.
- Use vertical storage.
- Add a small textile.
- Improve lighting.
- Create one focal point.
- Keep surrounding areas open.
To create an expensive appearance, focus on consistency rather than quantity.
Matching glass jars can look more polished than a collection of colorful packaging. A single beautiful ceramic vase can look more sophisticated than many small decorations.
Lighting also makes a major difference. Under-cabinet illumination can make even a basic kitchen feel more luxurious.
Avoid oversized decor. Small kitchens need appropriately scaled accessories.
The final room should feel calm and organized rather than empty. The best small kitchen designs demonstrate that limited space can still have plenty of personality.
10. Create a Complete Warm and Aesthetic Dream Kitchen
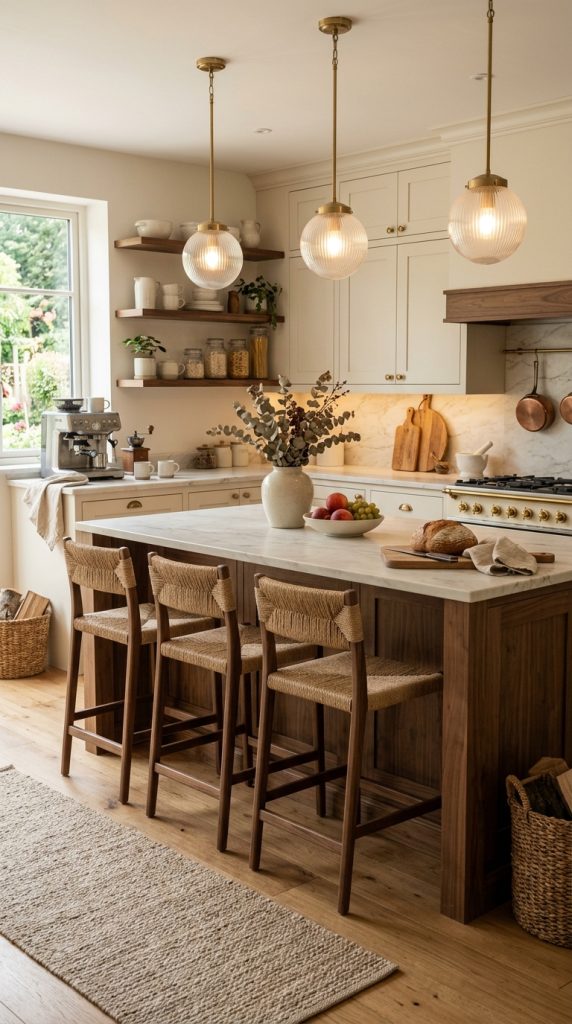
If you want a complete transformation, combine the strongest elements from the previous ideas into one cohesive design. The goal is not to use every possible decoration. Instead, build a kitchen where every feature supports the same visual story.
Start with a warm neutral foundation. Cream or warm-white cabinetry creates a soft backdrop. Natural walnut or oak elements add depth. Stone countertops provide a refined surface.
Create a clear island focal point. Use a wooden tray, ceramic vase, and fruit bowl, but keep enough space available for cooking.
Style open shelves with cream ceramics, wooden cutting boards, glass jars, and a few carefully selected cookbooks.
Create a coffee station in one corner. Keep it functional and visually organized.
Introduce woven baskets for storage and a textured runner for softness.
Finally, focus on lighting. Warm pendant lights, under-cabinet illumination, and soft ambient lighting should work together.
Materials and Things to Use
- Warm cream cabinetry
- Natural wood accessories
- Stone-look countertop
- Wooden cutting boards
- Ceramic bowls and mugs
- Glass storage jars
- Woven baskets
- Textured runner
- Wooden tray
- Ceramic vase
- Fruit bowl
- Coffee station accessories
- Warm pendant lighting
- Under-cabinet lighting
- Neutral kitchen towels
- Simple artwork
Step-by-Step Complete Kitchen Styling
Start by decluttering. Remove everything that does not need to be visible.
Next, establish your color palette. Choose approximately four primary shades and repeat them throughout the room.
Add natural wood through cutting boards, bowls, trays, shelves, stools, or utensils.
Introduce ceramics in cream, ivory, beige, or another coordinated neutral.
Organize everyday supplies using trays and containers.
Style the island as the primary focal point.
Decorate open shelves carefully if you have them.
Create a small coffee station or beverage area.
Add a runner and coordinated textiles.
Finish with layered warm lighting.
Finally, step back and evaluate the room as a whole. Look for areas that feel too empty and areas that feel crowded. Move objects until the composition feels balanced.
The most important rule is to maintain functionality. Your kitchen is not a museum. You should be able to cook, clean, prepare food, and move around comfortably.
For the ultimate Pinterest aesthetic, combine beauty with realism. A bowl of fruit, a few mugs, a cookbook, and a wooden cutting board make the kitchen feel lived-in. Perfectly empty countertops can look beautiful but may not communicate the warm lifestyle viewers are searching for.
Final Thoughts
Creating a warm and aesthetic kitchen does not have to mean spending thousands of dollars or completely remodeling the room. The most effective transformations often come from thoughtful styling decisions.
Start with your color palette. Warm white, cream, beige, caramel, walnut, muted brown, and subtle terracotta are excellent foundations. Then introduce natural materials such as wood, ceramic, woven fibers, glass, and soft textiles.
Focus on organization as much as decoration. A clear countertop, attractive storage containers, and thoughtfully styled shelves can make a kitchen feel instantly more sophisticated.
Lighting should never be overlooked. Warm, layered illumination can turn the same kitchen from cold and functional during the day into intimate and inviting in the evening.
Most importantly, remember that aesthetic does not mean impractical. Your kitchen should still work for everyday life. The most successful decorating approach combines beauty, comfort, organization, personality, and functionality.
For Pinterest, focus on creating a strong visual story. Use one clear focal point, repeat your color palette, mix textures, include natural materials, and avoid overcrowding the frame. A beautiful kitchen should make viewers immediately imagine themselves living in the space.
Whether your kitchen is large or tiny, modern or traditional, rented or owned, these ideas can be adapted to fit your home. You can start with something as simple as a wooden cutting board and a warm kitchen towel, then gradually build the look with better lighting, organized storage, ceramics, textiles, and carefully selected accessories.
The result should not simply be a kitchen that looks attractive in a photograph. It should be a kitchen that feels warm every time you walk into it.
Leave a Reply