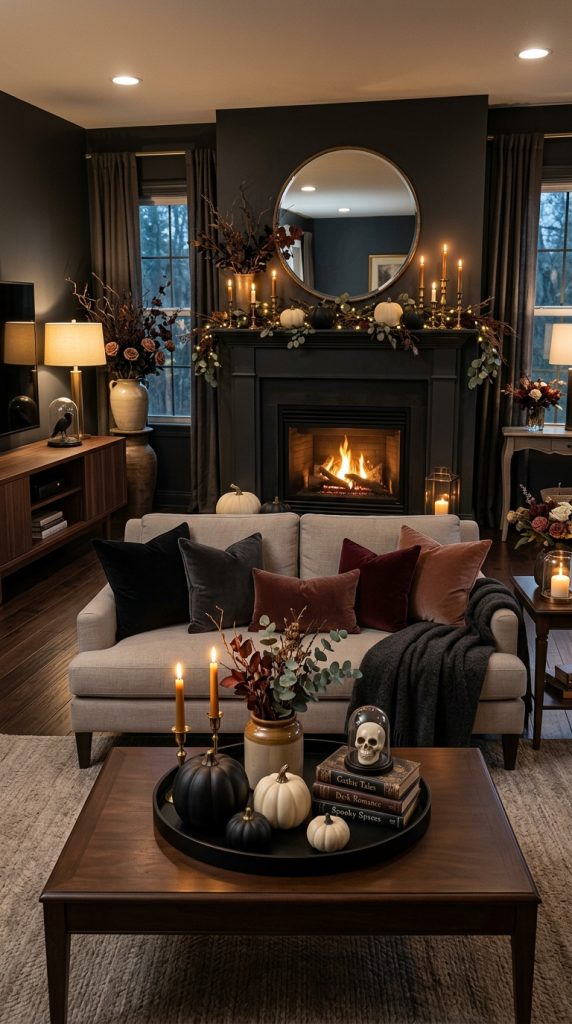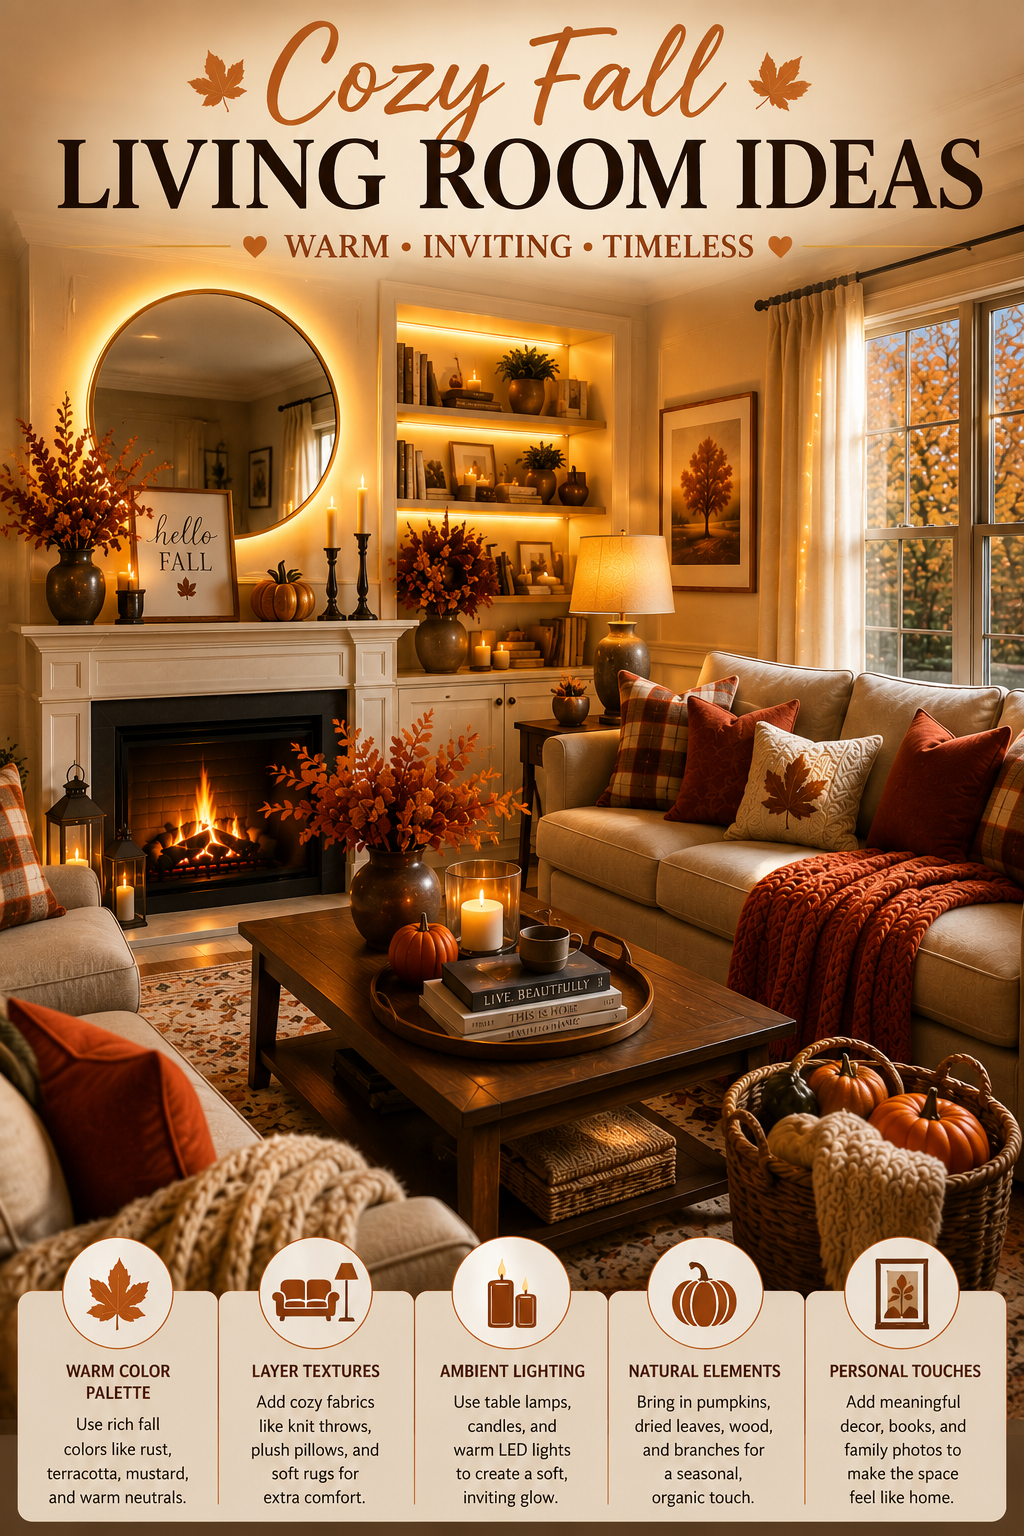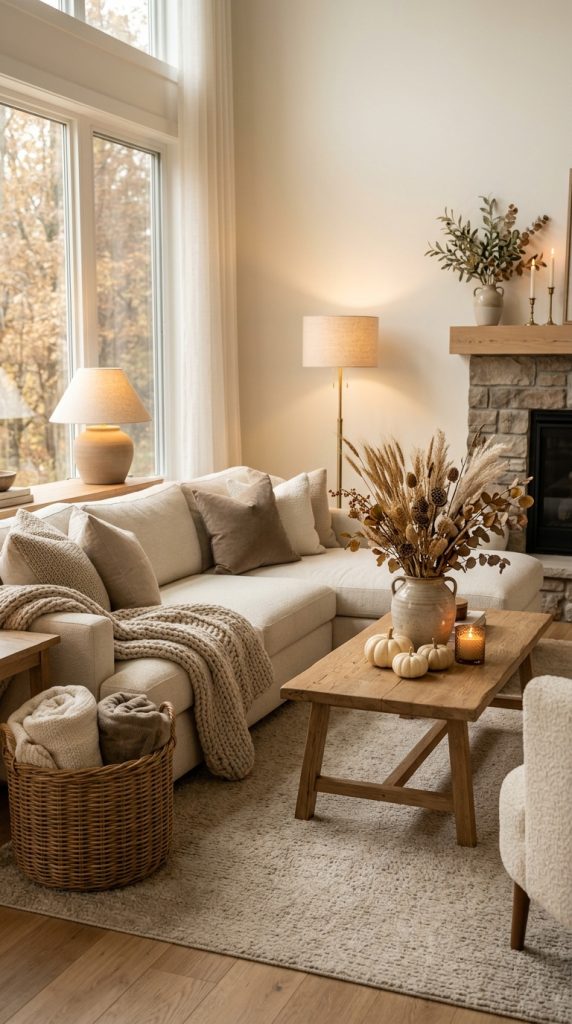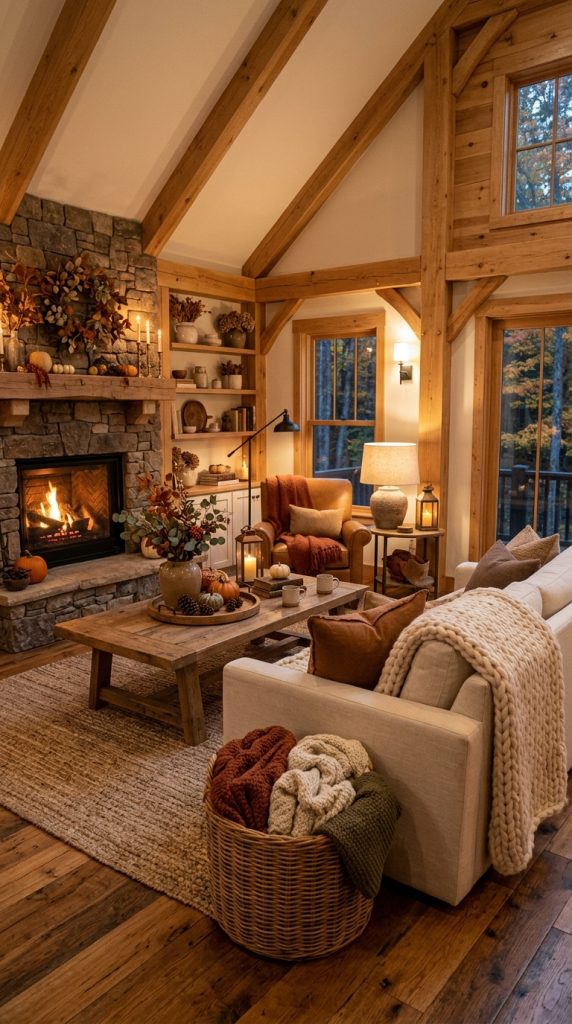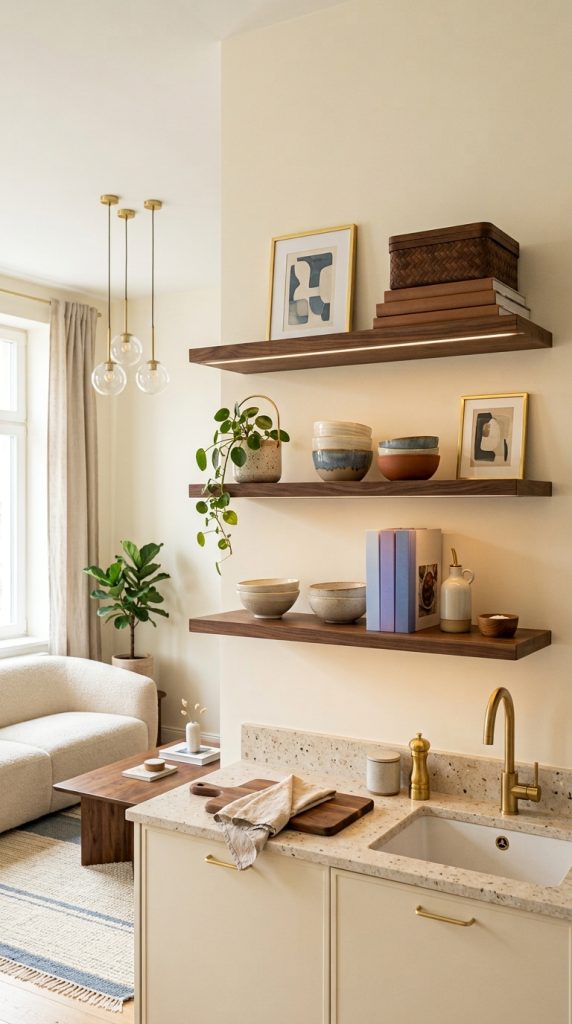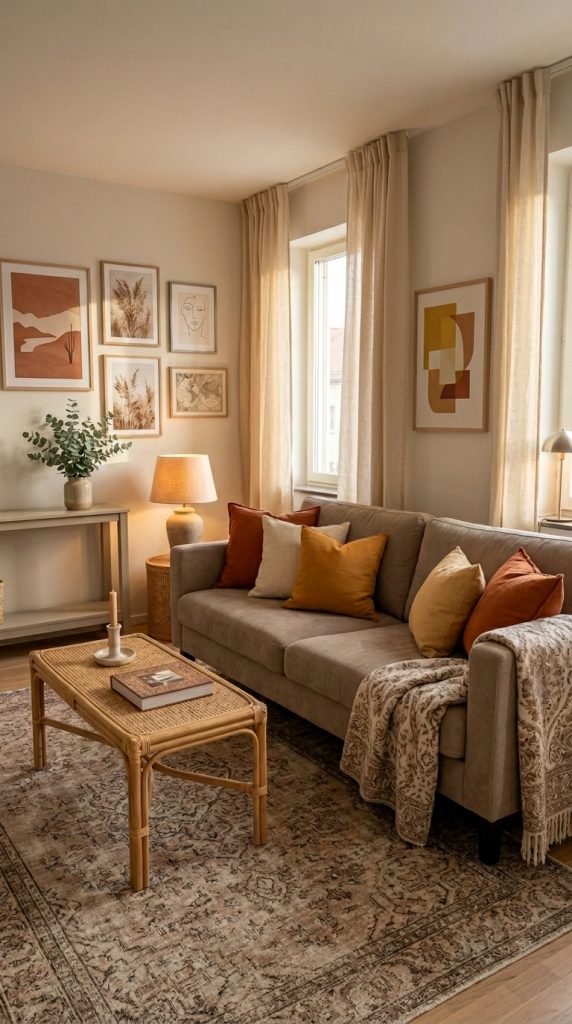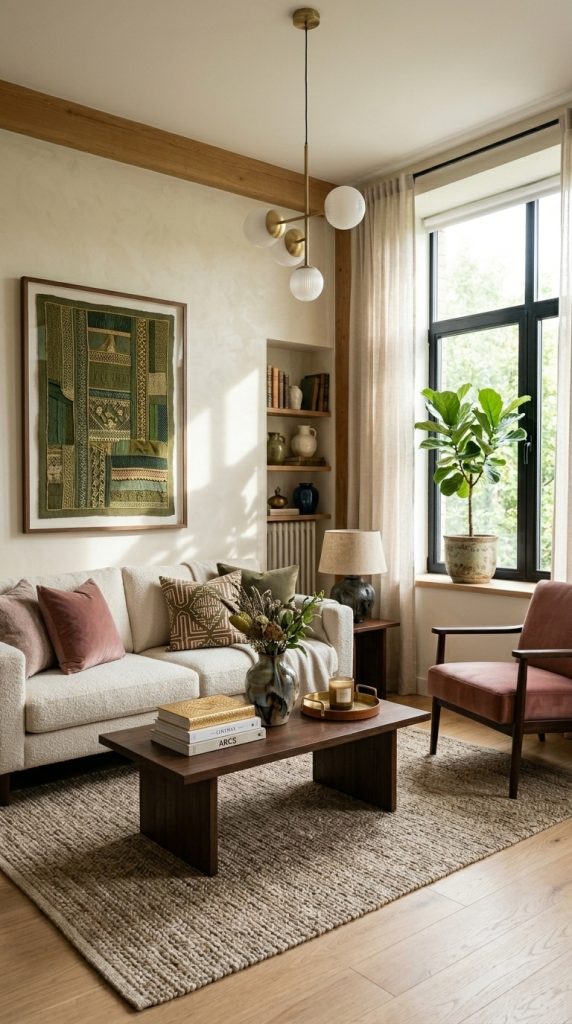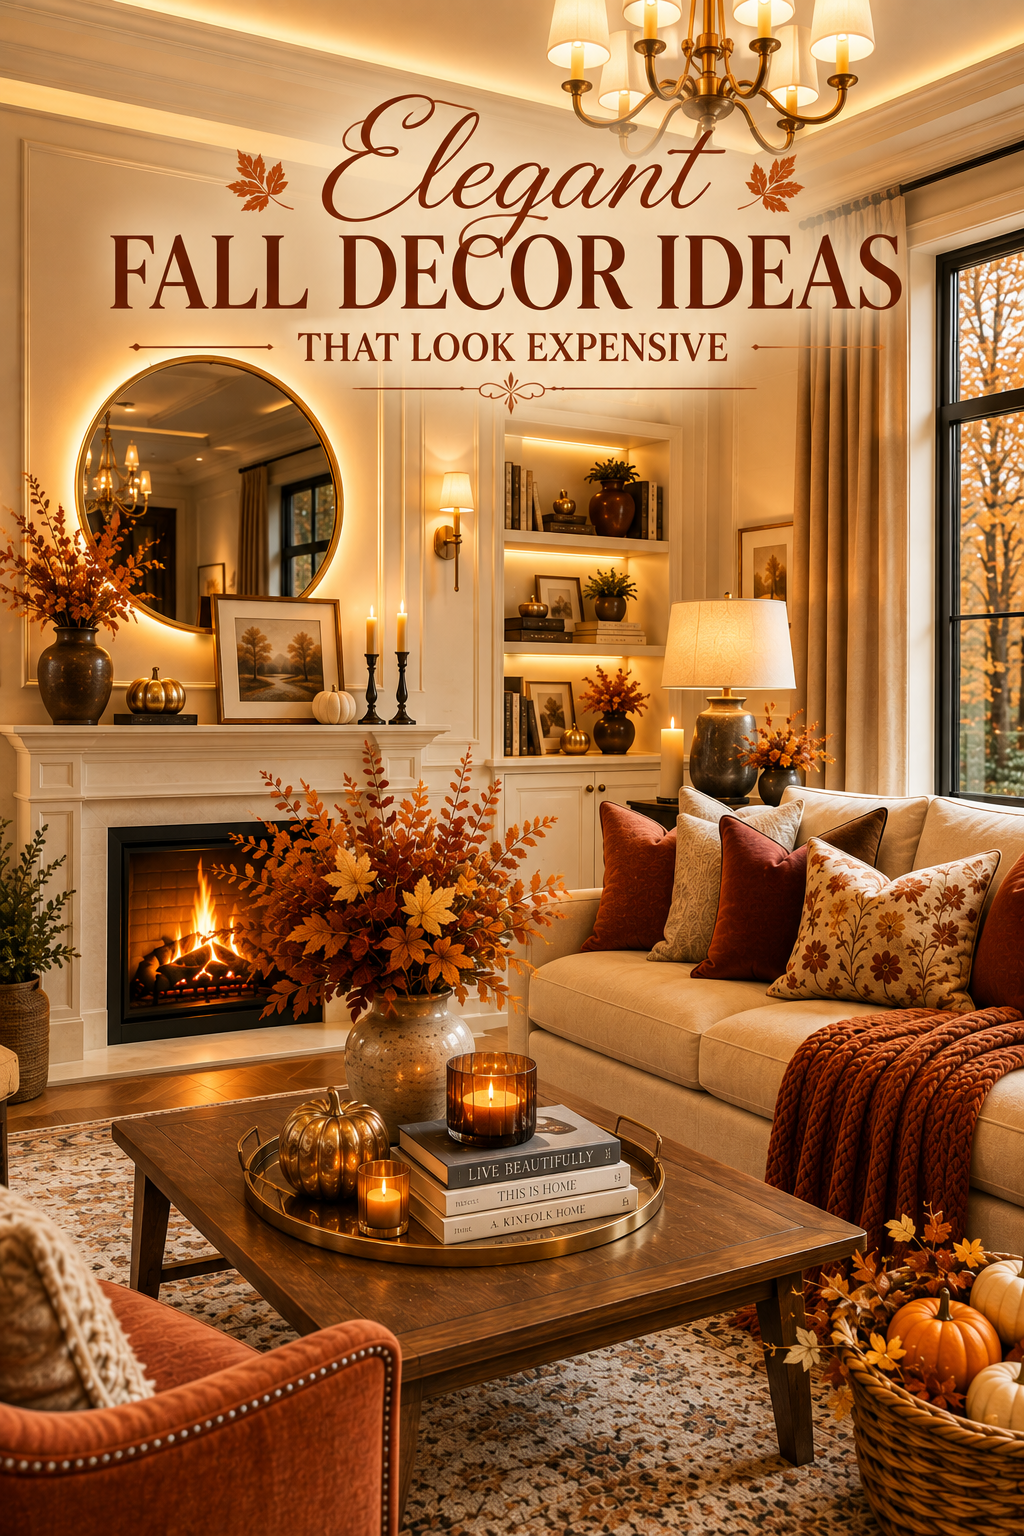
Blog

  • Neo Deco Living Rooms ideas

    Neo Deco Living Rooms ideas

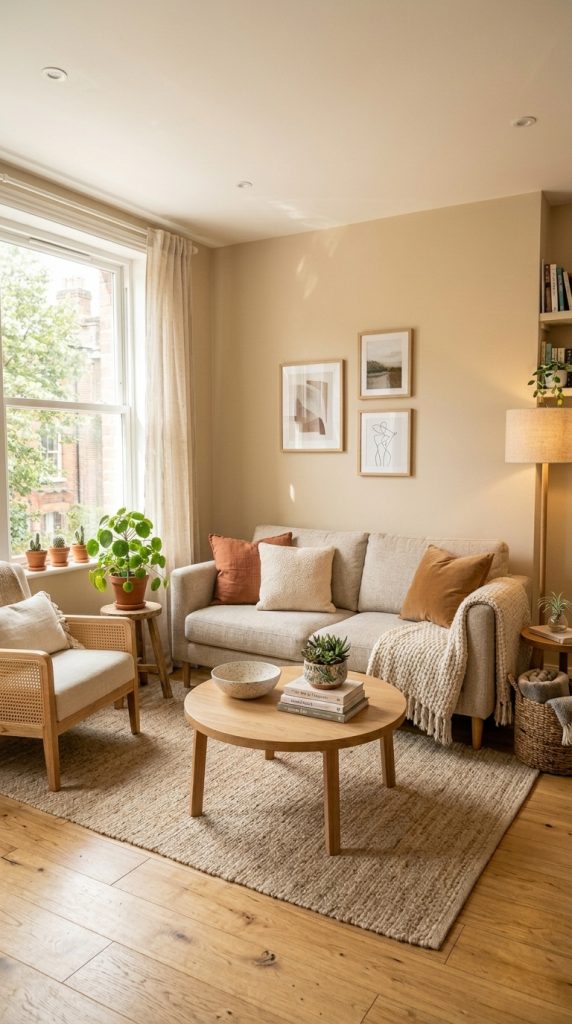
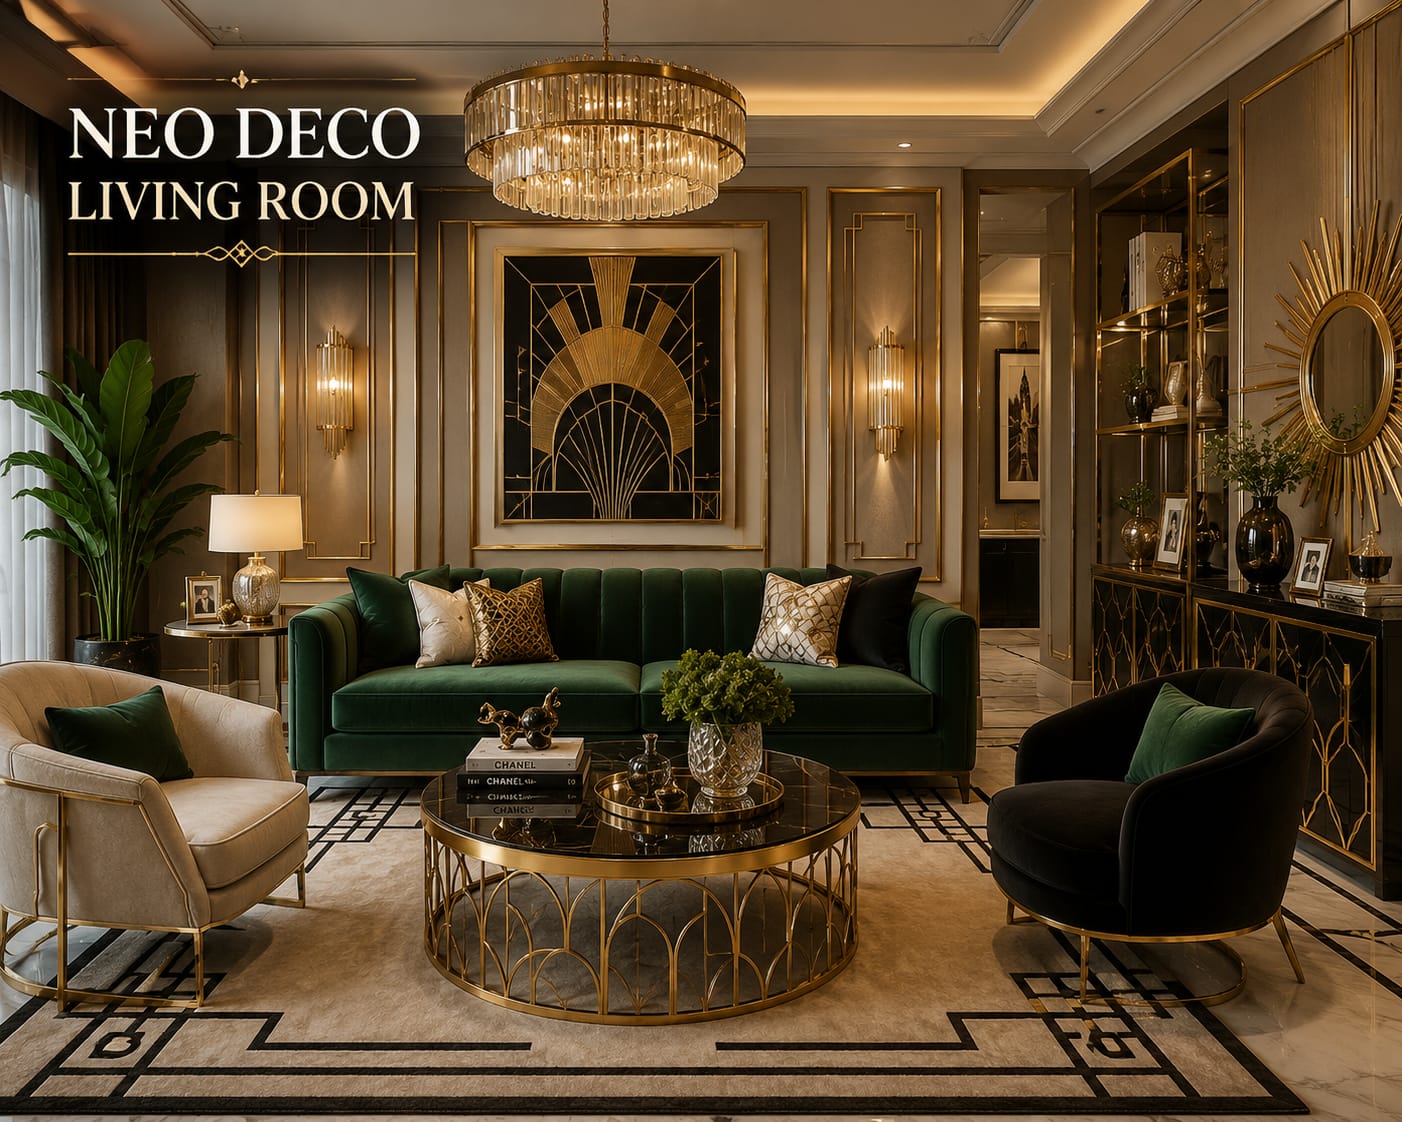
    Neo Deco is one of the most exciting interior-design directions for homeowners who love the glamour of classic Art Deco but want a space that feels fresh, comfortable, and modern. Traditional Art Deco is known for dramatic geometry, luxurious materials, rich colors, polished surfaces, symmetry, and glamorous lighting. Neo Deco takes those recognizable characteristics and softens them for contemporary homes. Instead of creating a room that feels like a historic hotel lobby, the goal is to combine elegant Art Deco-inspired details with modern furniture, practical layouts, warm textures, subtle color palettes, and comfortable everyday living.
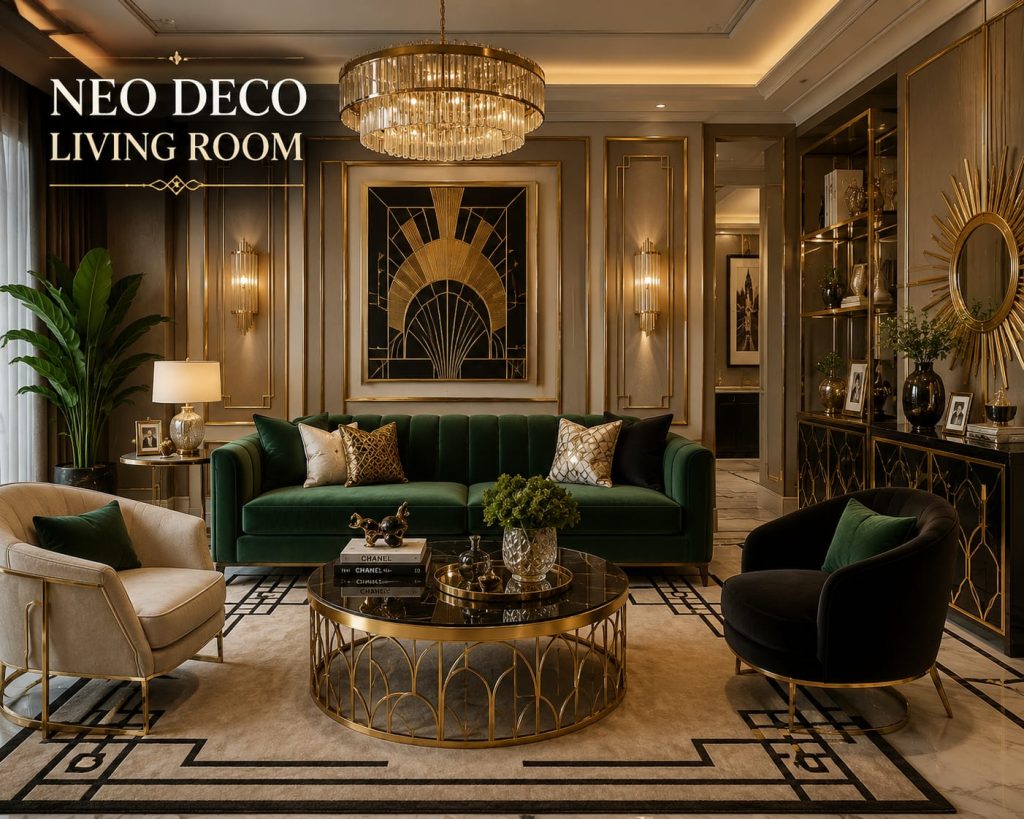
    A Neo Deco living room can therefore feel sophisticated without becoming overly formal. You might see a curved sofa paired with a sculptural coffee table, a geometric rug underneath contemporary furniture, fluted wall panels behind the television, brass lighting fixtures, velvet cushions, smoked-glass accents, and carefully selected artwork. The magic comes from balance. Too many decorative elements can make the room feel theatrical, while too few can make it look like an ordinary contemporary living room. Neo Deco works best when a few recognizable glamorous details are repeated throughout the space.

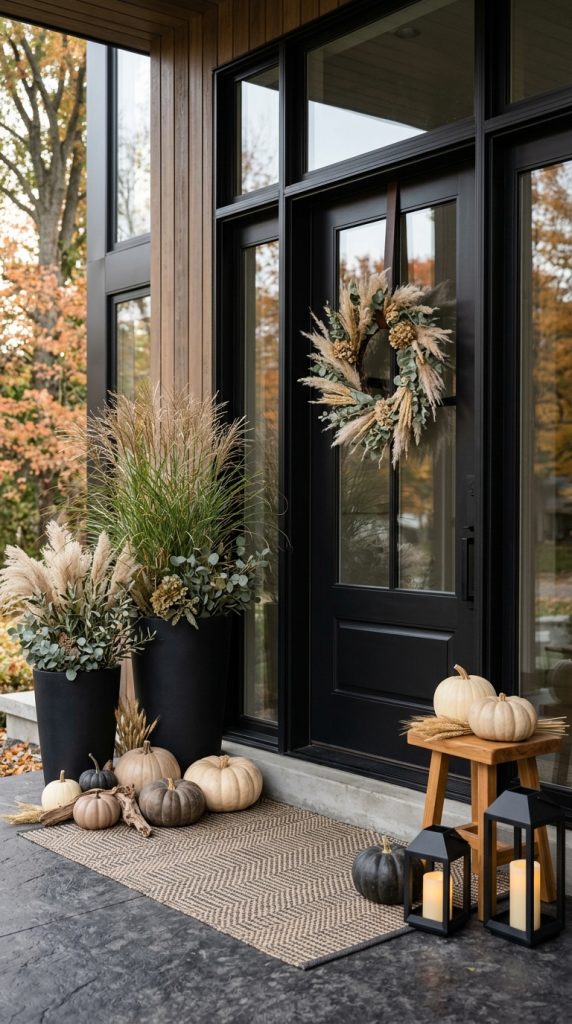
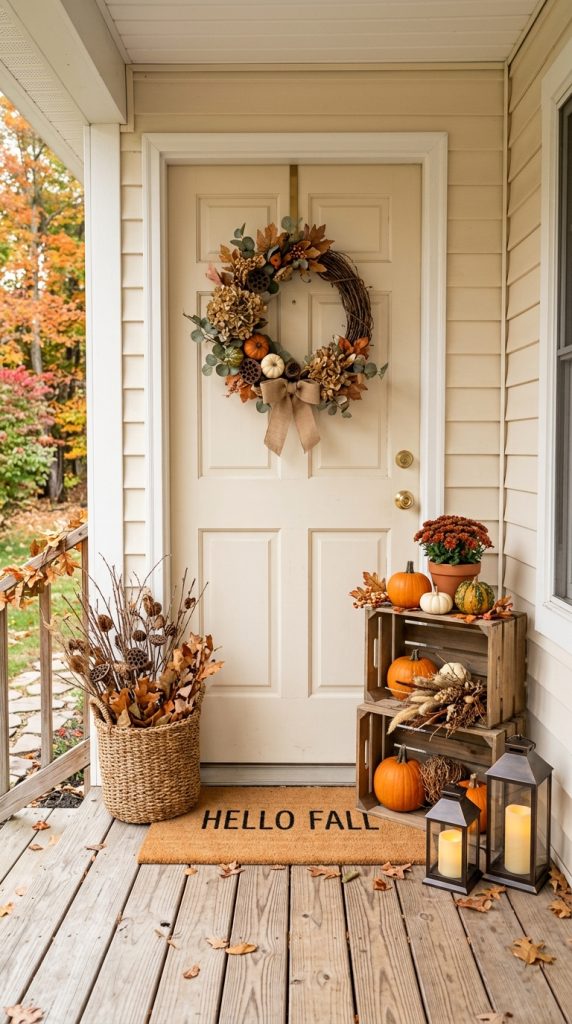
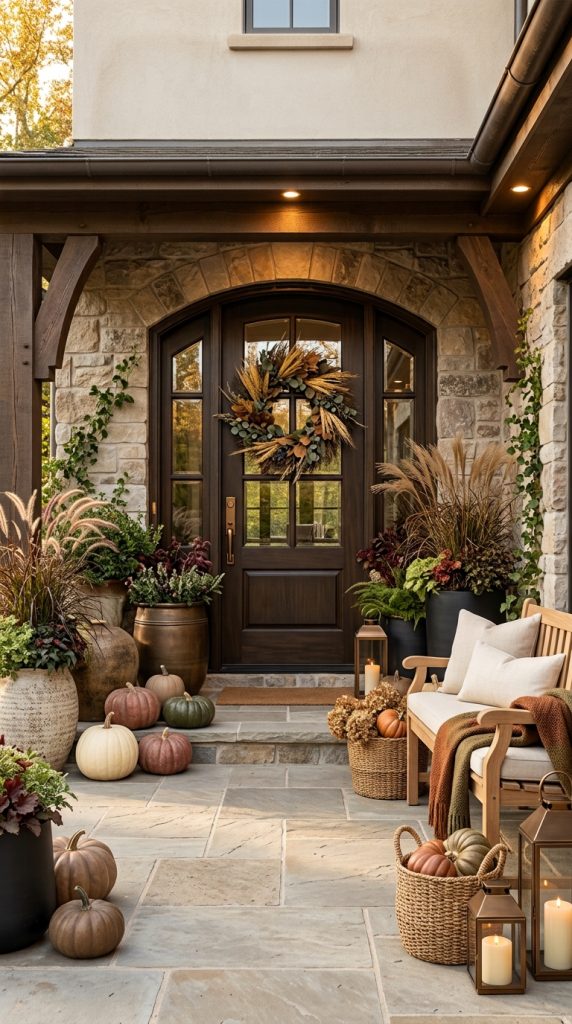
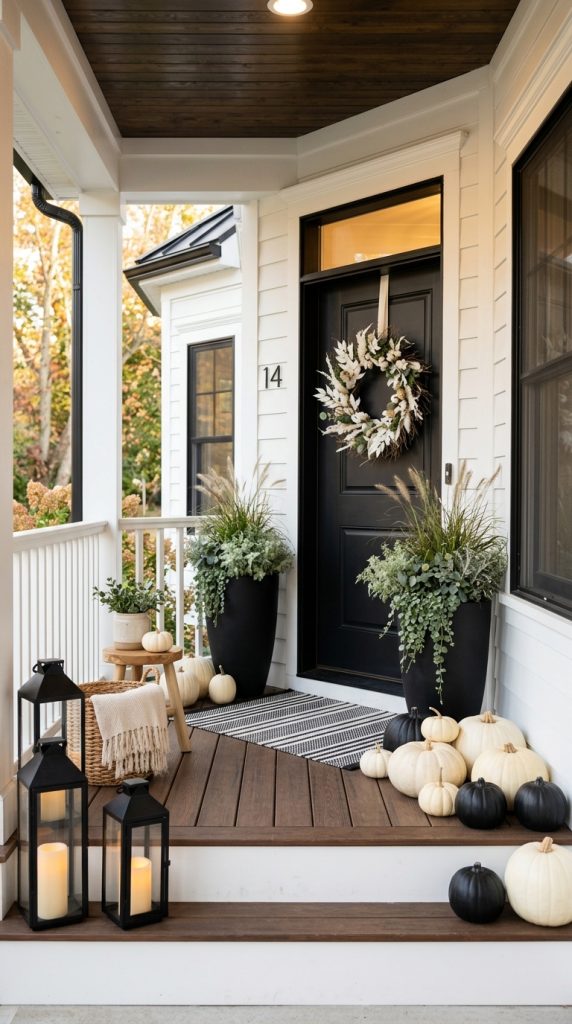
    One of the easiest ways to introduce the style is through shape. Curved sofas, rounded coffee tables, arched mirrors, circular side tables, scalloped chairs, and curved lamps instantly create a softer interpretation of Art Deco. These shapes can be combined with straight architectural lines such as wall paneling, shelving, rectangular artwork, or a clean media console. The contrast between curves and geometry gives the room its visual personality.

    Color is equally important. You do not need a black-and-gold living room to achieve a Neo Deco look. A neutral foundation of cream, warm white, taupe, beige, or soft gray can provide an elegant backdrop for smaller doses of emerald green, navy, burgundy, chocolate brown, charcoal, dusty rose, or deep teal. Metallic finishes such as antique brass, champagne gold, or brushed bronze can then provide the glamorous finishing touch. For a quieter room, use metallic accents sparingly rather than covering every surface in gold.

    Lighting is another major feature. Neo Deco interiors look especially beautiful when several layers of lighting are used together. A sculptural pendant can act as the focal point, while wall sconces, table lamps, concealed lighting, and floor lamps provide softer illumination around the room. Warm white bulbs generally make velvet, wood, brass, and textured fabrics appear richer and more inviting.

    Furniture should always remain comfortable. A beautiful living room is not successful if the sofa is difficult to sit on or the coffee table blocks movement. Choose pieces according to the size of the room first, then introduce decorative details. Leave comfortable walking paths, maintain visual balance, and avoid filling every empty corner.

    Another reason Neo Deco works so well for Pinterest is its strong visual identity. Geometric details, sophisticated color combinations, curved furniture, statement mirrors, dramatic lighting, and luxurious textures photograph beautifully. A carefully designed Neo Deco room can look expensive even when many elements are affordable. The secret is not simply buying expensive furniture; it is creating a cohesive visual story.

    The following 15 Neo Deco living room ideas will help you build that story step by step. Whether you have a large open-plan living room, a compact apartment, or a modest family space, these ideas can be adapted to suit different budgets and room sizes. Start with the structure of your room, select a controlled color palette, introduce one or two statement pieces, and then layer in texture and lighting. The result can be elegant, modern, comfortable, and unmistakably Neo Deco.

    1.Create a Curved Sofa as the Main Focal Point

    A curved sofa is one of the easiest ways to establish a Neo Deco living room because rounded furniture immediately introduces the soft geometry associated with modern interpretations of Art Deco. Instead of choosing several complicated statement pieces, let the sofa become the primary focal point and keep the surrounding furniture comparatively simple.
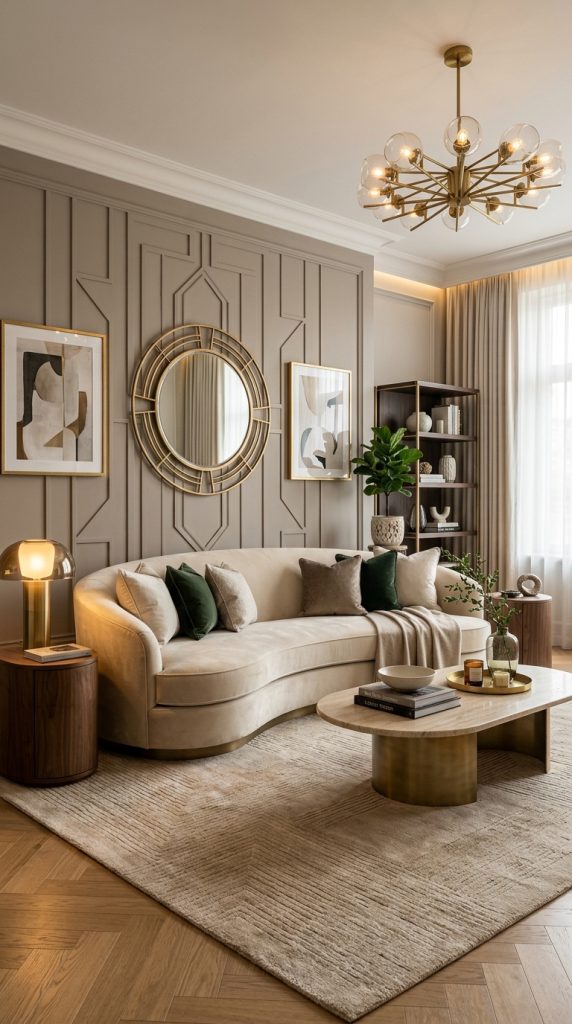
    Look for a curved or gently rounded sofa in velvet, boucle, chenille, linen-look fabric, or another tactile material. Cream, ivory, taupe, caramel, charcoal, deep green, navy, and warm brown can all work beautifully. If your room is small, choose a compact curved sofa rather than an oversized sectional that dominates the entire floor plan.

    Position the sofa so that it faces the main focal point of the room, such as a fireplace, television wall, large artwork, or statement window. Avoid pushing every piece of furniture against the walls. Neo Deco rooms often look more sophisticated when furniture is arranged into a defined conversation area.

    Materials and Things You Need

    • Curved sofa
    • Textured cushions
    • Soft throw
    • Round or oval coffee table
    • Area rug
    • One or two side tables
    • Decorative lamp
    • Artwork or mirror

    Step-by-Step Styling

    First, measure the available floor area and determine the largest sofa size that will leave comfortable walking space. Next, choose a fabric that contributes to the luxurious feeling of the room. Add a large rug underneath the main seating arrangement so the furniture feels visually connected.

    Place a round coffee table in front of the sofa. This reinforces the curved theme without making the room look repetitive. Add two or three cushions in contrasting textures rather than using many identical pillows. Finally, introduce a metallic side table or lamp to provide a subtle Art Deco reference.

    For a stronger Neo Deco appearance, repeat the curve somewhere else in the room. An arched mirror, rounded wall light, circular artwork, or curved accent chair can create continuity.

    The most important rule is restraint. The sofa should be the star. If every object is equally dramatic, the eye has nowhere to settle.

    2.Use Geometric Wall Paneling for Instant Art Deco Character

    Walls provide an excellent opportunity to introduce Neo Deco architecture without replacing your furniture. Geometric paneling, fluted details, decorative molding, or subtle linear patterns can transform an ordinary living room into a sophisticated space.
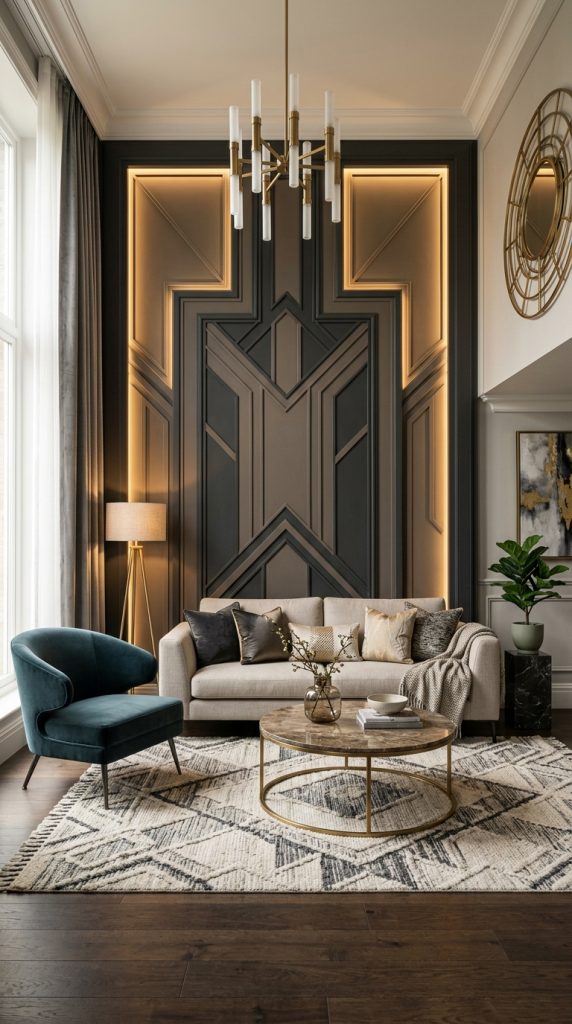
    You can use geometric wall treatment behind the sofa, television, fireplace, or main artwork. The design does not have to cover every wall. In fact, using one feature wall often creates a more expensive-looking result because it gives the room a clear focal point.

    For a contemporary interpretation, choose simple geometry rather than extremely ornate patterns. Vertical fluted panels, large rectangular molding, stepped shapes, arches, and symmetrical lines can all reference Art Deco while remaining modern.

    Materials and Things You Need

    • Wall molding or decorative panels
    • Measuring tape
    • Level
    • Suitable adhesive or installation supplies
    • Paint
    • Paint rollers and brushes
    • Optional LED strip lighting
    • Artwork or mirror

    Step-by-Step Styling

    Start by selecting the wall that deserves the most attention. Measure it carefully and sketch your pattern before purchasing materials. Symmetry is especially useful because balanced geometry is central to the Neo Deco aesthetic.

    Choose a paint color that supports your overall palette. Warm white, mushroom, beige, muted gray, deep green, navy, and charcoal are useful options. If you want a dramatic effect, use a darker color on the feature wall while keeping the remaining walls lighter.

    Install the panels or molding carefully, maintaining equal spacing. Once everything is dry, paint the surface so that the decorative structure appears intentional and integrated.

    For additional sophistication, place a large mirror or artwork over the wall rather than adding dozens of small decorations. Concealed warm lighting can also highlight the geometry in the evening.

    This approach is particularly useful for renters or budget-conscious decorators who want a luxury-inspired effect without purchasing a completely new furniture collection.

    3.Build a Warm Neutral Neo Deco Living Room

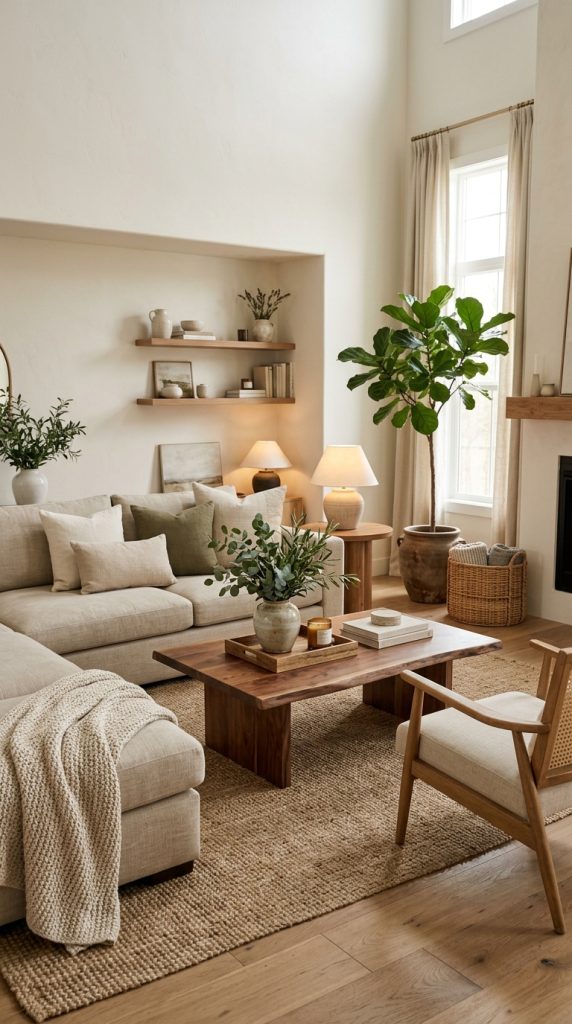
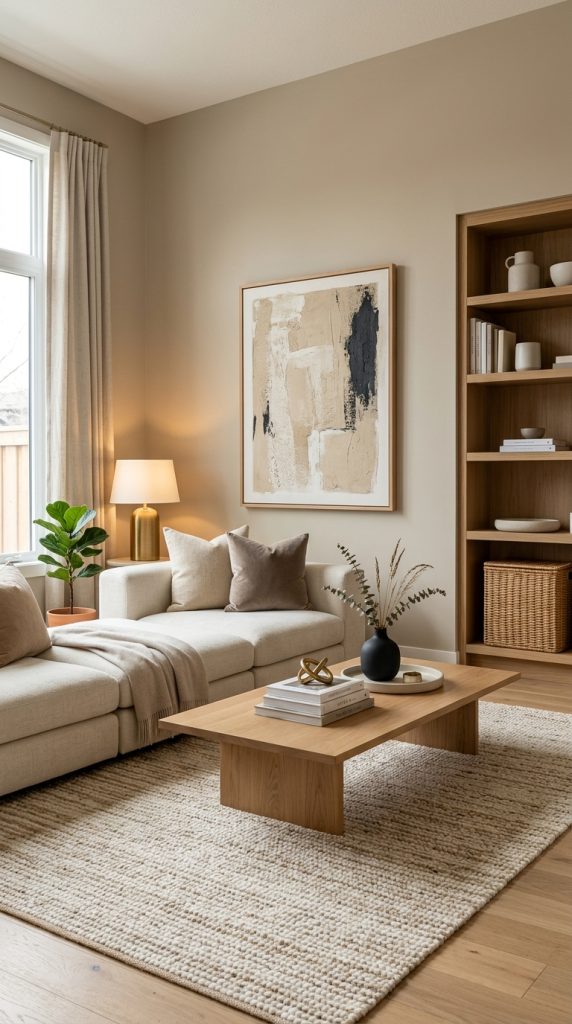
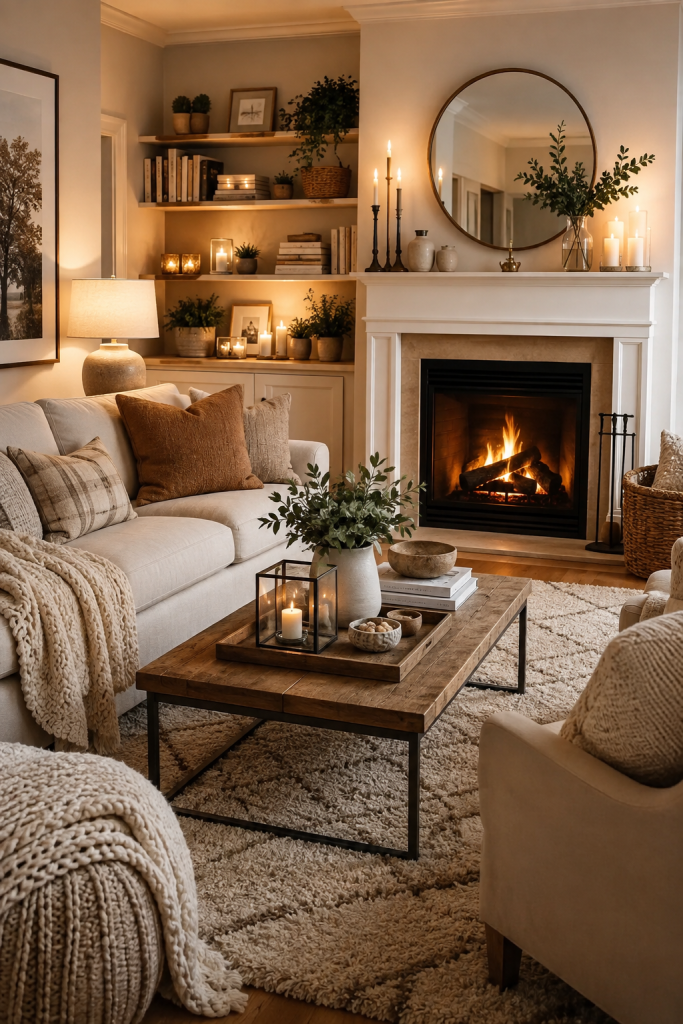
    Neo Deco does not have to mean dramatic dark colors. A warm neutral palette can create a softer, brighter, and highly sophisticated interpretation of the style. Cream, beige, taupe, ivory, warm gray, caramel, and natural wood can create the foundation, while brass and dark accents provide definition.
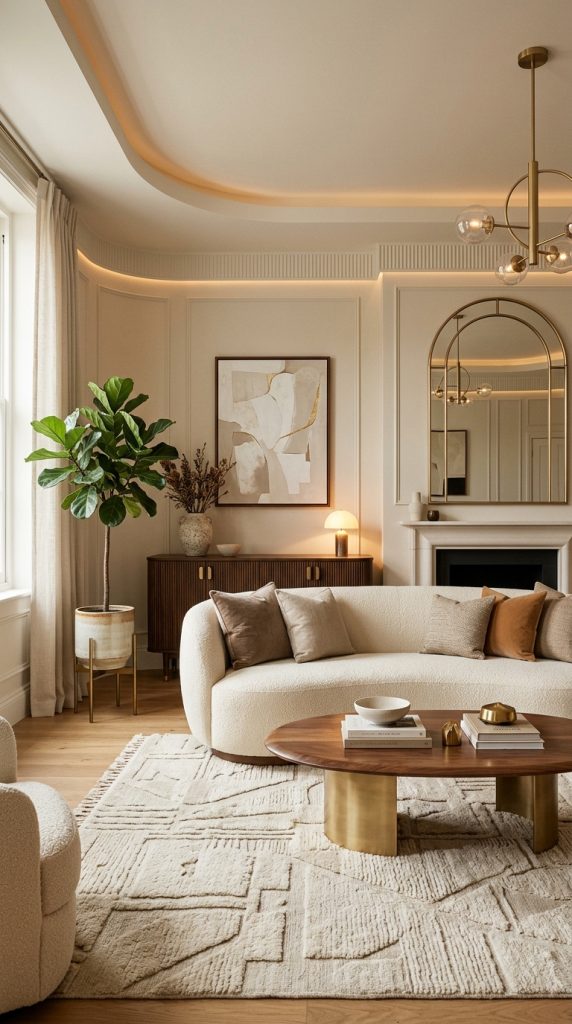
    This approach works particularly well in smaller living rooms because lighter colors can make the room feel more open. Instead of relying on strong color contrast, create interest through texture, shape, and subtle tonal differences.

    Materials and Things You Need

    • Neutral sofa
    • Cream or beige rug
    • Wooden furniture
    • Brass or bronze accents
    • Textured cushions
    • Statement mirror
    • Warm lighting
    • Neutral artwork
    • Decorative objects

    Step-by-Step Styling

    Begin with a warm neutral sofa. Add a large rug that is slightly lighter or darker than the sofa so the furniture remains visually defined.

    Introduce natural wood through a coffee table or sideboard. Then add brass or bronze through smaller objects such as lamps, table legs, picture frames, or handles. The metallic finish should appear several times but never overwhelm the room.

    Layer different fabrics. A linen-look cushion next to a velvet cushion and a knitted throw can make neutral colors feel much richer. Add an oversized mirror with an elegant frame to reflect light and increase visual depth.

    For the walls, choose warm white or soft beige. Avoid using too many unrelated shades of beige because the room can become flat. Instead, concentrate on texture and shape.

    This version of Neo Deco is especially useful for homeowners who want a timeless living room rather than a highly seasonal design.

    4.Add a Statement Art Deco-Inspired Mirror

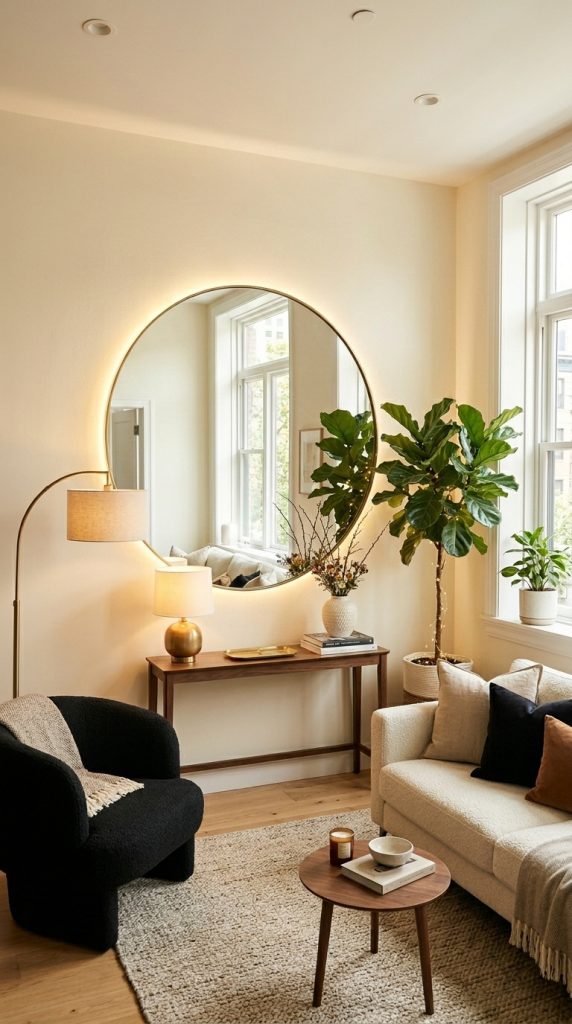
    A statement mirror can become one of the most effective decorative elements in a Neo Deco living room. Mirrors are functional, decorative, and capable of making a room appear larger and brighter.

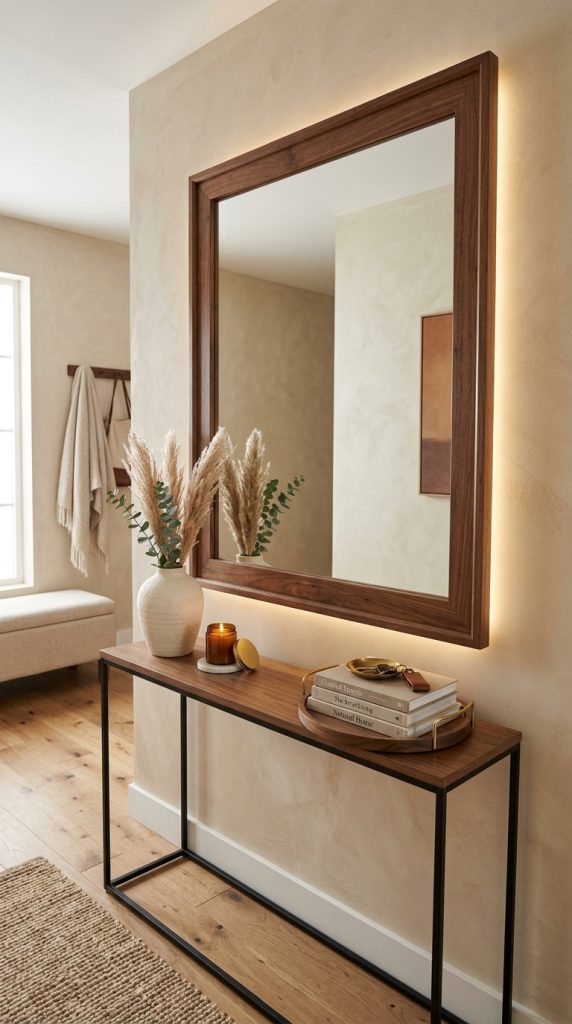
    Look for mirrors with arches, fan shapes, geometric frames, rounded corners, stepped edges, or elegant metallic finishes. A large mirror above a console table can create a classic composition, while a tall mirror behind a seating area can add architectural interest.

    Materials and Things You Need

    • Large decorative mirror
    • Console table
    • Decorative lamp
    • Small vase
    • Books
    • Sculptural accessory
    • Optional wall lighting

    Step-by-Step Styling

    Choose a wall where the mirror can be seen from several parts of the room. Avoid placing it where it simply reflects a cluttered area.

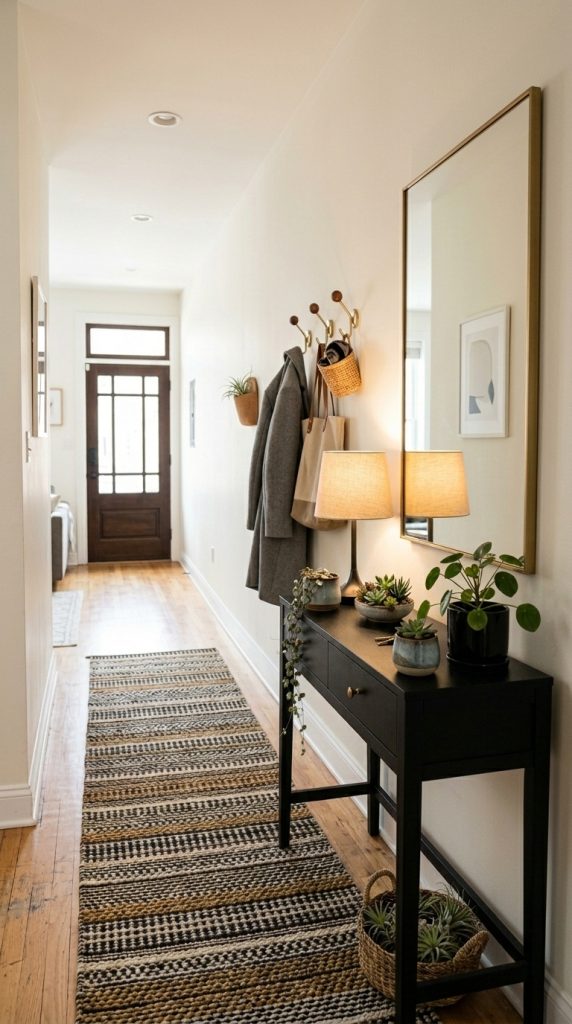
    Position a console beneath it if space permits. Keep the console styling simple: a pair of lamps, a few books, a small decorative object, or a vase may be enough.

    Lighting is particularly important. If possible, place wall sconces or concealed warm lighting around the mirror. The illumination should highlight the shape rather than create an uncomfortable glare.

    For a more luxurious appearance, select an antique brass, champagne, bronze, or dark metal frame. If your room already contains several metallic pieces, consider a black or wood frame instead.

    The mirror should support the room’s overall design rather than become a random decorative object.

    5.Introduce Velvet for Instant Luxury

    Texture is one of the easiest ways to make a Neo Deco living room feel luxurious. Velvet is particularly effective because it reflects light differently across its surface, creating depth and softness.
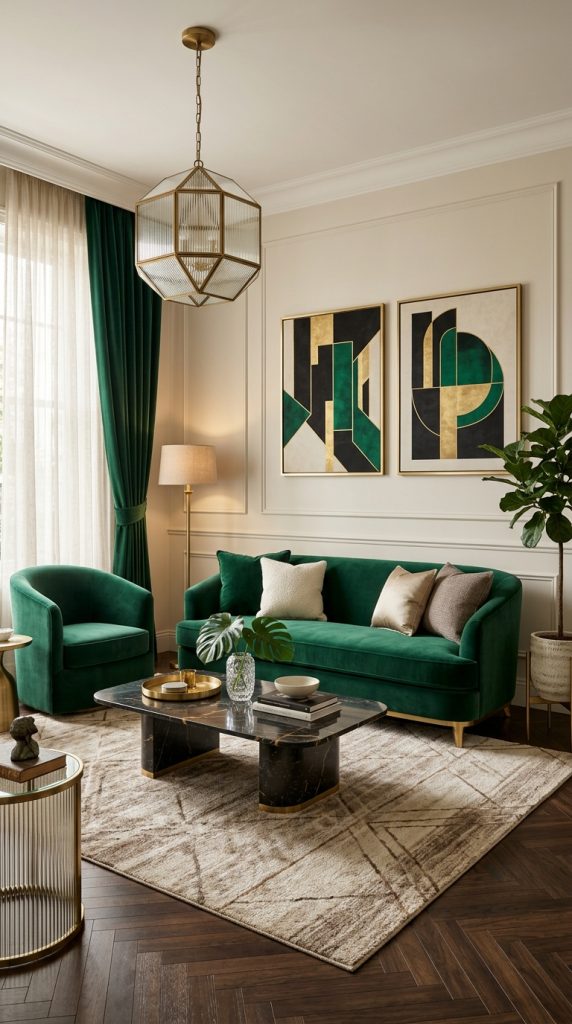
    You do not need a completely velvet-covered room. One velvet sofa, accent chair, cushion collection, or pair of curtains can be enough.

    Materials and Things You Need

    • Velvet accent chair or sofa
    • Velvet cushions
    • Soft rug
    • Metallic side table
    • Warm table lamp
    • Decorative throw

    Step-by-Step Styling

    Choose one major velvet item first. If your sofa is already velvet, use different fabrics for your cushions and curtains so the room does not become visually heavy.

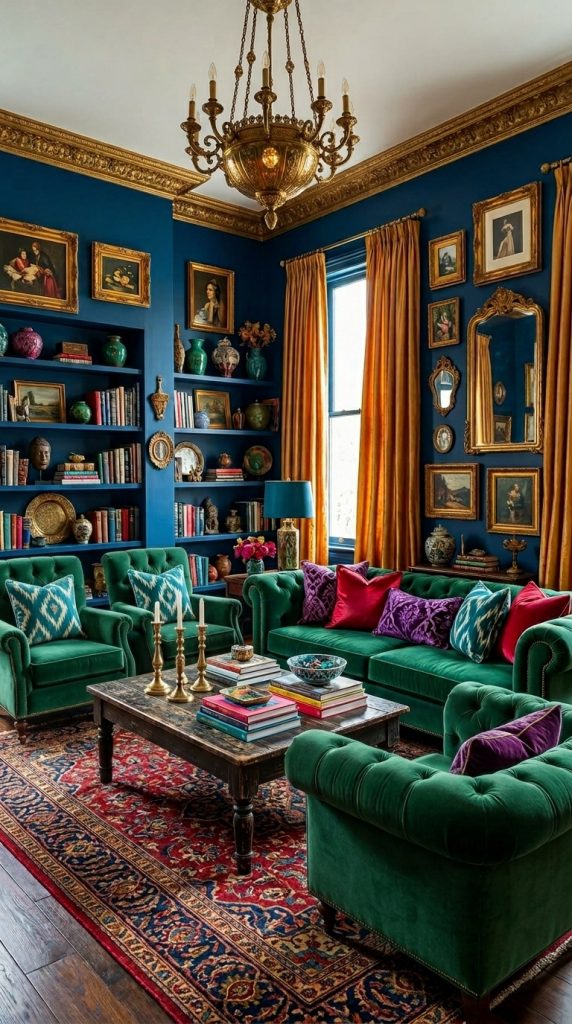
    Deep emerald, navy, burgundy, chocolate, dusty rose, and charcoal are excellent dramatic options. For a lighter look, try ivory, cream, taupe, or muted beige.

    Pair velvet with hard materials such as glass, stone, metal, or polished wood. This contrast prevents the room from looking too soft.

    A brass side table next to a velvet chair, for example, can create a beautiful Neo Deco combination. Add a warm lamp nearby to bring out the richness of the fabric.

    Use velvet strategically. The goal is sophistication, not excess.

    6.Design a Dramatic Black, Cream, and Brass Palette

    Black, cream, and brass create a classic Neo Deco combination because the three colors provide strong contrast without requiring many decorative objects.
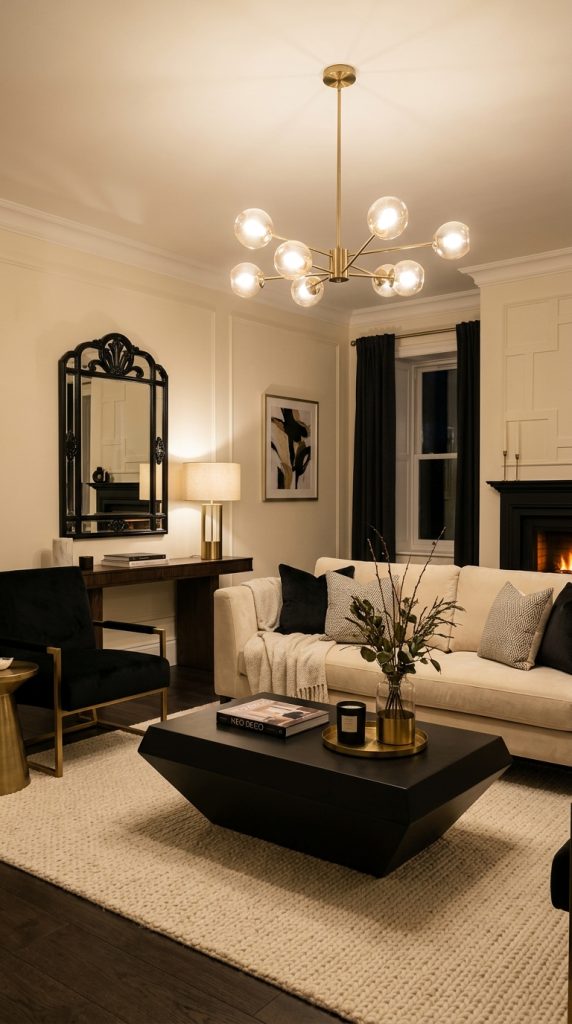
    Cream keeps the room welcoming, black adds definition, and brass provides warmth and glamour.

    Materials and Things You Need

    • Cream sofa
    • Black coffee table
    • Brass lighting
    • Black-framed artwork
    • Cream rug
    • Decorative cushions
    • Brass accessories
    • Dark wood or black console

    Step-by-Step Styling

    Start with cream as your largest color. Use it for the sofa, rug, or walls. Introduce black through furniture legs, frames, tables, artwork, or a statement chair.

    Then layer brass in small but noticeable amounts. A chandelier, table lamp, mirror frame, or decorative object can create enough metallic detail.

    Avoid covering every surface with brass. Too much metallic decoration can make the room feel overly themed.

    Use symmetry wherever possible. Two matching lamps on a console, paired chairs, or balanced artwork can reinforce the Art Deco influence.

    This palette is particularly effective in evening photographs because warm lighting against black and cream surfaces creates depth and drama.

    7.Choose a Sculptural Coffee Table

    The coffee table is often overlooked, but in a Neo Deco room it can become a sculptural centerpiece. Look for unusual silhouettes such as circular, oval, stepped, nested, pedestal, or geometric forms.
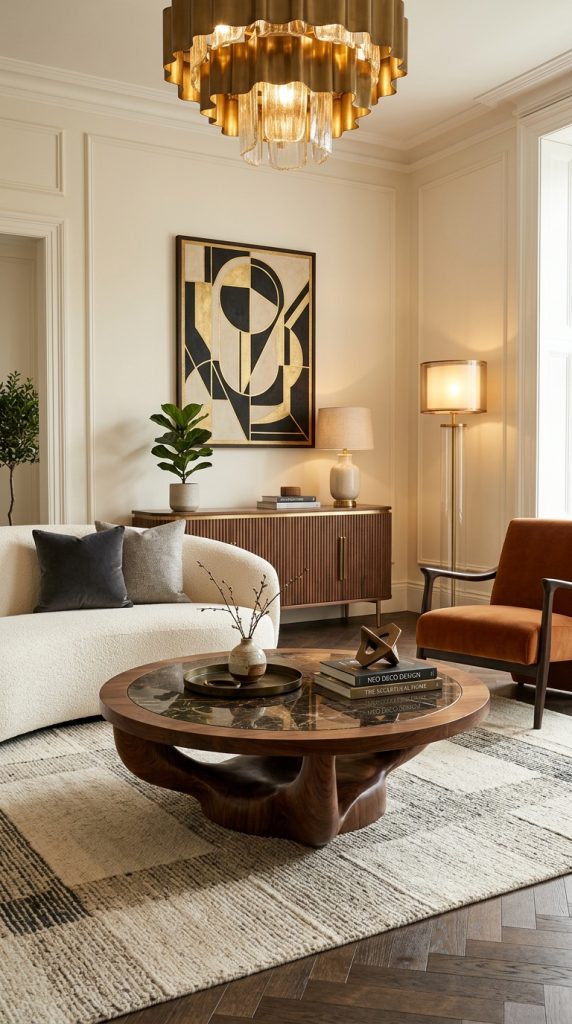
    Materials can include stone, marble-look surfaces, dark wood, glass, metal, or combinations of several materials.

    Materials and Things You Need

    • Sculptural coffee table
    • Decorative tray
    • Coffee-table books
    • Small vase
    • Candle or decorative object
    • Rug

    Step-by-Step Styling

    Choose the table according to the size of your seating area. A huge table can make a small room feel crowded.

    Round and oval tables work especially well with curved sofas because they create a consistent visual language. If the sofa is straight, a sculptural table can provide contrast.

    Place a tray on the table and add two or three carefully selected objects. Books, a small vase, and one sculptural accessory are usually sufficient.

    Leave plenty of empty surface area. Luxury styling often depends as much on what you leave out as what you display.

    The table should be visually interesting even when it is not decorated.

    8.Create a Neo Deco Gallery Wall

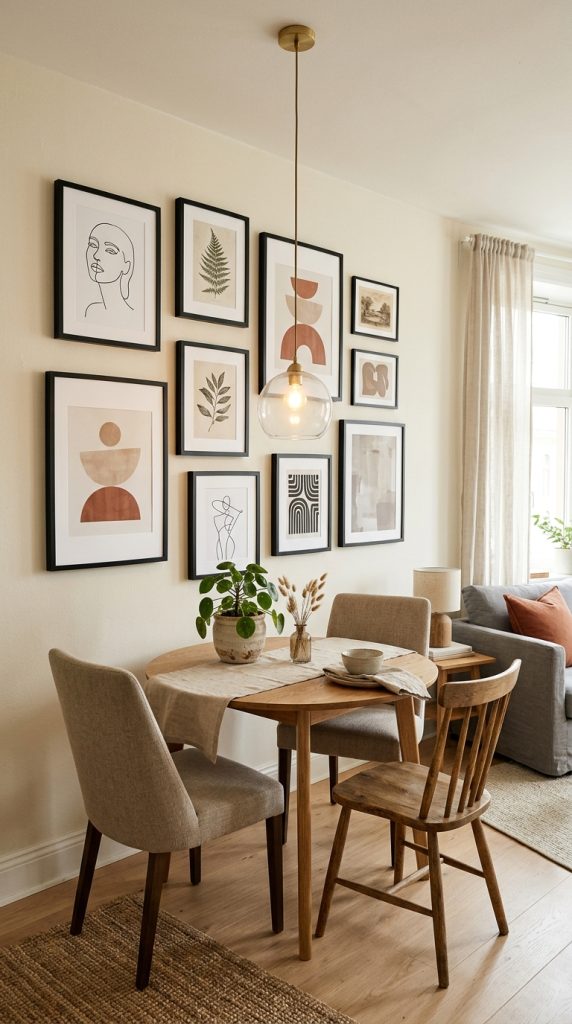
    Artwork can bring personality into a Neo Deco living room while reinforcing the room’s geometry and color palette. Instead of choosing random pictures, create a coordinated collection.
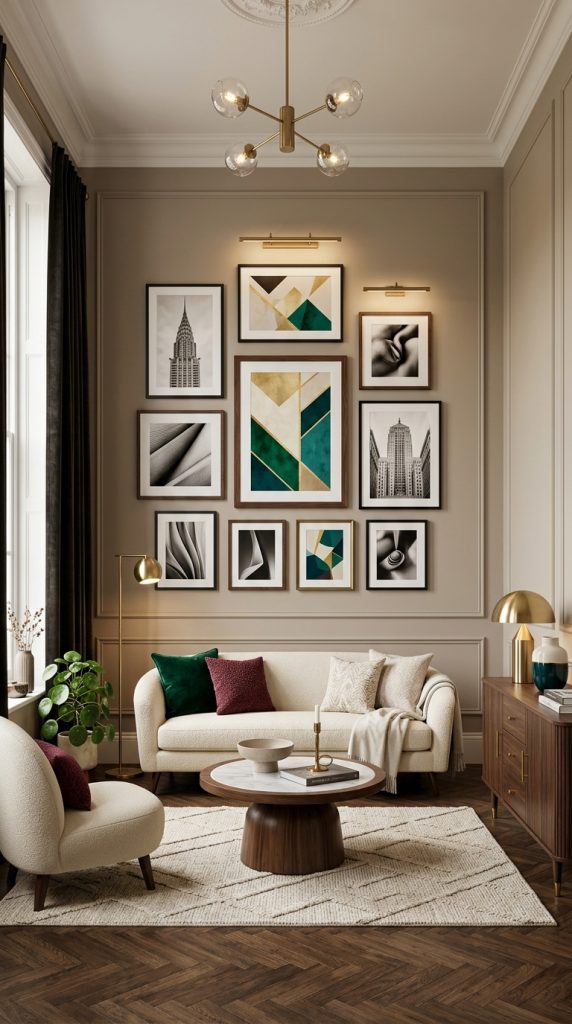
    Abstract geometric artwork, architectural prints, black-and-white photography, stylized botanical artwork, and vintage-inspired posters can all work.

    Materials and Things You Need

    • 3โ€“7 art pieces
    • Matching or coordinated frames
    • Measuring tape
    • Level
    • Hanging hardware
    • Optional picture lights

    Step-by-Step Styling

    Select artwork that shares at least one visual connection, such as color, frame style, subject, or shape.

    Lay the pieces on the floor first. Experiment with spacing before putting anything on the wall.

    For a traditional Neo Deco feeling, use symmetrical arrangements. For a more contemporary approach, create an asymmetrical gallery with strong alignment.

    Black, bronze, brass, and dark wood frames are particularly effective. Avoid using too many frame styles because this can make the wall appear chaotic.

    Add picture lighting if possible. Warm illumination can make artwork become a beautiful evening focal point.

    The gallery wall should complement the furniture rather than compete with it.

    9.Use Fluted Furniture for Subtle Texture

    Fluted and ribbed surfaces are excellent for Neo Deco interiors because they introduce vertical rhythm and decorative texture without overwhelming the room.
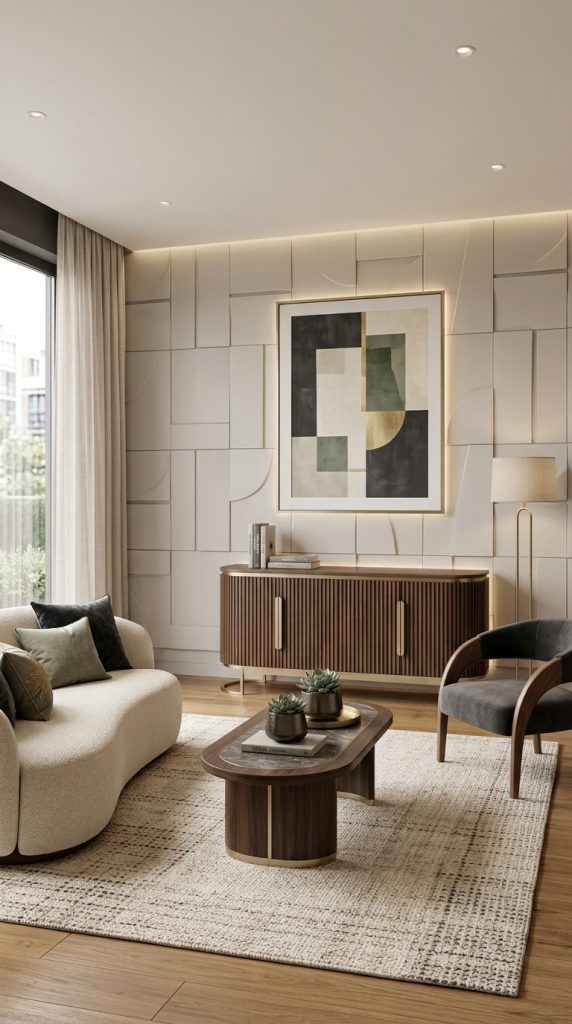
    A fluted sideboard, media console, cabinet, or occasional table can become a stylish feature.

    Materials and Things You Need

    • Fluted cabinet or console
    • Decorative lamp
    • Mirror or artwork
    • Books
    • Ceramic objects
    • Small plant if desired

    Step-by-Step Styling

    Choose one fluted furniture piece rather than using fluting everywhere.

    A fluted media console can look particularly sophisticated when paired with a clean television wall. Keep the top surface relatively uncluttered.

    Add a decorative lamp, a small stack of books, and one sculptural object. If you use greenery, select one controlled arrangement rather than filling the room with plants.

    For a stronger Deco effect, choose a cabinet with brass handles or dark wood detailing.

    The vertical lines of the fluted surface create visual height and make ordinary furniture feel more architectural.

    10.Add Layered Warm Lighting

    Lighting can completely change the appearance of a Neo Deco living room. Even beautiful furniture can look ordinary under harsh overhead lighting.
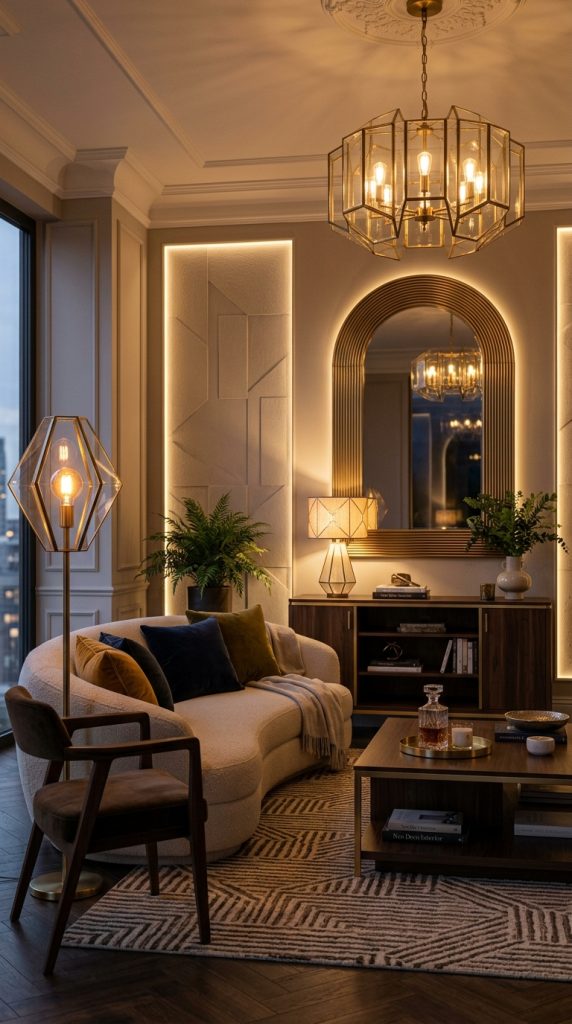
    Instead, create layers using a ceiling fixture, floor lamp, table lamp, wall sconces, and concealed lighting.

    Materials and Things You Need

    • Statement pendant or chandelier
    • Floor lamp
    • Table lamps
    • Wall sconces
    • Warm bulbs
    • Optional LED strip lighting
    • Decorative mirror

    Step-by-Step Styling

    Begin with the main ceiling light. Choose a fixture with an elegant geometric or sculptural shape.

    Next, add a floor lamp near the sofa or reading chair. A table lamp can create another pool of warm light on a console or side table.

    If your room contains a mirror or architectural wall treatment, consider concealed lighting to highlight it.

    Keep the lighting warm and comfortable rather than extremely bright. The goal is a welcoming evening atmosphere.

    Different lighting levels also make the room more versatile. Brighten the space when cleaning or entertaining, then reduce the lighting for a relaxed evening.

    Lighting should feel like part of the design rather than an afterthought.

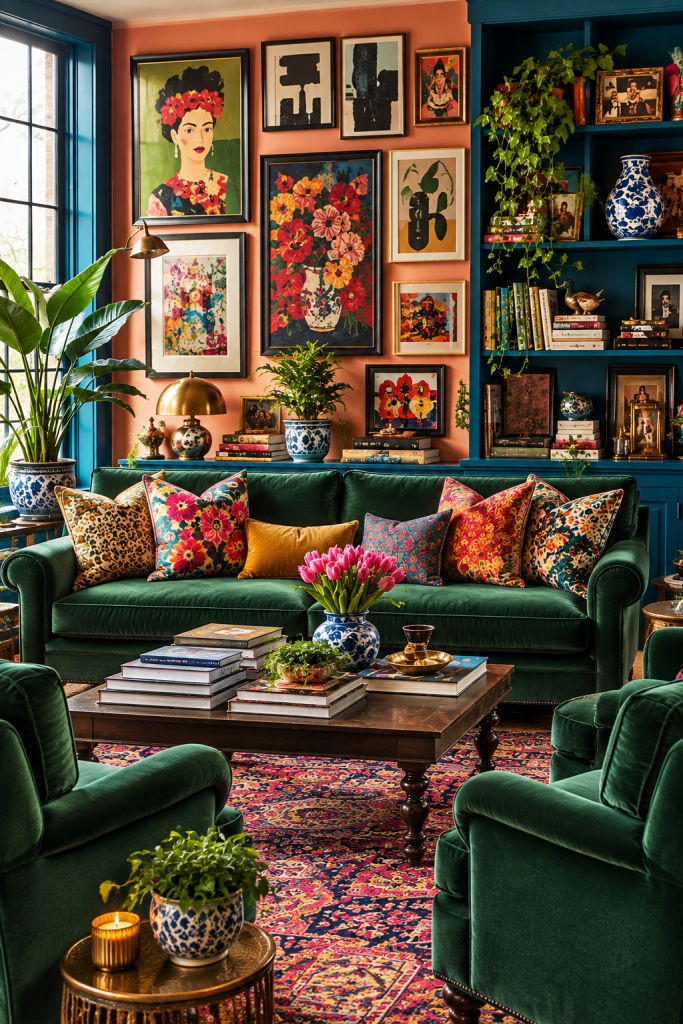
    11.Combine Emerald Green With Warm Metallics

    Emerald green is a powerful color for a Neo Deco living room because it immediately introduces richness and depth. It works especially well with brass, bronze, cream, walnut, and dark brown.
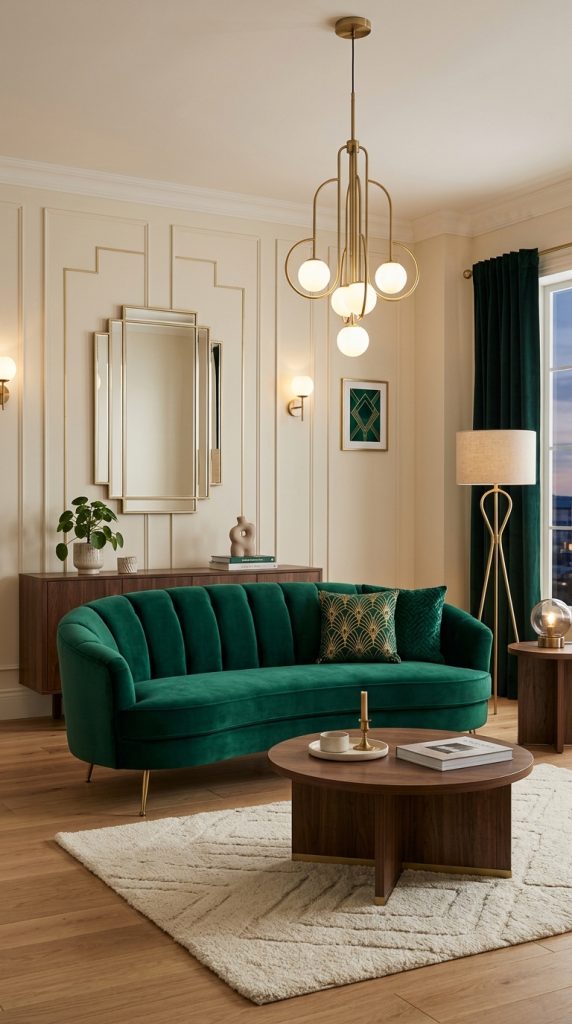
    You do not need to paint the entire room green. Use it strategically.

    Materials and Things You Need

    • Neutral sofa
    • Emerald accent chair
    • Green cushions
    • Brass lamp
    • Neutral rug
    • Dark wood furniture
    • Artwork

    Step-by-Step Styling

    Start with a neutral base. Introduce emerald through one major item, such as an accent chair.

    Repeat the green in smaller quantities through cushions or artwork. This creates cohesion.

    Add warm metallics through lighting, table legs, frames, or decorative objects. Natural wood can prevent the palette from becoming too glamorous.

    If you want a dramatic room, paint one wall a deep green. If you prefer a lighter design, keep the walls neutral and allow the green furniture to become the focal point.

    The key is repetition without overuse.

    12.Create a Small Neo Deco Reading Corner

    A reading corner can make a glamorous living room feel more personal and practical. It also gives you an opportunity to introduce a statement chair without purchasing a large sofa.
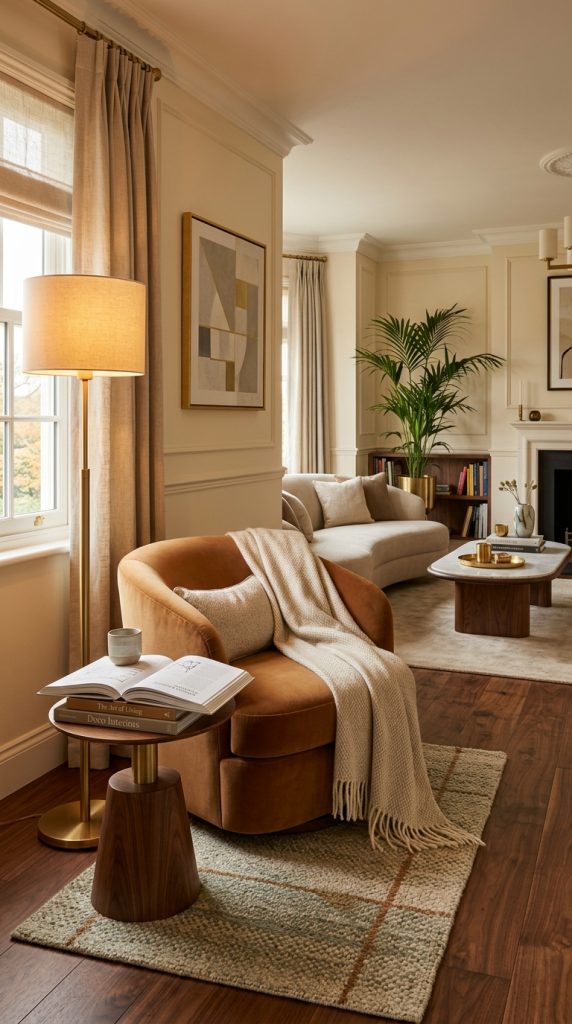
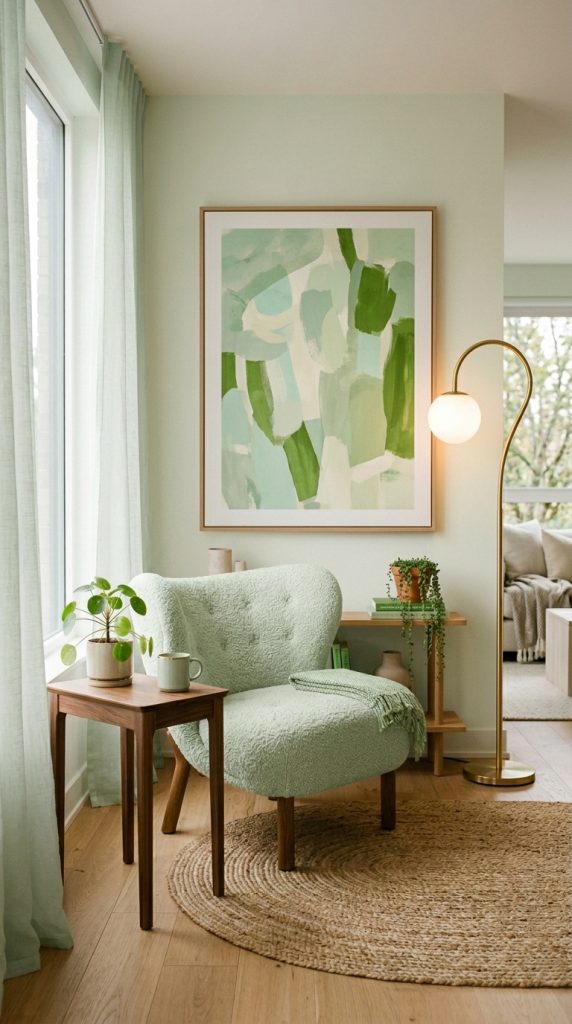
    Choose a curved accent chair, small side table, floor lamp, and comfortable throw.

    Materials and Things You Need

    • Accent chair
    • Small side table
    • Floor lamp
    • Reading books
    • Soft throw
    • Small rug
    • Decorative object

    Step-by-Step Styling

    Place the chair near a window, bookshelf, fireplace, or quiet corner. Make sure the chair does not interfere with the main walking path.

    Add a small side table that can hold a book and drink. A sculptural table is especially appropriate for Neo Deco.

    Position a floor lamp behind or beside the chair. Use warm illumination to create a cozy pool of light.

    Add a soft throw and one cushion. Avoid overcrowding the chair.

    Finally, place two or three favorite books on the table. The books should look naturally used rather than arranged like a showroom.

    This small corner can make the entire living room feel more lived-in while maintaining its sophisticated appearance.

    13.Mix Dark Wood With Cream Upholstery

    Dark wood adds richness and architectural weight to a Neo Deco living room. When combined with cream upholstery, it creates an elegant contrast that feels both timeless and modern.
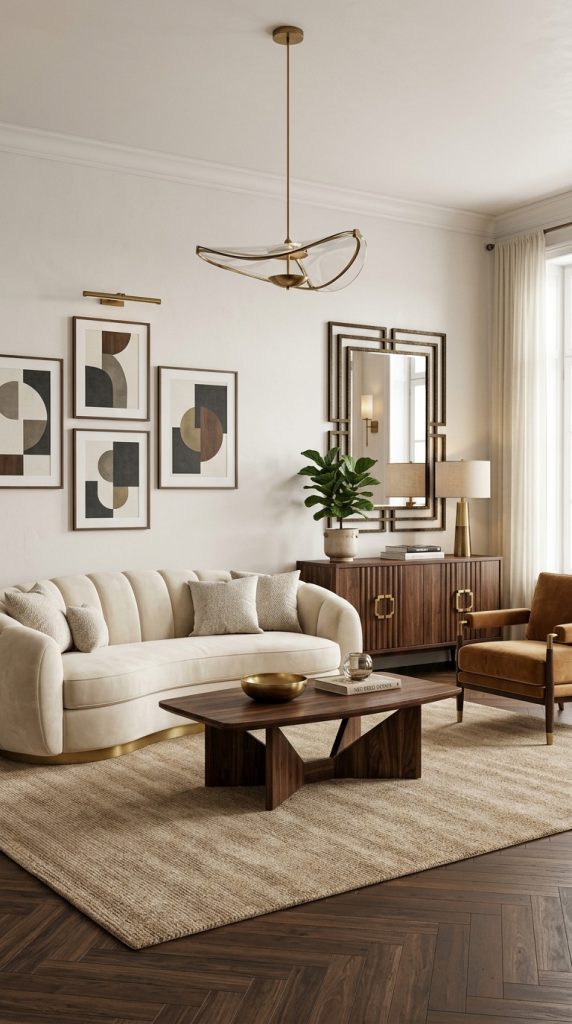
    Walnut, espresso, dark oak, and deep brown finishes can all work.

    Materials and Things You Need

    • Cream sofa
    • Dark wood coffee table
    • Dark wood console
    • Neutral rug
    • Brass accessories
    • Textured cushions
    • Artwork

    Step-by-Step Styling

    Use cream for the largest upholstered surfaces. Then introduce dark wood through two or three furniture pieces.

    Avoid mixing too many unrelated wood tones. Choose one primary wood finish and repeat it.

    Add brass or bronze details to bridge the warm wood and light upholstery.

    Texture is important here. Add a woven rug, velvet cushion, linen-look curtain, or boucle chair to keep the room from feeling too formal.

    For the walls, warm white or beige can provide contrast.

    This combination is especially suitable for people who want Neo Deco style without extremely bright colors.

    14.Make a Compact Apartment Feel Neo Deco

    You do not need a huge living room to enjoy Neo Deco. The style can work beautifully in an apartment when furniture is carefully scaled.
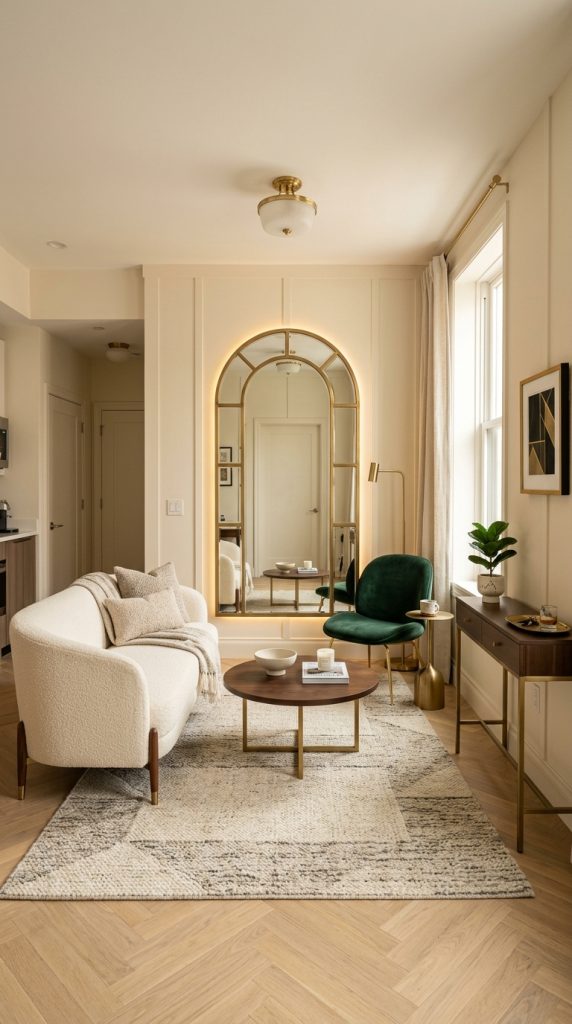
    The secret is to use fewer but more intentional pieces.

    Materials and Things You Need

    • Compact sofa
    • Round coffee table
    • Slim console
    • Large mirror
    • Small accent chair
    • Wall lamp
    • Compact rug
    • Minimal accessories

    Step-by-Step Styling

    Measure the entire room before shopping. Pay particular attention to door openings, windows, radiators, and walking paths.

    Choose a sofa that fits comfortably without overwhelming the space. A compact curved sofa can provide the Deco influence without consuming the entire room.

    Use a round coffee table because it can make movement around the furniture easier.

    A large mirror can visually expand the room. Choose one strong decorative mirror instead of several small pieces.

    Use wall-mounted lighting or slim floor lamps to save surface space. Select furniture with legs rather than extremely bulky pieces because visible floor area can make a small room feel more open.

    Keep decorative objects limited. A small apartment can still look luxurious when every piece has a purpose.

    15.Finish the Room With a Sophisticated Neo Deco Styling Layer

    The final layer is what turns a collection of attractive furniture into a complete Neo Deco living room. Accessories should connect the colors, textures, materials, and shapes already present.
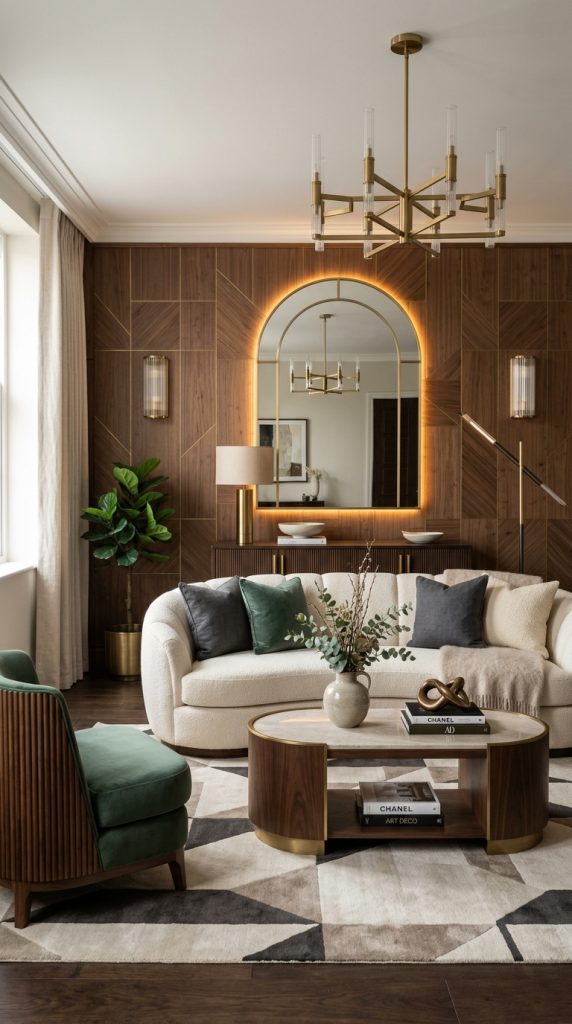
    Instead of purchasing decorations individually, look at the room as a whole.

    Materials and Things You Need

    • Decorative cushions
    • Throw blanket
    • Coffee-table books
    • Sculptural objects
    • Ceramic vase
    • Candles
    • Artwork
    • Mirror
    • Decorative tray
    • Small amount of greenery

    Step-by-Step Styling

    Start with the largest surfaces. Make sure the sofa, rug, curtains, walls, and major furniture pieces already work together.

    Then add cushions using two or three complementary colors. Mix textures rather than buying everything from the same fabric.

    Place a few coffee-table books on the central table. Add one sculptural object and perhaps a small vase.

    Style the console with a lamp, artwork, or mirror above it. Maintain some empty space so the room feels intentionally curated.

    Repeat important materials three or four times throughout the room. For example, if you use brass on the chandelier, repeat it on the mirror frame and one small table accessory.

    Finally, step back and remove anything that feels unnecessary. Neo Deco is not about filling every surface. It is about creating an atmosphere of refined luxury through carefully chosen details.

    How to Make Neo Deco Look Expensive on a Budget

    One of the biggest advantages of Neo Deco style is that you can achieve its visual character without buying an entire luxury furniture collection. The most important factors are proportion, coordination, lighting, and repetition.

    Start by investing your budget in one focal piece. This could be a beautiful sofa, statement mirror, sculptural coffee table, or dramatic lighting fixture. Then use affordable accessories around it.

    Paint is another inexpensive way to transform a room. A carefully selected feature wall can create architectural depth. Decorative molding can also provide an expensive-looking effect at a relatively modest cost.

    Hardware is another useful upgrade. Replacing ordinary cabinet handles with brass or bronze hardware can instantly change the appearance of furniture.

    Thrift stores and secondhand marketplaces can also be useful sources for mirrors, lamps, side tables, frames, and wooden furniture. A vintage-looking object can actually make a Neo Deco room feel more authentic.

    Do not try to make everything glamorous. A luxury-looking room usually contains contrast. Pair a sophisticated mirror with a simple sofa. Combine a glamorous lamp with natural wood. Place a refined coffee table on a textured rug.

    The balance between polished and comfortable is what makes Neo Deco feel modern rather than costume-like.

    Common Neo Deco Decorating Mistakes to Avoid

    The first mistake is using too many metallic finishes. Brass is beautiful, but if every lamp, table, frame, handle, and accessory is gold, the room can quickly feel excessive. Choose one primary metallic finish and repeat it selectively.

    The second mistake is ignoring scale. A large sofa in a small room can destroy the layout no matter how beautiful it is. Always measure before purchasing.

    The third mistake is using too many patterns. Neo Deco loves geometry, but every surface does not need a geometric print. Select one or two strong patterns and allow the rest of the room to remain calmer.

    Another mistake is choosing furniture only for appearance. Living rooms are meant to be used. Sofas should be comfortable, tables should be functional, and lighting should actually illuminate the areas where people sit.

    Finally, avoid creating a room that looks like a theme set. Modern Neo Deco should feel inspired by Art Deco rather than copied directly from it. Combine historical influences with contemporary furniture, natural textures, comfortable fabrics, and practical storage.

    Final Thoughts on Creating a Beautiful Neo Deco Living Room

    Neo Deco is ultimately about balance. It combines the glamour of Art Deco with the comfort and simplicity expected from a contemporary home. You can create this aesthetic through curved furniture, elegant geometry, warm metallic accents, rich textures, sculptural lighting, sophisticated artwork, and carefully controlled color.

    You do not need to use all 15 ideas at once. Begin with the elements that best suit your existing room. If the furniture is already neutral, introduce a statement mirror and brass lighting. If the walls are plain, consider geometric paneling. If the room feels cold, add velvet, warm wood, textured rugs, and layered lighting.

    For a small apartment, prioritize scale and multifunctional furniture. For a larger room, experiment with a dramatic sofa, accent chairs, architectural wall treatment, and a larger lighting fixture.

    Most importantly, keep the room visually intentional. Choose a clear palette, repeat materials thoughtfully, create a strong focal point, and leave enough negative space for each beautiful element to breathe.

    That is what makes Neo Deco so appealing: it can feel luxurious without being uncomfortable, dramatic without being overwhelming, and timeless without looking old-fashioned. With thoughtful choices, even a simple living room can become a sophisticated, Pinterest-worthy Neo Deco retreat.
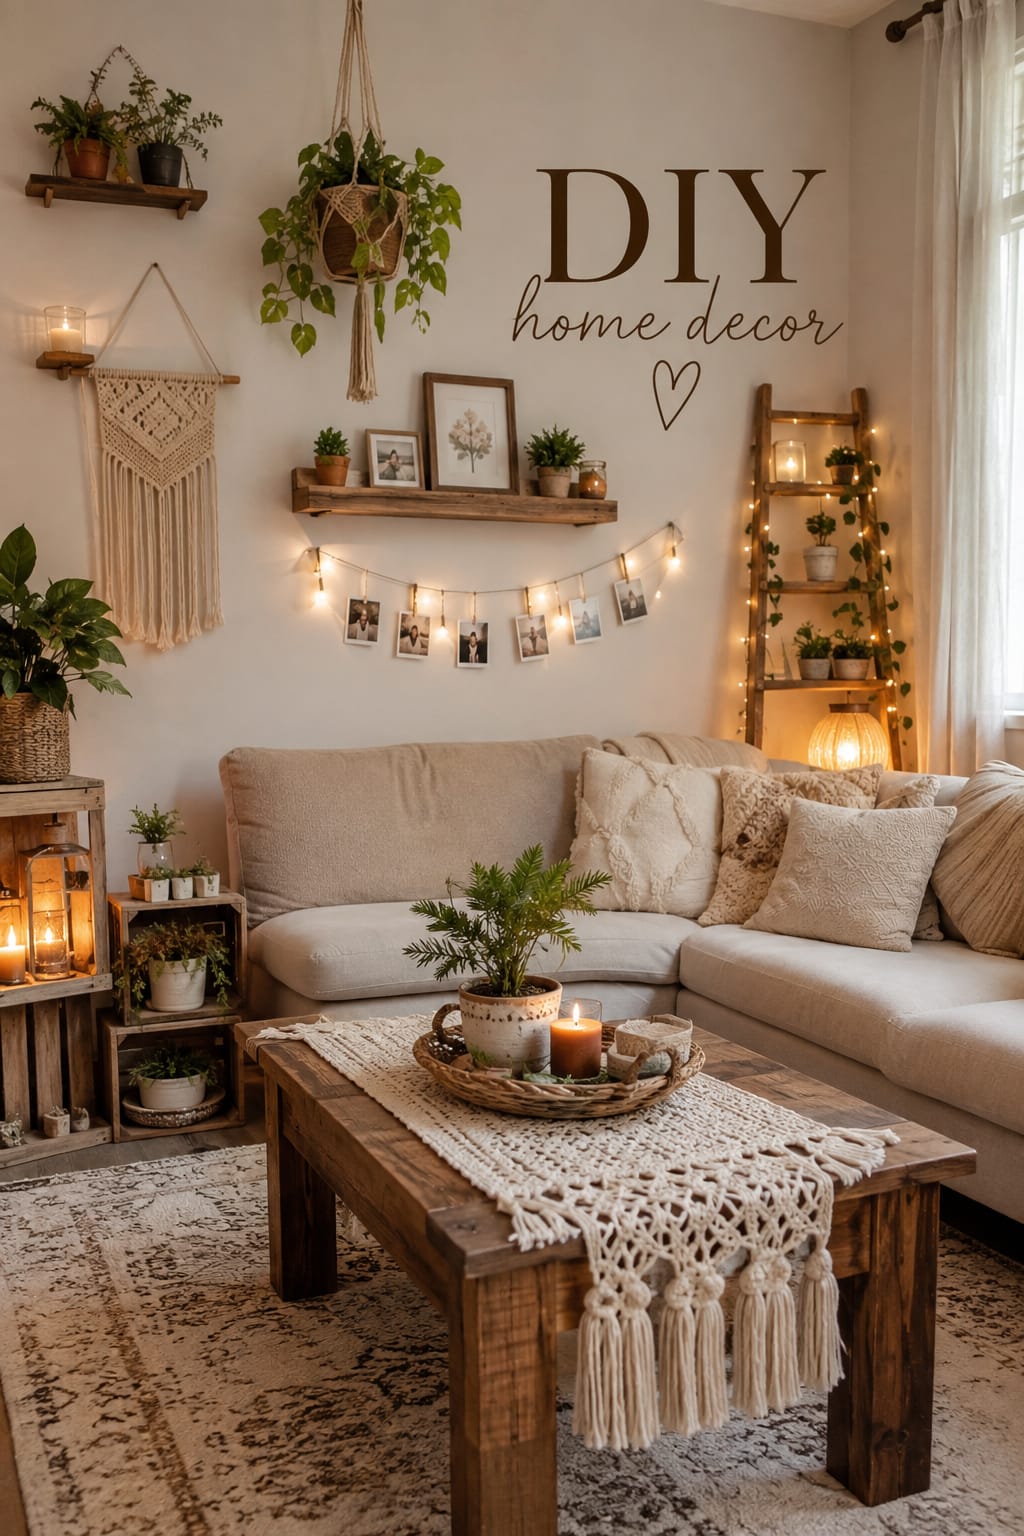

  • DIY Home Decor Ideas

    DIY Home Decor Ideas

    DIY home decor is one of the easiest ways to make your home feel personal, stylish, cozy, and unique without spending a fortune. Instead of purchasing every decorative item from a store, you can transform simple materials, old furniture, empty walls, and everyday objects into beautiful pieces that reflect your personality. Whether you live in a small apartment, a rented house, or a spacious family home, DIY decorating gives you the freedom to create a space that feels truly yours.

    The best DIY home decor projects do not require professional skills. Many beautiful projects can be completed with basic materials, simple tools, and a little patience. A plain wall can become an attractive gallery display, an inexpensive mirror can be transformed into an elegant statement piece, and an old piece of furniture can receive a completely new look with paint and updated hardware. Even small projects, such as handmade cushions or decorative candle holders, can make a noticeable difference.

    One of the biggest advantages of DIY decorating is affordability. Home decor can become expensive when you purchase multiple accessories, artwork, furniture pieces, and seasonal decorations. DIY projects allow you to achieve a similar visual impact for much less money. You can purchase inexpensive materials from craft stores or hardware stores, reuse items you already have, or repurpose objects that might otherwise be thrown away.

    DIY home decor is also perfect for people who enjoy changing their interiors regularly. Instead of replacing your entire room every season, you can create small decorative updates. For example, you might make warm-toned cushions and candle holders for fall, lighter fabrics for spring, or cozy textured accessories for winter. These small changes can refresh your home without requiring a major renovation.

    Another reason DIY decor is so popular is customization. Store-bought products are created for a wide audience, which means they may not have the exact color, size, shape, or style you need. When you make something yourself, you control every detail. You can choose the colors that match your sofa, the dimensions that fit your wall, and the textures that complement your furniture.

    For beginners, the key is to start small. Do not begin with a complicated furniture-building project if you have never used basic tools before. Start with simple projects such as wall art, cushion covers, candle holders, trays, or painted accessories. As you become more comfortable, you can move toward furniture makeovers, shelving, and larger decorative projects.

    A successful DIY project should also solve a decorating problem. Before beginning, look around the room and ask what is missing. Does the space need more texture? Does an empty wall need a focal point? Is the entryway cluttered? Does the room need warmer lighting? Is an old piece of furniture making the room look dated? Once you identify the problem, you can choose a DIY solution.

    The goal is not to make every object in your home yourself. A beautiful interior usually combines purchased furniture with handmade and personalized elements. A professionally designed sofa can look even more attractive when paired with handmade cushions. A simple coffee table can become more stylish with a DIY tray. A neutral bedroom can feel more personal with handmade artwork.

    In this article, you will discover ten practical DIY home decor ideas that can help you create a stylish and inviting home on a budget. Each idea includes an explanation, materials, step-by-step instructions, styling suggestions, and beginner-friendly tips.

    Whether you are decorating your first apartment, refreshing your living room, upgrading your bedroom, or simply looking for your next weekend project, these DIY ideas can help you create a home that feels beautiful, comfortable, and personal.

    1.Create a DIY Gallery Wall for an Instant Focal Point

    A DIY gallery wall is one of the easiest ways to transform an empty wall into a beautiful focal point. Instead of spending a large amount of money on expensive artwork, you can combine photographs, printable artwork, sketches, quotes, postcards, children’s artwork, or handmade pieces.

    Gallery walls work particularly well above sofas, beds, console tables, desks, and staircases. They can also be adapted to almost any decorating style.

    Materials You Will Need

    Picture frames

    Printed photographs or artwork

    Measuring tape

    Pencil

    Level

    Removable hanging strips or suitable wall hardware

    Paper for templates

    Optional decorative objects

    Step-by-Step Instructions

    Begin by choosing the wall.

    Measure the available space so you know how large the gallery should be. A common mistake is creating a gallery that is too small for a large wall.

    Next, choose a color palette.

    For an elegant look, use black, white, cream, wood, or metallic frames. For an eclectic appearance, combine different frame styles while keeping the artwork connected through color.

    Lay all the frames on the floor.

    Experiment with different arrangements before hanging anything.

    For beginners, create paper templates that match each frame. Tape the templates to the wall first. This allows you to adjust the layout without repeatedly putting holes in the wall.

    Keep the spacing relatively consistent.

    A few inches between frames usually creates a cohesive appearance.

    Choose Meaningful Artwork

    Your gallery wall does not need to contain only professional artwork.

    Include:

    Family photographs

    Travel photographs

    Printable illustrations

    Minimalist artwork

    Inspirational quotes

    Vintage postcards

    Children’s drawings

    Abstract paintings

    The goal is to make the wall feel personal.

    How to Make It Look Expensive

    Use a limited color palette.

    For example, black-and-white photographs combined with black frames can create a sophisticated appearance.

    Alternatively, use warm neutral artwork with natural wood frames for an organic style.

    Avoid overcrowding the wall.

    The empty space between pieces is important.

    Pinterest Styling Tip

    Place a console table underneath the gallery wall and add a lamp, small vase, books, or decorative bowl.

    This creates multiple layers and makes the entire arrangement feel professionally styled.

    2.Transform an Ordinary Mirror With a DIY Decorative Frame

    A mirror can make a room appear brighter and more spacious, but decorative mirrors can sometimes be expensive. Creating a DIY frame around an inexpensive mirror is a simple way to achieve a custom appearance.

    This project works beautifully in bedrooms, bathrooms, entryways, living rooms, and hallways.

    Materials You Will Need

    Plain frameless mirror

    Wooden trim

    Measuring tape

    Wood glue

    Sandpaper

    Paint or wood stain

    Paintbrush

    Suitable adhesive

    Mounting hardware

    Step-by-Step Instructions

    Measure your mirror carefully.

    The measurements determine the length of the frame pieces.

    Choose a frame style.

    Straight wooden trim gives a modern appearance, while thicker molding creates a more traditional look.

    Sand the wood carefully.

    Smooth surfaces create a more polished finished product.

    Paint or stain the frame pieces before installation.

    Allow them to dry completely.

    Attach the frame around the mirror using an appropriate adhesive or mounting system.

    Choose the Right Color

    Neutral colors are usually the most versatile.

    Consider:

    Warm white

    Cream

    Beige

    Black

    Walnut

    Soft gray

    Subtle metallic finishes

    Choose a shade that complements your existing furniture.

    Add Lighting Around the Mirror

    Lighting can make the mirror even more attractive.

    In a bedroom or entryway, warm lighting near the mirror can create a cozy atmosphere.

    If electrical lighting is involved, make sure installation is handled safely and appropriately.

    Styling the Area

    Place the mirror above a console table.

    Add a small tray, vase, candle, or decorative bowl underneath.

    Do not overcrowd the area.

    The mirror should remain the primary focal point.

    3.Make a Cozy DIY Decorative Cushion Cover

    Changing cushions is one of the simplest ways to refresh a living room or bedroom. Instead of purchasing new cushions every season, you can make your own decorative covers.

    This project is particularly useful if you already have cushion inserts at home.

    Materials You Will Need

    Fabric

    Cushion insert

    Measuring tape

    Scissors

    Needle and thread or sewing machine

    Pins

    Fabric marker

    Iron

    Optional decorative trim

    Choose the Fabric

    Fabric determines much of the final appearance.

    For a cozy room, consider:

    Cotton

    Linen

    Velvet

    Woven fabric

    Textured fabric

    Neutral shades such as cream, beige, taupe, and brown create an elegant appearance.

    For more color, try muted terracotta, dusty blue, olive, mustard, or soft pink.

    Step-by-Step Instructions

    Measure your cushion insert.

    Cut the fabric according to your measurements while allowing room for seams.

    An envelope-style cover is beginner-friendly because it does not require a zipper.

    Fold the fabric correctly so the back panels overlap.

    Sew the edges.

    Turn the cover right-side out.

    Press it with an iron.

    Insert the cushion.

    Add Decorative Details

    You can personalize the cushion with:

    Buttons

    Ribbon

    Simple embroidery

    Decorative borders

    Small fabric patterns

    Avoid adding too many details to every cushion.

    Instead, combine simple cushions with one or two decorative statement cushions.

    Pinterest Styling Tip

    Create a layered sofa arrangement.

    Use different sizes and textures rather than making every cushion identical.

    For example, combine large neutral cushions with one textured cushion and one smaller patterned piece.

    This creates depth while keeping the arrangement visually balanced.

    4.Turn Glass Jars Into Elegant DIY Candle Holders

    Empty glass jars can easily become attractive candle holders. This is a low-cost DIY project that works particularly well for coffee tables, dining tables, shelves, bedrooms, bathrooms, and entryways.

    Materials You Will Need

    Clean glass jars

    Battery-operated candles or suitable candles

    Paint

    Paintbrush

    Twine

    Ribbon

    Optional decorative stones

    Optional seasonal decorations

    Prepare the Jars

    Clean the jars thoroughly.

    Remove labels and adhesive residue.

    Dry the jars completely before decorating.

    For a minimalist look, leave the glass transparent.

    You can simply add a piece of twine or ribbon around the top.

    Paint the Glass

    If you want a more decorative appearance, use suitable glass paint.

    Soft neutral colors work well with modern interiors.

    Try:

    Cream

    White

    Beige

    Soft gray

    Muted brown

    You can create a distressed finish by lightly sanding selected areas after the paint has dried.

    Add Seasonal Details

    For fall, use warm neutral colors and natural-looking decorative elements.

    For winter, consider white and subtle metallic accents.

    For spring, soft pastel details can make the arrangement feel fresh.

    Safety Considerations

    Never leave an open flame unattended.

    Battery-operated LED candles are a practical alternative, particularly in homes with children or pets.

    Make sure any real candle is appropriate for the container and placed on a stable, heat-resistant surface.

    Styling Tip

    Group three jars together.

    Use different heights to create visual interest.

    Place them on a decorative tray to create a cohesive arrangement.

    The soft glow can instantly make a room feel warmer and more inviting.

    5.Build a DIY Wooden Tray for Coffee Table Styling

    A DIY wooden tray is both decorative and functional. It helps organize coffee table accessories and makes the table look more intentionally styled.

    Materials You Will Need

    Wooden board

    Handles

    Screws

    Drill

    Measuring tape

    Sandpaper

    Paint or stain

    Protective finish

    Choose the Right Size

    Measure your coffee table before selecting the board.

    The tray should leave enough open space around it.

    A tray that is too large can make a small coffee table appear crowded.

    Prepare the Wood

    Sand the board thoroughly.

    Remove all dust.

    Choose a finish that complements your room.

    Natural wood is excellent for rustic and organic interiors.

    Cream or black can create a more contemporary appearance.

    Add Handles

    Measure the handle positions carefully.

    Mark the locations.

    Drill and attach the handles securely.

    If you are inexperienced with tools, consider asking someone experienced to assist.

    Style the Tray

    Use the simple formula:

    Tall + organic + decorative.

    For example:

    A vase

    A small plant

    A candle

    A stack of books

    A decorative bowl

    Do not fill the entire tray.

    Empty space makes the arrangement feel more sophisticated.

    Pinterest Styling Tip

    Place two or three carefully selected objects on the tray rather than filling it with small accessories.

    Repeat colors already present in your living room.

    This creates visual connection and makes the coffee table feel professionally styled.

    6.Create DIY Floating Shelves for Decor and Storage

    Floating shelves are a fantastic way to use vertical space. They can provide additional storage while also creating an attractive decorative display.

    They are especially useful in small homes and apartments.

    Materials You Will Need

    Wooden shelf boards

    Appropriate brackets or floating shelf hardware

    Screws

    Wall anchors

    Measuring tape

    Level

    Pencil

    Drill

    Sandpaper

    Paint or stain

    Plan the Shelves

    Decide what you want to place on the shelves before installing them.

    Consider:

    Books

    Plants

    Frames

    Candles

    Baskets

    Decorative objects

    Heavy items require appropriate hardware.

    Always use mounting hardware suitable for your wall type and intended load.

    Prepare the Wood

    Sand the boards until smooth.

    Choose a natural wood finish or paint.

    Natural wood can make a neutral room feel warmer.

    A darker finish can create contrast against a light wall.

    Install Carefully

    Measure the wall.

    Mark the mounting points.

    Use a level to ensure the shelves are straight.

    Install suitable brackets or hardware.

    Do not overload the shelves.

    Style the Shelves

    Combine different heights.

    Place a tall object beside smaller objects.

    Lean artwork against the wall instead of hanging every piece.

    Use a combination of:

    Books

    Plants

    Ceramic objects

    Candles

    Frames

    Baskets

    Avoid Visual Clutter

    Do not fill every inch.

    Leave some empty space.

    Repeat a few colors across the shelves to make the display cohesive.

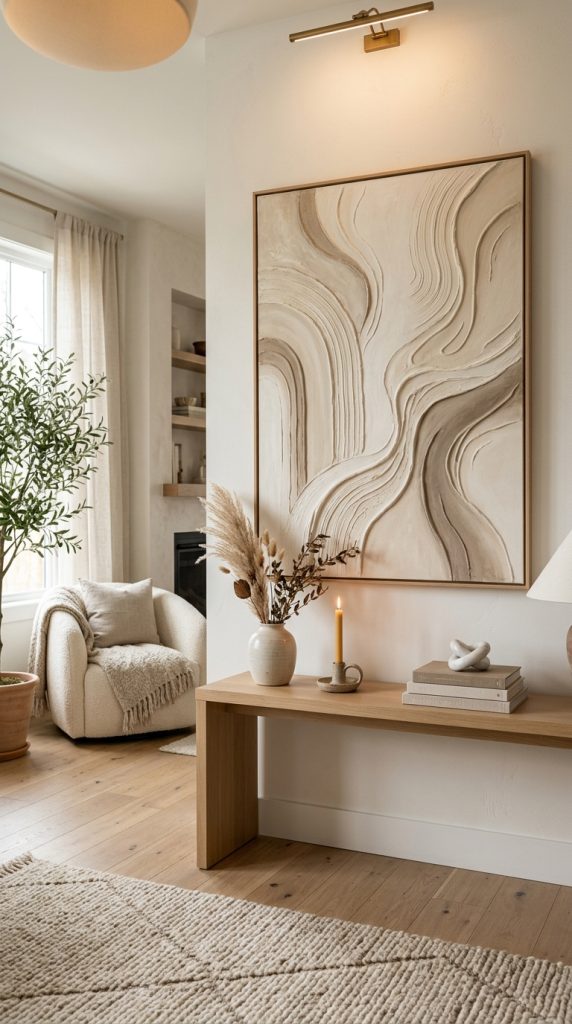
    7.Make a DIY Textured Wall Art Piece

    Textured wall art can create a sophisticated focal point without requiring advanced painting skills.

    This project is particularly suitable for neutral, modern, minimalist, organic, and contemporary interiors.

    Materials You Will Need

    Canvas

    Texture paste or suitable modeling medium

    Palette knife

    Acrylic paint

    Paintbrush

    Pencil

    Protective covering

    Optional frame

    Choose a Simple Design

    You can create:

    Abstract curves

    Arches

    Organic shapes

    Minimal lines

    Waves

    Geometric patterns

    Simple designs are often easier for beginners.

    Apply the Texture

    Lightly sketch your design.

    Use the palette knife to spread texture medium over the canvas.

    Experiment with ridges and curves.

    Do not worry about making everything perfectly symmetrical.

    Allow the texture to dry completely.

    Add Color

    Neutral colors are highly versatile.

    Try:

    Warm white

    Cream

    Beige

    Taupe

    Brown

    Soft gray

    You can also introduce a subtle accent color if your room needs more visual interest.

    Frame the Artwork

    A simple wooden frame can give handmade artwork a more polished appearance.

    Alternatively, leave the canvas unframed for a contemporary look.

    Display It

    Large textured artwork works particularly well above:

    Sofas

    Beds

    Console tables

    Desks

    Give the artwork enough surrounding space so it remains the focal point.

    8.Give an Old Piece of Furniture a DIY Makeover

    Before buying new furniture, consider whether an old piece can be transformed.

    A tired nightstand, side table, cabinet, or small dresser can often receive a completely new appearance with preparation, paint, and updated hardware.

    Materials You Will Need

    Existing furniture

    Cleaning supplies

    Sandpaper

    Primer

    Paint

    Paintbrush or roller

    New handles or knobs

    Protective finish

    Screwdriver

    Prepare the Furniture

    Clean the surface thoroughly.

    Remove existing hardware.

    Repair obvious damage.

    Sand the surface appropriately.

    Good preparation is one of the most important parts of a successful furniture makeover.

    Choose a New Color

    For a soft contemporary look, try:

    Cream

    Warm beige

    Soft gray

    Muted green

    Charcoal

    A darker shade can create a dramatic statement piece.

    Paint Carefully

    Apply primer when appropriate.

    Use thin coats.

    Allow sufficient drying time between coats.

    Follow the instructions for your selected paint.

    A smooth finish usually looks more professional than applying one thick coat.

    Upgrade the Hardware

    New hardware can dramatically change the furniture.

    Consider:

    Simple metal handles

    Brass-style hardware

    Ceramic knobs

    Wooden knobs

    Minimal black pulls

    Choose hardware that complements the rest of your room.

    Style the Finished Piece

    Add only a few decorative objects.

    A lamp, framed artwork, small vase, or candle can be enough.

    Avoid covering the entire surface.

    The finished furniture should remain practical.

    9.Create a DIY Entryway Organizer With Style

    The entryway sets the tone for your entire home. A DIY organizer can help keep everyday items under control while also creating an attractive first impression.

    Materials You Will Need

    Wooden board

    Hooks

    Screws

    Suitable wall anchors

    Paint or stain

    Sandpaper

    Measuring tape

    Level

    Optional shelf

    Small basket

    Decide What You Need to Store

    Think about your daily routine.

    Your organizer might hold:

    Keys

    Bags

    Hats

    Mail

    Small accessories

    Everyday essentials

    Choose the number of hooks based on your needs.

    Prepare the Board

    Sand the board.

    Apply paint or stain.

    Natural wood creates a warm and welcoming appearance.

    A painted board can create contrast against the wall.

    Add the Hooks

    Measure carefully.

    Mark the locations.

    Keep the hooks evenly spaced.

    Attach them securely using suitable hardware.

    Add Decorative Elements

    If there is enough space, add a small shelf.

    A framed print can make the organizer more decorative.

    A small bowl can hold keys.

    A basket can collect mail.

    Keep the Area Organized

    The organizer should prevent clutter rather than create another place for clutter to collect.

    Give everything a specific location.

    If an item is rarely used, store it elsewhere.

    Add a Mirror

    If space allows, place a mirror above or beside the organizer.

    A mirror can make a small entryway appear larger and can also reflect light.

    10.Create a DIY Cozy Reading Nook With Layered Decor

    A cozy reading nook can transform an unused corner into one of the most inviting areas of your home.

    You do not need an entire room.

    A comfortable chair, good lighting, a small table, and a few personal accessories can be enough.

    Materials You Will Need

    Comfortable chair

    Small side table

    Reading lamp

    Cushion

    Throw blanket

    Small rug

    Books

    DIY artwork

    Decorative basket

    Optional plant

    Choose the Location

    Look for an unused corner.

    A location near a window can provide pleasant natural light during the day.

    Make sure the chair does not block doors, walkways, heating vents, or other important areas.

    Create Comfort

    Start with a comfortable chair.

    Add a cushion for extra support.

    Place a soft throw casually over the chair.

    Add a small rug to visually define the area.

    Add Warm Lighting

    Lighting is essential for a reading corner.

    Choose a lamp that provides adequate reading light without harsh glare.

    Warm lighting can create a relaxing atmosphere in the evening.

    Make sure electrical cords are safely positioned.

    Add a DIY Element

    Personalize the nook with something handmade.

    You could create:

    DIY wall art

    A wooden tray

    A handmade cushion cover

    A floating bookshelf

    A decorative bookmark holder

    Style the Books

    Keep several favorite books within easy reach.

    Place a small stack on the side table.

    Add one decorative object on top if desired.

    Avoid creating a large, unstable pile.

    Add Texture

    A woven basket can hold blankets.

    A textured cushion can make the chair feel more inviting.

    Wooden accessories can add warmth.

    If you use plants, choose one that suits the available light and your ability to care for it.

    Make It Personal

    Add something meaningful.

    It could be:

    A favorite book

    A framed photograph

    A handmade object

    A favorite mug

    A small piece of artwork

    These personal details make the reading nook feel like a real part of your home rather than a staged corner.

    Final Thoughts:

    DIY home decor is not about creating a perfect home overnight. It is about making thoughtful changes that help your space become more comfortable, beautiful, functional, and personal.

    The ten ideas above offer simple ways to refresh different areas of your home without relying on expensive decor. A gallery wall can give an empty wall personality, while a framed mirror can create a sophisticated focal point. Handmade cushions can add texture, DIY candle holders can create warmth, and a wooden tray can instantly organize a coffee table.

    Floating shelves can provide both storage and decoration, while handmade textured artwork can bring an artistic element to an otherwise plain wall. Furniture makeovers allow you to reuse pieces you already own, and an entryway organizer can solve everyday clutter problems. Finally, a cozy reading nook can turn an unused corner into a relaxing retreat.

    The most important thing is to choose projects based on what your home actually needs. If your room feels empty, focus on artwork. If it feels cold, introduce texture and warm lighting. If it feels cluttered, prioritize storage. If your furniture looks outdated, consider a makeover before purchasing replacements.

    You also do not need to complete all ten projects at once. Start with one project that excites you and build from there.

    A beautiful DIY home is created through small, intentional details. With affordable materials, creativity, and a willingness to experiment, you can create decor that looks stylish while still feeling personal.

    The result should not simply look goodโ€”it should feel like your home.


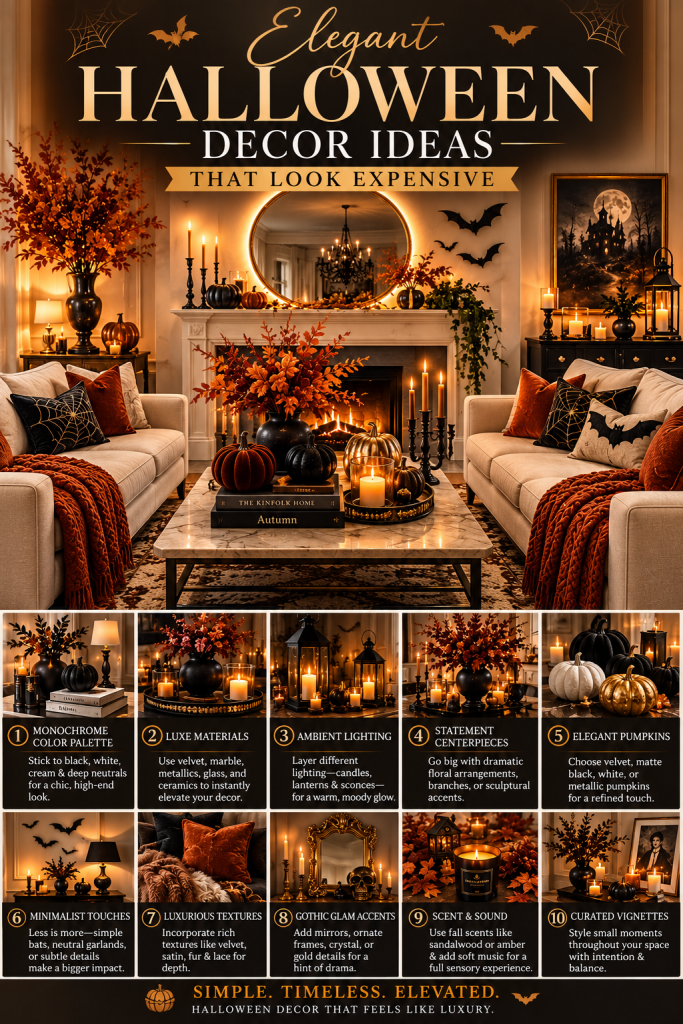
  • Elegant Halloween Decor Ideas That Look Expensive

    Elegant Halloween Decor Ideas That Look Expensive

    Halloween decorating does not have to mean covering every surface with plastic skeletons, neon-orange lights, cartoon pumpkins, or inexpensive-looking seasonal accessories. If your goal is to create a home that feels sophisticated, warm, dramatic, and beautifully styled for Halloween, the secret is not spending more moneyโ€”it is choosing the right colors, textures, materials, lighting, and decorative details. Elegant Halloween decor combines the mysterious atmosphere traditionally associated with Halloween with the polished visual language of luxury interiors. Think deep charcoal, warm ivory, muted black, aged brass, antique-inspired glass, velvet, natural wood, soft candlelight, and carefully selected pumpkins rather than an overwhelming collection of novelty decorations.

    An expensive-looking Halloween home should feel intentional. Every decorative piece should have a purpose, and the overall arrangement should look like it belongs together. Instead of buying dozens of Halloween-specific objects, you can often transform ordinary home decor into seasonal styling by changing textiles, adding atmospheric lighting, introducing dramatic floral arrangements, or creating a sophisticated centerpiece. A simple black vase, for example, can become an elegant Halloween focal point when filled with dark branches and surrounded by ivory pumpkins. A velvet throw can make an ordinary sofa look luxurious, while brass candlesticks and warm candles can immediately create a moody autumn atmosphere.

    The best elegant Halloween decorations also work with the existing character of your home. Modern homes can use minimalist black-and-white Halloween styling. Traditional interiors can embrace antique mirrors, vintage candlesticks, botanical arrangements, and classic pumpkins. Farmhouse spaces can combine natural wood, linen, dried branches, and understated black accents. Even a small apartment can achieve a luxurious Halloween appearance by concentrating decoration in a few high-impact areas instead of attempting to decorate every room.

    Color is one of the most important elements. Traditional orange can certainly be used, but elegant Halloween decor often looks more sophisticated when orange is muted or used sparingly. Burnt orange, terracotta, rust, caramel, cream, warm taupe, and deep brown can create an autumnal palette without looking overly themed. Black can then be introduced through candles, ribbons, vases, picture frames, textiles, or small accessories. Metallic accents such as antique gold, aged brass, or bronze add warmth and make inexpensive pieces feel more refined.

    Lighting is equally important. Bright overhead lighting can flatten a beautifully decorated room, while layered warm lighting creates depth and atmosphere. Table lamps, sconces, candles, lanterns, and small warm-white lights can make a room feel instantly more luxurious. The goal is not to make the space dark; it is to create a soft glow that highlights your best decorations. A mirror positioned near candlelight can also reflect the glow and make a room appear larger and more dramatic.

    Another important principle is restraint. Luxury interiors rarely depend on quantity. Instead, they use repetition, balance, scale, and texture. Three beautifully arranged pumpkins can be more visually impressive than twenty randomly placed pumpkins. One large floral arrangement may create more impact than several tiny decorations scattered throughout the room. A single dramatic wreath on the front door can communicate the Halloween theme more effectively than a collection of unrelated signs.

    Texture is another inexpensive way to create a premium appearance. Velvet, linen, wool, wood, ceramic, glass, metal, and natural branches create layers that make a room look professionally styled. Even if the individual pieces are affordable, combining different textures makes the finished arrangement appear richer. A matte black ceramic pumpkin beside a glossy glass candle holder and a soft velvet ribbon immediately creates visual contrast.

    The ideas below are designed for homeowners, renters, and beginners who want Halloween decor that looks elegant without requiring a huge decorating budget. Each idea focuses on a specific area or technique and includes practical styling instructions, materials, and ways to make affordable pieces look more expensive. You do not need to copy every idea. Choose a few that complement your home and repeat the same colors and materials throughout the space. This creates cohesion and makes your decorations look intentionally designed rather than randomly collected.

    Whether you are decorating a front porch, entryway, living room, dining table, bedroom, kitchen, or small apartment, the most effective strategy is to build a sophisticated Halloween atmosphere gradually. Start with a neutral base, introduce one or two dramatic colors, add natural textures, layer warm lighting, and finish with a few seasonal details. This approach allows Halloween decor to blend naturally with your everyday interior design.

    The result can be spooky without being childish, dramatic without being overwhelming, and luxurious without being expensive. These elegant Halloween decor ideas are especially useful for creating Pinterest-worthy spaces because they combine strong visual contrast, seasonal atmosphere, beautiful textures, and practical styling that readers can realistically recreate at home.

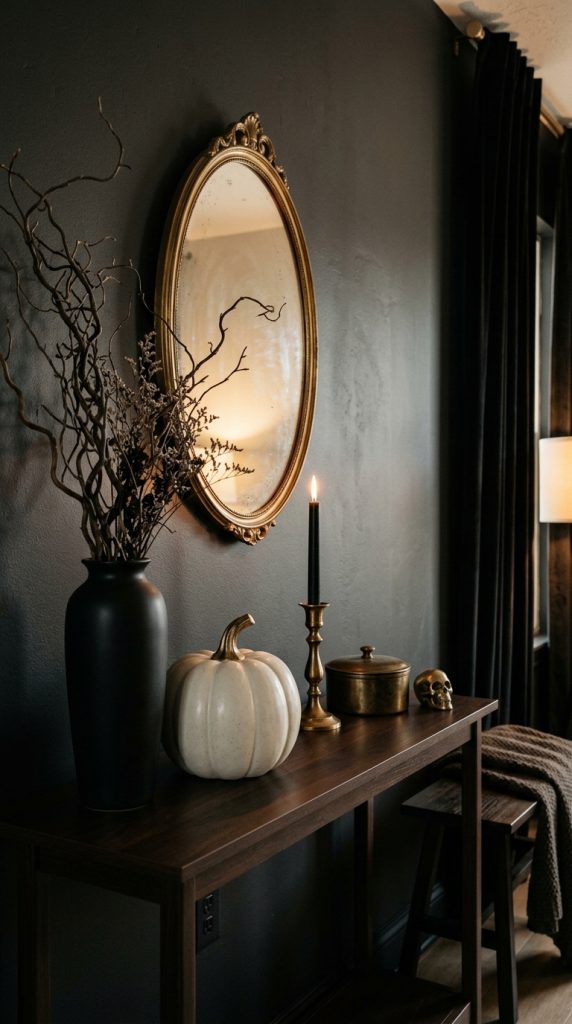
    1. Create a Black and Ivory Halloween Entryway

    The entryway is one of the easiest places to create an expensive-looking Halloween atmosphere because a small number of carefully chosen pieces can make a dramatic first impression. Instead of covering the entrance with traditional Halloween signs and brightly colored decorations, create a refined black-and-ivory arrangement that feels sophisticated and timeless.

    Begin with a neutral foundation. If you already have a console table, keep its surface relatively uncluttered. Add a large black or dark wood mirror above the table if one is available. The mirror creates height and gives the arrangement a finished interior-design appearance. If your existing mirror has a lighter frame, you can introduce black through smaller accessories instead of replacing it.

    Choose two or three pumpkins in different sizes. Ivory pumpkins work beautifully as the main feature, while one matte black pumpkin provides contrast. Avoid using too many different pumpkin colors because the limited palette is what makes the display look expensive.

    Add a tall black vase filled with dried branches. Bare branches create height and introduce a slightly mysterious Halloween feeling without relying on novelty decorations. If you want a softer autumn look, use dried eucalyptus, wheat, pampas grass, or preserved branches in muted brown tones.

    Next, introduce warm metallic accents. A small antique-brass tray, candlestick, or decorative bowl can provide just enough shine. Brass works particularly well with black because it creates a warm contrast instead of making the space feel cold.

    Lighting should remain soft. Place a small table lamp on the console if space allows, or use battery-operated candles in glass holders. Warm light will highlight the pumpkins and metallic details while making the entire entryway feel more inviting.

    Materials and Decor Needed

    • Black or dark wood mirror
    • Console table
    • Ivory pumpkins
    • One or two black pumpkins
    • Matte black vase
    • Dried branches
    • Antique-brass tray or candlestick
    • Warm LED candles
    • Small decorative bowl
    • Optional black ribbon

    How to Make It Look More Expensive

    The most important rule is to leave negative space. Do not fill every inch of the console. Group objects into small clusters and vary their heights. For example, place the vase on one side, pumpkins in the center, and a low tray or candle on the opposite side. This asymmetrical arrangement can look more sophisticated than a perfectly symmetrical display.

    You can also tie a thin black velvet ribbon around the vase or a pumpkin stem. Velvet immediately adds texture and creates a luxurious seasonal detail.

    For a Pinterest-worthy finish, photograph or style the entryway with warm evening lighting, clean surfaces, and a neutral background. The final effect should feel like an elegant autumn interior with a subtle Halloween identity rather than a traditional Halloween display.

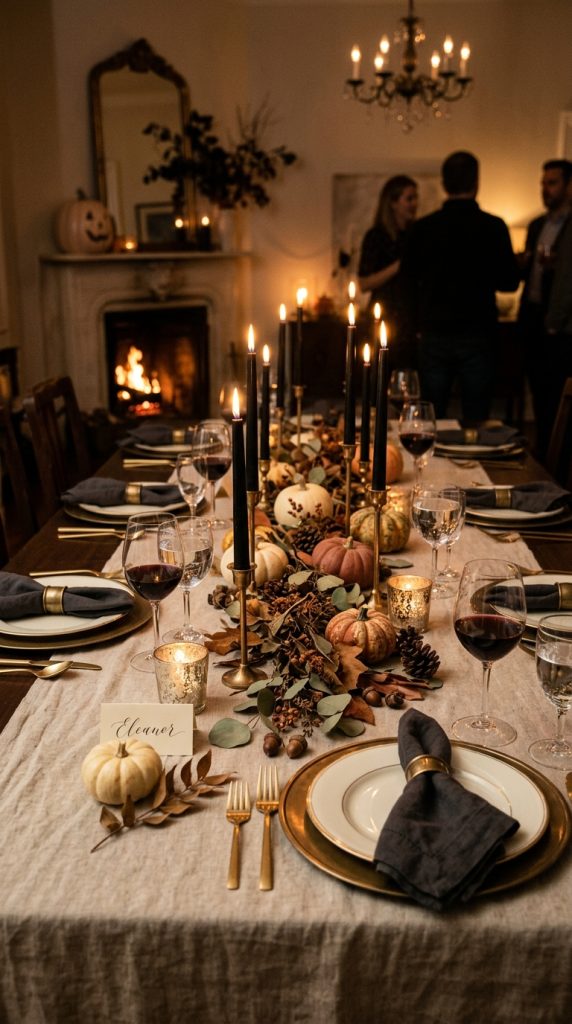
    2. Style a Luxury Halloween Dining Table

    A dining table offers a perfect opportunity to create a dramatic Halloween centerpiece without purchasing expensive decorations. The key is to treat the table as an elegant dinner setting first and a Halloween display second.

    Start with a neutral table runner in linen, cotton, or another natural fabric. Cream, taupe, charcoal, or muted brown are excellent choices. Avoid highly printed Halloween tablecloths because they can make the space feel less sophisticated.

    Place dark plates or neutral ceramic plates at each setting. If you do not own black dinnerware, ordinary white plates work perfectly. Layering white plates with black napkins can create the same effect.

    Use black or dark brown cloth napkins and add a simple decorative element. A small dried leaf, cinnamon-colored ribbon, rosemary sprig, or tiny pumpkin can be placed on top of each napkin.

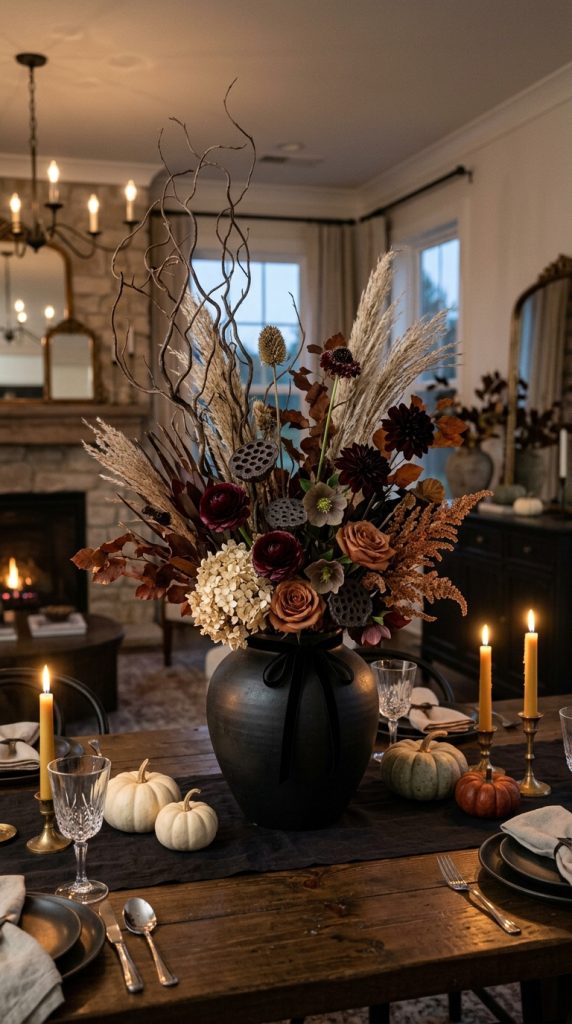
    For the centerpiece, select a low arrangement so guests can see across the table. Use a large ceramic bowl or shallow tray as the foundation. Add ivory mini pumpkins, a few muted orange pumpkins, pinecones, dried leaves, and dark branches.

    Candles are essential for creating an elegant Halloween atmosphere. Place several candle holders along the center of the table. Antique brass, black metal, or smoked glass holders are especially effective. Use warm LED candles if open flames are inconvenient.

    Materials and Decor Needed

    • Neutral table runner
    • Black or charcoal napkins
    • White or dark dinner plates
    • Ceramic bowl or tray
    • Ivory pumpkins
    • Muted orange pumpkins
    • Pinecones
    • Dried leaves
    • Black or brown branches
    • Brass or black candle holders
    • Warm LED candles
    • Simple glassware

    Step-by-Step Styling

    First, place the runner in the center of the table. Arrange your centerpiece tray in the middle. Add the largest pumpkins first, then fill smaller gaps with mini pumpkins and pinecones.

    Insert branches into the arrangement to create height. Do not make the centerpiece perfectly uniform. Slight variation creates a more natural, professionally styled appearance.

    Place candle holders around the centerpiece rather than directly inside it. This creates a layered effect and allows the candlelight to spread across the table.

    Finish the place settings with folded napkins and a small seasonal detail.

    How to Keep the Budget Low

    You do not need a complete Halloween dinnerware collection. Use your existing white plates and ordinary glassware. Invest your attention in the centerpiece and lighting because those elements are visually dominant.

    A beautiful table does not need expensive flowers either. Dried branches from your yard can sometimes create the perfect dramatic centerpiece. Combine them with affordable pumpkins and neutral ceramics to create a luxurious seasonal arrangement.

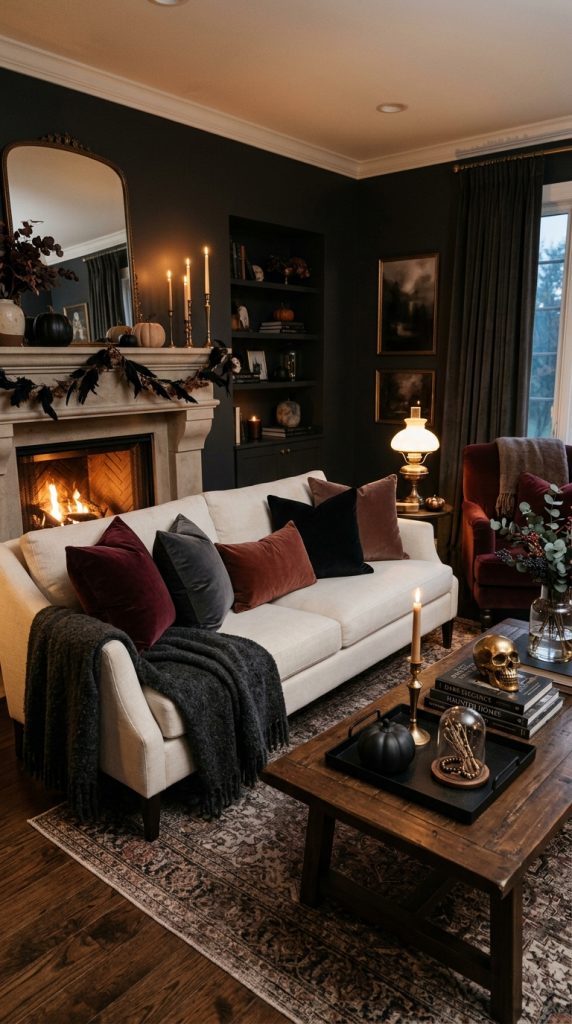
    3. Use Velvet to Make Halloween Decor Look Luxurious

    Velvet is one of the easiest materials for creating an expensive-looking Halloween interior. Its rich texture catches light beautifully and instantly makes ordinary furniture appear more sophisticated.

    You do not need to replace your furniture. Instead, introduce velvet through small accents. A black velvet pillow, rust-colored throw, dark green cushion, or deep plum blanket can completely change the seasonal appearance of a living room or bedroom.

    Begin with your existing neutral sofa. Add two velvet pillows in dark colors. Black, charcoal, forest green, burgundy, espresso brown, and muted rust all work beautifully for Halloween.

    Then add one textured throw. Drape it casually over the arm of the sofa rather than folding it perfectly. This makes the room feel comfortable and lived-in.

    Pair the velvet with natural materials such as wood, stone, ceramic, or woven baskets. Too much velvet can make a room feel heavy, but combining it with rougher textures creates balance.

    For Halloween, you can add one or two seasonal objects nearby. A black ceramic pumpkin on the coffee table or an antique-looking candle holder can reinforce the theme.

    Materials and Decor Needed

    • Velvet throw
    • Velvet cushions
    • Neutral sofa
    • Black or charcoal ceramic accessories
    • Wooden tray
    • Candles
    • Decorative pumpkins
    • Warm table lamp
    • Optional brass accessories

    Step-by-Step Styling

    Start with your largest textile, such as a throw. Choose a color that complements the existing sofa.

    Add two or three cushions in different textures. One can be velvet, another linen, and another woven. This creates visual depth.

    Place a wooden or metal tray on the coffee table. Add one candle, one small pumpkin, and one decorative object.

    Keep the remaining table surface clear.

    The luxury effect comes from restraint. Instead of adding ten Halloween accessories, choose two or three exceptional-looking pieces and allow them to stand out.

    Budget-Friendly Trick

    Look for velvet cushion covers rather than complete pillows. Cushion covers are often cheaper and easier to store after Halloween. You can also reuse the same covers for fall or winter styling by changing the surrounding accessories.

    This approach creates a seasonal transformation without requiring a large collection of Halloween decorations.

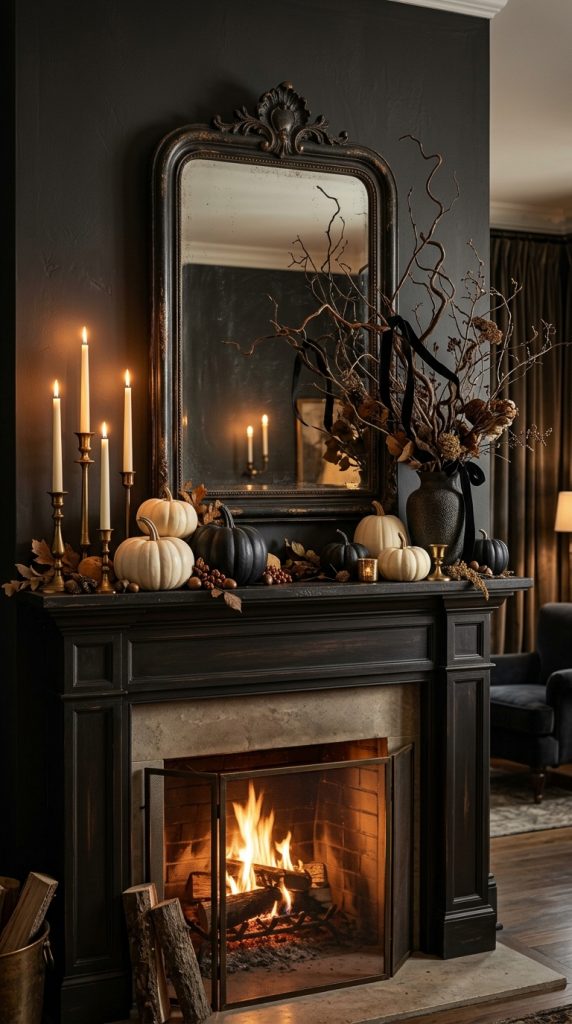
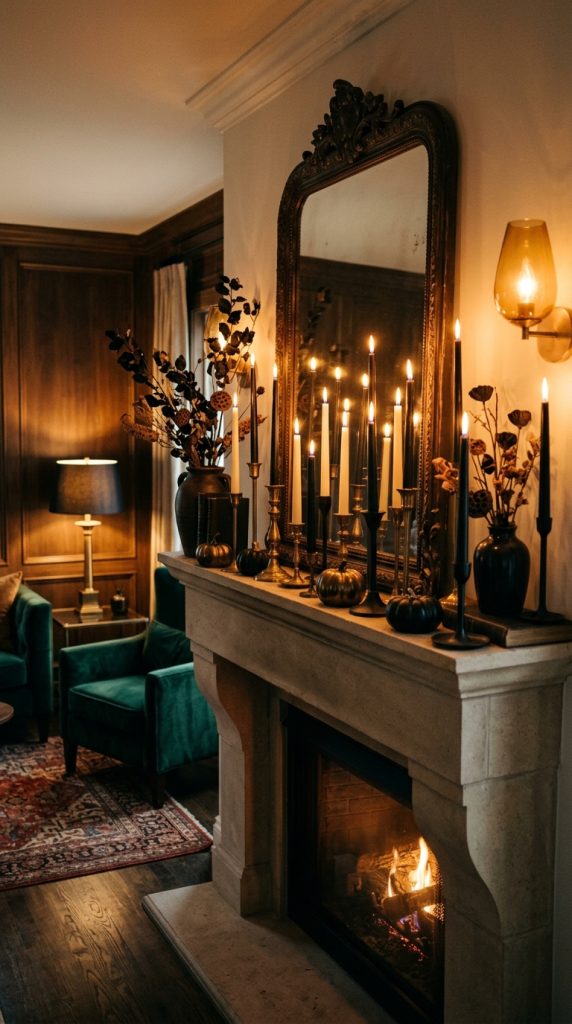
    4. Create a Moody Halloween Fireplace Mantel

    A fireplace mantel naturally becomes a focal point, making it ideal for sophisticated Halloween styling. Even if you have an electric fireplace or simply a media console, you can recreate the same visual effect.

    Begin with a large mirror or piece of artwork above the mantel. A black-framed mirror is especially effective because it reflects candlelight and adds depth.

    Next, introduce greenery or branches. Use dark branches, dried eucalyptus, olive branches, or another natural material that fits your home.

    Add pumpkins gradually. Place a large ivory pumpkin at one end and a black or muted orange pumpkin at the other. Add smaller pumpkins between them.

    Use candlesticks of different heights to create vertical movement. Antique brass, black iron, and dark bronze are excellent choices.

    If you want a more dramatic look, add a black velvet ribbon to the branches. Keep the ribbon loose rather than making large decorative bows.

    Materials and Decor Needed

    • Large mirror
    • Dried branches
    • Ivory pumpkins
    • Black pumpkins
    • Muted orange pumpkins
    • Brass or black candlesticks
    • LED candles
    • Velvet ribbon
    • Ceramic vase

    Styling Method

    Start by creating the tallest element, such as the branches. Position them slightly off-center.

    Add the mirror behind the arrangement if one is already installed.

    Place the largest pumpkin on the opposite side of the branches to create visual balance.

    Add medium and small pumpkins around the larger pieces.

    Finally, introduce candles at different heights.

    The goal is to create a composition that looks collected rather than arranged in a perfect row.

    Expensive-Looking Detail

    Use repetition. If your mantel includes antique brass, repeat brass in one smaller object elsewhere in the room. If you use black velvet ribbon, repeat black through a cushion or vase.

    Repeated materials create cohesion and make inexpensive decorations appear intentionally selected.

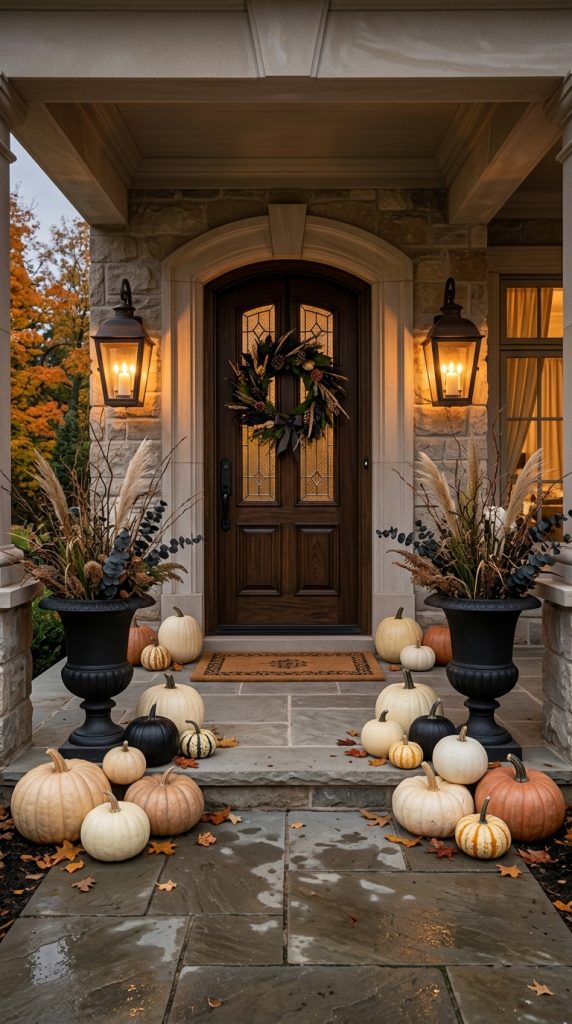
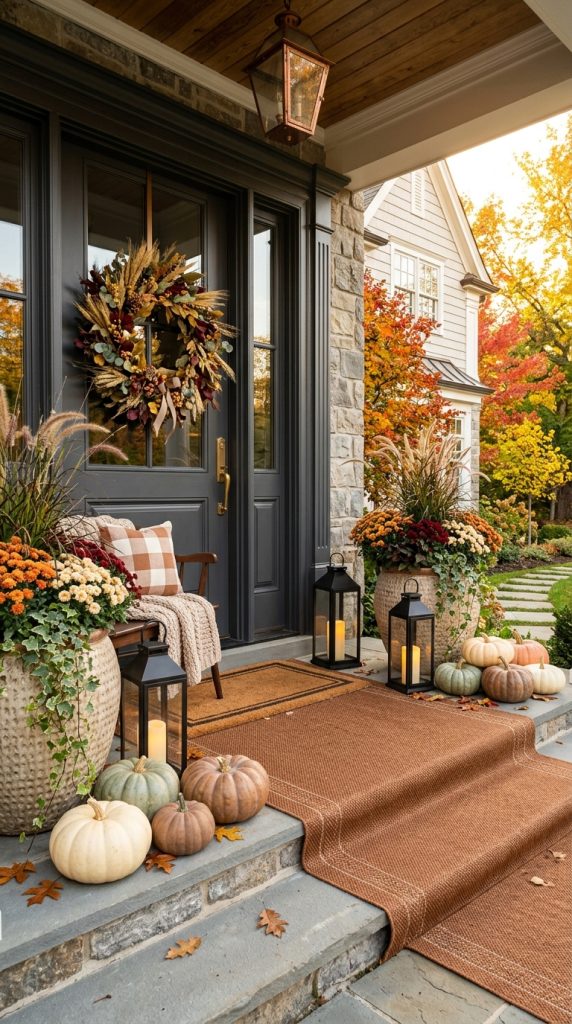
    5. Decorate the Front Porch With Sophisticated Pumpkins

    Your front porch establishes the Halloween mood before guests even enter your home. Fortunately, an elegant porch can be created with inexpensive pumpkins, natural materials, and strategic lighting.

    Instead of using brightly colored plastic decorations, build a monochromatic or muted autumn palette.

    Start with several pumpkins in different sizes. Use cream, white, black, muted orange, and natural green varieties if available.

    Arrange the pumpkins around the front door rather than placing them in one straight line. Create clusters on both sides of the entrance.

    Add tall planters with branches, dried grasses, or seasonal greenery. Height is important because it frames the doorway and creates a more finished appearance.

    A simple black wreath can be placed on the door. If you want a more luxurious effect, choose a wreath made with dried branches, eucalyptus, dark leaves, or a combination of neutral materials.

    Lighting should be warm and subtle. Use lanterns beside the door and warm outdoor bulbs if possible.

    Materials and Decor Needed

    • Assorted pumpkins
    • Black or neutral wreath
    • Large planters
    • Dried branches
    • Seasonal grasses
    • Lanterns
    • Warm outdoor lights
    • Black ribbon
    • Natural doormat

    How to Arrange the Pumpkins

    Start with your largest pumpkins near the bottom. Place medium pumpkins beside them and smaller pumpkins slightly forward.

    Avoid creating identical arrangements on both sides. Instead, balance them visually while allowing each side to remain slightly different.

    Add lanterns behind the pumpkins so the light appears to glow through the arrangement.

    Budget Tip

    Use ordinary pumpkins as your primary decoration rather than buying specialty Halloween props. A simple pumpkin can look expensive when it is styled with the right surroundings.

    You can also paint a few pumpkins matte black or warm ivory using appropriate craft paint. A consistent finish can make inexpensive pumpkins appear like designer accessories.

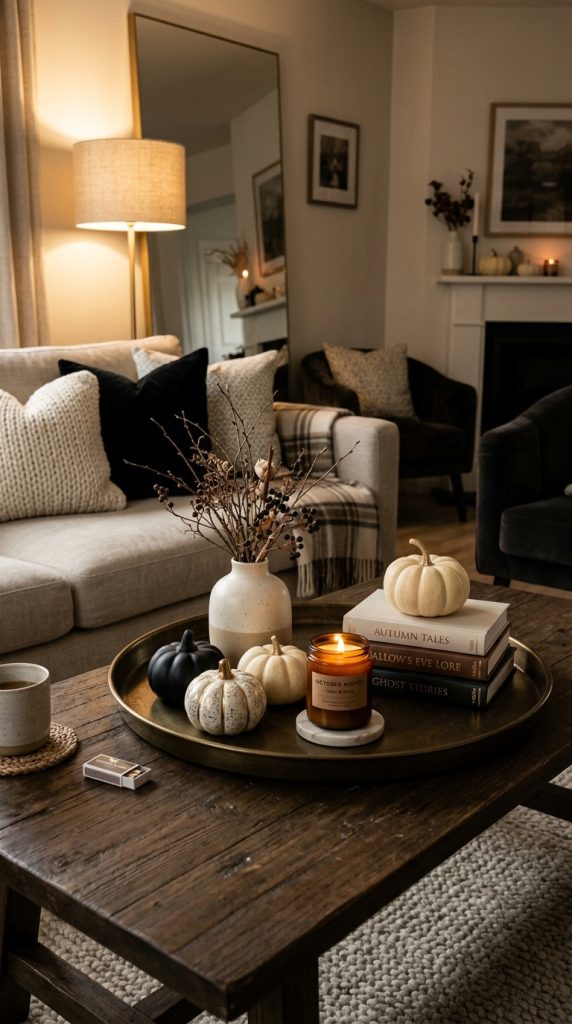
    6. Make a Sophisticated Halloween Coffee Table Arrangement

    The coffee table is an ideal place for a small Halloween moment that does not overwhelm the living room. The trick is to use a tray to organize the decoration.

    Choose a rectangular, round, or square tray. Wood, black metal, marble-look, or antique brass can all work.

    Place the tray in the center of the coffee table. Add a short ceramic vase filled with dried branches.

    Next, add one or two small pumpkins. Choose neutral or dark colors.

    Place a candle beside the vase. A black, cream, amber, or smoky glass candle works beautifully.

    Finally, add a small stack of decorative books if you have them. Books create height and make the arrangement feel like part of an interior-design composition rather than a seasonal display.

    Materials and Decor Needed

    • Decorative tray
    • Small vase
    • Dried branches
    • Two or three mini pumpkins
    • Candle
    • Decorative books
    • Small ceramic object
    • Optional brass accent

    Step-by-Step

    Place the books toward one side of the tray. Put the vase on top or beside them.

    Place one pumpkin at the front and another slightly behind it.

    Add the candle to the opposite side.

    Make sure the arrangement has different heights. The eye should naturally move from the tallest element to the smallest.

    Keep It Functional

    Remember that a coffee table still needs to be usable. Avoid creating an arrangement so large that people cannot place a cup or move around it.

    A compact, well-designed arrangement will always look more luxurious than a crowded table.

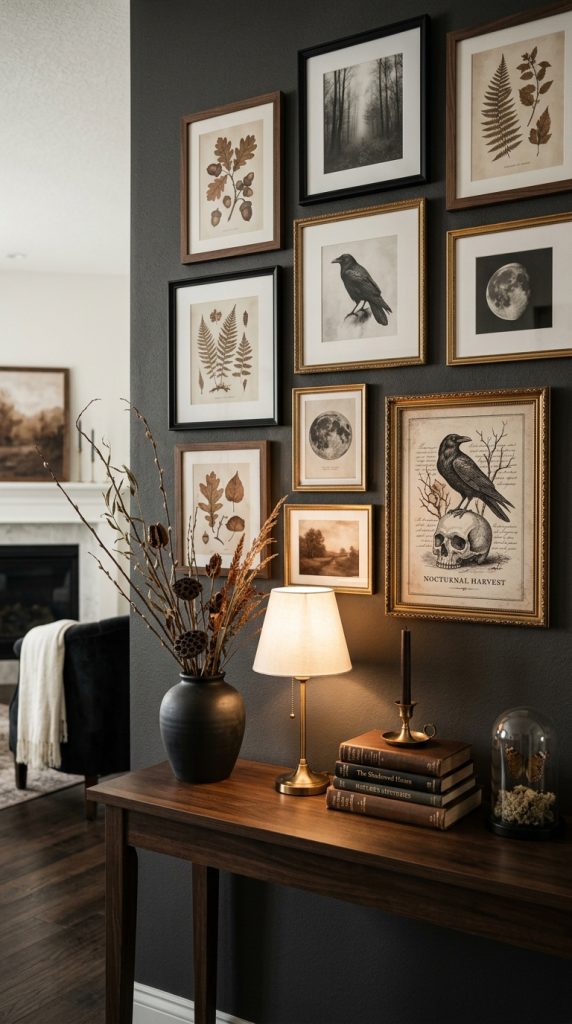
    7. Create an Elegant Halloween Gallery Wall

    Halloween does not always need pumpkins. Artwork can create a sophisticated seasonal mood while allowing the rest of your home to remain relatively understated.

    Use existing frames if possible. Black, walnut, dark brown, and antique gold frames work particularly well.

    You can create a temporary Halloween gallery wall using printable artwork featuring botanical illustrations, vintage-inspired silhouettes, ravens, moon imagery, autumn leaves, old-fashioned architecture, or black-and-white photography.

    Keep the artwork within a limited palette. Black, ivory, sepia, muted brown, and dark green create a cohesive appearance.

    Arrange the frames in a simple grid or relaxed gallery configuration.

    Materials and Decor Needed

    • Existing picture frames
    • Black-and-white artwork
    • Botanical prints
    • Vintage-style illustrations
    • Removable hanging strips if needed
    • Small decorative mirror
    • Optional brass frame

    Styling Advice

    Do not use too many Halloween-specific images. A single subtle seasonal print can be more sophisticated than a wall filled with ghosts and bats.

    Mix Halloween-inspired artwork with ordinary vintage-style pieces. This makes the gallery wall feel permanent and curated.

    Budget-Friendly Approach

    You can reuse frames you already own and change only the artwork inside them. This is an inexpensive seasonal decorating strategy because the frames can be used throughout the year.

    For renters, removable hanging strips can help create a temporary display without making permanent changes to the wall.

    8. Add Black Candles and Warm Ambient Lighting

    Lighting can completely transform inexpensive decor. If you want Halloween decorations to look expensive, focus on illumination as much as the decorations themselves.

    Black candles are especially effective because they create a dramatic contrast against cream walls, neutral tables, and warm wood.

    Arrange candles in groups of three or five. Use different heights but keep the same general color palette.

    Place them on a mantel, dining table, entryway console, bathroom counter, or bedroom nightstand.

    For safety and convenience, flameless LED candles are an excellent alternative. Choose warm-white versions rather than cool-white lights because warm light creates a softer atmosphere.

    Materials and Decor Needed

    • Black candles
    • Cream candles
    • Glass candle holders
    • Brass candlesticks
    • LED candles
    • Small lanterns
    • Table lamps
    • Warm string lights

    Layering the Lighting

    Begin with existing room lighting. Turn off harsh overhead lighting if possible.

    Use table lamps to create a base layer.

    Add candles as decorative accent lighting.

    Finally, use small warm lights around shelves, mirrors, or architectural features if needed.

    Why This Looks Expensive

    Luxury interiors rarely rely on one strong light source. Multiple small light sources create shadows, highlights, and depth.

    Your Halloween decorations will look more dramatic when the room has layered illumination rather than bright overhead light.

    The important thing is to maintain visibility. Elegant does not mean making the room excessively dark. Keep enough light for the space to remain comfortable and inviting.

    9. Style an Elegant Black and Gold Halloween Corner

    Black and gold are classic colors for creating a glamorous Halloween look. The combination can work in living rooms, dining rooms, bedrooms, entryways, and even small apartments.

    Start with a black base. This could be a black vase, picture frame, candle holder, lamp, or small side table.

    Introduce gold through one or two accents. Antique brass often looks more sophisticated than extremely shiny gold.

    Add a cream pumpkin between the black and metallic objects. This softens the contrast and prevents the arrangement from looking too severe.

    Materials and Decor Needed

    • Black vase
    • Antique brass tray
    • Cream pumpkins
    • Black candle
    • Brass candlestick
    • Dark branches
    • Small mirror
    • Velvet ribbon

    Arrangement

    Place the tallest object at the back. Add the pumpkin toward the front.

    Put the brass accessory beside the black object.

    Use the candle to create another vertical layer.

    If there is a mirror nearby, position it where it can reflect the metallic detail or candlelight.

    Beginner Tip

    Do not use gold everywhere. Two or three gold elements are usually enough.

    The expensive appearance comes from contrast: matte black, soft ivory, natural wood, and small amounts of aged metal.

    10. Create a Luxe Halloween Bedroom

    Halloween decor can be subtle and sophisticated in the bedroom. Rather than filling the room with themed objects, focus on bedding, lighting, and a few carefully selected accessories.

    Start with neutral bedding. White, cream, beige, or light gray provides an excellent base.

    Add dark velvet or linen pillows in black, charcoal, burgundy, or forest green.

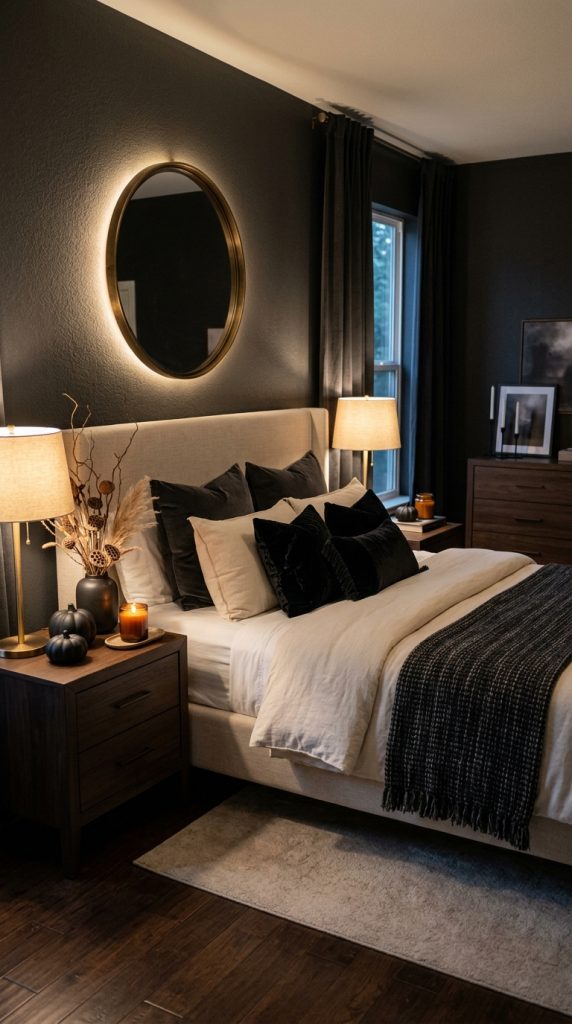
    Place a dark throw at the foot of the bed.

    On the nightstands, use warm lamps and one small seasonal object. A black ceramic pumpkin or amber glass candle can provide enough Halloween atmosphere.

    If you have a mirror, place warm lighting near it. The reflected glow creates depth and gives the room a more luxurious appearance.

    Materials and Decor Needed

    • Neutral bedding
    • Velvet cushions
    • Dark throw
    • Black ceramic pumpkin
    • Warm bedside lamps
    • Amber glass candle
    • Dark vase
    • Dried branches
    • Optional black ribbon

    Step-by-Step

    Begin with the bedding as the neutral foundation.

    Add two large pillows behind smaller decorative cushions.

    Place a dark throw across the bottom third of the bed.

    Keep nightstands uncluttered.

    Add one seasonal accessory to each side if desired.

    Use warm lighting to complete the mood.

    Why This Works

    The bedroom should remain relaxing. Too many Halloween decorations can make the space feel busy.

    Instead, use seasonal colors and textures to communicate the theme. A black velvet pillow can feel luxurious rather than overtly Halloween-themed, while a small pumpkin quietly reinforces the season.

    11. Design a Minimalist Halloween Kitchen

    The kitchen does not need extensive Halloween decorations to feel seasonal. In fact, minimalist styling often creates the most expensive appearance.

    Start by clearing unnecessary countertop clutter. A clean surface makes even a few decorative objects look more intentional.

    Choose one area, such as a coffee station, kitchen island, or open shelf.

    Add a small black ceramic vase with dried branches.

    Place two or three mini pumpkins nearby.

    If you have an open shelf, introduce a black mug, cream ceramic bowl, or dark glass container.

    Use warm under-cabinet lighting or a small lamp to create atmosphere.

    Materials and Decor Needed

    • Mini pumpkins
    • Black ceramic vase
    • Dried branches
    • Neutral ceramics
    • Black mugs
    • Amber glass jars
    • Warm lighting
    • Small wooden tray

    Coffee Station Idea

    A Halloween coffee station can become a beautiful seasonal focal point. Place a wooden tray on the counter.

    Add your coffee maker or mugs as usual, then introduce one black mug, a small pumpkin, and a candle or decorative jar.

    A small chalkboard-style sign can be added if desired, but keep the typography simple and elegant.

    Budget Tip

    Decorate with objects you already use. Black mugs, wooden boards, ceramic bowls, and glass jars can become seasonal accessories without requiring new purchases.

    The result feels natural because the Halloween decor is integrated into the kitchen rather than placed randomly around it.

    12. Create a Sophisticated Halloween Staircase

    A staircase can become one of the most dramatic areas in the home with surprisingly little decoration.

    Instead of covering the railing with plastic garlands, use a natural or fabric-based approach.

    Wrap a dark green or black garland loosely around the railing. Add a few dried branches and small velvet ribbons.

    You can place small pumpkins on the steps if they do not create a tripping hazard. Use only a few and position them safely along the side.

    Lanterns can be placed at the base of the staircase, provided they are suitable for the location and do not obstruct movement.

    Materials and Decor Needed

    • Dark garland
    • Dried branches
    • Black velvet ribbon
    • Mini pumpkins
    • Lanterns
    • Warm LED candles
    • Optional dried leaves

    Step-by-Step

    Begin at the top of the railing and loosely attach the garland.

    Do not make the wrapping too perfect.

    Add branches at selected points.

    Tie small velvet ribbons to the garland.

    Place one or two pumpkins near the base.

    Finish with warm lantern lighting.

    Safety First

    Never allow decorations to interfere with handrails or walking paths.

    Avoid loose cords and real flames near fabrics.

    The staircase should remain fully functional.

    Expensive-Looking Trick

    Use fewer decorations but make them larger and better coordinated. A single substantial garland with beautiful texture can look much more luxurious than multiple thin plastic strands.

    13. Style an Elegant Halloween Bathroom

    A bathroom can be transformed with very small changes. Because bathrooms often have mirrors and reflective surfaces, even a few decorative details can create a dramatic effect.

    Begin with towels. Replace bright everyday towels with neutral cream, charcoal, or black options.

    Add a small black soap dispenser or amber glass container.

    Place a small vase with dried branches near the sink if there is enough space.

    A small cream or black ceramic pumpkin can sit on a tray beside the sink.

    Add a candle or flameless light for a warm atmosphere.

    Materials and Decor Needed

    • Neutral towels
    • Black soap dispenser
    • Amber glass bottle
    • Small vase
    • Dried branches
    • Mini pumpkin
    • Small tray
    • Warm LED candle

    Styling the Vanity

    Keep the vanity mostly clear.

    Place a small tray near one side.

    Add the soap dispenser, candle, and mini pumpkin to the tray.

    Position the vase behind the arrangement if space permits.

    The mirror will reflect the objects and make the display appear larger.

    Why Simplicity Works

    Bathrooms can quickly look cluttered. A minimalist seasonal arrangement maintains the clean feeling of the room while still introducing Halloween character.

    Choose materials that look sophisticated rather than novelty-based.

    Black ceramic, amber glass, natural wood, and cream textiles are excellent choices.

    14. Make an Expensive-Looking Halloween Floral Arrangement

    Flowers and branches can make Halloween decor feel dramatically more sophisticated. You do not need an expensive florist arrangement. The secret is choosing the right container and using a restrained palette.

    Begin with a large ceramic vase. Black, ivory, dark brown, or antique metallic finishes work well.

    Use dried branches as the foundation. Add dried grasses, eucalyptus, seed pods, wheat, or dark foliage.

    For a more autumnal arrangement, introduce muted rust or burgundy elements.

    If using fresh flowers, choose deep red, burgundy, cream, or white flowers rather than bright colors.

    Materials and Decor Needed

    • Large ceramic vase
    • Dried branches
    • Dried grasses
    • Eucalyptus
    • Seed pods
    • Muted autumn foliage
    • Burgundy or cream flowers
    • Black ribbon

    Step-by-Step

    Place the tallest branches into the vase first.

    Add medium-height foliage around them.

    Fill empty areas with smaller dried materials.

    Step back and examine the arrangement from several angles.

    Trim anything that looks too crowded.

    Add a thin black velvet ribbon if desired.

    Where to Use It

    This arrangement can work on:

    • Dining tables
    • Entryway consoles
    • Kitchen islands
    • Fireplace mantels
    • Living room side tables
    • Bedroom dressers

    Budget Tip

    Dried arrangements can often last throughout the season and may be reused for autumn, Thanksgiving, and winter decorating. This makes them a practical investment compared with decorations designed exclusively for Halloween.

    15. Create a Complete Luxury Halloween Living Room With Layered Decor

    The final idea combines the principles from the previous sections into one cohesive living-room design. Instead of decorating every corner, create several connected focal points.

    Begin with the sofa. Add velvet cushions in black, charcoal, rust, or deep green. Place a soft neutral throw over one arm.

    Move to the coffee table. Use a wooden or black tray with a small vase, one candle, and two pumpkins.

    Next, style the fireplace or media console. Use a large mirror, dried branches, a few ivory pumpkins, and antique-brass candle holders.

    Add a small seasonal arrangement to a side table.

    Finally, adjust the lighting. Use warm table lamps, candles, and subtle accent lights.

    Materials and Decor Needed

    • Velvet cushions
    • Neutral throw
    • Wooden or black tray
    • Ceramic vase
    • Dried branches
    • Ivory pumpkins
    • Black pumpkins
    • Antique-brass candle holders
    • Warm LED candles
    • Table lamps
    • Dark decorative objects
    • Optional velvet ribbon
    • Neutral rug

    Step-by-Step Room Transformation

    First, remove unnecessary objects. A clean room provides the best foundation.

    Second, establish your color palette. For example, use ivory, black, warm brown, and antique brass.

    Third, introduce textiles. Add velvet cushions and a soft throw.

    Fourth, create the coffee-table arrangement.

    Fifth, style the main focal point, such as the fireplace.

    Sixth, add one or two smaller seasonal accents around the room.

    Finally, adjust lighting.

    The Rule of Three

    Use groups of three whenever possible. Three pumpkins in different sizes, three objects on a tray, or three candles at different heights can create a naturally balanced arrangement.

    The Rule of Repetition

    Repeat the same colors and materials throughout the room. If the coffee table has black ceramic, repeat black on the mantel. If you use brass on the fireplace, add a small brass accent elsewhere.

    The Rule of Restraint

    Do not add something simply because you have space for it.

    A luxury room contains breathing room.

    The purpose of elegant Halloween decor is to make the room feel transformed without making it feel overwhelmed.

    Final Thoughts

    Elegant Halloween decorating is ultimately about editing rather than adding. You do not need hundreds of decorations or expensive designer pieces to create a home that looks sophisticated for the season. Instead, focus on a carefully controlled color palette, layered textures, atmospheric lighting, natural materials, and a few dramatic focal points.

    Black and ivory are especially useful because they create instant contrast. Warm metallics such as antique brass and bronze add richness. Velvet brings softness and luxury, while dried branches and natural wood prevent the space from feeling overly formal. Pumpkins become much more sophisticated when they are used selectively and combined with neutral ceramics, glass, candles, and beautiful textiles.

    Lighting should never be overlooked. Warm lamps, candles, lanterns, and subtle accent lighting can transform even inexpensive decorations into something that feels dramatically more expensive. When possible, avoid relying on bright overhead lighting while entertaining. Instead, create several small pools of warm light around the room.

    The most successful Halloween interiors also maintain consistency. If you choose black, ivory, and antique brass for your entryway, repeat those colors in the living room and dining area. This repetition creates a cohesive home and makes your seasonal decorations appear professionally planned.

    You can also make your Halloween decor more sustainable and budget-friendly by choosing pieces that can be reused. Velvet pillows can work throughout autumn and winter. Dried branches can become Thanksgiving decorations. Black ceramic vases can remain part of your everyday decor. Neutral pumpkins can transition from Halloween into broader fall styling.

    For renters and small-space decorators, the same principles apply. You do not need a large home. Choose one focal area and make it beautiful. A console table, coffee table, kitchen counter, or front door can become the main seasonal feature.

    Most importantly, remember that expensive-looking decor is not necessarily expensive decor. The appearance of luxury comes from proportion, coordination, texture, lighting, and restraint. A simple black vase can look elevated when paired with the right branches. An ordinary pumpkin can look designer-inspired when surrounded by elegant materials. A basic dining table can become a memorable Halloween setting through candles, neutral linens, and thoughtful layering.

    Use these ideas as a starting point rather than a strict checklist. Mix the concepts that match your existing interior style. If your home is modern, keep the palette minimal and use clean shapes. If your home is traditional, embrace antique finishes, candles, and classic autumn colors. If your style is farmhouse, combine natural wood, linen, pumpkins, and dried branches. If your home is small, concentrate the decoration in one or two high-impact areas.

    The ultimate goal is a Halloween home that feels moody, warm, elegant, inviting, and intentionally designed. With a few carefully chosen materials and smart styling techniques, you can create a Pinterest-worthy seasonal interior that looks far more expensive than the actual decorating budget.

    Quick Shopping and Styling Checklist

    Core Color Palette

    • Black
    • Ivory
    • Cream
    • Warm brown
    • Muted orange
    • Rust
    • Deep green
    • Burgundy
    • Antique brass

    Essential Materials

    • Pumpkins in different sizes
    • Black and neutral ceramic pieces
    • Velvet cushions or ribbons
    • Linen textiles
    • Dried branches
    • Dried grasses
    • Candles or flameless LED candles
    • Brass or black candle holders
    • Warm table lamps
    • Decorative trays
    • Mirrors
    • Lanterns
    • Neutral baskets
    • Simple seasonal artwork

    Styling Rules to Remember

    1. Choose a limited color palette.
    2. Use different textures to create depth.
    3. Create one clear focal point in each decorated area.
    4. Combine large, medium, and small objects.
    5. Leave negative space around important pieces.
    6. Repeat colors and materials throughout the room.
    7. Use warm lighting instead of harsh overhead lighting when possible.
    8. Prefer natural materials over excessive plastic decorations.
    9. Use pumpkins selectively rather than covering every surface.
    10. Mix Halloween elements with everyday decor.
    11. Choose quality-looking finishes such as matte ceramic, velvet, glass, wood, and aged metal.
    12. Keep walkways and functional surfaces clear.
    13. Use removable decor solutions in rental homes.
    14. Reuse seasonal pieces whenever possible.
    15. Remember that simplicity often creates the strongest luxury effect.

    Elegant Halloween decor does not require a luxury budget. With thoughtful styling, a restrained palette, beautiful textures, and warm lighting, even simple seasonal decorations can create an atmosphere that feels sophisticated, memorable, and completely Pinterest-worthy.


  • Cozy Fall Living Room Ideas

    Cozy Fall Living Room Ideas

    Fall is the perfect season to make a living room feel warmer, softer, and more inviting. As the weather becomes cooler and daylight gradually decreases, the living room naturally becomes one of the most important spaces in the home. It is where family members gather, guests relax, books are read, movies are watched, and quiet evenings are enjoyed. A successful fall living room does not need to look heavily decorated or filled with obvious seasonal objects. Instead, the most beautiful spaces use subtle color, comfortable textiles, warm lighting, natural materials, and carefully selected autumn accents to create an atmosphere that feels cozy without becoming cluttered.

    One of the easiest ways to introduce fall into a living room is through textiles. Soft throws, knitted blankets, textured cushions, woven rugs, and heavier curtains can immediately change the feeling of a room. These elements are especially useful because they can be removed or replaced when the season ends. A neutral sofa, for example, can remain in place throughout the year while rust, caramel, cream, olive, and warm brown cushions make it feel distinctly autumnal.

    Color also plays a major role. Traditional fall decorating often uses orange, rust, mustard, burgundy, brown, and deep green. However, modern fall interiors do not have to rely on strong colors. Cream, beige, taupe, warm white, muted sage, dusty terracotta, and natural wood can create an equally cozy seasonal atmosphere. The best palette depends on the existing furniture and architecture of the room. Rather than completely changing the color scheme, it is usually more practical to select two or three autumn shades and repeat them throughout the space.

    Lighting is another essential component of a cozy fall living room. Bright overhead lighting can make a room feel functional but not necessarily comfortable. Layered lighting creates a much warmer effect. Floor lamps, table lamps, wall sconces, candles, fireplace lighting, and warm decorative lights can be used together to create different levels of illumination. A living room should ideally have enough lighting for practical activities while still offering softer light for relaxing in the evening.

    Natural materials are particularly effective during fall. Wood, rattan, wicker, linen, wool, cotton, stone, ceramic, and dried branches bring visual warmth and texture. Even a simple wooden bowl filled with pinecones or a ceramic vase containing dried grasses can introduce an autumn feeling without making the room look themed. These natural details also work well with neutral interiors.

    Another important consideration is layering. A cozy room rarely relies on one decorative element. Instead, several layers work together. A rug grounds the furniture. A throw adds softness to the sofa. Cushions provide color and texture. A coffee-table arrangement introduces small decorative details. Plants or branches add height. Lighting creates atmosphere. When these elements are balanced properly, the room feels complete without appearing overcrowded.

    Fall decorating can also be affordable. You do not need to replace furniture or purchase an entirely new collection of decorations. Small changes can have a surprisingly large impact. Rearranging furniture, adding a textured blanket, changing cushion covers, introducing a few pumpkins, styling a tray, or replacing cool-toned light bulbs with warmer ones can transform the atmosphere.

    The following ideas are designed for different home styles and budgets. Some focus on traditional autumn colors, while others use neutral palettes. Some are ideal for large living rooms, while others work beautifully in small apartments. Each concept emphasizes practical decorating decisions that beginners can realistically recreate.

    The goal is not simply to make a living room look โ€œfall-themed.โ€ The goal is to create a space that feels warm, comfortable, welcoming, and visually beautiful throughout the season. By combining practical furniture arrangements with thoughtful seasonal details, you can create a living room that feels like the perfect place to enjoy crisp autumn evenings.

    1. Layer Warm Throws and Textured Pillows for an Instant Fall Refresh

    One of the simplest ways to create a cozy fall living room is by changing the textiles. This approach is especially useful if you already like your furniture and do not want to spend money replacing large pieces.

    Start with the sofa because it usually occupies the largest visual area in the room. Keep the existing upholstery if it is neutral, such as cream, beige, gray, taupe, or brown. Then introduce autumn-inspired cushions and throws.

    Choose a combination of textures instead of buying cushions that all look identical. A knitted cushion can be paired with a linen-style cushion, while a soft velvet or boucle-style pillow adds another layer. The goal is to create tactile variety.

    Materials and Items Needed

    • 2โ€“6 decorative cushions
    • One or two textured throws
    • Neutral sofa
    • Soft area rug
    • Woven basket
    • Warm-toned decorative accessory
    • Optional autumn-colored cushion covers

    For colors, consider rust, caramel, cream, muted olive, terracotta, or warm brown. You do not need every color at once. Choose two or three and repeat them.

    For example, a cream sofa could feature rust and olive cushions with a caramel-colored throw. A brown sofa could use cream, beige, and muted terracotta.

    Drape one blanket casually over the arm of the sofa instead of folding every textile perfectly. A relaxed arrangement makes the room feel lived-in.

    Place another blanket inside a woven basket next to the sofa. This adds both functionality and decoration.

    The rug should support the palette rather than compete with it. If the room already has patterned furniture, choose a subtle rug. If the furniture is very simple, a patterned or textured rug can provide visual interest.

    Lighting can enhance the transformation. Add a floor lamp beside the sofa with a warm-toned bulb. A small table lamp on a side table can provide another layer of light.

    Avoid covering every surface with autumn decorations. When the textiles are doing most of the seasonal work, only a few accessories are necessary.

    This idea is highly practical because the cushions and blankets can be stored after fall and replaced with lighter fabrics during spring and summer. It creates a seasonal transformation without requiring a major redesign.

    2. Create a Neutral Cozy Fall Living Room With Cream and Beige

    Neutral fall decorating is ideal for people who love calm, sophisticated interiors. Instead of using strong orange and red accents, this approach relies on cream, beige, taupe, warm white, natural wood, and subtle greenery.

    Begin with a neutral sofa and add cushions in slightly different shades. Mixing cream, ivory, oatmeal, and warm beige creates depth even when the colors are similar.

    Materials and Items Needed

    • Cream or beige cushions
    • Chunky knit throw
    • Neutral rug
    • Woven basket
    • Wooden coffee table
    • Ceramic vase
    • Dried grasses
    • Warm table lamp
    • Small pumpkins in cream or beige

    Texture is essential because neutral colors can otherwise appear flat. Combine knitted textiles, woven baskets, linen-style cushions, wood, ceramic, and soft rugs.

    Place a large woven basket beside the sofa. Fill it with folded blankets or dried branches.

    On the coffee table, use a simple ceramic vase containing dried grasses. Add a small wooden tray and two or three neutral decorative objects.

    For subtle fall character, introduce a few cream or pale green pumpkins. Place them on the coffee table, bookshelf, or console rather than scattering them throughout the room.

    Warm lighting is particularly important in a neutral room. Use lamps with warm bulbs and avoid harsh blue-white overhead lighting.

    If the room has a fireplace, style the mantel with a simple arrangement of dried branches, ceramic objects, and a few small pumpkins.

    Greenery can also prevent the room from feeling too monochromatic. A small olive-style plant, eucalyptus-style stems, or another soft green plant can provide contrast.

    The beauty of this approach is its longevity. Most of the decor can remain in the room after fall because it does not rely heavily on seasonal colors.

    For a Pinterest-worthy composition, focus on three elements: soft textiles, natural textures, and warm lighting.

    The result should feel peaceful and expensive without requiring expensive decorations.

    3. Style a Warm Rustic Fall Living Room With Natural Wood

    Rustic fall decorating works particularly well in homes with wooden furniture, exposed beams, stone fireplaces, or traditional architecture. The style emphasizes natural materials and comfortable textures.

    Start with a wooden coffee table or console as a central element. If your existing furniture is modern, add rustic character through smaller accessories rather than replacing it.

    Materials and Items Needed

    • Wooden coffee table
    • Woven basket
    • Wool or knitted throw
    • Rustic ceramic vase
    • Dried branches
    • Pinecones
    • Neutral cushions
    • Earth-tone rug
    • Lantern-style lamp

    Choose colors inspired by nature: warm brown, cream, rust, muted green, tan, and soft gray.

    Place a wooden tray on the coffee table. Add a ceramic vase, a small candle, and a few pinecones or miniature pumpkins.

    A woven basket filled with blankets can sit beside the sofa. This creates a practical storage solution while contributing to the rustic aesthetic.

    Use layered textiles on the sofa. A thick knitted blanket provides softness, while linen-style cushions keep the arrangement from becoming visually heavy.

    If you have a fireplace, make it the focal point. Add a simple arrangement of wood, pumpkins, dried foliage, or lanterns around it.

    Lighting should be warm and atmospheric. A table lamp with a textured ceramic base or a floor lamp with a natural shade can add warmth.

    Avoid using too many rustic objects. When every item looks weathered or wooden, the room can start to feel like a themed display.

    Balance rustic materials with softer elements. A plush rug, comfortable sofa, and delicate greenery can make the space feel more sophisticated.

    This style works especially well for fall because the natural materials already complement autumn colors and textures.

    4. Decorate a Fall Fireplace Mantel as the Living Room Focal Point

    If your living room has a fireplace, the mantel provides an excellent opportunity to create a strong seasonal focal point.

    Rather than decorating every surface in the room, concentrate your autumn styling around the fireplace. This creates visual focus and prevents the space from becoming cluttered.

    Begin by selecting one main centerpiece. This could be a large vase of dried branches, a simple autumn arrangement, or an oversized neutral decorative object.

    Materials and Items Needed

    • Large ceramic vase
    • Dried branches
    • Small pumpkins
    • Candles
    • Decorative lantern
    • Seasonal greenery
    • Wooden objects
    • Simple artwork or mirror

    Place the tallest object slightly off-center. Add smaller objects around it to create balance.

    For example, a tall ceramic vase filled with dried branches can sit on one side of the mantel, while several small cream pumpkins and candles balance the other side.

    If you prefer symmetrical decorating, use matching lanterns or candleholders on both ends.

    A large mirror above the mantel can reflect warm light and make the room feel more spacious. Alternatively, use seasonal artwork with warm neutral colors.

    Do not place too many objects directly in front of the fireplace opening. Safety should always come before decoration, particularly if the fireplace is functional.

    If you have a television above the fireplace, keep the mantel arrangement low enough to avoid overwhelming the screen.

    Add subtle lighting around the mantel using battery-operated candles or warm accent lights.

    Repeat one or two mantel colors elsewhere in the room. If the mantel features rust and cream, use rust cushions or a cream throw on the sofa.

    The fireplace should look like part of the room rather than an isolated seasonal display.

    This approach is particularly effective for Pinterest because it creates a strong focal point and makes the entire living room feel intentionally styled.

    5. Add a Fall-Inspired Coffee Table Arrangement

    The coffee table is one of the easiest areas to refresh for fall. Because it is located near the center of the living room, even a small seasonal arrangement can influence the entire room.

    Begin with a decorative tray. A wooden, woven, ceramic, or stone tray can visually organize smaller objects.

    Materials and Items Needed

    • Decorative tray
    • Small ceramic vase
    • Dried flowers or grasses
    • Mini pumpkins
    • Candle
    • Small decorative bowl
    • Coffee table books
    • Wooden accessory

    Create height using a vase or candle. Then add lower objects such as a small bowl or pumpkins.

    A simple arrangement might include two stacked books, a ceramic vase with dried grasses, and three small cream pumpkins.

    For a warmer traditional look, use rust or burnt-orange pumpkins. For a modern design, choose cream, beige, or muted green.

    Avoid filling the entire table. Leave enough space for everyday use.

    A practical coffee-table arrangement should still allow you to place a cup, remote control, or book on the table.

    Natural materials work especially well. A wooden bowl, stone coaster, ceramic vase, and dried grasses can create a sophisticated fall atmosphere without looking overly seasonal.

    Add a candle with a warm autumn-inspired scent if desired, but keep it visually simple.

    The arrangement should coordinate with the sofa textiles and nearby decor. Repeating colors creates cohesion.

    For example, if the sofa has rust cushions, introduce a tiny rust-colored pumpkin on the coffee table.

    The best coffee-table displays often use different heights and textures while maintaining a limited color palette.

    This idea is inexpensive and easy to update, making it one of the most practical fall decorating projects for beginners.

    6. Create a Cozy Fall Reading Corner

    A cozy reading corner can turn an unused living-room area into one of the most inviting parts of the home.

    Choose a comfortable armchair and position it near a window, fireplace, bookshelf, or floor lamp. The chair should face into the room while still feeling slightly separated from the main seating area.

    Materials and Items Needed

    • Comfortable armchair
    • Small side table
    • Floor lamp
    • Soft throw
    • Decorative cushion
    • Small rug
    • Woven basket
    • Books
    • Seasonal greenery

    Choose a chair in a warm neutral shade such as cream, tan, beige, brown, or muted gray.

    Add a soft throw over one arm. A rust, caramel, or olive cushion can introduce a subtle autumn accent.

    Place a small side table beside the chair. Add a warm lamp, a small ceramic cup, and perhaps a simple vase with dried foliage.

    A woven basket underneath or beside the table can hold additional blankets.

    If the space allows, add a small rug underneath the chair. This visually separates the reading corner from the rest of the room.

    Lighting is particularly important. Choose a floor or table lamp that produces a warm, comfortable glow suitable for reading.

    Do not place the chair in a dark corner simply because there is unused space there. Natural daylight is valuable during the day, while warm artificial lighting should take over in the evening.

    Add a small seasonal detail such as a cream pumpkin, dried branch, or autumn-colored book cover.

    The reading corner should look functional rather than staged.

    This idea is particularly effective for Pinterest because it creates an emotional feeling: a quiet place to relax with a blanket and book on a cool autumn evening.

    7. Bring Fall Into a Small Living Room Without Overcrowding It

    Small living rooms require a different approach to seasonal decorating. The goal should be to add warmth without sacrificing valuable floor space.

    Start by keeping large furniture in place. Instead of adding extra chairs or large seasonal objects, focus on textiles and vertical surfaces.

    Materials and Items Needed

    • Warm-toned cushion covers
    • One textured throw
    • Compact rug
    • Small pumpkins
    • Wall art
    • Narrow basket
    • Table lamp
    • Small greenery

    Use a small number of seasonal objects. Three or four carefully chosen accents can be enough.

    For example, place two rust-colored cushions on the sofa, add one cream throw, and style a small coffee-table tray with a ceramic vase and mini pumpkin.

    Use a narrow basket beside the sofa for blankets rather than a bulky storage piece.

    Vertical decoration can include a fall wreath, artwork, or dried branches in a tall vase.

    Lighting can make the room appear warmer and more spacious. A floor lamp placed behind a sofa can add height without consuming much usable floor area.

    Avoid placing too many pumpkins on the floor. Instead, use shelves, side tables, or the coffee table.

    Mirrors can help reflect light and create a sense of additional space. A warm wooden or black frame can complement fall decor.

    Choose lighter neutral colors as the foundation and use richer autumn colors only as accents.

    The overall arrangement should feel breathable.

    A small living room does not need to contain every fall trend. Focus on the atmosphere you want to create: warmth, softness, and comfort.

    8. Style a Modern Fall Living Room With Terracotta and Sage

    Modern fall decor can be both seasonal and sophisticated. Terracotta and sage green are excellent alternatives to the traditional combination of bright orange and red.

    Begin with a neutral foundation of cream, beige, warm gray, or light taupe.

    Materials and Items Needed

    • Terracotta cushions
    • Sage green cushions
    • Cream throw
    • Neutral rug
    • Ceramic vase
    • Dried grasses
    • Sage-colored plant
    • Wooden tray
    • Warm table lamp

    Use terracotta sparingly. Two cushions or one decorative object may be enough.

    Introduce sage through plants, cushions, or small ceramic accessories.

    Natural wood can connect the colors and create warmth.

    On the coffee table, use a simple ceramic vase with dried grasses. Add a wooden tray and one small candle.

    For wall decoration, choose abstract artwork featuring muted earthy tones rather than obvious seasonal illustrations.

    Lighting should be warm but clean. A modern floor lamp or sculptural table lamp can provide visual interest.

    The result should feel contemporary while still communicating the cozy feeling of fall.

    Avoid mixing too many seasonal motifs. Modern decorating is often strongest when color and texture do most of the work.

    A cream sofa with terracotta and sage cushions, a textured rug, natural wood furniture, and warm lighting can create a beautiful fall atmosphere without using pumpkins at all.

    This is an excellent option for people who want seasonal decorating that remains sophisticated and reusable.

    9. Create a Traditional Autumn Living Room With Rich Fall Colors

    For those who love classic fall decorating, rich seasonal colors can create a dramatic and welcoming living room.

    Use burnt orange, rust, mustard, burgundy, deep green, brown, and cream. However, balance is essential.

    Choose one dominant color and two supporting shades. For example, rust can be the primary accent, while cream and deep green support it.

    Materials and Items Needed

    • Rust cushions
    • Burgundy throw
    • Cream cushions
    • Patterned rug
    • Wooden coffee table
    • Seasonal artwork
    • Ceramic vase
    • Dried leaves
    • Candles
    • Small pumpkins

    Start with the sofa. Add cushions in different textures but related colors.

    A rust velvet-style cushion can sit beside a cream knitted cushion, while a subtle patterned cushion adds visual variety.

    Place a burgundy or caramel throw over the sofa arm.

    On the coffee table, use a wooden tray with a ceramic vase, dried autumn foliage, and several small pumpkins.

    If the walls are neutral, introduce warm artwork featuring landscapes, leaves, or abstract earthy colors.

    Wood furniture is particularly effective with this palette because it adds warmth.

    Use lamps and candles to soften the stronger colors during the evening.

    The room should feel rich but not dark. Include enough cream and warm neutral elements to balance the deeper shades.

    Natural greenery can also help. A muted green plant or branch arrangement provides contrast against rust and burgundy.

    This traditional approach is particularly suitable for larger living rooms where deeper colors can be used without making the room feel too enclosed.

    10. Create a Cozy Fall Living Room With Warm Ambient Lighting

    Lighting may be the most underrated element of a cozy fall living room. Even beautifully decorated furniture can feel cold if the room relies entirely on one bright ceiling fixture.

    The solution is layered lighting.

    Materials and Items Needed

    • Floor lamp
    • Table lamps
    • Warm LED bulbs
    • Candles or battery candles
    • Fireplace lighting
    • Decorative lantern
    • String lights if suitable
    • Soft lampshades

    Begin with a floor lamp beside the sofa. Choose a shade that diffuses light rather than exposing a harsh bulb.

    Add a table lamp to a console, side table, or bookshelf. Use another lamp on the opposite side of the room if possible.

    Warm bulbs create a softer atmosphere. Avoid extremely cool white light for evening relaxation.

    Candles can provide another layer. Use several different sizes but keep them grouped rather than scattering them everywhere.

    If the room has a fireplace, allow its natural glow to become part of the lighting composition.

    Decorative lanterns can be placed on the floor beside a fireplace, near a reading chair, or on a console.

    If string lights are appropriate for the room, use them subtly around a bookshelf, mantel, or architectural feature rather than covering the entire space.

    The lighting should create zones. The sofa area can be softly illuminated for conversation, while a reading corner can have brighter task lighting.

    Use warm lighting to highlight autumn decorations. A lamp positioned near a vase of dried grasses can create beautiful shadows and texture.

    The result should feel cozy even when there are very few seasonal decorations.

    This approach also has an advantage beyond fall: good layered lighting improves the atmosphere of the living room throughout the year.

    11. Create a Cozy Fall Living Room With a Layered Neutral Sofa

    A neutral sofa provides one of the best foundations for creating a cozy fall living room because it allows seasonal colors and textures to be changed without replacing major furniture. Cream, beige, oatmeal, taupe, and warm gray sofas can all become the centerpiece of a beautiful autumn-inspired space when layered thoughtfully.

    Start by keeping the sofa relatively simple. Instead of covering every seat with cushions, use a carefully selected combination of pillows in different textures. For example, pair a chunky knitted cream cushion with a rust-colored velvet-style cushion and a smaller patterned pillow featuring muted brown or sage.

    Materials and Items Needed

    • Neutral sofa
    • Textured cushions
    • Rust or terracotta cushion
    • Cream knitted throw
    • Woven basket
    • Soft area rug
    • Wooden side table
    • Warm table lamp
    • Small seasonal plant
    • Mini pumpkins or dried foliage

    Add a chunky throw to one side of the sofa. Rather than folding it perfectly, allow part of it to fall naturally over the arm or seat. This creates a relaxed, lived-in appearance.

    A woven basket placed beside the sofa can hold additional blankets. This is both decorative and practical, especially during cooler evenings.

    For the coffee table, keep the decoration understated. A wooden tray containing a ceramic vase, dried grasses, and a few small cream or rust pumpkins can introduce fall without overwhelming the room.

    The floor should feel equally comfortable. A textured area rug can visually connect the sofa with the coffee table and surrounding furniture.

    Lighting is particularly important with neutral furniture. A warm table lamp positioned beside the sofa can create a cozy evening glow. If the room has a floor lamp, position it behind or beside the sofa to create another layer.

    Introduce greenery carefully. A small olive-style tree, eucalyptus-style stems, or another muted green plant can provide a natural contrast to the warm autumn tones.

    The key to this look is layering rather than quantity. Several different textures will make the sofa look richer than a large collection of decorative objects.

    This approach is also easy to update. After fall, simply replace the rust and terracotta cushions with lighter spring colors while keeping the sofa, rug, basket, and furniture unchanged.

    12. Decorate a Small Apartment Living Room for Fall

    Small apartments can become incredibly cozy during fall, but decorating them requires careful attention to scale. The goal is to create warmth without making the room feel smaller or crowded.

    Start by identifying the existing focal point. In many apartments, this may be the sofa, television wall, window, or coffee table. Build your seasonal decorations around that area rather than adding objects throughout the entire room.

    Materials and Items Needed

    • Compact textured rug
    • Two or three seasonal cushions
    • Soft throw
    • Small floor lamp
    • Narrow side table
    • Mini pumpkins
    • Small ceramic vase
    • Dried grasses
    • Woven storage basket
    • Small indoor plant

    Choose a light base palette such as cream, beige, warm white, or light gray. Then introduce small amounts of rust, caramel, terracotta, or olive.

    A small sofa can immediately look more seasonal with two autumn-colored cushions and one soft throw.

    Instead of using a large coffee-table centerpiece, choose a small tray with a ceramic vase, dried grasses, and one or two miniature pumpkins.

    Use vertical space wherever possible. A tall vase with branches can create height without taking up much floor area.

    A narrow basket beside the sofa can store blankets while adding texture.

    Lighting can dramatically change a small apartment. A slim floor lamp in a corner or a small table lamp on a side table can create warmth without occupying much space.

    Avoid filling the floor with pumpkins or large seasonal displays. Use shelves, window ledges, the coffee table, and the media console for smaller decorations.

    Mirrors are also useful in compact rooms because they can reflect natural and artificial light. Choose a warm wooden or black frame to complement the autumn palette.

    Keep the number of colors limited. A combination such as cream, caramel, and muted green can create a cohesive result.

    The finished space should feel warm and comfortable rather than heavily decorated.

    13. Style a Cozy Fall Living Room With a Fireplace and Candles

    A fireplace naturally creates a cozy atmosphere, making it an ideal focal point for autumn decorating. You can emphasize this architectural feature with warm textures, seasonal colors, and soft candlelight.

    Begin by keeping the fireplace itself visually clean. If it is functional, make sure decorations are positioned safely away from heat sources.

    Materials and Items Needed

    • Fireplace
    • Mantel
    • Candles or battery-operated candles
    • Ceramic vase
    • Dried branches
    • Small pumpkins
    • Seasonal greenery
    • Woven basket
    • Cozy throw
    • Neutral rug

    For the mantel, use a combination of height and low decorative elements. A large vase filled with dried branches can create vertical interest, while smaller pumpkins and candles can fill the surrounding space.

    If you have a mirror above the mantel, allow it to remain visible. The mirror can reflect candlelight and make the room feel brighter.

    For a more traditional style, introduce rust, burnt orange, and deep green. For a modern look, use cream, beige, brown, and muted olive.

    Place a woven basket filled with blankets near the fireplace. This makes the area look inviting while providing practical storage.

    A comfortable armchair positioned near the fireplace can create a dedicated relaxation zone.

    Add a soft area rug beneath the main seating arrangement. This helps visually connect the fireplace with the sofa and chairs.

    Lighting should be layered. Use the fireplace glow, warm lamps, and candles together rather than depending on a single light source.

    For safety, battery-operated candles are an excellent option when you want candlelight around children, pets, or areas where open flames may be unsuitable.

    Avoid decorating every inch of the mantel. A few larger objects usually look more sophisticated than many small ones.

    The final effect should feel intimate and peaceful, like a room designed specifically for cool autumn evenings.

    14. Create an Elegant Fall Living Room With Burgundy and Caramel

    Burgundy and caramel can create a rich, sophisticated fall palette without making the living room feel overly traditional. These shades work especially well with cream, warm white, brown, and natural wood.

    Begin with a neutral foundation. A cream or beige sofa allows the darker autumn colors to become accents rather than overwhelming the room.

    Materials and Items Needed

    • Burgundy cushions
    • Caramel throw
    • Cream cushions
    • Neutral rug
    • Wooden coffee table
    • Ceramic vase
    • Dried branches
    • Warm floor lamp
    • Woven basket
    • Small autumn accessories

    Introduce burgundy through one or two cushions rather than covering the entire sofa. Add a caramel throw to create a softer transition between the deep red and neutral furniture.

    A wooden coffee table can provide natural warmth. Style it with a ceramic vase containing dried grasses and a small wooden tray.

    Use cream accessories to keep the palette balanced. A cream candle, ceramic bowl, or neutral decorative object can prevent the darker shades from becoming too heavy.

    For the rug, choose warm beige or cream with a subtle pattern. This keeps the floor visually connected to the rest of the room.

    Add a woven basket beside the sofa for blankets. Natural wicker or rattan works particularly well with burgundy because it softens the richer color.

    Lighting should be warm and slightly atmospheric. A floor lamp with a fabric shade can create a gentle pool of light around the seating area.

    If you have wall art, look for pieces featuring warm landscapes, abstract earthy tones, or botanical elements.

    Avoid mixing too many additional colors. Burgundy, caramel, cream, and brown are already enough to create a complete palette.

    This style feels particularly elegant because it uses strong fall colors selectively rather than decorating the entire room in seasonal shades.

    It can also transition beautifully into Thanksgiving and winter by changing only a few accessories.

    15. Create a Cozy Fall Living Room on a Budget

    Creating a beautiful fall living room does not require buying new furniture or spending a large amount of money on seasonal decorations. With smart layering and a little creativity, inexpensive changes can make an existing room feel completely different.

    Begin with a โ€œshop your homeโ€ approach. Look around your house for baskets, blankets, ceramic vases, wooden trays, candles, lamps, cushions, and decorative objects that could be moved into the living room.

    Materials and Items Needed

    • Existing cushions
    • Affordable cushion covers
    • One cozy throw
    • Woven basket
    • Wooden tray
    • Mini pumpkins
    • Dried foliage
    • Secondhand vase or ceramic container
    • Candles
    • Existing lamps

    Instead of buying new cushions, purchase seasonal covers for the ones you already own. This requires much less storage space and can be significantly more affordable.

    A single rust, terracotta, caramel, or olive cushion cover can immediately change the appearance of a neutral sofa.

    Use a wooden tray to organize coffee-table decorations. Add a candle, small vase, and a few inexpensive mini pumpkins.

    Dried branches can often provide more visual impact than expensive floral arrangements. Place them in a simple existing vase and position the vase on a console or coffee table.

    Woven baskets are another versatile investment. They can store blankets during fall and serve other purposes throughout the year.

    Lighting can also be improved without replacing fixtures. Use warmer bulbs in existing lamps if they currently produce a harsh, cool light.

    Rearranging furniture costs nothing and can sometimes make the biggest difference. Angle a chair toward the sofa, move a side table closer to the seating area, or create a more intimate conversation zone.

    Avoid buying dozens of small seasonal decorations. A few larger visual changes will generally look more polished.

    The most effective budget formula is:

    Existing furniture + seasonal textiles + natural textures + warm lighting + a few fall accents.

    The finished living room should look intentionally decorated rather than inexpensive.

    This approach proves that cozy fall style is more about atmosphere and thoughtful styling than the amount of money spent.

    Part 2 Ideas 11โ€“15: Pinterest Styling Tips

    When creating Pinterest content around these five ideas, emphasize the details that immediately communicate comfort and seasonal warmth. Viewers should be able to understand the decorating concept at a glance.

    Use a strong focal point such as:

    • A layered neutral sofa
    • A fireplace
    • A cozy reading chair
    • A beautifully styled coffee table
    • A warm seasonal color palette

    Keep the background realistic and uncluttered. Pinterest-friendly decorating images tend to work particularly well when the viewer can imagine recreating the space in their own home.

    For cozy fall interiors, prioritize:

    • Warm lighting
    • Soft blankets
    • Textured cushions
    • Natural wood
    • Woven baskets
    • Ceramic accessories
    • Dried grasses
    • Subtle greenery
    • Cream and earthy tones
    • Seasonal accents

    Avoid making every surface look decorated. A room feels more luxurious when there is enough negative space for the important pieces to stand out.

    For smaller living rooms, emphasize functionality and space-saving styling. For larger rooms, use furniture grouping, rugs, fireplaces, and lighting zones to create intimacy.

    The most Pinterest-worthy fall living rooms are not necessarily the most elaborate. They are the ones that communicate a clear feelingโ€”warm, comfortable, inviting, and achievableโ€”while using cohesive colors and layered textures.


  • Fall Porch Decorating Ideas

    Fall Porch Decorating Ideas

    Fall is one of the best seasons for refreshing your home’s exterior because even a small porch can become a warm, inviting extension of your living space. As temperatures begin to cool and autumn arrives, natural seasonal elements such as pumpkins, mums, dried leaves, woven baskets, lanterns, cornstalks, and warm-toned textiles can completely transform an ordinary entrance. The beauty of fall porch decorating is that you do not need a huge budget, a large front porch, or expensive seasonal decorations to create an impressive result. With thoughtful layering, a cohesive color palette, and a few carefully selected focal pieces, almost any entryway can feel polished, cozy, and Pinterest-worthy.

    A successful fall porch should feel intentional rather than overcrowded. Instead of placing every autumn decoration you own near the front door, begin by considering the architecture and available space. A narrow porch may benefit from vertical arrangements, tall planters, and a simple wreath, while a wide porch can accommodate layered pumpkins, benches, baskets, lanterns, and larger seasonal displays. The goal is to create visual balance while keeping the entrance functional and easy to walk through.

    Color is another important part of creating an attractive autumn porch. Traditional fall colors such as burnt orange, rust, mustard yellow, cream, brown, and deep red naturally create a cozy seasonal atmosphere. However, modern decorating styles can also use neutral pumpkins, warm beige, ivory, muted green, or black accents for a sophisticated look. Choosing two or three dominant colors and repeating them throughout the porch helps the entire arrangement feel coordinated.

    Natural textures make fall decorating even more appealing. Wood, wicker, rattan, jute, linen, ceramic, galvanized metal, and dried foliage can add depth without making the space feel overly decorated. These materials also work beautifully with pumpkins and seasonal flowers, creating the layered appearance that performs well in interior and exterior design inspiration.

    Lighting deserves special attention as well. Fall afternoons become darker earlier, so warm lighting can make a porch feel especially inviting in the evening. Lanterns, warm-white string lights, battery-operated candles, and illuminated planters can create a gentle glow around the entrance without overpowering the decorations. Lighting should enhance the seasonal atmosphere while keeping pathways safe and visible.

    Another advantage of fall porch decorating is that many elements can be reused throughout the season. A neutral wreath, wooden crates, baskets, lanterns, and planters can become the foundation for different arrangements. You can begin with a simple early-fall look and gradually add pumpkins, autumn foliage, and seasonal details as October approaches. This makes decorating more affordable and gives the porch a refreshed appearance without requiring a complete redesign.

    The following ideas focus on practical ways to create beautiful fall porch arrangements for different styles, budgets, and porch sizes. Whether you prefer classic farmhouse charm, modern minimalism, rustic warmth, elegant neutrals, or a colorful traditional autumn look, these ideas can help you create an entrance that feels welcoming from the moment guests arrive.

    1. Layer Pumpkins Around the Front Door for an Instant Fall Transformation

    One of the easiest ways to create a classic autumn porch is to build a layered pumpkin display around the front door. Pumpkins immediately communicate the season, and they can be arranged in ways that look polished rather than cluttered.

    Start by choosing a color palette. A traditional arrangement might combine orange pumpkins with cream and green varieties. For a more sophisticated porch, use mostly white, ivory, and muted green pumpkins with only a few orange accents. If your home has a darker exterior, warm orange pumpkins can provide beautiful contrast.

    Begin with the largest pumpkins at the back of the arrangement. Place them near the sides of the doorway or against the wall. Add medium-sized pumpkins in front and finish with smaller pumpkins scattered toward the edges. This creates visual depth.

    For a narrow porch, avoid spreading pumpkins across the entire walkway. Instead, create two compact groupings on either side of the door. This symmetrical arrangement looks particularly attractive on traditional homes.

    Materials and Items Needed

    • Large pumpkins
    • Medium pumpkins
    • Mini pumpkins
    • Decorative gourds
    • Outdoor-safe basket or planter
    • Fall foliage
    • Optional wooden crate
    • Outdoor doormat

    For additional height, place a few pumpkins inside a wooden crate or large woven basket. You can also elevate one or two pumpkins on an overturned planter, creating different levels within the arrangement.

    Add greenery between the pumpkins to soften the display. Eucalyptus-style foliage, faux autumn leaves, dried grasses, or seasonal branches can work beautifully.

    The key is repetition. If you use cream pumpkins near one side of the doorway, repeat cream tones on the other side. This makes the display feel professionally styled.

    For an evening-friendly porch, add a pair of lanterns with warm battery-operated candles. Position them slightly behind or beside the pumpkin clusters so the light illuminates the display.

    This idea is especially effective because it can be adapted throughout the season. Early in fall, use pumpkins and greenery for a subtle harvest look. Later, add darker foliage, lanterns, plaid accents, or additional seasonal details.

    2. Create a Cozy Farmhouse Fall Porch With Baskets and Wooden Crates

    Farmhouse-style fall decorating remains popular because it combines comfort, natural textures, and practical simplicity. You can achieve this look without completely changing your porch.

    Begin with a neutral foundation. A cream or beige outdoor rug works well beneath the front door. Add a simple fall wreath featuring dried leaves, wheat, cotton stems, or muted foliage.

    Next, introduce wooden crates. Stack two crates beside the door and fill them with pumpkins, faux leaves, or small potted mums. The crates create height while also adding rustic character.

    Woven baskets are another essential element. A large basket can hold blankets, decorative branches, or tall faux foliage. Smaller baskets can be filled with pumpkins.

    Materials and Items Needed

    • Wooden crates
    • Woven baskets
    • Pumpkins
    • Mums or seasonal flowers
    • Neutral wreath
    • Rustic lantern
    • Outdoor rug
    • Wooden sign
    • Faux or dried foliage

    Choose weather-resistant materials whenever possible. If your porch is uncovered, faux pumpkins and artificial foliage may be more practical than delicate natural decorations.

    For the color palette, combine cream, warm brown, muted orange, and sage green. These shades create a cozy farmhouse atmosphere without looking too bright.

    Place the tallest objects toward the back and smaller items toward the front. For example, tall foliage can sit inside a basket behind medium pumpkins, while mini pumpkins fill the foreground.

    A wooden sign with a simple seasonal message can be included, but keep wording minimal. Too many signs can make a porch look busy.

    Warm lighting is particularly important for this style. Add lanterns on both sides of the door or place one larger lantern near the basket arrangement.

    The final effect should feel collected and comfortable rather than perfectly matched. Slight variations in pumpkin shape, basket texture, and wood tones actually make the farmhouse display more interesting.

    3. Design an Elegant Neutral Fall Porch With White Pumpkins

    If bright orange decorations do not match your home’s exterior, a neutral fall porch can provide a sophisticated alternative. White, cream, beige, soft brown, and muted green create an elegant autumn atmosphere.

    Start with white pumpkins in several sizes. Mixing different shapes prevents the display from appearing repetitive. Add a few pale green pumpkins for subtle color variation.

    A neutral wreath can become the main focal point. Choose one made from dried grasses, eucalyptus-style foliage, wheat, or cream-colored florals.

    Materials and Items Needed

    • White pumpkins
    • Cream pumpkins
    • Pale green pumpkins
    • Neutral wreath
    • Beige outdoor rug
    • Woven basket
    • Dried grasses
    • Ceramic planter
    • Warm lanterns

    Use texture instead of strong color to create visual interest. A woven basket next to smooth ceramic pumpkins creates contrast, while dried grasses add height.

    For a sophisticated appearance, avoid filling every available space. Leave some breathing room around the decorations. This is especially important for modern homes.

    Arrange three or five pumpkins together rather than placing them randomly. Odd-numbered groupings often create a more natural visual rhythm.

    A tall planter with ornamental grass can provide vertical structure. Place it beside the door or at the outer edge of the porch.

    Lighting should remain warm and subtle. Use warm-white bulbs rather than extremely bright cool lighting. A pair of simple lanterns can make the neutral palette feel warmer at night.

    This decorating idea also transitions easily from early fall into Thanksgiving. You can change only a few accessories rather than rebuilding the entire porch.

    4. Add Fall Mums for Color, Texture, and Seasonal Charm

    Flowers are one of the easiest ways to bring life to a fall porch. Chrysanthemums, commonly called mums, are especially useful because they naturally complement autumn decorating.

    Choose mums based on your home’s exterior colors. Golden yellow and orange work beautifully with traditional autumn displays, while burgundy, cream, and deep red create a richer appearance.

    Instead of placing one small plant beside the door, create layered groupings.

    Materials and Items Needed

    • Fall mums
    • Large planters
    • Small pumpkins
    • Decorative basket
    • Outdoor rug
    • Seasonal wreath
    • Garden stool or plant stand
    • Warm lantern

    Use large planters to establish a strong foundation. Place taller plants toward the back and smaller containers toward the front.

    Mums look particularly attractive when surrounded by pumpkins. For example, place a large pot of burgundy mums behind several cream pumpkins. Add a few orange mini pumpkins around the base.

    If you have steps leading to the entrance, repeat the same color combination across multiple steps. This creates a cohesive pathway.

    For a small porch, use one oversized planter rather than several small containers. A large statement planter can provide more visual impact without consuming too much floor space.

    Consider using decorative baskets around nursery pots. This hides ordinary plastic containers and gives the arrangement a more finished appearance.

    As temperatures change, maintain the plants according to their needs. If real plants are inconvenient, high-quality artificial mums can provide a similar visual effect with much less maintenance.

    5. Build a Welcoming Fall Entryway With a Seasonal Wreath

    Sometimes the most effective fall porch decoration is also one of the simplest. A beautiful seasonal wreath can immediately transform the front door while leaving the rest of the porch relatively uncluttered.

    Choose a wreath that complements your home’s architecture. Rustic homes may look best with grapevine wreaths and dried foliage, while modern homes can benefit from minimal eucalyptus-style designs.

    Materials and Items Needed

    • Fall wreath
    • Grapevine or simple wreath base
    • Dried leaves
    • Faux berries
    • Wheat stems
    • Ribbon
    • Door hardware
    • Small pumpkins
    • Seasonal doormat

    For a classic autumn look, combine rust-colored leaves, wheat, berries, and neutral flowers. For an elegant appearance, use cream foliage and muted greenery.

    The wreath should be proportional to the door. A tiny wreath on a large door may disappear visually, while an oversized wreath can overwhelm a narrow entrance.

    Repeat one or two colors from the wreath elsewhere on the porch. If the wreath contains rust-colored leaves, add a few rust pumpkins below. If it contains cream foliage, repeat cream tones in the doormat or planter.

    A wreath can also become the foundation for a more layered display. Add two planters or pumpkin arrangements at floor level while allowing the wreath to remain the main focal point.

    Avoid adding too many unrelated decorative signs or accessories. The purpose of the wreath is to create a strong visual anchor.

    For a budget-friendly approach, start with a simple wreath base and add seasonal stems yourself. This allows you to refresh the wreath each year without purchasing an entirely new decoration.

    6. Create a Rustic Fall Porch With Hay Bales and Corn Stalks

    For a more dramatic seasonal display, incorporate natural harvest elements such as hay bales, corn stalks, dried grasses, and pumpkins.

    This approach works particularly well for larger porches, farmhouse-style homes, and homes with broad front steps.

    Materials and Items Needed

    • Small hay bales
    • Corn stalk bundles
    • Pumpkins
    • Gourds
    • Wooden crates
    • Rustic lanterns
    • Dried grasses
    • Seasonal flowers
    • Outdoor mat

    Place corn stalks vertically beside the doorway to create height. Secure them properly so they remain stable in windy weather.

    Use hay bales as low platforms for pumpkins and planters. Rather than scattering them randomly, create one or two intentional groupings.

    For example, place a hay bale on one side of the door with pumpkins stacked across it. On the opposite side, use a tall planter and a smaller pumpkin grouping to balance the composition.

    Natural materials can look especially beautiful against white, cream, gray, or dark-colored siding.

    Because some natural harvest materials can shed or deteriorate outdoors, choose locations protected from heavy rain when possible. Artificial alternatives can also provide a similar appearance.

    Warm lanterns will make the rustic display especially inviting after sunset. Position them near the base of the arrangement rather than directly in front of the door.

    Keep pathways clear and avoid placing loose stalks where they could interfere with visitors.

    The goal is to create a welcoming harvest-inspired scene without making the porch resemble a crowded farm stand.

    7. Style a Small Fall Porch Without Making It Feel Crowded

    A small porch does not need to be left undecorated. The secret is using vertical space and selecting fewer, more impactful pieces.

    Start by identifying the areas that do not interfere with movement. The wall around the door, vertical planters, door itself, and corners can all provide decorating opportunities.

    Materials and Items Needed

    • Medium fall wreath
    • Tall planter
    • Small pumpkins
    • Narrow basket
    • Compact outdoor rug
    • Wall lantern
    • Seasonal doormat

    Choose one tall element, such as a planter filled with ornamental grass or tall autumn branches. This draws the eye upward and makes the porch feel taller.

    Instead of placing several pumpkins across the floor, create one compact grouping near the door.

    A seasonal doormat can provide another layer without consuming physical space.

    For the door, use a wreath as the primary decorative feature. If the door is colorful, choose a wreath that complements rather than competes with it.

    Wall-mounted lighting can be especially useful on small porches because it provides illumination without taking up floor space.

    Avoid oversized furniture, excessive signs, and too many small decorations. Small objects can quickly make a compact porch look cluttered.

    A simple formula works well: one wreath + one tall planter + one pumpkin grouping + one seasonal mat + warm lighting.

    This gives you enough seasonal personality while preserving an open and functional entrance.

    8. Add a Cozy Fall Seating Corner to a Larger Porch

    If your porch has enough space, create a small seating area where you can enjoy cool autumn mornings and evenings.

    A comfortable chair or compact bench can become the main focal point. Add a textured outdoor cushion in a warm seasonal color.

    Materials and Items Needed

    • Outdoor chair or bench
    • Weather-resistant cushions
    • Throw blanket
    • Small side table
    • Lantern
    • Pumpkins
    • Outdoor rug
    • Fall planter
    • Woven basket

    Position the seating toward the side of the porch rather than directly in front of the entrance.

    Place an outdoor rug underneath the seating area to visually define the zone. Add a small table beside the chair for drinks or seasonal accessories.

    A woven basket can hold a cozy blanket. Choose weather-resistant textiles if the porch is exposed.

    Add one or two pumpkins near the seating area rather than covering the entire floor with decorations.

    For lighting, a lantern on the side table or nearby floor can create an intimate atmosphere. Warm string lights can also be added along the porch railing if appropriate.

    Choose neutral furniture so that seasonal accessories can easily be changed later.

    This arrangement extends the use of the porch beyond decoration. It creates an actual destination where family members can sit, relax, and enjoy the season.

    9. Use Lanterns and Warm Lighting to Make the Porch Glow

    Lighting can completely change the appearance of fall decorations after sunset. A porch that looks attractive during the day can become even more inviting when illuminated correctly.

    Begin with warm-white lighting. Avoid harsh, cool-toned bulbs if your goal is a cozy autumn atmosphere.

    Materials and Items Needed

    • Lanterns
    • Battery-operated candles
    • Warm-white string lights
    • Wall lights
    • Pumpkins
    • Woven basket
    • Seasonal wreath

    Place matching lanterns on either side of the entrance for symmetry. Alternatively, use different sizes within the same style for a more relaxed appearance.

    Lanterns can be positioned behind pumpkin arrangements so that the light shines through the display.

    String lights can be attached along railings, around columns, or beneath covered porch ceilings. Keep the installation neat and use products appropriate for outdoor conditions.

    Battery-operated candles are often easier to manage than traditional candles and can provide a realistic glow.

    For a modern porch, choose simple black or bronze lanterns. For farmhouse styling, weathered metal or wood-look lanterns work beautifully.

    Lighting should support the decorations rather than dominate them. The objective is a soft, layered glow.

    Combining overhead lighting, lanterns, and subtle accent lighting creates depth and prevents the porch from appearing flat at night.

    10. Combine Pumpkins, Mums, and a Wreath for a Classic Pinterest-Worthy Porch

    For a timeless fall porch that works across many home styles, combine three foundational elements: pumpkins, seasonal flowers, and a wreath.

    This combination provides color, texture, height, and a clear focal point without requiring dozens of decorations.

    Materials and Items Needed

    • Large pumpkins
    • Mini pumpkins
    • Fall mums
    • Seasonal wreath
    • Outdoor rug
    • Planters
    • Lanterns
    • Decorative basket
    • Optional wooden crate

    Begin with the wreath on the door. Choose a design that establishes your color palette.

    Next, place matching or complementary mums on either side of the entrance. Use large planters to give them visual weight.

    Add pumpkins around the base of the planters. Use different sizes and shapes to create a natural layered arrangement.

    Finally, add one or two lanterns for evening warmth.

    Keep the walkway open and maintain enough room for the door to swing freely.

    The most important styling principle is balance. The two sides do not have to be identical, but they should have similar visual weight.

    For example, one side might contain a large mum planter and three pumpkins, while the other has two planters and a larger pumpkin grouping.

    Use a consistent color palette throughout. Orange, cream, and green create a traditional look, while cream, beige, and muted green create a modern neutral appearance.

    This approach is particularly Pinterest-friendly because it combines several recognizable fall elements into one cohesive composition while remaining realistic and achievable for beginners..

    11. Create a Modern Fall Porch With Black, Cream, and Warm Wood

    A modern fall porch can feel seasonal without relying heavily on traditional orange decorations. The combination of black, cream, warm wood, and subtle greenery creates a sophisticated autumn look that works especially well with contemporary, minimalist, and transitional homes. This style is ideal if you want your porch to look elegant enough for everyday use while still clearly reflecting the fall season.

    Start with a simple foundation. Choose a neutral outdoor rug in beige, cream, or charcoal. Then add a clean-lined black planter or pair of planters near the entrance. Fill them with ornamental grasses, muted greenery, or seasonal branches. The greenery introduces softness while the black containers provide structure.

    For pumpkins, choose a mixture of cream, soft beige, and a few darker varieties. You do not need dozens of pumpkins. Three to seven carefully positioned pumpkins can create much more impact than a large pile of mismatched decorations.

    Materials and Items Needed

    • Cream or beige pumpkins
    • A few black or charcoal pumpkins
    • Black planters
    • Ornamental grasses
    • Neutral outdoor rug
    • Simple fall wreath
    • Wooden stool or crate
    • Black lanterns
    • Warm-white battery candles
    • Small woven basket

    The front door should remain the main focal point. A simple wreath made from eucalyptus-style greenery, dried grasses, or neutral foliage can provide just enough seasonal character.

    Warm wood is another important element. A small wooden stool, crate, or narrow bench can soften the black-and-cream palette. Place a few pumpkins on the stool to create different heights.

    Lighting is essential for making a modern porch feel inviting. Black lanterns with warm battery-operated candles can create a beautiful contrast against cream pumpkins. If your porch has a ceiling, subtle warm string lights can add another layer of illumination.

    Avoid using too many decorative signs in this style. Modern decorating generally looks stronger when there is negative space around the main elements.

    For a polished Pinterest-inspired arrangement, repeat the same colors throughout the porch. If black appears in the planters, repeat it in the lanterns. If cream appears in the pumpkins, repeat it in the rug or wreath.

    The final result should feel intentional, calm, and sophisticated rather than heavily themed. This is an excellent option for homeowners who love fall but prefer a contemporary aesthetic.

    12. Decorate a Fall Porch on a Budget With Simple DIY Layers

    Beautiful fall porch decorating does not require an expensive shopping trip. A carefully planned budget-friendly arrangement can look just as attractive when you focus on layering, repetition, and a few versatile pieces.

    Begin by using what you already have. Existing planters, baskets, lanterns, stools, benches, and outdoor rugs can become the foundation of your seasonal design. Instead of purchasing an entirely new collection of decorations, add inexpensive seasonal elements around these existing pieces.

    Pumpkins are one of the easiest ways to create a fall atmosphere. Mix a few real pumpkins with inexpensive faux pumpkins. If you already own neutral decorative objects, group them with orange pumpkins to create contrast.

    Materials and Items Needed

    • Existing planters
    • Existing baskets
    • Real or faux pumpkins
    • Mini gourds
    • Artificial leaves
    • Dried grasses
    • Wooden crates
    • DIY wreath materials
    • Outdoor ribbon
    • Battery-operated candles

    One inexpensive DIY idea is to create a simple fall wreath from a grapevine base and seasonal stems. Add only a few clusters of foliage rather than covering the entire wreath. This keeps the design simple and reduces material costs.

    Wooden crates can also be used as inexpensive display platforms. Stack them near the entrance and fill them with pumpkins. If the wood looks too plain, add a small seasonal ribbon or place a basket on top.

    Another affordable trick is to shop your home before buying anything. A woven basket from another room can hold seasonal branches. A small wooden stool can become a pumpkin stand. An existing lantern can be refreshed with a battery candle.

    Use repetition to make inexpensive decorations look intentional. For example, place similar pumpkins on both sides of the entrance rather than scattering unrelated pieces.

    Lighting can also be affordable. Battery-operated warm-white candles placed inside existing lanterns can immediately improve the atmosphere after sunset.

    The biggest budget mistake is buying too many small decorations. Instead, invest in a few larger foundational pieces and supplement them with inexpensive seasonal accents.

    A simple formula is:

    Existing pieces + pumpkins + greenery + wreath + warm lighting = polished fall porch.

    This approach allows you to create an attractive seasonal entrance while keeping your decorating budget under control.

    13. Create a Rustic Luxury Fall Porch With Rich Textures

    Rustic luxury combines the warmth of traditional fall decorating with sophisticated materials, balanced arrangements, and elegant lighting. Instead of making the porch look overly rustic, the goal is to create a refined space that still feels comfortable and seasonal.

    Start with a rich but restrained color palette. Deep brown, warm cream, muted rust, dark green, and bronze work particularly well. Avoid using too many bright colors because luxury styling usually benefits from a controlled palette.

    Use large planters as architectural elements. Dark bronze, aged stone, black, or textured ceramic planters can immediately make the porch feel more substantial.

    Materials and Items Needed

    • Large textured planters
    • Cream pumpkins
    • Rust-colored pumpkins
    • Deep green foliage
    • Woven baskets
    • Dried branches
    • Bronze or black lanterns
    • Outdoor rug
    • Elegant fall wreath
    • Weather-resistant cushions
    • Wooden bench

    Texture is especially important in this design. Combine smooth ceramic or stone with woven baskets, natural wood, dried foliage, and soft outdoor textiles.

    A large wreath should serve as the primary focal point. Instead of choosing one covered in bright artificial flowers, select a design featuring dried grasses, muted leaves, branches, and subtle berries.

    Place a pair of substantial planters on either side of the doorway. Then build smaller pumpkin groupings around their bases.

    If space allows, add a wooden bench with neutral outdoor cushions. A folded warm-toned throw can create a relaxed, lived-in feeling.

    Lighting should be layered. Use warm wall lighting if available and supplement it with large lanterns. Bronze or black lanterns can provide an elegant finishing detail.

    One of the most important rules for rustic luxury decorating is restraint. Leave enough empty space for the major pieces to stand out.

    Rather than covering the porch with decorations, select fewer pieces with stronger visual presence.

    This approach works particularly well for large front porches because larger-scale furniture and planters prevent the space from looking empty.

    The final result should feel like a high-end autumn retreat: warm, textured, sophisticated, and comfortable without looking excessively decorated.

    14. Use Black and White Fall Decor for a Chic Front Porch

    Black-and-white fall decorating is an excellent choice for people who want seasonal style without the traditional orange-and-yellow color palette. The monochromatic foundation creates a clean appearance, while natural autumn textures prevent the porch from feeling cold.

    Begin with a black-and-white or charcoal outdoor rug. A simple stripe, check, or subtle pattern can add visual interest.

    For pumpkins, use mostly white and cream varieties. Add a few black pumpkins as accents. If real black pumpkins are difficult to find, dark decorative pumpkins can provide the same visual effect.

    Materials and Items Needed

    • White pumpkins
    • Cream pumpkins
    • Black pumpkins
    • Black planter
    • White or neutral mums
    • Black lanterns
    • Simple fall wreath
    • Black-and-white outdoor rug
    • Woven basket
    • Warm-white candles

    The wreath should coordinate with the monochromatic palette. A simple arrangement of white foliage, dried grasses, dark branches, or muted greenery can work beautifully.

    Place black lanterns near the doorway and use warm-white candles inside them. The warm glow prevents the black-and-white palette from appearing too stark at night.

    Add greenery to introduce a small amount of natural color. Olive-style branches, eucalyptus-style foliage, or muted green plants can soften the contrast.

    For a farmhouse-inspired version, add a black-and-white buffalo-check cushion or runner. For a modern version, choose solid fabrics and simple geometric patterns.

    Do not make every object black or white. Natural wood and woven materials are useful because they introduce warmth without disrupting the color scheme.

    A wooden crate underneath white pumpkins can create a beautiful layered arrangement. A wicker basket filled with dried grasses can provide height and texture.

    This style is also highly adaptable for Halloween. Small black accents can transition naturally into October without requiring a complete redesign.

    After Halloween, remove any spooky accessories and keep the neutral pumpkins, greenery, and warm lighting for a sophisticated Thanksgiving-ready porch.

    The key is maintaining consistency. Repeat black accents around the porch while allowing white and cream elements to remain dominant.

    15. Transform Your Fall Porch Into a Thanksgiving-Ready Entrance

    If you want your fall porch decorations to last from September through Thanksgiving, create a transitional design instead of decorating exclusively around Halloween. A Thanksgiving-ready porch can celebrate the entire autumn season while remaining elegant and welcoming.

    Start with a warm neutral base. Cream, caramel, brown, muted orange, rust, and deep green are excellent choices because they work throughout the season.

    Use pumpkins as the foundation. Select several different sizes and shapes, then add seasonal flowers and greenery around them.

    Materials and Items Needed

    • Large pumpkins
    • White pumpkins
    • Gourds
    • Fall mums
    • Dried grasses
    • Wheat bundles
    • Seasonal wreath
    • Wooden crates
    • Woven baskets
    • Lanterns
    • Outdoor rug
    • Warm cushions
    • Seasonal foliage

    Wheat and dried grasses are particularly useful because they immediately communicate harvest season without being tied to a specific holiday.

    Create a layered display around the doorway. Place tall wheat bundles or ornamental grasses at the back, medium pumpkins in the middle, and mini pumpkins and gourds toward the front.

    Add mums in large containers to provide seasonal color. Burgundy, cream, rust, and golden yellow can all work well.

    For the door, choose a wreath that features natural materials rather than Halloween-specific decorations. Dried leaves, wheat, berries, eucalyptus-style greenery, and branches can remain attractive through November.

    A wooden sign with a subtle message about gratitude can be added if desired, but keep it simple. One meaningful sign is usually more effective than several decorative signs competing for attention.

    Lighting should remain warm and welcoming. Place lanterns around the pumpkin arrangement and use battery-operated candles for a soft evening glow.

    The advantage of this design is flexibility. During September, emphasize greenery, grasses, and lighter-colored pumpkins. During October, add a few deeper orange or rust accents. In November, introduce richer brown, burgundy, and harvest-inspired details.

    This makes the porch feel refreshed throughout the season without requiring a complete redesign every few weeks.

    For a Pinterest-worthy finish, photograph or style the arrangement with clear visual layering: wreath at eye level, flowers and tall foliage in the middle zone, and pumpkins and lanterns anchoring the lower section.

    The result is a warm, timeless entrance that feels appropriate from the first cool days of fall through Thanksgiving.


  • 15 Apartment Decorating Ideas on a Budget

    15 Apartment Decorating Ideas on a Budget

    Decorating an apartment on a budget does not mean settling for a space that feels plain, temporary, or unfinished. Whether you live in a compact studio, a one-bedroom rental, or a larger apartment, thoughtful decorating can make your home feel comfortable, stylish, organized, and genuinely personal without requiring a huge investment. In fact, many of the most effective apartment decorating improvements are relatively simple: better lighting, appropriately sized furniture, attractive textiles, mirrors, greenery, clever storage, and a carefully chosen color palette. Current small-space design advice continues to emphasize these high-impact changes because they improve both appearance and functionality. (Real Simple)

    The biggest mistake people make when decorating an apartment is assuming they need to purchase lots of new things. More furniture and accessories do not necessarily create a better-looking room. In a smaller home, excessive furniture can make the space feel crowded, while too many small decorative objects can create visual clutter. A more successful approach is to determine what the apartment actually needs before buying anything. Measure the rooms, understand how you use them, identify problem areas, and then make a decorating plan.

    This is especially important when working with a limited budget. Your money should go toward changes that make a noticeable difference. A beautiful rug can define an entire living room. A pair of warm lamps can completely change the atmosphere at night. A large mirror can help a compact room feel more open. Coordinated curtains can make windows look taller and more finished. A few carefully selected cushions can refresh an existing sofa without requiring you to replace it.

    Lighting is one of the most powerful tools available to apartment decorators. A room that looks ordinary during the day can feel dramatically different in the evening when it has several layers of warm illumination. Instead of depending entirely on a ceiling fixture, use a combination of table lamps, floor lamps, accent lighting, and appropriate bulbs. Layered lighting is frequently recommended for small apartments because it brightens dark corners and creates depth without taking up much space.

    Color is equally important. You do not need to repaint an entire apartment to create a cohesive interior. Begin by identifying the colors already present in your sofa, flooring, cabinets, curtains, and larger furniture. Then choose a small group of complementary colors. Warm white, cream, beige, taupe, natural wood, olive, terracotta, muted blue, caramel, and soft brown can all create a sophisticated foundation. If you prefer stronger colors, use them through artwork, cushions, curtains, or one statement piece rather than allowing every room to compete for attention.

    Texture is another affordable way to add depth. A simple sofa becomes much more inviting when combined with linen or cotton cushions, a knitted throw, and a textured rug. A basic bedroom can feel more luxurious when the bed is layered with coordinated bedding, a quilt, a few pillows, and a soft blanket. Texture creates richness without requiring expensive furniture.

    Mirrors are especially valuable in apartments. They can reflect daylight, brighten darker areas, and create the visual impression of additional space. A large mirror can often make a greater impact than a collection of small decorative pieces. For the best effect, place a mirror where it reflects a window, attractive artwork, greenery, or another visually pleasing part of the room rather than clutter. Designers and home-staging experts continue to recommend strategic mirrors as one way to make compact rooms appear more spacious.

    Renters also have many more decorating possibilities than they might initially realize. Removable wallpaper, temporary wall treatments, freestanding shelving, renter-friendly hooks, removable hardware, and peel-and-stick products can personalize an apartment while allowing changes to be reversed. Current renter-focused decorating guides emphasize temporary and low-commitment solutions for exactly this reason.

    However, renters should always check their lease before making changes and follow the manufacturer’s instructions for removable products. Even products marketed as renter-friendly can behave differently depending on the wall paint, surface, temperature, and installation method. A careful patch test and documentation of the apartment’s original condition can help reduce problems later.

    Plants are another inexpensive way to add personality. Greenery introduces color and organic texture while softening the straight lines of apartment furniture. A large plant can fill an empty corner, while smaller plants can brighten a kitchen, shelf, desk, or bedside table. If natural plants are unsuitable for your space, choose realistic alternatives carefully, but avoid filling the apartment with artificial foliage simply for the sake of decoration.

    Storage should also be treated as part of the design. In a small apartment, clutter can quickly overpower even beautiful furniture. Baskets, storage ottomans, under-bed containers, vertical shelving, and furniture with hidden storage can keep everyday items organized. Open shelves can display books and decorative objects while closed baskets conceal less attractive necessities. The best solutions perform more than one function.

    Furniture selection deserves particular attention. Instead of buying furniture simply because it is labeled “small-space furniture,” look at actual dimensions, proportions, and functionality. A piece that technically fits the room can still make the space feel cramped if it is too deep or visually heavy. Furniture with visible legs can sometimes create a lighter appearance because more of the floor remains visible.

    Secondhand furniture is another excellent option for decorating on a budget. A solid wood side table, vintage dresser, console, dining chair, or bookshelf can often be found for considerably less than a comparable new piece. With cleaning, minor repairs, new hardware, or a suitable finish, an older piece can become a beautiful focal point. Mixing vintage and modern elements can also make an apartment feel more collected and personal rather than like a showroom.

    Do not underestimate the importance of curtains and rugs. Curtains can visually change the proportions of a room, especially when they are hung appropriately and extend close to the floor. Rugs help establish zones and connect furniture. In an open-plan apartment, a rug can visually separate the living area from the dining or work area without requiring walls. Correct rug sizing is important; a rug that is too small can make furniture appear disconnected.

    The kitchen can also be improved without renovation. Remove unnecessary countertop clutter and introduce a few attractive functional items. Wooden cutting boards, ceramic utensil containers, a coordinated fruit bowl, linen towels, a small plant, and a simple tray can make an ordinary kitchen feel more intentional. The goal is not to turn the countertop into a display shelf; it is to make everyday objects attractive enough to remain visible.

    The entryway deserves attention as well. Even a narrow apartment entrance can become functional and stylish with wall hooks, a slim shelf, a mirror, a small runner, and a basket. Vertical storage is particularly useful because it keeps belongings off the floor and preserves walking space.

    Bedrooms benefit from a similar strategy. Rather than purchasing a new bed, focus on the bedding, lighting, curtains, and wall behind the bed. A coordinated duvet, textured throw, attractive pillows, warm lamps, and one substantial artwork can completely change the atmosphere.

    Small balconies should not be ignored either. A compact outdoor rug, folding chair, small table, plants, cushions, and appropriate lighting can turn an unused balcony into a relaxing retreat. The furniture should be scaled to the available space, and the arrangement should leave enough room to move comfortably.

    A beautiful apartment does not need to look expensive. It needs to look considered.

    That means choosing a cohesive palette, using appropriate scale, mixing textures, creating practical storage, and giving important pieces enough breathing room. Expensive-looking interiors often have fewer objects but stronger focal points. They combine materials such as wood, ceramic, linen, metal, glass, and woven fibers rather than relying on one style or matching furniture collection.

    The following 15 apartment decorating ideas are designed around that philosophy. Each idea focuses on an affordable change that can make a meaningful difference to the way your apartment looks and functions. You can complete them individually, combine several together, or use them as the foundation for a complete apartment refresh.

    Your apartment does not have to be large to feel beautiful. It does not have to contain designer furniture to feel sophisticated. And it certainly does not have to consume your entire decorating budget.

    With creativity, planning, and a focus on high-impact details, you can create a home that feels cozy, stylish, functional, organized, and completely your own.

    1. Create a Cozy Living Room With Affordable Textures

    The living room is often the heart of an apartment, which makes it one of the best places to begin a budget-friendly decorating project. If your sofa, coffee table, and basic furniture are already functional, there is no need to replace them simply because the room feels boring. Instead, use texture, lighting, and carefully selected accessories to create a more finished appearance.

    Begin by choosing a simple color palette. If the sofa is beige or cream, introduce caramel, olive, muted terracotta, warm brown, or soft black. If the sofa is gray, combine it with cream, taupe, muted blue, or warm wood. The goal is to create relationships between the colors rather than using many unrelated shades.

    Materials and Things You Need

    • Cushions
    • Throw blanket
    • Area rug
    • Coffee table
    • Decorative tray
    • Ceramic vase
    • Indoor plant
    • Floor lamp
    • Small artwork
    • Woven basket

    Step-by-Step Decorating Process

    First, remove unnecessary objects from the living room.

    Next, rearrange the furniture if necessary. Before purchasing anything, try a different layout. Make sure walking paths remain clear and that seating encourages conversation.

    Add an appropriately sized area rug. Ideally, the rug should visually connect the major seating pieces rather than floating as a tiny island in the middle of the room.

    Add cushions in different textures. Instead of buying six identical cushions, combine linen, cotton, velvet, woven, or knitted fabrics.

    Place a throw naturally over one side of the sofa.

    Style the coffee table with a tray containing a few books, a ceramic object, and a small plant or vase.

    Add a floor lamp or table lamp to create another layer of lighting.

    Finally, use a woven basket to store additional blankets.

    The important principle is layering rather than accumulation.

    A room does not become more stylish simply because more accessories are added. In fact, removing one or two unnecessary objects can sometimes make the entire room feel more polished. Current design advice similarly emphasizes editing clutter and improving visual balance.

    How to Make the Room Look More Expensive

    Choose a few substantial pieces rather than many tiny decorations.

    A large ceramic vase can create a stronger focal point than several miniature objects. A properly sized rug can make the furniture arrangement feel intentional. A floor lamp can provide both function and visual height.

    Use natural materials whenever possible. Wood, ceramic, woven fibers, linen, cotton, and glass tend to create more visual depth than a collection of unrelated plastic accessories.

    The living room should feel comfortable enough for everyday life while still looking thoughtfully decorated.

    2. Make a Small Apartment Look Bigger With Mirrors

    Mirrors are one of the most practical decorating tools for apartment living. They do not require much floor space, and a well-positioned mirror can reflect natural light and make a compact room feel visually larger.

    Instead of covering the walls with several small mirrors, consider using one substantial mirror as a focal point.

    Materials and Things You Need

    • Large wall mirror
    • Floor mirror
    • Console table
    • Small lamp
    • Decorative vase
    • Indoor plant
    • Appropriate hanging hardware

    Step-by-Step Decorating Process

    Begin by identifying where the apartment feels darkest or smallest.

    Look for a position where a mirror can reflect natural light.

    If you have a large window, place the mirror where it can capture and reflect some of that brightness.

    A floor mirror can work well in a bedroom or living room.

    A round mirror above a narrow console can create an elegant entryway.

    Keep the surrounding decoration relatively simple.

    Do not use a mirror to reflect clutter.

    Instead, make sure it reflects something attractive such as a window, plant, artwork, or architectural feature.

    Mirrors are particularly useful in small apartments because they create the perception of additional depth without taking up much visual space.

    Budget Strategy

    You do not necessarily need a designer mirror.

    Look for secondhand frames, affordable mirrors, or simple designs that can be elevated through their placement.

    The size and positioning often matter more than the price.

    A simple oversized mirror can create a much greater impact than several expensive miniature mirrors.

    3. Decorate With Removable Wallpaper

    Blank apartment walls can make a rental feel temporary. Removable wallpaper offers a way to introduce color, pattern, and personality without committing to permanent renovations.

    Current renter-focused decorating resources continue to highlight temporary wallpaper and similar reversible treatments as practical ways to personalize rental spaces.

    Materials and Things You Need

    • Removable wallpaper
    • Measuring tape
    • Level
    • Squeegee
    • Cleaning cloth
    • Utility knife
    • Optional smoothing tool

    Step-by-Step Decorating Process

    Measure the wall carefully.

    Choose a pattern that complements the furniture already in the room.

    Clean the wall according to the product instructions.

    Begin at the recommended starting point.

    Apply the wallpaper gradually.

    Smooth out air bubbles as you work.

    Trim edges carefully.

    Step back frequently to check alignment.

    For a sophisticated apartment, consider subtle botanical patterns, linen-inspired textures, delicate geometric designs, or soft abstract patterns.

    Rather than wallpapering an entire apartment, create one focal wall behind a bed, sofa, dining table, or desk.

    This gives you a significant visual transformation while limiting cost.

    Important Rental Consideration

    Always check your lease before applying anything to the walls.

    Follow the manufacturer’s installation and removal instructions, and test the product in an inconspicuous location if recommended. Rental surfaces can vary considerably.

    The objective is to create personality without sacrificing the ability to restore the space later.

    4. Upgrade Your Apartment With Better Lighting

    Lighting is one of the most powerful ways to improve an apartment without spending heavily.

    A room with basic furniture can look beautiful under thoughtful lighting, while a well-decorated room can feel uncomfortable when illuminated only by harsh overhead fixtures.

    The solution is layered lighting.

    Materials and Things You Need

    • Table lamp
    • Floor lamp
    • Warm light bulbs
    • Accent lamp
    • Wall light where permitted
    • LED strip lighting
    • Decorative lantern

    Step-by-Step Decorating Process

    Begin by turning on the main overhead fixture and identifying areas that still feel dark.

    Add a table lamp to a console or side table.

    Place a floor lamp beside a sofa or reading chair.

    Add under-cabinet lighting in the kitchen if appropriate.

    Use warm-toned bulbs suitable for the fixture and intended use.

    Keep brighter task lighting in areas where you need it, such as a desk or kitchen workspace.

    Use softer ambient lighting in living and bedroom areas.

    Layered lighting is particularly valuable in small apartments because multiple smaller sources can brighten the space while creating depth. (Inspired Dreamer)

    Budget Tip

    You do not need to replace every fixture.

    Start with the two areas where lighting bothers you most.

    A single floor lamp and one attractive table lamp may make a larger difference than several inexpensive decorative objects.

    5. Create a Stylish Gallery Wall on a Budget

    Artwork can make an apartment feel personal and complete, but decorating every wall with expensive originals is unnecessary.

    A thoughtfully designed gallery wall can provide the same sense of personality for much less.

    Materials and Things You Need

    • Affordable prints
    • Photographs
    • Frames
    • Painter’s tape
    • Measuring tape
    • Hanging hardware
    • Optional mat boards

    Step-by-Step Decorating Process

    Choose a visual theme.

    You might use botanical prints, black-and-white photography, abstract artwork, family photographs, or a combination of related images.

    Select frames that coordinate.

    Lay the pieces on the floor before hanging them.

    Experiment with spacing.

    Use painter’s tape to mark positions.

    Install the artwork carefully.

    Keep the overall arrangement balanced.

    A gallery wall should not necessarily fill every inch of the wall.

    Leaving appropriate negative space can make the collection feel more sophisticated.

    Making Affordable Artwork Look Better

    Frame quality can have a major visual effect.

    Even inexpensive prints can look polished when placed inside well-proportioned frames.

    You can also use larger artwork instead of many tiny prints.

    One substantial piece can anchor a wall and create a cleaner appearance.

    The most important goal is to make the artwork feel personal.

    Your apartment should tell your story rather than simply reproducing a generic trend.

    6. Add Affordable Plants for a Fresh Apartment Makeover

    Plants are an easy way to introduce life, color, and texture into an apartment.

    They can also help fill awkward corners without requiring large furniture.

    Materials and Things You Need

    • Indoor plants
    • Planters
    • Plant stands
    • Woven baskets
    • Potting supplies
    • Small decorative pots

    Step-by-Step Decorating Process

    First, determine how much natural light each area receives.

    Choose plants appropriate for those conditions.

    Place a taller plant in an empty corner.

    Use smaller plants on shelves, desks, or counters.

    Place plants at different heights.

    Use baskets or ceramic planters to coordinate them with the rest of the interior.

    Avoid putting plants everywhere.

    Instead, create a few intentional green moments.

    Creating a Designer-Like Appearance

    Use a mixture of shapes.

    A tall plant with long leaves can contrast beautifully with a smaller rounded plant.

    Natural wood, woven baskets, and ceramic planters can complement the greenery.

    Plants can soften hard lines and make an apartment feel less sterile.

    If you choose artificial plants, prioritize realistic-looking pieces and use them selectively.

    7. Transform a Rental Kitchen With Temporary Decor

    A rental kitchen may have cabinets and countertops that cannot be changed, but that does not mean it has to remain visually boring.

    Countertop styling can make a major difference.

    Materials and Things You Need

    • Wooden cutting boards
    • Ceramic utensil container
    • Fruit bowl
    • Small plant
    • Decorative tray
    • Linen towels
    • Storage jars
    • Ceramic bowl

    Step-by-Step Decorating Process

    Begin by removing unnecessary appliances and products from the counters.

    Group everyday items together.

    Lean two or three wooden cutting boards against the backsplash.

    Add a ceramic container for utensils.

    Place a fruit bowl in a convenient location.

    Introduce one small plant.

    Use a coordinated kitchen towel.

    Put small items inside a decorative tray.

    The kitchen should remain practical.

    Do not cover every available surface with decoration.

    Natural materials such as wood and ceramic can make a basic kitchen feel warmer and more sophisticated.

    If you are renting, prioritize removable solutions for any larger changes and verify the rules before installing them.

    8. Create a Budget-Friendly Bedroom Makeover

    The bedroom can often be transformed without replacing the bed or major furniture.

    Focus on the elements you see most: bedding, lighting, curtains, rug, and the wall behind the bed.

    Materials and Things You Need

    • Duvet cover
    • Pillow covers
    • Throw blanket
    • Bedside lamps
    • Curtains
    • Area rug
    • Artwork
    • Decorative basket

    Step-by-Step Decorating Process

    Choose a simple color palette.

    Replace mismatched bedding with coordinated pieces.

    Layer pillows rather than using only one pillow per side.

    Add a textured blanket.

    Use warm bedside lamps.

    Install or hang curtains appropriately.

    Add a rug beside or underneath the bed where space permits.

    Place one meaningful artwork above the bed or on a nearby wall.

    The bedroom should feel calm rather than overcrowded.

    Budget Tip

    Changing the duvet cover can have more visual impact than buying several small decorative accessories.

    Choose a neutral foundation and change accent textiles seasonally.

    This allows you to refresh the room without replacing major pieces.

    9. Use Secondhand Furniture for a Designer Look

    Secondhand furniture can help you create a distinctive apartment without spending heavily.

    Look for pieces with good proportions and solid construction rather than focusing only on appearance.

    Materials and Things You Need

    • Secondhand furniture
    • Cleaning supplies
    • Sandpaper if appropriate
    • Paint or finish
    • New hardware
    • Screwdriver
    • Protective coating where suitable

    Step-by-Step Decorating Process

    Search for solid tables, dressers, consoles, chairs, and bookshelves.

    Check dimensions before purchasing.

    Inspect the structure.

    Clean the piece thoroughly.

    Repair minor problems.

    Replace outdated handles if appropriate.

    Refinish or paint according to the material and desired result.

    Style it with modern accessories.

    A vintage sideboard can look beautiful against contemporary artwork.

    An older wooden table can add warmth to an otherwise modern apartment.

    Why This Works

    Matching furniture sets can sometimes make an apartment look generic.

    A mixture of old and new pieces creates a more collected appearance.

    You can save money while also gaining furniture with more character.

    10. Turn a Tiny Balcony Into a Cozy Outdoor Retreat

    A small balcony can become one of the most enjoyable areas of an apartment.

    You do not need a full outdoor furniture set.

    Choose pieces based on the actual dimensions of the space.

    Materials and Things You Need

    • Compact outdoor chair
    • Folding table
    • Outdoor rug
    • Cushions
    • Plants
    • Lanterns
    • Outdoor lighting
    • Storage basket

    Step-by-Step Decorating Process

    Clean the balcony thoroughly.

    Measure the usable floor area.

    Add a weather-appropriate rug.

    Place one compact chair or bench.

    Add a small folding table.

    Introduce plants at different heights.

    Use outdoor cushions for comfort.

    Add appropriate lighting.

    Keep enough open floor space for movement.

    Vertical plants can save valuable floor area.

    Rail planters, wall-mounted planters, or tall containers can introduce greenery without overcrowding the balcony.

    11. Create a Stylish Entryway in a Tiny Apartment

    The entryway may be small, but it has a significant effect on how the apartment feels.

    An organized entrance creates a sense of order immediately.

    Materials and Things You Need

    • Wall hooks
    • Small mirror
    • Narrow shelf
    • Basket
    • Runner
    • Wall organizer
    • Small tray

    Step-by-Step Decorating Process

    Install renter-appropriate hooks where permitted.

    Add a narrow shelf above them.

    Place a mirror nearby.

    Use a basket for shoes, scarves, or bags.

    Add a narrow runner if space allows.

    Keep the floor clear.

    A mirror can make the entrance feel larger.

    Vertical storage keeps everyday items organized without consuming much floor space.

    This is especially useful in apartments where every square foot matters.

    12. Create a Cozy Reading Corner Without Spending Much

    An unused corner can become a relaxing retreat without requiring expensive furniture.

    Start with a comfortable chair you already own.

    Materials and Things You Need

    • Chair
    • Floor lamp
    • Side table
    • Throw blanket
    • Cushion
    • Books
    • Small plant
    • Small rug

    Step-by-Step Decorating Process

    Choose a corner with reasonable natural light.

    Position the chair comfortably.

    Add a small side table.

    Place a floor lamp nearby.

    Add a cushion and throw.

    Create a small stack of books.

    Add a plant.

    Use a small rug to visually define the area.

    This creates a dedicated zone without requiring construction or major furniture purchases.

    The corner can become a reading space, coffee area, journaling spot, or quiet place to relax.

    13. Style Open Shelves Without Creating Clutter

    Open shelving can provide both storage and decoration, but it needs careful editing.

    Begin by removing everything.

    Then rebuild the shelves deliberately.

    Materials and Things You Need

    • Books
    • Ceramic vases
    • Small plants
    • Baskets
    • Artwork
    • Decorative bowls
    • Sculptural objects

    Step-by-Step Decorating Process

    Place the largest objects first.

    Add groups of books.

    Mix horizontal and vertical arrangements.

    Introduce plants.

    Add ceramic or wooden objects.

    Leave empty spaces between groups.

    Avoid making every shelf identical.

    The goal is visual rhythm.

    For example, one shelf can contain books, another can contain a woven basket, and another can feature a plant and ceramic vase.

    This combination keeps the shelves useful while making them decorative.

    14. Use Textiles to Change Your Apartment for Every Season

    Textiles are among the easiest things to change.

    They can completely alter the appearance of a room without changing furniture.

    Materials and Things You Need

    • Cushion covers
    • Throw blankets
    • Bedding
    • Curtains
    • Rugs
    • Table linens
    • Storage bags

    Step-by-Step Decorating Process

    Choose neutral major furniture.

    Store seasonal textiles when they are not being used.

    Use lighter colors and fabrics during warmer months.

    Introduce deeper colors and heavier textures during fall and winter.

    Change cushion covers rather than purchasing new cushions.

    Use throws to introduce seasonal colors.

    Switch bedding when appropriate.

    The advantage is that textiles are relatively easy to store.

    A neutral apartment can become completely different simply by changing its textile layers.

    15. Create a Luxury Apartment Look With a Simple Color Palette

    A cohesive color palette is perhaps the most powerful finishing technique.

    Even inexpensive furniture can look intentional when the colors work together.

    Materials and Things You Need

    • Neutral curtains
    • Cushions
    • Area rug
    • Artwork
    • Decorative objects
    • Lamps
    • Plants
    • Baskets
    • Textiles

    Step-by-Step Decorating Process

    Begin by identifying the dominant colors already present.

    Choose one primary neutral.

    Add two or three accent colors.

    Repeat those colors throughout the apartment.

    Use natural materials to add texture.

    Remove pieces that clash.

    Keep large furniture relatively neutral when possible.

    For example, you could combine cream, walnut, olive, and muted terracotta.

    The living room might use cream and olive.

    The bedroom could emphasize cream and walnut.

    The kitchen could introduce terracotta through textiles or artwork.

    The colors do not need to appear in identical proportions.

    They simply need to feel connected.

    The Final Editing Step

    Walk through your apartment after everything has been arranged.

    Look for objects that feel unnecessary.

    Remove one or two items from crowded surfaces.

    Check that furniture has enough breathing room.

    Make sure walking paths remain clear.

    Confirm that every room has a focal point.

    The result should feel coordinated rather than overly decorated.

    Conclusion

    Creating a beautiful apartment on a budget is not about finding the cheapest version of every possible decoration. It is about deciding where your money, creativity, and attention will make the greatest difference.

    Start with the basics: layout, scale, lighting, color, texture, and storage.

    Before buying furniture, measure the room.

    Before buying accessories, declutter.

    Before adding artwork, decide what the wall needs.

    Before installing renter-friendly products, check your lease and the manufacturer’s instructions.

    These simple steps can prevent expensive mistakes.

    Use mirrors to create depth.

    Use rugs to define areas.

    Use curtains to soften windows.

    Use plants to introduce life.

    Use textiles to create comfort.

    Use lighting to establish atmosphere.

    Use secondhand furniture to add character.

    Use removable decorating techniques when you need flexibility.

    Most importantly, remember that small apartments require thoughtful editing. Every item occupies valuable visual and physical space. A successful apartment is not one that contains the most furniture or decorations; it is one where every important element has room to work.

    Current design guidance for small spaces consistently emphasizes appropriate scale, mirrors, layered lighting, rugs, vertical storage, and decluttering because these changes can improve both the visual perception and practical function of compact rooms. (Real Simple)

    You also do not need to complete all 15 ideas at once.

    Start with the room that bothers you most.

    If your living room feels unfinished, begin with the rug, seating arrangement, lighting, and textiles.

    If your bedroom feels plain, focus on bedding, curtains, lamps, and one strong artwork.

    If your kitchen feels cluttered, clear the counters and introduce coordinated functional accessories.

    If your entryway is chaotic, add vertical storage and a small mirror.

    If your balcony is unused, create one comfortable seating area rather than trying to furnish the entire space.

    The most successful budget decorating projects are gradual.

    You discover what works.

    You move furniture.

    You reuse what you already own.

    You buy only what is missing.

    You edit the room.

    Then you move on to the next area.

    This approach is not only easier on your budget; it also produces a more personal result.

    A home decorated entirely in one shopping trip can sometimes feel generic. A home created gradually can reflect your personality, experiences, preferences, and lifestyle.

    Do not be afraid to mix affordable pieces with secondhand finds, inherited furniture, DIY projects, and a few carefully selected investments. You do not need every item to come from the same store or match perfectly.

    In fact, variety can make an apartment feel more sophisticated.

    Combine smooth ceramic with rough wood.

    Mix soft textiles with metal.

    Pair modern furniture with vintage accessories.

    Use greenery against neutral walls.

    Add personal photographs beside professionally printed artwork.

    These contrasts create depth and character.

    Finally, remember that decorating on a budget should never mean sacrificing comfort. Your apartment should be a place where you can relax, entertain, work, sleep, and enjoy everyday life.

    The best budget-friendly apartment is not necessarily the one with the most impressive decorations.

    It is the one that feels organized without being sterile, stylish without being excessive, comfortable without being cluttered, and personal without being chaotic.

    With these 15 ideas, you can gradually transform even a basic apartment into a beautiful home that feels thoughtfully designed without requiring a huge decorating budget.


  • Elegant Fall Decor Ideas That Look Expensive

    Elegant Fall Decor Ideas That Look Expensive

    Fall is one of the most beautiful seasons for decorating because it naturally brings together warm colors, cozy textures, soft lighting, natural materials, and inviting layers. However, creating an elegant fall home does not mean covering every surface with orange pumpkins, artificial leaves, and seasonal signs. If your goal is to make your home look expensive, the secret is to approach fall decorating with restraint, sophistication, and intentional styling.

    Elegant fall decor is about capturing the feeling of autumn rather than filling a room with obvious seasonal decorations. Instead of relying on bright orange everywhere, consider a refined palette of warm ivory, camel, caramel, taupe, chocolate brown, muted terracotta, olive green, burgundy, dusty rose, and soft gold. These colors create warmth while maintaining an elevated appearance.

    Texture is equally important. Fall naturally encourages layers, so introduce chunky knitted throws, linen cushions, velvet pillows, woven baskets, wood accents, ceramic pieces, natural branches, dried flowers, and soft rugs. These materials can make an ordinary room feel considerably more luxurious without requiring expensive furniture.

    One of the most effective budget-friendly fall decorating techniques is to work with what you already own. You do not need to purchase a completely new collection every September. Instead, remove a few summer accessories and replace them with carefully selected seasonal pieces. A neutral vase filled with dried branches, a warm-toned throw on a sofa, or a collection of candles on a dining table can create an autumn atmosphere without overwhelming the room.

    Lighting can completely transform fall decor. As the days become shorter, warm lamps, candles, lanterns, and soft accent lighting become especially valuable. Rather than using bright overhead lighting throughout the evening, create several smaller sources of warm light around the room. This produces the cozy glow associated with sophisticated autumn interiors.

    Fall decorating also works beautifully with natural materials. Branches, acorns, pinecones, dried grasses, eucalyptus, wheat stems, seasonal flowers, wood, stone, and woven fibers can all add seasonal character. Many natural elements can be collected or purchased inexpensively, making them ideal for budget-conscious decorating.

    Another important principle is scale. A few large decorative elements often look more expensive than many tiny objects. A substantial ceramic vase filled with branches can make a stronger statement than a shelf full of miniature fall figurines. A large wreath can create a dramatic entryway moment. A generous throw draped naturally over a sofa can make the entire living room feel more inviting.

    The dining table is another excellent opportunity to introduce elegant autumn styling. Instead of using excessive seasonal decorations, create a layered tablescape with neutral linens, candles, natural greenery, simple ceramics, wood accents, and a restrained autumn color palette. The result can feel appropriate for everyday meals while also being beautiful enough for entertaining.

    The entryway should not be forgotten. It is the first part of the home visitors see, so a simple seasonal arrangement can establish the mood immediately. A wreath, a vase of branches, a small pumpkin arrangement, a runner, or a warm lantern can create a welcoming fall entrance.

    Bedrooms can also benefit from subtle seasonal updates. You do not need to change the entire room. Simply add warmer bedding, textured blankets, autumn-inspired cushions, and softer lighting. Deep brown, muted rust, cream, olive, and burgundy can create a cozy atmosphere without making the bedroom look overly themed.

    The most important lesson is that expensive-looking fall decor is not about spending more. It is about choosing better. Instead of buying twenty inexpensive decorations, invest in or create a few pieces that have strong visual impact. Instead of using every autumn color at once, select a cohesive palette. Instead of filling every shelf, allow some negative space.

    The following ten ideas are designed to help you create an elegant autumn home that feels warm, sophisticated, welcoming, and Pinterest-worthy. Each idea can be adapted to different budgets and home styles, from modern and contemporary interiors to traditional, transitional, farmhouse, or organic-inspired spaces.

    Whether you are decorating a small apartment or a large family home, these approaches can help you create a polished fall atmosphere without making the space feel cluttered or overly seasonal.

    1. Create an Elegant Neutral Fall Living Room

    One of the easiest ways to make fall decor look expensive is to start with a neutral foundation. Instead of relying heavily on bright orange, build your autumn living room around warm ivory, beige, taupe, caramel, brown, cream, and muted terracotta.

    Neutral fall decorating has a timeless quality. It allows the seasonal elements to feel sophisticated rather than overly decorative.

    Begin by looking at your existing living room. If your sofa is cream, beige, gray, or brown, you already have an excellent foundation. You do not need to replace major furniture pieces for the season.

    The easiest transformation comes through textiles.

    Replace lightweight summer cushions with warmer autumn textures. Look for linen, velvet, boucle, wool, cotton, or woven fabrics. Choose colors that complement your existing furniture rather than introducing too many new shades.

    For example, a cream sofa can be styled with camel, rust, olive, and chocolate-brown cushions. A gray sofa could work with taupe, burgundy, cream, and muted terracotta.

    Materials and Things You Need

    • Neutral or warm-toned cushions
    • Textured throw blankets
    • Area rug
    • Ceramic vase
    • Dried branches
    • Candles
    • Wooden tray
    • Decorative bowl
    • Coffee-table books
    • Woven basket
    • Seasonal flowers or foliage
    • Warm table lamp

    Step-by-Step Decorating Process

    Start by removing obvious summer accessories.

    Store bright tropical colors, lightweight decorative fabrics, and overly summery objects.

    Clean and organize the living room.

    Choose three to five autumn colors that work with your existing palette.

    Add textured cushions to the sofa.

    Drape a warm throw naturally over one side of the sofa.

    Place a woven basket nearby for additional blankets.

    Add one large vase filled with dried branches or seasonal foliage.

    Style the coffee table with a wooden tray, books, a ceramic bowl, and one seasonal object.

    Finish with warm lighting.

    The key is to avoid placing autumn decorations everywhere.

    Instead, create several intentional moments.

    For example, the sofa can become one seasonal focal point, while the coffee table provides another. A console table or fireplace can become a third.

    This creates visual rhythm throughout the room.

    How to Make It Look More Expensive

    Use fewer but larger accessories.

    A large ceramic vase generally creates more visual impact than several tiny vases.

    Choose matte ceramic, stoneware, wood, glass, or metal pieces rather than plastic-looking decorations.

    When using pumpkins, select a few in sophisticated colors such as cream, muted green, dusty orange, or soft brown.

    Arrange them in groups of different sizes.

    Avoid placing one small pumpkin randomly on every surface.

    Lighting is particularly important.

    Turn on table lamps and floor lamps during the evening instead of relying entirely on overhead lighting. Add candles where safe and appropriate.

    The combination of warm lighting and autumn textures creates the luxurious seasonal atmosphere people often associate with high-end interiors.

    Pinterest Styling Tip

    For a Pinterest-worthy photograph, create one clear focal point.

    A cream sofa layered with textured pillows, a chunky throw, a large ceramic vase, and warm candlelight can create an instantly recognizable fall scene.

    Keep the background clean.

    The goal is to make viewers notice the textures and colors immediately.

    2. Style Your Fireplace or Mantel With Sophisticated Fall Layers

    The fireplace or mantel is naturally one of the strongest focal points in many homes, making it an ideal location for elegant fall decorating.

    However, the most expensive-looking mantels are usually not the ones covered with dozens of seasonal objects.

    Instead, use height, repetition, texture, and negative space.

    Start with one large focal element.

    This could be an oversized mirror, framed artwork, a large wreath, or an architectural object.

    Then add smaller seasonal details around it.

    Materials and Things You Need

    • Large mirror or artwork
    • Fall wreath
    • Ceramic vases
    • Candles
    • Dried branches
    • Small pumpkins
    • Wooden objects
    • Brass or gold accents
    • Seasonal greenery
    • Decorative books
    • Lanterns

    Step-by-Step Process

    Clear the mantel completely.

    Clean the surface.

    Choose your main focal point.

    Place the largest piece first.

    Add two or three supporting objects.

    Introduce natural seasonal elements.

    Add small pumpkins if desired.

    Use candles or warm lighting.

    Step back and remove anything that feels unnecessary.

    An elegant mantel might feature a large round mirror centered above the fireplace.

    Place two tall ceramic vases on either side.

    Fill one with dried branches and leave the other relatively simple.

    Add a few cream-colored pumpkins at the base.

    Introduce candles between the objects.

    The result feels autumnal without looking like a seasonal store display.

    Another option is a large fall wreath.

    Choose a wreath made from eucalyptus, dried grasses, branches, olive foliage, or subtle autumn leaves.

    Avoid overly artificial-looking bright orange foliage if you want a refined appearance.

    You can also create a more modern mantel using asymmetrical styling.

    Place a large artwork slightly off-center.

    Balance it with a tall vase on one side and smaller objects on the other.

    Asymmetry can make the arrangement feel collected and sophisticated.

    Creating Luxury With Inexpensive Materials

    Natural branches are particularly useful.

    Collect suitable fallen branches where permitted, clean them properly, and place them in a large vase.

    Their height creates drama without requiring expensive decor.

    Dried grasses and wheat stems can also create an elegant autumn feeling.

    Use a simple ceramic vase instead of a heavily decorated seasonal container.

    Neutral pumpkins can add seasonal recognition without dominating the composition.

    Consider painting inexpensive pumpkins in cream, beige, muted olive, or soft brown if appropriate for the material.

    Pinterest Styling Tip

    Photograph the mantel with the fireplace glowing if possible.

    Add warm candles or soft lighting around the surrounding area.

    Use a cozy throw on a nearby chair.

    This creates a layered scene that communicates the feeling of fall rather than simply displaying autumn decorations.

    3. Create a Luxury Fall Tablescape With Simple Materials

    A beautifully styled dining table can make an entire home feel ready for autumn entertaining.

    The good news is that you do not need expensive dishes or designer tableware.

    The secret is layering.

    Start with a simple foundation such as a linen or cotton table runner.

    Then introduce natural materials, candles, seasonal foliage, and a restrained color palette.

    Materials and Things You Need

    • Linen table runner
    • Neutral plates
    • Simple glassware
    • Cloth napkins
    • Candles
    • Candle holders
    • Ceramic vase
    • Seasonal branches
    • Small pumpkins
    • Wooden serving board
    • Natural greenery
    • Optional brass accents

    Step-by-Step Process

    Begin with a clean dining table.

    Place the runner through the center.

    Arrange plates evenly.

    Add glassware.

    Fold or loosely arrange napkins.

    Create one central floral or branch arrangement.

    Add candles at different heights.

    Introduce a few seasonal accents.

    Check that guests still have enough room.

    For an expensive-looking tablescape, avoid using too many colors.

    A palette of cream, warm white, brown, muted rust, olive, and brass can look sophisticated.

    You can use white plates that you already own.

    The table can become more seasonal through the surrounding accessories rather than replacing everything.

    A simple ceramic vase filled with dried branches can become the centerpiece.

    Surround it with small candles.

    Add a few miniature pumpkins in cream or muted earthy shades.

    Wooden serving boards can introduce natural texture.

    Linen napkins provide another layer.

    Creating Height and Dimension

    The centerpiece should have variation in height.

    A tall branch arrangement can be paired with low pumpkins and medium-height candle holders.

    This creates a more dynamic composition.

    Avoid making the centerpiece so tall that guests cannot see across the table.

    If your table is small, use a low arrangement instead.

    A collection of small ceramic vessels can create a beautiful centerpiece without taking up too much space.

    Making It Budget-Friendly

    Use your everyday dishes.

    Change only the table runner, napkins, centerpiece, and candles.

    This dramatically reduces the cost.

    You can also use seasonal branches from your yard where appropriate.

    Dried flowers can be reused for several seasons.

    Choose neutral accessories that work beyond fall.

    Pinterest Styling Tip

    For a Pinterest-style image, photograph the table from slightly above and include part of the surrounding dining room.

    Show the warm lighting, chairs, centerpiece, and table details together.

    This makes the image feel aspirational and complete.

    4. Decorate the Entryway With Elegant Fall Layers

    The entryway creates the first impression of your home.

    During fall, it is the perfect place to introduce seasonal colors and textures without overwhelming the rest of the house.

    An elegant entryway does not need dozens of pumpkins or large signs.

    A few carefully selected elements are enough.

    Start with whatever furniture you already have.

    A console table, bench, narrow shelf, or small cabinet can become the foundation.

    Materials and Things You Need

    • Fall wreath
    • Console table
    • Mirror
    • Ceramic vase
    • Dried branches
    • Small pumpkins
    • Lantern
    • Runner rug
    • Woven basket
    • Seasonal foliage
    • Table lamp

    Step-by-Step Decorating Process

    Clear the entryway.

    Clean the furniture and floor.

    Add a mirror above the console if appropriate.

    Place a small lamp on the surface.

    Add a vase with branches.

    Introduce one or two pumpkins.

    Place a woven basket beneath the console.

    Add a seasonal runner.

    Finish with a wreath or subtle door decoration.

    The goal is to create a welcoming transition into the home.

    Warm lighting is especially valuable in entryways.

    A small table lamp can create a soft glow during the evening.

    If you do not have an electrical outlet nearby, consider a suitable battery-operated decorative light where safe and appropriate.

    Choosing Elegant Fall Colors

    Try muted autumn colors rather than extremely bright seasonal shades.

    Good options include:

    • Cream
    • Caramel
    • Olive
    • Rust
    • Burgundy
    • Chocolate brown
    • Warm white
    • Terracotta
    • Soft gold

    These shades work well with wood and natural materials.

    A cream pumpkin beside a brown ceramic vase can look much more sophisticated than a collection of brightly colored plastic decorations.

    Adding Practical Storage

    The entryway must remain functional.

    Use a woven basket for scarves, blankets, or other seasonal items.

    A tray can organize keys.

    Hooks can hold jackets.

    The goal is to combine beauty with everyday practicality.

    An expensive-looking home should not look like it is impossible to live in.

    Pinterest Styling Tip

    Create a clear focal point around the mirror and console.

    Use one large vase rather than many tiny objects.

    Keep the floor relatively uncluttered.

    A clean entryway photograph with warm lighting, a wreath, textured runner, and natural materials can create an exceptionally save-worthy Pinterest image.

    5. Transform the Bedroom Into a Cozy Elegant Fall Retreat

    The bedroom is one of the best places to introduce fall decor because the season naturally encourages comfort and warmth.

    Instead of using obvious seasonal decorations, focus on textiles.

    The bed should become the main focal point.

    Begin with neutral bedding and build layers through blankets, pillows, and throws.

    Materials and Things You Need

    • Duvet cover
    • Neutral sheets
    • Decorative pillows
    • Velvet cushions
    • Chunky knit throw
    • Quilt
    • Area rug
    • Floor-length curtains
    • Table lamps
    • Ceramic vase
    • Dried branches
    • Candles or safe LED alternatives
    • Seasonal artwork

    Step-by-Step Decorating Process

    Remove overly summery textiles.

    Choose a warm fall palette.

    Make the bed with layered bedding.

    Add two or three textured cushions.

    Place a throw casually across the foot or side of the bed.

    Add a soft rug.

    Introduce warm bedside lighting.

    Add one seasonal decorative element.

    Keep surfaces organized.

    For an elegant appearance, use a restrained palette.

    Cream, beige, caramel, brown, muted rust, olive, and burgundy work beautifully together.

    You do not need every color.

    Choose two or three.

    For example, cream bedding with caramel pillows and a rust throw can create a warm autumn look.

    Another combination could be ivory, chocolate brown, and olive green.

    Velvet is particularly effective in fall because it adds depth and a subtle sense of luxury.

    A velvet cushion or throw does not need to cover the entire bed.

    One or two carefully placed pieces can be enough.

    Creating a Boutique-Hotel Feeling

    Symmetry can help.

    Matching bedside lamps create balance.

    Keep bedside tables relatively clear.

    Use a small tray for personal items.

    Place a ceramic vase or small plant on one side if the composition allows.

    The bedroom should remain peaceful.

    Avoid filling the room with pumpkins, signs, or seasonal objects.

    Instead, let the colors and textures communicate the season.

    Pinterest Styling Tip

    Make the bed the hero of the image.

    Layer the bedding generously but naturally.

    Include a warm lamp, curtains, rug, and small autumn arrangement in the background.

    The final image should communicate comfort, sophistication, and autumn warmth simultaneously.

    6. Use Candles and Warm Lighting to Create an Expensive Fall Atmosphere

    Lighting can make even inexpensive decor feel luxurious.

    Fall is the perfect season to use layered lighting because evenings arrive earlier and warm illumination creates a naturally cozy atmosphere.

    Instead of relying on one bright ceiling fixture, combine different light sources.

    Materials and Things You Need

    • Table lamps
    • Floor lamps
    • Candles
    • Candle holders
    • Lanterns
    • Warm bulbs
    • Decorative lampshades
    • String lights where appropriate
    • LED candles for suitable locations

    Step-by-Step Decorating Process

    Turn off unnecessary overhead lighting.

    Identify dark corners.

    Add a table lamp.

    Place a floor lamp near seating.

    Use candles on dining and coffee tables where safe.

    Add lanterns near an entryway or fireplace.

    Choose appropriate warm lighting.

    Create different levels of illumination.

    The goal is not simply to make the room darker.

    It is to create layers.

    A table lamp beside a sofa can create a warm reading corner.

    A floor lamp can illuminate a darker corner.

    Candles can add small points of warm light.

    A fireplace can become another light source.

    Choosing Elegant Candle Displays

    Instead of placing one candle randomly, create a small group.

    Use different heights.

    Combine glass, ceramic, brass, or stone-inspired holders.

    Choose candles in neutral colors such as cream, ivory, brown, or muted amber.

    Avoid excessive labels or brightly colored seasonal packaging.

    You want the candle itself to become part of the decor.

    Safety Considerations

    Never leave burning candles unattended.

    Keep them away from curtains, bedding, children, pets, and flammable materials.

    LED candles can provide a similar visual effect where open flames are unsuitable.

    Creating Luxury Through Lighting

    Warm lighting can emphasize textures.

    A velvet cushion looks richer.

    A ceramic vase gains shadows.

    Wood furniture appears warmer.

    Glass objects reflect small points of light.

    This is why lighting should be considered part of the decor rather than an afterthought.

    Pinterest Styling Tip

    Photograph the room during the transition between daylight and evening.

    Allow warm lamps and candles to glow while some natural light remains.

    This creates the rich, atmospheric look that performs well in seasonal interior content.

    7. Decorate With Natural Fall Elements Instead of Expensive Seasonal Accessories

    Natural materials are among the best tools for creating elegant fall decor on a budget.

    Branches, dried leaves, pinecones, acorns, grasses, wheat stems, eucalyptus, seasonal flowers, and wood can all bring autumn indoors.

    The most important benefit is that natural materials rarely look overly manufactured.

    Materials and Things You Need

    • Dried branches
    • Dried grasses
    • Wheat stems
    • Pinecones
    • Acorns
    • Seasonal foliage
    • Wooden bowls
    • Ceramic vases
    • Woven baskets
    • Natural branches
    • Dried flowers

    Step-by-Step Decorating Process

    Choose a few natural elements.

    Clean and prepare them appropriately.

    Select a large container.

    Arrange tall branches first.

    Add shorter stems.

    Place the arrangement where it becomes a focal point.

    Add smaller natural elements around the room.

    Avoid overdecorating.

    A large branch arrangement can transform an empty corner.

    A bowl of pinecones can add subtle seasonal texture.

    Dried grasses can soften a console table.

    Wheat stems can create an understated harvest-inspired atmosphere.

    Why Natural Decor Looks Expensive

    Natural materials have irregular shapes and authentic textures.

    This creates visual interest.

    A branch does not need to be perfectly symmetrical.

    Its natural movement becomes part of the composition.

    Combine natural materials with refined containers.

    For example, dried branches in a large matte ceramic vase can look sophisticated.

    A woven basket filled with blankets can add warmth.

    A wooden bowl filled with pinecones can become a simple coffee-table centerpiece.

    Avoiding a Rustic-Only Appearance

    Natural fall decor does not have to mean farmhouse style.

    Pair branches with modern furniture.

    Use dried grasses in contemporary ceramic vases.

    Combine wood with brass.

    Place natural elements beside velvet textiles.

    The contrast between organic and refined materials creates an elevated appearance.

    Pinterest Styling Tip

    Use one oversized natural arrangement as the hero.

    Large branches photographed against a neutral wall can create a dramatic fall image.

    The composition should feel organic rather than overly arranged.

    8. Create an Expensive-Looking Fall Front Porch

    The front porch is another excellent place to create seasonal impact.

    However, you do not need to cover the entrance with dozens of pumpkins.

    Use symmetry, repetition, and scale instead.

    Begin with the door.

    A large wreath can become the primary focal point.

    Then build the surrounding composition with a few large elements.

    Materials and Things You Need

    • Fall wreath
    • Large planters
    • Pumpkins
    • Lanterns
    • Outdoor-safe rug
    • Seasonal greenery
    • Dried corn stalks where appropriate
    • Wooden crate
    • Outdoor cushions
    • Warm outdoor lighting

    Step-by-Step Decorating Process

    Clean the porch.

    Sweep the entrance.

    Place a seasonal wreath on the door.

    Add two large planters if the space allows.

    Use pumpkins in coordinated colors.

    Add lanterns.

    Place a seasonal rug.

    Introduce outdoor-safe greenery.

    Keep the pathway clear.

    Symmetry creates an especially polished look.

    Two similar planters on either side of the door can create an elegant frame.

    If you cannot afford large planters, use existing containers and update them with seasonal plants.

    Pumpkins should be grouped rather than scattered.

    Create clusters of different sizes.

    Use cream, white, muted orange, green, and brown for a refined palette.

    Making a Small Porch Look Expensive

    Small spaces benefit from fewer, larger elements.

    A large wreath, two medium planters, and a beautiful doormat may be enough.

    Do not overcrowd the entrance.

    The door itself should remain visible.

    If you have a bench, add one or two outdoor cushions and a textured throw appropriate for outdoor use.

    Lanterns can add warmth in the evening.

    Always use outdoor-safe lighting and decorations suitable for your climate.

    Pinterest Styling Tip

    Photograph the porch from an angle that shows the door, wreath, planters, pumpkins, and pathway.

    Early morning or late afternoon light can provide beautiful natural illumination.

    The goal is to make the entrance look welcoming rather than overloaded.

    9. Create a Sophisticated Fall Coffee Table and Console Display

    Small surfaces such as coffee tables, consoles, sideboards, and shelves are ideal for introducing seasonal details.

    But this is also where clutter can quickly become a problem.

    The secret to expensive-looking styling is grouping.

    Instead of placing individual objects randomly, create small compositions.

    Materials and Things You Need

    • Decorative tray
    • Coffee-table books
    • Ceramic vase
    • Small pumpkins
    • Candles
    • Wooden bowl
    • Dried foliage
    • Sculptural object
    • Seasonal flowers
    • Decorative box

    Step-by-Step Decorating Process

    Clear the entire surface.

    Choose one large object.

    Add a stack of books.

    Place a vase or bowl nearby.

    Introduce one seasonal element.

    Add a candle.

    Leave some empty space.

    Step back and evaluate the composition.

    A console table might feature a large mirror above it.

    Underneath, place a ceramic lamp, vase, and decorative box.

    Add a few small pumpkins near one side.

    The arrangement should have height variation.

    A coffee table can use a tray to contain objects.

    A bowl of pinecones, candle, and small branch arrangement can create an easy autumn centerpiece.

    Choosing Seasonal Objects

    The most elegant seasonal accessories often have subtle colors.

    Instead of bright orange plastic pumpkins, consider ceramic, wood, glass, or natural pumpkins.

    Instead of cartoon-like fall signs, choose framed artwork or botanical prints.

    Instead of artificial leaf garlands everywhere, use one natural-looking branch arrangement.

    The goal is to suggest autumn rather than announce it excessively.

    The Rule of Three

    Grouping objects in odd numbers can often create a visually pleasing arrangement.

    For example:

    • One vase
    • Three books
    • One candle

    Or:

    • One bowl
    • Two pumpkins
    • One branch

    Do not follow this as an absolute rule.

    The larger principle is visual balance.

    Pinterest Styling Tip

    Close-up photographs of coffee tables and consoles work especially well for Pinterest because viewers can easily save individual styling ideas.

    Show texture.

    Show the warm light.

    Show the details.

    But keep the composition clean enough that each object remains visible.

    10. Build a Cohesive Elegant Fall Look Throughout the Entire Home

    The final step is connecting all of your seasonal decorating ideas.

    A luxury-inspired home does not need every room to look identical.

    Instead, repeat a few colors, materials, and seasonal elements throughout the home.

    This creates cohesion.

    For example, choose a palette of:

    • Warm cream
    • Caramel
    • Olive green
    • Muted rust
    • Chocolate brown
    • Soft brass

    You do not need all six colors in every room.

    Use different combinations.

    The living room might emphasize cream, caramel, and olive.

    The bedroom might use cream, brown, and rust.

    The dining room might feature cream, brass, and olive.

    The entryway can include all three.

    Materials and Things You Need

    • Neutral textiles
    • Fall cushions
    • Throws
    • Candles
    • Ceramic vases
    • Dried branches
    • Natural wood
    • Woven baskets
    • Seasonal artwork
    • Pumpkins
    • Warm lighting
    • Fall wreath

    Step-by-Step Whole-Home Plan

    Choose your fall color palette.

    Remove summer-specific accessories.

    Decide which rooms need the strongest seasonal treatment.

    Repeat colors between neighboring rooms.

    Use similar materials throughout the home.

    Add seasonal lighting.

    Introduce natural elements.

    Keep major furniture neutral where possible.

    Edit unnecessary decorations.

    The hallway can become an important transition space.

    If the living room contains olive and rust, use artwork or a runner containing one of those colors in the hallway.

    This visually connects the spaces.

    Creating a Luxury Feeling Through Repetition

    Repeated materials make a home feel professionally designed.

    For example, if you use brass candle holders in the dining room, you could repeat brass through a lamp or small accessory in the living room.

    If you use woven baskets in the living room, repeat woven texture in the bedroom.

    If you use cream ceramics on the console, introduce similar ceramics elsewhere.

    The pieces do not need to match exactly.

    They simply need to feel related.

    Avoiding Over-Decorating

    This is perhaps the most important rule.

    Do not decorate every corner simply because it is fall.

    Leave some surfaces untouched.

    Allow the architecture and furniture to remain visible.

    A beautiful neutral room with three carefully chosen autumn moments can look more luxurious than a room filled with seasonal decorations.

    Making the Home Feel Warm

    Luxury is not only visual.

    It is also sensory.

    Soft textiles make the room feel comfortable.

    Warm lighting creates atmosphere.

    Natural materials provide texture.

    Seasonal scents can contribute to the experience where appropriate.

    Music, fresh flowers, warm beverages, and comfortable seating can complete the feeling.

    The objective is to create a home people want to spend time in.

    Pinterest Styling Tip

    When photographing the entire home, create a consistent visual story.

    Use similar lighting and color treatment across images.

    Show different rooms but repeat the same autumn palette.

    This makes the collection feel like one complete fall decorating guide rather than unrelated ideas.

    Conclusion

    Elegant fall decorating does not require a large budget or a complete home makeover. The most sophisticated autumn interiors are often created through restraint, texture, natural materials, warm lighting, and carefully selected seasonal details.

    Instead of buying dozens of decorations, begin with the pieces you already own. Remove summer accessories and replace them with a few carefully chosen fall elements.

    A neutral living room can become warmer with textured cushions, a soft throw, natural branches, and warm lighting.

    A mantel can become a sophisticated seasonal focal point with one large mirror or wreath, a few ceramic vessels, candles, and neutral pumpkins.

    A dining table can feel ready for an elegant autumn gathering with linen, everyday dishes, candles, natural branches, and simple seasonal details.

    An entryway can welcome guests with a wreath, mirror, warm lamp, woven basket, and a few muted fall accents.

    A bedroom can become a cozy retreat through layered bedding, velvet cushions, warm colors, soft lighting, and textured blankets.

    Natural elements can provide some of the most beautiful seasonal decoration without requiring a large investment.

    Branches, dried grasses, pinecones, wood, foliage, and seasonal flowers bring authenticity to the home.

    Lighting is equally transformative.

    Warm lamps, candles, lanterns, and soft accent lighting can turn ordinary decorations into an atmospheric autumn display.

    The biggest mistake to avoid is overdecorating.

    Elegant fall decor should feel intentional.

    Choose a limited palette.

    Repeat colors.

    Mix textures.

    Vary the scale of accessories.

    Use a few strong focal points.

    Leave enough negative space for the eye to rest.

    Instead of bright orange appearing everywhere, introduce it selectively through pumpkins, flowers, artwork, or textiles.

    Instead of filling every shelf with seasonal objects, create one or two carefully composed displays.

    Instead of buying new furniture, use textiles and accessories to transform what you already own.

    The result should feel like fall has naturally arrived in your home, rather than like a seasonal decorating store has been placed inside it.

    For an especially expensive-looking result, combine warm neutrals with one or two richer autumn shades. Add natural wood, ceramic, woven textures, soft textiles, and warm metallic accents. Then finish the room with carefully positioned lighting.

    Remember that luxury is not about excess.

    It is about quality of presentation.

    A single large ceramic vase can be more impactful than ten small decorations.

    A beautifully layered bed can look more luxurious than an expensive headboard.

    A well-styled coffee table can elevate an ordinary living room.

    A simple wreath can transform an entryway.

    A few candles can create more atmosphere than an entire shelf of seasonal accessories.

    Most importantly, your fall home should still feel like your home.

    Include personal artwork, favorite books, meaningful objects, family pieces, and things that make you comfortable.

    The best interiors balance beauty with everyday life.

    As you decorate for fall, think about how each item contributes to the overall story.

    Does it add warmth?

    Does it add texture?

    Does it connect with your color palette?

    Does it serve a purpose?

    Does it make the room feel more inviting?

    If the answer is yes, keep it.

    If an item only creates visual clutter, consider removing it.

    This approach allows you to create a home that feels sophisticated without spending excessively.

    Whether your style is modern, traditional, transitional, contemporary, organic, or eclectic, these principles can be adapted to your space.

    The ultimate goal is a fall home that feels warm, elegant, cozy, intentional, and timeless.

    And that is what makes elegant fall decor look expensive: not the amount you spend, but the thoughtfulness behind every detail.


  • Luxury Home Decor on a Budget

    Luxury Home Decor on a Budget

    Luxury home decor on a budget is about creating an elegant, polished, and high-end atmosphere without spending a fortune on designer furniture or expensive renovations. The most beautiful luxury-inspired homes are often not defined by how much money was spent on them, but by how thoughtfully each element has been selected, arranged, and layered. With the right approach, affordable furniture, secondhand finds, simple accessories, and budget-friendly upgrades can create a sophisticated interior that feels comfortable and expensive.

    The first step is understanding what actually makes a room look luxurious. It is rarely the price tag of an individual object. Instead, luxury is communicated through proportion, consistency, texture, lighting, organization, and visual simplicity. A modest sofa can look elegant when surrounded by coordinated cushions, a beautiful rug, attractive curtains, warm lighting, and carefully selected accessories. On the other hand, an expensive sofa can look ordinary if the room is cluttered or poorly arranged.

    Color is one of the easiest ways to create a luxury feeling. Neutral shades such as warm white, cream, beige, taupe, greige, soft gray, and brown provide an elegant foundation. These colors are easy to combine and make a room feel calm and cohesive. However, luxury does not mean that your home must be completely neutral. Deep green, navy, burgundy, chocolate brown, muted blue, terracotta, or dusty rose can add richness and personality. The key is to repeat colors throughout the room instead of introducing too many unrelated shades.

    Texture is equally important. A room decorated entirely with smooth surfaces can feel flat, even if the furniture itself is expensive. Layering linen, cotton, velvet, wool, wood, ceramic, glass, woven materials, and greenery creates depth. The good news is that texture can often be added inexpensively through cushions, blankets, baskets, curtains, rugs, and small accessories.

    Lighting is another major factor. Harsh overhead lighting can make a beautiful room feel cold and ordinary. Layered lighting creates a softer and more sophisticated environment. Table lamps, floor lamps, wall lights, pendant fixtures, and warm accent lighting can be combined to create different levels of illumination. You do not need expensive designer lamps. Sometimes replacing a lampshade or adding a warm-toned bulb can make an existing fixture look considerably better.

    Furniture arrangement also influences the perceived quality of a space. A luxury interior usually feels spacious and intentional because furniture is positioned according to the room’s proportions and how people actually use it. Avoid pushing every piece against the wall simply because that seems like the easiest arrangement. Where space allows, create conversation areas and allow enough room for movement.

    Curtains are another surprisingly effective upgrade. Floor-length curtains can make ceilings look taller and windows look larger. Hanging them at an appropriate height and allowing enough width for attractive folds creates a more finished appearance. Simple curtains in cream, ivory, beige, or soft gray can work particularly well.

    Accessories should be chosen selectively. Instead of covering every table and shelf with small decorative objects, choose a few pieces with strong visual presence. A large vase, sculptural object, oversized mirror, beautiful tray, coffee-table books, framed artwork, or statement plant can create more impact than many inexpensive decorations.

    Mirrors are especially useful in budget-friendly luxury decorating. A large mirror can reflect light, add depth, and create a focal point. Affordable mirrors can also be upgraded with paint or used secondhand. Positioning matters just as much as the mirror itself. A mirror reflecting a window or attractive artwork can make the room feel brighter and more expansive.

    Artwork does not have to be expensive either. Affordable prints, vintage-inspired posters, photography, botanical illustrations, or personal artwork can look sophisticated when printed at a good size and placed in attractive frames. Presentation is often more important than price.

    Plants add another layer of life and color. A large plant can fill an empty corner, while smaller plants can soften shelves and side tables. Pairing greenery with attractive ceramic, woven, or simple neutral pots can make the arrangement feel more intentional.

    The biggest secret to luxury on a budget is editing. Before buying anything, remove clutter and unnecessary objects. Give your favorite pieces room to breathe. A carefully edited room often looks more expensive than a room filled with expensive possessions.

    The ideas below focus on affordable changes that can be implemented gradually. You do not need to renovate your entire home. Start with one room, identify its biggest weakness, and choose the change that will make the greatest visual difference.

    1. Create a Sophisticated Neutral Living Room

    A neutral color palette is one of the simplest ways to create an elegant living room without spending a large amount of money. Neutral interiors provide a calm foundation and allow furniture, artwork, lighting, and textures to become the focus.

    Start with the largest existing pieces. If your sofa is already neutral, use it as the foundation. If it is colorful, do not automatically replace it. Instead, identify one or two colors from the sofa and repeat them throughout the room.

    Cream, beige, taupe, warm white, soft gray, and brown are excellent choices for creating a sophisticated appearance.

    Materials and Things You Need

    • Neutral cushion covers
    • Textured throw
    • Area rug
    • Curtains
    • Decorative vase
    • Coffee-table books
    • Tray
    • Artwork
    • Table lamp
    • Indoor plant
    • Decorative basket

    Step-by-Step Process

    First, remove unnecessary objects from the living room.

    Next, select a primary neutral shade.

    Choose one or two secondary colors.

    Replace mismatched cushion covers with coordinated ones.

    Add a textured throw to the sofa.

    Introduce an area rug that connects the furniture.

    Add one large decorative object rather than many tiny objects.

    Finish with warm lighting and greenery.

    Texture becomes particularly important when using neutral colors.

    Combine smooth ceramics with woven baskets, soft textiles, natural wood, glass, and greenery.

    For example, imagine a cream sofa styled with beige linen cushions, a chunky knitted throw, a wooden coffee table, a woven rug, and a ceramic vase.

    The colors are simple, but the textures create visual richness.

    You can introduce a darker accent through a walnut table, black picture frame, charcoal cushion, or dark artwork.

    This creates contrast without making the room feel busy.

    A neutral living room is also easy to update seasonally. In winter, add heavier throws and warm brown accents. In spring, introduce lighter textiles and greenery. During summer, linen and natural textures can make the room feel fresh.

    The goal is not to make everything beige.

    Instead, create a controlled palette in which different shades and textures work together.

    For a Pinterest-worthy result, make sure the room has one clear focal point. This could be the sofa, fireplace, artwork, coffee table, or a beautiful window.

    Avoid allowing too many accessories to compete for attention.

    2. Hang Curtains High and Wide for an Instant Luxury Effect

    Curtains are often underestimated when decorating on a budget. Yet properly selected and installed curtains can dramatically change the proportions of a room.

    Short curtains can make windows look smaller and ceilings appear lower. Floor-length curtains create a sense of height and softness.

    Where appropriate for your room’s architecture, position the curtain rod higher than the top of the window and extend it beyond the sides of the window. This can make the window appear larger.

    Materials and Things You Need

    • Curtain panels
    • Curtain rod
    • Measuring tape
    • Level
    • Mounting hardware
    • Curtain rings if required
    • Steamer or iron

    Step-by-Step Process

    Measure the width of the window.

    Measure from the desired rod position to the floor.

    Select panels with enough width to create attractive folds.

    Install the rod securely.

    Position the curtains so they frame the window.

    Steam the panels before styling them.

    Allow the fabric to fall naturally.

    Simple curtains often look more expensive than heavily decorated ones.

    Choose ivory, cream, beige, warm white, taupe, or soft gray for maximum versatility.

    If you have colorful walls, choose curtains that coordinate rather than compete.

    For example, deep green walls can look elegant with warm cream curtains.

    A neutral bedroom can become more luxurious with floor-length beige curtains and layered bedding.

    You do not have to replace every curtain in your home at once.

    Start with the living room or bedroom because these spaces benefit most visually.

    If affordable curtains are slightly transparent or lightweight, layering them with another panel can create greater fullness.

    Proper maintenance is also important. Wrinkled curtains can make a room look unfinished. Steam them regularly and follow the fabric’s care instructions.

    The final effect is subtle but powerful.

    The room feels taller, softer, and more complete.

    3. Build a High-End Look With Affordable Artwork

    Artwork can give a room personality while creating a sophisticated focal point.

    You do not need an expensive original painting.

    Affordable prints, photographs, botanical illustrations, abstract designs, vintage posters, and downloadable artwork can all work beautifully.

    The most important factors are scale, framing, and placement.

    Materials and Things You Need

    • Large artwork or prints
    • Picture frames
    • Mat boards
    • Measuring tape
    • Level
    • Hanging hardware
    • Optional picture ledge

    Step-by-Step Process

    Choose one wall that needs visual interest.

    Select artwork that matches your room’s color palette.

    Determine whether one large piece or a gallery arrangement is more appropriate.

    Measure the wall.

    Arrange pieces on the floor before hanging them.

    Keep spacing consistent.

    Install the artwork securely.

    A large artwork often creates a stronger luxury effect than several tiny pieces.

    If a large original painting is too expensive, create an oversized print.

    Choose a simple frame with a wide border or mat where appropriate.

    Black frames create a modern appearance.

    Wood frames add warmth.

    Metallic frames can introduce a subtle glamorous effect.

    For a more eclectic interior, combine frame styles while repeating a few colors.

    A gallery wall can also be created inexpensively by mixing artwork with photographs, mirrors, and small decorative objects.

    Do not overcrowd the arrangement.

    Leave enough visual breathing room.

    Artwork should support the room rather than compete with every other decorative element.

    A large artwork above a sofa, dining table, or console can immediately create a designer-inspired focal point.

    4. Upgrade Existing Furniture With New Hardware

    Replacing furniture is often expensive and unnecessary.

    A simple cabinet, dresser, console, or vanity can look completely different after replacing its hardware.

    This is one of the easiest budget-friendly projects because the change requires relatively few materials.

    Materials and Things You Need

    • New knobs
    • Cabinet handles
    • Screwdriver
    • Measuring tape
    • Pencil
    • Replacement screws
    • Optional paint
    • Optional wood filler

    Step-by-Step Process

    Measure the existing hardware.

    Record the distance between mounting holes.

    Choose replacement hardware that fits or plan for new holes where appropriate.

    Remove the old hardware.

    Clean the surface.

    Install the new pieces.

    Check that all handles are aligned.

    Brass hardware can make simple furniture look warmer and more traditional.

    Matte black hardware creates a modern appearance.

    Brushed metal can create a subtle contemporary look.

    Ceramic knobs can add personality to bedrooms or vintage-inspired spaces.

    If the furniture itself looks tired, consider refinishing or painting it before installing the new hardware.

    A basic wooden dresser can become an elegant statement piece with a fresh finish and sophisticated pulls.

    This technique works particularly well for rental-friendly or budget-conscious decorating because you can transform what you already own.

    The key is consistency.

    Use complementary hardware finishes in the same room.

    You do not have to use one finish throughout the entire house, but nearby furniture should feel coordinated.

    5. Use One Oversized Mirror as a Luxury Focal Point

    Large mirrors can make a room appear brighter and more spacious while also adding elegance.

    Instead of purchasing several small decorative mirrors, consider one large piece.

    Materials and Things You Need

    • Large mirror
    • Measuring tape
    • Level
    • Suitable mounting hardware
    • Cleaning cloth
    • Optional frame paint

    Step-by-Step Process

    Choose a wall that benefits from additional visual depth.

    Measure the space.

    Select a mirror proportional to the furniture.

    Check the mirror’s weight.

    Choose appropriate mounting hardware.

    Install it securely.

    Clean the surface.

    Style the surrounding area without overcrowding it.

    A round mirror can soften a room filled with angular furniture.

    A tall rectangular mirror can emphasize ceiling height.

    An arched mirror can introduce an architectural appearance.

    If the frame is unattractive, repainting it can be a relatively inexpensive way to improve its appearance.

    Place the mirror where it reflects something attractive.

    A window is particularly effective because it can reflect daylight.

    Artwork, plants, or a beautiful light fixture can also create interesting reflections.

    Avoid positioning it so it reflects cluttered shelves or messy areas.

    The mirror should add depth, not multiply visual disorder.

    6. Layer Lighting Instead of Relying on One Ceiling Fixture

    Luxury interiors rarely depend entirely on one harsh ceiling light.

    Layered lighting creates warmth, depth, and atmosphere.

    Use several smaller sources instead of one dominant source.

    Materials and Things You Need

    • Table lamp
    • Floor lamp
    • Pendant
    • Wall light
    • Appropriate warm-toned bulbs
    • Decorative lampshade
    • LED accent lighting where appropriate

    Step-by-Step Process

    Identify dark corners.

    Add a floor lamp.

    Place a table lamp on a console or side table.

    Use a pendant or ceiling fixture for general illumination.

    Highlight artwork or architectural details.

    Choose appropriate warm lighting for relaxing spaces.

    Turn off unnecessary lights and observe how the room changes.

    Different heights create depth.

    A floor lamp illuminates from low level.

    A table lamp provides medium-height lighting.

    A ceiling fixture provides overhead illumination.

    This creates a layered environment.

    You can also upgrade an inexpensive lamp by replacing the lampshade.

    A well-proportioned fabric shade can make a basic lamp feel much more sophisticated.

    For bedrooms and living rooms, softer lighting often creates a more inviting atmosphere.

    Always choose bulbs appropriate to the fixture and room requirements.

    7. Style a Coffee Table With a Simple Designer-Inspired Arrangement

    A coffee table can become a focal point without being expensive.

    The key is to create a composition rather than scatter objects across the surface.

    Materials and Things You Need

    • Decorative tray
    • Books
    • Vase
    • Plant
    • Bowl
    • Sculptural object
    • Candle or LED candle

    Step-by-Step Process

    Clear the entire table.

    Place one tray.

    Add two or three books.

    Place a vase or decorative object on the books.

    Add greenery.

    Leave part of the table empty.

    The empty space is important.

    It keeps the arrangement functional and prevents visual clutter.

    Use objects with different heights.

    A low stack of books next to a taller vase creates balance.

    A tray helps group objects and makes them easy to move when the table needs to be used.

    You can rotate decorative objects seasonally.

    In autumn, add warm-toned ceramics and dried branches.

    In spring, use fresh greenery and lighter colors.

    In winter, introduce cozy textures and neutral accessories.

    The arrangement should always feel practical enough for everyday life.

    8. Mix Natural Materials to Add Expensive-Looking Texture

    Natural materials are an excellent way to make an interior feel sophisticated.

    Wood, rattan, jute, linen, cotton, ceramic, stone-inspired accessories, and woven baskets create visual depth.

    Materials and Things You Need

    • Wooden tray
    • Woven basket
    • Jute rug
    • Linen cushion
    • Cotton throw
    • Ceramic vase
    • Rattan accessory
    • Wooden bowl
    • Indoor plant

    Step-by-Step Process

    Look around the room and identify overly smooth surfaces.

    Add one woven object.

    Introduce natural wood.

    Layer a linen or cotton textile.

    Add ceramic.

    Bring in greenery.

    Spread the materials throughout the room.

    Do not concentrate everything in one corner.

    A wooden coffee table, woven basket, linen cushion, ceramic vase, and natural-fiber rug can create a sophisticated combination without requiring designer furniture.

    Natural textures also work well with metal accents.

    A brass lamp beside a wooden table can create a beautiful contrast.

    The objective is to make the room feel tactile and layered.

    9. Give Your Bedroom a Boutique-Hotel Feeling

    A bedroom can look luxurious when it is organized, symmetrical, comfortable, and layered with textiles.

    The bed should become the main focal point.

    Choose coordinated bedding and build layers with pillows, throws, and blankets.

    Materials and Things You Need

    • Duvet cover
    • Sheets
    • Pillows
    • Decorative cushions
    • Throw blanket
    • Bedside lamps
    • Curtains
    • Area rug
    • Artwork
    • Decorative tray
    • Plant

    Step-by-Step Process

    Declutter the bedroom.

    Choose a calm color palette.

    Make the bed with layered bedding.

    Add decorative cushions.

    Place lamps on both sides when appropriate.

    Add a soft rug.

    Use full-length curtains.

    Keep bedside tables organized.

    Add one or two personal accessories.

    Symmetry can create an instant sense of order.

    Matching bedside lamps and balanced furniture arrangements make the room feel intentional.

    However, do not make the bedroom so perfect that it becomes uncomfortable.

    The purpose is relaxation.

    Choose fabrics that feel pleasant and practical.

    Layer different textures instead of relying entirely on decorative objects.

    A cream duvet, beige throw, textured cushions, wooden bedside tables, warm lamps, and soft curtains can create a sophisticated bedroom with relatively simple pieces.

    10. Declutter and Curate Your Home Before Buying Anything

    The final and most important budget luxury idea is to edit your existing space.

    You may already own everything necessary to create a beautiful home.

    The problem may simply be that too many things are competing for attention.

    Materials and Things You Need

    • Storage baskets
    • Decorative boxes
    • Trays
    • Storage containers
    • Donation bags
    • Cleaning supplies
    • Shelving

    Step-by-Step Process

    Work on one room at a time.

    Remove unnecessary objects.

    Group similar items.

    Store everyday clutter.

    Donate things you no longer use.

    Keep meaningful objects.

    Create intentional displays.

    Leave some surfaces empty.

    A luxury-inspired room needs visual breathing space.

    This does not mean becoming minimalist.

    You can still display books, plants, artwork, collections, and sentimental objects.

    The difference is that the items are arranged intentionally.

    Instead of placing ten objects on a console, choose three or four.

    Instead of filling every shelf, create a few attractive groupings.

    Instead of covering the sofa with every cushion you own, choose a coordinated selection.

    This approach makes your existing possessions feel more valuable.

    11. Create a Statement Accent Wall With Budget-Friendly Paint

    A statement wall can completely change the atmosphere of a room without requiring a full renovation. Instead of repainting every wall, choose one strategic surface and give it a richer, more sophisticated color. This approach works especially well behind a sofa, bed, dining table, fireplace, or console.

    For a luxury-inspired appearance, consider deep green, navy blue, warm taupe, chocolate brown, muted charcoal, dusty blue, terracotta, or creamy beige. The best choice depends on the existing furniture, natural light, and overall color palette.

    Materials and Things You Need

    • Interior wall paint
    • Paint roller
    • Paintbrush
    • Painter’s tape
    • Drop cloth
    • Paint tray
    • Sandpaper if required
    • Filler for small wall imperfections
    • Measuring tape

    Step-by-Step Process

    First, select the wall that naturally attracts attention.

    Clean the surface and repair obvious imperfections.

    Protect floors and furniture.

    Use painter’s tape around edges that need protection.

    Apply the appropriate primer if required.

    Apply the first coat of paint.

    Allow it to dry according to the manufacturer’s instructions.

    Add a second coat if necessary.

    Remove the tape carefully.

    Once the wall is finished, keep the surrounding decorations relatively controlled.

    The purpose of an accent wall is to create a focal point rather than compete with every other feature.

    For a sophisticated appearance, repeat the wall color somewhere else in the room. For example, if you paint the wall deep green, introduce green through a cushion, artwork, plant pot, or decorative object.

    This repetition makes the room feel professionally coordinated.

    You can also create a subtle luxury effect with two closely related colors rather than a dramatic contrast. A warm beige room with a slightly darker taupe accent wall can feel elegant and understated.

    If you prefer something more dramatic, choose a darker color and combine it with warm lighting and lighter furniture.

    An accent wall can also provide the perfect background for artwork or a large mirror. Position the focal object carefully so the wall and object work together.

    The beauty of this idea is that it creates a major visual change without requiring expensive furniture.

    12. Make a Budget-Friendly Entryway Look Like a Luxury Hotel Entrance

    The entryway is the first part of your home visitors experience, so it deserves as much attention as the living room. A small, carefully styled entrance can immediately make the entire home feel more sophisticated.

    You do not need a large hallway. Even a narrow entryway can become attractive with a few practical elements.

    Start with a console table or slim shelf if space permits. Add a mirror above it to create depth and reflect light.

    Materials and Things You Need

    • Console table or narrow shelf
    • Large mirror
    • Table lamp
    • Decorative tray
    • Small vase
    • Plant
    • Basket
    • Artwork
    • Runner rug
    • Storage hooks

    Step-by-Step Process

    Begin by clearing unnecessary items from the entrance.

    Choose one focal point, preferably a mirror or artwork.

    Add a narrow console if the space allows.

    Place a small lamp on the console.

    Use a tray for keys and everyday essentials.

    Add one vase or plant.

    Place a basket underneath for practical storage.

    Add a runner if the layout allows.

    Keep the color palette consistent with the rest of the home.

    The mirror is especially useful because it can make a narrow entryway feel larger.

    A large round mirror creates softness, while a rectangular mirror can emphasize architectural lines.

    Lighting is equally important. A small table lamp can create a welcoming glow during the evening.

    If your entryway is very small, wall-mounted shelves can replace a console table.

    A small basket underneath can provide storage without taking up too much floor space.

    Avoid placing too many decorative objects in the entrance. The area needs to remain functional because people will naturally use it for shoes, bags, keys, and coats.

    A sophisticated entryway balances beauty and practicality.

    The finished space should feel organized, welcoming, and connected to the design language of the rest of the home.

    13. Use Affordable Rugs to Make Every Room Feel More Finished

    A rug can dramatically change the appearance of a room because it connects furniture and establishes a visual foundation.

    Even affordable furniture can look more polished when it is placed correctly on a well-sized rug.

    One of the biggest mistakes is choosing a rug that is too small.

    In a living room, the rug should ideally relate to the main seating arrangement rather than appearing like a small island underneath the coffee table.

    Materials and Things You Need

    • Area rug
    • Rug pad
    • Measuring tape
    • Furniture layout plan
    • Vacuum
    • Rug-cleaning supplies appropriate for the material

    Step-by-Step Process

    Measure the room.

    Measure your furniture arrangement.

    Determine the largest practical rug size within your budget.

    Choose a color that connects existing furniture.

    Select a subtle pattern if the room already has strong colors.

    Use a more expressive pattern if the furniture is simple.

    Position the rug carefully.

    Add a rug pad where appropriate.

    A neutral rug can make a colorful room feel calmer.

    A patterned rug can introduce personality into a neutral room.

    For a luxury appearance, consider subtle patterns rather than overly busy designs if your room already contains statement furniture.

    Cream, beige, taupe, gray, muted blue, brown, and soft geometric patterns can create an elegant foundation.

    Texture is also valuable.

    A woven rug can create warmth.

    A plush rug can make a bedroom feel more comfortable.

    A low-pile rug may work better in high-traffic areas.

    The rug should also relate to the room’s color palette.

    If your sofa is beige and your artwork contains blue and brown, choose a rug that incorporates those shades.

    This creates visual connection.

    You do not need an expensive rug to achieve this effect. What matters most is selecting the correct size, color, pattern, and placement.

    14. Add Designer-Inspired Symmetry With Matching Accessories

    Symmetry is a simple design principle that can make a room appear more organized and sophisticated.

    You do not need matching designer furniture.

    Instead, create symmetry with affordable accessories.

    This works particularly well around beds, sofas, fireplaces, consoles, and dining areas.

    For example, two similar table lamps on either side of a bed immediately create a balanced appearance.

    Materials and Things You Need

    • Matching or coordinating lamps
    • Side tables
    • Decorative cushions
    • Vases
    • Artwork
    • Candles or LED candles
    • Trays
    • Decorative objects

    Step-by-Step Process

    Identify the area you want to balance.

    Choose a central focal point.

    Add similar objects on both sides.

    Keep their visual weight relatively balanced.

    Repeat materials or colors.

    Leave enough empty space around the arrangement.

    A bedroom is one of the easiest places to use symmetry.

    Place two bedside tables on either side of the bed.

    Add matching lamps.

    Use coordinated cushions.

    Keep the artwork centered above the headboard.

    This creates an instant boutique-hotel feeling.

    In a living room, you could place two similar lamps or chairs on opposite sides of the sofa.

    The objects do not have to be identical.

    They simply need similar visual weight.

    For example, one side might contain a tall plant while the other has a floor lamp of similar height.

    Symmetry is especially useful when your furniture is inexpensive or mismatched because the balanced arrangement creates visual order.

    However, avoid making the entire home perfectly symmetrical.

    Luxury interiors often combine symmetry with organic elements.

    You can create a symmetrical foundation and then introduce personality through artwork, books, plants, and decorative objects.

    This combination keeps the room polished without making it feel overly formal.

    15. Create a Luxury Spa Feeling in the Bathroom Without Renovating

    A bathroom can feel expensive without replacing the tiles, vanity, or plumbing fixtures. The key is creating a clean, coordinated, hotel-inspired atmosphere through textiles, lighting, accessories, and organization.

    Start by removing unnecessary products from visible surfaces.

    Then introduce coordinated towels, a simple bath mat, attractive containers, greenery, and warm lighting.

    Materials and Things You Need

    • Coordinated towels
    • Bath mat
    • Shower curtain if applicable
    • Decorative tray
    • Small plant
    • Ceramic container
    • Soap dispenser
    • Storage basket
    • Mirror
    • Warm lighting
    • Minimal artwork

    Step-by-Step Process

    Begin by completely clearing the bathroom counters.

    Group everyday products into attractive containers where practical.

    Choose towels in one or two coordinated colors.

    Add a simple bath mat.
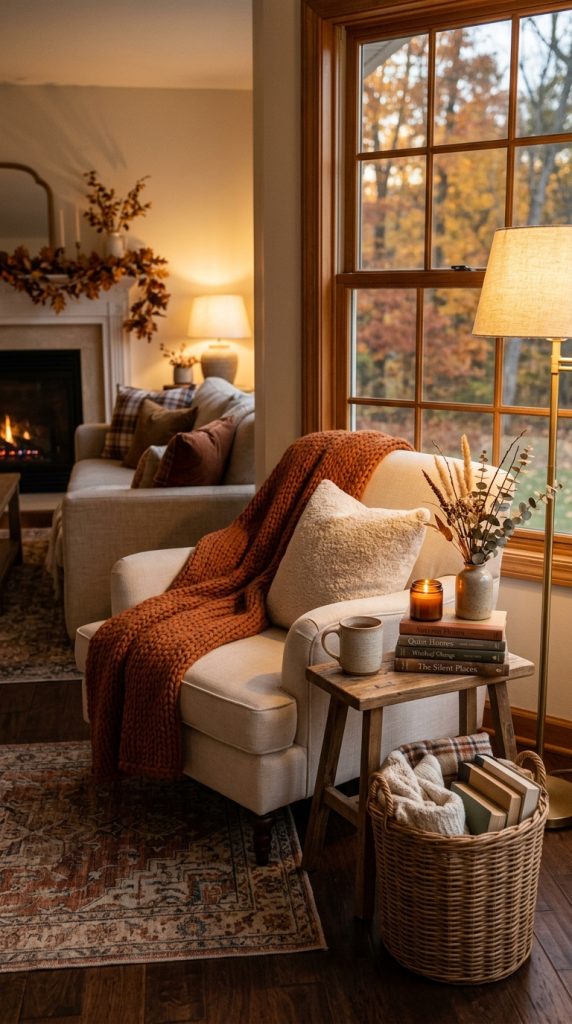
    Place a small plant where suitable.

    Use a tray to organize frequently used items.

    Replace mismatched dispensers with coordinated containers.

    Add a decorative basket for towels.

    Keep the countertop mostly clear.

    A neutral bathroom can immediately feel more luxurious with white, cream, beige, soft gray, or earthy towels.

    For a more dramatic appearance, use deep green, navy, or charcoal accents.

    Avoid displaying too many brightly colored product bottles.

    Use baskets or cabinets to hide visual clutter.

    Lighting also matters.

    If possible, use appropriate warm lighting for a relaxing atmosphere while maintaining sufficient illumination for practical tasks.

    A small plant can add freshness, while a wooden tray can introduce natural warmth.

    You can also add one framed piece of artwork if the bathroom conditions are suitable for it.

    The goal is to recreate the feeling of a calm boutique spa.
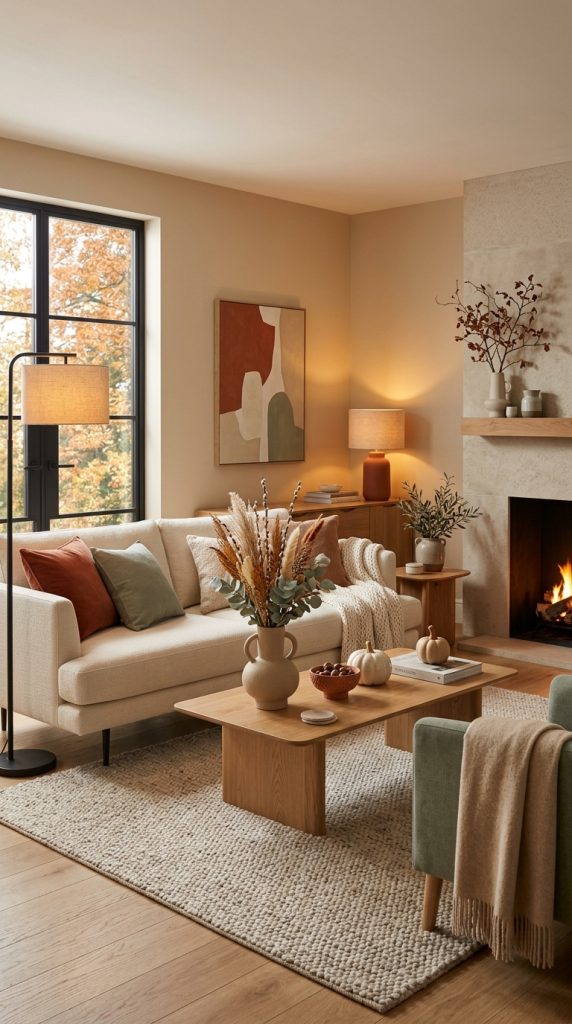
    Everything should feel clean, coordinated, and intentional.

    You do not need marble countertops or designer fixtures.

    A beautifully organized bathroom with matching textiles, thoughtful storage, warm lighting, and a few natural elements can create a surprisingly luxurious result.

    The most important finishing touch is cleanliness.

    Keep mirrors spotless, towels fresh, surfaces uncluttered, and fixtures well maintained.

    That final level of care can make inexpensive bathroom decor feel considerably more sophisticated.


  • Colorful Maximalist Decor Ideas to Create a Vibrant, Eclectic Home

    Colorful Maximalist Decor Ideas to Create a Vibrant, Eclectic Home

    Colorful maximalist decor is all about embracing personality, creativity, pattern, color, texture, and visual abundance. Unlike minimalist interiors, where the goal is often to reduce objects and keep the palette restrained, maximalism encourages you to express yourself through layers of beautiful details. It is a decorating style that says your home does not have to follow strict rules to be stylish. You can combine bold colors, vintage furniture, patterned fabrics, artwork, plants, books, collected objects, decorative lighting, and unexpected combinations to create a home that feels energetic and completely personal.

    The most important thing to understand about colorful maximalism is that it is not simply about putting as many colorful objects into a room as possible. Successful maximalist decorating still requires thought, balance, repetition, and visual organization. A room can contain many colors and patterns while still looking intentional. The secret is creating relationships between the different elements so the room feels layered rather than chaotic.

    Color is usually the starting point. You might choose a deep emerald green sofa, cobalt blue walls, terracotta accessories, mustard yellow cushions, or a vibrant pink accent chair. However, these colors should have some connection to one another. Repeating a color in several locations can help the room feel cohesive. For example, if you choose cobalt blue curtains, you could repeat that blue in artwork, cushions, books, or a decorative vase. The repetition makes the bold color feel intentional.

    Patterns are another defining feature of maximalist interiors. Floral prints, stripes, checks, geometric designs, animal-inspired patterns, paisley, botanical motifs, and abstract artwork can all work together. The trick is to vary the scale. A large floral wallpaper can be paired with smaller geometric cushions and a medium-sized patterned rug. When every pattern has the same scale, the room can become visually overwhelming.

    Texture is equally important. Velvet, linen, wool, boucle, rattan, wood, ceramic, glass, metal, woven fibers, and embroidered fabrics can create contrast. A colorful maximalist room should not only look interesting; it should feel interesting. Texture gives the eye different surfaces to discover and prevents the abundance of color from becoming flat.
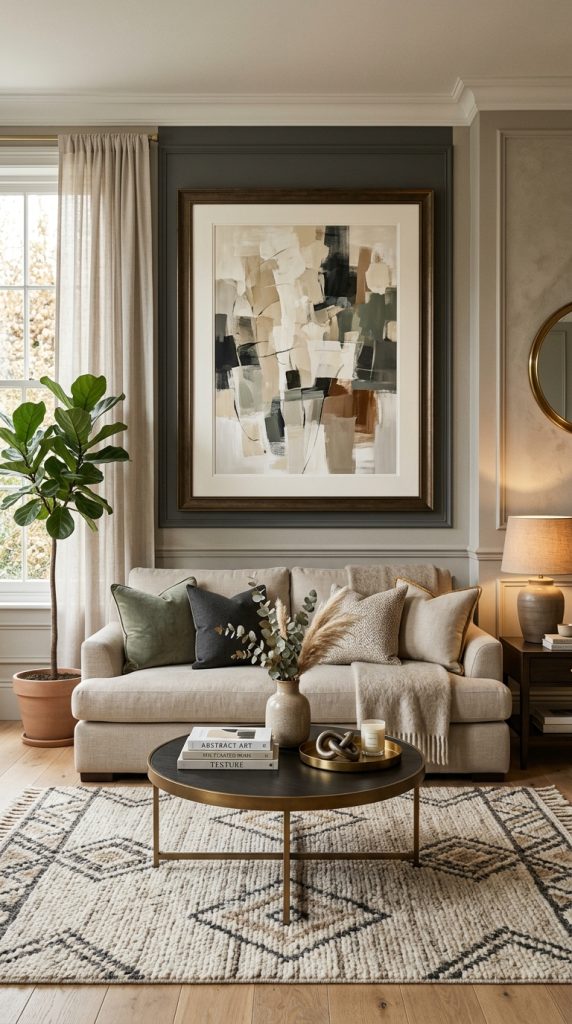
    Furniture can also contribute to maximalist character. Instead of buying an entire matching furniture set, consider mixing pieces with different shapes, periods, and finishes. A modern sofa can sit beside a vintage side table. An antique cabinet can share space with a contemporary lamp. A sculptural chair can become a focal point against a patterned wall.

    Artwork is another major component. Maximalist homes often use artwork generously. Gallery walls, oversized paintings, framed prints, photographs, mirrors, tapestries, and decorative plates can all become part of the composition. The artwork does not necessarily need to match perfectly. Instead, look for colors, themes, or frames that create a connection.
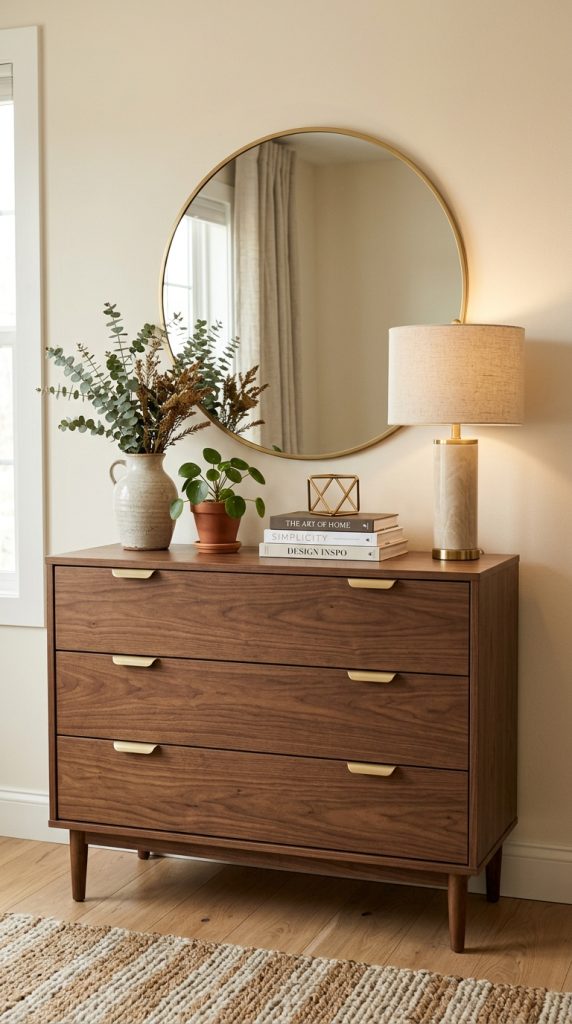
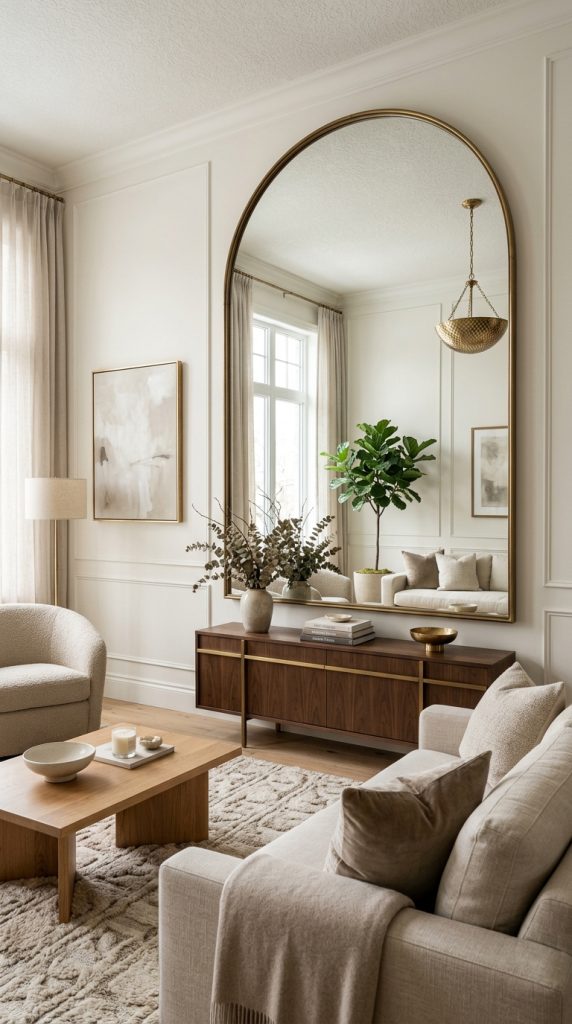
    Plants are also excellent for colorful maximalist interiors. Greenery adds another color layer while bringing softness into spaces filled with patterns and objects. Large tropical plants can create drama, while smaller plants can fill shelves, windowsills, and side tables.

    Lighting should never be forgotten. A colorful room can become even more dramatic with statement lamps, colorful shades, sculptural fixtures, pendant lights, table lamps, and warm accent lighting. Lighting can highlight artwork and create different moods throughout the day.

    Storage is especially important in maximalist homes. Since the style involves more objects, every item needs a place. Cabinets, shelves, baskets, decorative boxes, and closed storage can help maintain order while allowing collections and favorite objects to remain visible.

    The biggest advantage of colorful maximalism is freedom. You do not have to choose between modern and vintage, bold and soft, elegant and playful. You can combine different influences to create a home that represents your personality.

    At the same time, beginners should avoid trying to change everything at once. Start with one room and establish a color story. Add one strong focal point, then gradually introduce supporting colors, patterns, textures, and accessories.

    The ten ideas below provide practical ways to create a colorful maximalist home without making it feel random. Each approach can be adapted to apartments, houses, bedrooms, living rooms, dining areas, home offices, and even small spaces. The goal is to create a home that feels expressive, joyful, layered, and memorable.

    1. Create a Bold Color-Blocked Living Room

    Color blocking is one of the easiest ways to introduce colorful maximalist decor because it gives you a clear starting structure. Instead of randomly placing bright colors throughout a room, you intentionally assign different colors to walls, furniture, textiles, and accessories.

    A color-blocked living room can be dramatic, playful, sophisticated, or artistic depending on the shades you choose. For a sophisticated appearance, combine deep green with warm cream, burgundy, and mustard. For a playful interior, consider coral, cobalt blue, pink, and yellow. If you prefer an earthy maximalist style, combine terracotta, olive green, mustard, rust, and chocolate brown.

    Begin by selecting your dominant color. This should appear on one of the largest surfaces or pieces of furniture. A painted accent wall, sofa, large rug, or curtains can become the foundation.

    Next, choose two or three supporting colors. These should appear throughout the room rather than being isolated in one location.

    For example, imagine a living room with a deep emerald green wall. A rust-colored sofa becomes the main furniture feature, while mustard cushions and cobalt artwork introduce contrast. A patterned rug can combine several of these shades and visually connect the entire composition.

    Materials and Things You Need

    • Interior paint
    • Colorful sofa or slipcover
    • Accent chairs
    • Patterned area rug
    • Colorful cushions
    • Throw blankets
    • Curtains
    • Artwork
    • Decorative ceramics
    • Table lamps
    • Plants
    • Decorative books

    Step-by-Step Decorating Process

    Start by selecting your main color.

    Choose a secondary color that creates contrast.

    Add a third color through textiles or artwork.

    Use a neutral shade to give the eye a resting point.

    Introduce the colors repeatedly around the room.

    Add patterns only after establishing the main color relationships.

    Finish with small decorative objects.

    The most important rule is repetition. If a color appears only once, it may feel disconnected. Repeat it at least a few times in smaller details.

    For example, a bright pink chair could be connected to pink flowers in artwork, a pink decorative object, and a small pink cushion.

    You can also use color blocking on walls. Paint one wall a bold color while leaving the remaining walls relatively calm. Alternatively, use two colors on the same wall with a horizontal or geometric division.

    If painting feels too permanent, use colorful artwork, curtains, rugs, and furniture instead.

    Furniture arrangement should remain relatively simple when the colors are strong. You want the room to feel abundant but still functional.

    A large patterned rug can act as a visual bridge between several colors. If the rug contains green, pink, yellow, and blue, you can repeat those colors through cushions and artwork.

    For Pinterest-worthy styling, make one element the hero. This could be a colorful sofa, dramatic wall, oversized artwork, or patterned rug. Everything else should support that focal point.

    Lighting can change how colors appear. Warm lighting will make reds, oranges, yellows, and browns feel richer, while daylight may reveal the cooler qualities of blue and green.

    Do not be afraid of contrast. Maximalism becomes exciting when unexpected colors meet.

    However, contrast should still feel intentional. Use repetition and pattern to create visual connections.

    The final living room should feel energetic but comfortable, with enough open space for movement.

    2. Layer Bold Patterns Without Making the Room Look Chaotic

    Pattern mixing is one of the defining characteristics of maximalist decorating. Floral wallpaper, striped cushions, geometric rugs, checked curtains, abstract artwork, and decorative textiles can all exist in one room when they are layered thoughtfully.

    The biggest mistake beginners make is choosing too many patterns with the same visual strength. If every surface contains a large, complicated print, nothing becomes the focal point.

    Instead, vary the scale.

    Choose one large pattern, one medium pattern, and several smaller patterns. This creates a visual hierarchy.

    For example, use large botanical wallpaper as the main pattern. Add a medium geometric rug and small striped cushions. The patterns are different, but they do not compete equally.

    Color can also connect different patterns. If your wallpaper contains green, pink, and cream, choose cushions and rugs that repeat those shades.

    Materials and Things You Need

    • Patterned wallpaper
    • Patterned rug
    • Printed cushions
    • Floral fabric
    • Striped textiles
    • Geometric accessories
    • Artwork
    • Curtains
    • Decorative blankets
    • Upholstered furniture

    Step-by-Step Pattern Mixing

    Choose one dominant pattern.

    Select a second pattern with a different scale.

    Introduce a smaller pattern.

    Make sure at least one or two colors repeat between patterns.

    Use solid-colored pieces to create breathing space.

    Add artwork or accessories after the major patterns are established.

    Step back and evaluate the room from the doorway.

    Pattern mixing works particularly well in bedrooms and living rooms.

    A floral headboard can be combined with striped cushions and a geometric rug. A patterned sofa can work with solid curtains and a printed artwork collection.

    You do not have to match patterns exactly. In fact, maximalist interiors often look more interesting when patterns are intentionally different.

    The key is finding a shared characteristic. This might be color, scale, style, or even a common organic theme.

    For example, three different floral patterns can work together because they share botanical imagery even though their colors and sizes differ.

    You can also use pattern through smaller objects. Patterned lampshades, books, trays, ceramics, and decorative boxes can add interest without requiring major purchases.

    For Pinterest, a patterned room should still have a clear focal point. Choose the most visually powerful element and allow it to dominate.

    Avoid placing multiple competing statement pieces directly beside each other.

    For example, if you have dramatic floral wallpaper, choose relatively simple furniture. If the sofa has an elaborate pattern, use a quieter wall treatment.

    This balance allows maximalism to remain expressive without becoming exhausting.

    Pattern mixing is also an excellent way to personalize a room. You can combine traditional floral fabrics with modern geometric prints, vintage textiles with contemporary artwork, or global-inspired patterns with simple furniture.

    The result should feel collected rather than purchased as a single matching set.

    3. Decorate With a Jewel-Tone Maximalist Color Palette

    Jewel tones are perfect for creating dramatic and luxurious maximalist interiors. Emerald green, sapphire blue, ruby red, amethyst purple, deep teal, magenta, and rich amber can create a sophisticated environment when layered thoughtfully.

    Jewel tones work especially well in rooms where you want an intimate atmosphere. They can make large rooms feel more enclosed and dramatic while adding depth to smaller spaces.

    Start by choosing one dominant jewel tone. Emerald green is an especially versatile choice because it works well with gold, pink, blue, cream, and wood.

    Next, choose one or two complementary jewel tones.

    For example, an emerald green sofa could be paired with sapphire blue cushions, burgundy artwork, and brass lighting.

    You can also combine jewel tones with warm neutrals. Cream walls, walnut furniture, and colorful textiles create a sophisticated foundation.

    Materials and Things You Need

    • Jewel-tone paint
    • Velvet sofa
    • Colorful cushions
    • Rich curtains
    • Patterned rug
    • Brass accessories
    • Artwork
    • Ceramic decor
    • Statement lamp
    • Wood furniture
    • Plants

    Step-by-Step Jewel-Tone Styling

    Choose your dominant jewel tone.

    Apply it to a focal element.

    Add one complementary jewel shade.

    Introduce a warm neutral.

    Use metallic or natural materials for balance.

    Repeat colors throughout the room.

    Add patterns after the main palette is established.

    Velvet is particularly effective with jewel tones because its texture reflects light and creates visual depth.

    An emerald velvet sofa can become an instant focal point. Pair it with a patterned rug containing small amounts of green and another accent color.

    Blue walls can be paired with mustard furniture or warm wood.

    Deep burgundy can work beautifully with cream, brown, brass, and dusty pink.

    Purple can be softened with lavender, beige, and warm white.

    The key is not to make every element equally saturated.

    Use deeper colors in larger areas and brighter colors as accents.

    For example, dark teal walls can provide a dramatic background while pink cushions and gold accessories add energy.

    Natural wood can also prevent jewel tones from feeling too formal.

    Plants provide another excellent contrast. Greenery works naturally with blue, purple, burgundy, and teal.

    Lighting should be warm. Soft lamps can make jewel tones appear rich and sophisticated during the evening.

    For Pinterest, jewel-tone maximalism works particularly well when photographed with warm lighting and layered textures.

    Try combining velvet, wood, brass, ceramic, and patterned textiles.

    The result can feel luxurious without requiring expensive furniture.

    One of the advantages of jewel tones is that they can make ordinary pieces appear more dramatic. A simple chair becomes much more interesting when upholstered in deep green or blue.

    If you are unsure about committing to dark walls, start with furniture and textiles.

    Colorful curtains, cushions, rugs, and artwork can create the same atmosphere while remaining easier to change.

    4. Build a Colorful Gallery Wall Full of Personality

    A gallery wall is one of the most effective ways to express maximalist personality. Instead of choosing one artwork and leaving the rest of the wall empty, you can create a collection of paintings, photographs, prints, mirrors, illustrations, and decorative objects.

    The goal is not perfect matching. The goal is visual connection.

    Start by choosing a theme or color direction. Your gallery wall might contain botanical artwork, travel photography, vintage posters, abstract paintings, family photographs, or a mixture of several types.

    Color can become the unifying factor.

    If the room contains emerald green and pink, choose artwork that repeats those shades.

    Frame styles can also be mixed. Gold, wood, black, colorful, and antique-style frames can all work together in maximalist interiors.

    Materials and Things You Need

    • Framed artwork
    • Prints
    • Photographs
    • Mirrors
    • Decorative plates
    • Small textile pieces
    • Picture frames
    • Measuring tape
    • Level
    • Hanging hardware
    • Paper templates

    Step-by-Step Gallery Wall Process

    Collect more artwork than you initially think you need.

    Lay everything on the floor.

    Experiment with different arrangements.

    Create a rough visual balance.

    Mix large and small pieces.

    Include different frame styles.

    Use paper templates on the wall before hanging.

    Install the pieces carefully.

    A gallery wall should have both structure and spontaneity.

    You can create a grid if you prefer organization, or use an eclectic arrangement with varying spaces between pieces.

    For maximalism, the eclectic arrangement is particularly effective.

    Include unexpected objects such as a small mirror, decorative plate, textile, pressed botanical, or sculptural wall piece.

    Do not make every frame the same color.

    The variation contributes to the collected feeling.

    However, repeat colors throughout the gallery so it does not appear completely random.

    For example, a wall may contain gold frames, green artwork, pink prints, blue photography, and neutral illustrations.

    If the room already contains strong patterns, keep some artwork simpler.

    The gallery wall should complement the furniture rather than overwhelm it.

    A gallery wall above a colorful sofa can create an impressive focal point.

    In a dining room, it can create a conversation-starting feature.

    In a bedroom, it can add personality around the headboard.

    For Pinterest, gallery walls are highly visual and save-worthy because they provide many styling ideas in one image.

    The most important thing is to display objects that actually mean something to you.

    Maximalism becomes much more compelling when it tells a story.

    A collection of travel photographs, inherited artwork, favorite illustrations, and vintage finds will naturally feel more personal than a wall filled with generic prints.

    5. Mix Vintage and Modern Furniture for an Eclectic Maximalist Look

    Colorful maximalism becomes especially interesting when old and new furniture are combined. Instead of purchasing everything from the same collection, mix pieces with different shapes, materials, periods, and finishes.

    A modern sofa can work beautifully with a vintage wooden cabinet. A contemporary coffee table can sit beside an antique armchair. A traditional dresser can become interesting when paired with a modern colorful lamp.

    The key is finding one or two connecting elements.

    Color is one option. A vintage chair can be reupholstered in a fabric that matches the modern sofa.

    Shape is another. Rounded furniture can soften a room filled with straight lines.

    Material can also create connections. Wood, brass, glass, or ceramic can appear in both vintage and modern pieces.

    Materials and Things You Need

    • Modern sofa
    • Vintage chair
    • Antique cabinet
    • Contemporary coffee table
    • Wooden furniture
    • Brass accessories
    • Colorful upholstery
    • Decorative mirror
    • Vintage artwork
    • Modern lighting

    Step-by-Step Eclectic Styling

    Begin with your largest furniture piece.

    Add one vintage or antique element.

    Introduce a modern piece with a different shape.

    Connect them through color.

    Add textiles to soften the contrast.

    Introduce artwork that contains both traditional and contemporary influences.

    Use lighting to create a focal point.

    Do not attempt to make every piece look as though it belongs to the same period.

    The contrast is the point.

    A colorful vintage armchair can become the focal point in an otherwise modern living room.

    An antique cabinet can provide character against a brightly painted wall.

    A modern sculptural lamp can make an old wooden table feel fresh.

    For maximalist decorating, imperfections can be valuable. Vintage furniture may have visible wear, unusual shapes, or slightly different finishes. These characteristics create authenticity.

    If you find a secondhand piece with an unattractive color, consider whether it could be painted or reupholstered.

    Colorful upholstery is an excellent way to transform vintage furniture.

    For example, a traditional chair covered in emerald velvet can become a dramatic maximalist accent.

    A vintage dresser painted deep blue can provide contrast against warm walls.

    For Pinterest, mixing furniture styles creates a collected and aspirational look.

    However, avoid adding too many large furniture pieces. The room still needs circulation and practical functionality.

    Use accessories to create additional layers instead.

    A modern lamp, vintage vase, colorful books, patterned cushions, and botanical artwork can connect furniture from different periods.

    The finished space should feel as though it has evolved over time rather than being purchased all at once.

    6. Create a Maximalist Bedroom With Colorful Bedding and Layered Textiles

    The bedroom is one of the easiest rooms to transform with colorful maximalist decor because textiles provide endless opportunities for color and pattern.

    Start with the bed because it is naturally the room’s focal point.

    Instead of choosing a completely neutral bedding set, experiment with color.

    A cobalt blue duvet can be paired with mustard cushions, pink blankets, and patterned sheets.

    Alternatively, use a floral duvet with striped pillows and a solid jewel-tone throw.

    The secret is layering.

    Combine different patterns, but make sure they share at least one color.

    Materials and Things You Need

    • Colorful duvet
    • Patterned sheets
    • Decorative pillows
    • Quilted blanket
    • Throw
    • Bed runner
    • Patterned rug
    • Colorful curtains
    • Artwork
    • Table lamps
    • Decorative objects
    • Plants

    Step-by-Step Bedroom Styling

    Choose a dominant color.

    Select bedding in that shade.

    Add a contrasting throw.

    Introduce patterned pillows.

    Add a rug that connects the colors.

    Use curtains to create another layer.

    Decorate the bedside tables.

    Add artwork.

    Finish with plants or decorative objects.

    A maximalist bedroom should feel abundant but still restful.

    If you choose very bright bedding, keep the wall color slightly calmer.

    Alternatively, if the walls are bold, use bedding with several complementary colors rather than adding another competing color.

    Wallpaper can also be extremely effective behind the bed.

    Floral, botanical, geometric, and vintage-inspired wallpapers work beautifully with maximalist bedding.

    You can also use a colorful headboard.

    Velvet headboards in emerald, mustard, burgundy, blue, or pink can become dramatic focal points.

    Lighting should remain warm and comfortable.

    Use table lamps or wall sconces to create softer illumination in the evening.

    For Pinterest, layer the bed generously while keeping the surrounding furniture relatively organized.

    A colorful bed against patterned wallpaper can create a strong visual story.

    Add artwork above the bed only if it does not compete with the wallpaper.

    Plants can introduce another layer of green and help soften the abundance of patterns.

    Maximalist bedrooms are especially good for expressing personality.

    You can incorporate travel textiles, vintage cushions, handmade blankets, colorful artwork, and collections of objects.

    The bedroom should ultimately remain comfortable.

    Avoid using fabrics that are difficult to maintain or decorative pieces that interfere with everyday use.

    A successful maximalist bedroom feels like a colorful retreat rather than a chaotic collection.

    7. Use Colorful Kitchen Cabinets to Transform the Heart of the Home

    The kitchen is often dominated by neutral cabinetry, but colorful cabinets can turn the space into one of the most memorable rooms in the home.

    Deep green, blue, burgundy, mustard, teal, terracotta, and even soft pink can create beautiful kitchens when combined with the right materials.

    If you are renovating, cabinet color can become the main design feature.

    If you are working with an existing kitchen, you can introduce color through smaller elements instead.

    Painted cabinet doors, colorful bar stools, patterned backsplash tiles, bright appliances, textiles, artwork, and open shelving can all contribute to maximalist style.

    Materials and Things You Need

    • Colored cabinet paint where appropriate
    • Cabinet hardware
    • Colorful bar stools
    • Patterned backsplash
    • Open shelves
    • Ceramic dishes
    • Colorful cookware
    • Kitchen textiles
    • Artwork
    • Plants
    • Pendant lights

    Step-by-Step Kitchen Styling

    Choose your cabinet or accent color.

    Test samples in the actual kitchen lighting.

    Select hardware that complements the color.

    Choose a backsplash that does not compete excessively.

    Add colorful accessories.

    Introduce artwork.

    Use plants to soften hard surfaces.

    Finish with warm lighting.

    A green kitchen can work beautifully with brass hardware, cream walls, natural wood, and colorful ceramics.

    Blue cabinets can be paired with warm wood, patterned tiles, and terracotta accessories.

    Pink cabinets can become sophisticated when combined with muted green, brass, marble-look surfaces, or natural wood.

    If you are not ready to repaint cabinets, start with accessories.

    Colorful ceramic plates displayed on open shelves can immediately introduce maximalist energy.

    Patterned curtains or a colorful runner can also change the atmosphere.

    For Pinterest, open shelving is particularly useful because it allows colorful collections to become part of the decor.

    However, avoid displaying every kitchen item.

    Choose the pieces with the strongest visual appeal.

    Ceramic bowls, colorful glassware, vintage plates, cookbooks, wooden boards, and small plants can create a curated display.

    The kitchen should still remain practical.

    Keep everyday work areas relatively clear.

    Maximalist kitchens work best when visual abundance is concentrated in selected areas.

    The result should feel joyful and collected rather than cluttered.

    8. Transform Your Dining Room With Color, Pattern, and Statement Lighting

    A dining room is an excellent place to experiment with maximalist decor because it can handle stronger colors and patterns without requiring the same level of calm as a bedroom.

    Start with the dining table and chairs.

    You can choose a colorful dining table or use chairs as the primary color feature.

    Mismatched dining chairs can create an eclectic effect.

    For example, combine wooden chairs with upholstered chairs in different colors that share a common palette.

    The walls can also become a major focal point.

    Patterned wallpaper is particularly effective in dining rooms because it creates an immersive atmosphere.

    Materials and Things You Need

    • Dining table
    • Colorful chairs
    • Patterned wallpaper
    • Area rug
    • Statement pendant
    • Colorful tableware
    • Table runner
    • Artwork
    • Decorative mirror
    • Vase
    • Flowers or greenery

    Step-by-Step Dining Room Transformation

    Choose a dominant wall or furniture color.

    Add seating in complementary colors.

    Introduce a statement light.

    Select a patterned rug.

    Add colorful tableware.

    Create a centerpiece.

    Hang artwork or a mirror.

    Repeat colors through smaller accessories.

    A statement chandelier or pendant can become the visual centerpiece.

    Choose a fixture with an interesting shape, color, or material.

    For example, a sculptural glass pendant can contrast beautifully with colorful walls.

    A brass fixture can provide warmth against deep blue or green.

    Table styling should remain flexible.

    For everyday use, a colorful vase and simple greenery may be enough.

    For entertaining, introduce patterned plates, linen napkins, candles, and decorative serving pieces.

    The dining room can also become an excellent place to display collections.

    A wall of vintage plates, framed botanical artwork, or colorful paintings can create a memorable backdrop.

    For Pinterest, consider photographing the room with the table beautifully arranged.

    Colorful dishes, flowers, patterned textiles, and statement lighting create a strong visual composition.

    Do not forget the floor.

    A patterned rug can connect all the colors in the room.

    If the walls are already highly patterned, choose a rug with a simpler design.

    The goal is to create layers without allowing one element to completely dominate everything else.

    A colorful dining room can make everyday meals feel more special and encourage people to gather.

    9. Turn Open Shelving Into a Colorful Maximalist Display

    Open shelving provides an opportunity to turn everyday objects into decorative elements. Books, ceramics, artwork, plants, glassware, baskets, photographs, and collections can all become part of the room’s design.

    The biggest mistake is filling every shelf completely.

    Maximalism requires abundance, but visual organization is still necessary.

    Start by choosing a color story.

    For example, a shelf might feature blue, green, yellow, and cream.

    Then arrange objects according to height and shape.

    Place taller objects behind smaller pieces.

    Mix horizontal stacks of books with vertical objects.

    Introduce plants to soften the arrangement.

    Materials and Things You Need

    • Floating shelves
    • Books
    • Ceramic vases
    • Artwork
    • Small sculptures
    • Plants
    • Baskets
    • Decorative boxes
    • Photographs
    • Collectibles
    • Colorful glassware

    Step-by-Step Shelf Styling

    Clear the shelves.

    Group your objects by color.

    Place large pieces first.

    Add books.

    Introduce plants.

    Add smaller accessories.

    Repeat colors across different shelves.

    Leave small areas of empty space.

    Do not place every object directly beside another.

    Visual breathing space helps the collection look intentional.

    You can also create mini compositions on each shelf.

    For example, combine a stack of books with a vase and small plant.

    On another shelf, place a framed artwork beside a sculpture and ceramic bowl.

    Vary the height between these groupings.

    For maximalist interiors, shelves can display collections that might otherwise remain hidden.

    Vintage cameras, pottery, travel souvenirs, colorful books, framed photographs, or collected objects can become meaningful decorations.

    The key is editing.

    Even maximalist shelves benefit from removing items that do not contribute to the overall composition.

    For Pinterest, colorful shelves are highly useful because they provide viewers with many styling details to discover.

    You can also change the display seasonally.

    Autumn might introduce rust-colored ceramics and dried branches.

    Spring could bring botanical prints and lighter colors.

    Winter could include deeper shades and warm textures.

    Shelving is particularly useful in small homes because it uses vertical space.

    Instead of filling the floor with furniture, move some decorative storage upward.

    The result is a colorful display that combines personality and functionality.

    10. Create a Complete Colorful Maximalist Home With a Cohesive Color Story

    The final step in creating colorful maximalist decor is connecting all the individual rooms into one cohesive home. Maximalism allows different rooms to have different personalities, but repeating colors, materials, patterns, and design details helps the entire home feel intentional.

    Start by creating a whole-home color palette.

    Choose approximately three to five main colors.

    You do not need to use all of them equally in every room.

    Instead, allow different colors to dominate different spaces while repeating small amounts throughout the home.

    For example, your main palette could include emerald green, cobalt blue, mustard yellow, coral, and warm cream.

    The living room might emphasize emerald and cream.

    The bedroom could focus on cobalt and coral.

    The dining room might use mustard and green.

    The hallway could introduce artwork containing all five shades.

    This creates variety without losing cohesion.

    Materials and Things You Need

    • Colorful paint
    • Patterned wallpaper
    • Colorful furniture
    • Rugs
    • Curtains
    • Cushions
    • Artwork
    • Decorative objects
    • Plants
    • Statement lighting
    • Books
    • Vintage accessories
    • Storage baskets

    Step-by-Step Whole-Home Plan

    Start by choosing your main color palette.

    Create a mood board or collect inspiration images.

    Decide which color dominates each room.

    Repeat at least one color between neighboring spaces.

    Use similar materials throughout the home.

    Repeat wood, brass, ceramic, or woven elements.

    Add artwork that connects different color schemes.

    Use lighting consistently.

    Edit objects that feel completely disconnected.

    The hallway is particularly useful for creating transitions.

    If one room is dominated by blue and another by green, artwork or accessories in the hallway can contain both colors.

    This creates a visual bridge.

    Flooring also contributes to cohesion.

    If you have different rugs throughout the home, choose designs that share colors or materials.

    Furniture does not have to match.

    In fact, colorful maximalism benefits from variety.

    However, there should be some repeating elements.

    For example, brass hardware might appear in the kitchen, living room lamps, and dining room lighting.

    Wood might appear in furniture throughout the home.

    Greenery can be repeated in different rooms.

    This repetition creates rhythm.

    The biggest mistake in maximalist decorating is assuming that every surface needs decoration.

    Instead, think about visual hierarchy.

    Some rooms can be dramatic while others provide breathing space.

    A maximalist hallway might contain bold wallpaper and a gallery wall, while the bedroom uses softer colors and layered textiles.

    This creates a more comfortable overall home.

    For Pinterest, a cohesive maximalist home is especially compelling because every room offers new inspiration while the overall design still feels connected.

    The goal is not to create identical rooms.

    The goal is to create a home that feels like one person’s creative world.

    Colorful maximalism works best when it reflects your personality.

    Display things you love.

    Mix old and new.

    Experiment with unexpected combinations.

    Use color confidently.

    But always leave enough room for the home to function.

    Final Conclusion

    Colorful maximalist decor is ultimately about creating a home that feels expressive, joyful, collected, and personal. It gives you permission to move beyond safe neutral interiors and experiment with colors, patterns, textures, artwork, furniture, plants, and objects that genuinely make you happy.

    The most successful maximalist rooms are not simply full. They are layered with intention.

    A bold color-blocked living room creates a strong foundation. Pattern mixing adds visual energy. Jewel tones bring drama and richness. Gallery walls tell stories. Vintage and modern furniture create contrast. Colorful bedrooms become personal retreats. Kitchens and dining rooms can become playful focal points, while open shelving provides opportunities to display collections.

    The key to making all of these ideas work is balance.

    Repeat colors instead of randomly introducing new ones. Vary pattern scale instead of placing equally strong prints everywhere. Combine different textures to create depth. Use neutral elements strategically to give the eye a place to rest.

    Most importantly, remember that maximalism is personal.

    There is no single correct color palette or furniture combination. Your home might feature emerald green and pink, cobalt blue and orange, mustard and burgundy, or an unexpected combination of several colors.

    Start small if you are nervous.

    Add colorful cushions.

    Introduce a patterned rug.

    Paint one wall.

    Create a gallery wall.

    Bring in a colorful chair.

    Style your shelves with objects you love.

    As your confidence grows, you can add larger elements such as wallpaper, colorful furniture, statement lighting, or painted cabinetry.

    The ultimate goal is to create a space that makes you smile when you walk through the door.

    Colorful maximalist decor is not about following rules. It is about turning your home into a visual expression of who you are.


  • Cozy Home Decor Ideas to Make Your Home Feel Warm & Inviting

    Cozy Home Decor Ideas to Make Your Home Feel Warm & Inviting

    A cozy home is more than a beautifully decorated space. It is a place that immediately makes you feel comfortable, relaxed, and welcome. The right combination of warm colors, soft textures, natural materials, thoughtful lighting, comfortable furniture, and personal details can completely change the atmosphere of a home. You do not need a large budget or a complete renovation to create this feeling. In many cases, a few intentional changes can make an ordinary room feel dramatically warmer and more inviting.

    Cozy home decor has become especially popular because people are increasingly looking for interiors that feel lived-in rather than overly perfect. A home should not look like a showroom where everything is untouchable. Instead, it should communicate comfort and personality. A soft throw casually placed over a sofa, books stacked on a coffee table, warm lamps glowing in the evening, natural wood furniture, textured cushions, and a beautiful rug can create an atmosphere that feels welcoming the moment someone walks through the door.

    One of the most important foundations of cozy decorating is color. Warm neutrals such as cream, beige, oatmeal, taupe, caramel, warm white, and soft brown create an excellent base. These shades are easy to combine and can make rooms feel calm without becoming boring. You can then introduce earthy accent colors such as sage green, terracotta, muted mustard, dusty rose, olive, rust, or chocolate brown. The goal is not necessarily to use many colors. Instead, choose a small palette and repeat it naturally throughout the room.

    Texture is equally important. A room can have beautiful furniture and still feel cold if every surface is smooth and hard. Layering textures creates visual warmth. Consider linen curtains, cotton cushions, knitted blankets, boucle chairs, wool rugs, woven baskets, velvet accents, ceramic accessories, and natural wood. These materials make the home more interesting while creating a sense of softness and comfort.

    Lighting may be one of the most powerful elements of cozy home decor. Bright overhead lighting can make an otherwise beautiful room feel harsh. Layered lighting is much more effective. Table lamps, floor lamps, wall sconces, pendant lights, candles, and subtle accent lighting can create different moods throughout the day. During the evening, switching off the main ceiling light and using several smaller warm light sources can completely transform the atmosphere.

    Furniture arrangement also matters. A cozy home encourages conversation and connection. In a living room, arrange seating so people can comfortably face one another rather than placing every piece against a wall. In a bedroom, position the bed as the visual focal point and create enough space around it for easy movement. In a dining area, use lighting and textiles to make meals feel more inviting.

    Natural materials can make a home feel grounded. Wood, rattan, wicker, stone, linen, cotton, wool, and ceramics bring an organic quality to interiors. Even if your home has a very modern design, adding a few natural pieces can prevent it from feeling too sterile. A wooden tray, woven basket, ceramic vase, or linen cushion can have a surprisingly large impact.

    Plants are another simple way to add warmth and life. A large leafy plant can fill an empty corner, while smaller plants can decorate shelves, windowsills, and side tables. If maintaining plants is difficult, choose low-maintenance varieties or use high-quality artificial greenery.

    Personal details are what make a cozy home feel truly yours. Family photographs, artwork, books, travel memories, handmade objects, collections, and sentimental pieces add character. Trends can provide inspiration, but personal objects create emotional warmth.

    Another important principle is balance. Cozy does not mean cluttered. Adding too many cushions, accessories, blankets, baskets, and decorations can make a room feel chaotic rather than relaxing. The strongest cozy interiors usually contain layers, but each layer has a purpose. There is enough decoration to create interest while maintaining open space and visual breathing room.

    The following ten ideas provide practical ways to make your home feel warmer and more inviting. They can be used individually or combined to create a complete cozy home makeover. Whether you are decorating a small apartment, refreshing a family home, updating a living room, or simply looking for affordable ways to make your space more welcoming, these ideas provide a flexible foundation.

    1. Layer Soft Textures Throughout Your Living Space

    One of the easiest ways to make a home feel cozy is to introduce layers of soft and tactile textures. Texture gives a room depth and warmth while making furniture and surfaces feel more inviting. A living room with a smooth sofa, bare floor, plain curtains, and empty coffee table may look clean, but it can also feel unfinished. Adding different textiles can immediately soften the atmosphere.

    Start with the sofa because it is usually the largest upholstered piece in the living room. Add a few cushions in different textures rather than choosing cushions that are all made from the same fabric. Linen, cotton, boucle, velvet, knitted, and woven cushions can work together when they share a coordinated color palette.

    Next, introduce a throw blanket. Place it casually over the arm or back of the sofa rather than folding it too perfectly. Chunky knitted throws are ideal for colder months, while lightweight cotton or linen throws can create a relaxed summer look.

    A rug is another important texture. A large area rug can visually connect the seating arrangement and provide softness underfoot. Wool, cotton, jute, and low-pile woven rugs each create different effects. Choose one that complements your lifestyle and maintenance needs.

    Curtains can contribute another layer. Linen-look or cotton curtains soften windows and can make the entire room feel more finished. Floor-length curtains can also make ceilings appear taller.

    Do not forget smaller surfaces. A woven basket beside the sofa can hold blankets, while a ceramic vase or wooden tray can add contrasting tactile elements to the coffee table.

    Materials and Things You Need

    • Textured cushions
    • Soft throw blankets
    • Area rug
    • Linen or cotton curtains
    • Woven baskets
    • Ceramic accessories
    • Wooden trays
    • Upholstered furniture
    • Decorative textiles
    • Optional floor cushions

    Step-by-Step Decorating Process

    First, choose a base color such as cream, beige, warm gray, or oatmeal.

    Next, add two or three different textures within that color family.

    Place cushions at different sizes and angles on the sofa.

    Add a throw blanket to create a relaxed appearance.

    Position an area rug beneath the main seating arrangement.

    Use curtains to soften the windows and introduce another textile layer.

    Finally, add one or two natural accessories such as a woven basket or wooden tray.

    The important thing is not to use every texture available. Instead, create contrast. Pair smooth cotton with chunky knit, woven material with velvet, or linen with wood.

    For example, a cream sofa can be styled with beige linen cushions, a caramel velvet cushion, an oatmeal knitted throw, and a natural wool rug. The colors remain calm while the different textures prevent the room from looking flat.

    Texture also changes with the seasons. During winter, introduce heavier blankets, wool rugs, velvet cushions, and thicker curtains. During spring and summer, replace them with lighter cotton, linen, and woven fabrics.

    This approach is particularly useful for renters because textiles can completely transform a room without changing walls or furniture. It is also budget-friendly because you can add pieces gradually.

    For a Pinterest-worthy appearance, focus on layering rather than clutter. A simple sofa with three beautifully coordinated cushions and one casually placed throw can look more inviting than a sofa covered with too many accessories.

    The final result should make people want to sit down, relax, and stay awhile.

    2. Create a Warm and Inviting Living Room With Soft Lighting

    Lighting can completely transform the emotional atmosphere of a home. A room that looks ordinary during the day can become warm and sophisticated in the evening simply through thoughtful lighting. Cozy home decor works best when lighting is layered instead of relying entirely on a bright central ceiling fixture.

    Start by considering your main light. If it feels harsh, choose a warmer bulb that is compatible with the fixture. A dimmer can also be useful where appropriate because it allows you to change the intensity depending on the time of day.

    Next, add table lamps. Place one on a side table beside the sofa or on a console table. Fabric shades are particularly effective because they diffuse the light and create a softer glow.

    Floor lamps can brighten dark corners while adding height to the room. Place one next to an accent chair, reading corner, or cabinet.

    Wall sconces are another option. They work especially well in areas where floor and table space is limited. Choose fixtures that complement the home’s decorating style rather than treating lighting as an afterthought.

    Small accent lights can be used to highlight artwork, shelving, plants, or architectural features. The purpose is not to make everything equally bright but to create several pools of light.

    Materials and Things You Need

    • Table lamps
    • Floor lamps
    • Wall sconces
    • Warm-compatible bulbs
    • Dimmable fixtures where suitable
    • Accent lamps
    • Decorative lanterns
    • Battery-operated candles
    • Lamp shades
    • Cable-management accessories

    Step-by-Step Lighting Plan

    Begin by identifying the areas where you naturally spend time.

    Place a table lamp near the sofa for reading or relaxing.

    Add a floor lamp to a darker corner.

    Use accent lighting to highlight artwork, plants, or shelving.

    If possible, use a dimmer for the main fixture.

    In the evening, turn off the central light and switch on the smaller lamps.

    Look around the room and identify areas that still feel excessively dark.

    Adjust the placement until the lighting feels balanced.

    Warm lighting generally works especially well with beige, brown, cream, terracotta, wood, and other earthy colors. It can make natural materials appear richer and textiles feel softer.

    Safety is important. Keep cords organized, ensure lamps are stable, follow bulb wattage requirements, and keep open flames away from curtains, furniture, and textiles.

    Lighting should also reflect how you use each room. A living room may need brighter lighting for cleaning or entertaining but softer illumination for movie nights. A dining area can benefit from a warm pendant light, while a hallway may only need subtle accent lighting.

    For Pinterest-style interiors, multiple warm lamps create depth and atmosphere. Imagine a cream sofa, wooden coffee table, soft rug, and two warm lamps glowing against neutral walls. The room immediately feels more inviting.

    You do not need expensive lighting fixtures to create this effect. Affordable lamps can look sophisticated when their shapes, materials, and colors coordinate with the rest of the room.

    The goal is to create a home that feels welcoming at different times of day. Good lighting should support your lifestyle rather than simply illuminate the room.

    3. Decorate With Warm Neutral Colors for a Calm and Cozy Home

    A warm neutral color palette provides one of the most versatile foundations for cozy home decor. Cream, beige, warm white, oatmeal, taupe, caramel, soft brown, and greige can make rooms feel calm while providing plenty of opportunities for texture and personality.

    Begin with the largest surfaces. Walls, large rugs, sofas, curtains, and major furniture pieces often establish the dominant color of a room. If you want flexibility, keep these elements relatively neutral.

    Warm white can create a bright and airy appearance while avoiding the cold feeling sometimes associated with stark white. Beige and oatmeal can create a softer, more traditional atmosphere. Taupe and warm gray provide slightly more depth.

    Once the base is established, add accent colors. Sage green, terracotta, rust, muted mustard, olive, dusty rose, or chocolate brown can all work beautifully with warm neutrals.

    The important thing is repetition. If you use terracotta in one cushion, repeat a small amount of that color elsewhere through artwork, a vase, a blanket, or another accessory.

    Materials and Things You Need

    • Warm neutral paint
    • Cream or beige curtains
    • Neutral sofa or slipcovers
    • Cushions
    • Throw blankets
    • Neutral rug
    • Wooden accessories
    • Ceramic decor
    • Earth-toned artwork
    • Accent pieces in sage, terracotta, olive, or brown

    Step-by-Step Color Planning

    Choose your main neutral.

    Select one secondary neutral that is slightly darker or lighter.

    Choose one or two accent colors.

    Apply the dominant color to the largest surfaces.

    Use the secondary shade through furniture and textiles.

    Add accent colors through smaller accessories.

    Repeat colors subtly throughout the room.

    For example, imagine a living room with warm white walls, a beige sofa, an oatmeal rug, light oak furniture, sage green cushions, and terracotta artwork. Nothing is overly bright, but the room still has personality.

    Texture is essential when using neutrals. Without texture, a beige room can become visually flat. Add wood, woven baskets, linen, wool, ceramic, boucle, and knitted materials.

    Warm neutral colors are also extremely adaptable. You can change the accent colors seasonally without repainting the room. Spring might feature sage green and soft pink, summer can introduce natural woven textures, autumn can bring rust and caramel, and winter can emphasize chocolate brown and deep olive.

    This flexibility makes neutral decorating particularly practical for people who enjoy changing their decor.

    For Pinterest, warm neutral interiors photograph beautifully because they create a calm visual palette. However, avoid making everything exactly the same color. Variation is what gives the room depth.

    A cozy home should feel layered rather than monochromatic. Combine light and dark neutrals, different textures, and small accent colors.

    The result is a timeless foundation that can support many decorating styles, including modern, farmhouse, Scandinavian, organic modern, rustic, traditional, and minimalist.

    4. Add a Large Area Rug to Make Rooms Feel Softer

    A rug can transform the atmosphere of a room almost instantly. It provides physical softness, absorbs sound, defines furniture arrangements, and introduces another layer of color and texture.

    In living rooms, the rug should ideally be large enough to connect the main seating pieces. A rug that is too small can make the furniture arrangement feel disconnected. If possible, position at least the front legs of major seating pieces on the rug.

    In bedrooms, a large rug beneath the bed can create a warm landing area when you get up in the morning. Runners can work well on either side of a bed in smaller rooms.

    Dining rooms can also benefit from rugs, although practical considerations such as cleaning and chair movement should be considered.

    Materials and Things You Need

    • Large area rug
    • Wool rug
    • Cotton rug
    • Jute or natural-fiber rug
    • Low-pile rug
    • Washable rug
    • Rug pad
    • Measuring tape
    • Optional rug grippers

    Step-by-Step Rug Styling

    Measure the room before purchasing a rug.

    Mark the desired rug area with painter’s tape if possible.

    Choose a size that supports the furniture arrangement.

    Select a color that complements the existing palette.

    Choose the material based on traffic and maintenance requirements.

    Use an appropriate rug pad underneath.

    Arrange furniture so the rug visually connects the main pieces.

    For a cozy look, textured rugs are especially effective. Wool can provide warmth and softness, while jute and woven natural fibers create an organic feeling.

    If you have children or pets, a washable or durable low-pile rug may be more practical than a delicate high-pile style.

    Pattern can also be used strategically. If the furniture and walls are relatively simple, a subtle patterned rug can add personality. If the room already contains patterned cushions, artwork, and curtains, a solid textured rug may create better balance.

    Rugs can also help separate zones in open-plan homes. A living area can be visually defined with one rug while a dining zone uses another complementary design.

    The color of the rug should generally connect with at least two or three other elements in the room. For example, a beige rug can echo the sofa and curtains while allowing darker wood furniture to stand out.

    For Pinterest-worthy styling, avoid choosing a rug simply because it looks beautiful by itself. Consider how it interacts with the entire room.

    A large rug can also make furniture feel more grounded. Instead of appearing like separate objects floating across the floor, the sofa, chairs, coffee table, and accessories become part of one cohesive arrangement.

    This simple addition is one of the most effective ways to make a room feel finished and inviting.

    5. Bring Natural Wood and Organic Materials Into Your Home

    Natural materials have a special ability to make interiors feel warm, grounded, and comfortable. Wood, rattan, wicker, linen, cotton, wool, bamboo, stone, and ceramic can soften modern spaces and give traditional rooms a more relaxed appearance.

    Wood is an excellent starting point. If your home already has wooden flooring or furniture, emphasize it rather than covering everything with textiles. If the room lacks wood, introduce smaller elements such as a coffee table, side table, bench, tray, picture frame, or decorative bowl.

    Different wood tones create different moods. Light oak can produce a Scandinavian or modern organic atmosphere, while walnut and darker woods can make a room feel richer and more traditional.

    Woven materials provide another layer. Rattan baskets can store blankets, wicker trays can organize coffee tables, and woven lampshades can create beautiful texture.

    Linen and cotton are ideal for soft furnishings. Linen curtains can filter daylight while creating a relaxed appearance. Cotton cushions and blankets provide comfort without making the room feel overly formal.

    Materials and Things You Need

    • Wooden coffee table
    • Wooden side tables
    • Rattan baskets
    • Wicker trays
    • Bamboo accessories
    • Linen curtains
    • Cotton cushions
    • Wool blankets
    • Ceramic vases
    • Natural-fiber rugs
    • Stone or wood decorative objects

    Step-by-Step Natural Decor Plan

    Begin by identifying which areas feel too cold or visually plain.

    Introduce one natural material into those areas.

    Add wood through furniture or smaller accessories.

    Use woven storage to combine organization with texture.

    Introduce linen or cotton through curtains and cushions.

    Add ceramic or stone accessories for contrast.

    Finish with a plant or natural branch arrangement if appropriate.

    The goal is balance. You do not need every object to be made from natural materials. In fact, too much of one material can make the room feel repetitive.

    Pair natural wood with soft textiles, ceramics with woven materials, and smooth surfaces with rougher textures.

    For example, a modern living room with a neutral sofa can become warmer through a light oak coffee table, rattan basket, linen cushions, wool rug, and ceramic vase.

    Plants can strengthen the natural aesthetic. A large leafy plant can create a focal point in an empty corner, while smaller plants can decorate shelves.

    If you prefer a minimalist home, choose only a few strong natural pieces rather than many accessories.

    Natural materials are also excellent for creating a timeless interior. They can work with modern, farmhouse, Scandinavian, rustic, coastal, traditional, and organic styles.

    For Pinterest, natural wood combined with cream textiles and warm lighting creates a particularly strong visual combination.

    The most successful cozy homes often include imperfections and variations in natural materials. Wood grain, woven fibers, handmade ceramics, and slightly irregular surfaces can make a room feel authentic rather than mass-produced.

    The result should feel warm, tactile, and connected to nature.

    6. Create a Cozy Conversation Area in the Living Room

    A cozy home should encourage people to sit, relax, talk, and spend time together. Furniture arrangement plays a major role in creating this feeling. Even beautiful furniture can feel uncomfortable when it is positioned solely around the television or pushed against walls without considering conversation.

    Start by identifying the primary purpose of your living room. If conversation is important, arrange seating so that people can comfortably see one another.

    A sofa can face two accent chairs, or a sectional can be paired with a small chair or ottoman. The coffee table should be positioned close enough to be practical but far enough away to allow comfortable movement.

    An area rug can visually connect all the seating pieces. Ideally, the main furniture should interact with the rug rather than appearing scattered around it.

    Materials and Things You Need

    • Comfortable sofa
    • Accent chairs
    • Ottoman
    • Coffee table
    • Side tables
    • Area rug
    • Cushions
    • Throw blankets
    • Floor lamp
    • Table lamp
    • Decorative tray
    • Books

    Step-by-Step Arrangement

    Begin with the largest seating piece.

    Position it so that it faces the main conversational area.

    Add one or two chairs opposite or beside the sofa.

    Place the coffee table centrally.

    Add a rug beneath the seating arrangement.

    Introduce side tables where people can place drinks or books.

    Add lamps to create evening warmth.

    Finish with cushions and throws.

    Avoid pushing every piece against the wall simply because it creates more open floor space. In many cases, pulling furniture slightly inward makes a room feel more intimate.

    The arrangement should also maintain clear walking paths. Cozy does not mean difficult to navigate.

    If the room is small, use a compact loveseat, small chairs, or multifunctional ottomans.

    If the room is large, create multiple conversation zones rather than leaving a huge empty center.

    A reading chair can form one small zone, while the main sofa arrangement provides space for family and guests.

    For Pinterest styling, create a visually balanced arrangement with a clear focal point. A coffee table decorated with a tray, books, ceramic vase, and small plant can become the center of the seating area.

    Lighting should be positioned so that every major seating zone has comfortable illumination.

    The biggest benefit of this approach is that the room becomes more functional. It is not simply beautiful; it encourages interaction.

    A cozy living room should make you want to sit down. Comfortable seating, accessible tables, soft textiles, and warm lighting all contribute to that feeling.

    7. Style Your Coffee Table With Cozy, Practical Decor

    The coffee table is a small surface, but it often sits at the center of the living room. Styling it thoughtfully can make the entire room feel more finished. However, the coffee table should remain functional. It needs to provide space for drinks, books, remotes, and everyday items.

    Start by clearing the surface. Then introduce a tray. A tray provides structure and helps small objects look intentional.

    Add a stack of books or magazines that you genuinely enjoy. Books are useful decorative elements because they bring color, personality, and visual height.

    Next, add one natural or handmade object such as a ceramic vase, small bowl, candle, or plant.

    You can introduce one seasonal element if desired. In autumn, a small arrangement of branches or warm-toned accessories can work beautifully. During spring, fresh flowers or greenery can create a lighter appearance.

    Materials and Things You Need

    • Decorative tray
    • Coffee-table books
    • Ceramic vase
    • Small plant
    • Candle or battery-operated candle
    • Decorative bowl
    • Small sculpture
    • Seasonal accessory

    Step-by-Step Styling

    Clear the table completely.

    Choose a tray that fits the size of the table.

    Place books inside or beside the tray.

    Add one taller object such as a vase.

    Add one smaller object for balance.

    Leave some empty space.

    Check that everyday items can still be placed comfortably.

    The most common mistake is overdecorating the coffee table. Too many objects create clutter and make the room less functional.

    Instead, think in terms of height and texture. A stack of books provides a low horizontal layer, while a vase provides height. A ceramic bowl adds another shape.

    The colors should connect with the rest of the room. If your sofa has sage green cushions, you might include a small green detail in the coffee-table arrangement.

    Natural materials work especially well here. A wooden tray, ceramic vase, woven object, and plant can create a warm composition without requiring many items.

    For Pinterest, coffee-table styling is most attractive when it looks natural rather than perfectly staged. A few books, a ceramic vase, and a small plant can communicate a relaxed lifestyle.

    You can also change the arrangement seasonally without buying new furniture.

    The key is to create a surface that feels decorated but still usable.

    8. Add Curtains That Make Every Room Feel Softer

    Curtains are often one of the most overlooked elements of cozy home decor. They soften windows, provide privacy, control natural light, and add vertical texture. The right curtains can also make a room appear taller and more finished.

    For a cozy look, choose fabrics such as linen, cotton, linen blends, or soft textured materials. Sheer curtains can filter daylight, while heavier curtains provide privacy and darkness.

    Warm neutral shades are versatile. Cream, oatmeal, beige, taupe, and soft gray can complement many decorating styles.

    Curtain length matters. Floor-length panels usually create a more elegant appearance than short curtains. Hanging the rod higher and wider than the window can make the window appear larger and the ceiling taller, provided the installation is appropriate for the space.

    Materials and Things You Need

    • Curtain panels
    • Curtain rod
    • Sheer curtains
    • Blackout curtains where needed
    • Curtain rings
    • Tiebacks
    • Measuring tape
    • Appropriate mounting hardware

    Step-by-Step Curtain Styling

    Measure the window and desired curtain height.

    Choose fabric based on privacy and lighting needs.

    Select a color that complements the room.

    Install the rod securely.

    Hang the curtains so they fall naturally.

    Layer sheer and heavier panels if desired.

    Adjust the fabric so it frames rather than hides the window.

    Curtains can also improve the acoustic feeling of a room by adding another soft surface.

    In bedrooms, blackout curtains can support darkness while sheer panels provide daytime softness.

    In living rooms, lightweight curtains can allow sunlight to filter through, creating a beautiful warm glow.

    For Pinterest-worthy interiors, slightly relaxed fabric often looks more inviting than extremely stiff or formal panels.

    Avoid overly complicated patterns if the room already has several strong decorative elements.

    Simple curtains can become an elegant backdrop for furniture and artwork.

    The result is a room that feels softer, warmer, and more complete.

    9. Bring Greenery Into Your Home for a Fresh and Cozy Feel

    Plants are one of the easiest ways to make a home feel alive. They add color, texture, height, and natural beauty while filling empty areas without creating the heaviness of excessive furniture.

    Start by identifying areas that feel empty. A large plant can transform an unused corner. Smaller plants can decorate shelves, consoles, windowsills, and side tables.

    Choose plants according to the amount of natural light available. Some plants require bright indirect light, while others tolerate lower-light environments. Consider maintenance requirements before purchasing.

    Planter choice also matters. Ceramic pots create a clean and timeless appearance, woven baskets create warmth, and terracotta pots create an earthy feeling.

    Materials and Things You Need

    • Indoor plants
    • Large floor planter
    • Small ceramic pots
    • Terracotta pots
    • Woven plant baskets
    • Plant stands
    • Decorative tray
    • Watering tools
    • Optional artificial greenery

    Step-by-Step Greenery Plan

    First, identify suitable areas based on available light.

    Choose plants appropriate for those conditions.

    Select planters that complement the home’s color palette.

    Place large plants in empty corners.

    Use smaller plants on shelves and tables.

    Vary plant heights to create visual interest.

    Avoid overcrowding surfaces.

    Plants can also be used to soften hard architectural lines. A tall plant beside a cabinet, for example, can balance the rigid shape of the furniture.

    Greenery works beautifully with natural wood, beige, cream, rattan, and woven materials.

    If you travel frequently or prefer low-maintenance decor, choose resilient plants or realistic artificial greenery.

    For Pinterest, a large leafy plant beside a cream sofa or wooden console creates an immediate sense of warmth.

    Do not place plants solely because there is an empty spot. Consider how their shape and height interact with the surrounding furniture.

    The best plant arrangements look natural rather than overly symmetrical.

    Greenery can also connect different rooms visually. Repeating similar plants or planter materials throughout the home creates cohesion.

    The overall goal is to bring a subtle sense of nature indoors.

    10. Create a Cozy Entryway That Welcomes Everyone Home

    The entryway is the first part of your home that people experience, so it deserves just as much attention as the living room or bedroom. A cozy entryway should feel organized, practical, and welcoming.

    Begin with storage. Hooks, baskets, cabinets, benches, or a console table can prevent shoes, bags, and coats from taking over the space.

    A small bench is particularly useful. It provides a place to sit while putting on shoes and can also introduce texture through an upholstered cushion.

    A runner can add warmth and guide people visually into the home. Choose a durable material appropriate for the amount of traffic.

    Lighting is also important. If the entryway has limited natural light, use a wall sconce, pendant, or table lamp where appropriate.

    Materials and Things You Need

    • Entryway bench
    • Console table
    • Wall hooks
    • Storage baskets
    • Shoe cabinet
    • Runner rug
    • Mirror
    • Table lamp or wall sconce
    • Small plant
    • Decorative tray
    • Artwork

    Step-by-Step Entryway Makeover

    Begin by removing unnecessary items.

    Add practical storage for shoes, coats, and bags.

    Place a bench if the space allows.

    Add a mirror to create depth and provide a final appearance check before leaving.

    Introduce a runner to soften the floor.

    Add warm lighting.

    Place a small plant or decorative object.

    Keep the surface of the console relatively clear.

    A mirror can be particularly effective in a small entryway because it reflects light and creates a sense of greater depth.

    A wooden console can introduce natural warmth, while a woven basket can store everyday accessories.

    Avoid making the entryway too decorative. It needs to remain functional because it is a high-traffic area.

    For Pinterest-worthy styling, create a simple composition: a console, mirror, small lamp, plant, basket, and warm runner.

    The entryway should communicate the style of the rest of the home. If your living room uses warm neutrals and natural wood, repeat those elements near the entrance.

    This creates continuity and makes the home feel thoughtfully designed from the moment someone walks inside.

    11. Create a Cozy Reading Nook in an Empty Corner

    An unused corner can become one of the most inviting areas in your home when you turn it into a cozy reading nook. Instead of allowing an empty corner to collect clutter or remain visually unfinished, transform it into a small retreat where you can read, enjoy your morning coffee, listen to music, or simply relax.

    A reading nook does not require a large room. Even a small space beside a window, near a bookshelf, or in the corner of a bedroom can work beautifully. The most important elements are comfortable seating, soft lighting, a small surface, and textiles that make the area feel warm.

    Start with the seating. A comfortable armchair is ideal, but you can also use a compact lounge chair, upholstered bench, floor cushion, or small loveseat depending on the available space. Choose a fabric that adds texture, such as boucle, linen, cotton, or velvet.

    Next, add a soft throw blanket. A knitted or woven blanket immediately communicates comfort and makes the chair look more inviting.

    Lighting is essential. If the nook is beside a window, take advantage of natural daylight during the day. For evenings, add a floor lamp or small table lamp. A warm light source creates a peaceful atmosphere without overwhelming the rest of the room.

    A small side table can hold books, a cup of tea, glasses, or decorative objects. If floor space is limited, consider a narrow pedestal table or wall-mounted shelf.

    Materials and Things You Need

    • Comfortable armchair
    • Lounge chair or small bench
    • Soft throw blanket
    • Decorative cushion
    • Floor lamp or table lamp
    • Small side table
    • Books
    • Small rug
    • Plant
    • Basket
    • Decorative tray

    Step-by-Step Decorating Process

    First, identify an unused corner that receives reasonable natural light.

    Measure the area so your furniture does not block walking paths.

    Place your chair or seating piece at a comfortable angle.

    Add a small rug underneath or in front of the chair.

    Place a side table within easy reach.

    Add a warm lamp for evening use.

    Layer one cushion and one throw blanket onto the chair.

    Finish with a small plant, books, or another personal accessory.

    Avoid filling the entire corner with decorations. The purpose of a reading nook is relaxation, so leave enough space around the furniture.

    For a Pinterest-inspired look, position the chair near a window with a soft neutral cushion, knitted throw, wooden side table, warm floor lamp, and small plant. This combination creates a simple but highly inviting composition.

    You can also adapt the concept to different decorating styles. A Scandinavian reading nook might use light wood and cream textiles. A rustic nook could include a leather chair, reclaimed wood table, and woven basket. A modern organic version might combine boucle upholstery, oak furniture, beige textiles, and greenery.

    The most important thing is comfort. Choose a chair you genuinely enjoy sitting in rather than selecting furniture only because it looks attractive.

    A reading nook also adds personality to a home. It communicates that the space is designed not only to look beautiful but to support relaxing everyday activities.

    12. Decorate With Candles and Warm Ambient Accessories

    Candles and ambient accessories can add an immediate sense of warmth to a room. Their soft glow creates an intimate atmosphere, particularly during evenings when natural daylight disappears. Even if you prefer modern or minimalist decor, a few carefully chosen ambient accessories can make your home feel significantly more inviting.

    If using real candles, always place them on stable, heat-resistant surfaces and keep them away from curtains, bedding, paper, children, pets, and other flammable materials. Battery-operated candles are an excellent alternative when you want the visual effect without an open flame.

    Begin by selecting a few areas where ambient lighting will have the greatest effect. A coffee table, console, fireplace mantel, dining table, bedroom dresser, or bathroom shelf can all work well.

    Avoid placing too many candles together. Instead, create small groups with different heights and shapes.

    A decorative tray can help organize candles while preventing the arrangement from appearing scattered. Add a ceramic vase, small bowl, or natural element such as dried branches to complete the composition.

    Materials and Things You Need

    • Candles
    • Battery-operated candles
    • Candle holders
    • Decorative tray
    • Ceramic vase
    • Small bowl
    • Dried branches
    • Small plant
    • Lantern
    • Decorative books

    Step-by-Step Styling Process

    Choose one or two surfaces for your ambient arrangement.

    Place a decorative tray as the foundation.

    Add one taller candle or lantern.

    Introduce one or two smaller candles.

    Add a ceramic or wooden accessory for texture.

    Include a small natural element if desired.

    Leave enough empty space around the arrangement.

    For real candles, follow all safety instructions and never leave them burning unattended.

    You can also create seasonal arrangements. During autumn, combine warm-toned candles with wood, dried leaves, and ceramic accessories. During winter, use ivory candles, evergreen branches, and textured materials. In spring, lighter colors and fresh greenery can create a brighter feeling.

    Candles are especially effective when combined with other sources of warm lighting. For example, a living room with a floor lamp, table lamp, and subtle candlelight can feel much warmer than one illuminated only by an overhead fixture.

    The key is restraint. Cozy does not mean covering every surface with candles.

    A single beautiful lantern beside an armchair can be enough to create atmosphere.

    For Pinterest, candle arrangements work particularly well when paired with natural materials. Think wooden trays, ceramic vessels, cream textiles, woven baskets, and warm neutral colors.

    You can also incorporate scented candles if you enjoy fragrance, but choose scents that complement the mood you want to create. Soft vanilla, sandalwood, cedar, amber, or subtle floral fragrances can contribute to a relaxing environment.

    The overall goal is to create a home that feels softer and more peaceful as evening arrives.

    13. Use an Accent Wall to Create a Warm Focal Point

    An accent wall is a simple way to introduce personality and depth without changing the entire room. Instead of painting every wall a different color, choose one strategic surface and make it the focal point.

    In a living room, an accent wall can sit behind the sofa, fireplace, television area, or bookshelf. In a bedroom, the wall behind the bed is usually the strongest choice.

    For cozy interiors, warm earthy colors are particularly effective. Consider muted terracotta, warm beige, olive green, sage, chocolate brown, dusty rose, clay, or deep taupe.

    If you prefer a lighter room, a warm cream or slightly deeper beige can create subtle contrast without becoming dramatic.

    Paint is not the only option. You can also create an accent wall using wood paneling, wallpaper, limewash-inspired finishes, textured wall treatments, or a gallery arrangement.

    Materials and Things You Need

    • Interior paint
    • Paint rollers
    • Brushes
    • Painter’s tape
    • Drop cloth
    • Primer if needed
    • Wallpaper if preferred
    • Wood panels if appropriate
    • Measuring tape
    • Level
    • Decorative artwork

    Step-by-Step Accent Wall Process

    First, decide which wall should become the focal point.

    Observe the room’s existing lighting because natural and artificial light can change how colors appear.

    Choose a shade that complements your furniture and textiles.

    Test the color before committing to the entire wall.

    Prepare the surface and protect surrounding areas.

    Paint according to the product instructions.

    Allow the finish to dry properly.

    Reintroduce furniture and accessories while keeping the wall as the visual focus.

    Avoid choosing an accent color that has no connection to the rest of the room. Instead, repeat the shade through smaller accessories.

    For example, a sage green wall can be connected to the rest of the room through green cushions, artwork, plants, or a ceramic vase.

    A terracotta wall can work beautifully with cream furniture, natural wood, beige textiles, and brass or black accents.

    Accent walls are particularly effective because they create visual hierarchy. Rather than every wall competing for attention, one surface becomes the main feature.

    For Pinterest-style interiors, a warm accent wall behind a beautifully styled sofa or bed can create an immediate focal point.

    If you are renting, consider removable wallpaper or large textile wall hangings where appropriate.

    Another option is a gallery wall. Instead of changing the wall color, arrange artwork, photographs, and decorative objects to create a strong visual area.

    The best accent wall should enhance the architecture and furniture rather than simply add color.

    If the room already contains many patterns, choose a relatively subtle wall treatment. If the furniture is simple, a richer wall can provide much-needed personality.

    14. Make Your Dining Area Feel Warm and Welcoming

    The dining area is one of the most meaningful spaces in a home because it is often where people gather for meals, conversations, celebrations, and everyday routines. A cozy dining area should therefore feel comfortable rather than overly formal.

    Begin with the dining table. Natural wood is particularly effective for creating warmth, but you can soften glass, metal, or painted tables with textiles and natural accessories.

    Comfortable chairs are equally important. If the chairs feel uncomfortable, people are less likely to linger after meals. Cushions can provide additional comfort while introducing color and texture.

    Lighting should be positioned around the table. A pendant light or chandelier can create a strong focal point, especially when paired with warm illumination.

    A centerpiece can make the table feel finished. Instead of creating an elaborate arrangement, use a low vase, ceramic bowl, candles, or seasonal greenery.

    Materials and Things You Need

    • Dining table
    • Comfortable dining chairs
    • Seat cushions
    • Table runner
    • Linen napkins
    • Ceramic dishes
    • Wooden serving boards
    • Vase
    • Fresh or dried greenery
    • Warm pendant light
    • Candles or safe LED alternatives
    • Area rug if appropriate

    Step-by-Step Dining Room Styling

    Begin by positioning the dining table so there is enough room to move comfortably around it.

    Choose comfortable seating.

    Add cushions if needed.

    Introduce a rug if the space and lifestyle make one practical.

    Install or position warm lighting above the table.

    Choose a simple centerpiece.

    Add linen or cotton textiles.

    Use natural materials such as wood, ceramic, or woven accessories.

    Keep the tabletop functional enough for everyday meals.

    A cozy dining table does not need to be perfectly decorated every day. In fact, leaving some areas clear makes the room feel more practical.

    For everyday styling, a ceramic vase with greenery can be enough.

    For special occasions, add candles, linen napkins, a table runner, and attractive serving pieces.

    The color palette should connect with nearby rooms. If your living room uses cream, wood, and sage green, repeat those colors subtly in the dining area.

    An area rug can help define the dining zone in an open-plan home, but make sure chairs can move easily without catching on the edge.

    For Pinterest, a wooden dining table surrounded by comfortable chairs, warm pendant lighting, simple ceramics, greenery, and neutral textiles creates an inviting visual.

    The dining area should communicate togetherness rather than perfection.

    Small details can make a significant difference. A bowl of seasonal fruit, handmade ceramic plates, a linen runner, or wooden serving board can make an ordinary meal feel more special.

    The ultimate goal is to create a dining space where people naturally want to sit longer and enjoy each other’s company.

    15. Create a Cozy Bedroom With Layered Bedding and Soft Textiles

    The bedroom should be one of the most comfortable rooms in the home, and layered bedding is one of the easiest ways to achieve that feeling. A beautifully styled bed immediately becomes the focal point while also creating an atmosphere of softness and relaxation.

    Begin with comfortable sheets. Cotton and linen are popular choices because they provide a breathable and natural feeling. Choose colors that complement the rest of your bedroom.

    Next, add a duvet or quilt. For a cozy appearance, select a slightly relaxed texture rather than something that looks overly stiff.

    Layer a blanket across the lower third of the bed. A knitted blanket, quilt, waffle throw, or soft woven cover can add texture.

    Pillows should be layered from largest to smallest. Start with sleeping pillows, then add larger decorative pillows and one or two smaller cushions.

    Avoid using so many pillows that the bed becomes difficult to use. The arrangement should look inviting while remaining practical.

    Materials and Things You Need

    • Cotton or linen sheets
    • Duvet
    • Quilt
    • Comforter
    • Knitted throw
    • Woven blanket
    • Sleeping pillows
    • Decorative cushions
    • Pillow covers
    • Bedside lamps
    • Soft bedroom rug
    • Curtains

    Step-by-Step Bed Styling

    Start with clean, comfortable sheets.

    Add the duvet or comforter.

    Fold a blanket across the lower portion of the bed.

    Arrange sleeping pillows at the back.

    Add larger decorative pillows.

    Finish with one or two smaller cushions.

    Place a throw casually at the foot or corner.

    Balance the colors with the rest of the bedroom.

    The secret to a cozy bed is layering. Instead of choosing one blanket and one pillow style, combine several complementary textures.

    For example, cream cotton sheets can be paired with a beige linen duvet, oatmeal knitted throw, boucle cushions, and a taupe quilt.

    The colors remain neutral while the textures create depth.

    You can also change the layers according to the season. In colder weather, use wool, chunky knits, heavier quilts, and thicker blankets. During warmer months, use lightweight cotton and linen.

    Warm bedside lighting can complete the look. Matching lamps create symmetry, while slightly different accessories can make the room feel more personal.

    Curtains should also contribute to the atmosphere. Soft floor-length curtains can frame the bed and create a sense of enclosure.

    For Pinterest, a layered neutral bed surrounded by warm lamps, natural wood, soft curtains, and subtle artwork creates an especially inviting composition.

    The bed should not only look beautiful; it should feel comfortable when you actually use it.

    Choose materials you enjoy sleeping with and maintain them properly according to their care instructions.

    A cozy bedroom is ultimately about creating a peaceful transition between the busy outside world and restful personal time.