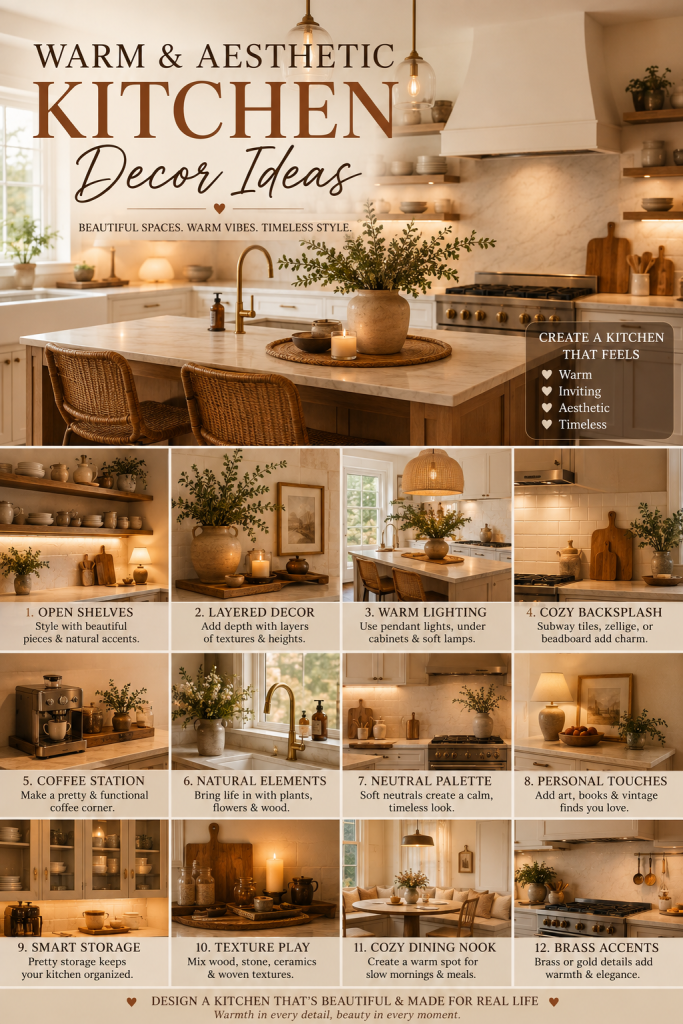
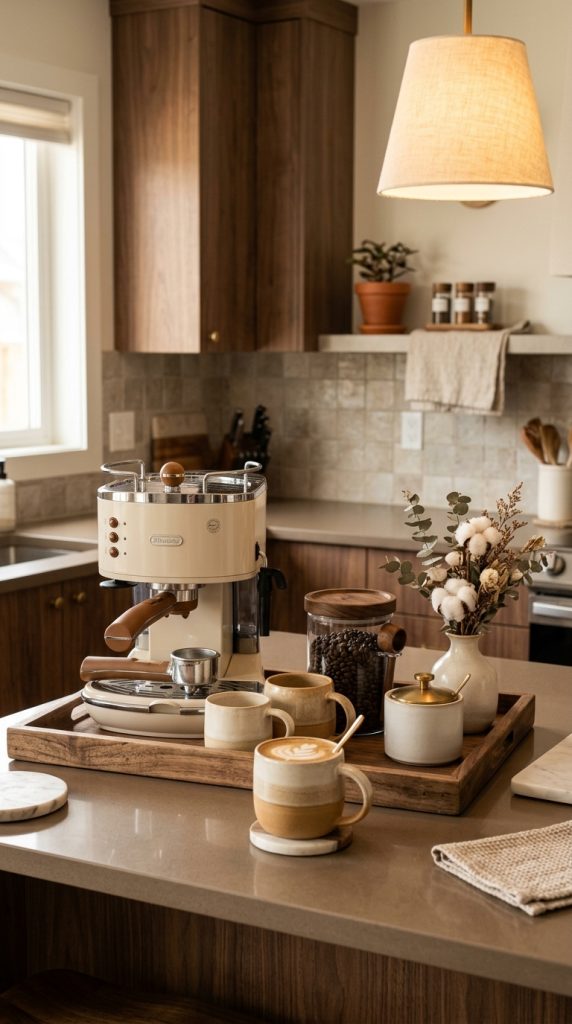
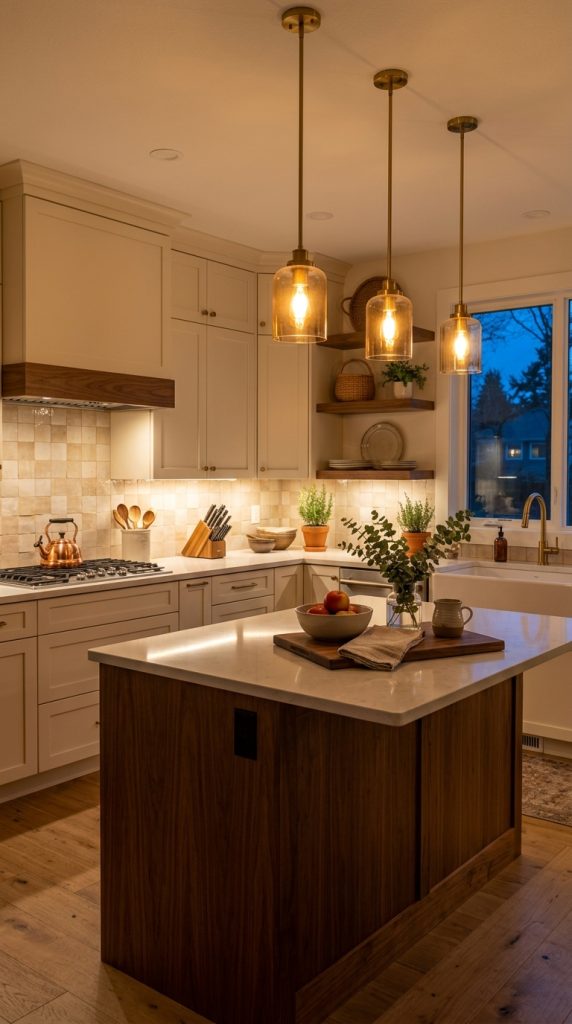
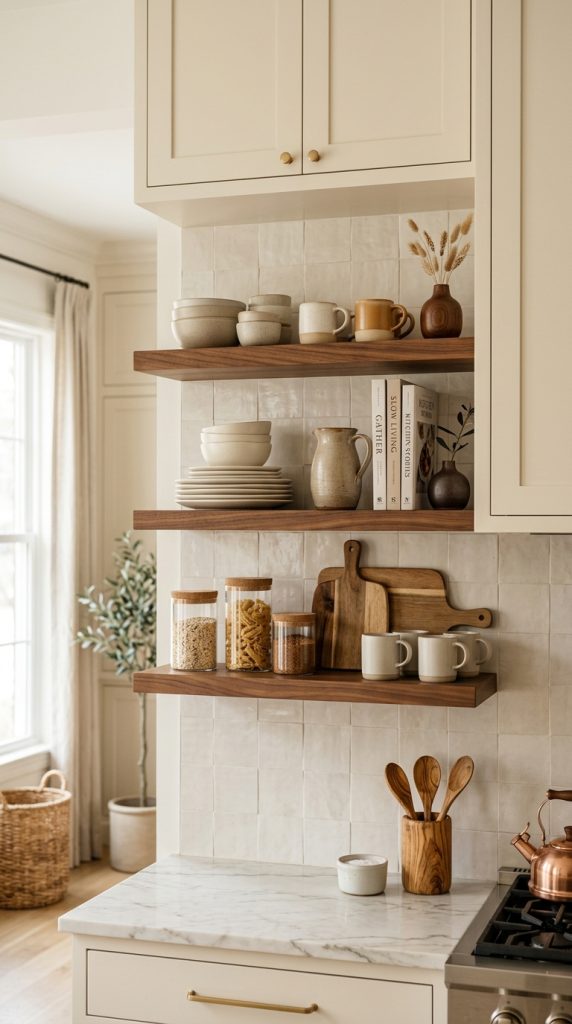
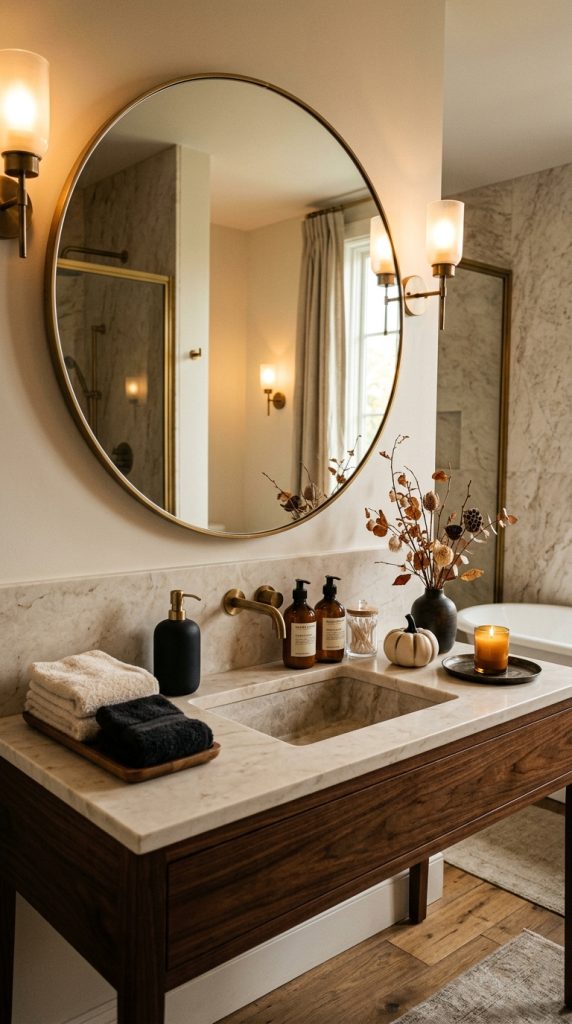
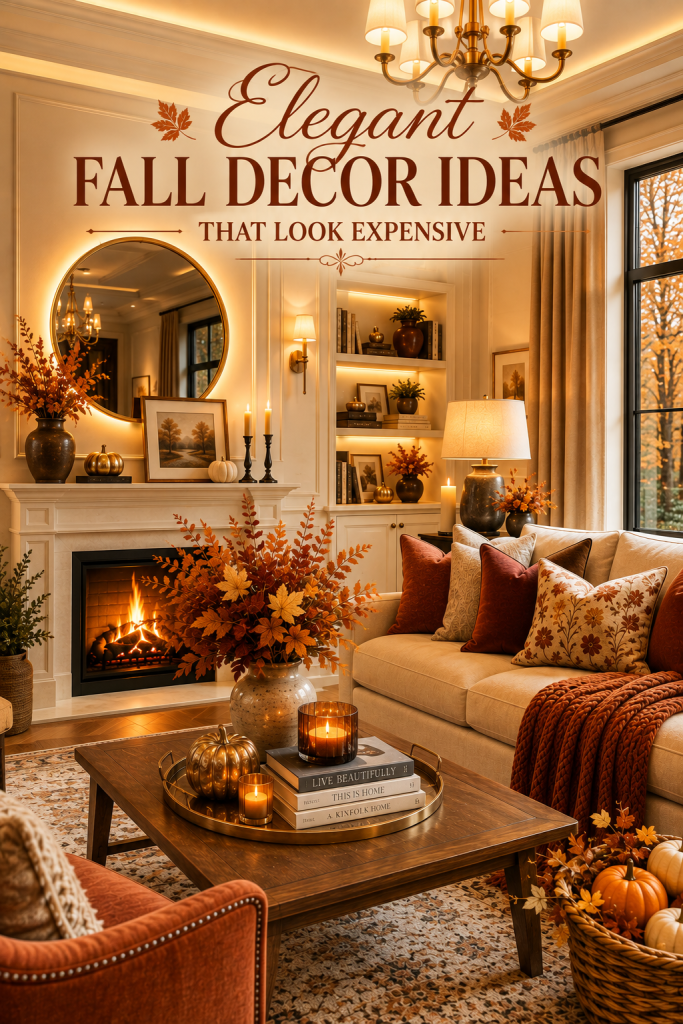
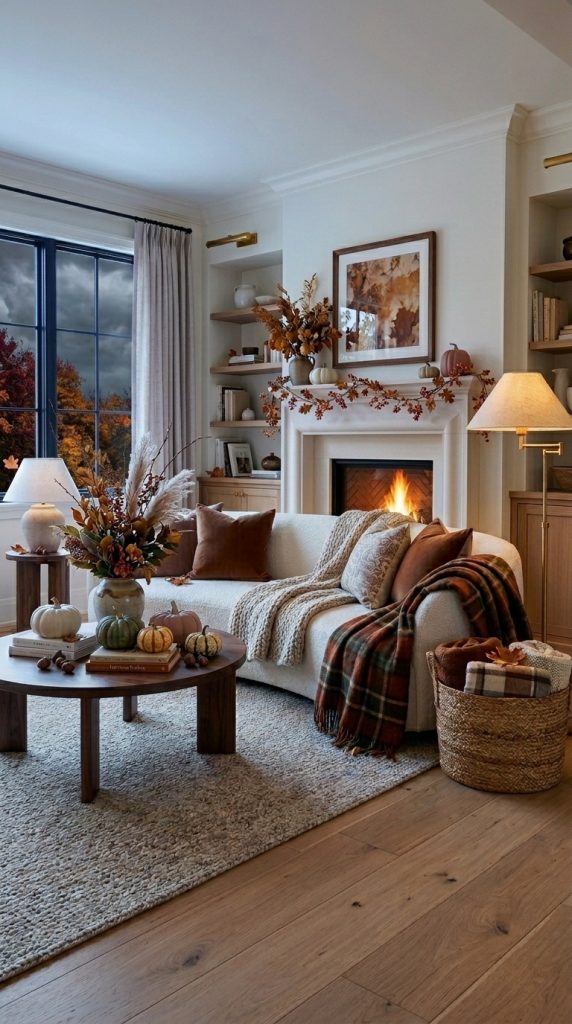
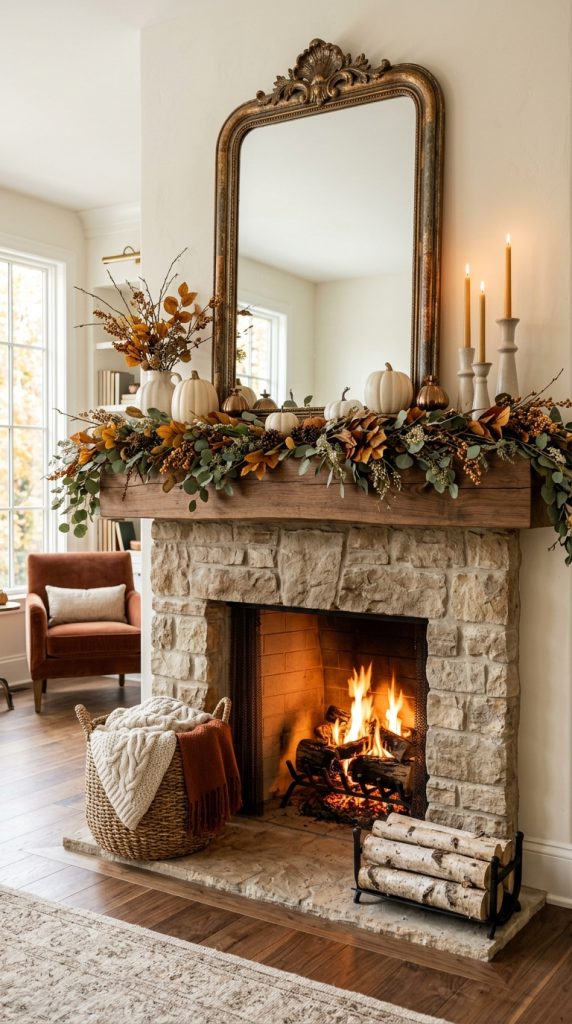
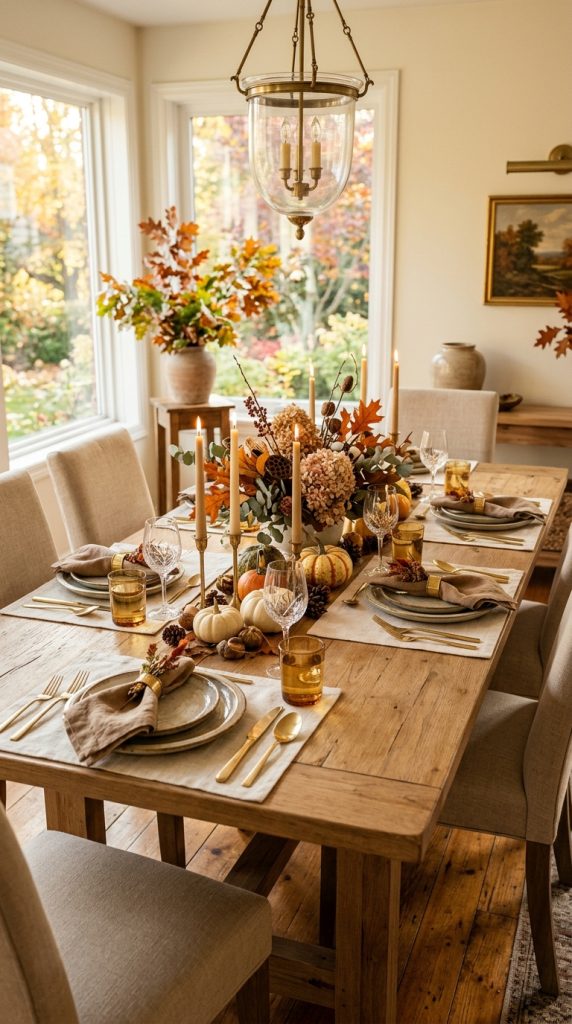
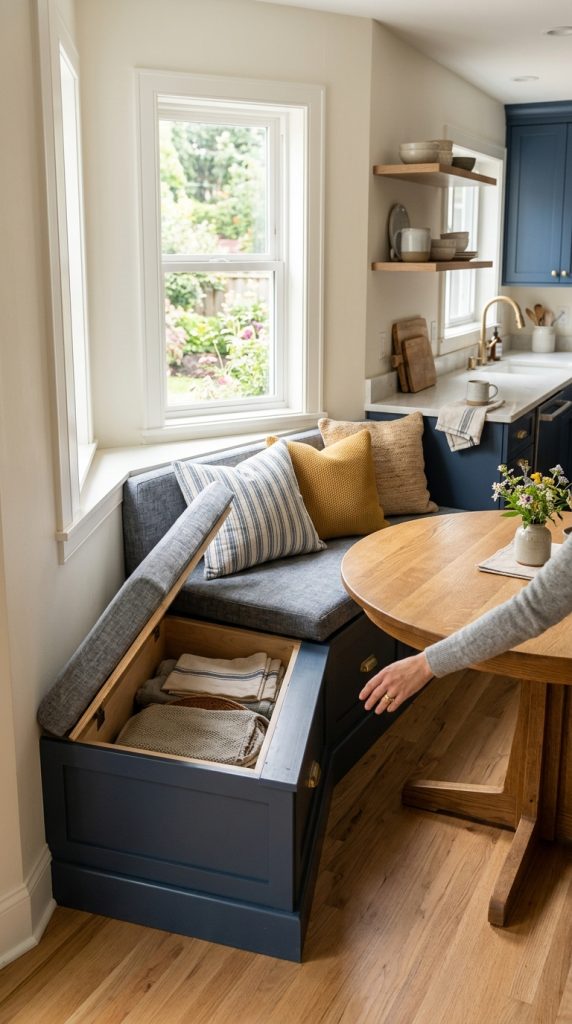
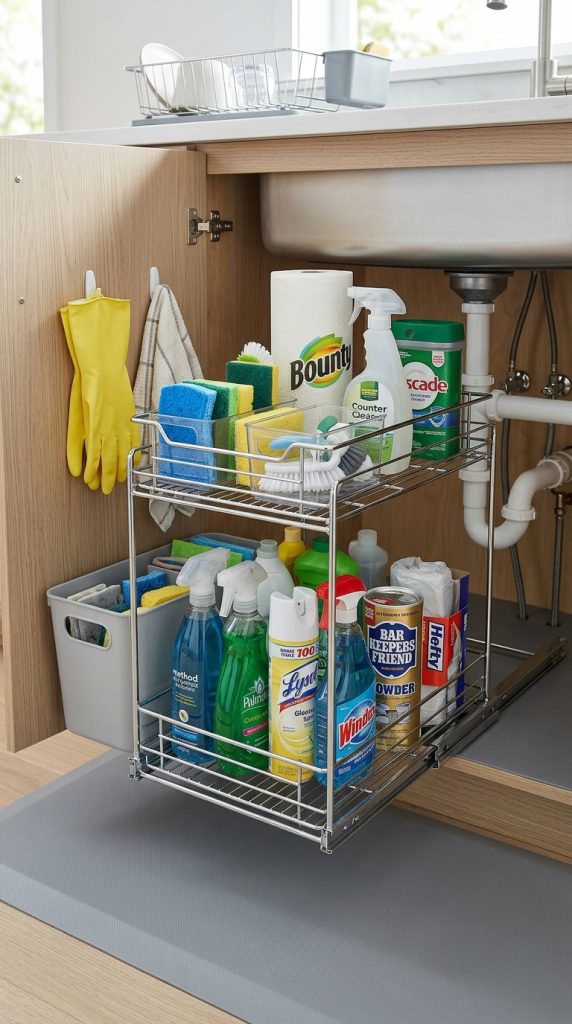
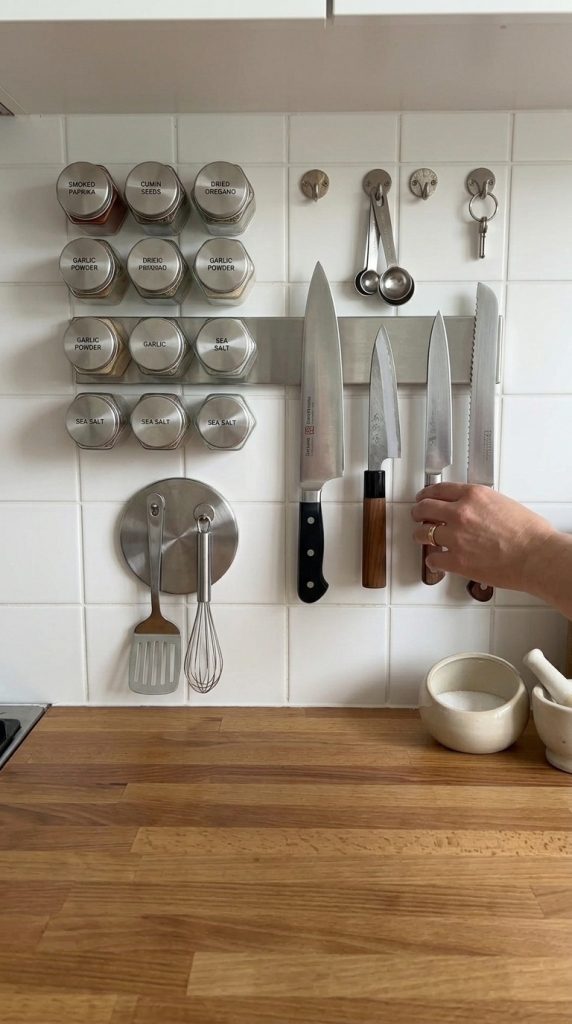
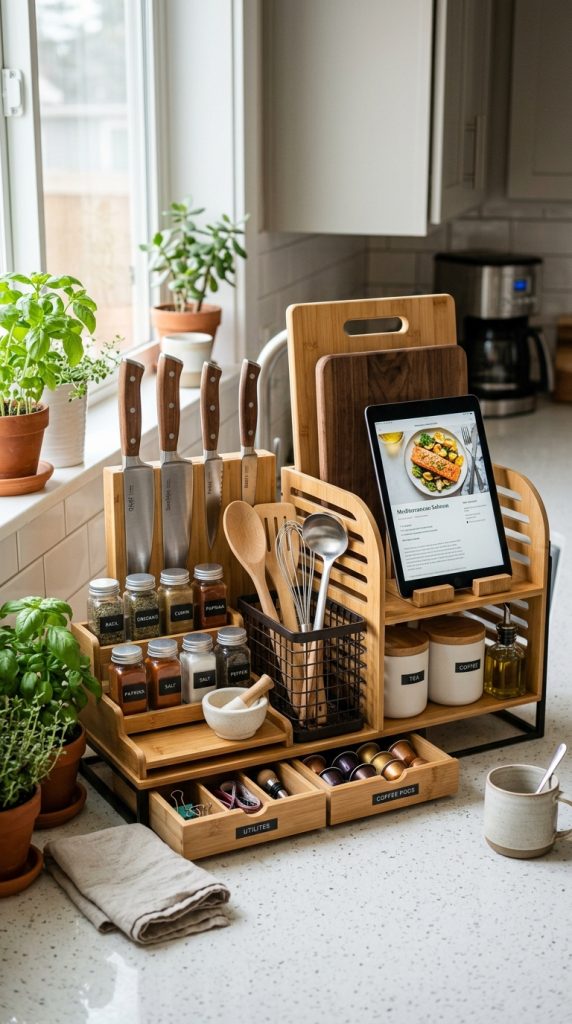
A warm and aesthetic kitchen is one of the most inviting spaces you can create in your home. Unlike decorating styles that focus only on appearance, a warm kitchen combines beauty with comfort, functionality, organization, and personality. It should be a place where you genuinely enjoy preparing meals, having morning coffee, gathering with family, or simply spending time at the end of a long day. The right combination of warm colors, natural materials, soft lighting, beautiful storage, and carefully chosen accessories can transform even a basic kitchen into a cozy and Pinterest-worthy space.
The good news is that creating a warm aesthetic kitchen does not necessarily require a renovation. You do not have to replace your cabinets, install expensive countertops, or purchase designer appliances. Often, the biggest transformation comes from small decorative changes. Adding a wooden cutting board, displaying attractive ceramic dishes, changing kitchen textiles, organizing countertops, introducing warm lighting, or creating a dedicated coffee corner can completely change how the room feels.
Color is one of the most important elements. Cool whites and stark gray tones can sometimes make kitchens feel clinical, especially when combined with bright overhead lighting. Warm neutrals create a much softer atmosphere. Think creamy white, ivory, beige, taupe, caramel, walnut brown, warm gray, muted terracotta, soft tan, and subtle earthy shades. These colors can be introduced through accessories rather than permanent features, making them ideal for renters and homeowners alike.
Natural materials are another major part of the warm aesthetic. Wood is especially useful because it immediately introduces warmth into modern kitchens. Wooden cutting boards, bowls, trays, stools, shelves, and utensils can create visual softness against white cabinets or stone countertops. Woven baskets, rattan accessories, linen-style textiles, ceramic pieces, and glass containers add additional layers of texture.
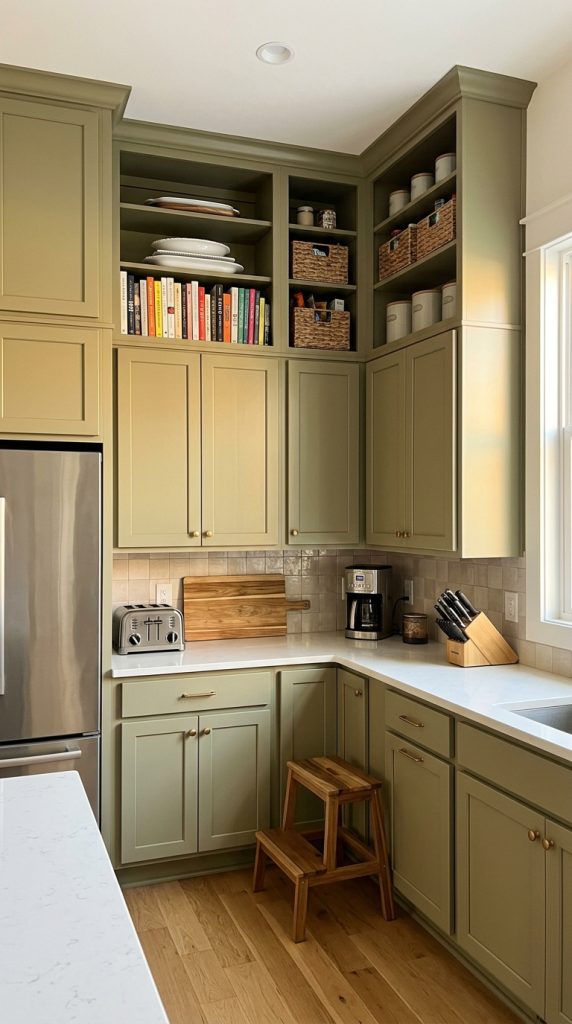
The secret is not simply adding more objects. A beautiful kitchen needs balance. Too many decorative pieces can make countertops look crowded and make everyday cooking difficult. Instead, choose a few meaningful focal points and allow empty space around them. A large wooden board leaning against the backsplash can often have more visual impact than a dozen small decorations.
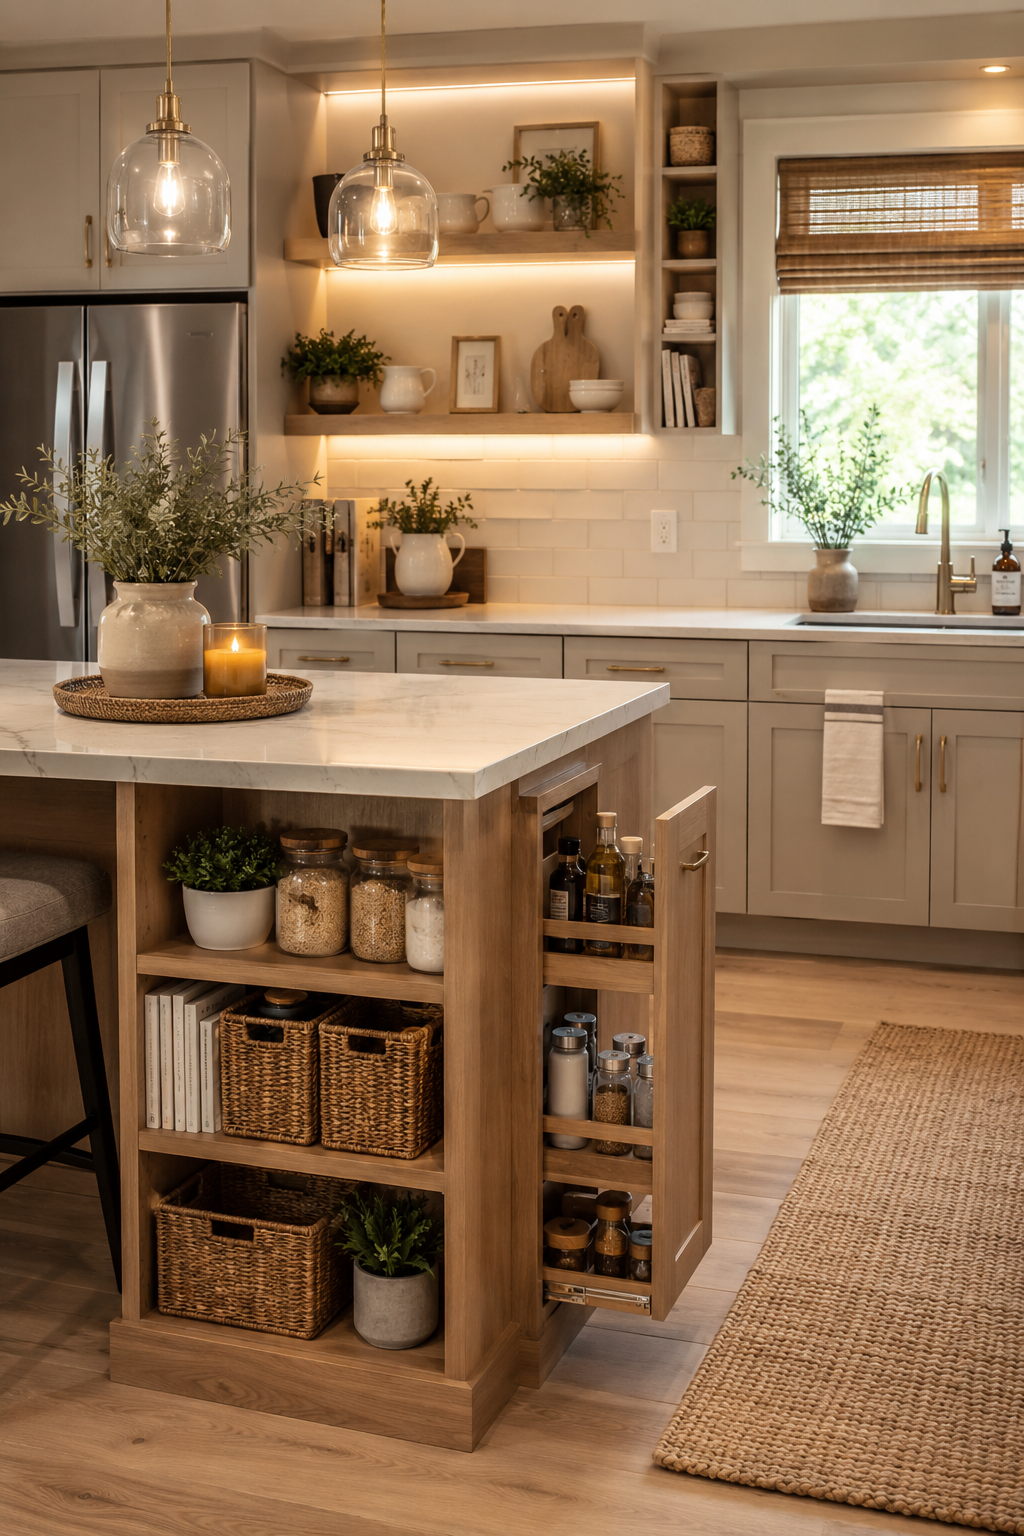
Lighting deserves special attention because it can completely change the atmosphere. A kitchen with beautiful decor can still feel cold under harsh white lighting. Warm pendant lights over an island, under-cabinet lighting, soft lamps, and carefully positioned decorative lights can create a comfortable evening environment. You can even make a rental kitchen feel dramatically different with rechargeable lighting solutions that do not require permanent electrical work.
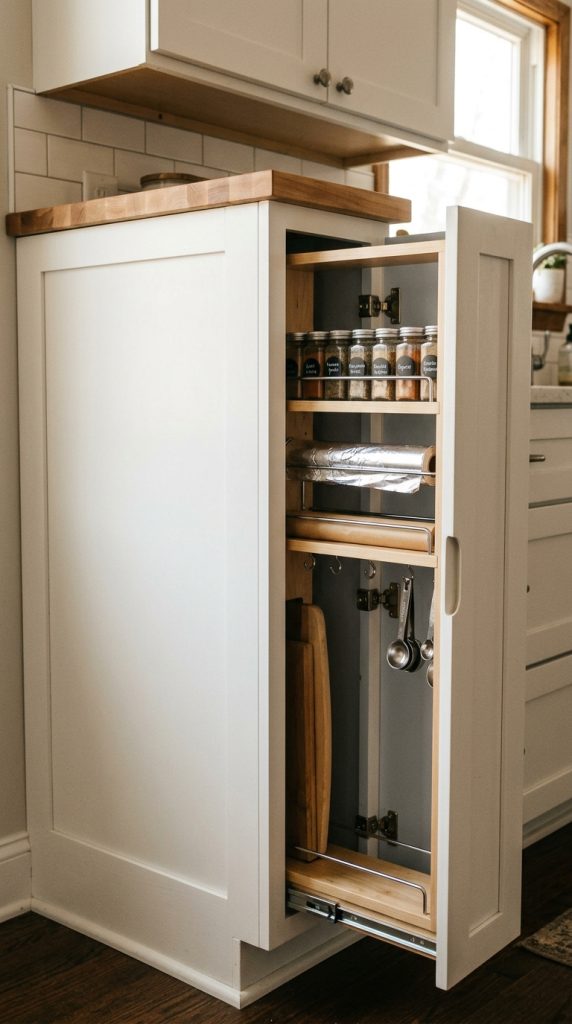
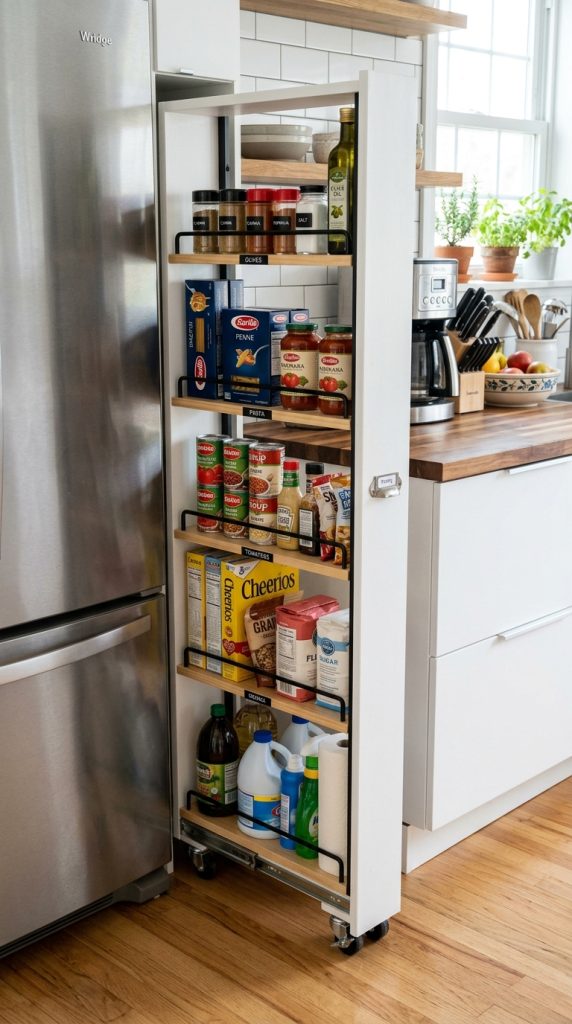
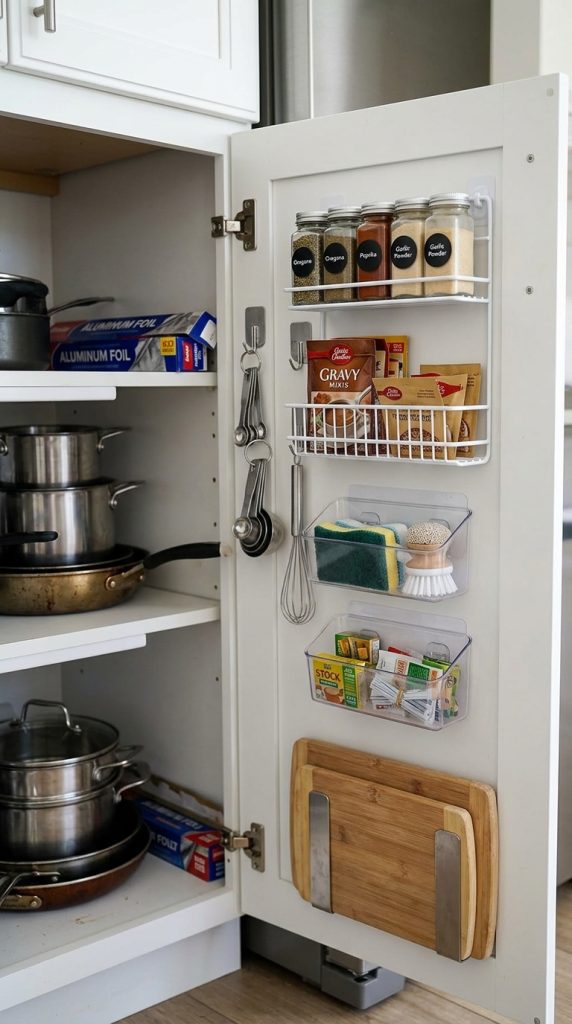
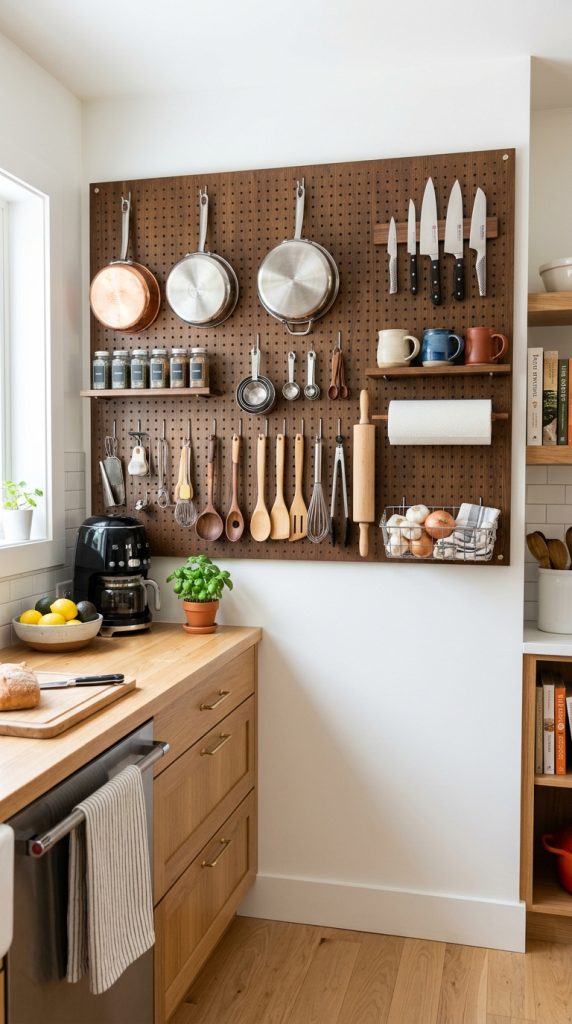
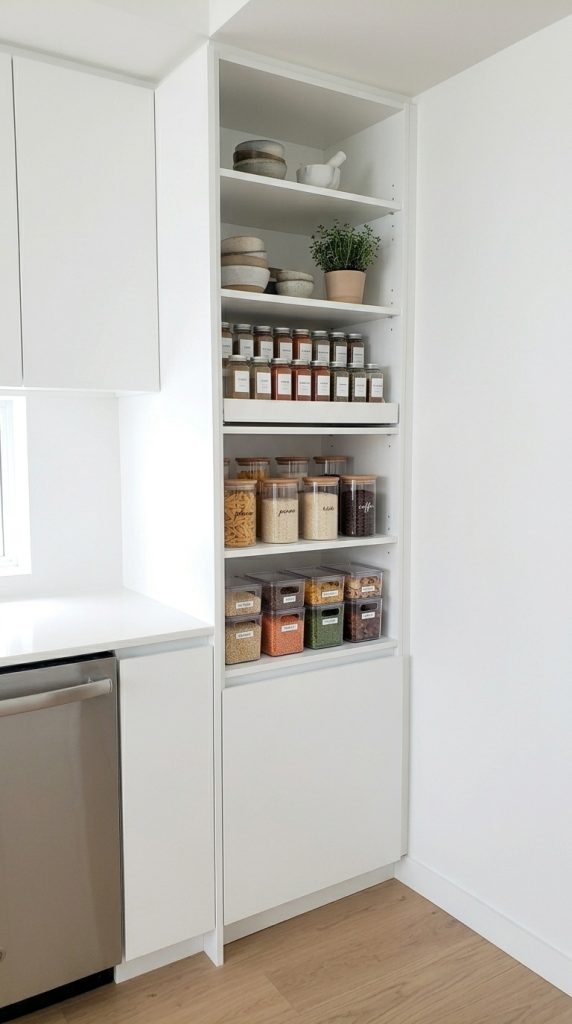
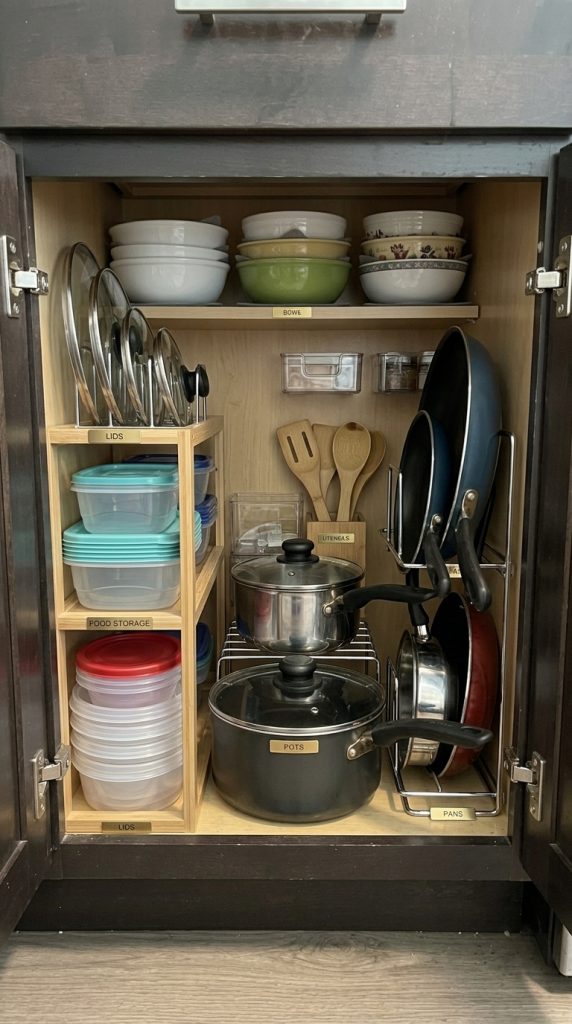
Storage can also become part of the aesthetic. Instead of hiding everything, display attractive everyday objects while organizing less attractive items. Glass jars can hold dry ingredients, woven baskets can hide packets and miscellaneous items, and wooden trays can group coffee supplies. When everything has a visual home, the kitchen naturally feels calmer.
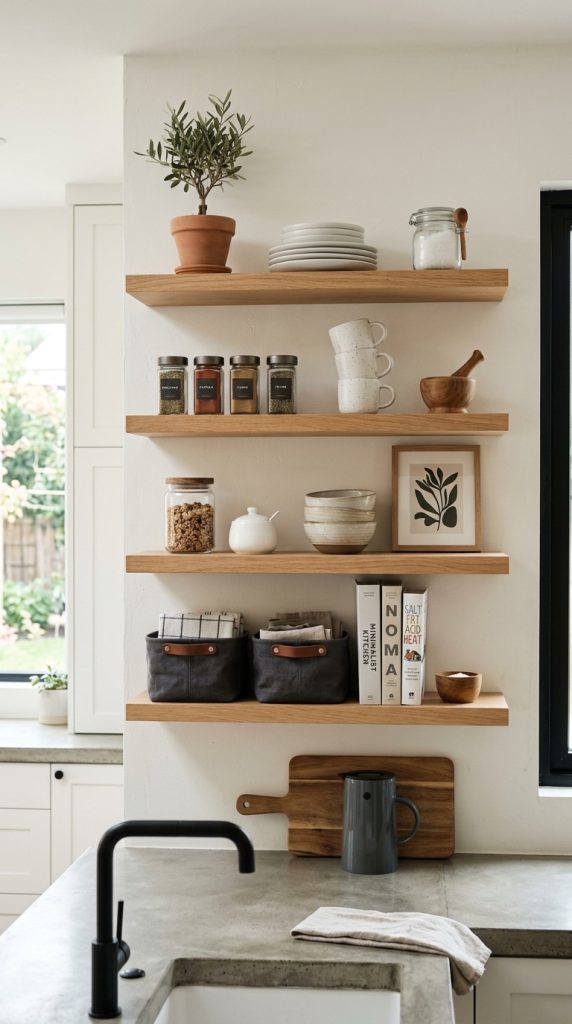
Open shelving is another opportunity for decorating. Rather than treating shelves as extra storage space that must be completely filled, think of them as curated displays. Combine ceramic plates, bowls, mugs, wooden boards, glass jars, cookbooks, and one or two decorative objects. Vary the heights and leave empty areas between groups. This gives the shelves an intentional designer appearance.
Textiles can make an enormous difference as well. A textured runner can soften hard kitchen floors, while linen-style towels and neutral fabric accessories can introduce warmth. Choose washable materials for areas that receive frequent spills. Practicality should always be considered alongside appearance.
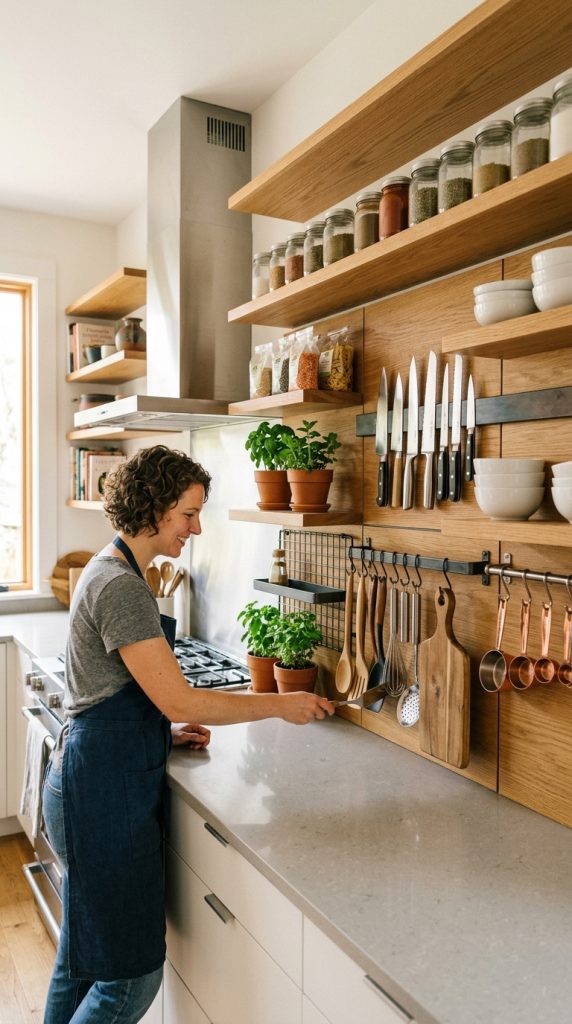
Plants and natural elements can also add life to the kitchen. A small herb corner near a suitable window can be both beautiful and functional. Fresh fruit in a wooden bowl creates natural color without looking overly decorative. Dried branches can provide height and texture when fresh plants are not practical.
For a truly aesthetic result, think about repetition. If you use walnut wood on the countertop, repeat a similar tone in a cutting board, stool, tray, or shelf. If you introduce muted terracotta through a towel, repeat the shade in a ceramic bowl or mug. Repeated colors make separate objects feel like part of the same design.
This approach is especially valuable for Pinterest because cohesive spaces are visually satisfying. A strong Pinterest image should have one obvious focal point, a clear color story, attractive textures, realistic styling, and enough visual interest to make viewers stop scrolling. A kitchen should look aspirational but still attainable.
The ten ideas below are designed to help you create exactly that kind of space. Each idea can stand alone, or you can combine several to create a complete kitchen transformation. They are practical, beginner-friendly, budget-conscious, and flexible enough to work with modern, farmhouse, vintage, Scandinavian, transitional, or contemporary interiors.
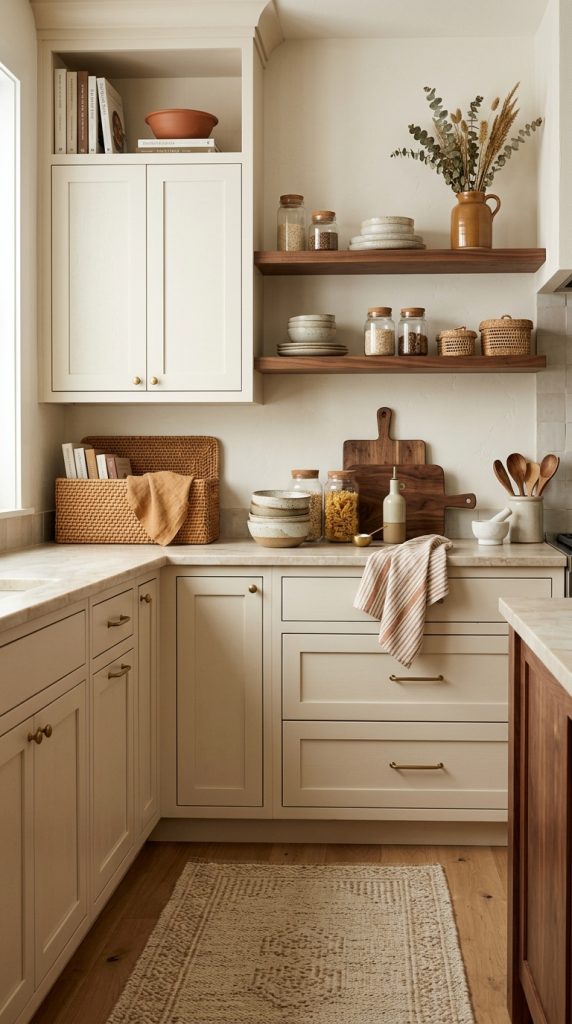
1. Create a Warm Neutral Kitchen With Natural Wood
A warm neutral kitchen is one of the easiest and most timeless ways to create an aesthetic space. The style works particularly well if your existing kitchen has white, cream, beige, or light-colored cabinets because natural wood accessories can immediately make the room feel warmer.
The first step is to establish a simple color palette. Choose three to five shades that work together. A beautiful combination is warm white, cream, beige, walnut brown, and muted caramel. If you want a slightly more colorful appearance, introduce a small amount of terracotta.
Once your palette is established, remove unnecessary objects from the countertop. A warm aesthetic kitchen should not feel crowded. Keep the appliances and items you use daily, but consider storing everything else.
Now introduce natural wood. Place one or two wooden cutting boards vertically against the backsplash. Add a wooden bowl or tray nearby. Wooden utensils can be displayed in a ceramic container rather than hidden inside a drawer.
The contrast between smooth countertops and natural wood creates visual interest. If your kitchen has glossy cabinets, wood can soften the overall appearance. If your kitchen already has wooden cabinetry, choose accessories that complement rather than compete with the existing tones.
Ceramics can add another layer. Choose cream, ivory, beige, or warm gray pieces. A ceramic utensil holder, bowl, vase, or pitcher can make the countertop look curated.
Materials and Things to Use
Natural wooden cutting boards
Wooden bowl
Wooden utensils
Cream ceramic vase
Ceramic utensil holder
Wooden tray
Neutral kitchen towels
Beige or cream runner
Glass storage jars
Warm lighting
Step-by-Step Styling
Clear unnecessary countertop clutter.
Select three to five coordinated colors.
Add one large wooden cutting board.
Introduce a wooden bowl or tray.
Add cream or neutral ceramics.
Display attractive utensils in one container.
Add one textured textile.
Introduce warm lighting.
Leave empty space around the main arrangement.
One common mistake is adding too many wooden objects. The purpose of natural wood is to provide warmth, not to turn the kitchen into a wood showroom. Choose different shapes and sizes and give each piece enough breathing room.
Another mistake is mixing too many colors. A warm kitchen usually looks more expensive when the palette is restrained. You can always introduce small seasonal colors later through towels, flowers, mugs, or ceramics.
For Pinterest styling, photograph the kitchen from a slightly angled viewpoint that captures the countertop, cabinets, lighting, and one clear decorative focal point. The composition should feel bright enough to reveal details but remain warm and cozy.
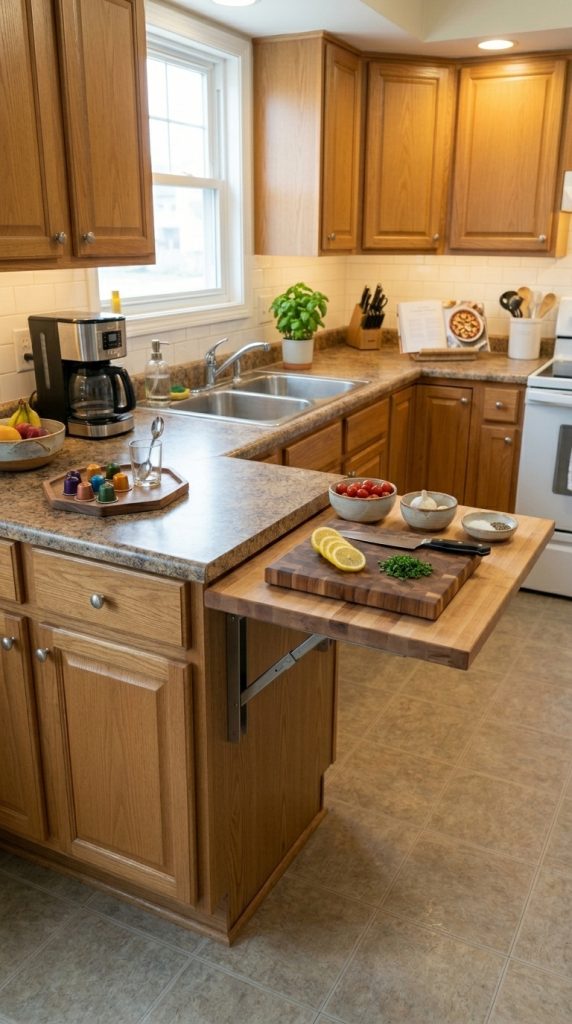
2. Create a Cozy and Aesthetic Coffee Station
A kitchen coffee station is both practical and decorative, making it one of the most save-worthy ideas for Pinterest. It gives you a dedicated area for your morning routine while creating a visually attractive corner that can be changed seasonally.
Start by choosing the location. A section of countertop near an electrical outlet is ideal. If you have a small kitchen, do not sacrifice valuable preparation space. A narrow corner is enough.
Use a wooden or ceramic tray to visually define the coffee station. This is important because a tray prevents several small objects from appearing randomly scattered across the counter.
Place the coffee machine or coffee maker at the back if space allows. In front or beside it, arrange your favorite mugs. Cream, beige, brown, or handmade-looking ceramic mugs create a warm appearance.
Use glass containers for coffee beans, sugar, tea, or other dry ingredients. Matching containers immediately make the space look more organized.
A small ceramic vase can add softness. If you have a suitable location, use a small natural arrangement. Avoid adding too many decorative objects because the station should remain functional.
You can also add a small wooden sign or framed artwork if you like personalized decor, but keep written elements minimal if your goal is a clean Pinterest aesthetic.
Materials and Things to Use
Wooden or ceramic tray
Coffee maker
Ceramic mugs
Glass coffee container
Sugar container
Small spoon
Ceramic vase
Wooden accessory
Small artwork
Warm lamp or lighting
Step-by-Step Styling
Choose a small dedicated countertop area.
Remove unnecessary objects.
Place a tray as the foundation.
Position the coffee maker.
Arrange two to four attractive mugs.
Add matching glass containers.
Introduce one ceramic or wooden accessory.
Add warm lighting if appropriate.
Keep enough space for comfortable use.
The most beautiful coffee stations often look like they belong naturally in the kitchen. Avoid creating a display that is so decorative that you cannot use it.
If you want to change the look seasonally, keep the foundation neutral and change only small details. During autumn, you might add a cinnamon-colored mug. During winter, use cream textiles. During spring, introduce softer colors.
This makes the coffee station a long-term decorating feature rather than a temporary trend.
For a Pinterest image, make the coffee station the main focal point. Use soft natural light during the day or warm ambient lighting for an evening aesthetic. Include enough surrounding kitchen detail to give viewers context.
3. Transform the Kitchen With Warm Layered Lighting
Lighting is one of the most powerful tools for creating a warm kitchen. You can have beautiful cabinets, countertops, accessories, and furniture, but if the lighting is too harsh, the entire space may feel cold.
The goal is to create layers rather than depending on one ceiling fixture.
Begin with your main overhead lighting. If the fixture is extremely cool or harsh, consider warmer bulbs where compatible with your fixtures. Warm white lighting can create a more comfortable atmosphere.
Next, introduce task lighting. Under-cabinet lights are particularly useful because they illuminate countertops while also creating a beautiful glow after dark.
If you have a kitchen island, pendant lights can become an important design feature. Choose fixtures that complement your overall style. Natural woven shades can add warmth, while simple glass or metal fixtures can create a more modern aesthetic.
Small lamps can also work in larger kitchens or open-plan spaces, provided they are positioned safely away from water and cooking areas. A compact lamp can make a kitchen feel connected to a nearby living area.
Materials and Things to Use
Warm LED bulbs
Under-cabinet lighting
Rechargeable cabinet lights
Pendant lights
Small table lamp
Decorative lantern
Dimmer where compatible
Candles for safe decorative use
Step-by-Step Lighting Plan
Identify the darkest areas.
Improve the main lighting if necessary.
Add under-cabinet illumination.
Use pendant lights over an island if available.
Add a small decorative lamp in an appropriate dry location.
Keep light temperatures visually consistent.
Use dimmable lighting where possible.
Create softer evening illumination.
Avoid mixing extremely cool blue lighting with warm yellow lighting unless there is a deliberate design reason. Inconsistent lighting can make the kitchen feel visually disconnected.
The ideal warm kitchen should be functional during the day and atmospheric at night.
For Pinterest, lighting is especially important. Warm evening lighting can make an ordinary kitchen look luxurious and inviting. However, make sure the image is not so dark that viewers cannot see the decor. The best visual balance is soft, warm, and detailed.
4. Style Open Shelves Like a Designer
Open shelves can be one of the most attractive features in an aesthetic kitchen, but they need careful styling. If shelves become storage for every random item, they can quickly make the kitchen feel messy.
Treat open shelving as a curated display.
Start by selecting your main materials. A combination of cream ceramics, natural wood, clear glass, and a small amount of earthy color works beautifully.
Place the largest pieces first. A wooden cutting board can lean vertically against the wall. Stack a few ceramic plates beside it. Add bowls on top of the stack.
Next, introduce mugs. Place several together rather than scattering them across the shelf.
Glass jars can provide visual transparency and keep ingredients accessible. Cookbooks can be stacked horizontally or positioned vertically.
Materials and Things to Use
Ceramic plates
Ceramic bowls
Neutral mugs
Wooden cutting boards
Glass jars
Cookbooks
Ceramic pitcher
Small vase
Decorative bowl
Small framed artwork
Step-by-Step
Remove everything from the shelves.
Group items by color and material.
Place large objects first.
Add stacked plates and bowls.
Arrange mugs together.
Introduce wooden boards for height.
Add glass jars.
Include one or two decorative pieces.
Leave intentional empty space.
Varying heights is extremely important. If everything is the same height, the shelf can appear flat.
Use the rule of visual grouping. Instead of placing one plate, one mug, one bowl, and one jar repeatedly, create small collections. A stack of plates, three mugs, and a vase can form one visual group.
Avoid overcrowding. Empty space makes the displayed objects more noticeable.
If you have very small shelves, reduce the number of objects. The goal is not to demonstrate how much storage you have but to create a beautiful composition.
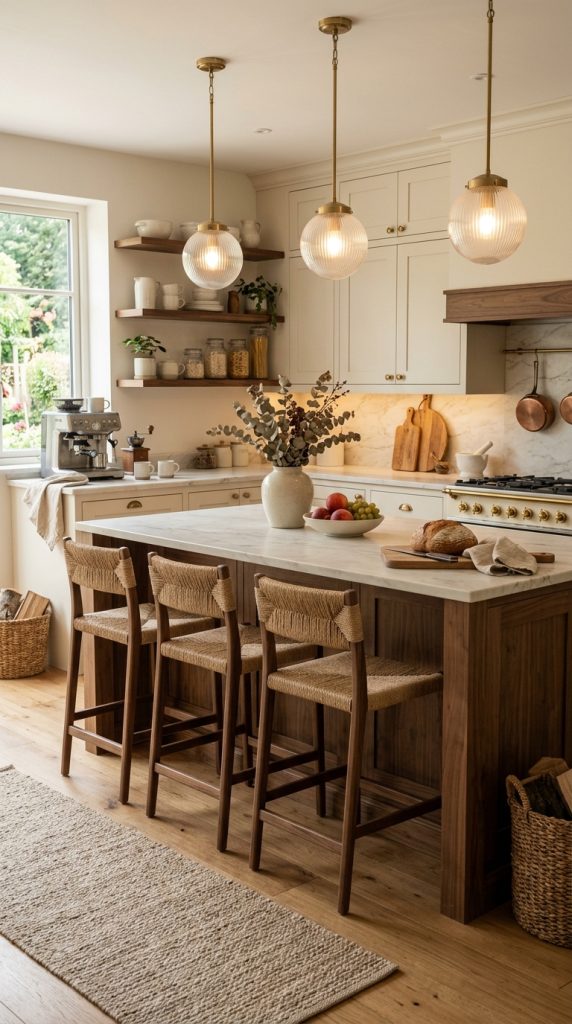
5. Design a Cozy Kitchen Island Focal Point
A kitchen island naturally attracts attention, so it should be styled intentionally. However, the island must remain functional. It should still provide enough room for preparing food, serving meals, and completing everyday tasks.
Start with one large tray. The tray provides a visual boundary and makes it easier to move the arrangement when you need the entire island.
Add a ceramic vase as the tallest object. Next to it, place a bowl filled with fresh fruit. You can also add a wooden cutting board or a small serving dish.
If the island is large, divide the surface into two visual areas rather than placing everything in the center. For example, one side can hold a decorative arrangement while the opposite side remains completely open for preparation.
Materials and Things to Use
Large wooden tray
Ceramic vase
Fresh fruit bowl
Wooden cutting board
Ceramic serving bowl
Small cookbook
Natural wood accessory
Warm pendant lighting
Step-by-Step
Clear the island.
Decide how much working space must remain available.
Choose one main focal arrangement.
Add the tallest object first.
Place a bowl or tray beside it.
Introduce one wooden element.
Keep the rest of the island open.
Check the arrangement from different angles.
Fresh fruit is particularly useful because it adds natural color without feeling like artificial decoration.
If your kitchen has a small island, keep the arrangement very simple. A vase and bowl may be all you need.
The island should look styled but not staged. A completely empty island can feel sterile, while an overcrowded one becomes impractical.
For Pinterest, photograph the island at an angle that also shows the pendant lights and surrounding cabinetry. This creates depth and makes the image feel like a complete kitchen rather than a close-up of one surface.
6. Add Natural Textures With Wood, Woven Pieces, and Ceramics
Warmth often comes from texture rather than color. A kitchen can use a neutral palette and still feel rich if different materials are layered thoughtfully.
Start by choosing one piece from each category rather than purchasing many accessories.
A wooden bowl can sit beside a smooth ceramic vase. A woven basket can hold kitchen towels. A textured runner can soften the floor.
Materials and Things to Use
Wooden bowl
Natural cutting boards
Woven basket
Ceramic vase
Ceramic bowls
Glass jars
Textured runner
Linen-style towels
Woven placemats
Wooden utensils
Step-by-Step
Identify areas that feel visually cold.
Add natural wood.
Introduce one woven item.
Add ceramic pieces.
Use glass for storage.
Add a soft textile.
Repeat one or two materials elsewhere.
The key is contrast. Smooth ceramic looks more interesting next to rough wood. Clear glass looks beautiful beside woven textures.
Avoid using too many competing patterns. If your backsplash is highly patterned, choose simpler accessories.
Texture is especially valuable for neutral kitchens because it creates visual depth without requiring strong colors.
A warm aesthetic kitchen should feel appealing not only because it looks beautiful but because viewers can almost imagine touching the materials. This tactile quality is one reason natural textures perform so well in interior photography.
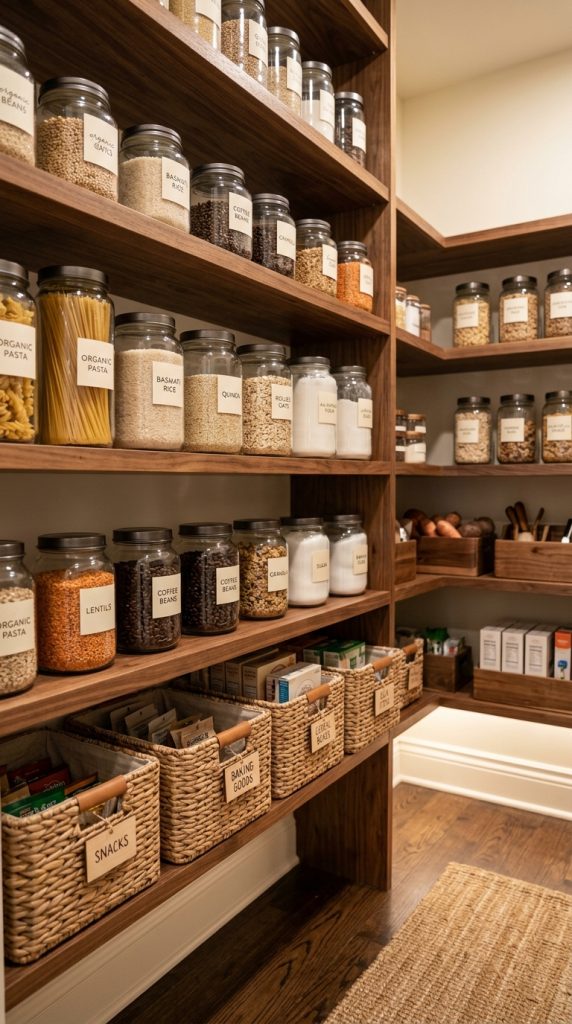
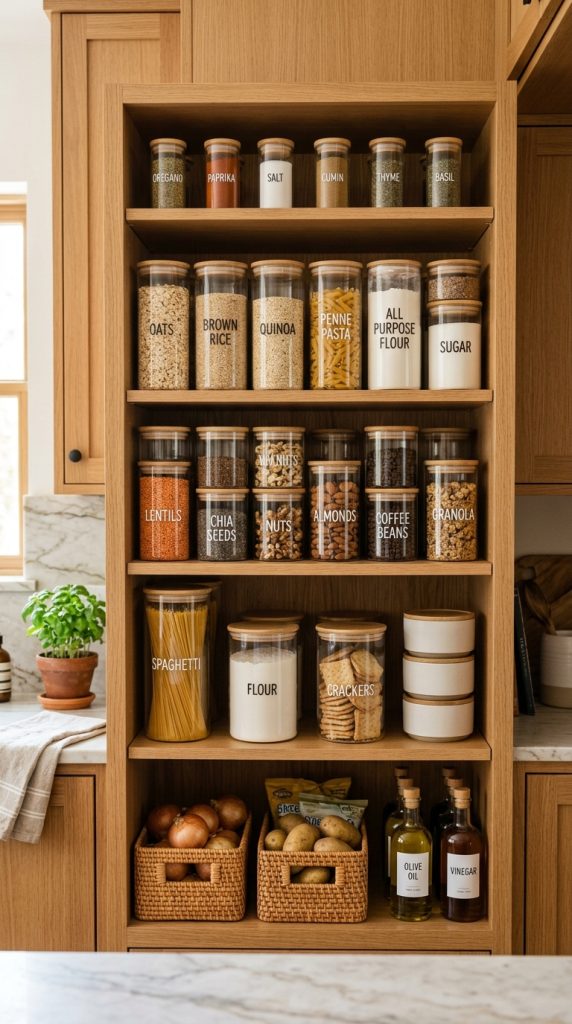
7. Create a Beautiful and Organized Kitchen Pantry
Organization can be decorative when it is approached intentionally. A beautiful pantry makes everyday cooking easier while creating the clean, satisfying aesthetic that performs well on Pinterest.
Begin by removing expired or unnecessary items. Then group similar ingredients together.
Glass jars are useful for dry goods because they allow you to see what is inside. Use containers that are practical for your household and suitable for food storage.
Woven baskets are useful for packaging that you do not want displayed individually. They can hold snacks, packets, baking supplies, or other small items.
Materials and Things to Use
Glass storage jars
Airtight containers
Woven baskets
Wooden bins
Simple labels
Shelf risers
Small trays
Storage boxes
Step-by-Step
Empty one pantry section at a time.
Check expiration dates.
Group similar ingredients.
Select suitable storage containers.
Transfer appropriate dry goods.
Add simple labels where useful.
Place frequently used items at accessible heights.
Use baskets for miscellaneous packaging.
Leave small amounts of visual breathing room.
Do not transfer every food item into matching containers simply for appearance. Organization should remain practical.
A pantry can look beautiful without becoming complicated. The strongest aesthetic usually comes from consistency.
Use similar containers, repeat materials, and avoid excessive labels or decorative signs.
For Pinterest imagery, an organized pantry should look satisfying but realistic. Include enough variation to show that it is a working kitchen rather than a showroom.
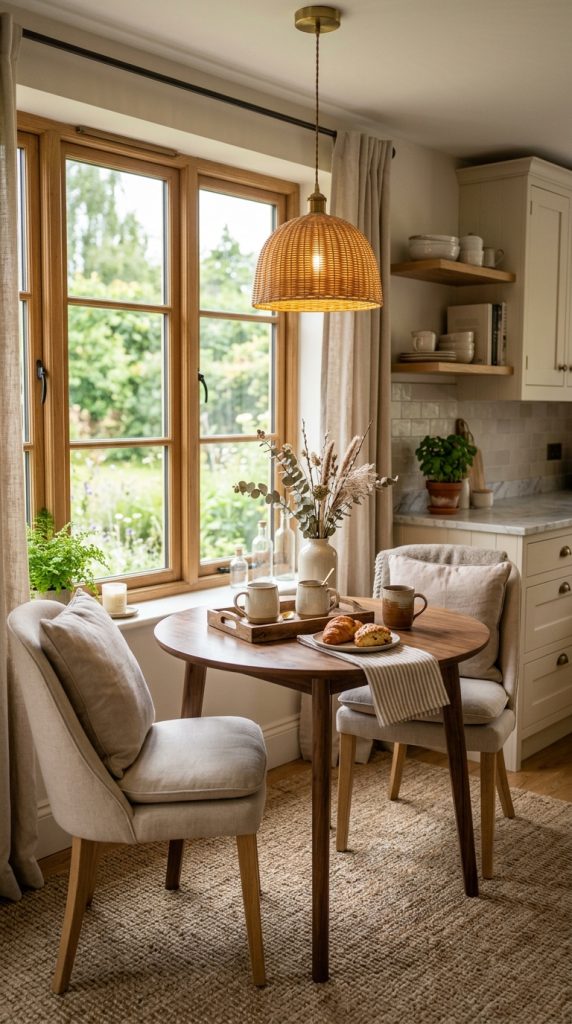
8. Add a Cozy Breakfast Nook
If your kitchen has a small unused corner, turn it into a breakfast nook. This can add personality while making the kitchen more functional.
A round table is often ideal for small spaces because its shape allows easier movement around the edges. Choose a natural wood table for warmth or a neutral table for a softer appearance.
Comfortable chairs are essential. Add cushions if the chairs are hard.
A small rug can define the dining area and create visual separation from the kitchen. Choose a washable or easy-care material if possible.
Materials and Things to Use
Small round dining table
Comfortable chairs
Neutral cushions
Small rug
Ceramic vase
Wooden tray
Warm pendant light
Simple artwork
Ceramic mugs
Step-by-Step
Measure the available space.
Choose furniture that leaves comfortable walking room.
Position the table near natural light if possible.
Add comfortable seating.
Introduce a small rug.
Style the table with one centerpiece.
Add suitable warm lighting.
Keep the area uncluttered.
The breakfast nook should feel like an extension of the kitchen rather than a separate room.
A ceramic vase with dried stems can become a simple centerpiece. A wooden tray with mugs can add a practical decorative detail.
This space can serve multiple purposes. It can become a breakfast area, work corner, homework station, or place for evening tea.
For Pinterest, focus on the relationship between the table, chairs, lighting, and surrounding kitchen. A cozy breakfast nook is most attractive when viewers can imagine themselves using it.
9. Make a Small Kitchen Look Warm and Expensive
Small kitchens can be extremely attractive when decoration is carefully controlled. The biggest mistake is trying to add too much.
Begin by removing anything that does not need to remain on the countertop. Then identify one or two focal areas.
Use light warm colors to keep the room visually open. Cream, ivory, beige, and light wood can make the kitchen feel spacious while still providing warmth.
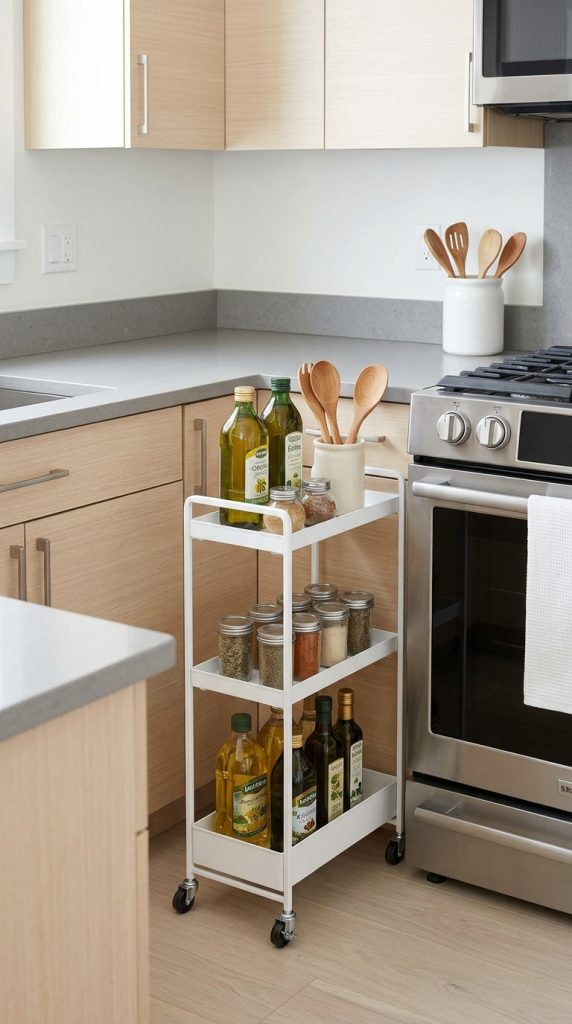
Vertical storage is especially useful. Open shelves, wall hooks, rails, and cabinets can move items away from the countertop.
Materials and Things to Use
Light wooden cutting board
Small ceramic vase
Glass storage jars
Compact wooden tray
Neutral kitchen towel
Small woven basket
Warm lighting
Simple runner
Wall shelf
Step-by-Step
Declutter countertops.
Select a limited color palette.
Add one wooden element.
Introduce matching storage containers.
Use vertical storage.
Add a small textile.
Improve lighting.
Create one focal point.
Keep surrounding areas open.
To create an expensive appearance, focus on consistency rather than quantity.
Matching glass jars can look more polished than a collection of colorful packaging. A single beautiful ceramic vase can look more sophisticated than many small decorations.
Lighting also makes a major difference. Under-cabinet illumination can make even a basic kitchen feel more luxurious.
Avoid oversized decor. Small kitchens need appropriately scaled accessories.
The final room should feel calm and organized rather than empty. The best small kitchen designs demonstrate that limited space can still have plenty of personality.
10. Create a Complete Warm and Aesthetic Dream Kitchen
If you want a complete transformation, combine the strongest elements from the previous ideas into one cohesive design. The goal is not to use every possible decoration. Instead, build a kitchen where every feature supports the same visual story.
Start with a warm neutral foundation. Cream or warm-white cabinetry creates a soft backdrop. Natural walnut or oak elements add depth. Stone countertops provide a refined surface.
Create a clear island focal point. Use a wooden tray, ceramic vase, and fruit bowl, but keep enough space available for cooking.
Style open shelves with cream ceramics, wooden cutting boards, glass jars, and a few carefully selected cookbooks.
Create a coffee station in one corner. Keep it functional and visually organized.
Introduce woven baskets for storage and a textured runner for softness.
Finally, focus on lighting. Warm pendant lights, under-cabinet illumination, and soft ambient lighting should work together.
Materials and Things to Use
Warm cream cabinetry
Natural wood accessories
Stone-look countertop
Wooden cutting boards
Ceramic bowls and mugs
Glass storage jars
Woven baskets
Textured runner
Wooden tray
Ceramic vase
Fruit bowl
Coffee station accessories
Warm pendant lighting
Under-cabinet lighting
Neutral kitchen towels
Simple artwork
Step-by-Step Complete Kitchen Styling
Start by decluttering. Remove everything that does not need to be visible.
Next, establish your color palette. Choose approximately four primary shades and repeat them throughout the room.
Add natural wood through cutting boards, bowls, trays, shelves, stools, or utensils.
Introduce ceramics in cream, ivory, beige, or another coordinated neutral.
Organize everyday supplies using trays and containers.
Style the island as the primary focal point.
Decorate open shelves carefully if you have them.
Create a small coffee station or beverage area.
Add a runner and coordinated textiles.
Finish with layered warm lighting.
Finally, step back and evaluate the room as a whole. Look for areas that feel too empty and areas that feel crowded. Move objects until the composition feels balanced.
The most important rule is to maintain functionality. Your kitchen is not a museum. You should be able to cook, clean, prepare food, and move around comfortably.
For the ultimate Pinterest aesthetic, combine beauty with realism. A bowl of fruit, a few mugs, a cookbook, and a wooden cutting board make the kitchen feel lived-in. Perfectly empty countertops can look beautiful but may not communicate the warm lifestyle viewers are searching for.
Final Thoughts
Creating a warm and aesthetic kitchen does not have to mean spending thousands of dollars or completely remodeling the room. The most effective transformations often come from thoughtful styling decisions.
Start with your color palette. Warm white, cream, beige, caramel, walnut, muted brown, and subtle terracotta are excellent foundations. Then introduce natural materials such as wood, ceramic, woven fibers, glass, and soft textiles.
Focus on organization as much as decoration. A clear countertop, attractive storage containers, and thoughtfully styled shelves can make a kitchen feel instantly more sophisticated.
Lighting should never be overlooked. Warm, layered illumination can turn the same kitchen from cold and functional during the day into intimate and inviting in the evening.
Most importantly, remember that aesthetic does not mean impractical. Your kitchen should still work for everyday life. The most successful decorating approach combines beauty, comfort, organization, personality, and functionality.
For Pinterest, focus on creating a strong visual story. Use one clear focal point, repeat your color palette, mix textures, include natural materials, and avoid overcrowding the frame. A beautiful kitchen should make viewers immediately imagine themselves living in the space.
Whether your kitchen is large or tiny, modern or traditional, rented or owned, these ideas can be adapted to fit your home. You can start with something as simple as a wooden cutting board and a warm kitchen towel, then gradually build the look with better lighting, organized storage, ceramics, textiles, and carefully selected accessories.
The result should not simply be a kitchen that looks attractive in a photograph. It should be a kitchen that feels warm every time you walk into it.
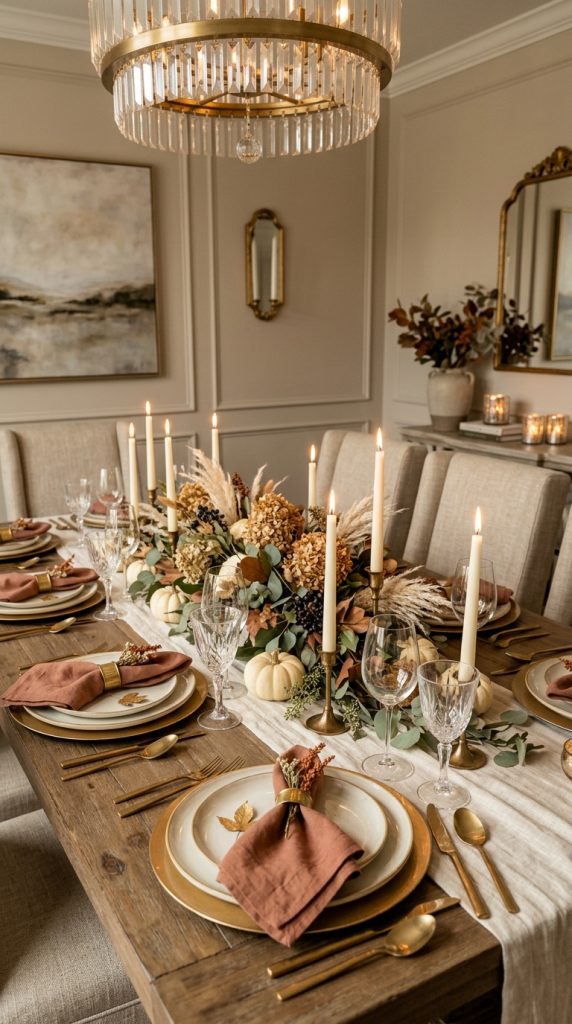
Fall is the perfect season to make your dining table feel warm, inviting, and beautifully styled. As the weather becomes cooler and evenings become cozier, the dining table naturally becomes an important gathering place for family dinners, weekend breakfasts, coffee with friends, seasonal celebrations, and special autumn meals. A thoughtfully designed fall tablescape can completely transform an ordinary dining area without requiring expensive furniture or a major home makeover. With the right combination of color, texture, lighting, natural elements, and tableware, you can create a table that feels elegant, cozy, sophisticated, and perfect for sharing on Pinterest.
A beautiful tablescape is more than simply putting plates and decorations on a table. It is about creating visual balance and telling a seasonal story through carefully selected details. The best fall tablescapes combine practical dining essentials with decorative elements that make the table feel special. Linen napkins, ceramic plates, wooden trays, candles, pumpkins, autumn branches, seasonal flowers, woven textures, and beautiful glassware can all contribute to the overall look.
One of the easiest ways to create an elegant fall tablescape is to begin with a limited color palette. Traditional autumn decorating often uses strong orange, red, yellow, and brown tones, but sophisticated fall tables can look even more beautiful when those colors are softened. Cream, ivory, beige, taupe, caramel, muted rust, olive green, terracotta, burgundy, and chocolate brown create a warm seasonal atmosphere without making the table appear overly themed.
Natural materials are particularly effective for fall. Wood, linen, ceramic, stoneware, woven fibers, dried foliage, pinecones, acorns, pumpkins, and seasonal fruit all bring an organic quality to the table. These materials can make even simple dinnerware look more luxurious because they add layers of texture and visual interest.
Lighting is another important element. A table can look completely different in the evening when illuminated by candles, a warm pendant light, or nearby table lamps. Instead of using harsh overhead lighting alone, create multiple layers of illumination. Candlelight can make glassware sparkle, emphasize the texture of linen napkins, and create a welcoming atmosphere. Warm lighting also works beautifully with the earthy colors commonly associated with fall.
The centerpiece is usually the main visual focus of a tablescape, but it does not need to be complicated. A few branches in a large ceramic vase can create a dramatic centerpiece. A low wooden tray filled with small pumpkins can create a rustic appearance. A row of candles surrounded by greenery can produce an elegant romantic effect. Even a bowl of pears and apples can become a beautiful seasonal centerpiece when styled thoughtfully.
The height of your centerpiece matters too. If the centerpiece is too tall, guests may have difficulty seeing across the table. For dinner parties, low arrangements are usually practical. If you are decorating a table that will not be used for dining, taller arrangements can create more drama.
Texture is one of the easiest ways to make a tablescape look expensive. Layer a linen runner over a wooden table, use ceramic plates with slightly imperfect edges, add woven placemats, and incorporate velvet or cotton napkins. The contrast between smooth glass, rough wood, soft linen, and handmade-looking ceramics creates a sophisticated layered appearance.
Another useful principle is repetition. Choose a few colors or materials and repeat them across the table. If your centerpiece contains muted rust leaves, repeat that shade in the napkins. If you use natural wood in the centerpiece, consider wooden chargers or serving boards. Repetition helps the table feel coordinated rather than randomly decorated.
At the same time, avoid making everything perfectly matching. A table becomes more interesting when different shapes, textures, and materials work together. Matching dinnerware can provide structure, while different decorative elements add personality.
Fall tablescapes are also highly adaptable. You can create an elegant table for a formal dinner, a rustic farmhouse table for a family gathering, a minimalist arrangement for a small apartment, or a romantic candlelit setting for two. You can use inexpensive materials, shop your home, or incorporate seasonal items from your garden or local market.
The ten ideas below are designed to provide practical inspiration for creating beautiful fall tablescapes. Each idea includes a clear design concept, suggested materials, step-by-step styling instructions, and practical tips. You can copy one look exactly or combine elements from several ideas to create a tablescape that matches your home’s style.
Whether you prefer modern neutrals, rustic farmhouse decor, romantic candlelight, natural organic styling, or sophisticated dark autumn colors, there is a fall tablescape idea here that can help you create a dining table that feels warm, memorable, and Pinterest-worthy.
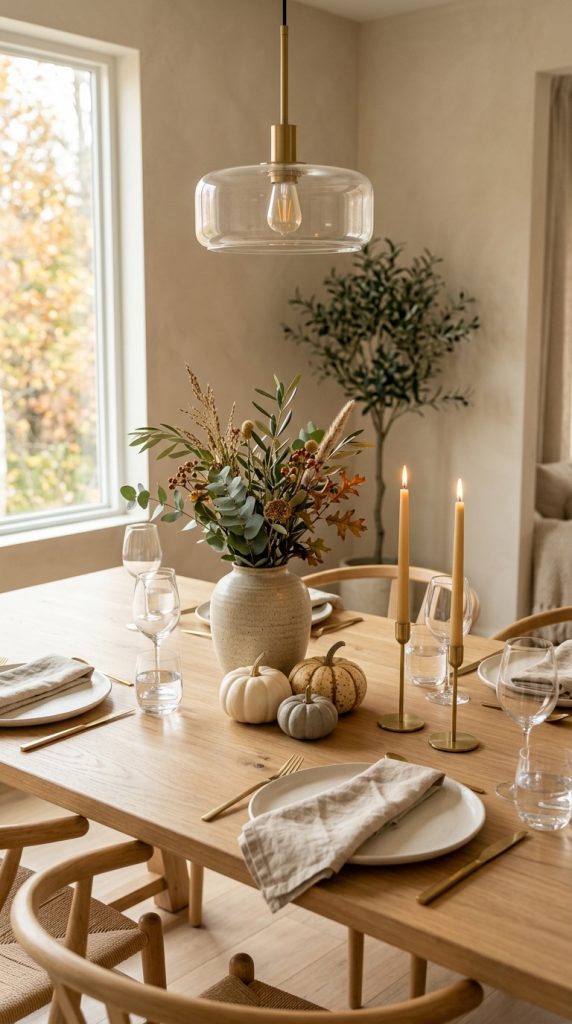
1. Elegant Neutral Fall Tablescape With Cream and Beige
A neutral fall tablescape is one of the easiest ways to create an elegant and timeless autumn dining table. Instead of relying on bright orange decorations, this approach uses cream, ivory, beige, taupe, warm white, natural wood, and subtle brown accents. The result feels sophisticated while still capturing the warmth of fall.
Start with the table itself. If you have a beautiful natural wood table, allow some of the wood to remain visible. Its natural grain immediately adds warmth and character. If the table is painted, use a simple neutral linen runner to create a soft foundation.
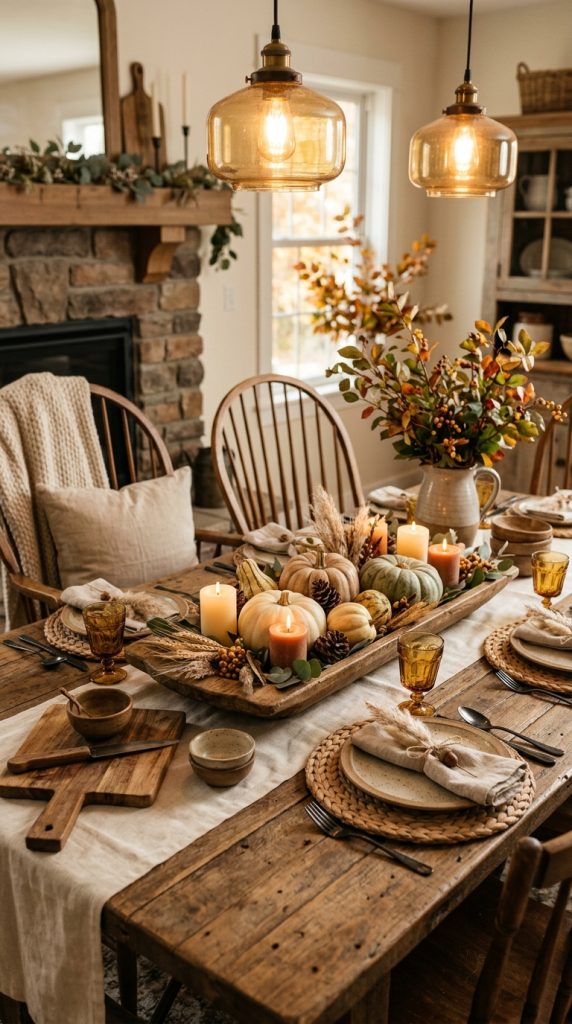
Choose cream or ivory dinnerware. Stoneware plates with slightly irregular edges can create a relaxed handcrafted appearance. Layer each place setting with a woven or natural-fiber placemat if your table allows.
Napkins are an excellent place to introduce subtle autumn color. Use linen napkins in oatmeal, beige, taupe, caramel, or muted rust. Fold them simply rather than creating complicated shapes.
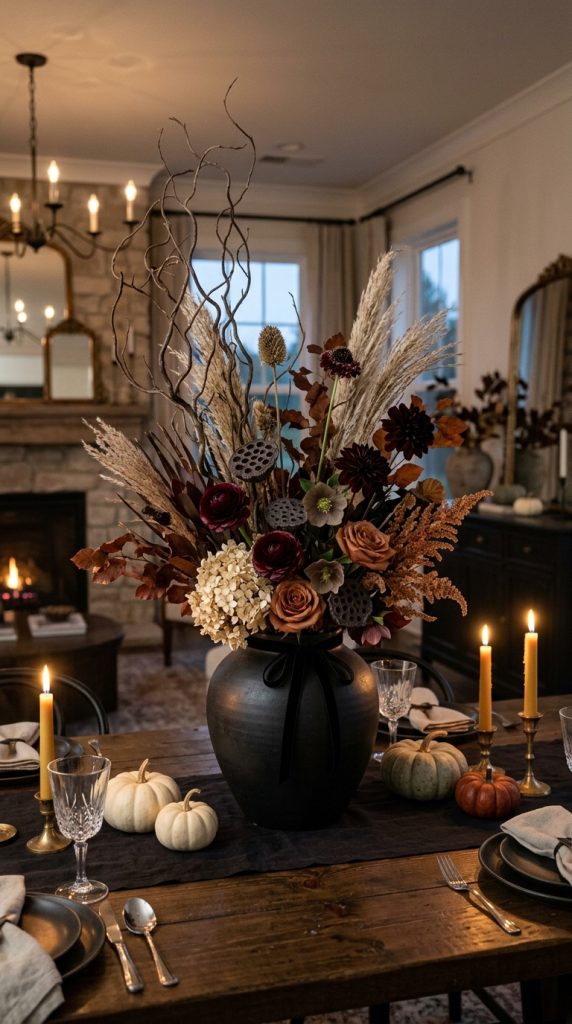
For the centerpiece, use a large ceramic vase filled with dried branches. Choose branches with delicate leaves in muted brown or soft autumn tones. Surround the vase with a few small cream pumpkins and natural pinecones.
Add candles in simple ceramic, glass, or brass holders. Keep them spaced evenly so that the table does not feel crowded.
Materials and Things to Use
Natural wood table
Neutral linen runner
Cream dinner plates
Woven placemats
Linen napkins
Ceramic vase
Dried autumn branches
Cream pumpkins
Pinecones
Candles
Simple candle holders
Neutral glassware
Wooden serving board
Step-by-Step Styling
Begin by placing the neutral runner down the center of the table.
Add placemats at each seating position.
Layer the dinner plates and add napkins.
Place the ceramic vase in the center.
Surround the vase with three to five small seasonal elements.
Add candles between the natural decorations.
Finish with simple glassware and wooden serving pieces.
Keep the centerpiece relatively low if guests will be sitting around the table.
The final look should feel warm, expensive, understated, and effortlessly elegant.
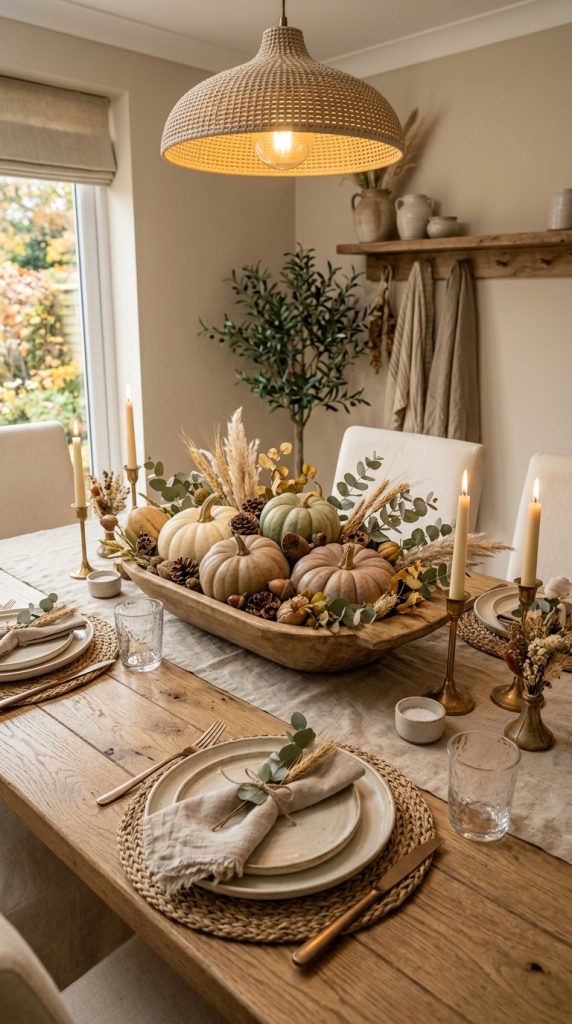
2. Rustic Farmhouse Fall Tablescape
A rustic farmhouse fall tablescape creates a relaxed, welcoming atmosphere using natural wood, vintage-inspired pieces, warm textiles, pumpkins, and seasonal foliage. This style is ideal for family dinners because it looks beautiful without feeling overly formal.
Start with a wooden dining table. Do not worry if the table has natural imperfections. Scratches, knots, and variations in the wood can actually contribute to the rustic character.
Use a burlap, cotton, or linen runner. For a softer appearance, choose cream or oatmeal linen instead of heavy burlap.
Select stoneware plates in cream, beige, or muted gray. Mismatched vintage-inspired plates can also work beautifully if they share a similar color palette.
For the centerpiece, use a wooden crate or long wooden tray. Fill it with miniature pumpkins, pinecones, dried flowers, wheat stems, and small branches.
Add mason-jar-style glasses or vintage-inspired drinking glasses. Linen napkins tied with simple twine can provide a charming farmhouse detail.
Use wooden serving boards for bread, cheese, fruit, or appetizers. This makes the table feel practical as well as decorative.
Materials and Things to Use
Rustic wooden table
Linen or cotton runner
Stoneware plates
Wooden chargers
Linen napkins
Twine
Wooden tray
Mini pumpkins
Wheat stems
Pinecones
Dried flowers
Wooden serving boards
Vintage-inspired glassware
Ceramic pitchers
Step-by-Step Styling
Place the runner down the center of the table.
Position the wooden tray or crate in the middle.
Add pumpkins and dried foliage inside the tray.
Place plates and napkins at each setting.
Tie napkins with natural twine if desired.
Add wooden serving boards.
Finish with small candles placed safely between the centerpiece elements.
Avoid adding too many decorative signs or farmhouse-specific accessories. Natural materials should provide most of the visual character.
3. Moody Burgundy and Chocolate Brown Fall Tablescape
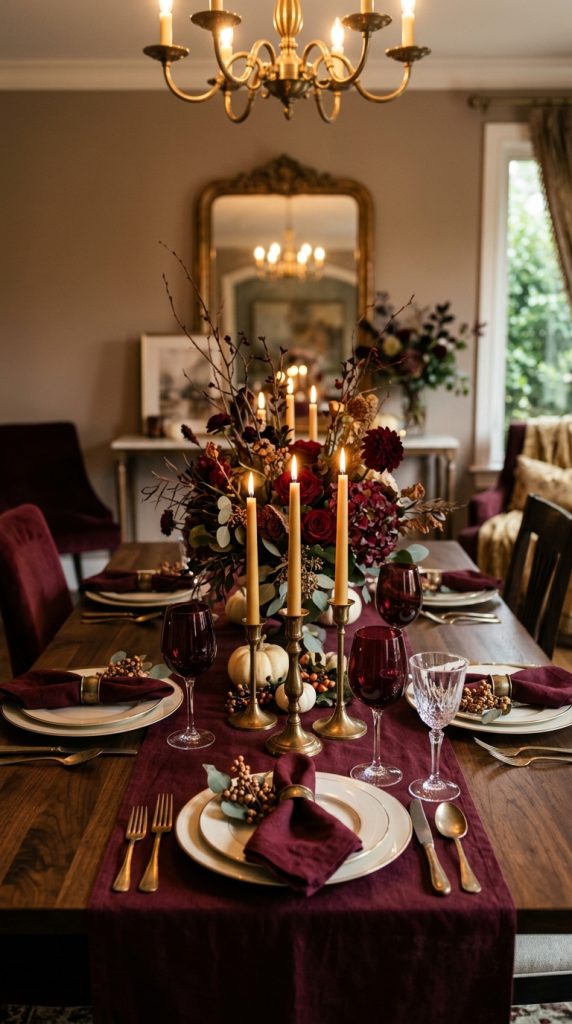
For a dramatic and sophisticated fall dining table, use deep burgundy, chocolate brown, warm cream, and subtle brass accents. This palette is especially beautiful for evening dinners because it works naturally with candlelight and warm illumination.
Begin with a dark wood table or a neutral table covered with a deep-toned runner. Burgundy linen can create an immediate autumn mood.
Use cream or ivory plates to prevent the table from becoming too dark. Add burgundy napkins for a rich seasonal accent.
Brass or antique-gold candle holders can provide a small amount of shine. Avoid excessive metallic decoration because the goal is sophisticated warmth rather than glamour.
Create a centerpiece with dark autumn foliage, burgundy flowers, dried branches, and a few neutral pumpkins. Keep the arrangement loose and organic.
Add several candles around the centerpiece. The warm candlelight will reflect beautifully from glassware and metallic details.
Materials and Things to Use
Dark wood table
Burgundy runner
Cream plates
Burgundy linen napkins
Brass candle holders
Taper candles
Dried branches
Burgundy flowers
Cream pumpkins
Dark glassware
Wooden serving pieces
Step-by-Step Styling
Begin with the burgundy runner.
Add cream dinnerware to create contrast.
Place burgundy napkins at each setting.
Build the centerpiece using branches and flowers.
Add cream pumpkins sparingly.
Place brass candle holders around the centerpiece.
Add warm lighting around the dining area.
The result should feel intimate, sophisticated, dramatic, and perfect for an autumn dinner party.
4. Minimalist Fall Tablescape With Natural Greenery
A minimalist fall tablescape proves that you do not need a large collection of seasonal decorations to create a beautiful table. This approach is ideal for people who prefer clean lines, neutral colors, and uncluttered spaces.
Start with a simple wooden or neutral table. Skip the tablecloth and allow the table surface to become part of the design.
Use simple cream or white ceramic plates.
Add neutral linen napkins without elaborate folds.
For the centerpiece, choose a long branch arrangement or a simple collection of greenery. Olive branches, eucalyptus, or other suitable foliage can provide freshness while still feeling seasonal.
Instead of placing many pumpkins around the table, use only three or five small neutral pumpkins in one area.
Add two or three small candles.
The overall composition should have plenty of empty space.
Materials and Things to Use
Natural wood table
Cream plates
Neutral linen napkins
Greenery
Eucalyptus or olive branches
Ceramic vase
Small neutral pumpkins
Simple glassware
Small candles
Wooden serving bowl
Step-by-Step Styling
Leave most of the table surface visible.
Place one central vase or arrangement.
Add a small group of pumpkins.
Position candles around the arrangement.
Set the plates and napkins.
Use only a few accessories.
Step back and remove anything that appears unnecessary.
This style is particularly effective in modern, Scandinavian, contemporary, and minimalist homes.
5. Romantic Candlelit Fall Tablescape
A candlelit tablescape can create one of the most atmospheric fall dining experiences. It is especially suitable for date nights, dinner parties, Thanksgiving-inspired gatherings, or cozy evening meals.
Begin with a neutral linen runner. Choose cream, taupe, beige, or soft brown.
Use elegant dinnerware in white or cream.
Add linen napkins in muted rust, burgundy, or caramel.
The centerpiece should focus on candles. Use several candle holders at different heights, but make sure they are arranged safely and do not obstruct conversation.
Surround the candles with subtle greenery, dried leaves, or small branches.
Add a few small pumpkins in cream or muted orange.
Warm pendant lighting or nearby lamps should complement the candles rather than overpower them.
Materials and Things to Use
Linen runner
Cream plates
Linen napkins
Taper candles
Candle holders
Glass votive candles
Greenery
Dried foliage
Small pumpkins
Elegant glassware
Warm ambient lighting
Step-by-Step Styling
Lay down the runner.
Set each place setting.
Create a central line of candles.
Add greenery between candle holders.
Introduce a few small pumpkins.
Dim the overhead lighting.
Use warm lamps or pendant lighting to complement the candlelight.
Always keep candles away from fabrics and other flammable objects, and never leave burning candles unattended.
6. Organic Fall Tablescape With Pumpkins and Seasonal Foliage
An organic fall tablescape brings the beauty of nature directly to the dining table. It is a wonderful option if you want your table to feel seasonal without relying on artificial decorations.
Start with natural wood, stoneware, and linen.
Choose pumpkins in multiple muted shades, such as cream, sage, pale green, soft brown, and dusty orange. Mixing different sizes creates a natural appearance.
Add dried branches, wheat, eucalyptus, grasses, and seasonal foliage.
Use a large shallow wooden bowl or tray as the centerpiece.
Arrange pumpkins loosely instead of creating a perfectly symmetrical display.
Add a few pinecones and seed pods for additional texture.
Use cream ceramic dinnerware and neutral napkins to prevent the natural elements from becoming visually overwhelming.
Materials and Things to Use
Natural wood table
Linen runner
Wooden bowl
Mini pumpkins
Cream pumpkins
Muted green pumpkins
Dried foliage
Wheat
Eucalyptus
Pinecones
Seed pods
Stoneware plates
Linen napkins
Step-by-Step Styling
Place the wooden bowl or tray in the center.
Begin with the largest pumpkin.
Add smaller pumpkins around it.
Insert dried foliage between the pumpkins.
Add wheat stems for height.
Place pinecones and seed pods into empty spaces.
Set the dinnerware around the centerpiece.
Finish with warm candles or small lanterns.
The goal is to make the arrangement look naturally collected rather than perfectly manufactured.
7. Elegant Fall Tablescape With Vintage-Inspired Decor
Vintage-inspired fall tablescapes combine old-world charm with autumn warmth. This style is perfect for traditional homes, cottage interiors, romantic dining rooms, and anyone who loves timeless decor.
Start with a linen or lace-inspired runner.
Use vintage-looking plates with delicate patterns or slightly aged finishes.
Add brass, antique-gold, or bronze candle holders.
For the centerpiece, use a vintage ceramic pitcher or glass vase filled with dried branches and autumn flowers.
Place a few small pumpkins among the flowers.
Vintage-inspired glassware can add beautiful character.
For napkins, use linen in cream, dusty rose, burgundy, or muted brown.
Keep the table slightly imperfect. Vintage styling looks more authentic when the pieces do not appear overly coordinated.
Materials and Things to Use
Vintage-inspired table runner
Patterned plates
Linen napkins
Brass candle holders
Vintage glassware
Ceramic pitcher
Dried flowers
Autumn branches
Small pumpkins
Wooden serving board
Antique-inspired decorative pieces
Step-by-Step Styling
Begin with the runner.
Place your vintage-style dinnerware.
Add linen napkins.
Use the ceramic pitcher as the centerpiece.
Fill it with dried branches and seasonal flowers.
Arrange pumpkins around the base.
Add brass candle holders.
Use warm ambient lighting to emphasize the vintage character.
Avoid combining too many different colors. Cream, brown, burgundy, and muted rose can create a particularly elegant combination.
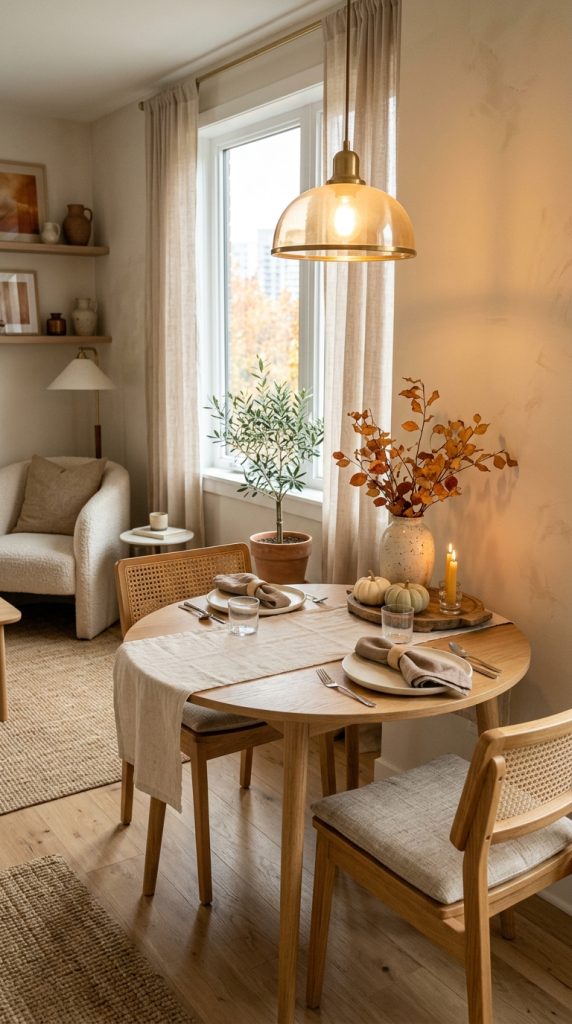
8. Cozy Small-Space Fall Tablescape
You do not need a large dining room to create a beautiful fall tablescape. A small apartment dining table, breakfast table, or kitchen island can look just as inviting when the styling is carefully scaled.
The key is to avoid oversized decorations.
Choose a narrow linen runner rather than a large centerpiece.
Use small ceramic pumpkins, a compact vase, and a few candles.
If you have a round table, create a small circular centerpiece rather than a long arrangement.
Use neutral plates and simple napkins.
A small vase filled with a few autumn branches can provide height without taking up much space.
Choose compact lighting such as a small pendant, table lamp nearby, or battery-operated candles.
Materials and Things to Use
Small dining table
Narrow runner
Compact ceramic vase
Small autumn branches
Mini pumpkins
Small candles
Neutral plates
Linen napkins
Compact glassware
Small wooden tray
Step-by-Step Styling
Measure the table before selecting decorative pieces.
Choose one small focal point.
Place the vase in the center.
Add two or three miniature pumpkins.
Position candles around the centerpiece.
Set the table with compact dinnerware.
Leave enough space for plates, food, and comfortable dining.
A small table often looks more elegant when it is decorated lightly rather than completely covered.
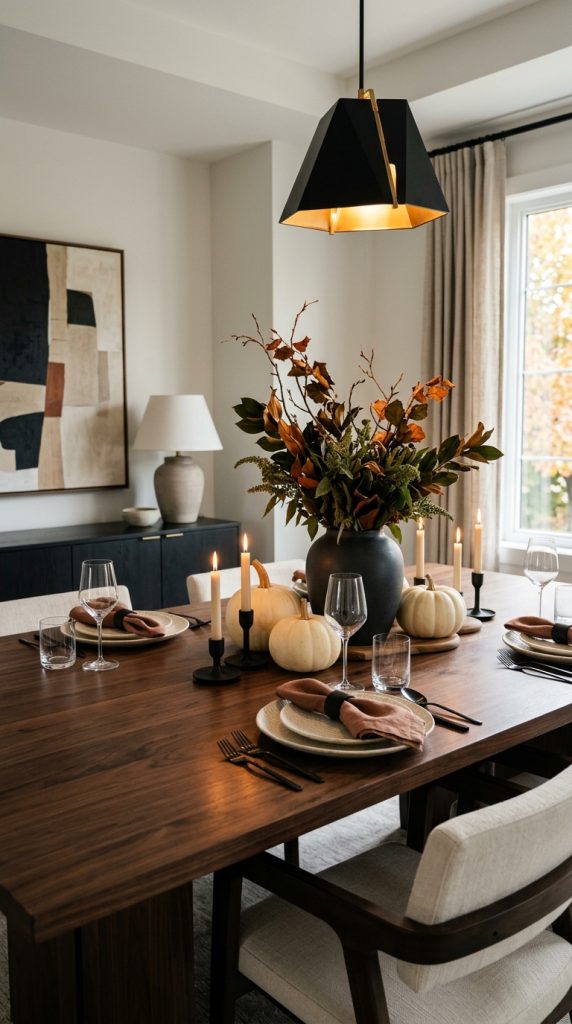
9. Modern Black, Cream, and Rust Fall Tablescape
For a contemporary fall tablescape, combine black, cream, natural wood, and muted rust. This palette creates contrast while remaining sophisticated.
Begin with a natural wood or black table.
Use cream plates to create a bright foundation.
Add black flatware if available.
Choose linen napkins in muted rust or caramel.
Create a simple centerpiece with cream pumpkins, rust-colored foliage, and black or dark ceramic vessels.
Add clear glassware to prevent the table from becoming too heavy.
Warm candles can soften the contrast between black and cream.
Include a small amount of greenery to make the table feel fresh.
Materials and Things to Use
Black or wood dining table
Cream plates
Black flatware
Rust linen napkins
Dark ceramic vase
Autumn foliage
Cream pumpkins
Clear glassware
Wooden serving board
Candles
Greenery
Step-by-Step Styling
Start with the table surface.
Add cream plates and black flatware.
Fold rust napkins simply.
Place the dark vase in the center.
Add autumn branches and greenery.
Arrange cream pumpkins around the vase.
Add candles.
Finish with clear glassware.
Keep the design clean and geometric rather than overly rustic.
This style works especially well in modern apartments and contemporary homes.
10. Luxurious Fall Tablescape for an Autumn Dinner Party
For a special fall dinner party, create a layered tablescape that combines elegant tableware, rich textiles, natural elements, candles, and sophisticated lighting.
Begin with a high-quality-looking linen runner in cream, taupe, caramel, or muted brown.
Use layered dinnerware. A charger underneath the dinner plate can make each place setting feel more formal.
Add linen napkins in burgundy, olive, or muted rust.
Use elegant glassware and, if appropriate, polished flatware.
The centerpiece should be dramatic but low enough for conversation. A long arrangement of autumn foliage, dried flowers, branches, and neutral pumpkins can run down the center of the table.
Add taper candles at different points along the arrangement.
For place settings, consider adding a tiny seasonal detail such as a miniature pumpkin, dried leaf, or small sprig of greenery.
Use warm pendant lighting or a chandelier combined with candlelight.
Materials and Things to Use
Linen table runner
Chargers
Elegant dinner plates
Linen napkins
Polished flatware
Glassware
Autumn branches
Dried flowers
Neutral pumpkins
Taper candles
Candle holders
Greenery
Wooden serving boards
Decorative bowls
Step-by-Step Styling
Start with the runner.
Build each place setting layer by layer.
Fold the napkins and position them consistently.
Create the centerpiece down the middle of the table.
Use foliage as the base.
Add dried flowers and branches.
Place pumpkins between the arrangements.
Add candle holders at regular intervals.
Introduce subtle greenery.
Turn on warm ambient lighting and dim brighter overhead lights if possible.
Before guests arrive, remove anything that blocks conversation or makes the table difficult to use.
The finished table should feel luxurious, welcoming, and special without becoming excessively formal.
How to Make Any Fall Tablescape Look More Expensive
You do not need expensive tableware to create a luxury-looking fall tablescape. The most important factor is how the individual elements are combined.
Start with a limited palette. Three to five coordinated colors usually look more sophisticated than a table covered in unrelated colors.
Layer your materials. Combine linen, ceramic, wood, glass, greenery, and metal. Different textures create depth and make even inexpensive items appear more interesting.
Use larger focal pieces rather than many tiny decorations. One beautiful vase with branches can create more impact than ten small seasonal objects.
Repeat colors throughout the table. If you use muted rust napkins, repeat rust through a few leaves or flowers in the centerpiece.
Add warm lighting. Candles, warm pendant lighting, table lamps, and lanterns can dramatically improve the atmosphere.
Leave some empty space. A luxurious table should not look crowded.
Finally, make sure everything is clean and properly arranged. Ironed or neatly folded napkins, polished glassware, and evenly spaced plates can make a simple table feel much more refined.
Final Conclusion
A beautiful fall tablescape can completely change the atmosphere of your dining space. You do not need a huge collection of seasonal decorations or an expensive dining set to create a table that feels warm, elegant, and Pinterest-worthy. With a thoughtful combination of colors, textures, natural materials, tableware, and warm lighting, even a simple dining table can become a beautiful seasonal focal point.
The most successful fall tablescapes begin with a clear design direction. Neutral cream and beige create a timeless and sophisticated appearance. Rustic wood and natural textures create a relaxed farmhouse feeling. Burgundy and chocolate brown bring drama and richness. Minimalist greenery creates a clean contemporary look, while candlelight adds romance and warmth.
Natural materials are particularly effective because they make seasonal decorating feel authentic. Pumpkins, pinecones, dried branches, wheat, eucalyptus, seasonal flowers, wooden bowls, and woven placemats can all bring autumn indoors without making the table look overly themed.
Color should be used intentionally. Rather than combining every traditional fall color, select a small palette and repeat it throughout the table. Cream with muted rust and olive is an especially versatile combination. Burgundy, brown, and ivory can create a deeper and more dramatic mood, while black, cream, and rust work beautifully for modern interiors.
Texture is equally important. Linen napkins, stoneware plates, natural wood, woven placemats, glassware, ceramic vessels, and metallic candle holders create layers that make the table visually interesting.
Lighting can be the final detail that transforms an attractive tablescape into a memorable one. Warm candlelight, soft pendant lighting, and nearby lamps create a cozy atmosphere that is particularly beautiful during fall evenings. Keep the lighting slightly warm and inviting rather than extremely bright.
Remember that the table still needs to function as a dining space. Centerpieces should not block conversation, decorative pieces should not interfere with serving food, and candles should always be positioned safely. Beautiful styling works best when it supports comfortable dining rather than making it difficult.
Most importantly, do not be afraid to keep things simple. A beautiful linen runner, cream dinnerware, a ceramic vase filled with autumn branches, a few pumpkins, and several warm candles can be enough to create an impressive fall table.
Whether you are preparing a casual family dinner, a cozy date night, a Thanksgiving-inspired gathering, or a sophisticated autumn dinner party, these ten fall tablescape ideas give you plenty of ways to create a table that feels seasonal without sacrificing elegance.
The perfect fall tablescape should make people want to sit down, stay longer, enjoy good food, and appreciate the beauty of the season. Choose your favorite color palette, layer natural textures, add a few carefully selected autumn details, introduce warm lighting, and let your dining table become the cozy centerpiece of your fall home.
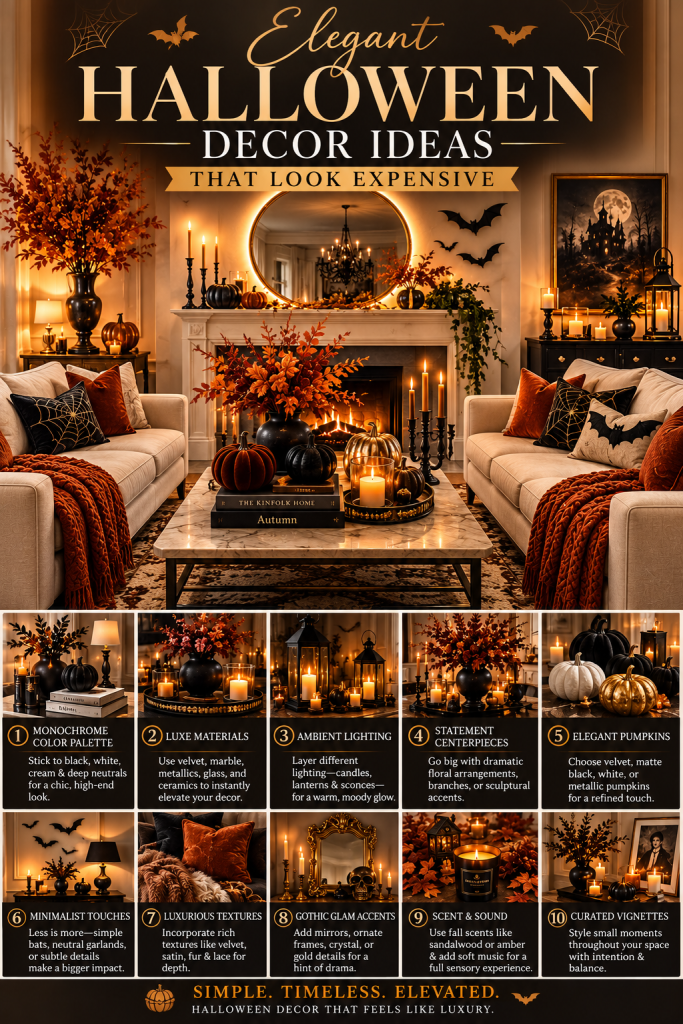
Halloween decorating does not have to mean covering every surface with plastic skeletons, neon-orange lights, cartoon pumpkins, or inexpensive-looking seasonal accessories. If your goal is to create a home that feels sophisticated, warm, dramatic, and beautifully styled for Halloween, the secret is not spending more money—it is choosing the right colors, textures, materials, lighting, and decorative details. Elegant Halloween decor combines the mysterious atmosphere traditionally associated with Halloween with the polished visual language of luxury interiors. Think deep charcoal, warm ivory, muted black, aged brass, antique-inspired glass, velvet, natural wood, soft candlelight, and carefully selected pumpkins rather than an overwhelming collection of novelty decorations.
An expensive-looking Halloween home should feel intentional. Every decorative piece should have a purpose, and the overall arrangement should look like it belongs together. Instead of buying dozens of Halloween-specific objects, you can often transform ordinary home decor into seasonal styling by changing textiles, adding atmospheric lighting, introducing dramatic floral arrangements, or creating a sophisticated centerpiece. A simple black vase, for example, can become an elegant Halloween focal point when filled with dark branches and surrounded by ivory pumpkins. A velvet throw can make an ordinary sofa look luxurious, while brass candlesticks and warm candles can immediately create a moody autumn atmosphere.
The best elegant Halloween decorations also work with the existing character of your home. Modern homes can use minimalist black-and-white Halloween styling. Traditional interiors can embrace antique mirrors, vintage candlesticks, botanical arrangements, and classic pumpkins. Farmhouse spaces can combine natural wood, linen, dried branches, and understated black accents. Even a small apartment can achieve a luxurious Halloween appearance by concentrating decoration in a few high-impact areas instead of attempting to decorate every room.
Color is one of the most important elements. Traditional orange can certainly be used, but elegant Halloween decor often looks more sophisticated when orange is muted or used sparingly. Burnt orange, terracotta, rust, caramel, cream, warm taupe, and deep brown can create an autumnal palette without looking overly themed. Black can then be introduced through candles, ribbons, vases, picture frames, textiles, or small accessories. Metallic accents such as antique gold, aged brass, or bronze add warmth and make inexpensive pieces feel more refined.
Lighting is equally important. Bright overhead lighting can flatten a beautifully decorated room, while layered warm lighting creates depth and atmosphere. Table lamps, sconces, candles, lanterns, and small warm-white lights can make a room feel instantly more luxurious. The goal is not to make the space dark; it is to create a soft glow that highlights your best decorations. A mirror positioned near candlelight can also reflect the glow and make a room appear larger and more dramatic.
Another important principle is restraint. Luxury interiors rarely depend on quantity. Instead, they use repetition, balance, scale, and texture. Three beautifully arranged pumpkins can be more visually impressive than twenty randomly placed pumpkins. One large floral arrangement may create more impact than several tiny decorations scattered throughout the room. A single dramatic wreath on the front door can communicate the Halloween theme more effectively than a collection of unrelated signs.
Texture is another inexpensive way to create a premium appearance. Velvet, linen, wool, wood, ceramic, glass, metal, and natural branches create layers that make a room look professionally styled. Even if the individual pieces are affordable, combining different textures makes the finished arrangement appear richer. A matte black ceramic pumpkin beside a glossy glass candle holder and a soft velvet ribbon immediately creates visual contrast.
The ideas below are designed for homeowners, renters, and beginners who want Halloween decor that looks elegant without requiring a huge decorating budget. Each idea focuses on a specific area or technique and includes practical styling instructions, materials, and ways to make affordable pieces look more expensive. You do not need to copy every idea. Choose a few that complement your home and repeat the same colors and materials throughout the space. This creates cohesion and makes your decorations look intentionally designed rather than randomly collected.
Whether you are decorating a front porch, entryway, living room, dining table, bedroom, kitchen, or small apartment, the most effective strategy is to build a sophisticated Halloween atmosphere gradually. Start with a neutral base, introduce one or two dramatic colors, add natural textures, layer warm lighting, and finish with a few seasonal details. This approach allows Halloween decor to blend naturally with your everyday interior design.
The result can be spooky without being childish, dramatic without being overwhelming, and luxurious without being expensive. These elegant Halloween decor ideas are especially useful for creating Pinterest-worthy spaces because they combine strong visual contrast, seasonal atmosphere, beautiful textures, and practical styling that readers can realistically recreate at home.
1. Create a Black and Ivory Halloween Entryway
The entryway is one of the easiest places to create an expensive-looking Halloween atmosphere because a small number of carefully chosen pieces can make a dramatic first impression. Instead of covering the entrance with traditional Halloween signs and brightly colored decorations, create a refined black-and-ivory arrangement that feels sophisticated and timeless.
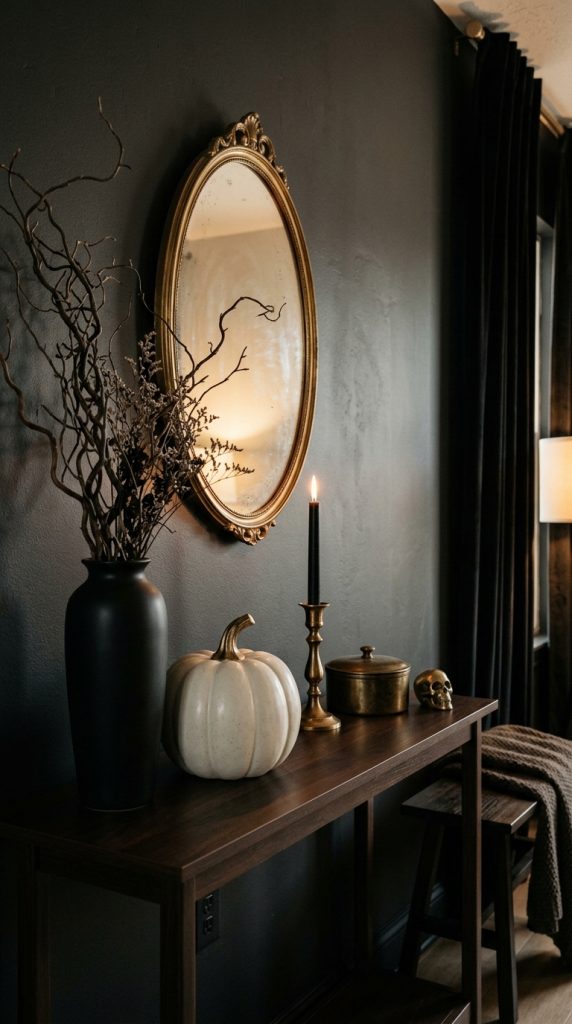
Begin with a neutral foundation. If you already have a console table, keep its surface relatively uncluttered. Add a large black or dark wood mirror above the table if one is available. The mirror creates height and gives the arrangement a finished interior-design appearance. If your existing mirror has a lighter frame, you can introduce black through smaller accessories instead of replacing it.
Choose two or three pumpkins in different sizes. Ivory pumpkins work beautifully as the main feature, while one matte black pumpkin provides contrast. Avoid using too many different pumpkin colors because the limited palette is what makes the display look expensive.
Add a tall black vase filled with dried branches. Bare branches create height and introduce a slightly mysterious Halloween feeling without relying on novelty decorations. If you want a softer autumn look, use dried eucalyptus, wheat, pampas grass, or preserved branches in muted brown tones.
Next, introduce warm metallic accents. A small antique-brass tray, candlestick, or decorative bowl can provide just enough shine. Brass works particularly well with black because it creates a warm contrast instead of making the space feel cold.
Lighting should remain soft. Place a small table lamp on the console if space allows, or use battery-operated candles in glass holders. Warm light will highlight the pumpkins and metallic details while making the entire entryway feel more inviting.
Materials and Decor Needed
Black or dark wood mirror
Console table
Ivory pumpkins
One or two black pumpkins
Matte black vase
Dried branches
Antique-brass tray or candlestick
Warm LED candles
Small decorative bowl
Optional black ribbon
How to Make It Look More Expensive
The most important rule is to leave negative space. Do not fill every inch of the console. Group objects into small clusters and vary their heights. For example, place the vase on one side, pumpkins in the center, and a low tray or candle on the opposite side. This asymmetrical arrangement can look more sophisticated than a perfectly symmetrical display.
You can also tie a thin black velvet ribbon around the vase or a pumpkin stem. Velvet immediately adds texture and creates a luxurious seasonal detail.
For a Pinterest-worthy finish, photograph or style the entryway with warm evening lighting, clean surfaces, and a neutral background. The final effect should feel like an elegant autumn interior with a subtle Halloween identity rather than a traditional Halloween display.
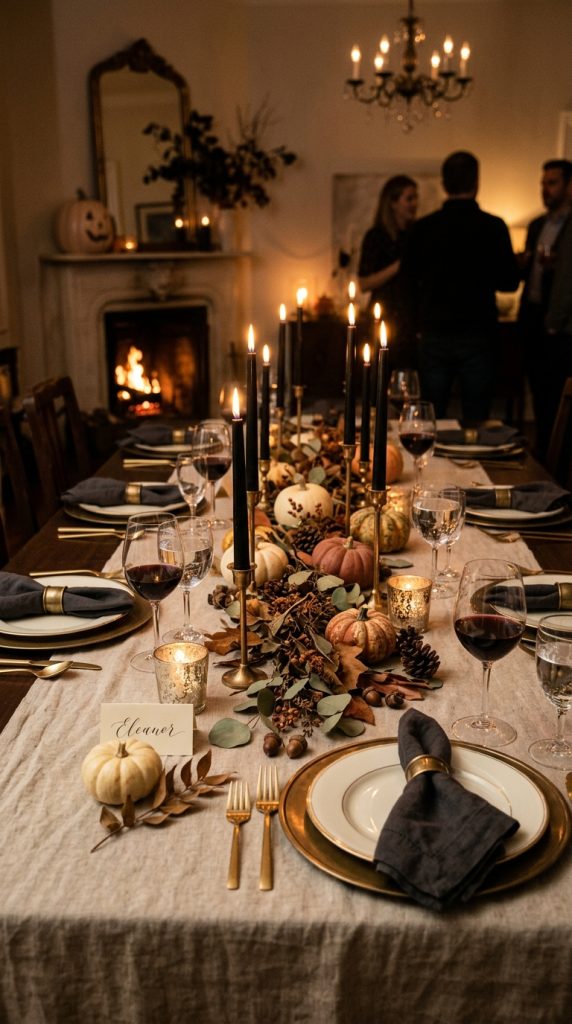
2. Style a Luxury Halloween Dining Table
A dining table offers a perfect opportunity to create a dramatic Halloween centerpiece without purchasing expensive decorations. The key is to treat the table as an elegant dinner setting first and a Halloween display second.
Start with a neutral table runner in linen, cotton, or another natural fabric. Cream, taupe, charcoal, or muted brown are excellent choices. Avoid highly printed Halloween tablecloths because they can make the space feel less sophisticated.
Place dark plates or neutral ceramic plates at each setting. If you do not own black dinnerware, ordinary white plates work perfectly. Layering white plates with black napkins can create the same effect.
Use black or dark brown cloth napkins and add a simple decorative element. A small dried leaf, cinnamon-colored ribbon, rosemary sprig, or tiny pumpkin can be placed on top of each napkin.
For the centerpiece, select a low arrangement so guests can see across the table. Use a large ceramic bowl or shallow tray as the foundation. Add ivory mini pumpkins, a few muted orange pumpkins, pinecones, dried leaves, and dark branches.
Candles are essential for creating an elegant Halloween atmosphere. Place several candle holders along the center of the table. Antique brass, black metal, or smoked glass holders are especially effective. Use warm LED candles if open flames are inconvenient.
Materials and Decor Needed
Neutral table runner
Black or charcoal napkins
White or dark dinner plates
Ceramic bowl or tray
Ivory pumpkins
Muted orange pumpkins
Pinecones
Dried leaves
Black or brown branches
Brass or black candle holders
Warm LED candles
Simple glassware
Step-by-Step Styling
First, place the runner in the center of the table. Arrange your centerpiece tray in the middle. Add the largest pumpkins first, then fill smaller gaps with mini pumpkins and pinecones.
Insert branches into the arrangement to create height. Do not make the centerpiece perfectly uniform. Slight variation creates a more natural, professionally styled appearance.
Place candle holders around the centerpiece rather than directly inside it. This creates a layered effect and allows the candlelight to spread across the table.
Finish the place settings with folded napkins and a small seasonal detail.
How to Keep the Budget Low
You do not need a complete Halloween dinnerware collection. Use your existing white plates and ordinary glassware. Invest your attention in the centerpiece and lighting because those elements are visually dominant.
A beautiful table does not need expensive flowers either. Dried branches from your yard can sometimes create the perfect dramatic centerpiece. Combine them with affordable pumpkins and neutral ceramics to create a luxurious seasonal arrangement.
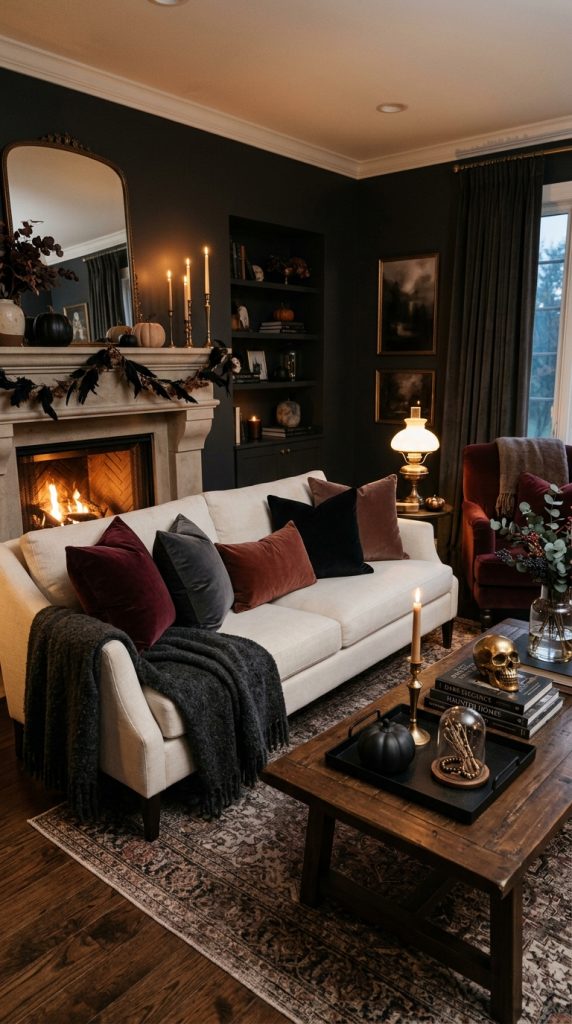
3. Use Velvet to Make Halloween Decor Look Luxurious
Velvet is one of the easiest materials for creating an expensive-looking Halloween interior. Its rich texture catches light beautifully and instantly makes ordinary furniture appear more sophisticated.
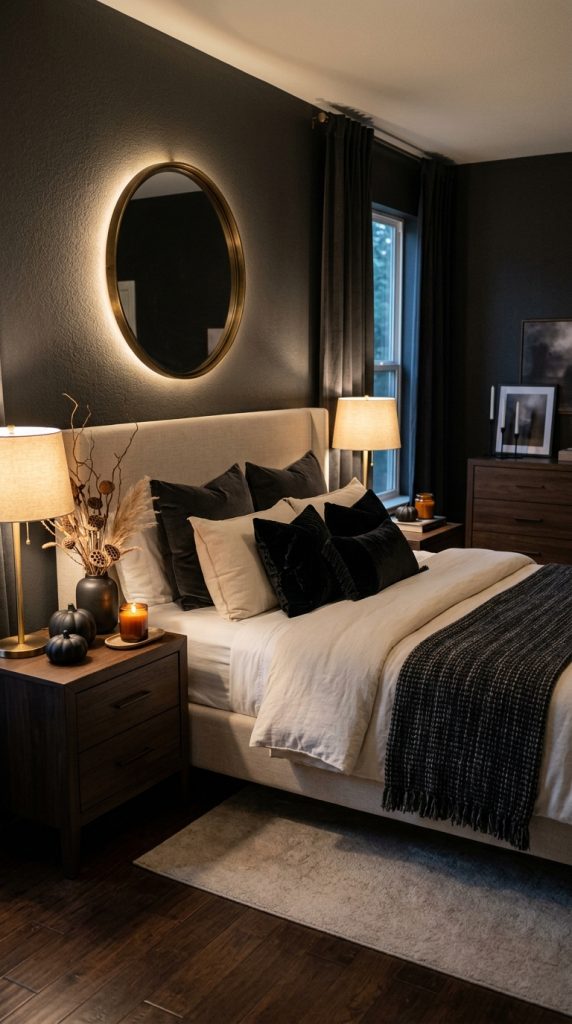
You do not need to replace your furniture. Instead, introduce velvet through small accents. A black velvet pillow, rust-colored throw, dark green cushion, or deep plum blanket can completely change the seasonal appearance of a living room or bedroom.
Begin with your existing neutral sofa. Add two velvet pillows in dark colors. Black, charcoal, forest green, burgundy, espresso brown, and muted rust all work beautifully for Halloween.
Then add one textured throw. Drape it casually over the arm of the sofa rather than folding it perfectly. This makes the room feel comfortable and lived-in.
Pair the velvet with natural materials such as wood, stone, ceramic, or woven baskets. Too much velvet can make a room feel heavy, but combining it with rougher textures creates balance.
For Halloween, you can add one or two seasonal objects nearby. A black ceramic pumpkin on the coffee table or an antique-looking candle holder can reinforce the theme.
Materials and Decor Needed
Velvet throw
Velvet cushions
Neutral sofa
Black or charcoal ceramic accessories
Wooden tray
Candles
Decorative pumpkins
Warm table lamp
Optional brass accessories
Step-by-Step Styling
Start with your largest textile, such as a throw. Choose a color that complements the existing sofa.
Add two or three cushions in different textures. One can be velvet, another linen, and another woven. This creates visual depth.
Place a wooden or metal tray on the coffee table. Add one candle, one small pumpkin, and one decorative object.
Keep the remaining table surface clear.
The luxury effect comes from restraint. Instead of adding ten Halloween accessories, choose two or three exceptional-looking pieces and allow them to stand out.
Budget-Friendly Trick
Look for velvet cushion covers rather than complete pillows. Cushion covers are often cheaper and easier to store after Halloween. You can also reuse the same covers for fall or winter styling by changing the surrounding accessories.
This approach creates a seasonal transformation without requiring a large collection of Halloween decorations.
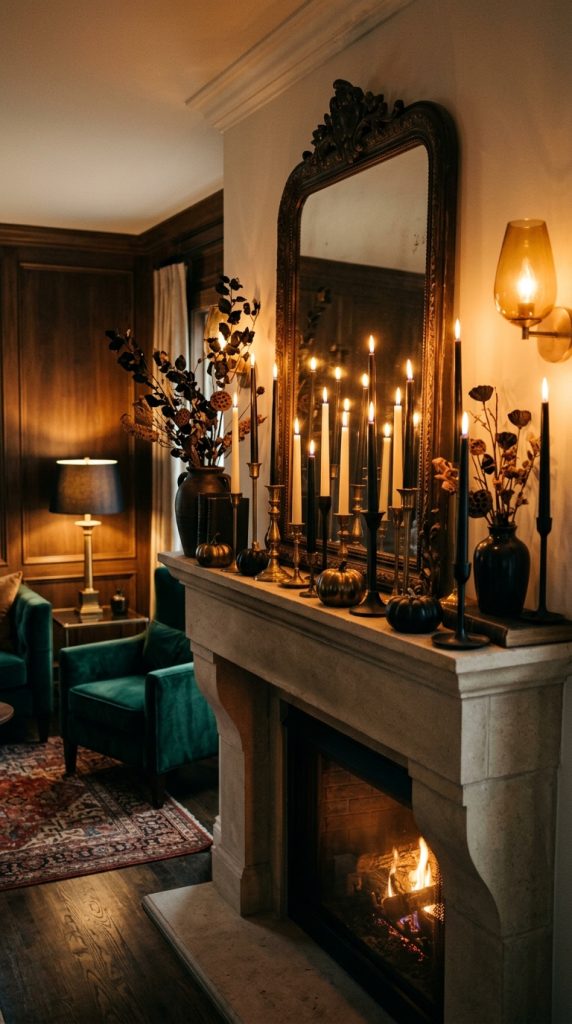
4. Create a Moody Halloween Fireplace Mantel
A fireplace mantel naturally becomes a focal point, making it ideal for sophisticated Halloween styling. Even if you have an electric fireplace or simply a media console, you can recreate the same visual effect.
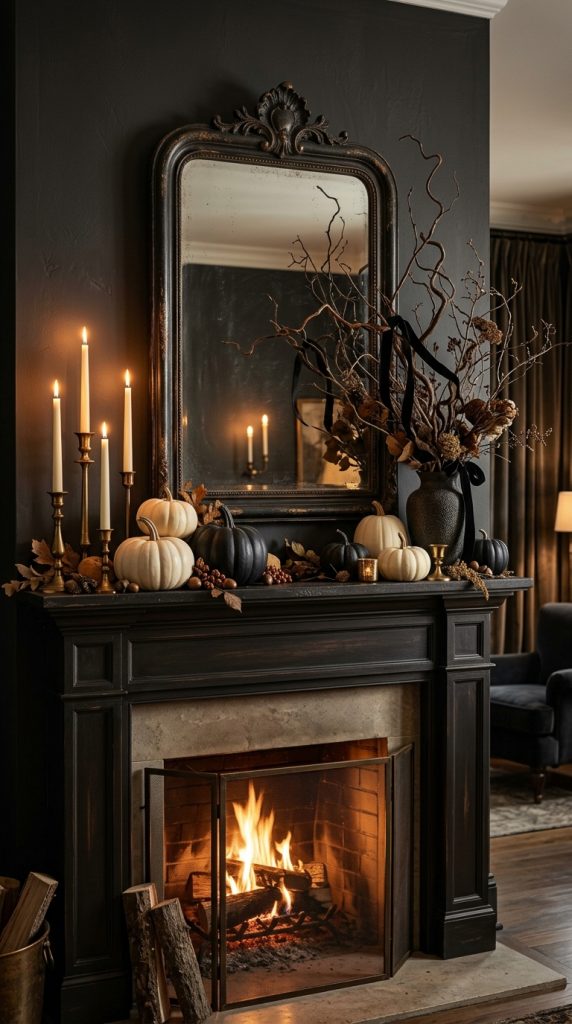
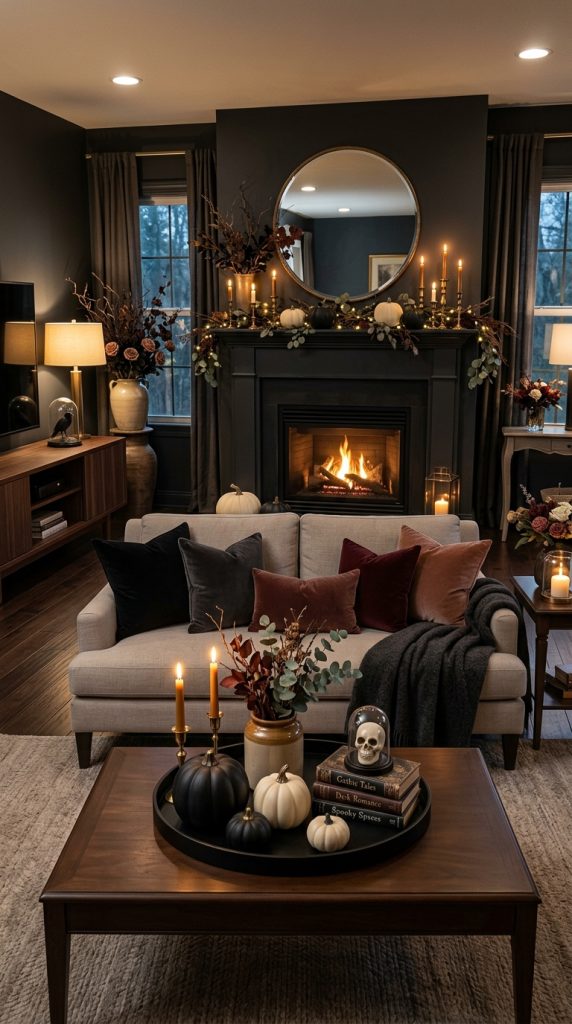
Begin with a large mirror or piece of artwork above the mantel. A black-framed mirror is especially effective because it reflects candlelight and adds depth.
Next, introduce greenery or branches. Use dark branches, dried eucalyptus, olive branches, or another natural material that fits your home.
Add pumpkins gradually. Place a large ivory pumpkin at one end and a black or muted orange pumpkin at the other. Add smaller pumpkins between them.
Use candlesticks of different heights to create vertical movement. Antique brass, black iron, and dark bronze are excellent choices.
If you want a more dramatic look, add a black velvet ribbon to the branches. Keep the ribbon loose rather than making large decorative bows.
Materials and Decor Needed
Large mirror
Dried branches
Ivory pumpkins
Black pumpkins
Muted orange pumpkins
Brass or black candlesticks
LED candles
Velvet ribbon
Ceramic vase
Styling Method
Start by creating the tallest element, such as the branches. Position them slightly off-center.
Add the mirror behind the arrangement if one is already installed.
Place the largest pumpkin on the opposite side of the branches to create visual balance.
Add medium and small pumpkins around the larger pieces.
Finally, introduce candles at different heights.
The goal is to create a composition that looks collected rather than arranged in a perfect row.
Expensive-Looking Detail
Use repetition. If your mantel includes antique brass, repeat brass in one smaller object elsewhere in the room. If you use black velvet ribbon, repeat black through a cushion or vase.
Repeated materials create cohesion and make inexpensive decorations appear intentionally selected.
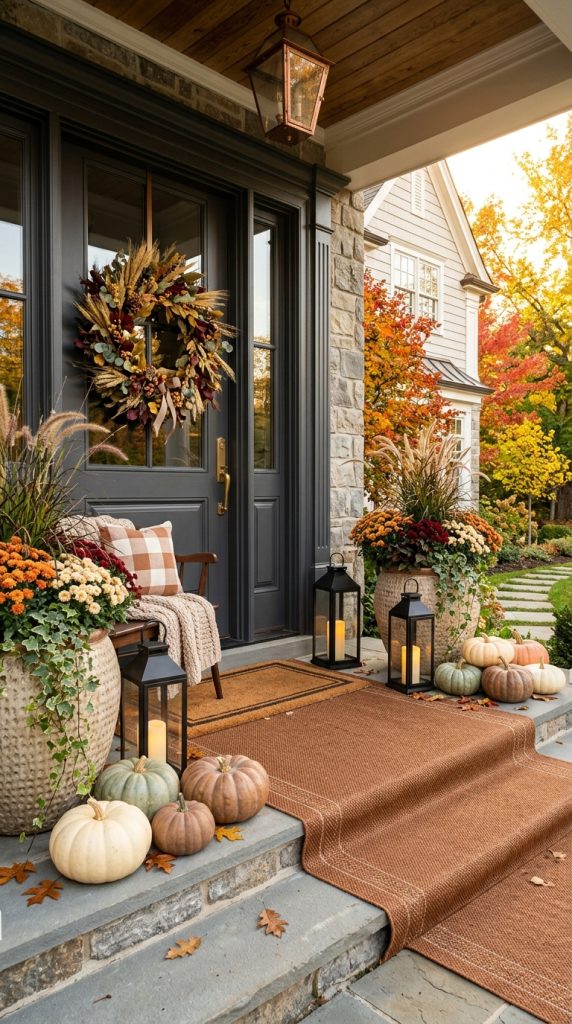
5. Decorate the Front Porch With Sophisticated Pumpkins
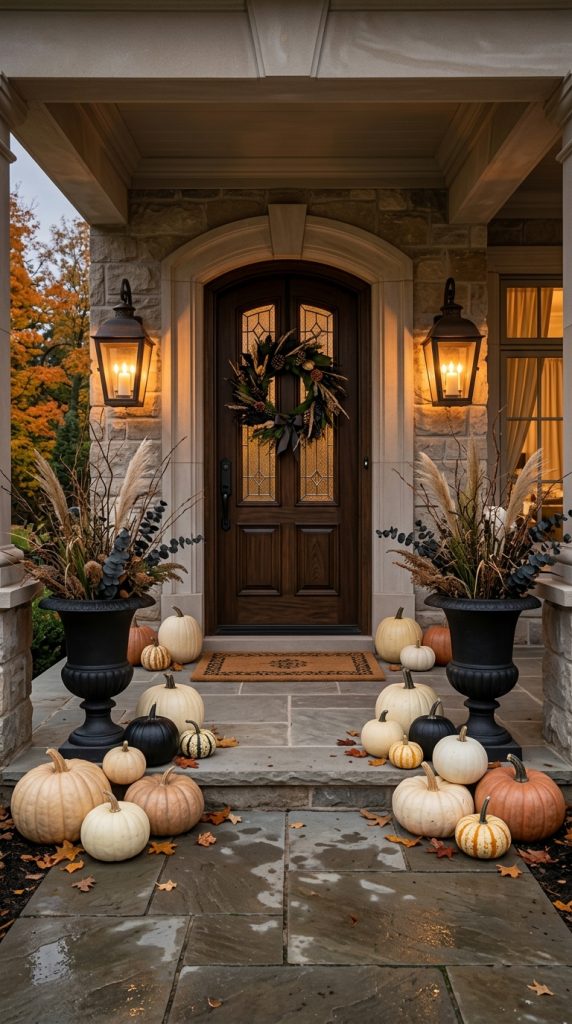
Your front porch establishes the Halloween mood before guests even enter your home. Fortunately, an elegant porch can be created with inexpensive pumpkins, natural materials, and strategic lighting.
Instead of using brightly colored plastic decorations, build a monochromatic or muted autumn palette.
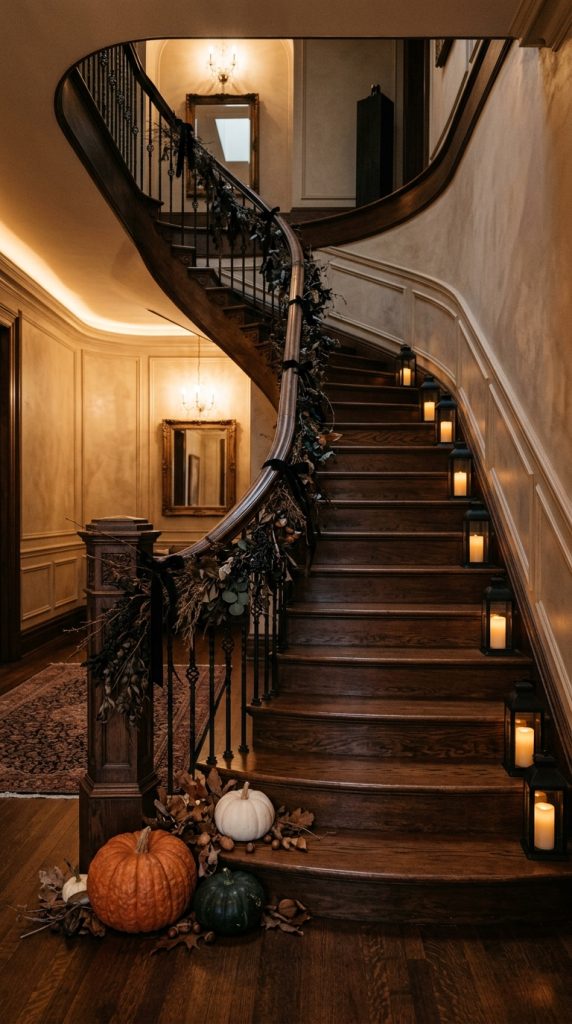
Start with several pumpkins in different sizes. Use cream, white, black, muted orange, and natural green varieties if available.
Arrange the pumpkins around the front door rather than placing them in one straight line. Create clusters on both sides of the entrance.
Add tall planters with branches, dried grasses, or seasonal greenery. Height is important because it frames the doorway and creates a more finished appearance.
A simple black wreath can be placed on the door. If you want a more luxurious effect, choose a wreath made with dried branches, eucalyptus, dark leaves, or a combination of neutral materials.
Lighting should be warm and subtle. Use lanterns beside the door and warm outdoor bulbs if possible.
Materials and Decor Needed
Assorted pumpkins
Black or neutral wreath
Large planters
Dried branches
Seasonal grasses
Lanterns
Warm outdoor lights
Black ribbon
Natural doormat
How to Arrange the Pumpkins
Start with your largest pumpkins near the bottom. Place medium pumpkins beside them and smaller pumpkins slightly forward.
Avoid creating identical arrangements on both sides. Instead, balance them visually while allowing each side to remain slightly different.
Add lanterns behind the pumpkins so the light appears to glow through the arrangement.
Budget Tip
Use ordinary pumpkins as your primary decoration rather than buying specialty Halloween props. A simple pumpkin can look expensive when it is styled with the right surroundings.
You can also paint a few pumpkins matte black or warm ivory using appropriate craft paint. A consistent finish can make inexpensive pumpkins appear like designer accessories.
6. Make a Sophisticated Halloween Coffee Table Arrangement
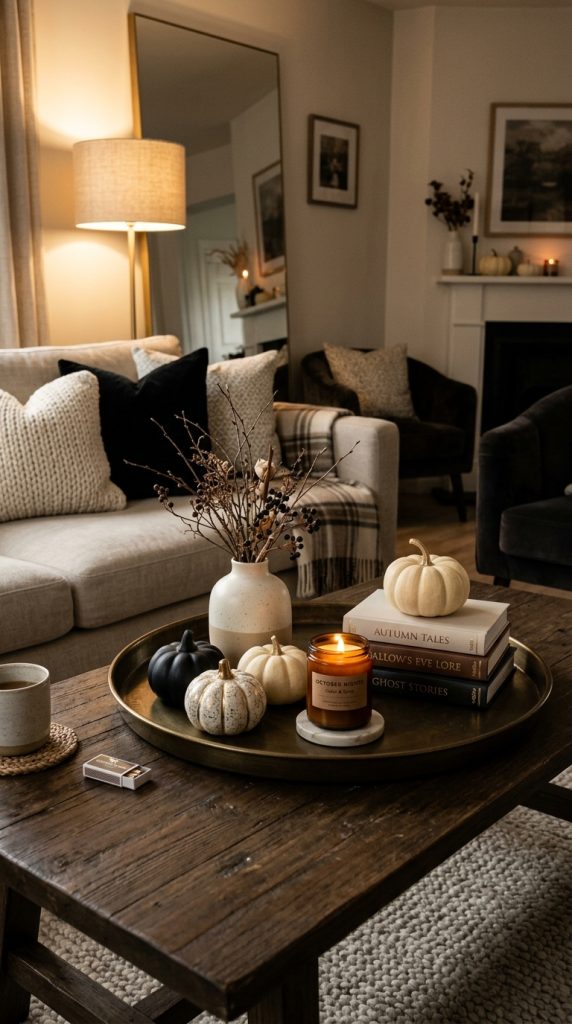
The coffee table is an ideal place for a small Halloween moment that does not overwhelm the living room. The trick is to use a tray to organize the decoration.
Choose a rectangular, round, or square tray. Wood, black metal, marble-look, or antique brass can all work.
Place the tray in the center of the coffee table. Add a short ceramic vase filled with dried branches.
Next, add one or two small pumpkins. Choose neutral or dark colors.
Place a candle beside the vase. A black, cream, amber, or smoky glass candle works beautifully.
Finally, add a small stack of decorative books if you have them. Books create height and make the arrangement feel like part of an interior-design composition rather than a seasonal display.
Materials and Decor Needed
Decorative tray
Small vase
Dried branches
Two or three mini pumpkins
Candle
Decorative books
Small ceramic object
Optional brass accent
Step-by-Step
Place the books toward one side of the tray. Put the vase on top or beside them.
Place one pumpkin at the front and another slightly behind it.
Add the candle to the opposite side.
Make sure the arrangement has different heights. The eye should naturally move from the tallest element to the smallest.
Keep It Functional
Remember that a coffee table still needs to be usable. Avoid creating an arrangement so large that people cannot place a cup or move around it.
A compact, well-designed arrangement will always look more luxurious than a crowded table.
7. Create an Elegant Halloween Gallery Wall
Halloween does not always need pumpkins. Artwork can create a sophisticated seasonal mood while allowing the rest of your home to remain relatively understated.
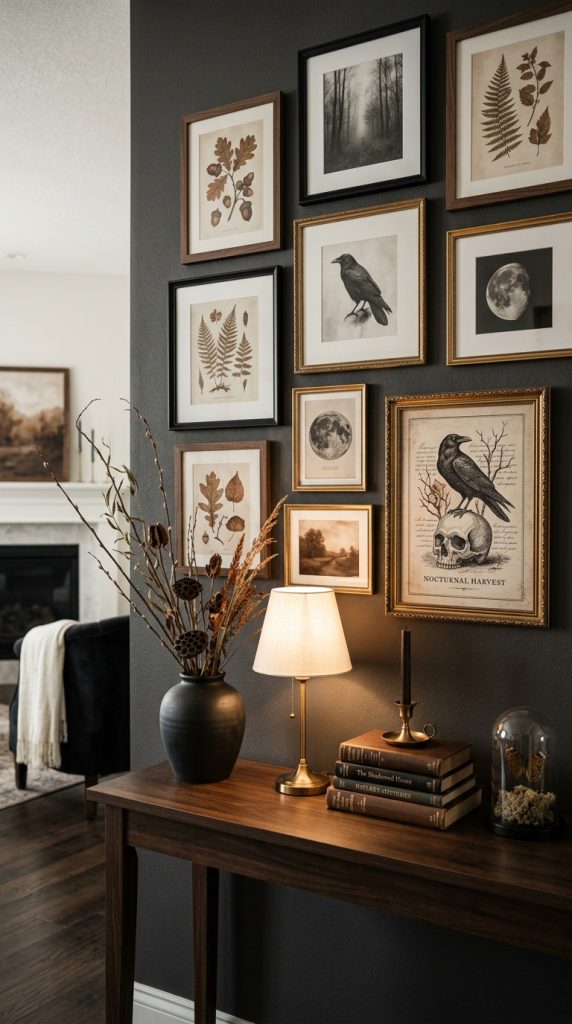
Use existing frames if possible. Black, walnut, dark brown, and antique gold frames work particularly well.
You can create a temporary Halloween gallery wall using printable artwork featuring botanical illustrations, vintage-inspired silhouettes, ravens, moon imagery, autumn leaves, old-fashioned architecture, or black-and-white photography.
Keep the artwork within a limited palette. Black, ivory, sepia, muted brown, and dark green create a cohesive appearance.
Arrange the frames in a simple grid or relaxed gallery configuration.
Materials and Decor Needed
Existing picture frames
Black-and-white artwork
Botanical prints
Vintage-style illustrations
Removable hanging strips if needed
Small decorative mirror
Optional brass frame
Styling Advice
Do not use too many Halloween-specific images. A single subtle seasonal print can be more sophisticated than a wall filled with ghosts and bats.
Mix Halloween-inspired artwork with ordinary vintage-style pieces. This makes the gallery wall feel permanent and curated.
Budget-Friendly Approach
You can reuse frames you already own and change only the artwork inside them. This is an inexpensive seasonal decorating strategy because the frames can be used throughout the year.
For renters, removable hanging strips can help create a temporary display without making permanent changes to the wall.
8. Add Black Candles and Warm Ambient Lighting
Lighting can completely transform inexpensive decor. If you want Halloween decorations to look expensive, focus on illumination as much as the decorations themselves.
Black candles are especially effective because they create a dramatic contrast against cream walls, neutral tables, and warm wood.
Arrange candles in groups of three or five. Use different heights but keep the same general color palette.
Place them on a mantel, dining table, entryway console, bathroom counter, or bedroom nightstand.
For safety and convenience, flameless LED candles are an excellent alternative. Choose warm-white versions rather than cool-white lights because warm light creates a softer atmosphere.
Materials and Decor Needed
Black candles
Cream candles
Glass candle holders
Brass candlesticks
LED candles
Small lanterns
Table lamps
Warm string lights
Layering the Lighting
Begin with existing room lighting. Turn off harsh overhead lighting if possible.
Use table lamps to create a base layer.
Add candles as decorative accent lighting.
Finally, use small warm lights around shelves, mirrors, or architectural features if needed.
Why This Looks Expensive
Luxury interiors rarely rely on one strong light source. Multiple small light sources create shadows, highlights, and depth.
Your Halloween decorations will look more dramatic when the room has layered illumination rather than bright overhead light.
The important thing is to maintain visibility. Elegant does not mean making the room excessively dark. Keep enough light for the space to remain comfortable and inviting.
9. Style an Elegant Black and Gold Halloween Corner
Black and gold are classic colors for creating a glamorous Halloween look. The combination can work in living rooms, dining rooms, bedrooms, entryways, and even small apartments.
Start with a black base. This could be a black vase, picture frame, candle holder, lamp, or small side table.
Introduce gold through one or two accents. Antique brass often looks more sophisticated than extremely shiny gold.
Add a cream pumpkin between the black and metallic objects. This softens the contrast and prevents the arrangement from looking too severe.
Materials and Decor Needed
Black vase
Antique brass tray
Cream pumpkins
Black candle
Brass candlestick
Dark branches
Small mirror
Velvet ribbon
Arrangement
Place the tallest object at the back. Add the pumpkin toward the front.
Put the brass accessory beside the black object.
Use the candle to create another vertical layer.
If there is a mirror nearby, position it where it can reflect the metallic detail or candlelight.
Beginner Tip
Do not use gold everywhere. Two or three gold elements are usually enough.
The expensive appearance comes from contrast: matte black, soft ivory, natural wood, and small amounts of aged metal.
10. Create a Luxe Halloween Bedroom
Halloween decor can be subtle and sophisticated in the bedroom. Rather than filling the room with themed objects, focus on bedding, lighting, and a few carefully selected accessories.
Start with neutral bedding. White, cream, beige, or light gray provides an excellent base.
Add dark velvet or linen pillows in black, charcoal, burgundy, or forest green.
Place a dark throw at the foot of the bed.
On the nightstands, use warm lamps and one small seasonal object. A black ceramic pumpkin or amber glass candle can provide enough Halloween atmosphere.
If you have a mirror, place warm lighting near it. The reflected glow creates depth and gives the room a more luxurious appearance.
Materials and Decor Needed
Neutral bedding
Velvet cushions
Dark throw
Black ceramic pumpkin
Warm bedside lamps
Amber glass candle
Dark vase
Dried branches
Optional black ribbon
Step-by-Step
Begin with the bedding as the neutral foundation.
Add two large pillows behind smaller decorative cushions.
Place a dark throw across the bottom third of the bed.
Keep nightstands uncluttered.
Add one seasonal accessory to each side if desired.
Use warm lighting to complete the mood.
Why This Works
The bedroom should remain relaxing. Too many Halloween decorations can make the space feel busy.
Instead, use seasonal colors and textures to communicate the theme. A black velvet pillow can feel luxurious rather than overtly Halloween-themed, while a small pumpkin quietly reinforces the season.
11. Design a Minimalist Halloween Kitchen
The kitchen does not need extensive Halloween decorations to feel seasonal. In fact, minimalist styling often creates the most expensive appearance.
Start by clearing unnecessary countertop clutter. A clean surface makes even a few decorative objects look more intentional.
Choose one area, such as a coffee station, kitchen island, or open shelf.
Add a small black ceramic vase with dried branches.
Place two or three mini pumpkins nearby.
If you have an open shelf, introduce a black mug, cream ceramic bowl, or dark glass container.
Use warm under-cabinet lighting or a small lamp to create atmosphere.
Materials and Decor Needed
Mini pumpkins
Black ceramic vase
Dried branches
Neutral ceramics
Black mugs
Amber glass jars
Warm lighting
Small wooden tray
Coffee Station Idea
A Halloween coffee station can become a beautiful seasonal focal point. Place a wooden tray on the counter.
Add your coffee maker or mugs as usual, then introduce one black mug, a small pumpkin, and a candle or decorative jar.
A small chalkboard-style sign can be added if desired, but keep the typography simple and elegant.
Budget Tip
Decorate with objects you already use. Black mugs, wooden boards, ceramic bowls, and glass jars can become seasonal accessories without requiring new purchases.
The result feels natural because the Halloween decor is integrated into the kitchen rather than placed randomly around it.
12. Create a Sophisticated Halloween Staircase
A staircase can become one of the most dramatic areas in the home with surprisingly little decoration.
Instead of covering the railing with plastic garlands, use a natural or fabric-based approach.
Wrap a dark green or black garland loosely around the railing. Add a few dried branches and small velvet ribbons.
You can place small pumpkins on the steps if they do not create a tripping hazard. Use only a few and position them safely along the side.
Lanterns can be placed at the base of the staircase, provided they are suitable for the location and do not obstruct movement.
Materials and Decor Needed
Dark garland
Dried branches
Black velvet ribbon
Mini pumpkins
Lanterns
Warm LED candles
Optional dried leaves
Step-by-Step
Begin at the top of the railing and loosely attach the garland.
Do not make the wrapping too perfect.
Add branches at selected points.
Tie small velvet ribbons to the garland.
Place one or two pumpkins near the base.
Finish with warm lantern lighting.
Safety First
Never allow decorations to interfere with handrails or walking paths.
Avoid loose cords and real flames near fabrics.
The staircase should remain fully functional.
Expensive-Looking Trick
Use fewer decorations but make them larger and better coordinated. A single substantial garland with beautiful texture can look much more luxurious than multiple thin plastic strands.
13. Style an Elegant Halloween Bathroom
A bathroom can be transformed with very small changes. Because bathrooms often have mirrors and reflective surfaces, even a few decorative details can create a dramatic effect.
Begin with towels. Replace bright everyday towels with neutral cream, charcoal, or black options.
Add a small black soap dispenser or amber glass container.
Place a small vase with dried branches near the sink if there is enough space.
A small cream or black ceramic pumpkin can sit on a tray beside the sink.
Add a candle or flameless light for a warm atmosphere.
Materials and Decor Needed
Neutral towels
Black soap dispenser
Amber glass bottle
Small vase
Dried branches
Mini pumpkin
Small tray
Warm LED candle
Styling the Vanity
Keep the vanity mostly clear.
Place a small tray near one side.
Add the soap dispenser, candle, and mini pumpkin to the tray.
Position the vase behind the arrangement if space permits.
The mirror will reflect the objects and make the display appear larger.
Why Simplicity Works
Bathrooms can quickly look cluttered. A minimalist seasonal arrangement maintains the clean feeling of the room while still introducing Halloween character.
Choose materials that look sophisticated rather than novelty-based.
Black ceramic, amber glass, natural wood, and cream textiles are excellent choices.
14. Make an Expensive-Looking Halloween Floral Arrangement
Flowers and branches can make Halloween decor feel dramatically more sophisticated. You do not need an expensive florist arrangement. The secret is choosing the right container and using a restrained palette.
Begin with a large ceramic vase. Black, ivory, dark brown, or antique metallic finishes work well.
Use dried branches as the foundation. Add dried grasses, eucalyptus, seed pods, wheat, or dark foliage.
For a more autumnal arrangement, introduce muted rust or burgundy elements.
If using fresh flowers, choose deep red, burgundy, cream, or white flowers rather than bright colors.
Materials and Decor Needed
Large ceramic vase
Dried branches
Dried grasses
Eucalyptus
Seed pods
Muted autumn foliage
Burgundy or cream flowers
Black ribbon
Step-by-Step
Place the tallest branches into the vase first.
Add medium-height foliage around them.
Fill empty areas with smaller dried materials.
Step back and examine the arrangement from several angles.
Trim anything that looks too crowded.
Add a thin black velvet ribbon if desired.
Where to Use It
This arrangement can work on:
Dining tables
Entryway consoles
Kitchen islands
Fireplace mantels
Living room side tables
Bedroom dressers
Budget Tip
Dried arrangements can often last throughout the season and may be reused for autumn, Thanksgiving, and winter decorating. This makes them a practical investment compared with decorations designed exclusively for Halloween.
15. Create a Complete Luxury Halloween Living Room With Layered Decor
The final idea combines the principles from the previous sections into one cohesive living-room design. Instead of decorating every corner, create several connected focal points.
Begin with the sofa. Add velvet cushions in black, charcoal, rust, or deep green. Place a soft neutral throw over one arm.
Move to the coffee table. Use a wooden or black tray with a small vase, one candle, and two pumpkins.
Next, style the fireplace or media console. Use a large mirror, dried branches, a few ivory pumpkins, and antique-brass candle holders.
Add a small seasonal arrangement to a side table.
Finally, adjust the lighting. Use warm table lamps, candles, and subtle accent lights.
Materials and Decor Needed
Velvet cushions
Neutral throw
Wooden or black tray
Ceramic vase
Dried branches
Ivory pumpkins
Black pumpkins
Antique-brass candle holders
Warm LED candles
Table lamps
Dark decorative objects
Optional velvet ribbon
Neutral rug
Step-by-Step Room Transformation
First, remove unnecessary objects. A clean room provides the best foundation.
Second, establish your color palette. For example, use ivory, black, warm brown, and antique brass.
Third, introduce textiles. Add velvet cushions and a soft throw.
Fourth, create the coffee-table arrangement.
Fifth, style the main focal point, such as the fireplace.
Sixth, add one or two smaller seasonal accents around the room.
Finally, adjust lighting.
The Rule of Three
Use groups of three whenever possible. Three pumpkins in different sizes, three objects on a tray, or three candles at different heights can create a naturally balanced arrangement.
The Rule of Repetition
Repeat the same colors and materials throughout the room. If the coffee table has black ceramic, repeat black on the mantel. If you use brass on the fireplace, add a small brass accent elsewhere.
The Rule of Restraint
Do not add something simply because you have space for it.
A luxury room contains breathing room.
The purpose of elegant Halloween decor is to make the room feel transformed without making it feel overwhelmed.
Final Thoughts
Elegant Halloween decorating is ultimately about editing rather than adding. You do not need hundreds of decorations or expensive designer pieces to create a home that looks sophisticated for the season. Instead, focus on a carefully controlled color palette, layered textures, atmospheric lighting, natural materials, and a few dramatic focal points.
Black and ivory are especially useful because they create instant contrast. Warm metallics such as antique brass and bronze add richness. Velvet brings softness and luxury, while dried branches and natural wood prevent the space from feeling overly formal. Pumpkins become much more sophisticated when they are used selectively and combined with neutral ceramics, glass, candles, and beautiful textiles.
Lighting should never be overlooked. Warm lamps, candles, lanterns, and subtle accent lighting can transform even inexpensive decorations into something that feels dramatically more expensive. When possible, avoid relying on bright overhead lighting while entertaining. Instead, create several small pools of warm light around the room.
The most successful Halloween interiors also maintain consistency. If you choose black, ivory, and antique brass for your entryway, repeat those colors in the living room and dining area. This repetition creates a cohesive home and makes your seasonal decorations appear professionally planned.
You can also make your Halloween decor more sustainable and budget-friendly by choosing pieces that can be reused. Velvet pillows can work throughout autumn and winter. Dried branches can become Thanksgiving decorations. Black ceramic vases can remain part of your everyday decor. Neutral pumpkins can transition from Halloween into broader fall styling.
For renters and small-space decorators, the same principles apply. You do not need a large home. Choose one focal area and make it beautiful. A console table, coffee table, kitchen counter, or front door can become the main seasonal feature.
Most importantly, remember that expensive-looking decor is not necessarily expensive decor. The appearance of luxury comes from proportion, coordination, texture, lighting, and restraint. A simple black vase can look elevated when paired with the right branches. An ordinary pumpkin can look designer-inspired when surrounded by elegant materials. A basic dining table can become a memorable Halloween setting through candles, neutral linens, and thoughtful layering.
Use these ideas as a starting point rather than a strict checklist. Mix the concepts that match your existing interior style. If your home is modern, keep the palette minimal and use clean shapes. If your home is traditional, embrace antique finishes, candles, and classic autumn colors. If your style is farmhouse, combine natural wood, linen, pumpkins, and dried branches. If your home is small, concentrate the decoration in one or two high-impact areas.
The ultimate goal is a Halloween home that feels moody, warm, elegant, inviting, and intentionally designed. With a few carefully chosen materials and smart styling techniques, you can create a Pinterest-worthy seasonal interior that looks far more expensive than the actual decorating budget.
Quick Shopping and Styling Checklist
Core Color Palette
Black
Ivory
Cream
Warm brown
Muted orange
Rust
Deep green
Burgundy
Antique brass
Essential Materials
Pumpkins in different sizes
Black and neutral ceramic pieces
Velvet cushions or ribbons
Linen textiles
Dried branches
Dried grasses
Candles or flameless LED candles
Brass or black candle holders
Warm table lamps
Decorative trays
Mirrors
Lanterns
Neutral baskets
Simple seasonal artwork
Styling Rules to Remember
Choose a limited color palette.
Use different textures to create depth.
Create one clear focal point in each decorated area.
Combine large, medium, and small objects.
Leave negative space around important pieces.
Repeat colors and materials throughout the room.
Use warm lighting instead of harsh overhead lighting when possible.
Prefer natural materials over excessive plastic decorations.
Use pumpkins selectively rather than covering every surface.
Mix Halloween elements with everyday decor.
Choose quality-looking finishes such as matte ceramic, velvet, glass, wood, and aged metal.
Keep walkways and functional surfaces clear.
Use removable decor solutions in rental homes.
Reuse seasonal pieces whenever possible.
Remember that simplicity often creates the strongest luxury effect.
Elegant Halloween decor does not require a luxury budget. With thoughtful styling, a restrained palette, beautiful textures, and warm lighting, even simple seasonal decorations can create an atmosphere that feels sophisticated, memorable, and completely Pinterest-worthy.
Fall is one of the most beautiful seasons for decorating because it naturally brings together warm colors, cozy textures, soft lighting, natural materials, and inviting layers. However, creating an elegant fall home does not mean covering every surface with orange pumpkins, artificial leaves, and seasonal signs. If your goal is to make your home look expensive, the secret is to approach fall decorating with restraint, sophistication, and intentional styling.
Elegant fall decor is about capturing the feeling of autumn rather than filling a room with obvious seasonal decorations. Instead of relying on bright orange everywhere, consider a refined palette of warm ivory, camel, caramel, taupe, chocolate brown, muted terracotta, olive green, burgundy, dusty rose, and soft gold. These colors create warmth while maintaining an elevated appearance.
Texture is equally important. Fall naturally encourages layers, so introduce chunky knitted throws, linen cushions, velvet pillows, woven baskets, wood accents, ceramic pieces, natural branches, dried flowers, and soft rugs. These materials can make an ordinary room feel considerably more luxurious without requiring expensive furniture.
One of the most effective budget-friendly fall decorating techniques is to work with what you already own. You do not need to purchase a completely new collection every September. Instead, remove a few summer accessories and replace them with carefully selected seasonal pieces. A neutral vase filled with dried branches, a warm-toned throw on a sofa, or a collection of candles on a dining table can create an autumn atmosphere without overwhelming the room.
Lighting can completely transform fall decor. As the days become shorter, warm lamps, candles, lanterns, and soft accent lighting become especially valuable. Rather than using bright overhead lighting throughout the evening, create several smaller sources of warm light around the room. This produces the cozy glow associated with sophisticated autumn interiors.
Fall decorating also works beautifully with natural materials. Branches, acorns, pinecones, dried grasses, eucalyptus, wheat stems, seasonal flowers, wood, stone, and woven fibers can all add seasonal character. Many natural elements can be collected or purchased inexpensively, making them ideal for budget-conscious decorating.
Another important principle is scale. A few large decorative elements often look more expensive than many tiny objects. A substantial ceramic vase filled with branches can make a stronger statement than a shelf full of miniature fall figurines. A large wreath can create a dramatic entryway moment. A generous throw draped naturally over a sofa can make the entire living room feel more inviting.
The dining table is another excellent opportunity to introduce elegant autumn styling. Instead of using excessive seasonal decorations, create a layered tablescape with neutral linens, candles, natural greenery, simple ceramics, wood accents, and a restrained autumn color palette. The result can feel appropriate for everyday meals while also being beautiful enough for entertaining.
The entryway should not be forgotten. It is the first part of the home visitors see, so a simple seasonal arrangement can establish the mood immediately. A wreath, a vase of branches, a small pumpkin arrangement, a runner, or a warm lantern can create a welcoming fall entrance.
Bedrooms can also benefit from subtle seasonal updates. You do not need to change the entire room. Simply add warmer bedding, textured blankets, autumn-inspired cushions, and softer lighting. Deep brown, muted rust, cream, olive, and burgundy can create a cozy atmosphere without making the bedroom look overly themed.
The most important lesson is that expensive-looking fall decor is not about spending more. It is about choosing better. Instead of buying twenty inexpensive decorations, invest in or create a few pieces that have strong visual impact. Instead of using every autumn color at once, select a cohesive palette. Instead of filling every shelf, allow some negative space.
The following ten ideas are designed to help you create an elegant autumn home that feels warm, sophisticated, welcoming, and Pinterest-worthy. Each idea can be adapted to different budgets and home styles, from modern and contemporary interiors to traditional, transitional, farmhouse, or organic-inspired spaces.
Whether you are decorating a small apartment or a large family home, these approaches can help you create a polished fall atmosphere without making the space feel cluttered or overly seasonal.
1. Create an Elegant Neutral Fall Living Room
One of the easiest ways to make fall decor look expensive is to start with a neutral foundation. Instead of relying heavily on bright orange, build your autumn living room around warm ivory, beige, taupe, caramel, brown, cream, and muted terracotta.
Neutral fall decorating has a timeless quality. It allows the seasonal elements to feel sophisticated rather than overly decorative.
Begin by looking at your existing living room. If your sofa is cream, beige, gray, or brown, you already have an excellent foundation. You do not need to replace major furniture pieces for the season.
The easiest transformation comes through textiles.
Replace lightweight summer cushions with warmer autumn textures. Look for linen, velvet, boucle, wool, cotton, or woven fabrics. Choose colors that complement your existing furniture rather than introducing too many new shades.
For example, a cream sofa can be styled with camel, rust, olive, and chocolate-brown cushions. A gray sofa could work with taupe, burgundy, cream, and muted terracotta.
Materials and Things You Need
Neutral or warm-toned cushions
Textured throw blankets
Area rug
Ceramic vase
Dried branches
Candles
Wooden tray
Decorative bowl
Coffee-table books
Woven basket
Seasonal flowers or foliage
Warm table lamp
Step-by-Step Decorating Process
Start by removing obvious summer accessories.
Store bright tropical colors, lightweight decorative fabrics, and overly summery objects.
Clean and organize the living room.
Choose three to five autumn colors that work with your existing palette.
Add textured cushions to the sofa.
Drape a warm throw naturally over one side of the sofa.
Place a woven basket nearby for additional blankets.
Add one large vase filled with dried branches or seasonal foliage.
Style the coffee table with a wooden tray, books, a ceramic bowl, and one seasonal object.
Finish with warm lighting.
The key is to avoid placing autumn decorations everywhere.
Instead, create several intentional moments.
For example, the sofa can become one seasonal focal point, while the coffee table provides another. A console table or fireplace can become a third.
This creates visual rhythm throughout the room.
How to Make It Look More Expensive
Use fewer but larger accessories.
A large ceramic vase generally creates more visual impact than several tiny vases.
Choose matte ceramic, stoneware, wood, glass, or metal pieces rather than plastic-looking decorations.
When using pumpkins, select a few in sophisticated colors such as cream, muted green, dusty orange, or soft brown.
Arrange them in groups of different sizes.
Avoid placing one small pumpkin randomly on every surface.
Lighting is particularly important.
Turn on table lamps and floor lamps during the evening instead of relying entirely on overhead lighting. Add candles where safe and appropriate.
The combination of warm lighting and autumn textures creates the luxurious seasonal atmosphere people often associate with high-end interiors.
Pinterest Styling Tip
For a Pinterest-worthy photograph, create one clear focal point.
A cream sofa layered with textured pillows, a chunky throw, a large ceramic vase, and warm candlelight can create an instantly recognizable fall scene.
Keep the background clean.
The goal is to make viewers notice the textures and colors immediately.
2. Style Your Fireplace or Mantel With Sophisticated Fall Layers
The fireplace or mantel is naturally one of the strongest focal points in many homes, making it an ideal location for elegant fall decorating.
However, the most expensive-looking mantels are usually not the ones covered with dozens of seasonal objects.
Instead, use height, repetition, texture, and negative space.
Start with one large focal element.
This could be an oversized mirror, framed artwork, a large wreath, or an architectural object.
Then add smaller seasonal details around it.
Materials and Things You Need
Large mirror or artwork
Fall wreath
Ceramic vases
Candles
Dried branches
Small pumpkins
Wooden objects
Brass or gold accents
Seasonal greenery
Decorative books
Lanterns
Step-by-Step Process
Clear the mantel completely.
Clean the surface.
Choose your main focal point.
Place the largest piece first.
Add two or three supporting objects.
Introduce natural seasonal elements.
Add small pumpkins if desired.
Use candles or warm lighting.
Step back and remove anything that feels unnecessary.
An elegant mantel might feature a large round mirror centered above the fireplace.
Place two tall ceramic vases on either side.
Fill one with dried branches and leave the other relatively simple.
Add a few cream-colored pumpkins at the base.
Introduce candles between the objects.
The result feels autumnal without looking like a seasonal store display.
Another option is a large fall wreath.
Choose a wreath made from eucalyptus, dried grasses, branches, olive foliage, or subtle autumn leaves.
Avoid overly artificial-looking bright orange foliage if you want a refined appearance.
You can also create a more modern mantel using asymmetrical styling.
Place a large artwork slightly off-center.
Balance it with a tall vase on one side and smaller objects on the other.
Asymmetry can make the arrangement feel collected and sophisticated.
Creating Luxury With Inexpensive Materials
Natural branches are particularly useful.
Collect suitable fallen branches where permitted, clean them properly, and place them in a large vase.
Their height creates drama without requiring expensive decor.
Dried grasses and wheat stems can also create an elegant autumn feeling.
Use a simple ceramic vase instead of a heavily decorated seasonal container.
Neutral pumpkins can add seasonal recognition without dominating the composition.
Consider painting inexpensive pumpkins in cream, beige, muted olive, or soft brown if appropriate for the material.
Pinterest Styling Tip
Photograph the mantel with the fireplace glowing if possible.
Add warm candles or soft lighting around the surrounding area.
Use a cozy throw on a nearby chair.
This creates a layered scene that communicates the feeling of fall rather than simply displaying autumn decorations.
3. Create a Luxury Fall Tablescape With Simple Materials
A beautifully styled dining table can make an entire home feel ready for autumn entertaining.
The good news is that you do not need expensive dishes or designer tableware.
The secret is layering.
Start with a simple foundation such as a linen or cotton table runner.
Then introduce natural materials, candles, seasonal foliage, and a restrained color palette.
Materials and Things You Need
Linen table runner
Neutral plates
Simple glassware
Cloth napkins
Candles
Candle holders
Ceramic vase
Seasonal branches
Small pumpkins
Wooden serving board
Natural greenery
Optional brass accents
Step-by-Step Process
Begin with a clean dining table.
Place the runner through the center.
Arrange plates evenly.
Add glassware.
Fold or loosely arrange napkins.
Create one central floral or branch arrangement.
Add candles at different heights.
Introduce a few seasonal accents.
Check that guests still have enough room.
For an expensive-looking tablescape, avoid using too many colors.
A palette of cream, warm white, brown, muted rust, olive, and brass can look sophisticated.
You can use white plates that you already own.
The table can become more seasonal through the surrounding accessories rather than replacing everything.
A simple ceramic vase filled with dried branches can become the centerpiece.
Surround it with small candles.
Add a few miniature pumpkins in cream or muted earthy shades.
Wooden serving boards can introduce natural texture.
Linen napkins provide another layer.
Creating Height and Dimension
The centerpiece should have variation in height.
A tall branch arrangement can be paired with low pumpkins and medium-height candle holders.
This creates a more dynamic composition.
Avoid making the centerpiece so tall that guests cannot see across the table.
If your table is small, use a low arrangement instead.
A collection of small ceramic vessels can create a beautiful centerpiece without taking up too much space.
Making It Budget-Friendly
Use your everyday dishes.
Change only the table runner, napkins, centerpiece, and candles.
This dramatically reduces the cost.
You can also use seasonal branches from your yard where appropriate.
Dried flowers can be reused for several seasons.
Choose neutral accessories that work beyond fall.
Pinterest Styling Tip
For a Pinterest-style image, photograph the table from slightly above and include part of the surrounding dining room.
Show the warm lighting, chairs, centerpiece, and table details together.
This makes the image feel aspirational and complete.
4. Decorate the Entryway With Elegant Fall Layers
The entryway creates the first impression of your home.
During fall, it is the perfect place to introduce seasonal colors and textures without overwhelming the rest of the house.
An elegant entryway does not need dozens of pumpkins or large signs.
A few carefully selected elements are enough.
Start with whatever furniture you already have.
A console table, bench, narrow shelf, or small cabinet can become the foundation.
Materials and Things You Need
Fall wreath
Console table
Mirror
Ceramic vase
Dried branches
Small pumpkins
Lantern
Runner rug
Woven basket
Seasonal foliage
Table lamp
Step-by-Step Decorating Process
Clear the entryway.
Clean the furniture and floor.
Add a mirror above the console if appropriate.
Place a small lamp on the surface.
Add a vase with branches.
Introduce one or two pumpkins.
Place a woven basket beneath the console.
Add a seasonal runner.
Finish with a wreath or subtle door decoration.
The goal is to create a welcoming transition into the home.
Warm lighting is especially valuable in entryways.
A small table lamp can create a soft glow during the evening.
If you do not have an electrical outlet nearby, consider a suitable battery-operated decorative light where safe and appropriate.
Choosing Elegant Fall Colors
Try muted autumn colors rather than extremely bright seasonal shades.
Good options include:
Cream
Caramel
Olive
Rust
Burgundy
Chocolate brown
Warm white
Terracotta
Soft gold
These shades work well with wood and natural materials.
A cream pumpkin beside a brown ceramic vase can look much more sophisticated than a collection of brightly colored plastic decorations.
Adding Practical Storage
The entryway must remain functional.
Use a woven basket for scarves, blankets, or other seasonal items.
A tray can organize keys.
Hooks can hold jackets.
The goal is to combine beauty with everyday practicality.
An expensive-looking home should not look like it is impossible to live in.
Pinterest Styling Tip
Create a clear focal point around the mirror and console.
Use one large vase rather than many tiny objects.
Keep the floor relatively uncluttered.
A clean entryway photograph with warm lighting, a wreath, textured runner, and natural materials can create an exceptionally save-worthy Pinterest image.
5. Transform the Bedroom Into a Cozy Elegant Fall Retreat
The bedroom is one of the best places to introduce fall decor because the season naturally encourages comfort and warmth.
Instead of using obvious seasonal decorations, focus on textiles.
The bed should become the main focal point.
Begin with neutral bedding and build layers through blankets, pillows, and throws.
Materials and Things You Need
Duvet cover
Neutral sheets
Decorative pillows
Velvet cushions
Chunky knit throw
Quilt
Area rug
Floor-length curtains
Table lamps
Ceramic vase
Dried branches
Candles or safe LED alternatives
Seasonal artwork
Step-by-Step Decorating Process
Remove overly summery textiles.
Choose a warm fall palette.
Make the bed with layered bedding.
Add two or three textured cushions.
Place a throw casually across the foot or side of the bed.
Add a soft rug.
Introduce warm bedside lighting.
Add one seasonal decorative element.
Keep surfaces organized.
For an elegant appearance, use a restrained palette.
Cream, beige, caramel, brown, muted rust, olive, and burgundy work beautifully together.
You do not need every color.
Choose two or three.
For example, cream bedding with caramel pillows and a rust throw can create a warm autumn look.
Another combination could be ivory, chocolate brown, and olive green.
Velvet is particularly effective in fall because it adds depth and a subtle sense of luxury.
A velvet cushion or throw does not need to cover the entire bed.
One or two carefully placed pieces can be enough.
Creating a Boutique-Hotel Feeling
Symmetry can help.
Matching bedside lamps create balance.
Keep bedside tables relatively clear.
Use a small tray for personal items.
Place a ceramic vase or small plant on one side if the composition allows.
The bedroom should remain peaceful.
Avoid filling the room with pumpkins, signs, or seasonal objects.
Instead, let the colors and textures communicate the season.
Pinterest Styling Tip
Make the bed the hero of the image.
Layer the bedding generously but naturally.
Include a warm lamp, curtains, rug, and small autumn arrangement in the background.
The final image should communicate comfort, sophistication, and autumn warmth simultaneously.
6. Use Candles and Warm Lighting to Create an Expensive Fall Atmosphere
Lighting can make even inexpensive decor feel luxurious.
Fall is the perfect season to use layered lighting because evenings arrive earlier and warm illumination creates a naturally cozy atmosphere.
Instead of relying on one bright ceiling fixture, combine different light sources.
Materials and Things You Need
Table lamps
Floor lamps
Candles
Candle holders
Lanterns
Warm bulbs
Decorative lampshades
String lights where appropriate
LED candles for suitable locations
Step-by-Step Decorating Process
Turn off unnecessary overhead lighting.
Identify dark corners.
Add a table lamp.
Place a floor lamp near seating.
Use candles on dining and coffee tables where safe.
Add lanterns near an entryway or fireplace.
Choose appropriate warm lighting.
Create different levels of illumination.
The goal is not simply to make the room darker.
It is to create layers.
A table lamp beside a sofa can create a warm reading corner.
A floor lamp can illuminate a darker corner.
Candles can add small points of warm light.
A fireplace can become another light source.
Choosing Elegant Candle Displays
Instead of placing one candle randomly, create a small group.
Use different heights.
Combine glass, ceramic, brass, or stone-inspired holders.
Choose candles in neutral colors such as cream, ivory, brown, or muted amber.
Avoid excessive labels or brightly colored seasonal packaging.
You want the candle itself to become part of the decor.
Safety Considerations
Never leave burning candles unattended.
Keep them away from curtains, bedding, children, pets, and flammable materials.
LED candles can provide a similar visual effect where open flames are unsuitable.
Creating Luxury Through Lighting
Warm lighting can emphasize textures.
A velvet cushion looks richer.
A ceramic vase gains shadows.
Wood furniture appears warmer.
Glass objects reflect small points of light.
This is why lighting should be considered part of the decor rather than an afterthought.
Pinterest Styling Tip
Photograph the room during the transition between daylight and evening.
Allow warm lamps and candles to glow while some natural light remains.
This creates the rich, atmospheric look that performs well in seasonal interior content.
7. Decorate With Natural Fall Elements Instead of Expensive Seasonal Accessories
Natural materials are among the best tools for creating elegant fall decor on a budget.
Branches, dried leaves, pinecones, acorns, grasses, wheat stems, eucalyptus, seasonal flowers, and wood can all bring autumn indoors.
The most important benefit is that natural materials rarely look overly manufactured.
Materials and Things You Need
Dried branches
Dried grasses
Wheat stems
Pinecones
Acorns
Seasonal foliage
Wooden bowls
Ceramic vases
Woven baskets
Natural branches
Dried flowers
Step-by-Step Decorating Process
Choose a few natural elements.
Clean and prepare them appropriately.
Select a large container.
Arrange tall branches first.
Add shorter stems.
Place the arrangement where it becomes a focal point.
Add smaller natural elements around the room.
Avoid overdecorating.
A large branch arrangement can transform an empty corner.
A bowl of pinecones can add subtle seasonal texture.
Dried grasses can soften a console table.
Wheat stems can create an understated harvest-inspired atmosphere.
Why Natural Decor Looks Expensive
Natural materials have irregular shapes and authentic textures.
This creates visual interest.
A branch does not need to be perfectly symmetrical.
Its natural movement becomes part of the composition.
Combine natural materials with refined containers.
For example, dried branches in a large matte ceramic vase can look sophisticated.
A woven basket filled with blankets can add warmth.
A wooden bowl filled with pinecones can become a simple coffee-table centerpiece.
Avoiding a Rustic-Only Appearance
Natural fall decor does not have to mean farmhouse style.
Pair branches with modern furniture.
Use dried grasses in contemporary ceramic vases.
Combine wood with brass.
Place natural elements beside velvet textiles.
The contrast between organic and refined materials creates an elevated appearance.
Pinterest Styling Tip
Use one oversized natural arrangement as the hero.
Large branches photographed against a neutral wall can create a dramatic fall image.
The composition should feel organic rather than overly arranged.
8. Create an Expensive-Looking Fall Front Porch
The front porch is another excellent place to create seasonal impact.
However, you do not need to cover the entrance with dozens of pumpkins.
Use symmetry, repetition, and scale instead.
Begin with the door.
A large wreath can become the primary focal point.
Then build the surrounding composition with a few large elements.
Materials and Things You Need
Fall wreath
Large planters
Pumpkins
Lanterns
Outdoor-safe rug
Seasonal greenery
Dried corn stalks where appropriate
Wooden crate
Outdoor cushions
Warm outdoor lighting
Step-by-Step Decorating Process
Clean the porch.
Sweep the entrance.
Place a seasonal wreath on the door.
Add two large planters if the space allows.
Use pumpkins in coordinated colors.
Add lanterns.
Place a seasonal rug.
Introduce outdoor-safe greenery.
Keep the pathway clear.
Symmetry creates an especially polished look.
Two similar planters on either side of the door can create an elegant frame.
If you cannot afford large planters, use existing containers and update them with seasonal plants.
Pumpkins should be grouped rather than scattered.
Create clusters of different sizes.
Use cream, white, muted orange, green, and brown for a refined palette.
Making a Small Porch Look Expensive
Small spaces benefit from fewer, larger elements.
A large wreath, two medium planters, and a beautiful doormat may be enough.
Do not overcrowd the entrance.
The door itself should remain visible.
If you have a bench, add one or two outdoor cushions and a textured throw appropriate for outdoor use.
Lanterns can add warmth in the evening.
Always use outdoor-safe lighting and decorations suitable for your climate.
Pinterest Styling Tip
Photograph the porch from an angle that shows the door, wreath, planters, pumpkins, and pathway.
Early morning or late afternoon light can provide beautiful natural illumination.
The goal is to make the entrance look welcoming rather than overloaded.
9. Create a Sophisticated Fall Coffee Table and Console Display
Small surfaces such as coffee tables, consoles, sideboards, and shelves are ideal for introducing seasonal details.
But this is also where clutter can quickly become a problem.
The secret to expensive-looking styling is grouping.
Instead of placing individual objects randomly, create small compositions.
Materials and Things You Need
Decorative tray
Coffee-table books
Ceramic vase
Small pumpkins
Candles
Wooden bowl
Dried foliage
Sculptural object
Seasonal flowers
Decorative box
Step-by-Step Decorating Process
Clear the entire surface.
Choose one large object.
Add a stack of books.
Place a vase or bowl nearby.
Introduce one seasonal element.
Add a candle.
Leave some empty space.
Step back and evaluate the composition.
A console table might feature a large mirror above it.
Underneath, place a ceramic lamp, vase, and decorative box.
Add a few small pumpkins near one side.
The arrangement should have height variation.
A coffee table can use a tray to contain objects.
A bowl of pinecones, candle, and small branch arrangement can create an easy autumn centerpiece.
Choosing Seasonal Objects
The most elegant seasonal accessories often have subtle colors.
Instead of bright orange plastic pumpkins, consider ceramic, wood, glass, or natural pumpkins.
Instead of cartoon-like fall signs, choose framed artwork or botanical prints.
Instead of artificial leaf garlands everywhere, use one natural-looking branch arrangement.
The goal is to suggest autumn rather than announce it excessively.
The Rule of Three
Grouping objects in odd numbers can often create a visually pleasing arrangement.
For example:
One vase
Three books
One candle
Or:
One bowl
Two pumpkins
One branch
Do not follow this as an absolute rule.
The larger principle is visual balance.
Pinterest Styling Tip
Close-up photographs of coffee tables and consoles work especially well for Pinterest because viewers can easily save individual styling ideas.
Show texture.
Show the warm light.
Show the details.
But keep the composition clean enough that each object remains visible.
10. Build a Cohesive Elegant Fall Look Throughout the Entire Home
The final step is connecting all of your seasonal decorating ideas.
A luxury-inspired home does not need every room to look identical.
Instead, repeat a few colors, materials, and seasonal elements throughout the home.
This creates cohesion.
For example, choose a palette of:
Warm cream
Caramel
Olive green
Muted rust
Chocolate brown
Soft brass
You do not need all six colors in every room.
Use different combinations.
The living room might emphasize cream, caramel, and olive.
The bedroom might use cream, brown, and rust.
The dining room might feature cream, brass, and olive.
The entryway can include all three.
Materials and Things You Need
Neutral textiles
Fall cushions
Throws
Candles
Ceramic vases
Dried branches
Natural wood
Woven baskets
Seasonal artwork
Pumpkins
Warm lighting
Fall wreath
Step-by-Step Whole-Home Plan
Choose your fall color palette.
Remove summer-specific accessories.
Decide which rooms need the strongest seasonal treatment.
Repeat colors between neighboring rooms.
Use similar materials throughout the home.
Add seasonal lighting.
Introduce natural elements.
Keep major furniture neutral where possible.
Edit unnecessary decorations.
The hallway can become an important transition space.
If the living room contains olive and rust, use artwork or a runner containing one of those colors in the hallway.
This visually connects the spaces.
Creating a Luxury Feeling Through Repetition
Repeated materials make a home feel professionally designed.
For example, if you use brass candle holders in the dining room, you could repeat brass through a lamp or small accessory in the living room.
If you use woven baskets in the living room, repeat woven texture in the bedroom.
If you use cream ceramics on the console, introduce similar ceramics elsewhere.
The pieces do not need to match exactly.
They simply need to feel related.
Avoiding Over-Decorating
This is perhaps the most important rule.
Do not decorate every corner simply because it is fall.
Leave some surfaces untouched.
Allow the architecture and furniture to remain visible.
A beautiful neutral room with three carefully chosen autumn moments can look more luxurious than a room filled with seasonal decorations.
Making the Home Feel Warm
Luxury is not only visual.
It is also sensory.
Soft textiles make the room feel comfortable.
Warm lighting creates atmosphere.
Natural materials provide texture.
Seasonal scents can contribute to the experience where appropriate.
Music, fresh flowers, warm beverages, and comfortable seating can complete the feeling.
The objective is to create a home people want to spend time in.
Pinterest Styling Tip
When photographing the entire home, create a consistent visual story.
Use similar lighting and color treatment across images.
Show different rooms but repeat the same autumn palette.
This makes the collection feel like one complete fall decorating guide rather than unrelated ideas.
Conclusion
Elegant fall decorating does not require a large budget or a complete home makeover. The most sophisticated autumn interiors are often created through restraint, texture, natural materials, warm lighting, and carefully selected seasonal details.
Instead of buying dozens of decorations, begin with the pieces you already own. Remove summer accessories and replace them with a few carefully chosen fall elements.
A neutral living room can become warmer with textured cushions, a soft throw, natural branches, and warm lighting.
A mantel can become a sophisticated seasonal focal point with one large mirror or wreath, a few ceramic vessels, candles, and neutral pumpkins.
A dining table can feel ready for an elegant autumn gathering with linen, everyday dishes, candles, natural branches, and simple seasonal details.
An entryway can welcome guests with a wreath, mirror, warm lamp, woven basket, and a few muted fall accents.
A bedroom can become a cozy retreat through layered bedding, velvet cushions, warm colors, soft lighting, and textured blankets.
Natural elements can provide some of the most beautiful seasonal decoration without requiring a large investment.
Branches, dried grasses, pinecones, wood, foliage, and seasonal flowers bring authenticity to the home.
Lighting is equally transformative.
Warm lamps, candles, lanterns, and soft accent lighting can turn ordinary decorations into an atmospheric autumn display.
The biggest mistake to avoid is overdecorating.
Elegant fall decor should feel intentional.
Choose a limited palette.
Repeat colors.
Mix textures.
Vary the scale of accessories.
Use a few strong focal points.
Leave enough negative space for the eye to rest.
Instead of bright orange appearing everywhere, introduce it selectively through pumpkins, flowers, artwork, or textiles.
Instead of filling every shelf with seasonal objects, create one or two carefully composed displays.
Instead of buying new furniture, use textiles and accessories to transform what you already own.
The result should feel like fall has naturally arrived in your home, rather than like a seasonal decorating store has been placed inside it.
For an especially expensive-looking result, combine warm neutrals with one or two richer autumn shades. Add natural wood, ceramic, woven textures, soft textiles, and warm metallic accents. Then finish the room with carefully positioned lighting.
Remember that luxury is not about excess.
It is about quality of presentation.
A single large ceramic vase can be more impactful than ten small decorations.
A beautifully layered bed can look more luxurious than an expensive headboard.
A well-styled coffee table can elevate an ordinary living room.
A simple wreath can transform an entryway.
A few candles can create more atmosphere than an entire shelf of seasonal accessories.
Most importantly, your fall home should still feel like your home.
Include personal artwork, favorite books, meaningful objects, family pieces, and things that make you comfortable.
The best interiors balance beauty with everyday life.
As you decorate for fall, think about how each item contributes to the overall story.
Does it add warmth?
Does it add texture?
Does it connect with your color palette?
Does it serve a purpose?
Does it make the room feel more inviting?
If the answer is yes, keep it.
If an item only creates visual clutter, consider removing it.
This approach allows you to create a home that feels sophisticated without spending excessively.
Whether your style is modern, traditional, transitional, contemporary, organic, or eclectic, these principles can be adapted to your space.
The ultimate goal is a fall home that feels warm, elegant, cozy, intentional, and timeless.
And that is what makes elegant fall decor look expensive: not the amount you spend, but the thoughtfulness behind every detail.
Luxury home decor on a budget is about creating an elegant, polished, and high-end atmosphere without spending a fortune on designer furniture or expensive renovations. The most beautiful luxury-inspired homes are often not defined by how much money was spent on them, but by how thoughtfully each element has been selected, arranged, and layered. With the right approach, affordable furniture, secondhand finds, simple accessories, and budget-friendly upgrades can create a sophisticated interior that feels comfortable and expensive.
The first step is understanding what actually makes a room look luxurious. It is rarely the price tag of an individual object. Instead, luxury is communicated through proportion, consistency, texture, lighting, organization, and visual simplicity. A modest sofa can look elegant when surrounded by coordinated cushions, a beautiful rug, attractive curtains, warm lighting, and carefully selected accessories. On the other hand, an expensive sofa can look ordinary if the room is cluttered or poorly arranged.
Color is one of the easiest ways to create a luxury feeling. Neutral shades such as warm white, cream, beige, taupe, greige, soft gray, and brown provide an elegant foundation. These colors are easy to combine and make a room feel calm and cohesive. However, luxury does not mean that your home must be completely neutral. Deep green, navy, burgundy, chocolate brown, muted blue, terracotta, or dusty rose can add richness and personality. The key is to repeat colors throughout the room instead of introducing too many unrelated shades.
Texture is equally important. A room decorated entirely with smooth surfaces can feel flat, even if the furniture itself is expensive. Layering linen, cotton, velvet, wool, wood, ceramic, glass, woven materials, and greenery creates depth. The good news is that texture can often be added inexpensively through cushions, blankets, baskets, curtains, rugs, and small accessories.
Lighting is another major factor. Harsh overhead lighting can make a beautiful room feel cold and ordinary. Layered lighting creates a softer and more sophisticated environment. Table lamps, floor lamps, wall lights, pendant fixtures, and warm accent lighting can be combined to create different levels of illumination. You do not need expensive designer lamps. Sometimes replacing a lampshade or adding a warm-toned bulb can make an existing fixture look considerably better.
Furniture arrangement also influences the perceived quality of a space. A luxury interior usually feels spacious and intentional because furniture is positioned according to the room’s proportions and how people actually use it. Avoid pushing every piece against the wall simply because that seems like the easiest arrangement. Where space allows, create conversation areas and allow enough room for movement.
Curtains are another surprisingly effective upgrade. Floor-length curtains can make ceilings look taller and windows look larger. Hanging them at an appropriate height and allowing enough width for attractive folds creates a more finished appearance. Simple curtains in cream, ivory, beige, or soft gray can work particularly well.
Accessories should be chosen selectively. Instead of covering every table and shelf with small decorative objects, choose a few pieces with strong visual presence. A large vase, sculptural object, oversized mirror, beautiful tray, coffee-table books, framed artwork, or statement plant can create more impact than many inexpensive decorations.
Mirrors are especially useful in budget-friendly luxury decorating. A large mirror can reflect light, add depth, and create a focal point. Affordable mirrors can also be upgraded with paint or used secondhand. Positioning matters just as much as the mirror itself. A mirror reflecting a window or attractive artwork can make the room feel brighter and more expansive.
Artwork does not have to be expensive either. Affordable prints, vintage-inspired posters, photography, botanical illustrations, or personal artwork can look sophisticated when printed at a good size and placed in attractive frames. Presentation is often more important than price.
Plants add another layer of life and color. A large plant can fill an empty corner, while smaller plants can soften shelves and side tables. Pairing greenery with attractive ceramic, woven, or simple neutral pots can make the arrangement feel more intentional.
The biggest secret to luxury on a budget is editing. Before buying anything, remove clutter and unnecessary objects. Give your favorite pieces room to breathe. A carefully edited room often looks more expensive than a room filled with expensive possessions.
The ideas below focus on affordable changes that can be implemented gradually. You do not need to renovate your entire home. Start with one room, identify its biggest weakness, and choose the change that will make the greatest visual difference.
1. Create a Sophisticated Neutral Living Room
A neutral color palette is one of the simplest ways to create an elegant living room without spending a large amount of money. Neutral interiors provide a calm foundation and allow furniture, artwork, lighting, and textures to become the focus.
Start with the largest existing pieces. If your sofa is already neutral, use it as the foundation. If it is colorful, do not automatically replace it. Instead, identify one or two colors from the sofa and repeat them throughout the room.
Cream, beige, taupe, warm white, soft gray, and brown are excellent choices for creating a sophisticated appearance.
Materials and Things You Need
Neutral cushion covers
Textured throw
Area rug
Curtains
Decorative vase
Coffee-table books
Tray
Artwork
Table lamp
Indoor plant
Decorative basket
Step-by-Step Process
First, remove unnecessary objects from the living room.
Next, select a primary neutral shade.
Choose one or two secondary colors.
Replace mismatched cushion covers with coordinated ones.
Add a textured throw to the sofa.
Introduce an area rug that connects the furniture.
Add one large decorative object rather than many tiny objects.
Finish with warm lighting and greenery.
Texture becomes particularly important when using neutral colors.
Combine smooth ceramics with woven baskets, soft textiles, natural wood, glass, and greenery.
For example, imagine a cream sofa styled with beige linen cushions, a chunky knitted throw, a wooden coffee table, a woven rug, and a ceramic vase.
The colors are simple, but the textures create visual richness.
You can introduce a darker accent through a walnut table, black picture frame, charcoal cushion, or dark artwork.
This creates contrast without making the room feel busy.
A neutral living room is also easy to update seasonally. In winter, add heavier throws and warm brown accents. In spring, introduce lighter textiles and greenery. During summer, linen and natural textures can make the room feel fresh.
The goal is not to make everything beige.
Instead, create a controlled palette in which different shades and textures work together.
For a Pinterest-worthy result, make sure the room has one clear focal point. This could be the sofa, fireplace, artwork, coffee table, or a beautiful window.
Avoid allowing too many accessories to compete for attention.
2. Hang Curtains High and Wide for an Instant Luxury Effect
Curtains are often underestimated when decorating on a budget. Yet properly selected and installed curtains can dramatically change the proportions of a room.
Short curtains can make windows look smaller and ceilings appear lower. Floor-length curtains create a sense of height and softness.
Where appropriate for your room’s architecture, position the curtain rod higher than the top of the window and extend it beyond the sides of the window. This can make the window appear larger.
Materials and Things You Need
Curtain panels
Curtain rod
Measuring tape
Level
Mounting hardware
Curtain rings if required
Steamer or iron
Step-by-Step Process
Measure the width of the window.
Measure from the desired rod position to the floor.
Select panels with enough width to create attractive folds.
Install the rod securely.
Position the curtains so they frame the window.
Steam the panels before styling them.
Allow the fabric to fall naturally.
Simple curtains often look more expensive than heavily decorated ones.
Choose ivory, cream, beige, warm white, taupe, or soft gray for maximum versatility.
If you have colorful walls, choose curtains that coordinate rather than compete.
For example, deep green walls can look elegant with warm cream curtains.
A neutral bedroom can become more luxurious with floor-length beige curtains and layered bedding.
You do not have to replace every curtain in your home at once.
Start with the living room or bedroom because these spaces benefit most visually.
If affordable curtains are slightly transparent or lightweight, layering them with another panel can create greater fullness.
Proper maintenance is also important. Wrinkled curtains can make a room look unfinished. Steam them regularly and follow the fabric’s care instructions.
The final effect is subtle but powerful.
The room feels taller, softer, and more complete.
3. Build a High-End Look With Affordable Artwork
Artwork can give a room personality while creating a sophisticated focal point.
You do not need an expensive original painting.
Affordable prints, photographs, botanical illustrations, abstract designs, vintage posters, and downloadable artwork can all work beautifully.
The most important factors are scale, framing, and placement.
Materials and Things You Need
Large artwork or prints
Picture frames
Mat boards
Measuring tape
Level
Hanging hardware
Optional picture ledge
Step-by-Step Process
Choose one wall that needs visual interest.
Select artwork that matches your room’s color palette.
Determine whether one large piece or a gallery arrangement is more appropriate.
Measure the wall.
Arrange pieces on the floor before hanging them.
Keep spacing consistent.
Install the artwork securely.
A large artwork often creates a stronger luxury effect than several tiny pieces.
If a large original painting is too expensive, create an oversized print.
Choose a simple frame with a wide border or mat where appropriate.
Black frames create a modern appearance.
Wood frames add warmth.
Metallic frames can introduce a subtle glamorous effect.
For a more eclectic interior, combine frame styles while repeating a few colors.
A gallery wall can also be created inexpensively by mixing artwork with photographs, mirrors, and small decorative objects.
Do not overcrowd the arrangement.
Leave enough visual breathing room.
Artwork should support the room rather than compete with every other decorative element.
A large artwork above a sofa, dining table, or console can immediately create a designer-inspired focal point.
4. Upgrade Existing Furniture With New Hardware
Replacing furniture is often expensive and unnecessary.
A simple cabinet, dresser, console, or vanity can look completely different after replacing its hardware.
This is one of the easiest budget-friendly projects because the change requires relatively few materials.
Materials and Things You Need
New knobs
Cabinet handles
Screwdriver
Measuring tape
Pencil
Replacement screws
Optional paint
Optional wood filler
Step-by-Step Process
Measure the existing hardware.
Record the distance between mounting holes.
Choose replacement hardware that fits or plan for new holes where appropriate.
Remove the old hardware.
Clean the surface.
Install the new pieces.
Check that all handles are aligned.
Brass hardware can make simple furniture look warmer and more traditional.
Matte black hardware creates a modern appearance.
Brushed metal can create a subtle contemporary look.
Ceramic knobs can add personality to bedrooms or vintage-inspired spaces.
If the furniture itself looks tired, consider refinishing or painting it before installing the new hardware.
A basic wooden dresser can become an elegant statement piece with a fresh finish and sophisticated pulls.
This technique works particularly well for rental-friendly or budget-conscious decorating because you can transform what you already own.
The key is consistency.
Use complementary hardware finishes in the same room.
You do not have to use one finish throughout the entire house, but nearby furniture should feel coordinated.
5. Use One Oversized Mirror as a Luxury Focal Point
Large mirrors can make a room appear brighter and more spacious while also adding elegance.
Instead of purchasing several small decorative mirrors, consider one large piece.
Materials and Things You Need
Large mirror
Measuring tape
Level
Suitable mounting hardware
Cleaning cloth
Optional frame paint
Step-by-Step Process
Choose a wall that benefits from additional visual depth.
Measure the space.
Select a mirror proportional to the furniture.
Check the mirror’s weight.
Choose appropriate mounting hardware.
Install it securely.
Clean the surface.
Style the surrounding area without overcrowding it.
A round mirror can soften a room filled with angular furniture.
A tall rectangular mirror can emphasize ceiling height.
An arched mirror can introduce an architectural appearance.
If the frame is unattractive, repainting it can be a relatively inexpensive way to improve its appearance.
Place the mirror where it reflects something attractive.
A window is particularly effective because it can reflect daylight.
Artwork, plants, or a beautiful light fixture can also create interesting reflections.
Avoid positioning it so it reflects cluttered shelves or messy areas.
The mirror should add depth, not multiply visual disorder.
6. Layer Lighting Instead of Relying on One Ceiling Fixture
Luxury interiors rarely depend entirely on one harsh ceiling light.
Layered lighting creates warmth, depth, and atmosphere.
Use several smaller sources instead of one dominant source.
Materials and Things You Need
Table lamp
Floor lamp
Pendant
Wall light
Appropriate warm-toned bulbs
Decorative lampshade
LED accent lighting where appropriate
Step-by-Step Process
Identify dark corners.
Add a floor lamp.
Place a table lamp on a console or side table.
Use a pendant or ceiling fixture for general illumination.
Highlight artwork or architectural details.
Choose appropriate warm lighting for relaxing spaces.
Turn off unnecessary lights and observe how the room changes.
Different heights create depth.
A floor lamp illuminates from low level.
A table lamp provides medium-height lighting.
A ceiling fixture provides overhead illumination.
This creates a layered environment.
You can also upgrade an inexpensive lamp by replacing the lampshade.
A well-proportioned fabric shade can make a basic lamp feel much more sophisticated.
For bedrooms and living rooms, softer lighting often creates a more inviting atmosphere.
Always choose bulbs appropriate to the fixture and room requirements.
7. Style a Coffee Table With a Simple Designer-Inspired Arrangement
A coffee table can become a focal point without being expensive.
The key is to create a composition rather than scatter objects across the surface.
Materials and Things You Need
Decorative tray
Books
Vase
Plant
Bowl
Sculptural object
Candle or LED candle
Step-by-Step Process
Clear the entire table.
Place one tray.
Add two or three books.
Place a vase or decorative object on the books.
Add greenery.
Leave part of the table empty.
The empty space is important.
It keeps the arrangement functional and prevents visual clutter.
Use objects with different heights.
A low stack of books next to a taller vase creates balance.
A tray helps group objects and makes them easy to move when the table needs to be used.
You can rotate decorative objects seasonally.
In autumn, add warm-toned ceramics and dried branches.
In spring, use fresh greenery and lighter colors.
In winter, introduce cozy textures and neutral accessories.
The arrangement should always feel practical enough for everyday life.
8. Mix Natural Materials to Add Expensive-Looking Texture
Natural materials are an excellent way to make an interior feel sophisticated.
Look around the room and identify overly smooth surfaces.
Add one woven object.
Introduce natural wood.
Layer a linen or cotton textile.
Add ceramic.
Bring in greenery.
Spread the materials throughout the room.
Do not concentrate everything in one corner.
A wooden coffee table, woven basket, linen cushion, ceramic vase, and natural-fiber rug can create a sophisticated combination without requiring designer furniture.
Natural textures also work well with metal accents.
A brass lamp beside a wooden table can create a beautiful contrast.
The objective is to make the room feel tactile and layered.
9. Give Your Bedroom a Boutique-Hotel Feeling
A bedroom can look luxurious when it is organized, symmetrical, comfortable, and layered with textiles.
The bed should become the main focal point.
Choose coordinated bedding and build layers with pillows, throws, and blankets.
Materials and Things You Need
Duvet cover
Sheets
Pillows
Decorative cushions
Throw blanket
Bedside lamps
Curtains
Area rug
Artwork
Decorative tray
Plant
Step-by-Step Process
Declutter the bedroom.
Choose a calm color palette.
Make the bed with layered bedding.
Add decorative cushions.
Place lamps on both sides when appropriate.
Add a soft rug.
Use full-length curtains.
Keep bedside tables organized.
Add one or two personal accessories.
Symmetry can create an instant sense of order.
Matching bedside lamps and balanced furniture arrangements make the room feel intentional.
However, do not make the bedroom so perfect that it becomes uncomfortable.
The purpose is relaxation.
Choose fabrics that feel pleasant and practical.
Layer different textures instead of relying entirely on decorative objects.
A cream duvet, beige throw, textured cushions, wooden bedside tables, warm lamps, and soft curtains can create a sophisticated bedroom with relatively simple pieces.
10. Declutter and Curate Your Home Before Buying Anything
The final and most important budget luxury idea is to edit your existing space.
You may already own everything necessary to create a beautiful home.
The problem may simply be that too many things are competing for attention.
Materials and Things You Need
Storage baskets
Decorative boxes
Trays
Storage containers
Donation bags
Cleaning supplies
Shelving
Step-by-Step Process
Work on one room at a time.
Remove unnecessary objects.
Group similar items.
Store everyday clutter.
Donate things you no longer use.
Keep meaningful objects.
Create intentional displays.
Leave some surfaces empty.
A luxury-inspired room needs visual breathing space.
This does not mean becoming minimalist.
You can still display books, plants, artwork, collections, and sentimental objects.
The difference is that the items are arranged intentionally.
Instead of placing ten objects on a console, choose three or four.
Instead of filling every shelf, create a few attractive groupings.
Instead of covering the sofa with every cushion you own, choose a coordinated selection.
This approach makes your existing possessions feel more valuable.
11. Create a Statement Accent Wall With Budget-Friendly Paint
A statement wall can completely change the atmosphere of a room without requiring a full renovation. Instead of repainting every wall, choose one strategic surface and give it a richer, more sophisticated color. This approach works especially well behind a sofa, bed, dining table, fireplace, or console.
For a luxury-inspired appearance, consider deep green, navy blue, warm taupe, chocolate brown, muted charcoal, dusty blue, terracotta, or creamy beige. The best choice depends on the existing furniture, natural light, and overall color palette.
Materials and Things You Need
Interior wall paint
Paint roller
Paintbrush
Painter’s tape
Drop cloth
Paint tray
Sandpaper if required
Filler for small wall imperfections
Measuring tape
Step-by-Step Process
First, select the wall that naturally attracts attention.
Clean the surface and repair obvious imperfections.
Protect floors and furniture.
Use painter’s tape around edges that need protection.
Apply the appropriate primer if required.
Apply the first coat of paint.
Allow it to dry according to the manufacturer’s instructions.
Add a second coat if necessary.
Remove the tape carefully.
Once the wall is finished, keep the surrounding decorations relatively controlled.
The purpose of an accent wall is to create a focal point rather than compete with every other feature.
For a sophisticated appearance, repeat the wall color somewhere else in the room. For example, if you paint the wall deep green, introduce green through a cushion, artwork, plant pot, or decorative object.
This repetition makes the room feel professionally coordinated.
You can also create a subtle luxury effect with two closely related colors rather than a dramatic contrast. A warm beige room with a slightly darker taupe accent wall can feel elegant and understated.
If you prefer something more dramatic, choose a darker color and combine it with warm lighting and lighter furniture.
An accent wall can also provide the perfect background for artwork or a large mirror. Position the focal object carefully so the wall and object work together.
The beauty of this idea is that it creates a major visual change without requiring expensive furniture.
12. Make a Budget-Friendly Entryway Look Like a Luxury Hotel Entrance
The entryway is the first part of your home visitors experience, so it deserves as much attention as the living room. A small, carefully styled entrance can immediately make the entire home feel more sophisticated.
You do not need a large hallway. Even a narrow entryway can become attractive with a few practical elements.
Start with a console table or slim shelf if space permits. Add a mirror above it to create depth and reflect light.
Materials and Things You Need
Console table or narrow shelf
Large mirror
Table lamp
Decorative tray
Small vase
Plant
Basket
Artwork
Runner rug
Storage hooks
Step-by-Step Process
Begin by clearing unnecessary items from the entrance.
Choose one focal point, preferably a mirror or artwork.
Add a narrow console if the space allows.
Place a small lamp on the console.
Use a tray for keys and everyday essentials.
Add one vase or plant.
Place a basket underneath for practical storage.
Add a runner if the layout allows.
Keep the color palette consistent with the rest of the home.
The mirror is especially useful because it can make a narrow entryway feel larger.
A large round mirror creates softness, while a rectangular mirror can emphasize architectural lines.
Lighting is equally important. A small table lamp can create a welcoming glow during the evening.
If your entryway is very small, wall-mounted shelves can replace a console table.
A small basket underneath can provide storage without taking up too much floor space.
Avoid placing too many decorative objects in the entrance. The area needs to remain functional because people will naturally use it for shoes, bags, keys, and coats.
A sophisticated entryway balances beauty and practicality.
The finished space should feel organized, welcoming, and connected to the design language of the rest of the home.
13. Use Affordable Rugs to Make Every Room Feel More Finished
A rug can dramatically change the appearance of a room because it connects furniture and establishes a visual foundation.
Even affordable furniture can look more polished when it is placed correctly on a well-sized rug.
One of the biggest mistakes is choosing a rug that is too small.
In a living room, the rug should ideally relate to the main seating arrangement rather than appearing like a small island underneath the coffee table.
Materials and Things You Need
Area rug
Rug pad
Measuring tape
Furniture layout plan
Vacuum
Rug-cleaning supplies appropriate for the material
Step-by-Step Process
Measure the room.
Measure your furniture arrangement.
Determine the largest practical rug size within your budget.
Choose a color that connects existing furniture.
Select a subtle pattern if the room already has strong colors.
Use a more expressive pattern if the furniture is simple.
Position the rug carefully.
Add a rug pad where appropriate.
A neutral rug can make a colorful room feel calmer.
A patterned rug can introduce personality into a neutral room.
For a luxury appearance, consider subtle patterns rather than overly busy designs if your room already contains statement furniture.
Cream, beige, taupe, gray, muted blue, brown, and soft geometric patterns can create an elegant foundation.
Texture is also valuable.
A woven rug can create warmth.
A plush rug can make a bedroom feel more comfortable.
A low-pile rug may work better in high-traffic areas.
The rug should also relate to the room’s color palette.
If your sofa is beige and your artwork contains blue and brown, choose a rug that incorporates those shades.
This creates visual connection.
You do not need an expensive rug to achieve this effect. What matters most is selecting the correct size, color, pattern, and placement.
14. Add Designer-Inspired Symmetry With Matching Accessories
Symmetry is a simple design principle that can make a room appear more organized and sophisticated.
You do not need matching designer furniture.
Instead, create symmetry with affordable accessories.
This works particularly well around beds, sofas, fireplaces, consoles, and dining areas.
For example, two similar table lamps on either side of a bed immediately create a balanced appearance.
Materials and Things You Need
Matching or coordinating lamps
Side tables
Decorative cushions
Vases
Artwork
Candles or LED candles
Trays
Decorative objects
Step-by-Step Process
Identify the area you want to balance.
Choose a central focal point.
Add similar objects on both sides.
Keep their visual weight relatively balanced.
Repeat materials or colors.
Leave enough empty space around the arrangement.
A bedroom is one of the easiest places to use symmetry.
Place two bedside tables on either side of the bed.
Add matching lamps.
Use coordinated cushions.
Keep the artwork centered above the headboard.
This creates an instant boutique-hotel feeling.
In a living room, you could place two similar lamps or chairs on opposite sides of the sofa.
The objects do not have to be identical.
They simply need similar visual weight.
For example, one side might contain a tall plant while the other has a floor lamp of similar height.
Symmetry is especially useful when your furniture is inexpensive or mismatched because the balanced arrangement creates visual order.
However, avoid making the entire home perfectly symmetrical.
Luxury interiors often combine symmetry with organic elements.
You can create a symmetrical foundation and then introduce personality through artwork, books, plants, and decorative objects.
This combination keeps the room polished without making it feel overly formal.
15. Create a Luxury Spa Feeling in the Bathroom Without Renovating
A bathroom can feel expensive without replacing the tiles, vanity, or plumbing fixtures. The key is creating a clean, coordinated, hotel-inspired atmosphere through textiles, lighting, accessories, and organization.
Start by removing unnecessary products from visible surfaces.
Then introduce coordinated towels, a simple bath mat, attractive containers, greenery, and warm lighting.
Materials and Things You Need
Coordinated towels
Bath mat
Shower curtain if applicable
Decorative tray
Small plant
Ceramic container
Soap dispenser
Storage basket
Mirror
Warm lighting
Minimal artwork
Step-by-Step Process
Begin by completely clearing the bathroom counters.
Group everyday products into attractive containers where practical.
Choose towels in one or two coordinated colors.
Add a simple bath mat.
Place a small plant where suitable.
Use a tray to organize frequently used items.
Replace mismatched dispensers with coordinated containers.
Add a decorative basket for towels.
Keep the countertop mostly clear.
A neutral bathroom can immediately feel more luxurious with white, cream, beige, soft gray, or earthy towels.
For a more dramatic appearance, use deep green, navy, or charcoal accents.
Avoid displaying too many brightly colored product bottles.
Use baskets or cabinets to hide visual clutter.
Lighting also matters.
If possible, use appropriate warm lighting for a relaxing atmosphere while maintaining sufficient illumination for practical tasks.
A small plant can add freshness, while a wooden tray can introduce natural warmth.
You can also add one framed piece of artwork if the bathroom conditions are suitable for it.
The goal is to recreate the feeling of a calm boutique spa.
Everything should feel clean, coordinated, and intentional.
You do not need marble countertops or designer fixtures.
A beautifully organized bathroom with matching textiles, thoughtful storage, warm lighting, and a few natural elements can create a surprisingly luxurious result.
The most important finishing touch is cleanliness.
Keep mirrors spotless, towels fresh, surfaces uncluttered, and fixtures well maintained.
That final level of care can make inexpensive bathroom decor feel considerably more sophisticated.
A modern kitchen does not need to be large, expensive, or filled with custom cabinetry to look beautiful and function efficiently. In fact, one of the most inspiring ways to create a stylish kitchen is to work creatively with limited space. Small kitchens often encourage smarter decorating choices because every cabinet, shelf, drawer, wall, and countertop has to serve a purpose. The best modern kitchen decor combines clean visual lines, practical organization, warm materials, and carefully chosen storage solutions so the room feels open rather than crowded.
When storage is limited, the goal is not simply to find more places to put things away; it is to create a kitchen where everything has a logical home and where useful items remain easy to reach. This approach can completely change the way a compact kitchen looks and feels. Instead of allowing countertops to become crowded with appliances, containers, utensils, and everyday necessities, you can use vertical space, unused corners, cabinet doors, narrow gaps, drawers, and attractive open shelving to increase storage without sacrificing style. Modern design works particularly well for small kitchens because it favors simplicity, multifunctional furniture, streamlined hardware, neutral colors, and intentional decoration. A few well-selected materials such as light wood, white cabinetry, matte black accents, brushed metal, glass, or natural stone can create an expensive-looking appearance without requiring a complete renovation. The key is to decorate according to the actual needs of the kitchen rather than copying a large kitchen design that may not work in a compact room. Storage baskets can make open shelves look organized, drawer dividers can prevent small utensils from becoming messy, and magnetic organizers can turn an otherwise unused wall into a functional storage zone. Even the area underneath a sink can become surprisingly useful when cleaning products, brushes, and extra supplies are arranged in stackable bins or pull-out organizers. Another important principle is visual balance. Small kitchens can quickly feel overwhelmed when every available surface is decorated, so modern decor should focus on a few beautiful elements rather than dozens of accessories. A decorative cutting board, a small herb garden, a sculptural pendant light, a simple runner, or a carefully arranged shelf can provide personality while keeping the space visually calm.
Color also has a major impact. Soft whites, warm creams, pale gray, muted green, natural beige, and light wood tones can make a compact kitchen feel brighter and more spacious, while darker accents can add contrast without dominating the room. The following ideas are designed specifically around this combination of modern aesthetics and small-space functionality. Each concept can be adapted to apartments, rental kitchens, narrow kitchens, studio spaces, older homes, or compact family kitchens. You do not need to implement every idea at once. Start by identifying the areas that create the most clutter, then choose storage solutions that address those specific problems. Think of the kitchen as a collection of small zones: food preparation, cooking, cleaning, coffee or beverage preparation, pantry storage, and everyday serving. When each zone has appropriate storage, the entire room becomes easier to maintain. These ideas also prioritize beginner-friendly improvements that can be completed gradually, often without major construction. The result is a modern kitchen that feels organized, welcoming, practical, and Pinterest-worthy while making the most of every available inch.
1. Create a Minimalit Floating Shelf Storage Wall
Floating shelves are one of the easiest ways to introduce modern character into a small kitchen while gaining useful storage. Instead of treating shelves as purely decorative features, design them as a combination of display and organization. A blank wall that previously served no practical purpose can become a compact storage station for frequently used kitchenware, spices, cookbooks, mugs, jars, and decorative accessories.
The modern look comes from keeping the arrangement intentional. Rather than filling every inch of each shelf, leave some breathing room between objects. This prevents the wall from appearing visually heavy. Choose shelves in a finish that complements the existing kitchen. Light oak or natural wood creates warmth against white cabinets, while black shelves can provide a sophisticated contrast. White shelves blend into pale walls and create a nearly built-in appearance.
What to use
Two to four floating shelves
Wall anchors appropriate for your wall type
Small storage baskets
Matching glass jars
Neutral-toned containers
A few favorite mugs
Small decorative bowls
One or two plants or herbs
Cookbooks
A decorative cutting board
Step-by-step approach
Begin by choosing a wall that is close to the area where the stored items will be used. For example, shelves near the preparation area are ideal for spices, oils, cutting boards, and cooking ingredients. Shelves near a coffee station can hold mugs, coffee containers, and small accessories.
Measure the wall carefully before purchasing shelves. In a compact kitchen, proportion matters. Oversized shelves can make the space feel crowded, while shelves that are too short may look disconnected from the surrounding cabinetry.
Install the shelves at comfortable heights. Frequently used items should be easy to reach, while decorative or less frequently used pieces can occupy the upper shelf.
Use containers to create visual consistency. If you store flour, sugar, rice, pasta, or coffee on the shelves, transferring them into matching jars instantly gives the kitchen a more polished appearance.
Finally, style the shelves using a simple rhythm: functional item, decorative item, functional item. This keeps the arrangement useful without making it look like a storage closet.
The biggest advantage of this idea is flexibility. You can change the contents seasonally, reorganize them as your needs change, or use removable shelving solutions when decorating a rental kitchen. A floating shelf wall can become both a practical storage solution and one of the strongest visual features in a small modern kitchen.
2. Turn the Side of a Cabinet Into a Hidden Storage Zone
The side of a kitchen cabinet is frequently overlooked, especially in compact kitchens where every inch matters. If a cabinet sits against an exposed wall or has a visible side panel, that narrow surface can become an excellent location for small storage. This is particularly useful for spices, measuring spoons, cooking utensils, paper towels, or frequently used ingredients.
The trick is to make the storage look intentional rather than improvised. Modern kitchens benefit from slim organizers with clean lines and minimal visual clutter. A narrow rail system, shallow shelves, adhesive hooks, or a slim vertical rack can transform an unused cabinet side without requiring major renovation.
Useful materials
Slim wall-mounted rack
Small metal rail
Adhesive hooks
Narrow baskets
Spice containers
Small wooden pegs
Measuring spoon hooks
Compact paper towel holder
Labels
Removable mounting strips
Step-by-step organization
First, examine the exposed cabinet side and decide what type of items would benefit most from being stored there. Avoid placing bulky objects on this surface. The best candidates are thin or lightweight items.
If you frequently use spices, install a narrow rack and organize spices alphabetically or according to frequency of use. If cooking utensils are the main problem, a small rail with hooks may work better.
For renters, removable adhesive organizers can provide a temporary option. Always check the weight limit and the manufacturer’s recommendations before attaching anything.
Choose a limited color palette. Black metal against a white cabinet creates a crisp modern appearance, while brushed brass can add warmth and sophistication. Natural wood accents can soften a minimalist kitchen.
Another useful trick is to reserve the lowest section for items that need to be accessed often. Place rarely used ingredients higher up.
Labels can help maintain order, but avoid excessive labeling. A few consistent labels on matching containers look much more modern than dozens of different stickers.
This solution is especially valuable because it creates storage without taking away from the countertop or floor area. It can also make cooking more convenient by keeping small essentials close to the work zone.
For a Pinterest-inspired appearance, photograph the cabinet side as part of the overall kitchen rather than making it look like a separate storage station. When colors, materials, and containers coordinate with the rest of the kitchen, even this tiny organizational area can contribute to the room’s overall decor.
3. Design a Slim Rolling Pantry for Narrow Spaces
A narrow gap between appliances or cabinets can become one of the most useful storage areas in a small kitchen. Instead of allowing the space to remain empty, consider adding a slim rolling pantry. These compact units are designed to slide into narrow gaps and provide several levels of vertical storage.
This is particularly useful for dry goods, spices, bottles, canned foods, baking ingredients, and cleaning supplies. Because the pantry can roll outward, items at the back become much easier to reach than they would be in a deep cabinet.
Materials and supplies
Slim rolling pantry
Measuring tape
Storage bins
Small labels
Matching food containers
Non-slip shelf liner
Optional dividers
Small baskets
How to create the storage zone
Start by measuring the gap at its narrowest point. Do not assume that a space that looks wide enough will accommodate a storage unit. Measure the width, depth, and available height carefully.
Once you have selected a suitable rolling unit, decide how each level will be used. The lower shelf can hold heavier cans or bottles. Middle shelves are useful for frequently used pantry items. Upper shelves can store lighter ingredients.
Avoid putting too many items on the shelves. The purpose of a rolling pantry is accessibility, not simply maximizing capacity.
Group similar items together. For example, dedicate one shelf to baking supplies, another to sauces and condiments, and another to packaged foods.
Use bins for small packages. This prevents individual packets from falling behind the pantry or becoming difficult to find.
For a more modern appearance, choose a pantry with a simple frame and neutral-colored containers. If the unit is visible when pulled out, consistency matters.
One of the most important benefits is that a rolling pantry can eliminate the need to overcrowd existing cabinets. It creates additional vertical storage while occupying very little floor space.
This idea works especially well in apartments and narrow galley kitchens. It can also be adapted for cleaning supplies if the location is close to the sink. Just keep food storage and cleaning chemicals separated.
A slim pantry is more than an organization trick; it changes the way you think about unused space. A gap that once looked too narrow to matter can become a valuable storage zone, making a small kitchen feel considerably more functional.
4. Build a Compact Coffee Station With Vertical Storage
A small coffee station can make a modern kitchen feel personalized while organizing one of the most commonly cluttered areas. Coffee makers, mugs, coffee bags, sweeteners, filters, spoons, and syrups can quickly consume valuable counter space. The solution is to create a compact beverage station that combines countertop function with vertical organization.
The goal is to make the station visually attractive enough to feel like decor while ensuring that everything needed for coffee preparation has a dedicated location.
Things to include
Compact coffee machine
Two or three favorite mugs
Small mug hooks
Coffee canister
Sugar container
Small tray
Narrow shelf
Coffee scoop
Decorative jar
Small plant
Optional drawer organizer
Step-by-step setup
Choose a corner of the countertop that is already close to an electrical outlet. Keep the coffee machine as the primary focal point.
Place the machine on a small tray if you want the station to look more organized. A wooden tray adds warmth, while a stone or ceramic tray creates a cleaner contemporary look.
Install a small shelf above the station if wall space allows. Store coffee beans, mugs, or decorative pieces there.
Hooks underneath the shelf can hold mugs, freeing valuable cabinet space. Choose mugs that coordinate with the kitchen rather than displaying every mug you own.
Use one attractive container for coffee and another for sugar or sweetener. This reduces the number of branded packages visible on the counter.
Keep only daily essentials in this area. Extra filters, backup coffee bags, and rarely used accessories should be stored elsewhere.
For a particularly small kitchen, choose a vertical arrangement. The machine occupies the lower level, mugs hang above it, and coffee supplies sit on the upper shelf.
This setup creates a mini destination within the kitchen. It is both functional and visually appealing, which makes it especially suitable for Pinterest-style home organization content.
The most important principle is restraint. A coffee station should not become another cluttered countertop. Limit the displayed items to those you actually use and a few decorative accents.
With thoughtful organization, even a tiny corner can become a beautiful morning routine station while simultaneously freeing cabinet and countertop space.
5. Use the Inside of Cabinet Doors for Extra Organization
Cabinet doors provide hidden storage that is often completely ignored. Because the storage remains behind the closed door, it is particularly effective for small kitchens where maintaining clean visual lines is important.
The inside of a cabinet door can hold measuring cups, pot lids, spices, cutting boards, cleaning brushes, food wraps, or small kitchen tools. The best choice depends on the cabinet and what is already stored inside it.
Storage materials
Over-the-door organizer
Adhesive hooks
Slim wire rack
Small clips
Measuring cup hooks
Spice pockets
Removable adhesive strips
Labels
Small bins
How to organize it
Begin with one cabinet rather than trying to modify every door. Empty the cabinet and identify the items that create the most frustration.
For example, if measuring cups are constantly buried in drawers, attach small hooks to the inside of the cabinet door and hang them there.
If you are organizing food wrap, use a slim holder designed for the cabinet door. Make sure the door can close completely before adding more items.
For cleaning supplies, an under-sink cabinet door is often ideal. Small brushes, sponges, gloves, and cloths can be stored in narrow holders.
Do not overload the door. Excess weight can affect hinges and make the cabinet difficult to operate.
The visual advantage of this solution is that the kitchen remains uncluttered when the cabinets are closed. Everything disappears behind a clean cabinet facade.
For renters, removable hooks and adhesive organizers can provide a less permanent option, although the surface should always be tested according to the product instructions.
This storage strategy is particularly useful for small objects because it takes advantage of vertical space that would otherwise remain unused.
A modern kitchen should not only look organized from the outside. It should also work efficiently when you open the cabinets. Interior door storage makes everyday tasks easier because small tools can be placed exactly where they are needed.
Once you discover how much space is available inside cabinet doors, you may find that you need fewer bulky countertop organizers.
6. Create a Modern Pegboard Kitchen Organization Wall
A pegboard can turn a blank kitchen wall into a flexible storage and decor feature. Although pegboards were traditionally associated with workshops and utility rooms, modern versions can look surprisingly sophisticated when styled thoughtfully.
The greatest advantage is flexibility. Hooks, shelves, baskets, and holders can be moved whenever your storage needs change.
What you need
Kitchen-safe pegboard
Mounting hardware
Hooks
Small shelves
Wire baskets
Wooden pegs
Measuring tape
Level
Lightweight kitchen tools
Optional framed artwork
Step-by-step method
Choose a wall that is close to your cooking or preparation area. Avoid placing the pegboard somewhere that will interfere with cabinet doors or walking paths.
Measure the wall before choosing the board. A compact rectangular board is often better for a small kitchen than a large full-wall installation.
Install the board securely according to the manufacturer’s instructions. Once mounted, begin with the items you use most frequently.
Hang wooden spoons, spatulas, whisks, measuring tools, scissors, and lightweight pans where appropriate.
Add one or two small shelves for jars or decorative objects.
The secret to making a pegboard look modern is repetition. Use hooks and accessories in a consistent finish. Black hardware creates a dramatic modern appearance, while natural wood accessories create a softer Scandinavian-inspired effect.
Do not fill every hole. Negative space helps the display look intentional.
You can also combine practical storage with decorative elements. A small plant, framed print, or attractive cutting board can break up the collection of tools.
The layout should reflect how you cook. Place frequently used utensils near the center or lower section, while occasional tools can occupy higher areas.
A pegboard also works well for small kitchens because it shifts storage from horizontal surfaces to vertical ones. Instead of covering the counter with utensil holders, you can move many of those items onto the wall.
This idea is especially appealing for Pinterest because the transformation is easy to demonstrate visually: a blank wall becomes an organized, attractive kitchen command center.
7. Add a Built-In-Looking Bench With Hidden Storage
If your kitchen includes a small dining corner, breakfast nook, or unused wall area, a storage bench can provide both seating and hidden organization. This is an excellent solution for kitchens that need additional storage but do not have room for another cabinet.
A bench can store table linens, small appliances, serving dishes, cookware, or pantry backups. The outside should remain simple so that it blends naturally with the kitchen decor.
Materials to consider
Compact storage bench
Removable seat cushion
Neutral fabric
Storage baskets
Decorative pillows
Hinged or lift-up seat
Small dining table
Wall art
Optional floating shelf
Creating the space
First, identify whether your kitchen actually has enough clearance for a bench. Measure the area carefully, including the distance required for people to sit and move around the table.
Choose a bench with internal storage or use baskets underneath an open design.
If the bench has a lift-up seat, divide the interior into categories. For example, one section can store table linens, while another can hold serving pieces.
Use fabric in a neutral color to maintain a modern appearance. Cream, beige, soft gray, or muted green can work beautifully with contemporary kitchens.
Avoid oversized cushions or too many pillows because they can make a compact area feel crowded.
A narrow floating shelf above the bench can provide additional vertical storage or display space. However, keep the shelf lightly decorated.
The combination of seating and storage is particularly valuable because one piece of furniture performs two functions.
For very small homes, this principle is essential. Instead of asking where to add another storage unit, ask whether existing furniture can perform a second job.
A storage bench can also visually anchor a dining nook, making the kitchen feel more finished and intentional.
When styled with a simple table, warm lighting, and one or two decorative elements, the area becomes more than a storage solution. It becomes a cozy feature that adds personality without consuming unnecessary space.
8. Organize the Under-Sink Area With Pull-Out Storage
The space underneath the kitchen sink is usually one of the most difficult areas to keep organized. Plumbing pipes create awkward shapes, cleaning products become scattered, and small items can disappear into dark corners.
A modern small kitchen benefits from treating this cabinet as a dedicated utility zone rather than allowing it to become a miscellaneous storage area.
Storage supplies
Pull-out organizer
Stackable bins
Small cleaning caddy
Microfiber cloths
Reusable gloves
Brush holder
Trash-bag dispenser
Labels
Shelf liner
Small hooks
Step-by-step organization
Empty the entire cabinet first. Discard empty containers and move unrelated items elsewhere.
Measure around the plumbing pipes before purchasing an organizer. A standard rectangular bin may not fit around the pipes, so adjustable or narrow designs can be more effective.
A pull-out organizer is especially helpful because it brings items toward you instead of forcing you to reach into the back of the cabinet.
Use a small caddy for products that you regularly move around the kitchen. This allows you to carry several items at once.
Attach lightweight hooks to the cabinet wall or door for gloves and brushes if appropriate.
Use a shelf liner to make cleaning spills easier.
Avoid storing too many products. Under-sink cabinets become difficult to maintain when they are filled beyond capacity.
The modern design principle here is hidden simplicity. Nothing needs to be displayed because the entire storage system is concealed behind the cabinet door.
Once organized, the under-sink area becomes much easier to clean and maintain.
This idea is especially useful for beginners because it does not require changing the appearance of the kitchen. You are simply improving an existing storage area.
It can also inspire a broader decluttering strategy: instead of purchasing more containers immediately, first remove items you no longer use. Better organization often comes from owning fewer unnecessary items rather than adding more storage products.
9. Install a Magnetic Storage System for Small Kitchen Tools
Magnetic storage can be a smart solution when drawers and cabinets are already full. A magnetic strip or magnetic organizer can hold lightweight metal kitchen tools while keeping them visible and accessible.
The concept works particularly well in modern kitchens because the storage system can have a sleek, minimalist appearance.
Items you may use
Magnetic kitchen strip
Strong mounting hardware
Metal measuring spoons
Small metal utensils
Kitchen scissors
Lightweight tools
Magnetic containers
Spice tins
Labels
Optional small hooks
How to make it work
Choose a wall section that is close to the preparation area but does not interfere with cooking or movement.
Before installing anything, check the manufacturer’s recommended weight capacity and make sure the mounting method is suitable for your wall.
Start with a few lightweight tools rather than hanging everything immediately.
Arrange the tools according to frequency of use. Your everyday utensils should be easiest to reach.
Magnetic spice containers can also be useful if they are designed specifically for kitchen use. They can turn an unused vertical surface into a compact spice display.
To preserve the modern appearance, avoid mixing too many finishes. A single metal finish often looks more cohesive.
The system should remain visually balanced. If one side of the strip is overloaded while the other is empty, redistribute the tools.
Magnetic storage is particularly valuable in kitchens with limited drawer space. It moves selected items onto the wall without requiring additional cabinetry.
However, safety should remain the priority. Avoid placing sharp or heavy objects where they could fall into food preparation areas or be reached accidentally by children.
The beauty of this approach is that it combines function and decoration. Carefully arranged kitchen tools can create a subtle professional-kitchen aesthetic.
For Pinterest content, this concept also has strong organizational appeal because it demonstrates a simple transformation from cluttered drawers to accessible vertical storage.
Used selectively, magnetic storage can make a small kitchen feel more spacious because it reduces the number of objects competing for countertop and drawer space.
10. Create a Multi-Functional Countertop Storage Station
The final idea for Part 1 is to create a compact countertop station that combines several functions in one carefully organized area. This is particularly effective for kitchens where there is not enough room for separate coffee stations, cooking organizers, fruit storage, and decorative displays.
Instead of placing individual containers across the entire countertop, group related items onto one attractive tray or compact organizer.
Things to include
Large decorative tray
Small utensil container
Oil and vinegar bottles
Salt and pepper
Small cutting board
Fruit bowl
Compact canisters
Herb pot
Small decorative object
Optional tiered organizer
Step-by-step setup
Choose one countertop section to become your organized station. The first step is removing everything from the area.
Only return items that you use regularly.
Place a tray underneath related products. For example, cooking oils, salt, pepper, and everyday seasonings can sit together.
If countertop space is extremely limited, use a tiered organizer. The upper level can hold smaller containers while the lower level stores larger bottles.
Keep the tallest items toward the back and shorter items toward the front. This creates a cleaner visual hierarchy.
Add one decorative feature such as a small herb plant, ceramic container, or wooden utensil holder.
Avoid filling the station simply because space is available. Empty space is part of modern kitchen decor.
The countertop should remain usable for food preparation. If your station takes over the entire work surface, it has become counterproductive.
A unified station can also create a visual focal point. Instead of having random objects scattered around the kitchen, the eye sees one deliberate arrangement.
Choose materials that complement the rest of your kitchen. Wood, ceramic, glass, stainless steel, and matte finishes can all work together when used thoughtfully.
This approach is particularly beginner-friendly because it requires no permanent installation. You can experiment with the layout, change the containers, or move the station whenever your needs change.
The larger lesson is that small kitchens benefit from grouping rather than scattering. When similar items live together, the kitchen becomes easier to use and easier to clean.
A thoughtfully designed countertop station can therefore serve as both a storage solution and a decorative element, helping a compact kitchen feel polished without making it feel overdecorated.
11. Use Vertical Cabinet Extensions for Extra Kitchen Storage
When a small kitchen feels short on storage, the first instinct is often to add another cabinet or purchase a larger storage unit. Before doing that, look upward. The vertical space above existing cabinets can become surprisingly useful when it is designed intentionally. In many kitchens, the area between the top of the cabinets and the ceiling is either completely empty or used to collect decorative objects that are difficult to clean. Turning part of this vertical area into organized storage can increase capacity without taking away valuable floor or countertop space.
This idea works particularly well for items that are used occasionally, such as serving platters, seasonal dishes, extra baking supplies, large bowls, picnic accessories, or entertaining pieces. The key is to avoid storing everyday essentials in places that require a step stool.
Materials and things to use
Stackable storage boxes
Lidded baskets
Uniform woven baskets
Clear containers
Lightweight risers
Labels
Small step stool
Cabinet-top shelving
Decorative storage boxes
Non-slip shelf liner
Step-by-step setup
Begin by measuring the empty space above your cabinets. Pay attention to both height and depth. If the area is dusty, clean it thoroughly before adding storage.
Choose containers that have a consistent appearance. Matching baskets create a cleaner modern look than a collection of unrelated cardboard boxes. If you prefer to see what is inside, clear containers can be practical, but use them selectively because too many visible containers can make the kitchen look busy.
Group items according to how often they are used. Seasonal serving dishes can go toward the back, while larger backup supplies can stay in accessible positions.
If your cabinets do not extend all the way to the ceiling, consider a lightweight shelving extension or cabinet-top organizer. Make sure anything installed is securely supported and appropriate for the structure.
For a polished appearance, do not fill the entire area with storage. Leave enough visual space for the kitchen to feel intentional.
A simple row of matching baskets can actually become a decorative feature. Choose warm beige, natural fiber, white, or a color that complements your cabinets.
This idea is especially helpful in kitchens with limited cabinet capacity because it creates storage without changing the existing layout. It also encourages a useful habit: storing occasional items higher while keeping everyday tools at comfortable reach.
For safety, avoid storing heavy glassware or unstable objects overhead. Lightweight, infrequently used items are the better choice.
The result is a kitchen that uses its full vertical footprint while maintaining the clean, uncluttered appearance associated with modern design.
12. Transform an Empty Corner Into a Slim Kitchen Storage Tower
Corners are among the most underused areas in compact kitchens. A corner may be too narrow for a standard cabinet but still large enough for a slim vertical storage tower. Instead of allowing this awkward space to remain empty, turn it into a dedicated zone for pantry goods, appliances, cookbooks, serving dishes, or decorative kitchen accessories.
A narrow tower is especially useful because it takes advantage of height rather than width. This makes it appropriate for apartments, galley kitchens, narrow kitchens, and open-plan spaces where floor space is limited.
Things and materials to consider
Slim vertical shelving unit
Narrow cabinet
Adjustable shelves
Storage baskets
Clear food containers
Decorative jars
Cookbooks
Small appliance storage
Labels
Non-slip shelf liners
Step-by-step organization
Start by identifying exactly what the corner should store. Avoid buying a tower before deciding its purpose. If the main problem is pantry overflow, use adjustable shelves and containers. If appliances are taking over the counter, choose deeper shelves that can accommodate them.
Measure the corner carefully. Check the distance from nearby doors, drawers, appliances, and walkways. A storage tower should improve the kitchen rather than create an obstruction.
Choose a design that matches your existing cabinetry. A white tower can visually disappear into a light kitchen, while natural wood can create warmth. Black shelving provides stronger contrast and can work particularly well with modern industrial decor.
Keep heavy objects on lower shelves. Middle shelves can hold frequently used items, while decorative pieces and occasional-use items can occupy the top.
Use baskets to group small packages. Without containers, a narrow tower can quickly become visually chaotic.
For open shelving, limit the color palette. Neutral containers, wooden accessories, and a few ceramic pieces can make the unit feel like part of the kitchen design.
If you prefer a cleaner appearance, choose a cabinet with doors. Closed storage is especially helpful if the items being stored are visually mismatched.
One useful strategy is to create a “backup zone.” Store extra paper products, unopened pantry staples, specialty cooking ingredients, or serving supplies in the tower rather than spreading them throughout the kitchen.
This creates a practical storage system while keeping the main cabinets dedicated to everyday items.
A narrow storage tower proves that a difficult corner does not necessarily need to be remodeled. With careful measurements and thoughtful organization, even a small unused section of the kitchen can become an attractive and hardworking storage feature.
13. Add Drawer Dividers for a Calm, Organized Kitchen
Drawers are excellent storage spaces, but without internal organization they can become one of the biggest sources of hidden clutter. Utensils overlap, measuring spoons disappear, gadgets become difficult to identify, and every time you open a drawer you have to search for what you need.
Modern kitchen organization works best when drawers are divided into small functional zones. Drawer dividers are simple, affordable, and beginner-friendly because they do not require construction or major changes to the kitchen.
Useful materials
Adjustable drawer dividers
Bamboo organizers
Expandable trays
Small containers
Utensil separators
Labels
Non-slip liner
Measuring tape
Small kitchen bins
Step-by-step drawer organization
Remove everything from one drawer at a time. Do not attempt to organize every drawer simultaneously.
Sort the contents into categories such as cooking utensils, measuring tools, serving utensils, gadgets, or miscellaneous items.
Discard duplicates and relocate objects that do not belong in that drawer.
Measure the drawer interior, including its height. This prevents you from buying an organizer that prevents the drawer from closing.
Choose adjustable dividers when possible. They allow you to customize compartments around your actual utensils rather than forcing your items into fixed spaces.
Place frequently used tools toward the front. Less frequently used items can go toward the back.
Use narrow sections for measuring spoons and small utensils. Larger compartments can hold spatulas, tongs, or whisks.
For a modern appearance, bamboo or neutral-colored organizers can add warmth. Clear organizers are practical but can create a more utilitarian appearance.
Avoid creating too many tiny compartments. The purpose of organization is to make items easier to find, not to make the drawer complicated.
Once the drawer is organized, test it for several days. If you constantly return an item to the wrong compartment, the layout may need to change.
This system can make a surprisingly large difference in a small kitchen because efficient drawers reduce the need for additional countertop storage. When utensils have defined homes, you are less likely to leave them scattered around the cooking area.
Drawer organization also makes cleaning easier. Instead of removing an entire collection of loose tools, you can lift an organizer or clean one designated compartment.
For Pinterest-worthy results, focus on consistency. Matching organizers, clean lines, and carefully grouped utensils create the satisfying visual order that makes small-space organization content especially appealing.
14. Create a Hidden Appliance Garage to Free Counter Space
Small appliances can consume a huge amount of countertop space. Toasters, blenders, coffee equipment, food processors, and mixers are useful, but when they remain permanently visible, even a well-decorated kitchen can feel crowded.
An appliance garage provides a solution by giving frequently used appliances a dedicated concealed home. It can be created inside an existing cabinet, beneath a counter, or within a specially designed storage section.
Materials and items
Appliance cabinet or storage compartment
Roll-up door or lift-up door
Electrical outlet
Cable clips
Non-slip mat
Small appliance
Adjustable shelf
Compact storage basket
How to create the zone
Begin by identifying the appliances that you use often enough to justify countertop access but do not want permanently displayed.
Measure the appliance dimensions, including its cord and any parts that need to remain attached.
Choose a cabinet or compartment with sufficient ventilation and clearance. Electrical appliances should be stored and operated according to their safety instructions. Do not modify electrical wiring unless the work is performed by an appropriately qualified professional.
Use cable clips to prevent cords from becoming tangled.
A non-slip mat can help protect the surface and keep smaller appliances stable.
If your kitchen already has a deep cabinet, consider dedicating one section to appliances. Place the heaviest appliance on the bottom and lighter equipment above.
For a truly modern appearance, use a door that matches the cabinetry. When closed, the appliance disappears completely.
If you are planning a kitchen renovation, an appliance garage can be incorporated directly into the cabinetry design. For a rental or budget makeover, a freestanding cabinet or carefully selected countertop organizer may achieve a similar result.
The important principle is accessibility. Hidden storage is only useful if retrieving the appliance does not become frustrating. Frequently used items should remain easy to access.
A compact appliance garage can dramatically improve the visual appearance of a small kitchen. Once several bulky appliances disappear behind a cabinet front, the countertop immediately looks larger.
This is also a good example of modern design thinking: rather than eliminating useful appliances, design the storage system around them.
The kitchen remains practical while maintaining a cleaner appearance. With fewer objects visible, decorative elements such as a plant, pendant light, backsplash, or carefully styled tray have more visual impact.
15. Turn the Kitchen Backsplash Into a Functional Storage Area
A backsplash does not have to be purely decorative. In a small kitchen, the wall between the countertop and upper cabinets can become valuable vertical storage when accessories are selected carefully.
Instead of covering the backsplash with hooks and organizers everywhere, create a small functional section. A slim rail can hold cooking utensils, small shelves can display spices, or magnetic containers can keep frequently used ingredients accessible.
Materials to consider
Slim kitchen rail
Small hooks
Magnetic containers
Narrow spice shelves
Lightweight baskets
Measuring spoons
Cooking utensils
Small herb containers
Wall-safe mounting hardware
Step-by-step approach
First, identify what is currently taking up too much drawer or countertop space. Those items should become the priority for backsplash storage.
A cooking rail can hold a few everyday utensils such as a whisk, spatula, or ladle. Avoid hanging too many objects because the backsplash can quickly become visually overwhelming.
If spices are the main problem, install a shallow rack. Keep frequently used spices near the cooking zone.
Magnetic containers can provide another streamlined option. Choose matching containers if you want the system to look like part of the decor.
Consider the existing backsplash material before drilling. Tile, stone, glass, and painted surfaces may require different installation approaches. For rental kitchens, removable solutions may be preferable.
Keep objects away from direct heat sources and follow product installation instructions.
The visual secret is restraint. A modern backsplash storage system should look curated rather than crowded.
For example, a short black rail with five carefully selected wooden utensils can create a sophisticated contrast against a light backsplash. A narrow brass shelf with matching spice jars can create a warmer appearance.
This approach also makes cooking easier because frequently used tools remain within reach.
One advantage of backsplash storage is that it preserves cabinet and drawer capacity for other categories. You are effectively creating a new storage layer without adding furniture.
However, remember that the backsplash is exposed to cooking splashes. Items stored there should be easy to clean, and delicate decorative objects should be positioned away from areas where grease or water is likely to reach them.
When designed thoughtfully, the backsplash can become one of the most functional and visually interesting surfaces in a small modern kitchen.
16. Use Tiered Organizers Inside Deep Cabinets
Deep cabinets often look spacious but can actually waste storage because items disappear behind one another. You may have enough cabinet volume but still struggle to find what you need.
Tiered organizers solve this problem by creating multiple visual levels. Instead of placing cans, jars, sauces, or containers in one flat row, you can raise items toward the back so everything remains visible.
Things to use
Tiered shelf risers
Expandable cabinet organizers
Can organizers
Lazy Susan
Clear bins
Small baskets
Shelf liner
Labels
Measuring tape
Step-by-step method
Remove everything from the cabinet before organizing it. Group similar products together.
Measure the cabinet’s width, depth, and height. Pay special attention to the distance between shelves.
Choose a tiered organizer appropriate for the cabinet category. A stepped riser works well for cans and jars, while a rotating organizer can be useful for bottles and condiments.
Place the most frequently used products toward the front or on the most accessible level.
Keep heavier products on stable surfaces.
If using bins, choose containers that can be pulled out easily. A bin can function as a drawer within a cabinet, allowing you to access multiple small items at once.
Use labels when several categories look similar.
Avoid overfilling the cabinet. You should be able to remove one item without knocking over several others.
For a modern aesthetic, neutral baskets and clear containers can create visual consistency. However, there is no need to transfer every food item into decorative containers. Focus on the categories that genuinely benefit from containerization.
A tiered system is particularly effective for small kitchens because it improves the storage capacity you already have. You may discover that you do not actually need additional cabinetry; you simply needed to use the existing space more efficiently.
This is an important distinction when decorating a compact kitchen. Buying more storage products without fixing the underlying organization can make the kitchen feel even more crowded.
Start with cabinet efficiency before purchasing additional furniture.
Once the cabinet is arranged in levels, everything becomes easier to see. The kitchen feels more organized because visual clutter is reduced inside the cabinets as well as outside them.
17. Add a Fold-Down Preparation Table or Counter Extension
A small kitchen sometimes has enough storage but not enough working surface. When countertop space is limited, a fold-down table or counter extension can provide additional preparation space only when needed.
This multifunctional approach is ideal for compact apartments, narrow kitchens, and homes where a permanent island would make the room difficult to navigate.
Materials and items
Wall-mounted folding table
Folding countertop
Strong brackets
Wall anchors
Measuring tape
Level
Cutting board
Optional stools
Compact storage basket
How to use the idea
Start by identifying a wall with enough clearance for the table to fold down without blocking a doorway or walkway.
Measure the available width and depth. A narrow surface may be enough for food preparation, baking, or placing small appliances temporarily.
Choose hardware appropriate for the wall structure and intended load. If installation involves structural or electrical considerations, use qualified professional assistance.
When the table is folded up, it should occupy minimal visual space. When folded down, it becomes a temporary work surface.
For an especially cohesive appearance, select a finish that matches the countertop or cabinetry. Natural wood can add warmth to a neutral kitchen, while a white surface can visually disappear against the wall.
The area underneath the folded table can sometimes accommodate hooks or a slim storage rail, provided it does not interfere with the table’s operation.
If you need occasional seating, a pair of folding stools can turn the surface into a compact breakfast area. Store the stools vertically or in a nearby closet when not in use.
The biggest advantage is multifunctionality. One wall feature can function as a preparation surface, breakfast table, baking station, work area, or temporary serving counter.
This makes it particularly valuable in a small kitchen where every permanent piece of furniture has a significant impact on movement.
Keep the surface relatively uncluttered so that it is ready to use. Decorative objects can be placed nearby rather than permanently occupying the fold-down surface.
A fold-down table is an excellent example of modern small-space design because it responds to the changing needs of the room. Instead of demanding more square footage, it allows the existing space to perform multiple functions throughout the day.
18. Create a Compact Pantry With Matching Containers
A small pantry does not need to be a dedicated room. Even one cabinet, narrow shelf, or section of a kitchen wall can become a highly functional pantry when the contents are categorized and stored vertically.
Matching containers are particularly helpful because they create visual order. They also make it easier to see how much of an ingredient remains, although food should always be stored according to appropriate food-safety recommendations.
Pantry materials
Airtight food containers where appropriate
Stackable bins
Labels
Shelf risers
Narrow baskets
Can organizers
Lazy Susan
Measuring scoop
Small jars
Inventory list
Step-by-step pantry setup
Begin by removing everything and checking expiration dates. Group ingredients by category rather than randomly returning them to the cabinet.
Possible categories include grains, pasta, baking ingredients, snacks, breakfast foods, canned goods, sauces, and cooking essentials.
Use stackable containers where they genuinely improve space efficiency. Tall containers can make better use of vertical height.
Place heavier items lower and frequently used ingredients at comfortable eye level.
Use small baskets for loose packets and snack items. A basket prevents small packages from spreading across an entire shelf.
A lazy Susan can be useful for bottles or jars that would otherwise hide behind one another.
Labels should be simple and consistent. Use the same style across the pantry rather than creating a collection of different fonts and colors.
Do not transfer foods into containers merely for aesthetic reasons if doing so makes expiration information, allergens, or preparation instructions harder to identify. Keep original packaging or relevant information accessible as needed.
The modern appearance comes from repetition: similar containers, coordinated labels, and clear categories.
A compact pantry also reduces food waste because ingredients are easier to see. When you know what you already have, you are less likely to purchase duplicates.
For Pinterest-inspired styling, place the most attractive containers and baskets in visible sections while keeping less visually appealing backup supplies in closed storage.
The pantry should ultimately support your daily routine. If an organizational system looks beautiful but takes too much effort to maintain, simplify it.
The best small-kitchen pantry is one that remains organized after several weeks of real cooking.
19. Use a Narrow Utility Cart as Flexible Kitchen Storage
A narrow rolling cart can provide storage without requiring permanent installation. Because it can move, the cart can serve different purposes depending on what the kitchen needs.
It can become a coffee cart, baking station, vegetable storage unit, beverage station, pantry overflow area, or appliance cart.
Useful items
Slim rolling cart
Storage baskets
Small jars
Hooks
Canisters
Wooden tray
Kitchen towels
Small plants
Appliance
Labels
Non-slip liner
How to style and organize it
Choose a cart that is narrow enough to fit comfortably into your kitchen. Measure the space before buying.
Decide on one primary purpose. A cart that stores everything eventually becomes cluttered.
For a coffee cart, place the coffee machine or coffee supplies on the top level, mugs on the middle shelf, and backup supplies below.
For a baking cart, store mixing bowls, baking trays, flour containers, measuring tools, and accessories together.
Use baskets to hide small miscellaneous items.
Keep the top surface attractive but functional. A wooden tray can group items together and prevent the cart from appearing scattered.
Wheels make the cart flexible, but that does not mean it should constantly move. Ideally, it should have a dedicated parking location.
If the kitchen is very small, choose a cart that can slide beneath a counter or fit beside a refrigerator when not needed.
The cart can also be useful during entertaining. Move it near a dining area and use it as a temporary serving station.
This makes it an excellent example of multifunctional furniture. Instead of buying separate storage pieces for different purposes, one compact unit can adapt to changing needs.
For a modern look, choose clean lines and a restrained material palette. Black metal with wood shelves works well in contemporary spaces. White metal can blend into a light kitchen, while natural wood creates a warmer appearance.
A narrow cart is also a budget-friendly option because it can be added without modifying cabinets or walls.
The key is disciplined organization. Give each shelf a clear role and avoid allowing unrelated items to accumulate.
When used intentionally, a rolling cart can increase storage, improve flexibility, and add personality to a small kitchen without making the room feel permanently crowded.
20. Combine Modern Decor With Hidden Multifunctional Storage
The most effective small-kitchen design does not treat decoration and organization as separate tasks. Instead, the two should work together. The final idea is to create a kitchen where decorative elements also provide storage or practical function.
A wooden cutting board can lean against the backsplash while remaining ready for food preparation. Attractive ceramic containers can store everyday ingredients. A bench can provide seating and hidden storage. A decorative tray can organize cooking oils. A floating shelf can display dishes while holding frequently used kitchenware.
This approach is particularly valuable when square footage is limited because every object earns its place.
Materials and things to incorporate
Decorative storage baskets
Wooden cutting boards
Ceramic canisters
Glass jars
Floating shelves
Storage bench
Decorative tray
Multifunctional stools
Wall hooks
Small plants
Neutral textiles
Coordinated containers
Step-by-step design strategy
Begin by identifying the objects you already use every day. Instead of hiding everything, decide which items are attractive enough to become part of the kitchen’s visual design.
Group similar materials together. Natural wood, ceramic, woven baskets, glass, and matte metal can create a sophisticated modern combination.
Choose one primary color palette. Warm white, beige, light wood, muted green, soft gray, and black accents can work together without overwhelming a small room.
Then identify opportunities for dual-purpose decor.
A beautiful basket can store kitchen towels. A ceramic crock can hold cooking utensils. A narrow shelf can display cookbooks and store spices. A stool can provide seating while fitting beneath a counter.
Use vertical space wherever possible, but keep the walls from becoming overloaded.
Maintain open countertop areas. Even if storage is available, the kitchen needs breathing room to feel spacious.
Use lighting to highlight useful areas. Under-cabinet lighting can make a preparation zone more functional while creating a warm atmosphere.
The final step is editing. Walk through the kitchen and remove anything that feels unnecessary, duplicated, or visually distracting.
Modern design is often less about adding and more about selecting.
The result should feel effortless: useful items are easy to find, decorative objects have a purpose, and storage solutions blend into the overall design.
This philosophy can transform even the smallest kitchen because it eliminates the artificial division between “pretty” and “practical.” Instead, the entire room becomes a coordinated system.
A kitchen does not need expensive renovations to feel luxurious. Clean surfaces, thoughtful organization, warm materials, good lighting, and multifunctional storage can create the same sense of intentionality.
Final Takeaway: Build a Small Kitchen That Feels Bigger
The best modern kitchen decor ideas are not necessarily the most expensive ones. In a compact kitchen, smart planning often creates a greater impact than a large renovation. The goal is to make every available area work harder while keeping the overall room visually calm.
The ten ideas in Part 2 demonstrate several powerful small-space principles. Vertical cabinet extensions use otherwise ignored height. Slim storage towers transform corners into functional zones. Drawer dividers make existing storage easier to use. Appliance garages remove bulky equipment from sight. Backsplash systems convert walls into practical storage. Tiered cabinet organizers improve visibility. Fold-down tables add temporary workspace. Compact pantries make food storage more efficient. Rolling carts provide flexible organization, while multifunctional decor allows everyday objects to contribute to the room’s aesthetic.
The most important step is to begin with your actual problems.
If your counters are crowded, prioritize hidden appliance storage and multifunctional countertop organization. If your cabinets are full, look at vertical storage, tiered organizers, cabinet-door solutions, and narrow pantry systems. If your drawers are chaotic, use dividers before buying more storage furniture. If you lack workspace, consider a fold-down counter or multifunctional cart.
The best storage solution is the one that matches your routine.
Think about what you reach for every day. Think about what repeatedly becomes cluttered. Think about which items are difficult to access. Then design storage around those habits.
For a modern Pinterest-inspired appearance, repetition and restraint are essential. Choose a small group of complementary materials instead of using every trend at once. Natural wood can add warmth. Matte black can create contrast. Glass can keep storage visually light. Woven baskets can soften hard cabinetry. Ceramic containers can introduce handcrafted character. Neutral textiles can make the kitchen feel welcoming.
Color should also support the feeling of space. Light neutrals can help a compact kitchen appear brighter, while carefully selected darker accents create definition. You do not need to make everything white to create a spacious feeling. The more important factor is visual consistency.
Another important principle is open space. Storage should not become an excuse to fill every wall and surface. Modern kitchens look best when functional areas are balanced with empty areas. Leave part of the countertop clear. Avoid overcrowding floating shelves. Use only as many baskets and containers as necessary.
Organization should also be sustainable. A system that looks perfect for one day but becomes difficult to maintain is not a successful system. Make sure everyday objects are easy to return to their designated homes.
A beginner-friendly makeover can happen gradually. Start with one cabinet, one drawer, one corner, or one wall. Remove unnecessary items, measure the available space, select an appropriate storage solution, and then style the area with a few coordinated details.
The result should not simply be a kitchen that looks good in a photograph. It should be a kitchen that feels better every morning when you make breakfast, every evening when you prepare dinner, and every weekend when you clean and reset the space.
Small kitchens can be beautiful because limitations encourage creativity. A narrow wall becomes a storage system. An empty corner becomes a pantry. A cabinet door becomes an organizer. A bench becomes a hidden cupboard. A rolling cart becomes a flexible workstation. A simple shelf becomes both decor and storage.
That is the real secret behind modern small-kitchen design: do more with less while keeping the room visually simple.
When storage, decor, and daily function are designed together, even a compact kitchen can feel spacious, organized, warm, and genuinely enjoyable to use.
20-Idea Quick Reference
Floating shelves can combine display and everyday storage.
Cabinet sides can become narrow spice or utensil stations.
Rolling pantry units can transform unused gaps.
Coffee stations can organize beverage supplies beautifully.
Cabinet-door organizers create hidden storage.
Pegboards turn blank walls into flexible organization zones.
Storage benches combine seating with concealed storage.
Under-sink pull-outs make difficult cabinets easier to use.
Magnetic systems move small tools onto unused wall space.
Countertop stations group everyday essentials into one organized area.
Vertical cabinet extensions make use of unused upper space.
Slim storage towers turn awkward corners into useful zones.
Drawer dividers give every small utensil a defined home.
Backsplash storage adds function without using floor space.
Tiered organizers make deep cabinets easier to see and access.
Fold-down counters create workspace only when needed.
Compact pantry systems maximize food-storage efficiency.
Rolling carts provide flexible, multifunctional storage.
Multifunctional decor allows useful objects to become part of the design.
The overall strategy is simple: declutter first, measure second, organize third, and decorate last. When storage is solved before decorative styling begins, the final kitchen is more likely to remain practical, attractive, and easy to maintain.