
Halloween decorating does not have to mean covering every surface with plastic skeletons, neon-orange lights, cartoon pumpkins, or inexpensive-looking seasonal accessories. If your goal is to create a home that feels sophisticated, warm, dramatic, and beautifully styled for Halloween, the secret is not spending more money—it is choosing the right colors, textures, materials, lighting, and decorative details. Elegant Halloween decor combines the mysterious atmosphere traditionally associated with Halloween with the polished visual language of luxury interiors. Think deep charcoal, warm ivory, muted black, aged brass, antique-inspired glass, velvet, natural wood, soft candlelight, and carefully selected pumpkins rather than an overwhelming collection of novelty decorations.
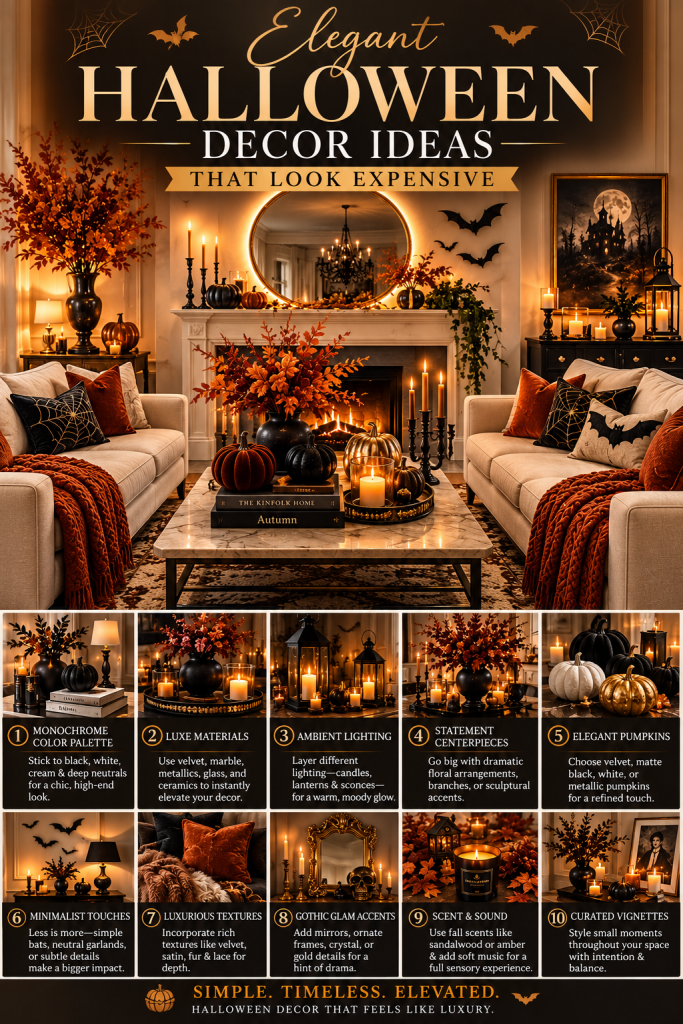
An expensive-looking Halloween home should feel intentional. Every decorative piece should have a purpose, and the overall arrangement should look like it belongs together. Instead of buying dozens of Halloween-specific objects, you can often transform ordinary home decor into seasonal styling by changing textiles, adding atmospheric lighting, introducing dramatic floral arrangements, or creating a sophisticated centerpiece. A simple black vase, for example, can become an elegant Halloween focal point when filled with dark branches and surrounded by ivory pumpkins. A velvet throw can make an ordinary sofa look luxurious, while brass candlesticks and warm candles can immediately create a moody autumn atmosphere.
The best elegant Halloween decorations also work with the existing character of your home. Modern homes can use minimalist black-and-white Halloween styling. Traditional interiors can embrace antique mirrors, vintage candlesticks, botanical arrangements, and classic pumpkins. Farmhouse spaces can combine natural wood, linen, dried branches, and understated black accents. Even a small apartment can achieve a luxurious Halloween appearance by concentrating decoration in a few high-impact areas instead of attempting to decorate every room.
Color is one of the most important elements. Traditional orange can certainly be used, but elegant Halloween decor often looks more sophisticated when orange is muted or used sparingly. Burnt orange, terracotta, rust, caramel, cream, warm taupe, and deep brown can create an autumnal palette without looking overly themed. Black can then be introduced through candles, ribbons, vases, picture frames, textiles, or small accessories. Metallic accents such as antique gold, aged brass, or bronze add warmth and make inexpensive pieces feel more refined.
Lighting is equally important. Bright overhead lighting can flatten a beautifully decorated room, while layered warm lighting creates depth and atmosphere. Table lamps, sconces, candles, lanterns, and small warm-white lights can make a room feel instantly more luxurious. The goal is not to make the space dark; it is to create a soft glow that highlights your best decorations. A mirror positioned near candlelight can also reflect the glow and make a room appear larger and more dramatic.
Another important principle is restraint. Luxury interiors rarely depend on quantity. Instead, they use repetition, balance, scale, and texture. Three beautifully arranged pumpkins can be more visually impressive than twenty randomly placed pumpkins. One large floral arrangement may create more impact than several tiny decorations scattered throughout the room. A single dramatic wreath on the front door can communicate the Halloween theme more effectively than a collection of unrelated signs.
Texture is another inexpensive way to create a premium appearance. Velvet, linen, wool, wood, ceramic, glass, metal, and natural branches create layers that make a room look professionally styled. Even if the individual pieces are affordable, combining different textures makes the finished arrangement appear richer. A matte black ceramic pumpkin beside a glossy glass candle holder and a soft velvet ribbon immediately creates visual contrast.
The ideas below are designed for homeowners, renters, and beginners who want Halloween decor that looks elegant without requiring a huge decorating budget. Each idea focuses on a specific area or technique and includes practical styling instructions, materials, and ways to make affordable pieces look more expensive. You do not need to copy every idea. Choose a few that complement your home and repeat the same colors and materials throughout the space. This creates cohesion and makes your decorations look intentionally designed rather than randomly collected.
Whether you are decorating a front porch, entryway, living room, dining table, bedroom, kitchen, or small apartment, the most effective strategy is to build a sophisticated Halloween atmosphere gradually. Start with a neutral base, introduce one or two dramatic colors, add natural textures, layer warm lighting, and finish with a few seasonal details. This approach allows Halloween decor to blend naturally with your everyday interior design.
The result can be spooky without being childish, dramatic without being overwhelming, and luxurious without being expensive. These elegant Halloween decor ideas are especially useful for creating Pinterest-worthy spaces because they combine strong visual contrast, seasonal atmosphere, beautiful textures, and practical styling that readers can realistically recreate at home.
1. Create a Black and Ivory Halloween Entryway
The entryway is one of the easiest places to create an expensive-looking Halloween atmosphere because a small number of carefully chosen pieces can make a dramatic first impression. Instead of covering the entrance with traditional Halloween signs and brightly colored decorations, create a refined black-and-ivory arrangement that feels sophisticated and timeless.

Begin with a neutral foundation. If you already have a console table, keep its surface relatively uncluttered. Add a large black or dark wood mirror above the table if one is available. The mirror creates height and gives the arrangement a finished interior-design appearance. If your existing mirror has a lighter frame, you can introduce black through smaller accessories instead of replacing it.
Choose two or three pumpkins in different sizes. Ivory pumpkins work beautifully as the main feature, while one matte black pumpkin provides contrast. Avoid using too many different pumpkin colors because the limited palette is what makes the display look expensive.
Add a tall black vase filled with dried branches. Bare branches create height and introduce a slightly mysterious Halloween feeling without relying on novelty decorations. If you want a softer autumn look, use dried eucalyptus, wheat, pampas grass, or preserved branches in muted brown tones.
Next, introduce warm metallic accents. A small antique-brass tray, candlestick, or decorative bowl can provide just enough shine. Brass works particularly well with black because it creates a warm contrast instead of making the space feel cold.
Lighting should remain soft. Place a small table lamp on the console if space allows, or use battery-operated candles in glass holders. Warm light will highlight the pumpkins and metallic details while making the entire entryway feel more inviting.
Materials and Decor Needed
- Black or dark wood mirror
- Console table
- Ivory pumpkins
- One or two black pumpkins
- Matte black vase
- Dried branches
- Antique-brass tray or candlestick
- Warm LED candles
- Small decorative bowl
- Optional black ribbon
How to Make It Look More Expensive
The most important rule is to leave negative space. Do not fill every inch of the console. Group objects into small clusters and vary their heights. For example, place the vase on one side, pumpkins in the center, and a low tray or candle on the opposite side. This asymmetrical arrangement can look more sophisticated than a perfectly symmetrical display.
You can also tie a thin black velvet ribbon around the vase or a pumpkin stem. Velvet immediately adds texture and creates a luxurious seasonal detail.
For a Pinterest-worthy finish, photograph or style the entryway with warm evening lighting, clean surfaces, and a neutral background. The final effect should feel like an elegant autumn interior with a subtle Halloween identity rather than a traditional Halloween display.
2. Style a Luxury Halloween Dining Table
A dining table offers a perfect opportunity to create a dramatic Halloween centerpiece without purchasing expensive decorations. The key is to treat the table as an elegant dinner setting first and a Halloween display second.
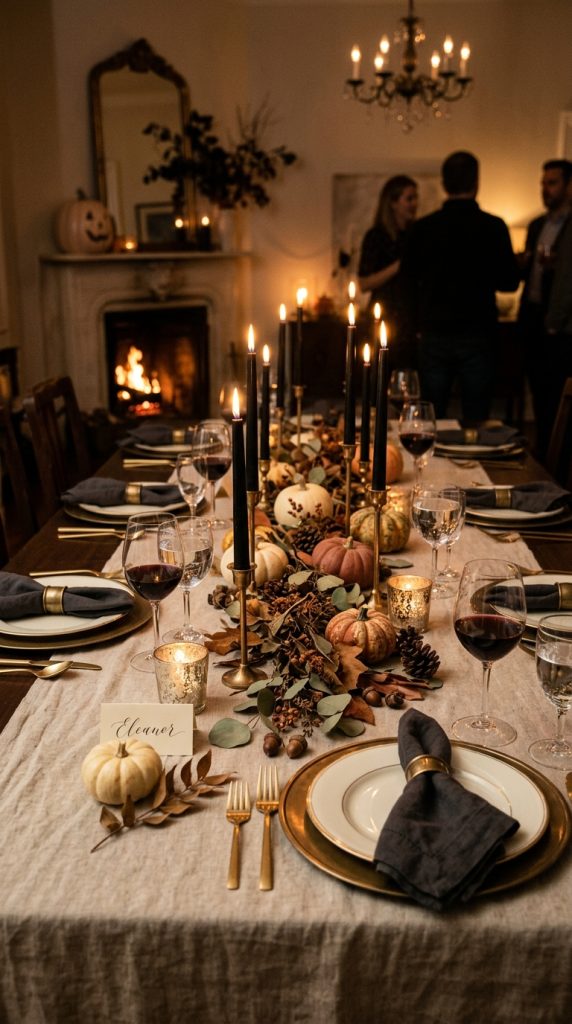
Start with a neutral table runner in linen, cotton, or another natural fabric. Cream, taupe, charcoal, or muted brown are excellent choices. Avoid highly printed Halloween tablecloths because they can make the space feel less sophisticated.
Place dark plates or neutral ceramic plates at each setting. If you do not own black dinnerware, ordinary white plates work perfectly. Layering white plates with black napkins can create the same effect.
Use black or dark brown cloth napkins and add a simple decorative element. A small dried leaf, cinnamon-colored ribbon, rosemary sprig, or tiny pumpkin can be placed on top of each napkin.
For the centerpiece, select a low arrangement so guests can see across the table. Use a large ceramic bowl or shallow tray as the foundation. Add ivory mini pumpkins, a few muted orange pumpkins, pinecones, dried leaves, and dark branches.
Candles are essential for creating an elegant Halloween atmosphere. Place several candle holders along the center of the table. Antique brass, black metal, or smoked glass holders are especially effective. Use warm LED candles if open flames are inconvenient.
Materials and Decor Needed
- Neutral table runner
- Black or charcoal napkins
- White or dark dinner plates
- Ceramic bowl or tray
- Ivory pumpkins
- Muted orange pumpkins
- Pinecones
- Dried leaves
- Black or brown branches
- Brass or black candle holders
- Warm LED candles
- Simple glassware
Step-by-Step Styling
First, place the runner in the center of the table. Arrange your centerpiece tray in the middle. Add the largest pumpkins first, then fill smaller gaps with mini pumpkins and pinecones.
Insert branches into the arrangement to create height. Do not make the centerpiece perfectly uniform. Slight variation creates a more natural, professionally styled appearance.
Place candle holders around the centerpiece rather than directly inside it. This creates a layered effect and allows the candlelight to spread across the table.
Finish the place settings with folded napkins and a small seasonal detail.
How to Keep the Budget Low
You do not need a complete Halloween dinnerware collection. Use your existing white plates and ordinary glassware. Invest your attention in the centerpiece and lighting because those elements are visually dominant.
A beautiful table does not need expensive flowers either. Dried branches from your yard can sometimes create the perfect dramatic centerpiece. Combine them with affordable pumpkins and neutral ceramics to create a luxurious seasonal arrangement.
3. Use Velvet to Make Halloween Decor Look Luxurious
Velvet is one of the easiest materials for creating an expensive-looking Halloween interior. Its rich texture catches light beautifully and instantly makes ordinary furniture appear more sophisticated.
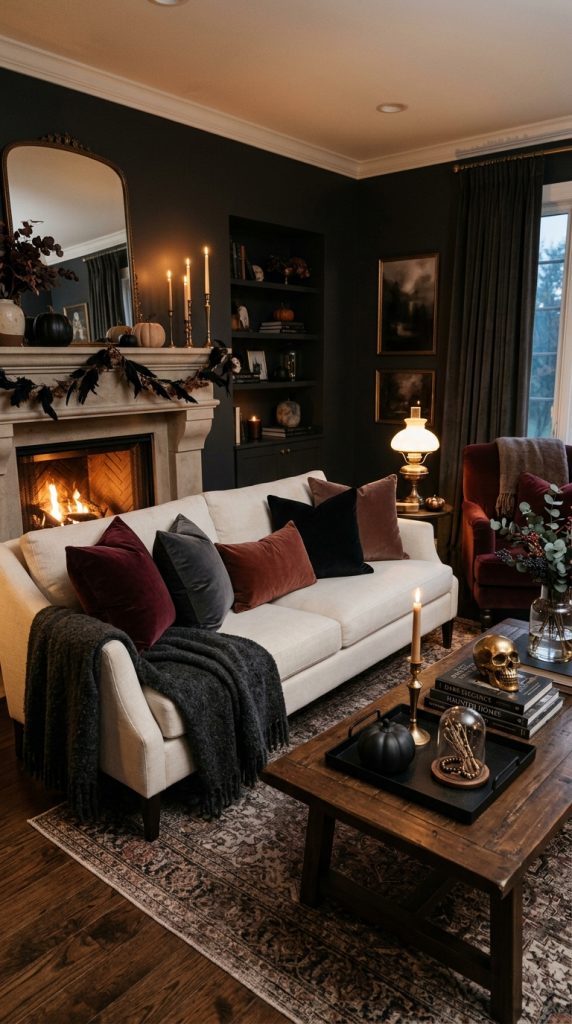
You do not need to replace your furniture. Instead, introduce velvet through small accents. A black velvet pillow, rust-colored throw, dark green cushion, or deep plum blanket can completely change the seasonal appearance of a living room or bedroom.
Begin with your existing neutral sofa. Add two velvet pillows in dark colors. Black, charcoal, forest green, burgundy, espresso brown, and muted rust all work beautifully for Halloween.
Then add one textured throw. Drape it casually over the arm of the sofa rather than folding it perfectly. This makes the room feel comfortable and lived-in.
Pair the velvet with natural materials such as wood, stone, ceramic, or woven baskets. Too much velvet can make a room feel heavy, but combining it with rougher textures creates balance.
For Halloween, you can add one or two seasonal objects nearby. A black ceramic pumpkin on the coffee table or an antique-looking candle holder can reinforce the theme.
Materials and Decor Needed
- Velvet throw
- Velvet cushions
- Neutral sofa
- Black or charcoal ceramic accessories
- Wooden tray
- Candles
- Decorative pumpkins
- Warm table lamp
- Optional brass accessories
Step-by-Step Styling
Start with your largest textile, such as a throw. Choose a color that complements the existing sofa.
Add two or three cushions in different textures. One can be velvet, another linen, and another woven. This creates visual depth.
Place a wooden or metal tray on the coffee table. Add one candle, one small pumpkin, and one decorative object.
Keep the remaining table surface clear.
The luxury effect comes from restraint. Instead of adding ten Halloween accessories, choose two or three exceptional-looking pieces and allow them to stand out.
Budget-Friendly Trick
Look for velvet cushion covers rather than complete pillows. Cushion covers are often cheaper and easier to store after Halloween. You can also reuse the same covers for fall or winter styling by changing the surrounding accessories.
This approach creates a seasonal transformation without requiring a large collection of Halloween decorations.
4. Create a Moody Halloween Fireplace Mantel
A fireplace mantel naturally becomes a focal point, making it ideal for sophisticated Halloween styling. Even if you have an electric fireplace or simply a media console, you can recreate the same visual effect.
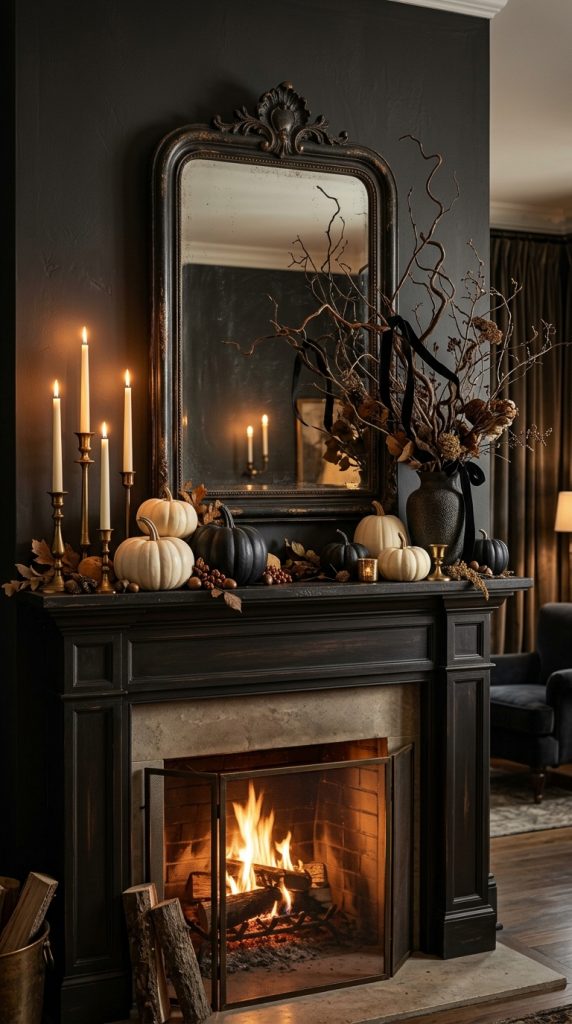
Begin with a large mirror or piece of artwork above the mantel. A black-framed mirror is especially effective because it reflects candlelight and adds depth.
Next, introduce greenery or branches. Use dark branches, dried eucalyptus, olive branches, or another natural material that fits your home.
Add pumpkins gradually. Place a large ivory pumpkin at one end and a black or muted orange pumpkin at the other. Add smaller pumpkins between them.
Use candlesticks of different heights to create vertical movement. Antique brass, black iron, and dark bronze are excellent choices.
If you want a more dramatic look, add a black velvet ribbon to the branches. Keep the ribbon loose rather than making large decorative bows.
Materials and Decor Needed
- Large mirror
- Dried branches
- Ivory pumpkins
- Black pumpkins
- Muted orange pumpkins
- Brass or black candlesticks
- LED candles
- Velvet ribbon
- Ceramic vase
Styling Method
Start by creating the tallest element, such as the branches. Position them slightly off-center.
Add the mirror behind the arrangement if one is already installed.
Place the largest pumpkin on the opposite side of the branches to create visual balance.
Add medium and small pumpkins around the larger pieces.
Finally, introduce candles at different heights.
The goal is to create a composition that looks collected rather than arranged in a perfect row.
Expensive-Looking Detail
Use repetition. If your mantel includes antique brass, repeat brass in one smaller object elsewhere in the room. If you use black velvet ribbon, repeat black through a cushion or vase.
Repeated materials create cohesion and make inexpensive decorations appear intentionally selected.
5. Decorate the Front Porch With Sophisticated Pumpkins
Your front porch establishes the Halloween mood before guests even enter your home. Fortunately, an elegant porch can be created with inexpensive pumpkins, natural materials, and strategic lighting.
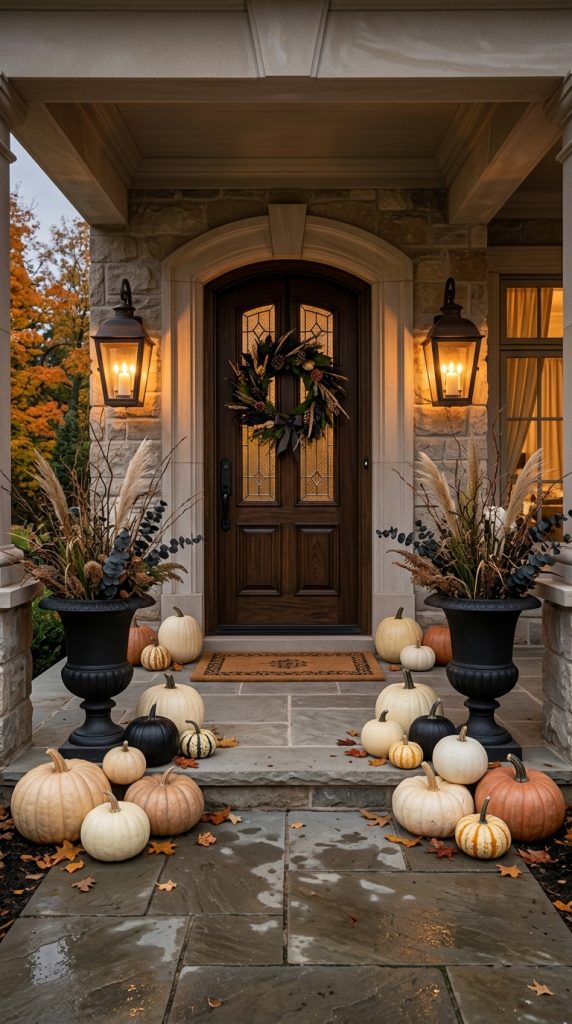
Instead of using brightly colored plastic decorations, build a monochromatic or muted autumn palette.
Start with several pumpkins in different sizes. Use cream, white, black, muted orange, and natural green varieties if available.
Arrange the pumpkins around the front door rather than placing them in one straight line. Create clusters on both sides of the entrance.
Add tall planters with branches, dried grasses, or seasonal greenery. Height is important because it frames the doorway and creates a more finished appearance.
A simple black wreath can be placed on the door. If you want a more luxurious effect, choose a wreath made with dried branches, eucalyptus, dark leaves, or a combination of neutral materials.
Lighting should be warm and subtle. Use lanterns beside the door and warm outdoor bulbs if possible.
Materials and Decor Needed
- Assorted pumpkins
- Black or neutral wreath
- Large planters
- Dried branches
- Seasonal grasses
- Lanterns
- Warm outdoor lights
- Black ribbon
- Natural doormat
How to Arrange the Pumpkins
Start with your largest pumpkins near the bottom. Place medium pumpkins beside them and smaller pumpkins slightly forward.
Avoid creating identical arrangements on both sides. Instead, balance them visually while allowing each side to remain slightly different.
Add lanterns behind the pumpkins so the light appears to glow through the arrangement.
Budget Tip
Use ordinary pumpkins as your primary decoration rather than buying specialty Halloween props. A simple pumpkin can look expensive when it is styled with the right surroundings.
You can also paint a few pumpkins matte black or warm ivory using appropriate craft paint. A consistent finish can make inexpensive pumpkins appear like designer accessories.
6. Make a Sophisticated Halloween Coffee Table Arrangement
The coffee table is an ideal place for a small Halloween moment that does not overwhelm the living room. The trick is to use a tray to organize the decoration.
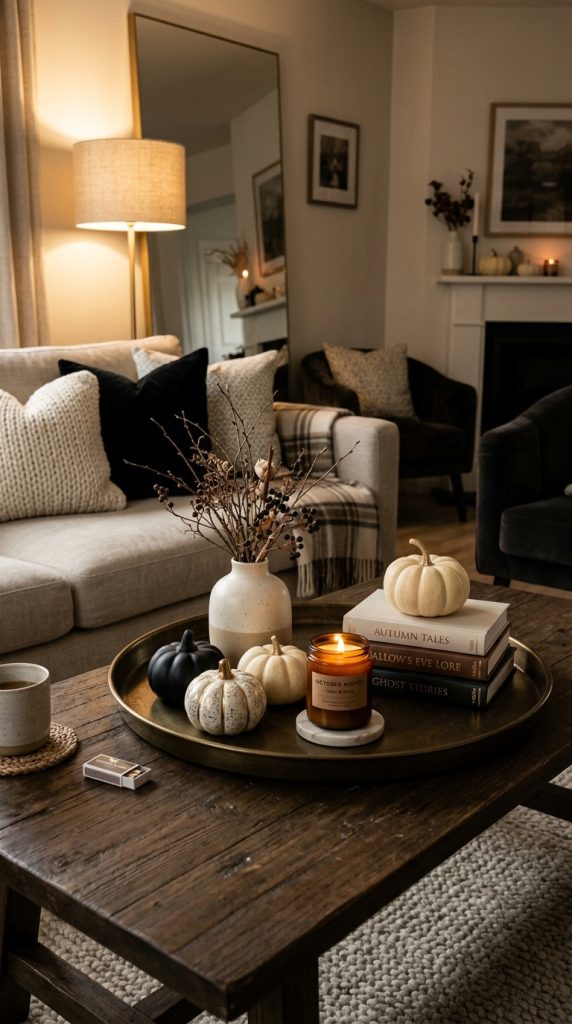
Choose a rectangular, round, or square tray. Wood, black metal, marble-look, or antique brass can all work.
Place the tray in the center of the coffee table. Add a short ceramic vase filled with dried branches.
Next, add one or two small pumpkins. Choose neutral or dark colors.
Place a candle beside the vase. A black, cream, amber, or smoky glass candle works beautifully.
Finally, add a small stack of decorative books if you have them. Books create height and make the arrangement feel like part of an interior-design composition rather than a seasonal display.
Materials and Decor Needed
- Decorative tray
- Small vase
- Dried branches
- Two or three mini pumpkins
- Candle
- Decorative books
- Small ceramic object
- Optional brass accent
Step-by-Step
Place the books toward one side of the tray. Put the vase on top or beside them.
Place one pumpkin at the front and another slightly behind it.
Add the candle to the opposite side.
Make sure the arrangement has different heights. The eye should naturally move from the tallest element to the smallest.
Keep It Functional
Remember that a coffee table still needs to be usable. Avoid creating an arrangement so large that people cannot place a cup or move around it.
A compact, well-designed arrangement will always look more luxurious than a crowded table.
7. Create an Elegant Halloween Gallery Wall
Halloween does not always need pumpkins. Artwork can create a sophisticated seasonal mood while allowing the rest of your home to remain relatively understated.
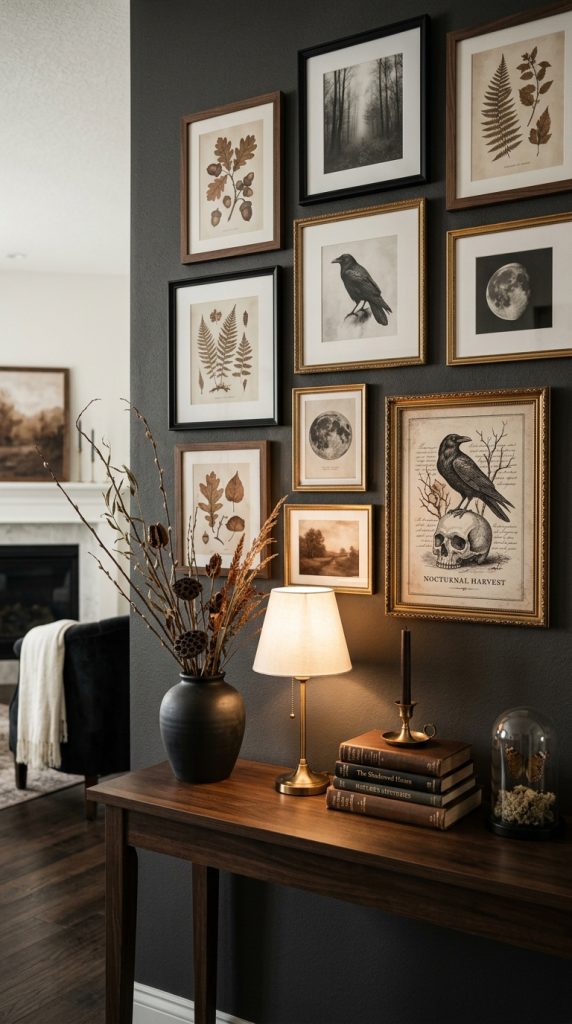
Use existing frames if possible. Black, walnut, dark brown, and antique gold frames work particularly well.
You can create a temporary Halloween gallery wall using printable artwork featuring botanical illustrations, vintage-inspired silhouettes, ravens, moon imagery, autumn leaves, old-fashioned architecture, or black-and-white photography.
Keep the artwork within a limited palette. Black, ivory, sepia, muted brown, and dark green create a cohesive appearance.
Arrange the frames in a simple grid or relaxed gallery configuration.
Materials and Decor Needed
- Existing picture frames
- Black-and-white artwork
- Botanical prints
- Vintage-style illustrations
- Removable hanging strips if needed
- Small decorative mirror
- Optional brass frame
Styling Advice
Do not use too many Halloween-specific images. A single subtle seasonal print can be more sophisticated than a wall filled with ghosts and bats.
Mix Halloween-inspired artwork with ordinary vintage-style pieces. This makes the gallery wall feel permanent and curated.
Budget-Friendly Approach
You can reuse frames you already own and change only the artwork inside them. This is an inexpensive seasonal decorating strategy because the frames can be used throughout the year.
For renters, removable hanging strips can help create a temporary display without making permanent changes to the wall.
8. Add Black Candles and Warm Ambient Lighting
Lighting can completely transform inexpensive decor. If you want Halloween decorations to look expensive, focus on illumination as much as the decorations themselves.
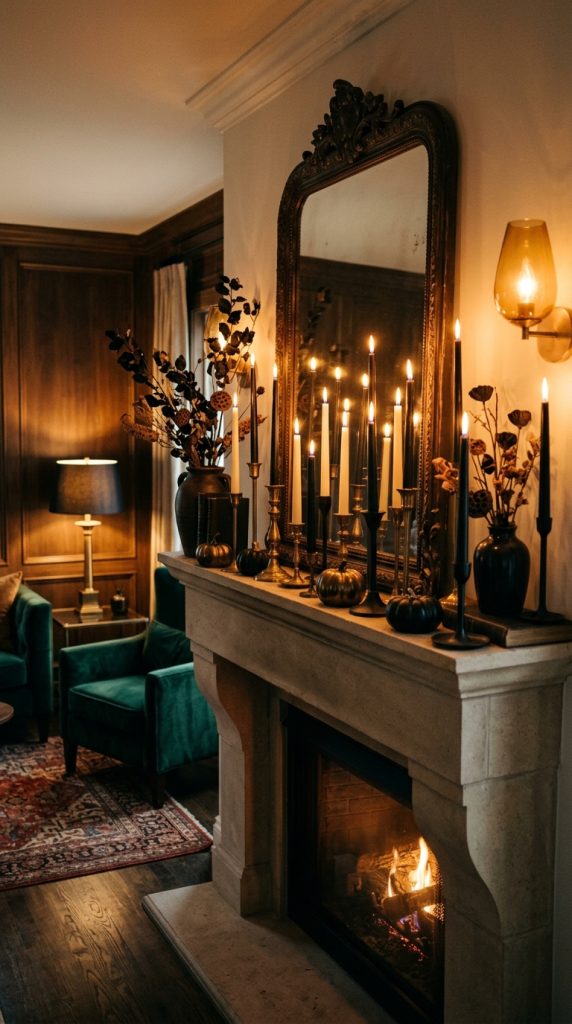
Black candles are especially effective because they create a dramatic contrast against cream walls, neutral tables, and warm wood.
Arrange candles in groups of three or five. Use different heights but keep the same general color palette.
Place them on a mantel, dining table, entryway console, bathroom counter, or bedroom nightstand.
For safety and convenience, flameless LED candles are an excellent alternative. Choose warm-white versions rather than cool-white lights because warm light creates a softer atmosphere.
Materials and Decor Needed
- Black candles
- Cream candles
- Glass candle holders
- Brass candlesticks
- LED candles
- Small lanterns
- Table lamps
- Warm string lights
Layering the Lighting
Begin with existing room lighting. Turn off harsh overhead lighting if possible.
Use table lamps to create a base layer.
Add candles as decorative accent lighting.
Finally, use small warm lights around shelves, mirrors, or architectural features if needed.
Why This Looks Expensive
Luxury interiors rarely rely on one strong light source. Multiple small light sources create shadows, highlights, and depth.
Your Halloween decorations will look more dramatic when the room has layered illumination rather than bright overhead light.
The important thing is to maintain visibility. Elegant does not mean making the room excessively dark. Keep enough light for the space to remain comfortable and inviting.
9. Style an Elegant Black and Gold Halloween Corner
Black and gold are classic colors for creating a glamorous Halloween look. The combination can work in living rooms, dining rooms, bedrooms, entryways, and even small apartments.
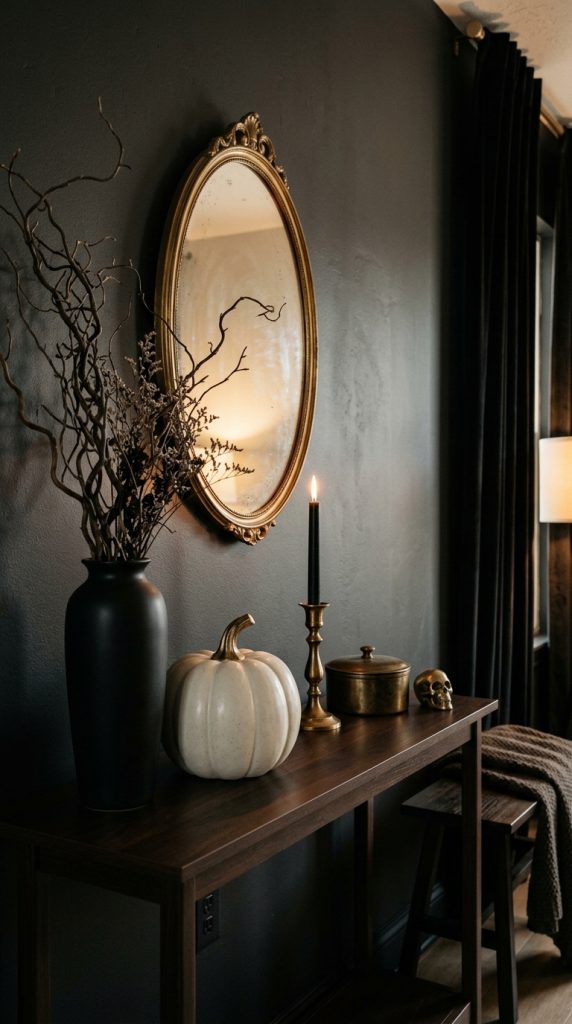
Start with a black base. This could be a black vase, picture frame, candle holder, lamp, or small side table.
Introduce gold through one or two accents. Antique brass often looks more sophisticated than extremely shiny gold.
Add a cream pumpkin between the black and metallic objects. This softens the contrast and prevents the arrangement from looking too severe.
Materials and Decor Needed
- Black vase
- Antique brass tray
- Cream pumpkins
- Black candle
- Brass candlestick
- Dark branches
- Small mirror
- Velvet ribbon
Arrangement
Place the tallest object at the back. Add the pumpkin toward the front.
Put the brass accessory beside the black object.
Use the candle to create another vertical layer.
If there is a mirror nearby, position it where it can reflect the metallic detail or candlelight.
Beginner Tip
Do not use gold everywhere. Two or three gold elements are usually enough.
The expensive appearance comes from contrast: matte black, soft ivory, natural wood, and small amounts of aged metal.
10. Create a Luxe Halloween Bedroom
Halloween decor can be subtle and sophisticated in the bedroom. Rather than filling the room with themed objects, focus on bedding, lighting, and a few carefully selected accessories.
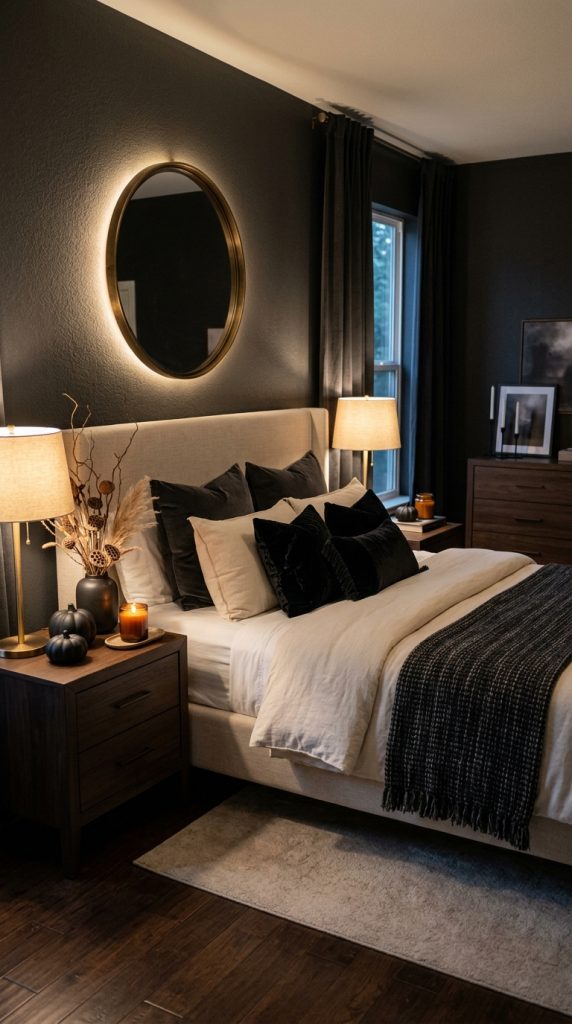
Start with neutral bedding. White, cream, beige, or light gray provides an excellent base.
Add dark velvet or linen pillows in black, charcoal, burgundy, or forest green.
Place a dark throw at the foot of the bed.
On the nightstands, use warm lamps and one small seasonal object. A black ceramic pumpkin or amber glass candle can provide enough Halloween atmosphere.
If you have a mirror, place warm lighting near it. The reflected glow creates depth and gives the room a more luxurious appearance.
Materials and Decor Needed
- Neutral bedding
- Velvet cushions
- Dark throw
- Black ceramic pumpkin
- Warm bedside lamps
- Amber glass candle
- Dark vase
- Dried branches
- Optional black ribbon
Step-by-Step
Begin with the bedding as the neutral foundation.
Add two large pillows behind smaller decorative cushions.
Place a dark throw across the bottom third of the bed.
Keep nightstands uncluttered.
Add one seasonal accessory to each side if desired.
Use warm lighting to complete the mood.
Why This Works
The bedroom should remain relaxing. Too many Halloween decorations can make the space feel busy.
Instead, use seasonal colors and textures to communicate the theme. A black velvet pillow can feel luxurious rather than overtly Halloween-themed, while a small pumpkin quietly reinforces the season.
11. Design a Minimalist Halloween Kitchen
The kitchen does not need extensive Halloween decorations to feel seasonal. In fact, minimalist styling often creates the most expensive appearance.

Start by clearing unnecessary countertop clutter. A clean surface makes even a few decorative objects look more intentional.
Choose one area, such as a coffee station, kitchen island, or open shelf.
Add a small black ceramic vase with dried branches.
Place two or three mini pumpkins nearby.
If you have an open shelf, introduce a black mug, cream ceramic bowl, or dark glass container.
Use warm under-cabinet lighting or a small lamp to create atmosphere.
Materials and Decor Needed
- Mini pumpkins
- Black ceramic vase
- Dried branches
- Neutral ceramics
- Black mugs
- Amber glass jars
- Warm lighting
- Small wooden tray
Coffee Station Idea
A Halloween coffee station can become a beautiful seasonal focal point. Place a wooden tray on the counter.
Add your coffee maker or mugs as usual, then introduce one black mug, a small pumpkin, and a candle or decorative jar.
A small chalkboard-style sign can be added if desired, but keep the typography simple and elegant.
Budget Tip
Decorate with objects you already use. Black mugs, wooden boards, ceramic bowls, and glass jars can become seasonal accessories without requiring new purchases.
The result feels natural because the Halloween decor is integrated into the kitchen rather than placed randomly around it.
12. Create a Sophisticated Halloween Staircase
A staircase can become one of the most dramatic areas in the home with surprisingly little decoration.
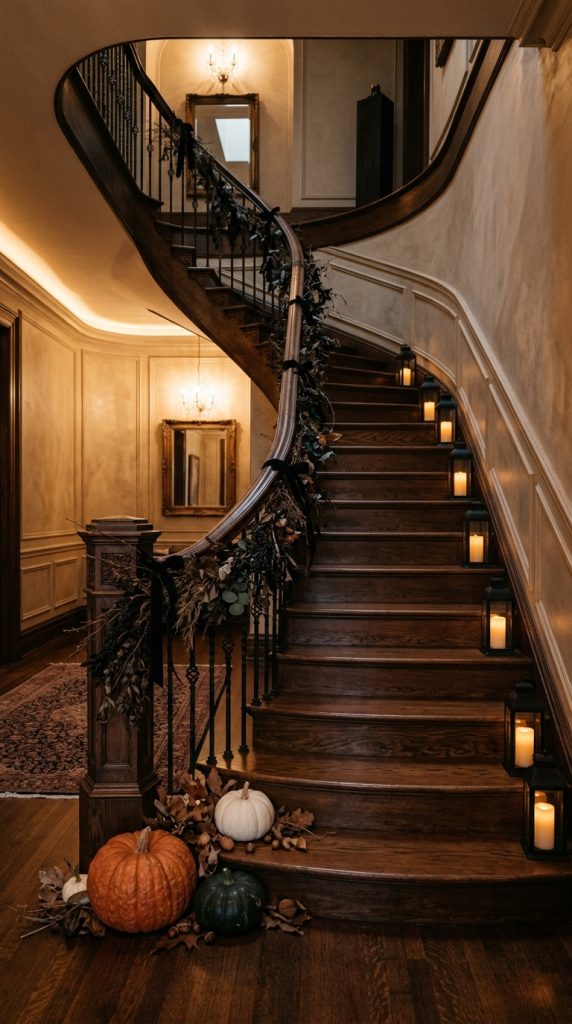
Instead of covering the railing with plastic garlands, use a natural or fabric-based approach.
Wrap a dark green or black garland loosely around the railing. Add a few dried branches and small velvet ribbons.
You can place small pumpkins on the steps if they do not create a tripping hazard. Use only a few and position them safely along the side.
Lanterns can be placed at the base of the staircase, provided they are suitable for the location and do not obstruct movement.
Materials and Decor Needed
- Dark garland
- Dried branches
- Black velvet ribbon
- Mini pumpkins
- Lanterns
- Warm LED candles
- Optional dried leaves
Step-by-Step
Begin at the top of the railing and loosely attach the garland.
Do not make the wrapping too perfect.
Add branches at selected points.
Tie small velvet ribbons to the garland.
Place one or two pumpkins near the base.
Finish with warm lantern lighting.
Safety First
Never allow decorations to interfere with handrails or walking paths.
Avoid loose cords and real flames near fabrics.
The staircase should remain fully functional.
Expensive-Looking Trick
Use fewer decorations but make them larger and better coordinated. A single substantial garland with beautiful texture can look much more luxurious than multiple thin plastic strands.
13. Style an Elegant Halloween Bathroom
A bathroom can be transformed with very small changes. Because bathrooms often have mirrors and reflective surfaces, even a few decorative details can create a dramatic effect.
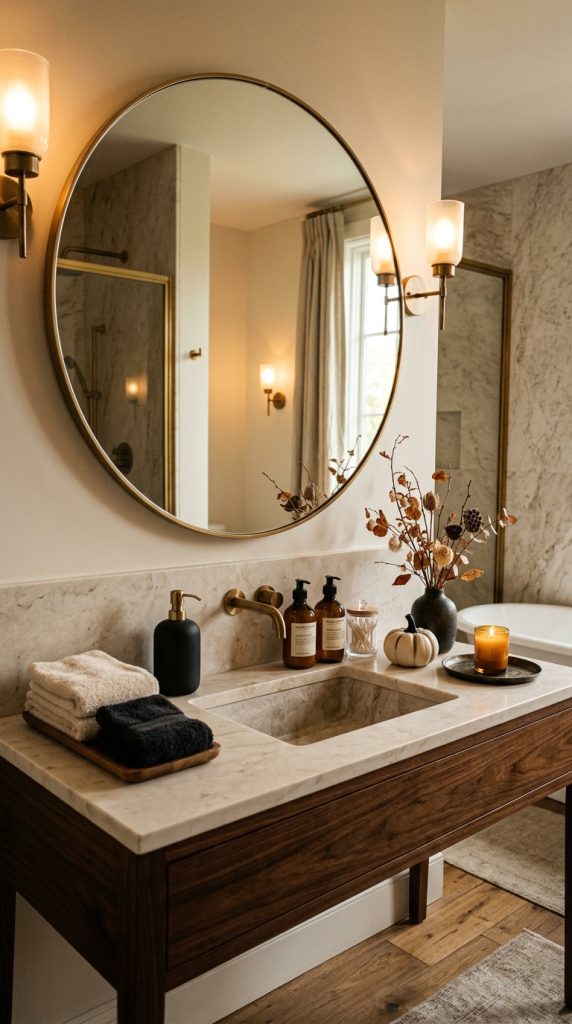
Begin with towels. Replace bright everyday towels with neutral cream, charcoal, or black options.
Add a small black soap dispenser or amber glass container.
Place a small vase with dried branches near the sink if there is enough space.
A small cream or black ceramic pumpkin can sit on a tray beside the sink.
Add a candle or flameless light for a warm atmosphere.
Materials and Decor Needed
- Neutral towels
- Black soap dispenser
- Amber glass bottle
- Small vase
- Dried branches
- Mini pumpkin
- Small tray
- Warm LED candle
Styling the Vanity
Keep the vanity mostly clear.
Place a small tray near one side.
Add the soap dispenser, candle, and mini pumpkin to the tray.
Position the vase behind the arrangement if space permits.
The mirror will reflect the objects and make the display appear larger.
Why Simplicity Works
Bathrooms can quickly look cluttered. A minimalist seasonal arrangement maintains the clean feeling of the room while still introducing Halloween character.
Choose materials that look sophisticated rather than novelty-based.
Black ceramic, amber glass, natural wood, and cream textiles are excellent choices.
14. Make an Expensive-Looking Halloween Floral Arrangement
Flowers and branches can make Halloween decor feel dramatically more sophisticated. You do not need an expensive florist arrangement. The secret is choosing the right container and using a restrained palette.
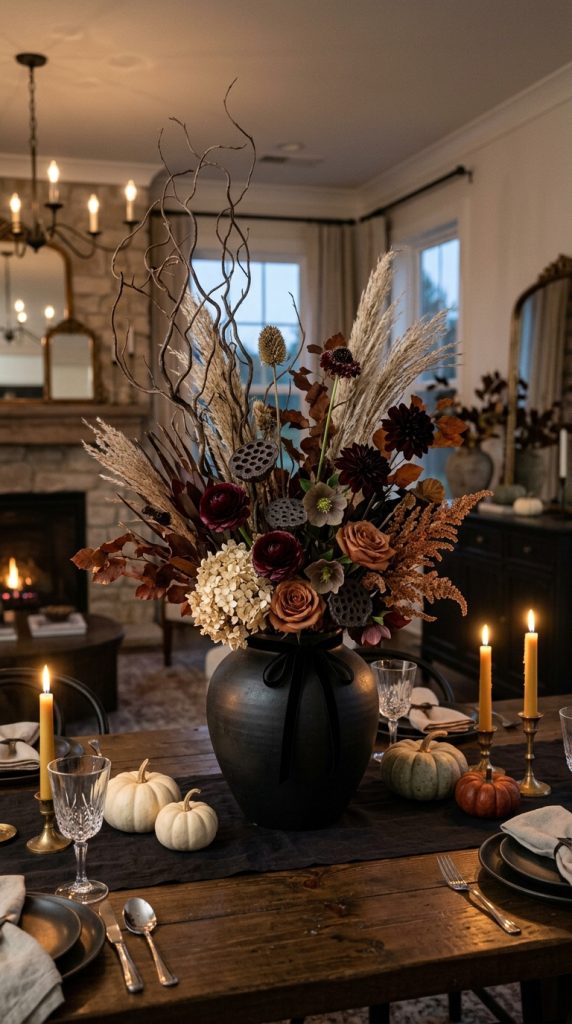
Begin with a large ceramic vase. Black, ivory, dark brown, or antique metallic finishes work well.
Use dried branches as the foundation. Add dried grasses, eucalyptus, seed pods, wheat, or dark foliage.
For a more autumnal arrangement, introduce muted rust or burgundy elements.
If using fresh flowers, choose deep red, burgundy, cream, or white flowers rather than bright colors.
Materials and Decor Needed
- Large ceramic vase
- Dried branches
- Dried grasses
- Eucalyptus
- Seed pods
- Muted autumn foliage
- Burgundy or cream flowers
- Black ribbon
Step-by-Step
Place the tallest branches into the vase first.
Add medium-height foliage around them.
Fill empty areas with smaller dried materials.
Step back and examine the arrangement from several angles.
Trim anything that looks too crowded.
Add a thin black velvet ribbon if desired.
Where to Use It
This arrangement can work on:
- Dining tables
- Entryway consoles
- Kitchen islands
- Fireplace mantels
- Living room side tables
- Bedroom dressers
Budget Tip
Dried arrangements can often last throughout the season and may be reused for autumn, Thanksgiving, and winter decorating. This makes them a practical investment compared with decorations designed exclusively for Halloween.
15. Create a Complete Luxury Halloween Living Room With Layered Decor
The final idea combines the principles from the previous sections into one cohesive living-room design. Instead of decorating every corner, create several connected focal points.
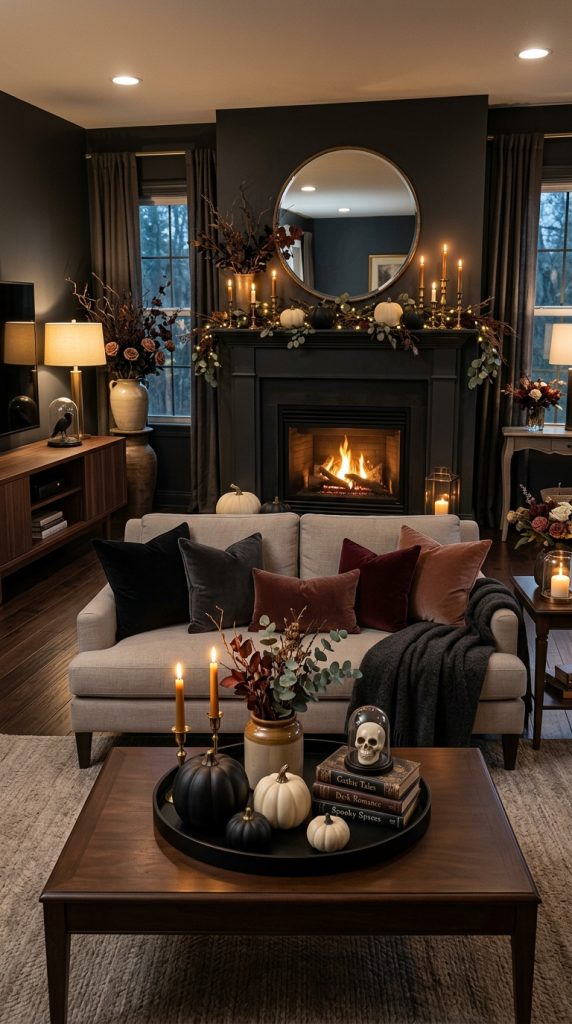
Begin with the sofa. Add velvet cushions in black, charcoal, rust, or deep green. Place a soft neutral throw over one arm.
Move to the coffee table. Use a wooden or black tray with a small vase, one candle, and two pumpkins.
Next, style the fireplace or media console. Use a large mirror, dried branches, a few ivory pumpkins, and antique-brass candle holders.
Add a small seasonal arrangement to a side table.
Finally, adjust the lighting. Use warm table lamps, candles, and subtle accent lights.
Materials and Decor Needed
- Velvet cushions
- Neutral throw
- Wooden or black tray
- Ceramic vase
- Dried branches
- Ivory pumpkins
- Black pumpkins
- Antique-brass candle holders
- Warm LED candles
- Table lamps
- Dark decorative objects
- Optional velvet ribbon
- Neutral rug
Step-by-Step Room Transformation
First, remove unnecessary objects. A clean room provides the best foundation.
Second, establish your color palette. For example, use ivory, black, warm brown, and antique brass.
Third, introduce textiles. Add velvet cushions and a soft throw.
Fourth, create the coffee-table arrangement.
Fifth, style the main focal point, such as the fireplace.
Sixth, add one or two smaller seasonal accents around the room.
Finally, adjust lighting.
The Rule of Three
Use groups of three whenever possible. Three pumpkins in different sizes, three objects on a tray, or three candles at different heights can create a naturally balanced arrangement.
The Rule of Repetition
Repeat the same colors and materials throughout the room. If the coffee table has black ceramic, repeat black on the mantel. If you use brass on the fireplace, add a small brass accent elsewhere.
The Rule of Restraint
Do not add something simply because you have space for it.
A luxury room contains breathing room.
The purpose of elegant Halloween decor is to make the room feel transformed without making it feel overwhelmed.
Final Thoughts
Elegant Halloween decorating is ultimately about editing rather than adding. You do not need hundreds of decorations or expensive designer pieces to create a home that looks sophisticated for the season. Instead, focus on a carefully controlled color palette, layered textures, atmospheric lighting, natural materials, and a few dramatic focal points.
Black and ivory are especially useful because they create instant contrast. Warm metallics such as antique brass and bronze add richness. Velvet brings softness and luxury, while dried branches and natural wood prevent the space from feeling overly formal. Pumpkins become much more sophisticated when they are used selectively and combined with neutral ceramics, glass, candles, and beautiful textiles.
Lighting should never be overlooked. Warm lamps, candles, lanterns, and subtle accent lighting can transform even inexpensive decorations into something that feels dramatically more expensive. When possible, avoid relying on bright overhead lighting while entertaining. Instead, create several small pools of warm light around the room.
The most successful Halloween interiors also maintain consistency. If you choose black, ivory, and antique brass for your entryway, repeat those colors in the living room and dining area. This repetition creates a cohesive home and makes your seasonal decorations appear professionally planned.
You can also make your Halloween decor more sustainable and budget-friendly by choosing pieces that can be reused. Velvet pillows can work throughout autumn and winter. Dried branches can become Thanksgiving decorations. Black ceramic vases can remain part of your everyday decor. Neutral pumpkins can transition from Halloween into broader fall styling.
For renters and small-space decorators, the same principles apply. You do not need a large home. Choose one focal area and make it beautiful. A console table, coffee table, kitchen counter, or front door can become the main seasonal feature.
Most importantly, remember that expensive-looking decor is not necessarily expensive decor. The appearance of luxury comes from proportion, coordination, texture, lighting, and restraint. A simple black vase can look elevated when paired with the right branches. An ordinary pumpkin can look designer-inspired when surrounded by elegant materials. A basic dining table can become a memorable Halloween setting through candles, neutral linens, and thoughtful layering.
Use these ideas as a starting point rather than a strict checklist. Mix the concepts that match your existing interior style. If your home is modern, keep the palette minimal and use clean shapes. If your home is traditional, embrace antique finishes, candles, and classic autumn colors. If your style is farmhouse, combine natural wood, linen, pumpkins, and dried branches. If your home is small, concentrate the decoration in one or two high-impact areas.
The ultimate goal is a Halloween home that feels moody, warm, elegant, inviting, and intentionally designed. With a few carefully chosen materials and smart styling techniques, you can create a Pinterest-worthy seasonal interior that looks far more expensive than the actual decorating budget.
Quick Shopping and Styling Checklist
Core Color Palette
- Black
- Ivory
- Cream
- Warm brown
- Muted orange
- Rust
- Deep green
- Burgundy
- Antique brass
Essential Materials
- Pumpkins in different sizes
- Black and neutral ceramic pieces
- Velvet cushions or ribbons
- Linen textiles
- Dried branches
- Dried grasses
- Candles or flameless LED candles
- Brass or black candle holders
- Warm table lamps
- Decorative trays
- Mirrors
- Lanterns
- Neutral baskets
- Simple seasonal artwork
Styling Rules to Remember
- Choose a limited color palette.
- Use different textures to create depth.
- Create one clear focal point in each decorated area.
- Combine large, medium, and small objects.
- Leave negative space around important pieces.
- Repeat colors and materials throughout the room.
- Use warm lighting instead of harsh overhead lighting when possible.
- Prefer natural materials over excessive plastic decorations.
- Use pumpkins selectively rather than covering every surface.
- Mix Halloween elements with everyday decor.
- Choose quality-looking finishes such as matte ceramic, velvet, glass, wood, and aged metal.
- Keep walkways and functional surfaces clear.
- Use removable decor solutions in rental homes.
- Reuse seasonal pieces whenever possible.
- Remember that simplicity often creates the strongest luxury effect.
Elegant Halloween decor does not require a luxury budget. With thoughtful styling, a restrained palette, beautiful textures, and warm lighting, even simple seasonal decorations can create an atmosphere that feels sophisticated, memorable, and completely Pinterest-worthy.
Leave a Reply