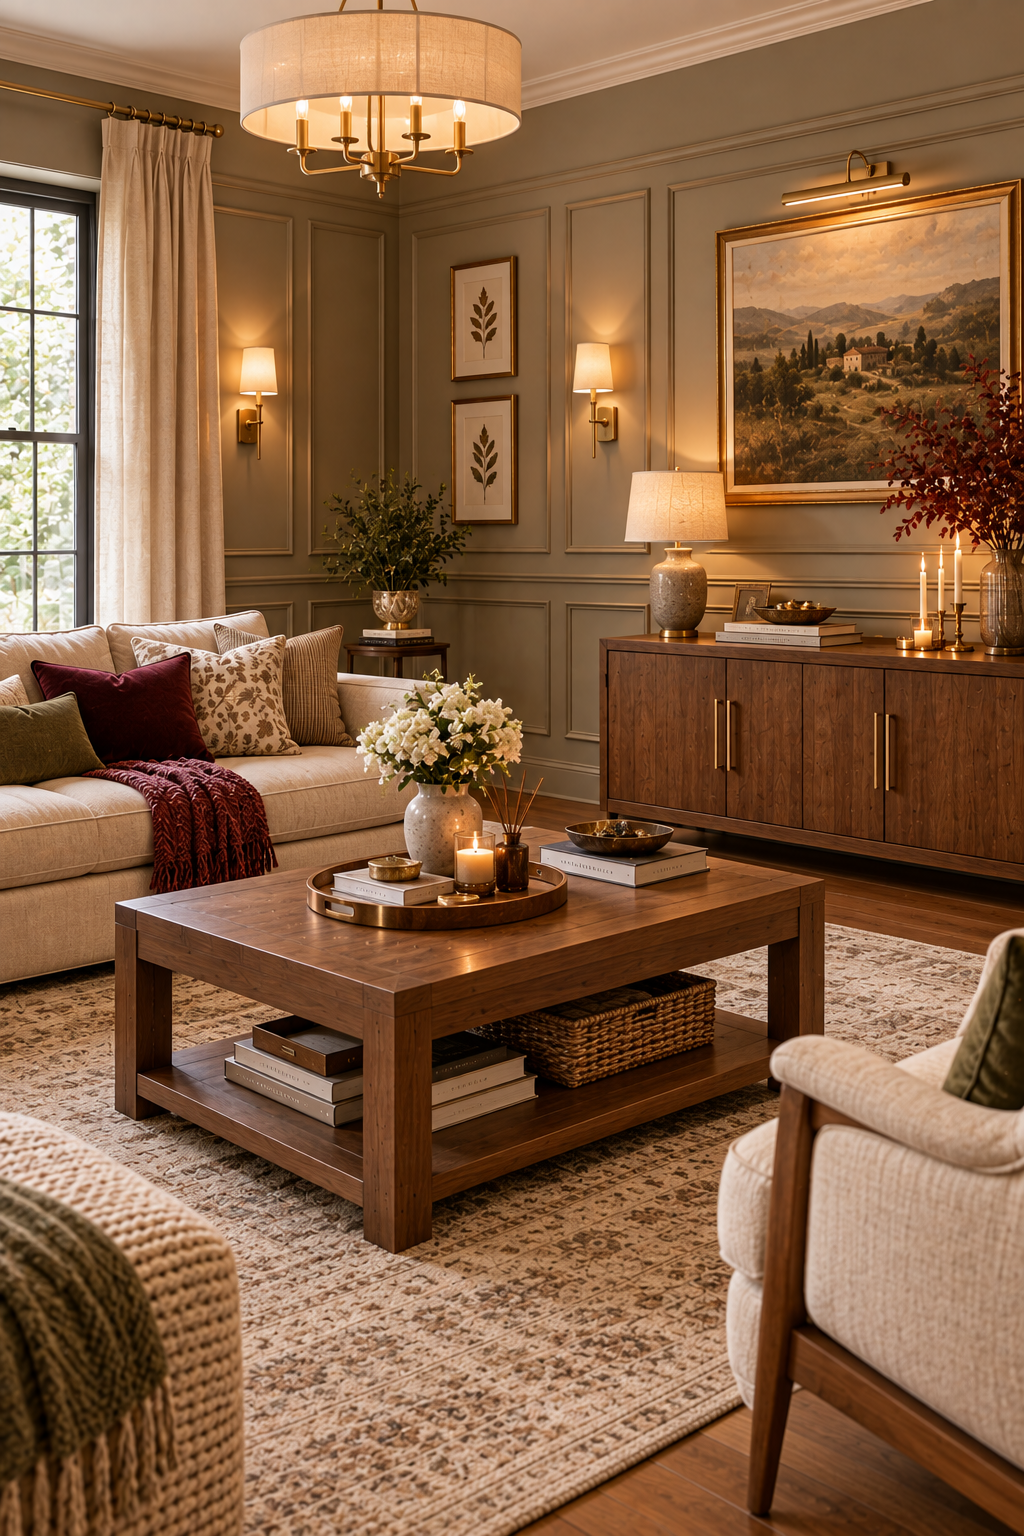
Wainscoting has evolved far beyond the traditional raised panels and formal dining rooms many people associate with it. Today, modern wainscoting can add architectural character, warmth, texture, and visual sophistication to almost any room. Whether you prefer a minimalist bedroom, a cozy living room, an elegant dining space, or a modern hallway, the right wainscoting design can completely transform plain walls without making the room feel old-fashioned.

Modern wainscoting is especially beautiful when combined with warm wood and carefully selected wall colors. Natural oak, walnut, ash, and warm-toned painted wood can soften contemporary interiors while adding a timeless quality. At the same time, elegant colors such as creamy beige, muted olive, warm white, taupe, charcoal, dusty blue, and sophisticated greige can give traditional wall paneling a fresh modern appearance.
One of the biggest advantages of wainscoting is that it creates architectural detail without requiring an entire room renovation. A blank wall can look ordinary even when the furniture is beautiful. Adding paneling introduces structure and creates a backdrop for furniture, artwork, lighting, and decorative accessories. It can also make a room appear more thoughtfully designed because the wall itself becomes part of the architecture.
Wainscoting can be used in many different ways. Traditional chair-rail-height paneling works beautifully in dining rooms and hallways. Half-wall board-and-batten can create a clean farmhouse-modern or transitional look. Full-height vertical panels can make a room feel taller. Picture-frame molding can provide a refined appearance in bedrooms and formal spaces. Slatted wood wainscoting can introduce warmth and texture into contemporary interiors.
The key to modernizing wainscoting is choosing the right proportions. Paneling that is too short can look disconnected from the rest of the wall, while overly complicated molding can make a room feel visually heavy. Modern designs generally benefit from cleaner lines, wider spacing, simpler profiles, and a limited material palette.
Color is equally important. One of the most effective techniques is painting the wainscoting and upper wall in closely related shades. For example, warm white paneling below a soft beige wall can create subtle depth. Painting both the paneling and wall the same color creates a more architectural, enveloping effect. For a stronger contrast, deep olive or charcoal wainscoting can be paired with warm cream walls.
Warm wood offers another direction. Instead of painting the paneling, you can use natural wood to introduce authentic texture. Oak creates a light and approachable appearance, while walnut feels richer and more luxurious. Vertical oak slats can make a modern living room feel warmer without overwhelming the space.
Wainscoting also has practical benefits. It can protect lower walls from furniture bumps, everyday wear, and marks, particularly in hallways, dining areas, entryways, and family spaces. In a busy home, durable painted paneling can be easier to clean than a completely exposed painted wall.
The design should always reflect the room’s purpose. In a dining room, wainscoting can establish a sophisticated backdrop for a table and pendant light. In a bedroom, it can create an elegant foundation behind the bed. In a hallway, it can visually guide the eye through the space. In a bathroom, moisture-resistant materials can add architectural detail while maintaining a spa-inspired atmosphere.
Another important consideration is the existing architecture. Wainscoting should look as though it belongs to the house rather than being randomly attached to the walls. Pay attention to baseboards, door casings, window trim, ceiling height, flooring, and nearby furniture. The best designs connect these elements through repeated colors, materials, or proportions.
You also do not need a huge budget to achieve the look. MDF molding, trim boards, paint, construction adhesive, and a few basic tools can be enough for many painted wainscoting projects. If you prefer natural wood, unfinished oak or pine can be stained to complement existing flooring and furniture.
Before beginning, measure the wall carefully. Decide how high the wainscoting will rise, how wide each panel or slat will be, and how the design will meet corners, doors, and windows. Creating a simple sketch or digital layout before buying materials can prevent expensive mistakes.
Lighting should also be considered. Wall sconces, picture lights, table lamps, and natural daylight can interact beautifully with paneling. Warm illumination emphasizes wood grain and creates gentle shadows along molding, making the wall detail more noticeable in the evening.
The following modern wainscoting ideas are designed to work across different decorating styles. Some emphasize natural wood, while others use elegant paint colors or traditional molding in a simplified way. Each idea includes practical materials and step-by-step guidance so beginners can understand how to recreate the look.
The most important principle is balance. Wainscoting should enhance the room rather than compete with every other feature. When the paneling, color, furniture, lighting, and accessories work together, the result feels timeless rather than trend-driven.
1. Warm Oak Vertical Wainscoting for a Modern Living Room
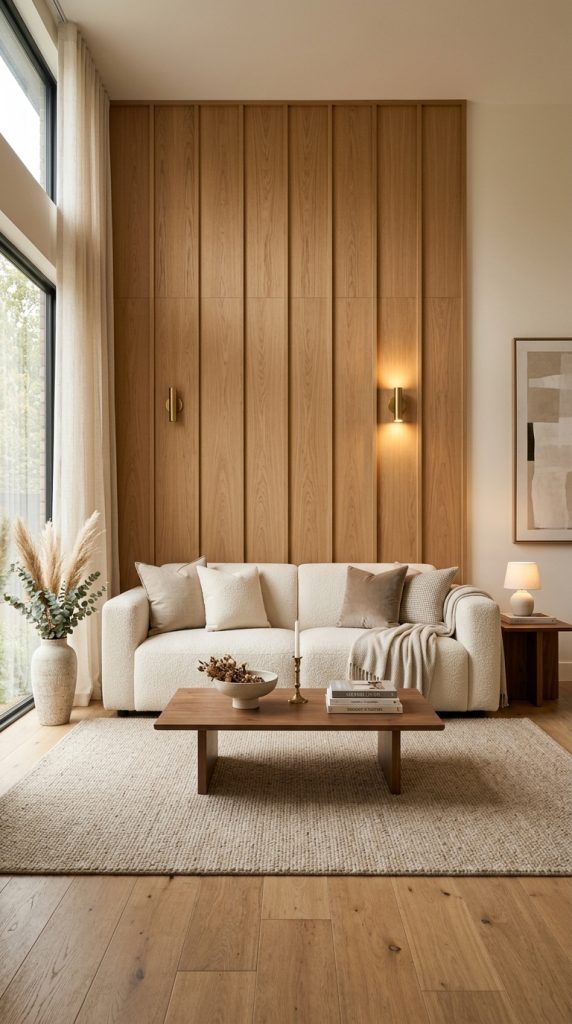
Warm oak vertical wainscoting is an excellent choice when you want architectural detail without creating a heavy traditional appearance. The vertical direction naturally draws the eye upward, making the ceiling feel taller while introducing the warmth of natural wood.
This design works especially well in modern living rooms with neutral furniture. Imagine a warm cream sofa positioned in front of a wall covered with evenly spaced oak panels. Add a low-profile coffee table, textured rug, soft curtains, and a few black or aged-brass accents, and the room immediately develops more depth.
Choose oak with a relatively consistent grain if you want a contemporary appearance. Natural variations are beautiful, but extremely knotty or heavily rustic wood can shift the style toward farmhouse or cabin-inspired decorating.
Materials and Tools
- Oak boards or oak veneer panels
- Measuring tape
- Level
- Pencil
- Construction adhesive
- Finishing nails
- Nail gun or hammer
- Wood filler
- Fine-grit sandpaper
- Wood stain or clear protective finish
- Caulk
- Paintable trim if required
Step-by-Step
Start by measuring the wall and determining how many vertical sections you need. Keep the spacing consistent from one side of the wall to the other.
Mark the vertical centerlines lightly with a pencil. Use a level to ensure every board is perfectly straight.
If the wall is painted, clean it thoroughly before installation. Lightly sanding glossy surfaces can help improve adhesion.
Install the first vertical panel carefully. This piece establishes the alignment for the rest of the wall, so accuracy matters.
Continue installing the remaining boards while checking the spacing regularly.
Fill nail holes with wood filler and lightly sand the repaired areas.
If you want to preserve the natural oak appearance, apply a clear finish. For a warmer or darker appearance, use a wood stain first.
Finish the edges with appropriate trim so the installation looks intentional.
How to Style the Room
Keep the surrounding furniture relatively simple. The oak wall is already a major visual element.
Use warm neutral fabrics such as cream, oatmeal, beige, and soft brown.
Add a large piece of artwork if the wall has enough open space, but avoid covering too much of the wood.
Warm floor lamps or wall sconces can emphasize the grain during the evening.
This design is particularly effective behind a sofa, media console, or reading area.
2. Cream Picture-Frame Wainscoting for an Elegant Bedroom
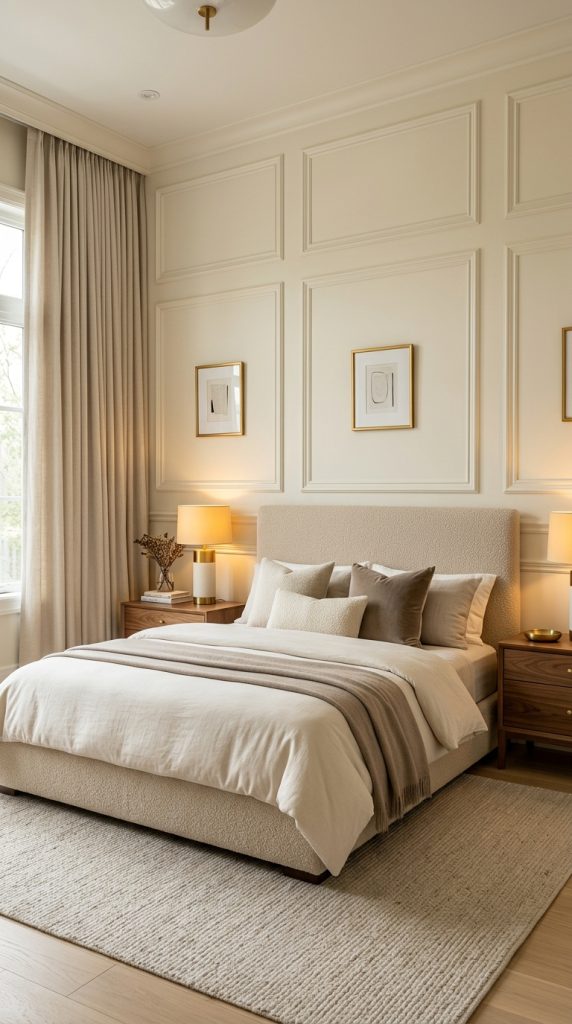
Picture-frame molding offers a refined way to introduce traditional architectural detail while maintaining a modern color palette. In a bedroom, cream or warm-white picture-frame wainscoting can create an elegant backdrop without making the room feel overly formal.
This design works beautifully behind a bed, especially when the headboard is upholstered in linen, boucle, or velvet.
Instead of creating very small frames, use larger rectangular proportions. Oversized frames generally look more contemporary and allow the wall to breathe.
Materials and Tools
- MDF molding
- Measuring tape
- Level
- Pencil
- Mitre saw
- Construction adhesive
- Finishing nails
- Caulk
- Wood filler
- Sandpaper
- Primer
- Warm-white paint
Step-by-Step
Measure the wall and mark the desired height of the wainscoting.
Create a simple layout using paper or painter’s tape before cutting any molding. This allows you to experiment with frame size.
Mark the outer boundaries of each rectangle.
Cut the molding carefully, paying attention to the angles at each corner.
Attach the pieces using construction adhesive and finishing nails.
Check every section with a level before the adhesive fully sets.
Fill nail holes and seams with suitable filler and caulk.
Prime the molding before applying your final paint color.
For a sophisticated look, use the same warm cream shade on the wall above and the molding below.
How to Style the Bedroom
Choose a simple upholstered headboard.
Use bedding in ivory, beige, taupe, or muted brown.
Introduce warm bedside lamps rather than very bright overhead lighting.
Add natural wood through nightstands or a bench at the foot of the bed.
Keep artwork minimal because the wall molding already creates visual structure.
The result is timeless, elegant, and easy to adapt as your bedroom style changes.
3. Olive Green Board-and-Batten Wainscoting for a Sophisticated Dining Room

Deep olive green can make wainscoting feel dramatic and sophisticated without becoming excessively dark. It works particularly well in dining rooms because the rich color creates an intimate atmosphere.
Board-and-batten construction is particularly effective because the vertical battens provide rhythm and architectural structure.
Pair olive green with warm natural wood furniture, cream upholstery, and brass or bronze lighting.
Materials and Tools
- MDF backing or wall boards
- Vertical battens
- Top rail
- Baseboard
- Measuring tape
- Level
- Construction adhesive
- Finishing nails
- Caulk
- Primer
- Olive green paint
Step-by-Step
Determine the height of the wainscoting. Dining-room paneling often works well at approximately one-third to one-half of the wall height, depending on ceiling proportions.
Install or retain a substantial baseboard.
Measure the wall and calculate equal spacing for the battens.
Install the outer battens first, then work toward the center.
Check each piece with a level.
Add the horizontal top rail across the installation.
Fill nail holes and caulk seams.
Prime the surface and apply two consistent coats of paint.
How to Style the Dining Room
Pair the olive paneling with a warm wood dining table.
Choose cream or beige upholstered dining chairs.
Add an aged-brass pendant above the table.
Use linen table textiles rather than highly patterned fabrics.
A large mirror can reflect the warm lighting and make the room feel more spacious.
This combination creates a sophisticated dining room that feels traditional enough to be timeless but modern enough for contemporary homes.
4. Half-Wall Wainscoting in Warm Greige for a Transitional Hallway
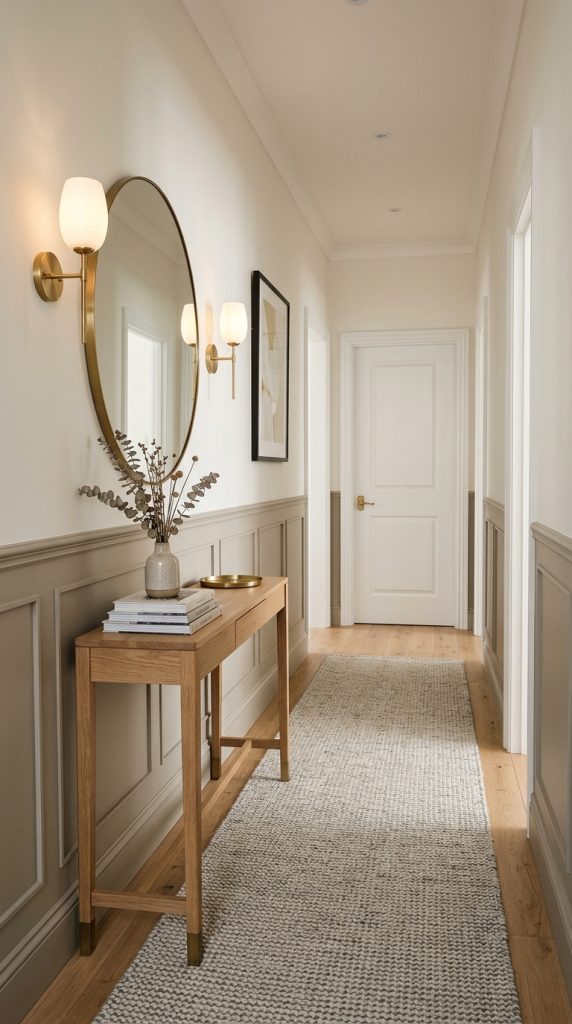
Hallways are often overlooked when decorating, yet they can benefit dramatically from wainscoting.
A half-wall wainscoting installation in warm greige provides subtle architectural detail while protecting the lower portion of the wall from everyday marks.
Greige is particularly useful because it sits between gray and beige, making it compatible with both warm and cool elements.
Materials and Tools
- MDF panels
- Chair rail or top molding
- Baseboard
- Level
- Measuring tape
- Adhesive
- Finishing nails
- Caulk
- Primer
- Warm greige paint
Step-by-Step
Measure the hallway and determine a consistent panel height.
Mark the height across all walls using a laser level or standard level.
Install the baseboard if needed.
Attach the panels or individual trim pieces.
Add the top rail to establish a finished edge.
Continue around corners carefully.
Use caulk to create seamless transitions.
Prime and paint the entire lower section.
How to Style the Hallway
Keep the upper wall lighter than the paneling.
Add simple framed artwork above the wainscoting.
Use warm ceiling lights or wall sconces.
A narrow console table can work if the hallway is wide enough.
Add a runner in cream, taupe, or muted earth tones.
This approach makes an ordinary hallway feel intentional while keeping the design neutral enough to complement adjoining rooms.
5. Walnut Slat Wainscoting for a Contemporary Bedroom

For a stronger modern look, replace traditional molding with narrow walnut slats.
The repeated vertical lines create texture and architectural rhythm while the natural wood introduces warmth.
This design is especially effective behind a bed because the wall becomes a natural focal point.
Materials and Tools
- Walnut slats or walnut veneer strips
- Measuring tape
- Level
- Construction adhesive
- Finishing nails
- Wood finish
- Saw
- Spacers
- Pencil
Step-by-Step
Measure the wall carefully.
Determine the width of each slat and the spacing between them.
Create a small test section before installing the complete wall.
Cut the slats to the correct length.
Mark the wall so the spacing remains consistent.
Install the first slat using a level.
Use a spacer to position each following slat evenly.
Continue across the wall.
Apply a suitable clear finish to protect the walnut.
How to Style the Bedroom
Use cream bedding and warm neutral textiles.
Choose black or bronze bedside lighting for contrast.
Add soft upholstered furniture to balance the hard wood surface.
Avoid excessive wall decoration.
A simple piece of artwork or a sculptural pendant can complement the slatted texture without competing with it.
The result is a sophisticated contemporary bedroom with a strong architectural identity.
6. Soft Beige Wainscoting for a Cozy Modern Living Room
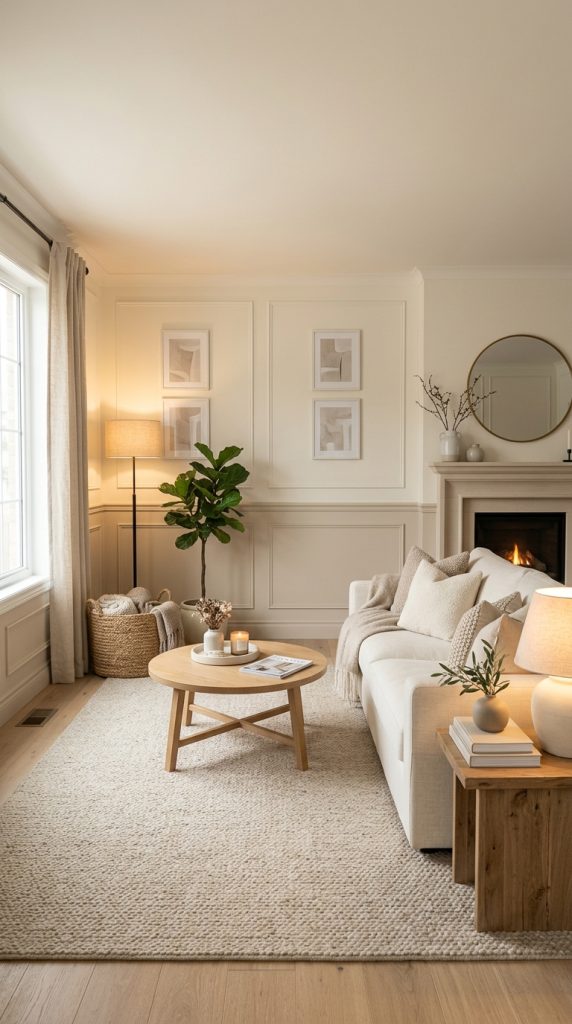
If you want wainscoting that feels subtle rather than dramatic, soft beige is an excellent choice.
A warm beige paneling system can create depth while maintaining a calm neutral environment.
This is particularly useful for living rooms decorated with cream sofas, natural wood, woven textures, and warm lighting.
Materials and Tools
- MDF trim
- Baseboard
- Top rail
- Measuring tape
- Level
- Adhesive
- Finishing nails
- Caulk
- Primer
- Soft beige paint
Step-by-Step
Choose the exact beige tone based on the natural lighting in the room.
Measure the wall and establish the panel height.
Plan the width of each panel before cutting.
Install the outer frames first.
Work inward while checking the spacing.
Add the top rail.
Fill holes and seams.
Prime and paint the entire paneling.
Allow sufficient drying time before placing furniture against the wall.
How to Style the Room
Use different shades of beige rather than trying to match everything exactly.
Combine cream upholstery with warm wood.
Add woven baskets, linen cushions, and textured rugs.
Use warm lamps to create soft evening illumination.
Keep metallic accents subtle.
This design works because it creates architectural interest without introducing a strong color.
7. Dark Charcoal Wainscoting With Warm White Walls
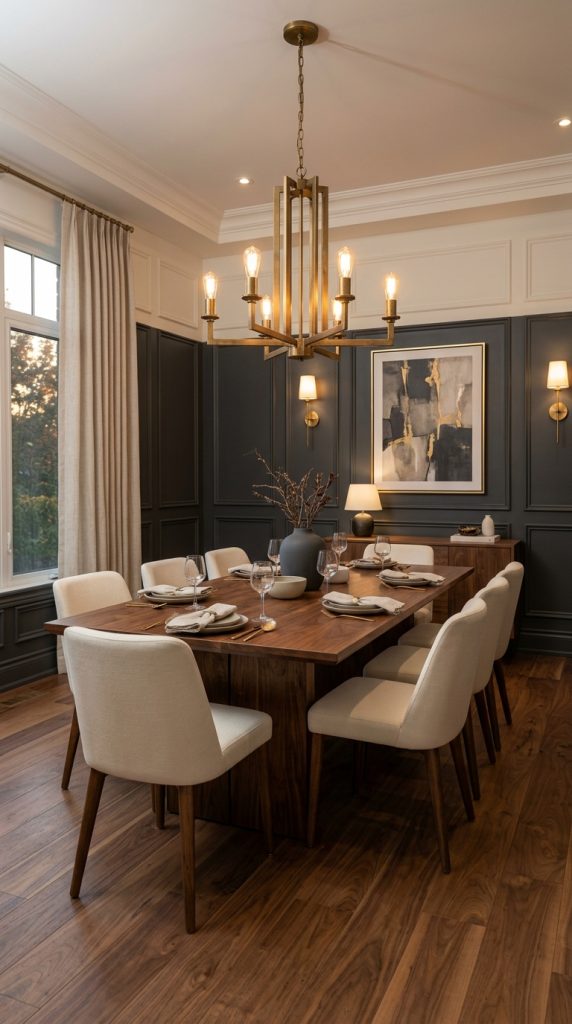
For a dramatic but timeless appearance, combine dark charcoal wainscoting with a warm white upper wall.
This contrast can work in dining rooms, offices, bedrooms, and sophisticated entryways.
The dark lower section visually anchors the room while the warm white upper wall prevents the space from becoming too heavy.
Materials and Tools
- MDF panels or molding
- Baseboard
- Top rail
- Measuring tape
- Level
- Adhesive
- Finishing nails
- Caulk
- Primer
- Charcoal paint
- Warm-white paint
Step-by-Step
Determine the height of the dark paneling.
Install the wainscoting according to your chosen design.
Fill and sand all visible imperfections.
Prime the entire installation.
Apply the charcoal color to the lower section.
Paint the upper wall warm white.
Use painter’s tape carefully at the transition line.
Remove the tape while the paint is still slightly workable to create a clean edge.
How to Style the Room
Introduce warm wood furniture to soften the contrast.
Use cream textiles.
Choose aged brass or bronze hardware.
Add warm lamps or sconces.
Avoid introducing too many additional colors.
This design creates a sophisticated contrast that can remain attractive for many years.
8. Natural Oak Wainscoting in a Modern Entryway
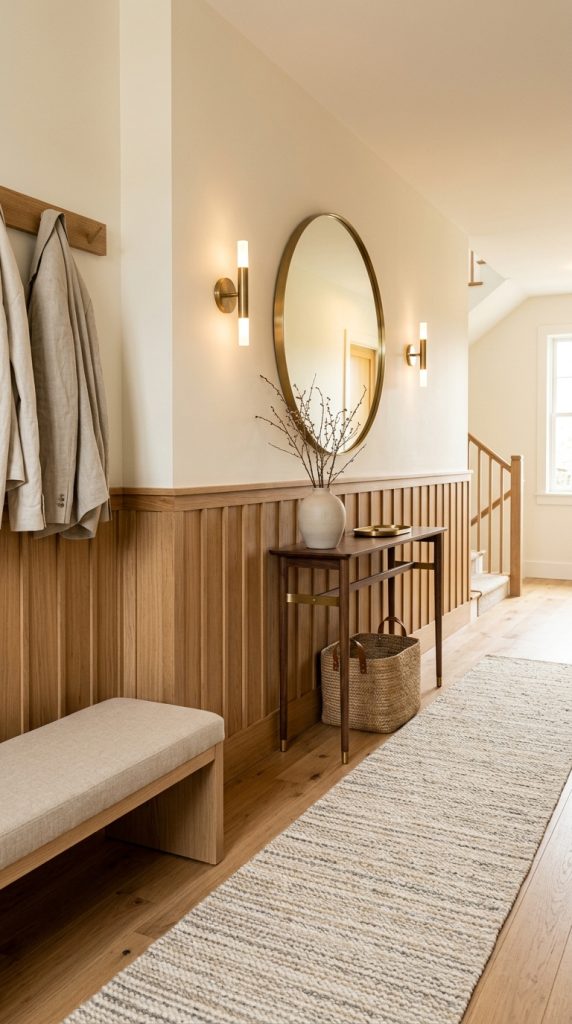
An entryway is one of the best places for natural wood wainscoting because it creates an immediate impression when entering the home.
Oak paneling can provide warmth while protecting the walls in a high-traffic area.
Use vertical panels or simple flat boards rather than complicated molding.
Materials and Tools
- Natural oak boards
- Measuring tape
- Level
- Adhesive
- Finishing nails
- Sandpaper
- Clear wood finish
- Baseboard
- Top rail
Step-by-Step
Measure the entryway walls.
Decide whether you want half-height or taller paneling.
Cut the oak boards carefully.
Sand rough edges.
Install the boards with consistent spacing.
Add finishing trim around the top.
Fill nail holes if necessary.
Apply a clear protective finish.
How to Style the Entryway
Add a slim wood or upholstered bench.
Install a large round mirror above the paneling.
Use a simple console table if space permits.
Place a woven basket underneath for everyday items.
Choose warm lighting.
Keep the floor area clear to maintain a welcoming appearance.
The natural oak provides enough visual interest that the rest of the entryway can remain relatively simple.
9. Full-Height Wainscoting for a Sophisticated Home Office

Full-height paneling can make a home office feel architectural and established.
Rather than using traditional small molding details, choose tall rectangular panels or vertical wood strips.
This can visually increase the height of the room and provide a sophisticated backdrop for a desk.
Materials and Tools
- MDF or wood panels
- Measuring tape
- Level
- Construction adhesive
- Finishing nails
- Caulk
- Wood filler
- Primer
- Paint or stain
- Desk and shelving
Step-by-Step
Measure the complete wall height.
Plan the panel widths carefully around windows, doors, and electrical outlets.
Mark the layout before cutting materials.
Install the larger vertical sections first.
Add horizontal or decorative rails if your design requires them.
Check every panel for alignment.
Fill and caulk all seams.
Prime and finish the wall.
How to Style the Office
Use a warm wood desk if the paneling is painted.
Choose a comfortable upholstered chair.
Add one or two shelves rather than filling the wall with storage.
Use warm desk lighting.
Introduce books, ceramics, and a small plant for personality.
Keep cables concealed whenever possible.
The paneling becomes a sophisticated architectural background rather than a distraction from work.
10. Two-Tone Wainscoting With Warm White and Natural Wood
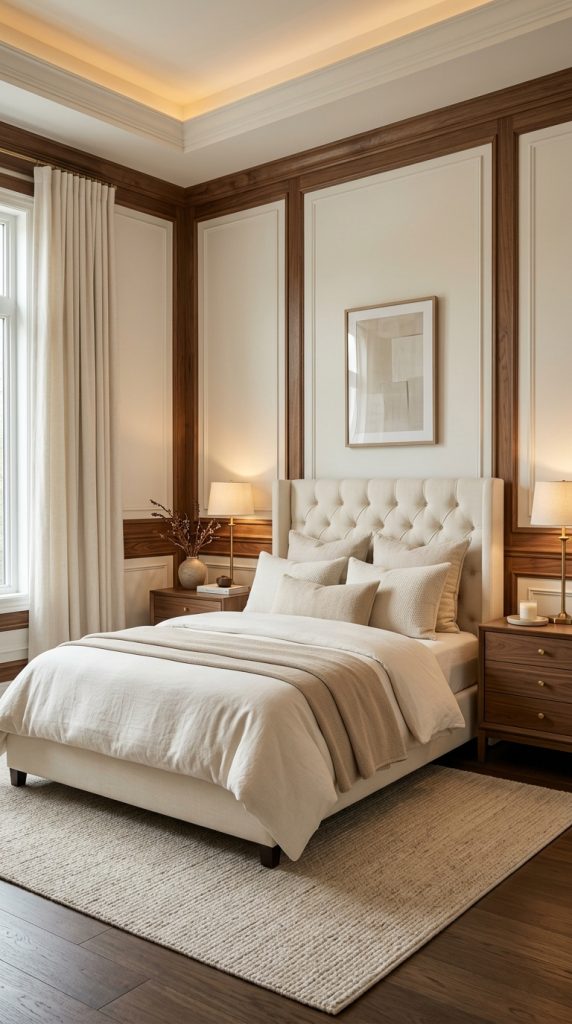
For a balanced modern look, combine painted wainscoting with natural wood details.
For example, use warm white panels with a walnut top rail or natural oak vertical inserts.
This approach creates contrast without relying on strong colors.
It is particularly effective in bedrooms, dining rooms, and transitional living spaces.
Materials and Tools
- MDF panels
- Natural wood trim
- Baseboard
- Top rail
- Measuring tape
- Level
- Adhesive
- Finishing nails
- Caulk
- Primer
- Warm-white paint
- Wood finish
Step-by-Step
Decide which areas will be painted and which will remain natural wood.
Create a layout before installation.
Install the main panel structure.
Add the natural wood elements carefully.
Fill nail holes in painted areas.
Caulk seams where required.
Prime the painted sections.
Apply warm white paint.
Finish the natural wood with a protective clear coat.
How to Style the Room
Repeat the natural wood somewhere else in the room so it feels intentional.
For example, pair walnut trim with walnut furniture.
Use cream, beige, or taupe textiles.
Choose warm lighting.
Keep decorative colors muted.
The result is a timeless modern interior that combines the softness of painted walls with the authenticity of natural wood.
How to Choose the Right Wainscoting Height
Wainscoting height has a significant effect on how a room feels.
Lower installations can make a room feel traditional and understated. Taller paneling creates more architectural impact.
For a modern appearance, avoid automatically choosing a standard height without considering the room’s proportions.
Measure the ceiling height, doors, windows, and existing furniture.
A tall installation can work particularly well with high ceilings.
In rooms with lower ceilings, a carefully proportioned half-wall may prevent the space from feeling compressed.
The top rail should also relate visually to existing door and window trim.
How to Choose the Best Color for Modern Wainscoting
Warm white is one of the most versatile choices because it creates subtle architectural detail.
Beige creates softness.
Greige works well in transitional spaces.
Olive green introduces natural depth.
Charcoal creates drama.
Muted blue can provide a sophisticated cool accent.
For natural wood, oak works beautifully with cream, beige, olive, and warm white, while walnut pairs especially well with ivory, taupe, charcoal, and muted earthy colors.
Always test paint samples under both daylight and artificial lighting before committing.
How to Make Wainscoting Look Expensive
The most expensive-looking wainscoting is usually not the most complicated.
Accurate measurements matter more than elaborate molding.
Consistent spacing creates visual quality.
Clean corners and carefully finished seams make a major difference.
Use good-quality paint and apply it evenly.
If using natural wood, choose a finish that enhances the grain rather than hiding it.
Coordinate the paneling with the rest of the room.
Repeat the wood tone or paint color through furniture and accessories.
Finally, avoid overcrowding the wall. Let the wainscoting remain visible.
Beginner Mistakes to Avoid
One of the biggest mistakes is skipping the planning stage.
Always measure before purchasing materials.
Do not assume walls are perfectly straight.
Use a level throughout installation.
Avoid inconsistent spacing between panels.
Do not ignore doors, windows, electrical outlets, or heating vents.
Another common mistake is choosing panel dimensions that are too small for a large wall.
If the design feels visually busy before installation, it will probably feel even busier once complete.
Test your layout with painter’s tape first.
Also remember that natural wood expands and contracts. Follow appropriate installation practices for the material you select.
Final Thoughts
Modern wainscoting offers one of the easiest ways to introduce architectural personality into an ordinary room. It can make a hallway feel finished, give a bedroom a sophisticated backdrop, make a dining room feel more elegant, or bring natural warmth into a contemporary living space.
The strongest designs do not depend on complicated patterns. They rely on proportion, material quality, consistent spacing, and thoughtful color.
Warm oak and walnut bring natural character. Cream and beige create softness. Olive adds depth. Charcoal provides drama. Picture-frame molding introduces refined elegance, while vertical slats create a distinctly contemporary appearance.
Before starting your project, consider the architecture of your room and decide whether you want the wainscoting to become the focal point or quietly support the furniture.
Measure carefully, create your layout, test colors, and select materials that fit your budget and skill level.
Then let the design breathe.
When warm wood, elegant colors, beautiful lighting, and clean architectural lines are combined thoughtfully, wainscoting can create a room that feels both current and timeless.
That balance is what makes modern wainscoting such a valuable design feature: it adds personality without forcing the room into a short-lived trend, giving your home architectural detail that can remain beautiful for years.
Leave a Reply