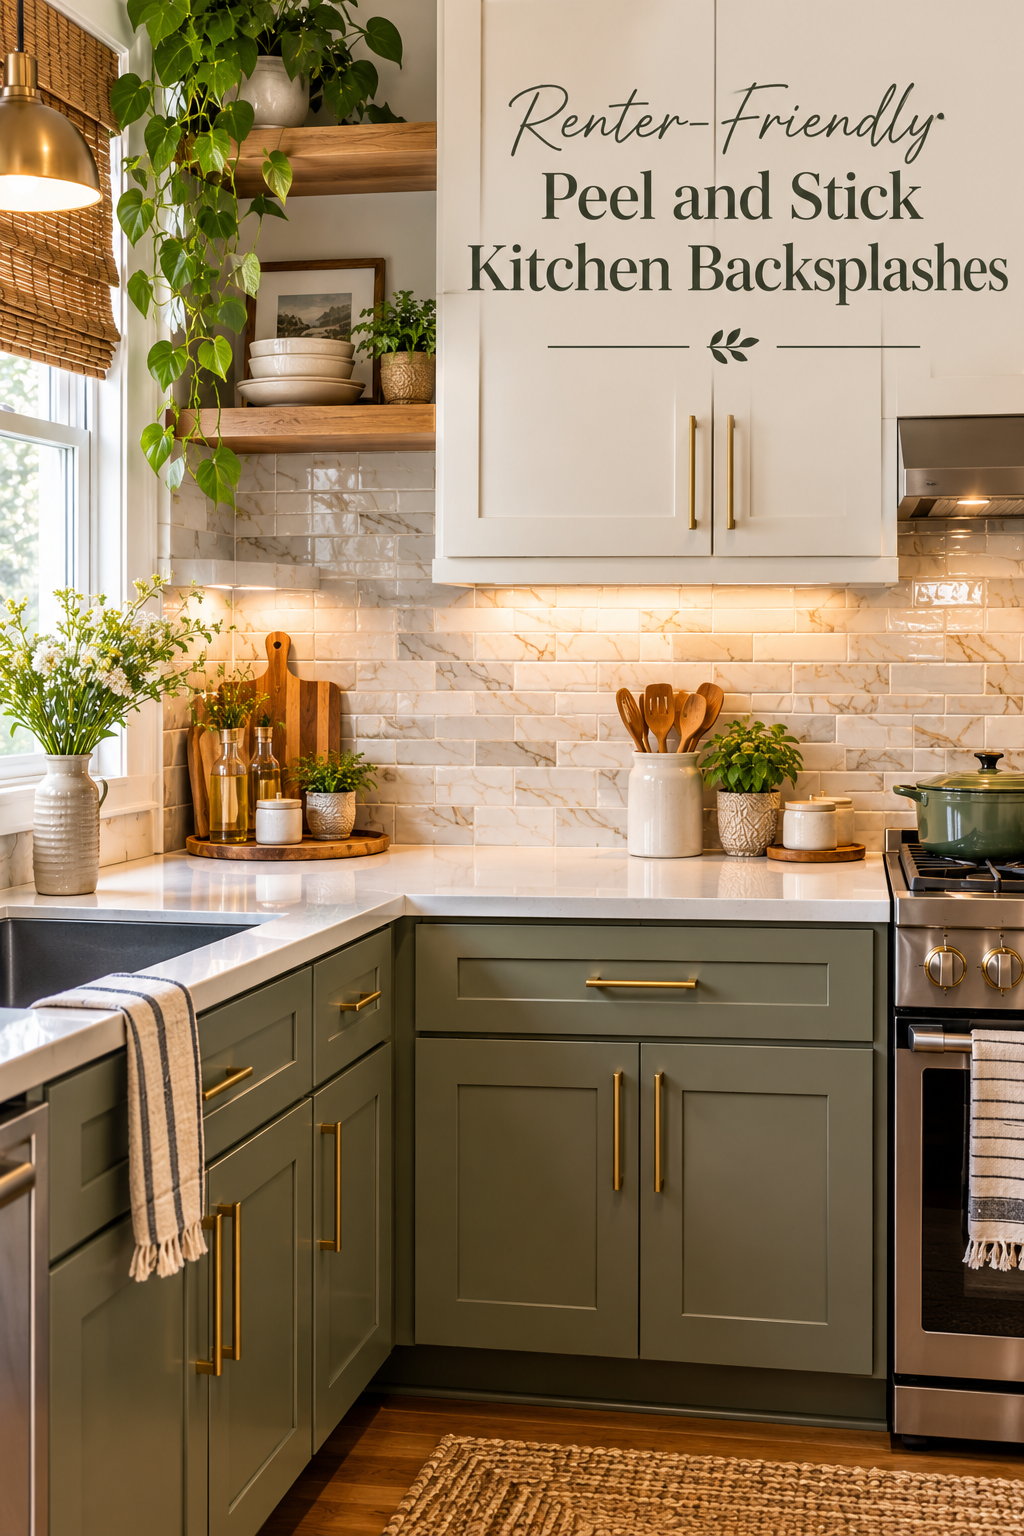
Living in a rental property invariably introduces an ongoing interior design dilemma: how to elevate a generic, builder-grade space into a tailored home without violating lease terms or forfeiting a security deposit. Among all residential areas, the kitchen serves as the visual and functional heartbeat of daily living. It is where morning rituals begin, culinary experiments unfold, and guests congregate during weekend gatherings. Yet, in standard rental units, kitchens are notoriously prone to neglect by property managers. Tenants are frequently saddled with lackluster laminate countertops, dated honey-oak cabinetry, uninspired hollow-core doors, and, most visibly, blank or stained drywall standing in for a functional kitchen backsplash. In older properties, the situation can be even more disheartening: discolored, cracked four-inch square ceramic tiles paired with yellowed, porous grout lines that absorb cooking grease and resist even the most aggressive scrubbing. For decades, tenants were left with virtually no recourse. Traditional ceramic, porcelain, natural stone, or glass mosaic tile installations demand invasive interventions: demolition of the underlying wallboard, thick mortar beds, cementitious grouts, messy diamond-blade tile wet saws, and permanent mortar bonding that fundamentally alters the structure of the property. For a renter, undertaking traditional tile work constitutes an immediate breach of lease agreements and guarantees substantial monetary deductions from the initial deposit upon moving out.
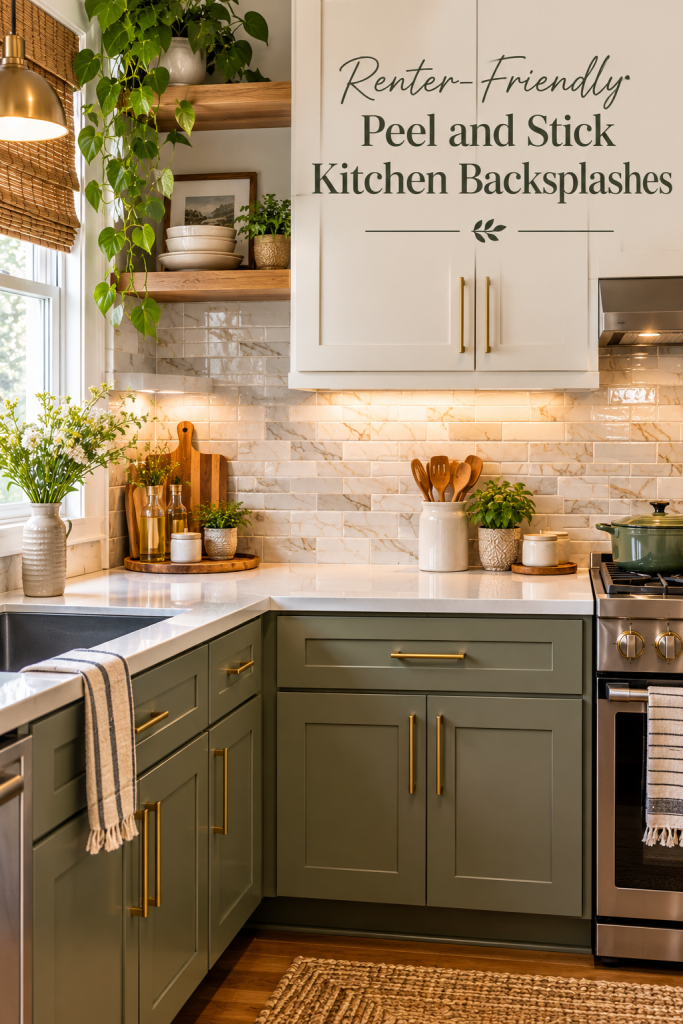
The advent and engineering revolution of modern peel and stick surface technology has fundamentally transformed tenant-led home improvement. No longer restricted to flimsy, paper-thin vinyl films that buckle under moisture or look blatantly synthetic, contemporary peel and stick backsplashes represent an authentic convergence of high-end aesthetics, resilient materials science, and non-destructive adhesive engineering. Contemporary manufacturers produce peel and stick tiles that incorporate authentic crushed stone composites, metallic aluminum finishes, dimensional epoxy resin gels with realistic beveled depths, and impervious cellular PVC cores. These materials authentically simulate the optical depth, weight, tactile profile, and light-reflective characteristics of traditional masonry, artisanal ceramic, and hand-cut zellige tiles. When properly applied, they present a surface so visually and structurally convincing that casual observers and landlords alike routinely mistake them for permanently grouted installations. This structural evolution provides renters with the extraordinary luxury of complete visual customization, allowing them to transform a dreary kitchen into an inspiring culinary studio over a single weekend.
The core genius of peel and stick backsplash installations lies within the chemistry of pressure-sensitive adhesives. Unlike mastic, thin-set mortar, or construction glues that undergo an irreversible chemical curing process to weld building materials directly to the drywall paper, renter-rated peel and stick backsplashes utilize specialized adhesive formulations designed for high shear strength and moderate peel resistance. This means the tile will grip vertical surfaces tenaciously, resisting moisture from boiling pots, humidity from dishwashers, and airborne cooking oils, while remaining removable under the right physical conditions. When it comes time to vacate the rental property, the application of gentle convective heat from a standard household hairdryer or heat gun softens the adhesive matrix, allowing the tile to be peeled away cleanly from the wall without tearing the underlying gypsum paper or leaving behind stubborn, cured chemical residues. This dual capacity for long-term daily durability and non-destructive removal has established peel and stick tiles as the premier design upgrade for discerning renters, urban apartment dwellers, and budget-conscious homeowners seeking high-impact aesthetic enhancements without the expense of full-scale remodeling.
Mastering this installation requires an appreciation of structural preparation and surface geometry. A peel and stick backsplash will only perform as well as the substrate beneath it. Kitchen walls naturally accumulate microscopic layers of vaporized cooking grease, dish soap residue, moisture, and household dust over months and years of use. Applying an adhesive directly over this invisible barrier will lead to premature edge curling, bubbling, and eventual adhesive failure. A thorough, systematic preparation protocol—stripping the wall surface down to pristine drywall or degreasing existing ceramic tile with trisodium phosphate or isopropyl alcohol solutions—is non-negotiable. Beyond hygiene, the structural topography of the wall dictates material selection. While thin gel-coat vinyl sheets require an impeccably flat, smooth drywall surface to prevent telegraphing imperfections, thicker stone composite, metal, or rigid PVC interlocking tiles possess the rigidity necessary to span directly across existing, uneven grout lines, masking ugly landlord-special tile installations beneath an impervious, modern facade. Armed with basic measuring tools, an aluminum straightedge, a sharp utility knife, and an intentional spatial plan, any renter can successfully execute a museum-grade kitchen transformation that looks exquisitely tailored, functions impeccably through rigorous daily cooking, and detaches cleanly on moving day. Below is an exhaustive, fifteen-part master guide detailing distinct, renter-friendly peel and stick backsplash ideas, engineered to address diverse design sensibilities, structural wall conditions, and installation challenges.
1. Dimensional Faux-Grout Classic Subway Tile
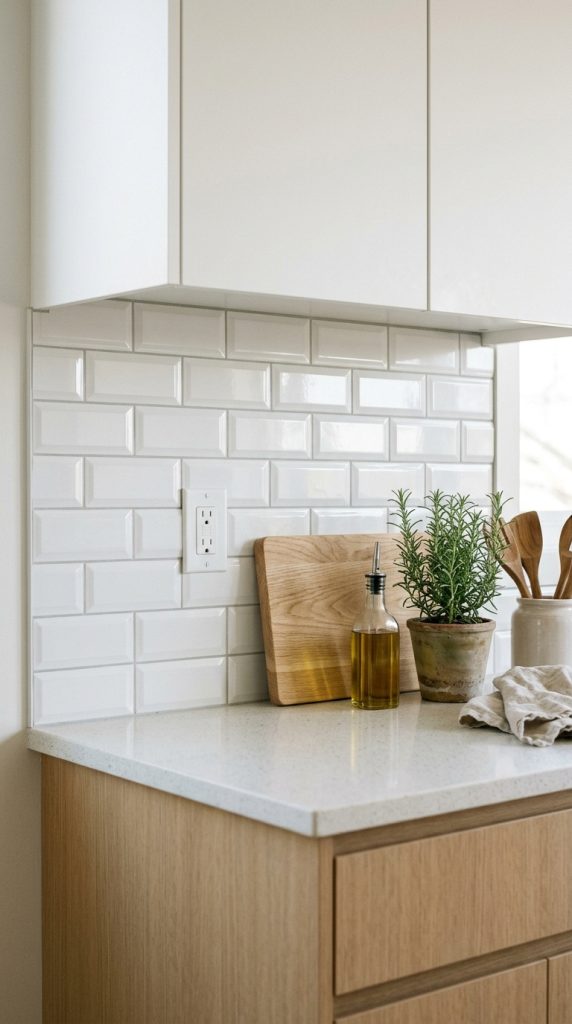
The timeless white subway tile represents the gold standard of architectural versatility, effortlessly complementing everything from mid-century modern cabinetry to traditional farmhouse aesthetics. Modern peel and stick subway tiles have evolved far beyond flat, printed sticker sheets. Contemporary premium versions utilize an innovative heavy-gauge clear polyurethane gel layered over a high-opacity substrate, creating a three-dimensional beveled edge that catches and refracts ambient kitchen light exactly like kiln-fired glazed ceramic. Between each simulated tile run lies an integrated, slightly recessed faux-grout line rendered in realistic light gray or charcoal. This textural variation creates shadow lines that disguise the synthetic nature of the sheet, providing the structural appearance of a permanently grouted ceramic wall without the weight, mess, or permanence.
- Required Tools and Materials:
- Polyurethane 3D gel-coated subway tile interlocking sheets (30 cm x 30 cm)
- Heavy-duty utility knife with fresh carbon steel replacement blades
- Aluminum straightedge ruler (minimum 60 cm length)
- Cutting mat or thick scrap plywood surface
- Trisodium phosphate (TSP) cleaner or high-percentage isopropyl alcohol
- Microfiber cloths and painter’s tape
Begin by washing the entire backsplash wall with a diluted TSP solution to strip away grease, followed by a clean water wipe-down and thorough air drying. Measure the vertical centerline between the upper cabinets and countertop using a tape measure and mark a crisp level reference line using a spirit level and pencil. Because subway tiles utilize a running-bond pattern, the left-hand edge of your initial starter sheet must be trimmed flush with an aluminum straightedge to establish a clean, vertical beginning boundary against the edge of the cabinetry or wall corner. Peel back three inches of the release liner from the top edge, align the sheet precisely with your drawn reference line, and press it firmly against the wall, smoothing outward from center to edge with a dry cloth to prevent air entrapment. As you install successive sheets, overlap the transparent connecting margins according to the manufacturer’s registration marks, ensuring the faux-grout lines interlock seamlessly. To fit around electrical outlet boxes, shut off the breaker, unscrew the cover plates, measure the socket box dimensions, cut matching rectangular openings into the tile sheets with your utility knife, apply the sheet, and reinstall the faceplate over the trimmed edge for a flush finish.
2. Rigid Stone-Composite Hexagonal Mosaic
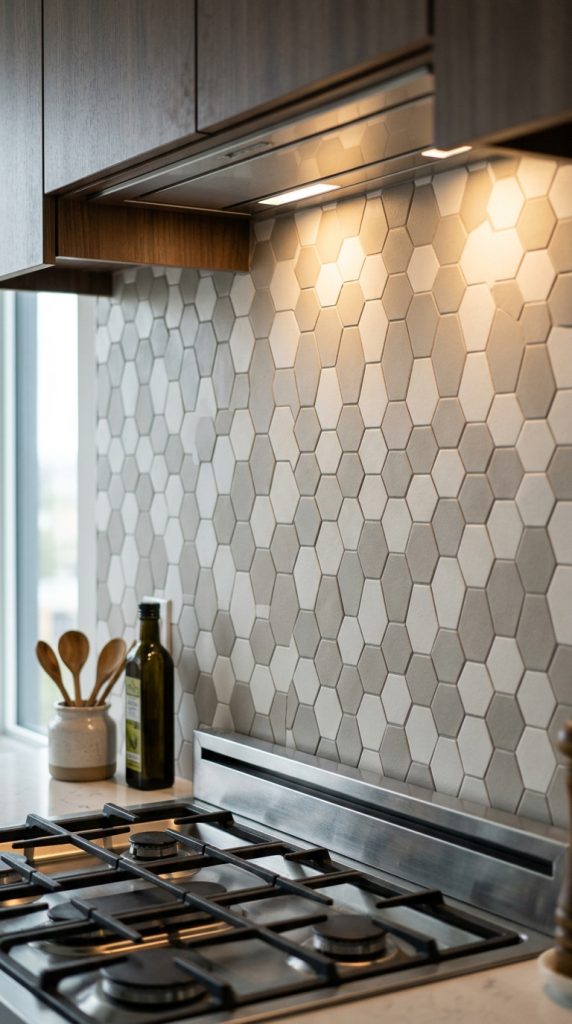
Hexagonal geometry introduces a sophisticated honeycomb pattern that energizes small, galley-style rental kitchens by breaking up monotonous straight cabinet lines. Opting for a rigid stone-plastic composite (SPC) hexagonal tile elevates the installation from a temporary decorative fix to an architectural feature. These tiles are manufactured using a crushed limestone core blended with polymer stabilizers, yielding a rigid, non-flexible tile body that feels cool and dense to the touch. Because the material is structurally rigid, it does not conform to minor surface dips or existing tile grout lines beneath it, making it the ideal solution for renters burdened with ugly, bumpy, or partially damaged existing walls.
- Required Tools and Materials:
- Rigid stone-composite peel and stick hexagonal mosaic sheets
- Compact handheld rotary tool with an abrasive wheel or heavy-duty aviation snips
- Fine-tooth file or 120-grit sanding block
- Level and soft-face rubber roller
- Degreasing cleaner and lint-free cleaning rags
To install rigid stone-composite hexagons, meticulous leveling is mandatory because geometric shapes quickly show angular drift across long horizontal spans. Measure the total length of the counter and dry-fit the mosaic sheets along the surface to determine how the hexagonal points will terminate under the cabinets. Since cutting stone-composite material requires more force than vinyl, use aviation snips or score the face deeply with a carbide-tipped utility knife along a steel straightedge, snapping the tile over the edge of a sturdy table. Alternatively, a rotary tool fitted with a diamond cutting wheel slices cleanly through the dense composite core around plumbing pipes or corner returns. Smooth any rough cut edges using a medium-grit sanding block. Strip the adhesive backing completely, align the interlocking interlocking tooth pattern of the adjacent hexagonal sheet, and press the composite tile onto the wall. Follow immediately by rolling the surface firmly with a soft-face rubber roller, applying uniform body weight to activate the pressure-sensitive adhesive bonds against the wall substrate.
3. High-Gloss Undulated Zellige Moroccan Style
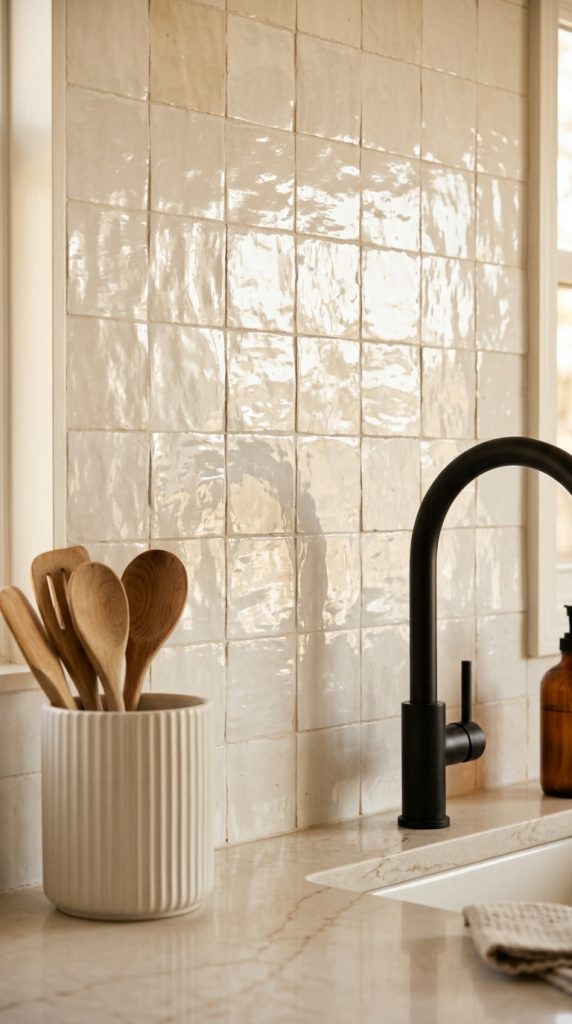
Traditional Moroccan Zellige tiles are celebrated worldwide for their artisanal imperfections—subtle undulating surfaces, varied color saturations, irregular edges, and high-gloss glazes that reflect light dynamically. Peel and stick variations capturing this aesthetic employ thick, multi-layer resin coatings over varied pigment bases, reproducing the handmade appearance of square Zellige tiles without requiring specialist masonry tools. This aesthetic works exceptionally well in kitchens that suffer from poor natural lighting, as the glossy, multi-faceted surfaces catch incoming daylight and bounce ambient illumination across the room, lending an organic, lived-in luxury to plain apartments.
- Required Tools and Materials:
- High-gloss dimensional Zellige-style peel and stick square tile panels
- Precision hobby knife (X-Acto style) and heavy-duty utility knife
- Metal T-square
- Non-abrasive microfiber application pad
- Wall degreasing spray and clean water sponge
Before peeling the backing, unpack multiple tile boxes and shuffle the sheets. Authentic Zellige features subtle tonal shifts from warm ivory to pearl white and soft biscuit; intermixing panels from different packages prevents clusters of identical color tones, guaranteeing a realistic, artisanal dispersion across your wall. Clean the backsplash drywall thoroughly, paying special attention to the zone directly behind the cooktop. Starting from the most visually prominent corner of the kitchen, slice the uneven tabs off the first tile sheet to create a straight starting edge. Position the panel on the wall, resting the lower edge flush against the countertop edge or backsplash lip. Use a non-abrasive microfiber pad to exert firm, circular pressure across the undulating faces of the tiles, ensuring the adhesive behind the varied heights makes complete, uniform contact with the drywall without scratching the high-gloss protective clear coat.
4. Modern Farmhouse Vertical Stacked Wood Plank Look
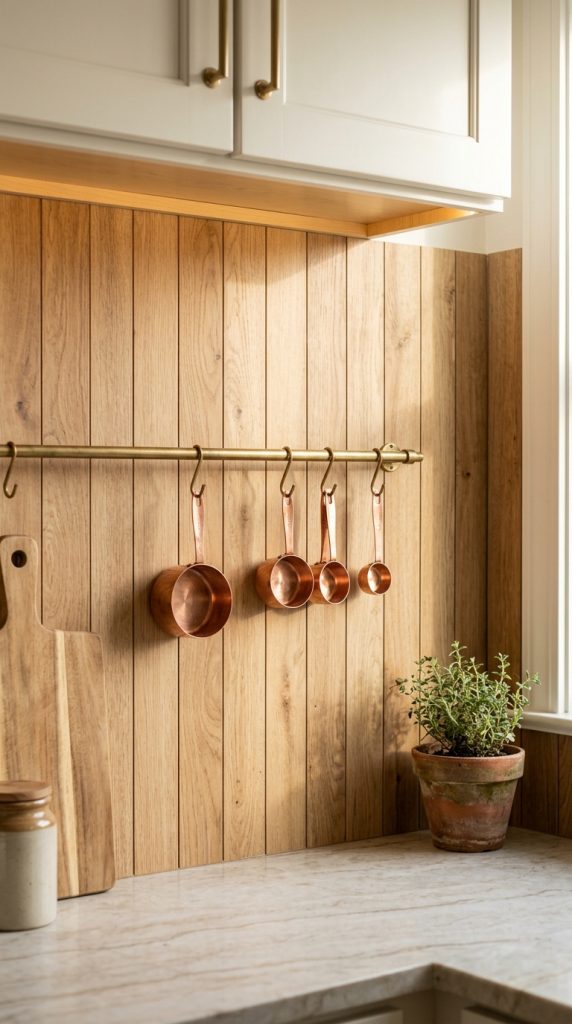
The modern farmhouse movement has largely transitioned away from heavily distressed, weathered barn wood toward sleek, vertical timber paneling that introduces clean lines and natural texture. Renter-friendly peel and stick wood-look planks, fabricated from lightweight, moisture-resistant cellular vinyl with realistic embossed wood grain, bring immediate warmth to sterile white-and-gray rental kitchens. Orienting the planks vertically draws the eye upward toward the ceiling, creating an optical illusion of greater height between the countertop and upper cabinetry—a major asset in low-ceilinged apartments.
- Required Tools and Materials:
- Water-resistant peel and stick vinyl wood planks (approximately 10 cm x 90 cm)
- Carpenter’s metal square
- Heavy-duty utility knife and straightedge
- Blue low-tack painter’s tape
- Tape measure and mechanical pencil
Measure the exact vertical distance between your countertop surface and the underside of the wall cabinets at multiple intervals, as builder-grade cabinetry is rarely hung perfectly level. Mark the required length on the reverse side of a vinyl wood plank, line up your carpenter’s square, and slice firmly through the face with your utility knife before snapping the plank clean along the score line. Establish a crisp, perfectly vertical plumb line near the primary focal point of the kitchen using your spirit level. Peel the release paper from the back of the plank, line the long edge up with your vertical plumb line, and press it firmly into position from bottom to top. Continue setting subsequent planks tightly edge-to-edge with no gaps, alternating grain directions or flipping cut pieces to ensure that natural timber patterns look authentic and non-repetitive along the horizontal wall run.
5. Brushed Metallic Aluminum Herringbone
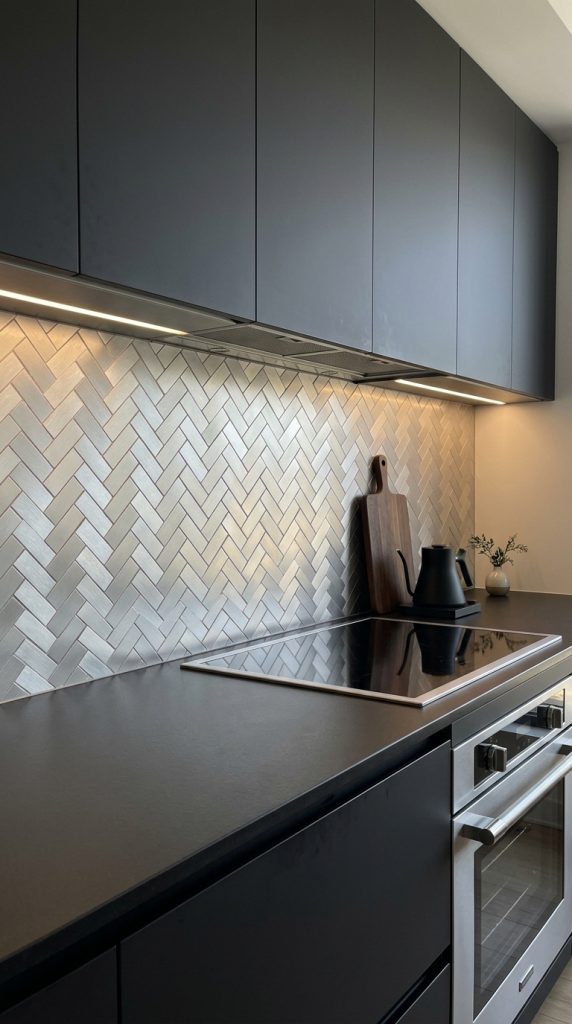
For contemporary, industrial, or minimalist kitchen aesthetics, brushed metallic surfaces provide an architectural look that pairs with stainless steel appliances. Peel and stick metallic herringbone tiles are constructed with an authentic, ultra-thin top layer of anodized aluminum bonded to a lightweight, fire-retardant composite core. Arranging these slender metallic rectangles in a classic V-shaped herringbone pattern introduces dynamic geometric energy to the kitchen, reflecting kitchen under-cabinet lighting while resisting heat and grease spatter behind the cooktop.
- Required Tools and Materials:
- Real-metal aluminum composite herringbone peel and stick sheets
- Tin snips or heavy-duty metal shear scissors
- Aluminum straightedge
- Silicone kitchen edge scraper
- Degreasing surface prep wipes and protective work gloves
Because metallic tiles feature an genuine aluminum surface, working with cut edges demands caution to avoid handling sharp metal burrs. Begin by degreasing the wall surface thoroughly, ensuring no moisture remains. Herringbone sheets interlock using diagonal tabs; trim the left-hand triangular extensions of your starter panel flat using heavy-duty tin snips or score the aluminum repeatedly with a fresh utility blade along a metal straightedge until it snaps through the composite backing. Peel the adhesive backing, mate the interlocking tabs of the second panel against the first, and press firmly against the wall. Because metal does not compress like vinyl, dry-fit each adjoining sheet to confirm the joints interlock tightly before making wall contact. Run a silicone scraper firmly over the flat faces of the installed tiles to press down all corners and secure a permanent adhesive bond.
6. Mediterranean Encaustic Talavera Mosaic
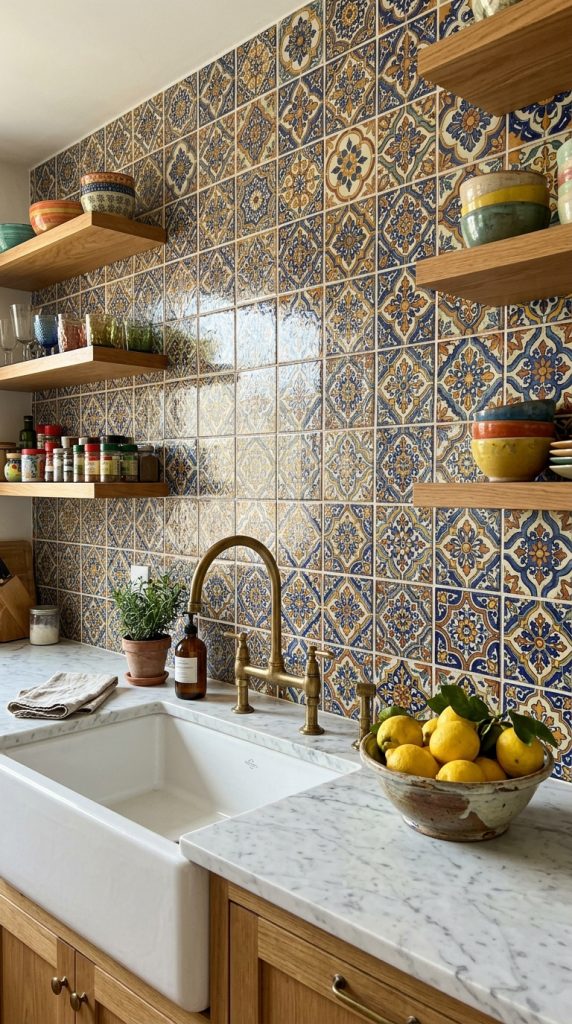
Standard rentals often suffer from neutral monotony: beige walls, white appliances, and gray laminate. Incorporating a Mediterranean or Spanish Talavera-style peel and stick backsplash introduces artistic character, energetic geometric motifs, and rich, historic pigments like cobalt blue, terracotta, mustard yellow, and sage green into the kitchen. These tiles replicate traditional hand-painted, kiln-fired cement and clay tiles, transforming a blank backsplash into an eye-catching focal wall that infuses personality into an otherwise sterile apartment.
- Required Tools and Materials:
- Encaustic-patterned peel and stick vinyl square tile panels (20 cm x 20 cm)
- Cutting mat and precision craft knife
- Straightedge metal ruler
- Level and painter’s tape
- Surface prep cleaning solution
Encaustic patterns rely on symmetrical motifs that repeat across adjoining tiles to form complex secondary designs. Therefore, layout planning is critical to prevent the pattern from looking misaligned or abruptly truncated at eye-level. Lay your tiles out across the kitchen counter first, matching the interlocking lines and central medallions to understand how the full pattern flows horizontally. Locate the exact center of the focal wall, draw a level horizontal guideline and a vertical plumb line intersecting at that point, and install your first four tiles in the center quadrant. Work outward toward the sides and upper cabinetry from this central axis. When you reach the corners and edges, trim the remaining tiles cleanly using a precision knife, ensuring any truncated patterns are relegated to the least visible peripheral margins of the room.
7. Moody Matte Charcoal Chevron
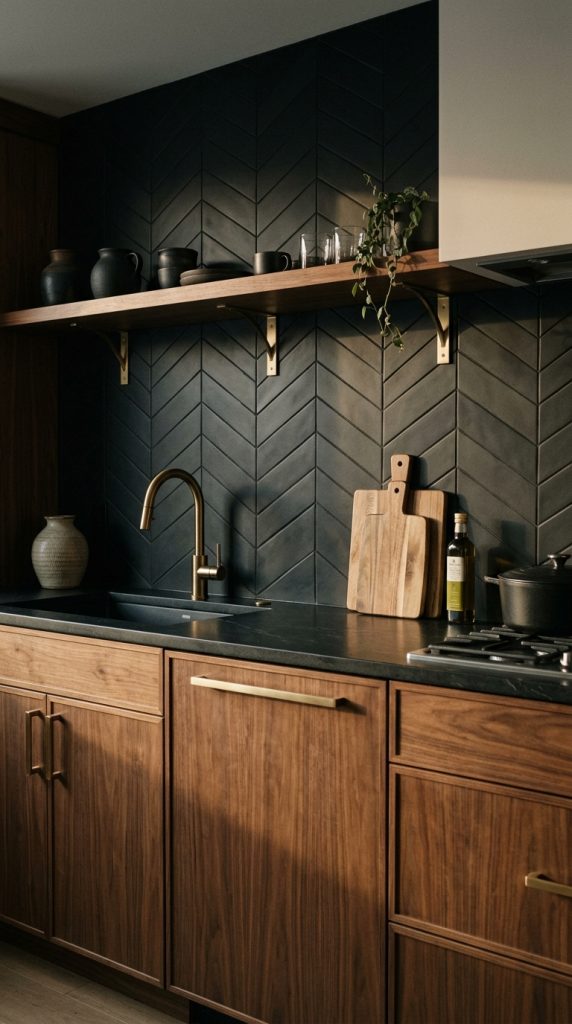
While light and bright surfaces remain widespread, a dark, moody kitchen aesthetic brings contemporary drama, visual depth, and a high-end designer atmosphere to rental spaces. A matte charcoal or deep slate-black chevron peel and stick backsplash provides a velvety, non-reflective surface that absorbs harsh glare, highlights gleaming kitchen hardware, and makes inexpensive laminate countertops look considerably more luxurious by contrast. The chevron pattern—featuring angled planks that meet cleanly at continuous points—delivers an intentional, modern aesthetic that elevates standard kitchen geometry.
- Required Tools and Materials:
- Matte black/charcoal textured peel and stick chevron mosaic sheets
- Heavy-duty utility knife and steel ruler
- Removable double-sided mounting tape (for fine edge reinforcement)
- Surface cleaning alcohol and lint-free cloths
- Clean cotton gloves to prevent oil transfer from hands to matte surfaces
Matte finishes are susceptible to absorbing natural oils from fingertips during installation, which can cause temporary shiny spots on the surface. Wearing clean cotton gloves while handling the tiles keeps the matte charcoal texture pristine. Prepare the wall by scrubbing with an alcohol solution to remove all dust, as dark tiles will show fine dust outlines along exposed seams. Establish your horizontal baseline along the countertop lip. When aligning the chevron points, check that the central seam forms an unbroken straight vertical line. Smooth the sheets from the center seam outward, locking the adhesive down. If you encounter minor lifting at the extreme points around electrical cutouts, slide a sliver of removable double-sided mounting tape beneath the point to anchor it down without damaging the drywall underneath.
8. Mid-Century Modern Penny Round Tiles

The circular geometry of mid-century penny round tiles introduces a soft, organic texture that contrasts against the sharp angles of cabinetry and appliances. Traditional penny round installations are notoriously difficult, requiring tedious spacing and messy grouting over flexible mesh backings. In contrast, modern peel and stick penny round sheets feature round, high-gloss gel domes arranged across an integrated faux-grout background sheet, offering vintage character with simple peel-and-stick application.
- Required Tools and Materials:
- Flexible gel-coat penny round peel and stick mosaic sheets
- Curved craft scissors and utility knife
- Chalk line or erasable pencil
- Degreasing spray
- Smoothing squeegee or plastic putty knife
The challenge of installing penny round sheets lies in managing the irregular, scalloped edges where adjacent sheets connect. Unlike square-cut tiles, penny round sheets feature wave-like margins designed to interlock like jigsaw puzzles to hide linear seams. Clean the wall thoroughly and snap an erasable pencil line across your backsplash space. Begin at the most visible end of the kitchen, trimming the scalloped edge off the initial sheet with sharp craft scissors to create a straight line against the wall corner. Apply the sheet, smoothing it down with a flexible plastic squeegee to remove air bubbles between the small circular domes. When placing the next sheet, carefully overlap the scalloped edges, fitting the circular relief shapes over the corresponding receiving tabs of the installed sheet until the seam disappears.
9. Terrazzo Stone Composite Tile Squares
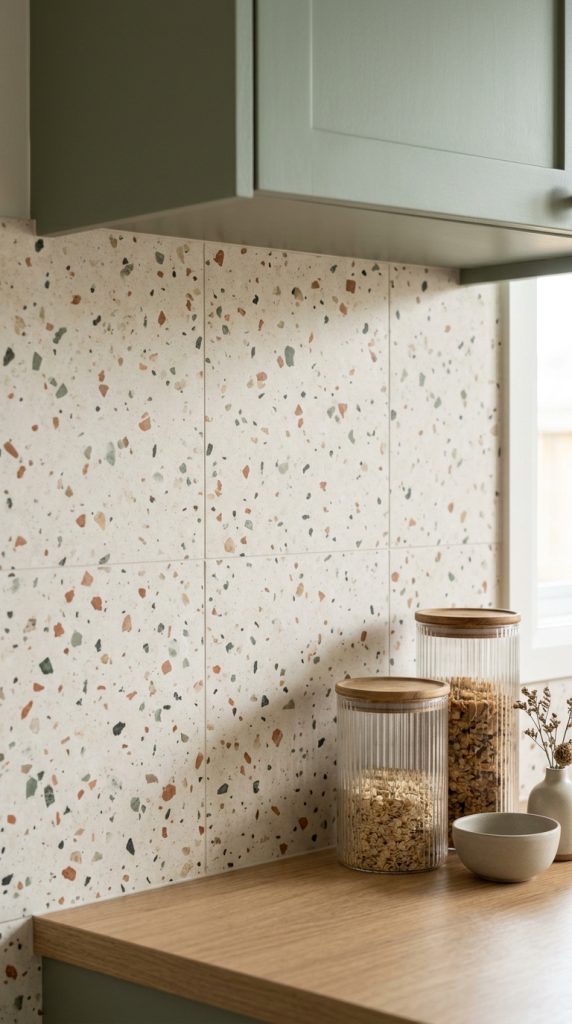
Terrazzo, with its roots in mid-century Italian design, has enjoyed a massive interior revival thanks to its playful composition of mineral chips, marble flecks, and natural aggregate embedded in smooth cement. Peel and stick terrazzo tiles allow renters to introduce this high-end trend into their spaces without committing to heavy masonry work. The subtle, multi-colored mineral flecks—often incorporating blush pinks, forest greens, ochres, and charcoal flakes against an off-white base—act as a cohesive design bridge, tying together mismatched rental appliances, countertops, and floor finishes.
- Required Tools and Materials:
- Heavy-gauge composite peel and stick terrazzo square tiles (30 cm x 30 cm)
- Utility knife with hooked blades
- Steel framing square
- Cutting board
- Isopropyl alcohol cleaning solution
- Firm rolling pin or laminate seam roller
Scrub the wall down with isopropyl alcohol to create an optimal bonding surface. Hooked utility blades work best for cutting dense, heavy-gauge composite terrazzo tiles, as they slice cleanly through the material from the face side without tearing the decorative printed aggregate layer. Measure the wall height and mark your tile grid using a framing square to ensure ninety-degree alignment. Peel back the release paper, line the bottom edge of the terrazzo tile flush to the countertop surface, and smooth the tile upward into place. Use a firm seam roller or rolling pin across every square inch of the surface, exerting steady pressure along the perimeter seams. The aggregate pattern is forgiving; tiny hairline joints naturally blend into the multi-colored speckled composition, making the finished installation look like a solid stone installation.
10. Luxurious Beveled White Carrara Marble Hexagon
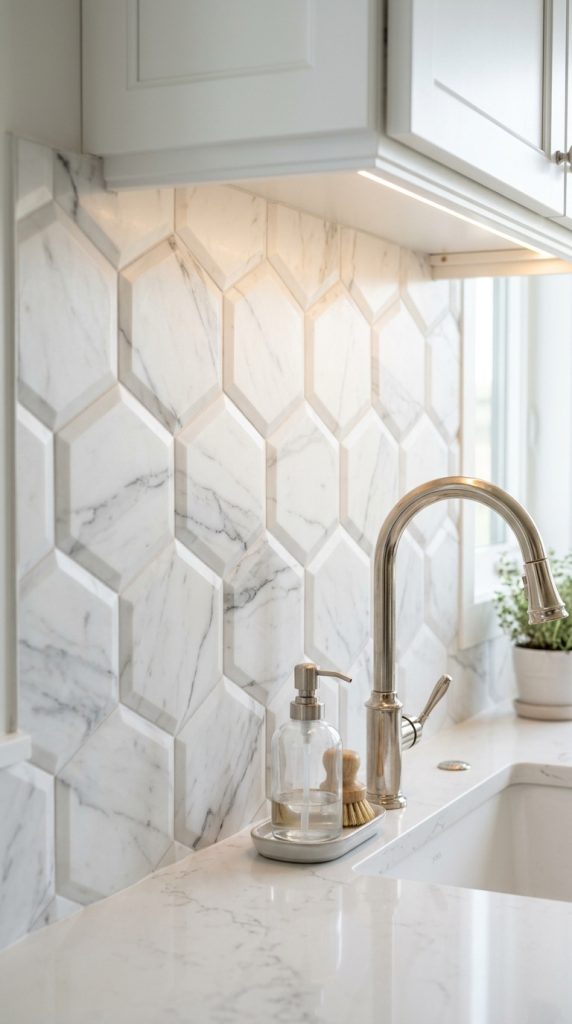
Authentic Italian Carrara marble conveys elegance, but installing real stone is completely off-limits for renters due to cost, weight, and permanent mortar bonding. High-end peel and stick Carrara marble hexagon tiles simulate this luxury through advanced multi-layer printing on stone-plastic composite backings, capturing soft gray veining across a luminous white base. The beveled edges catch light softly, creating depth that looks right at home in modern, transitional, and classic kitchen designs.
- Required Tools and Materials:
- Beveled stone-composite Carrara marble hexagon peel and stick tiles
- Heavy-duty utility knife and straightedge
- Rotary tool (optional, for complex cuts around outlets)
- Level and measuring tape
- Clean microfiber cloth and gentle surface degreaser
To maintain realism, unpack multiple sheets of the faux Carrara marble hexagons and examine the veining patterns. Authentic natural marble never repeats identical veining side-by-side; mix sheets from different boxes to ensure that dramatic gray veins flow across the wall in varied, natural directions. Prep the wall by eliminating all grease and dust. Align the starter sheet’s flat-cut edge with the vertical edge of your upper cabinetry, and use a spirit level to verify that your horizontal baseline is plumb. Position the tile on the wall, smoothing the surface with a microfiber cloth while pressing firmly on the beveled edges. The density of the stone-composite core ensures that once placed, the hexagons maintain a rigid, flat surface that does not telegraph wall imperfections beneath.
11. Industrial Faux Red Brick Texture
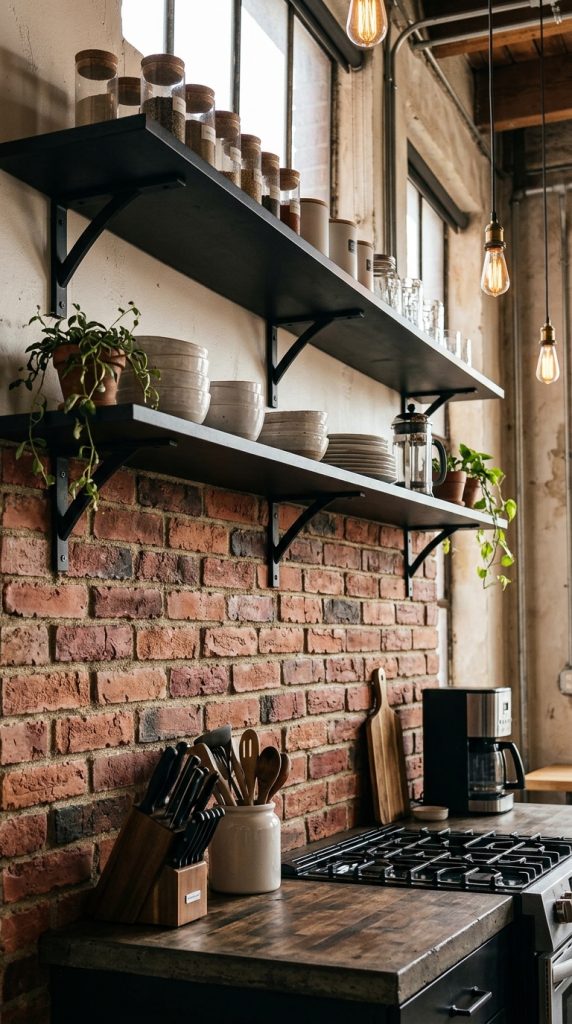
Exposed brick walls impart urban loft character, texture, and rustic warmth to a living space. For renters living in modern, sterile apartments with flat drywall, a peel and stick faux brick backsplash adds immediate industrial appeal. Premium faux brick products feature dimensional, textured surfaces made of elastomeric or high-density foam composites that simulate the porous, rough texture of real kiln-fired clay bricks, complete with recessed, sandy-textured faux mortar joints that absorb and diffuse light.
- Required Tools and Materials:
- Textured 3D dimensional peel and stick faux brick panels
- Heavy-duty kitchen scissors or utility knife
- Straightedge and level
- Damp cleaning sponge and degreasing soap
- High-adhesion painter’s tape for dry-fitting
Clean the wall thoroughly with mild degreasing soap, taking care not to saturate the underlying drywall with excess water, and allow it to dry completely. Faux brick panels are generally produced in larger modular interlocking sheets that mimic running-bond brick patterns with stepped ends. Dry-fit the panels along the counter using low-tack painter’s tape to verify how the brick courses will align with electrical outlets and upper cabinets. Trim the stepped tabs on the far-left starter sheet using heavy-duty shears to form a plumb edge. Peel the backing and press the panel into place, using your fingers to press into the recessed mortar lines to activate the adhesive in the low points. When installing adjacent sheets, mesh the interlocking brick tabs tightly into the cutouts of the previous sheet, working across the wall to create a continuous, uninterrupted brick surface.
12. Vertical Stacked Fluted Bamboo and Timber Slats
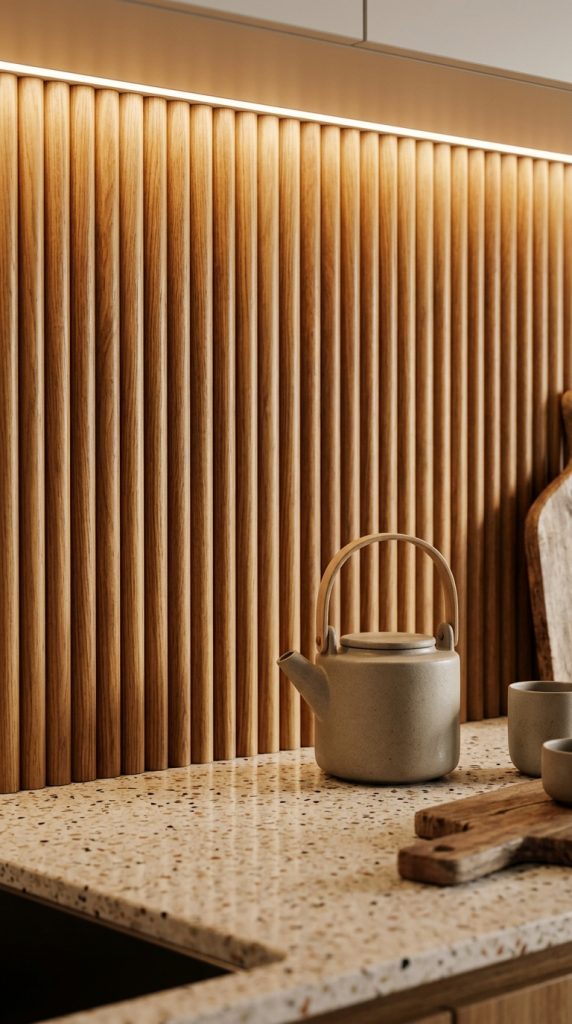
Fluted textures and narrow acoustic wood slat walls have become a standout trend in contemporary interior design, introducing clean architectural rhythm and organic timber warmth. Peel and stick fluted timber-look tiles feature parallel, vertical rounded ridges that create deep, linear shadow profiles across the backsplash. This three-dimensional, fluted texture catches light dynamically throughout the day, drawing the eye upward and providing an unexpected organic contrast to smooth countertop stone and painted cabinets.
- Required Tools and Materials:
- 3D fluted timber/bamboo-look peel and stick rigid tiles
- Fine-tooth Japanese pull saw or heavy-duty miter shears
- Steel straightedge and pencil
- Spirit level
- Isopropyl alcohol wipes
Because fluted tiles feature a pronounced three-dimensional profile, cutting across the vertical ridges requires care to avoid crushing or cracking the raised flutes. Use a fine-tooth Japanese pull saw or miter shears rather than a utility knife when making cross-cuts for height adjustments or electrical outlets. Clean the wall meticulously with alcohol wipes. Draw a plumb vertical reference line using a level at the center of the kitchen wall run. Remove the adhesive liner and align the edge of the first fluted panel directly to your plumb line, pressing the flat valleys between the raised ridges firmly into the drywall using a narrow wooden dowel or your fingers. Continue installing panels horizontally, butt-joining the edges tightly together. The natural vertical shadow cast by the fluted profiles conceals vertical seams entirely, creating a unified architectural wood slat installation.
13. Distressed Vintage Tin Ceiling Tiles
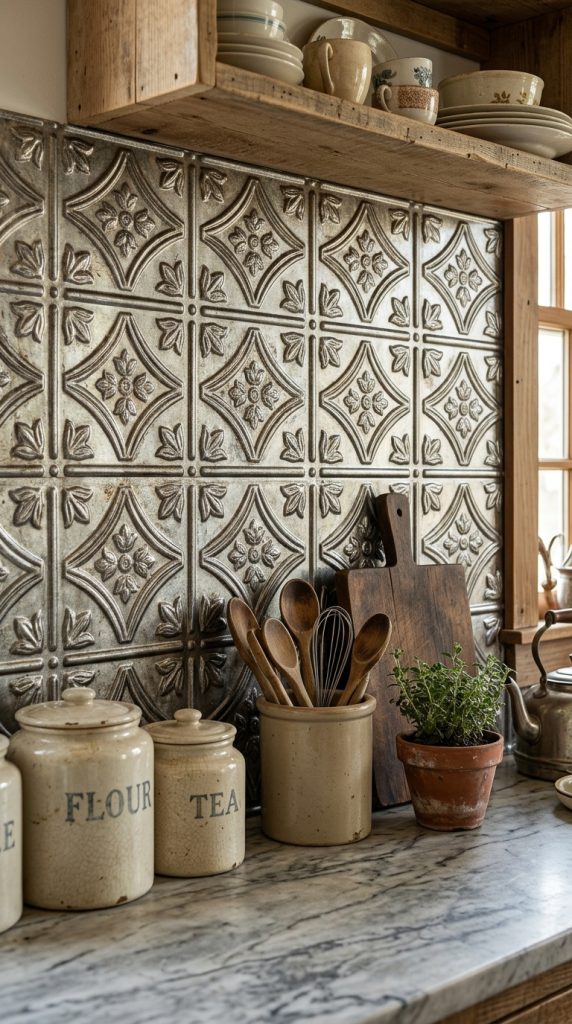
Vintage stamped tin panels recall historic Victorian and early twentieth-century architecture, offering charming period character and antique flair. Peel and stick stamped-tin backsplash tiles are crafted from lightweight, flexible metalized polymers or ultra-thin embossed aluminum, stamped with floral rosettes, filigree medallions, or geometric diamond reliefs. Finished in antiqued copper, distressed bronze, or soft hammered pewter, these panels bring rich character to cottage, transitional, or eclectic kitchen spaces, while reflecting light and masking rough or uneven wall surfaces beneath.
- Required Tools and Materials:
- Embossed peel and stick metalized vintage tin-look tiles (30 cm x 30 cm)
- Heavy-duty utility shears or aviation snips
- Metal straightedge
- Level and measuring tape
- Surface prep degreaser and microfiber cloths
Ensure the wall is free from dust and grease by wiping it down with your degreasing cleaner. Because stamped tin panels feature intricate repeating embossed reliefs, plan your layout from the center of the wall to keep the pressed medallions symmetrical between the countertop and cabinetry. Measure and trace your layout directly onto the drywall with a pencil and level. Use heavy-duty utility shears to trim perimeter edges, keeping cuts outside the main raised pattern where possible. Peel the adhesive backing and press each panel onto the wall, applying deliberate pressure across the flat margins between the raised patterns to anchor the adhesive securely without denting the hollow, embossed decorative motifs.
14. Modern Scandinavian Matte White Triangle Mosaics
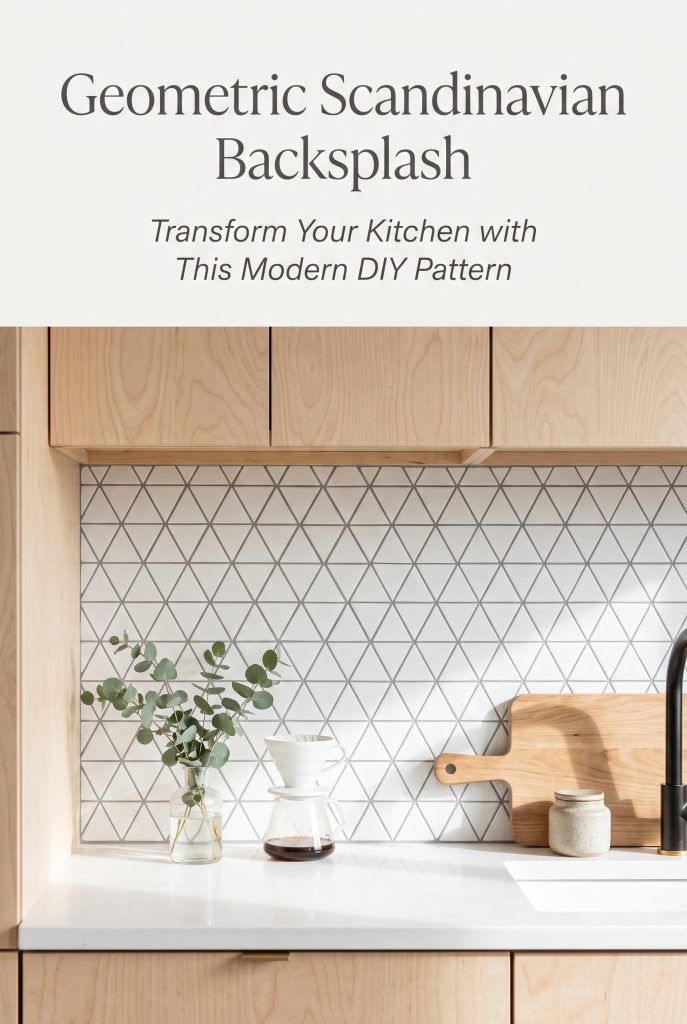
For renters who appreciate geometric Scandinavian design, matte white equilateral triangle mosaics offer a fresh, playful alternative to conventional rectangular subway tiles. The crisp diagonal lines of interlocking triangles introduce dynamic movement to the kitchen, creating clean visual rhythm across the wall. The matte, low-sheen finish brings a contemporary, understated look that complements flat-panel cabinets, light oak accents, and clean minimalist styling.
- Required Tools and Materials:
- Matte white interlocking triangle mosaic peel and stick sheets
- Precision hobby knife with fresh blades
- Aluminum straightedge
- Degreasing cleaner and wiping sponges
- Firm silicone squeegee
Begin by cleaning the wall surface with a degreasing cleaner to eliminate kitchen grime. Geometric triangle sheets use interlocking sawtooth margins on all sides; plan your starting cuts carefully to avoid awkward slivers at visible corners. Trim the jagged left-hand edge of your starter sheet with a precision knife against a metal ruler to establish a straight vertical edge. Apply the sheet to the wall along a level baseline, pressing it down from the center outward using a firm silicone squeegee to eliminate trapped air pockets. When mounting subsequent sheets, align the points of the triangles precisely with the receiving margins of the installed sheets, ensuring the faux-grout spacing remains consistent across the entire pattern.
15. Chic French Bistro Black and White Harlequin Diamonds
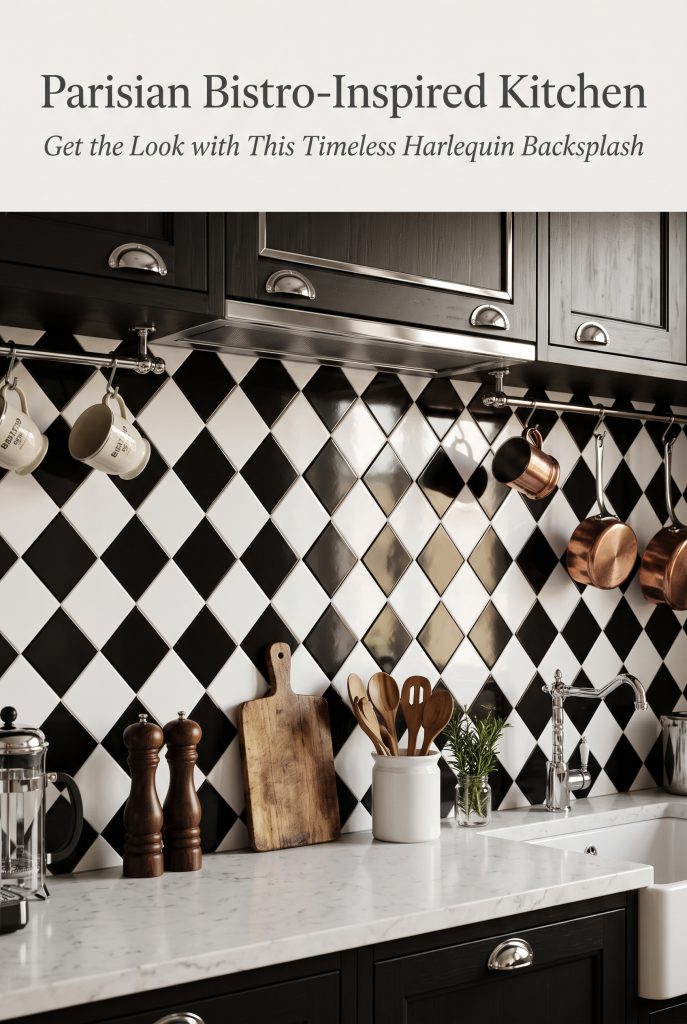
Drawing inspiration from classic Parisian cafes, the high-contrast black-and-white harlequin diamond pattern brings retro European charm to rental kitchens. Constructed from high-density, smooth vinyl or acrylic composites, these peel and stick panels feature alternating pitch-black and clean-white diamonds arranged on a forty-five-degree diagonal axis. This bold, graphic design energizes small kitchens, pulling attention away from dated appliances and framing the food preparation area as a deliberate, stylish space.
- Required Tools and Materials:
- High-contrast black and white harlequin diamond peel and stick tile sheets
- Heavy-duty utility knife and cutting mat
- Carpenter’s square and long aluminum straightedge
- Spirit level
- Wall cleaning wipes and dry lint-free towels
Begin by wiping the entire wall surface with cleaning wipes and drying it thoroughly with a lint-free towel. Establish a level horizontal line midway up the backsplash area using your spirit level, along with a vertical plumb line intersecting the focal center of the wall. Because high-contrast black-and-white designs show alignment errors easily, line up the primary diamond intersection point of your first panel directly over this central crosshair. Press the panel firmly to the wall, smoothing the surface with a clean cloth. Continue outward, aligning the contrasting points of the adjoining sheets with care. Trim the perimeter edges cleanly where they meet the cabinets, countertops, and corners using your utility knife and straightedge for a tailored, professional finish.
Complete Backsplash Transformation and Non-Destructive Removal
+----------------------------------------------------------------------------------------------------+
|                               MASTER PEEL & STICK SPECIFICATION MATRIX                            |
+------------------------------+---------------------------+-------------------+---------------------+
| Aesthetic Style              | Primary Composition       | Surface Depth     | Best Wall Substrate |
+------------------------------+---------------------------+-------------------+---------------------+
| 1. Classic Subway            | Polyurethane 3D Gel       | 2.0 mm - 2.5 mm   | Smooth Drywall      |
| 2. Hexagonal Mosaic          | Stone-Plastic Composite   | 3.5 mm - 4.5 mm   | Existing Tile/Rough |
| 3. Undulated Zellige         | Gloss Epoxy Resin         | 2.5 mm - 3.0 mm   | Smooth Drywall      |
| 4. Vertical Wood Planks      | Cellular Rigid Vinyl      | 2.0 mm - 3.0 mm   | Drywall/Plaster     |
| 5. Metallic Herringbone      | Anodized Aluminum / PVC   | 3.0 mm - 4.0 mm   | Smooth Drywall/Tile |
| 6. Encaustic Talavera        | Matte Printed Vinyl       | 1.2 mm - 1.5 mm   | Smooth Drywall      |
| 7. Matte Charcoal Chevron    | Textured Polymer Vinyl    | 2.0 mm - 2.5 mm   | Smooth Drywall      |
| 8. Penny Round Tiles         | High-Gloss Gel Domes      | 2.0 mm - 2.5 mm   | Smooth Drywall      |
| 9. Terrazzo Squares          | Stone Composite / Mineral | 3.0 mm - 4.0 mm   | Existing Tile/Plaster|
| 10. Carrara Marble Hexagon   | Stone-Plastic Composite   | 4.0 mm - 5.0 mm   | Existing Tile/Rough |
| 11. Industrial Faux Brick    | High-Density Elastomer    | 5.0 mm - 8.0 mm   | Uneven Drywall      |
| 12. Fluted Timber Slats      | 3D Molded Polymer/Wood    | 6.0 mm - 10.0 mm  | Smooth Drywall      |
| 13. Vintage Stamped Tin      | Embossed Aluminum Polymer | 1.5 mm - 2.0 mm   | Drywall/Plaster     |
| 14. Scandinavian Triangles   | Matte Rigid Vinyl         | 1.5 mm - 2.0 mm   | Smooth Drywall      |
| 15. Bistro Harlequin Diamond | Gloss Acrylic / Vinyl     | 2.0 mm - 2.5 mm   | Smooth Drywall      |
+------------------------------+---------------------------+-------------------+---------------------+
Executing a peel and stick backsplash project allows renters to take creative control of their living spaces, bridging the divide between temporary tenancy and authentic home design. Modern adhesive technology and composite materials give tenants the tools to make bold design statements that withstand daily cooking routines while protecting the underlying walls. The true success of any renter-friendly installation rests in its graceful departure: when it is time to move, you can leave the kitchen in its original, undamaged condition, ensuring your security deposit remains intact.
To remove peel and stick backsplashes cleanly, always rely on gentle heat rather than brute force. Aim a household hairdryer or heat gun set to low heat at a corner tile, holding the nozzle about four inches from the surface for fifteen to twenty seconds to soften the adhesive layer. Once the adhesive warms, slip a flexible plastic putty knife under the heated edge and peel the tile slowly away at a shallow, forty-five-degree angle. Never rip the tile straight off the wall, as pulling perpendicularly can tear the paper facing of the drywall. Continue heating and peeling along the wall section by section. If any sticky adhesive residue remains on the surface, wipe it away using a sponge dampened with mineral oil or an adhesive remover, followed by a quick wash with warm, soapy water. When the walls dry, the kitchen will be clean, undamaged, and ready for your final move-out walkthrough. This effortless balance of durable daily performance and damage-free removal makes peel and stick backsplashes one of the most effective, accessible, and satisfying DIY improvements available for the modern rental home.
Leave a Reply