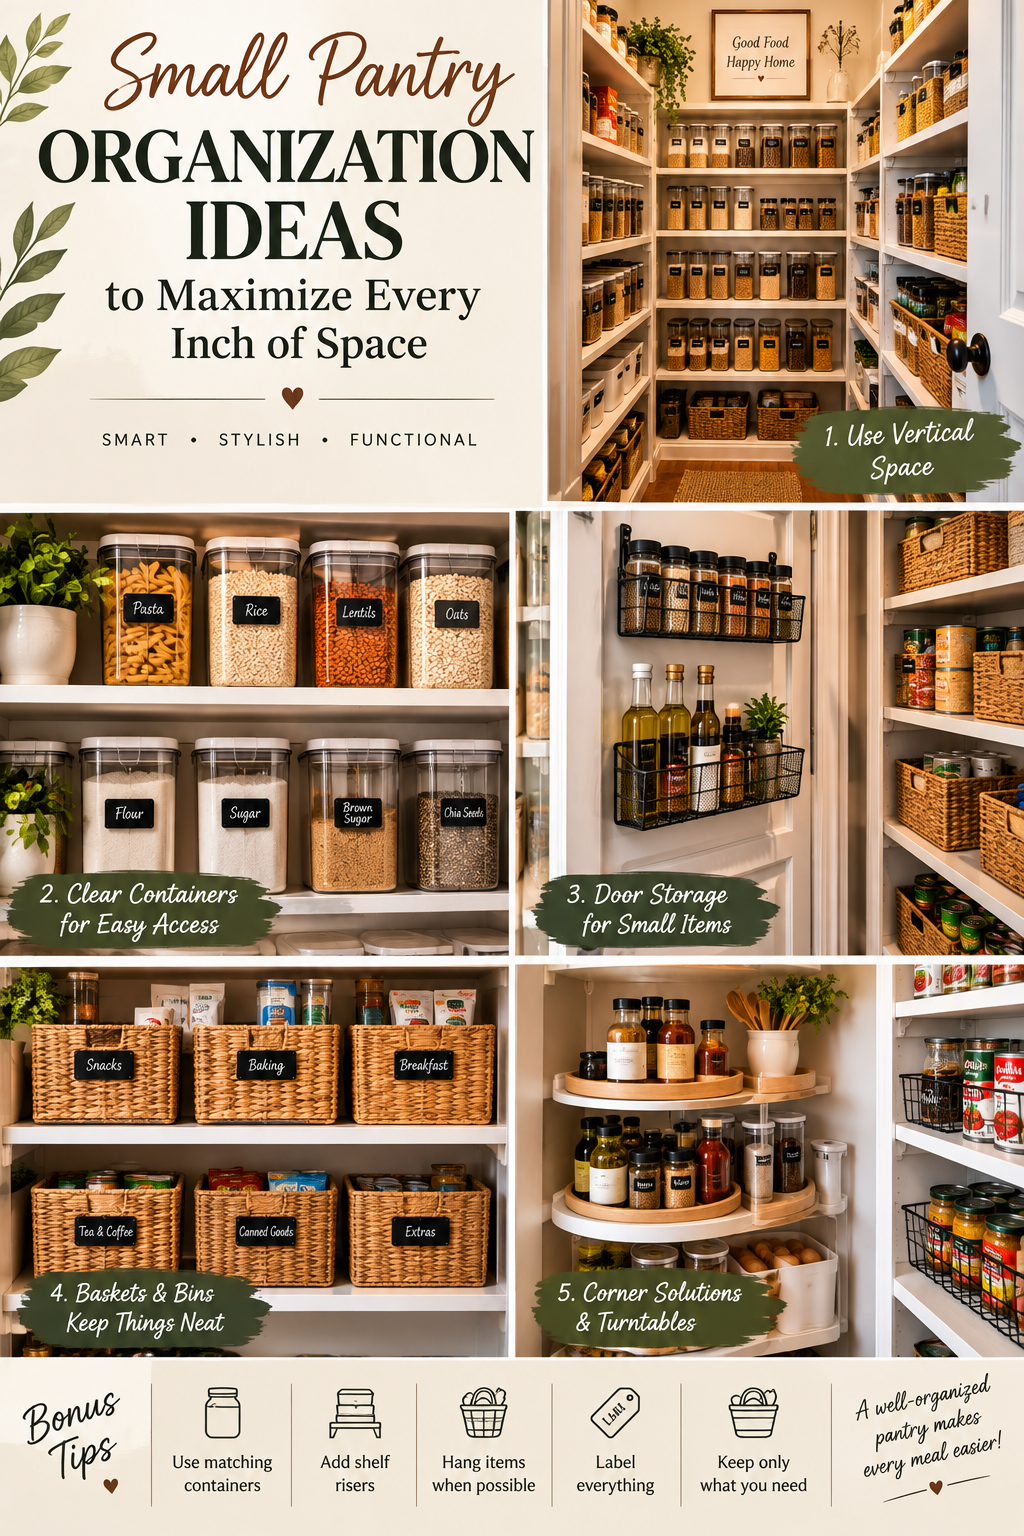
A small pantry can be one of the hardest spaces in the kitchen to keep organized. There may be plenty of food, but somehow there never seems to be enough room for everything. Cereal boxes become stacked towers, cans disappear behind bags, spices get pushed into dark corners, and items you know you bought seem to vanish completely.
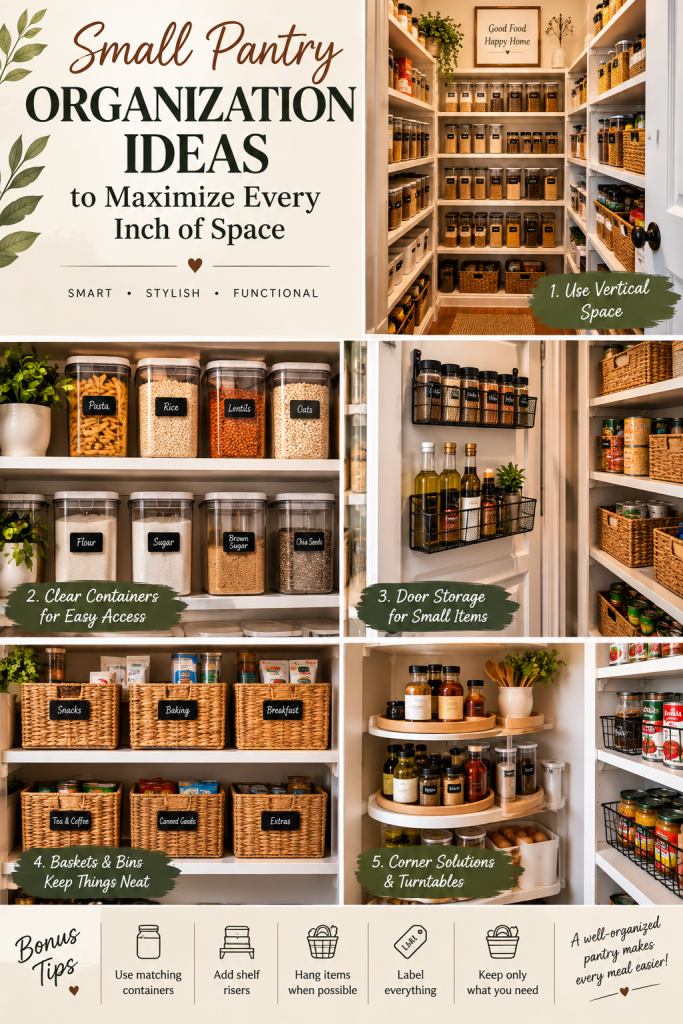
The good news is that you do not need a huge walk-in pantry to create an organized and functional storage space. The secret is to stop thinking only about the floor area and start thinking about every available inch of height, depth, door space, corners, and shelf space.
A well-organized small pantry should make everyday life easier. You should be able to see what you have, quickly grab what you need, and return items to their proper place without having to reorganize the entire pantry every time you shop.
Before buying containers, baskets, or expensive storage systems, start by measuring the pantry and removing unnecessary items. Professional organizing advice consistently recommends decluttering first because adding more organizers to an overcrowded pantry can simply create another layer of clutter.
The following 10 small pantry organization ideas will help you maximize every inch while creating a pantry that looks clean, attractive, and easy to maintain.
1. Use Adjustable Shelving to Maximize Vertical Space
One of the biggest problems in a small pantry is wasted vertical space.

Many pantry shelves are installed with large gaps between them. This may look spacious at first, but it often means that several inches of usable space are sitting completely empty above your food containers.
Adjustable shelving is one of the most effective ways to solve this problem.
Instead of having one shelf with cereal boxes standing underneath a huge empty gap, you can add another shelf or adjust the existing shelves so that each level matches the height of the items you actually store.
Start by measuring the height of your pantry from floor to ceiling.
Then measure the height of your most frequently stored items.
Think about:
- Cereal boxes
- Pasta containers
- Canned goods
- Snack bags
- Baking supplies
- Jars
- Bottles
- Small appliances
- Food storage containers
The goal is not to make every shelf exactly the same height.
Instead, create different shelf heights based on the categories you need to store.
For example, cereal boxes might need a taller section while canned goods can use a much shorter space. Baking containers may require medium-height shelves, while small snack bins can fit into compact spaces.
This allows you to use vertical space instead of leaving large empty gaps.
If your pantry has a very high ceiling, reserve the highest shelves for items you rarely use. Holiday baking supplies, specialty serving pieces, extra paper products, and occasional appliances can live higher up.
Everyday foods should remain between approximately waist and eye level so they are easy to reach.
If you cannot install permanent shelving, freestanding shelf risers can provide a similar effect. These small platforms allow you to create a second level inside an existing shelf.
For example, instead of placing cans in one flat row, place a riser toward the back. You can then put smaller cans underneath or in front while still keeping labels visible.
The same approach works for jars, sauces, spices, and small containers.
Another clever option is a narrow rolling cart if you have unused vertical space beside or near the pantry. A slim cart can hold oils, sauces, baking supplies, or snacks while remaining easy to move.
The important thing is to think vertically.
A small pantry may not have much floor space, but it often has far more vertical storage potential than you realize.
Budget tip: Before purchasing an expensive custom shelving system, try inexpensive shelf risers or adjustable organizers. They can dramatically increase usable space without remodeling.
Best for: Narrow closets, reach-in pantries, cabinet pantries, and kitchens with tall unused shelves.
2. Create Dedicated Pantry Zones
One of the simplest ways to make a small pantry feel larger is to stop treating it as one giant storage area.
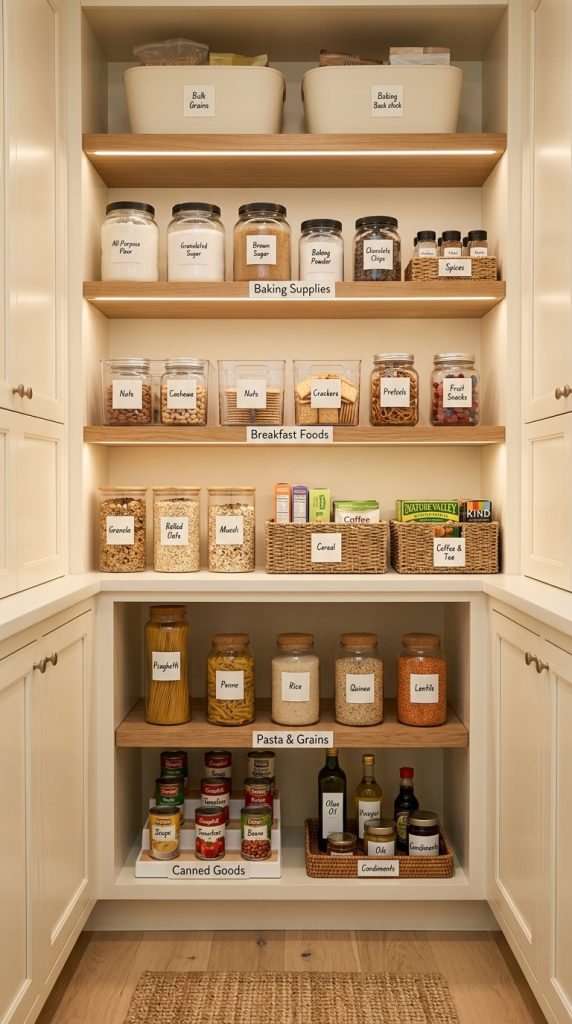
Instead, divide it into clear zones.
A zone is simply a designated area for a particular category of food or kitchen supplies.
For example, you could create:
- Breakfast zone
- Baking zone
- Snack zone
- Pasta and grains zone
- Canned food zone
- Cooking essentials zone
- Beverage zone
- Backstock zone
The exact categories should depend on your household.
If your family eats cereal and oatmeal every morning, the breakfast zone should be easy to reach.
If you bake frequently, flour, sugar, baking powder, chocolate chips, and decorating supplies should live together.
The goal is to organize the pantry around how you actually use your kitchen, rather than simply arranging objects according to their shape.
Place frequently used items at eye level.
Less frequently used products can go on higher or lower shelves.
Heavy items should generally be stored lower and securely, while lightweight items can be placed higher.
This approach also makes grocery shopping easier.
When similar products are grouped together, you can quickly see what you already have.
For example, if all your pasta is stored in one clear bin, you can immediately see whether you need spaghetti or penne before buying another package.
Without zones, pantry items often migrate into empty spaces.
A half-used bag of rice gets placed beside cereal because there happens to be room. A box of crackers gets pushed behind the flour. A can of tomatoes ends up on the snack shelf.
Over time, the pantry becomes difficult to understand.
Zones prevent this.
You can even label each shelf.
Simple labels such as Breakfast, Snacks, Baking, Pasta, and Cans are enough.
You do not need elaborate labels on every individual item.
The most important thing is that everyone in the household knows where things belong.
This is especially helpful for children. A clearly labeled snack bin can allow them to choose snacks without opening every pantry door and moving everything around.
A zone system also makes restocking easier.
When you return from grocery shopping, you do not have to search for where everything belongs. You already have a designated location.
Recent pantry organization advice similarly recommends organizing around routines and categories rather than simply filling containers for visual appeal.
Budget tip: Use inexpensive baskets, cardboard boxes covered with decorative paper, or existing containers as temporary zone bins.
Best for: Families, busy kitchens, small closets, and pantries that frequently become messy after grocery shopping.
3. Turn the Pantry Door Into Extra Storage
The pantry door is often one of the most overlooked storage opportunities in a small kitchen.
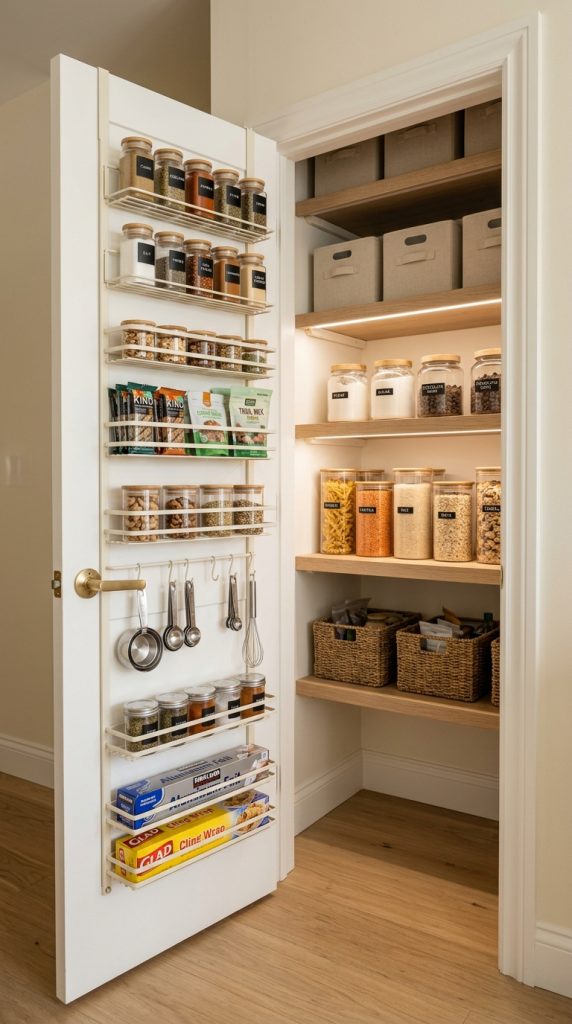
Think of the inside of the door as an extra wall.
You can use it for lightweight items that would otherwise consume valuable shelf space.
An over-the-door organizer can hold:
- Spices
- Snack packets
- Sauce packets
- Small baking supplies
- Foil
- Plastic wrap
- Sandwich bags
- Measuring tools
- Small jars
- Tea
- Coffee accessories
The key is to choose items that are relatively lightweight and frequently used.
Before installing anything, measure the door and check how much clearance exists between the door and the pantry shelves.
This is extremely important.
An organizer that is too deep may prevent the door from closing or cause stored items to collide with the shelves.
Choose a narrow organizer for a small pantry.
Tiered baskets are particularly useful because they allow you to see the contents instead of creating another hidden storage layer.
You can also use small adhesive hooks on the inside of the door for lightweight items such as measuring spoons or reusable shopping bags, provided the surface and product are suitable for the load.
For a more permanent solution, a slim wall-mounted rack can provide even more storage.
If your pantry door has a flat interior surface, you could also create a simple magnetic storage area for small metal items.
Another inexpensive idea is to use a hanging pocket organizer.
These organizers are usually associated with bedrooms or closets, but the smaller pockets can work well for lightweight pantry supplies.
The advantage of door storage is that it adds capacity without taking away shelf space.
This makes it particularly valuable in extremely narrow pantries.
However, avoid turning the door into a second cluttered pantry.
Keep the contents limited to items that benefit from quick access.
The door should support your organization system rather than become another dumping zone.
Budget tip: Look for inexpensive over-the-door shoe organizers or narrow hanging organizers that can be repurposed for lightweight pantry items.
Best for: Narrow pantries, apartment kitchens, cabinet pantries, and renters who cannot remodel.
4. Use Clear Stackable Containers for Dry Goods
Packaging can take up more space than the food inside it.
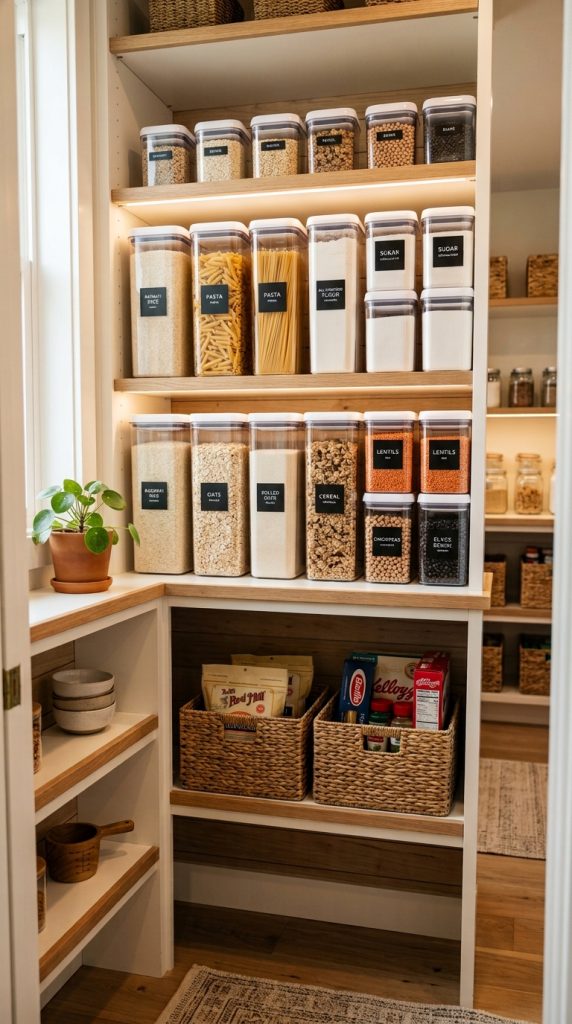
Large cereal boxes, floppy bags, half-empty pasta packages, and irregular flour bags can create a surprising amount of wasted space.
Clear containers can solve several problems at once.
They make the contents visible, allow you to stack similar items, and create more consistent shapes.
Good candidates for containers include:
- Rice
- Pasta
- Flour
- Sugar
- Oats
- Cereal
- Lentils
- Beans
- Crackers
- Baking ingredients
However, you do not need to transfer every food item into a container.
Selective decanting is often more practical.
Focus on foods that you purchase regularly and that benefit from being stored in uniform containers.
For example, if your pantry contains several types of pasta, matching containers can make the shelf much easier to navigate.
Choose containers based on your pantry dimensions.
This is extremely important.
Do not buy a large container set first and then try to force it into your pantry.
Measure the shelf width, depth, and vertical clearance first.
The outside dimensions of the container matter more than its advertised capacity.
Stackable rectangular containers are often more efficient than round ones because they use shelf space with fewer gaps.
Clear containers also make it easier to monitor quantities.
When you can see that your rice container is nearly empty, you know it is time to add rice to the shopping list.
But remember to preserve important food information.
If you transfer food out of its original packaging, keep relevant cooking, allergy, ingredient, lot, and date information available. Label the container clearly and follow appropriate storage instructions for the particular food.
For long-term dry goods, use clean, dry, food-safe containers with appropriate seals.
Do not pour new food into a container without checking what remains at the bottom.
Use the older food first and clean the container as needed before refilling.
This simple habit keeps your storage system more hygienic and prevents old food from getting forgotten.
Budget tip: You do not need a matching designer container set. Start with three or four high-use foods and expand gradually.
Best for: Dry goods, narrow shelves, families who buy pantry staples regularly, and anyone who wants better visibility.
5. Add Tiered Risers for Cans and Jars
Cans are some of the easiest pantry items to organize badly.

Because cans are short, they often get pushed toward the back of deep shelves where they become almost impossible to see.
A tiered shelf riser changes this.
Instead of placing cans in one flat row, the riser creates multiple levels.
This allows the labels of the cans behind to remain visible.
For example, a three-level riser can display:
- Tomato products
- Beans
- Soups
- Vegetables
- Coconut milk
- Tuna
- Sauces
The most frequently used cans should be placed at the easiest-to-reach level.
Heavier canned goods can go on lower shelves.
You can also create a dedicated canned-food zone.
Group similar items together rather than mixing every type of can.
For example, place tomatoes together, beans together, and soups together.
This reduces visual clutter.
Another useful strategy is to rotate your stock.
When you buy new cans, place them behind older cans rather than in front.
This helps you use older products first.
A small pantry can also benefit from narrow can dispensers if you purchase large quantities of canned food.
However, measure carefully before buying one.
A large organizer can actually waste space if your pantry is narrow.
Sometimes two small risers are more useful than one large unit.
You can also use a tiered riser for jars of spices, sauces, and spreads.
If you have deep shelves, consider combining a riser with a pull-out bin.
The riser keeps the labels visible while the bin allows you to remove the entire group when needed.
This is particularly useful when you have many small jars.
Budget tip: Simple acrylic, wire, or bamboo shelf risers can create multiple levels without changing the shelving itself.
Best for: Cans, jars, sauces, spices, and small pantry products.
6. Make Deep Shelves Easier With Pull-Out Bins and Baskets
Deep shelves can create some of the biggest organization problems in a small pantry.

The front looks organized while the back becomes a hidden storage area.
You might know something is there, but reaching it requires moving five other things first.
Pull-out bins solve this problem.
Instead of reaching into the back of the shelf, you pull the entire bin toward you.
This turns a deep shelf into an accessible drawer.
Use one bin for each category.
For example:
Bin 1: Snacks
Bin 2: Baking supplies
Bin 3: Pasta
Bin 4: Breakfast foods
Bin 5: Backstock
This system works especially well for small bags and packages that are difficult to stack neatly.
Choose bins with handles or an open front so you can easily pull them forward.
Do not make the bins too heavy.
If a container becomes difficult to lift or slide, you are less likely to use the system correctly.
Another option is a pull-out drawer system installed directly into the pantry.
This can be particularly effective for deep cabinet-style pantries.
Pull-out systems are increasingly recommended for deep kitchen storage because they prevent items from becoming buried at the back.
For a budget version, use inexpensive baskets or plastic bins that fit the shelf width.
Label each one clearly.
If you have a very deep shelf, you can use one bin toward the back for backstock and keep daily-use products toward the front.
The important thing is to avoid creating two completely unorganized rows.
Every part of the shelf should have a purpose.
If something is rarely used, it can occupy the back.
If something is used every day, keep it at the front.
Budget tip: Before buying expensive pull-out hardware, test the system with inexpensive baskets. If it works well for your routine, consider upgrading later.
Best for: Deep pantry shelves, cabinet pantries, snack storage, and backstock.
7. Use Lazy Susans for Awkward Corners
Corners are often the most frustrating part of a small pantry.
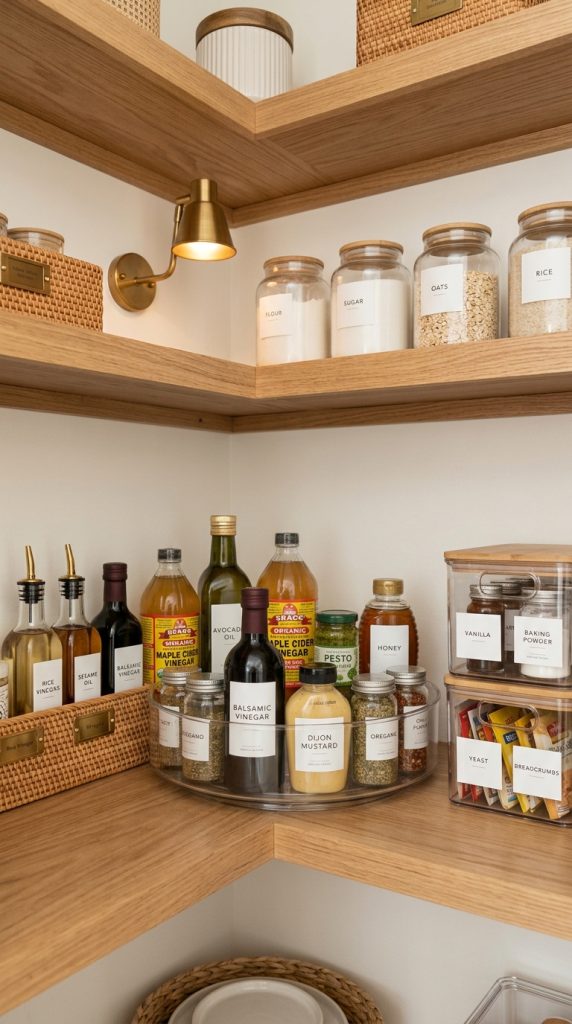
Bottles disappear behind one another. Small jars become impossible to reach. You may end up removing half the shelf just to grab one item.
A lazy Susan can make these areas much easier to use.
Because it rotates, you can bring the item you need toward you instead of reaching behind everything.
Lazy Susans are especially useful for:
- Oils
- Vinegar
- Sauces
- Condiments
- Small jars
- Spreads
- Baking extracts
- Drink syrups
However, they are not ideal for every pantry.
A round turntable placed on a narrow rectangular shelf can actually waste valuable corner space.
Measure the shelf before purchasing one.
Choose the smallest size that comfortably fits the products you want to store.
You can also use separate turntables for different categories.
For example, one could hold sauces while another holds baking supplies.
Avoid putting too many unrelated products on one spinner.
If the turntable contains oils, spices, jars, and cans all together, it becomes difficult to understand.
Instead, give each rotating tray one clear purpose.
You can label the tray itself or the shelf area around it.
For tall bottles, choose a turntable with a raised edge.
This helps prevent bottles from sliding off when the unit rotates.
Lazy Susans can also be helpful on upper shelves where reaching the back is difficult.
But always make sure the shelf is strong enough for the weight of the products.
Budget tip: You only need one or two turntables to transform difficult areas. Do not buy one for every shelf.
Best for: Corners, deep shelves, bottles, sauces, and small jars.
8. Create a Dedicated Snack Station
If snacks are one of the main reasons your pantry becomes messy, give them their own zone.
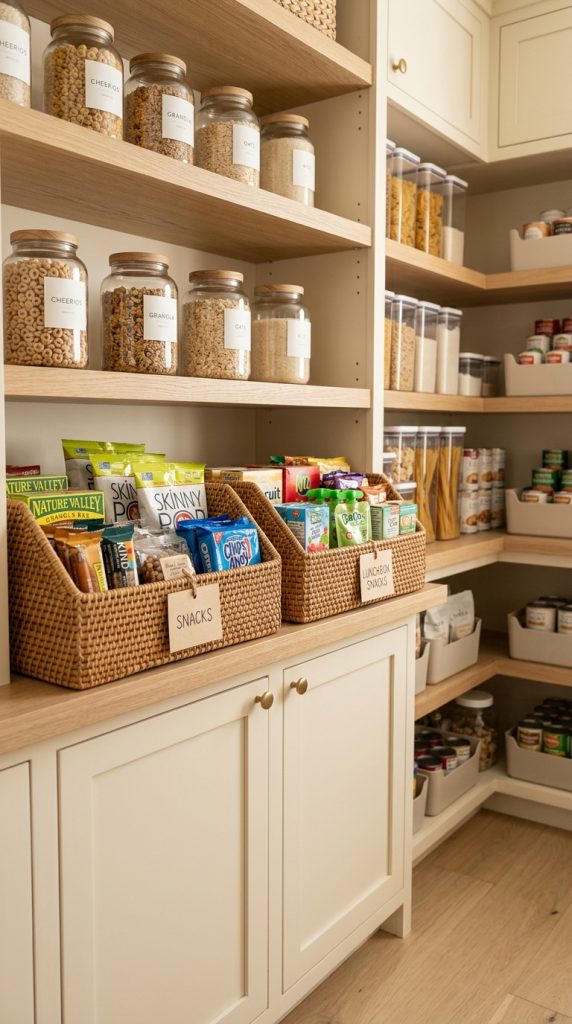
A snack station can save an enormous amount of space because individual packages no longer need to be scattered throughout the pantry.
Choose one shelf or pull-out bin.
Place commonly eaten snacks together.
For example:
- Granola bars
- Crackers
- Popcorn
- Cookies
- Nuts
- Fruit snacks
- Small packets
- Lunchbox snacks
Use one or two open bins rather than many small containers.
An open-front basket allows family members to see what is available without pulling everything out.
For children, place the snack bin at a reachable height.
This allows them to choose from one designated location rather than searching through the entire pantry.
You can label it simply:
Snacks
or divide it into:
Everyday Snacks
and
Lunchbox Snacks
The exact system should match your household.
A snack station also makes grocery shopping easier.
You can see when the bin is becoming empty and know what needs to be replenished.
If you buy large multipacks, separate only what you need for immediate use and keep the remaining stock in a designated backstock area.
This prevents your daily-use shelf from becoming overloaded.
For a visually appealing pantry, choose one consistent basket style.
Natural woven baskets can create a warm look, while clear bins provide maximum visibility.
White bins create a clean minimalist appearance.
You do not need to spend a lot.
Even inexpensive plastic bins can look attractive when they are arranged consistently and labeled neatly.
Budget tip: Repurpose sturdy shoe boxes or small cardboard boxes by covering them with neutral paper or contact paper.
Best for: Families with children, lunchbox preparation, snack-heavy households, and busy kitchens.
9. Use the Floor and Lowest Shelves for Heavy or Bulky Items
The floor of a pantry is often treated as wasted space.
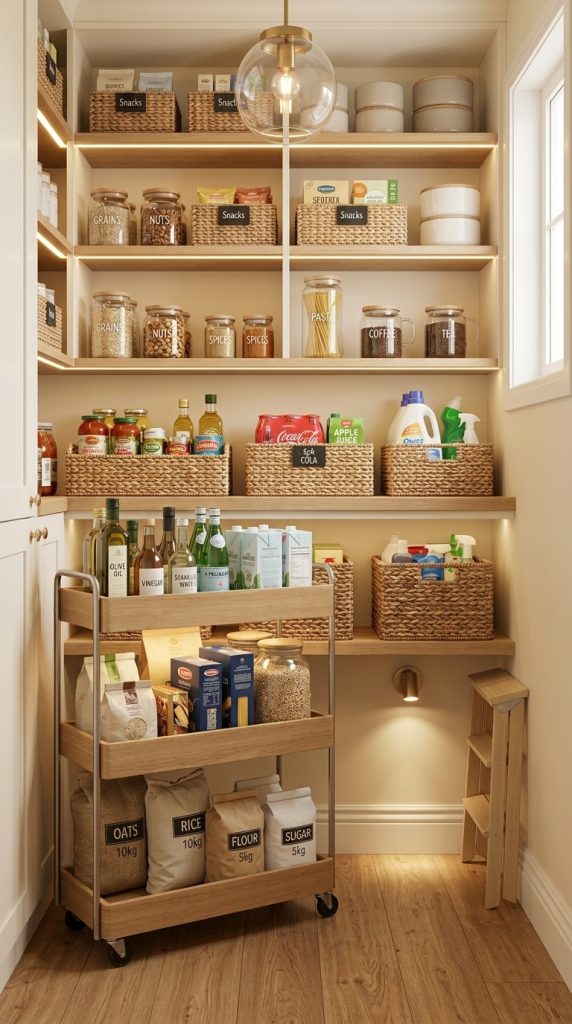
But with the right system, it can become one of the most useful storage zones.
The key is not to simply place random bags and boxes on the floor.
Instead, create a specific purpose for the lowest area.
Good floor-level storage items include:
- Bulk rice
- Large flour bags
- Bottled drinks
- Extra paper products
- Large cooking appliances
- Refill packages
- Pet food, if stored appropriately
- Large storage containers
Use a sturdy basket, rolling cart, or low bin to keep these products contained.
A rolling cart can be particularly useful in a narrow pantry.
You can pull it forward when needed and push it back when finished.
For a very small pantry, choose a slim cart that fits the available clearance.
If you have children, avoid placing heavy items where they could fall or become difficult to handle.
Use the lowest shelves for products that are heavy but frequently needed.
For example, a large bag of rice may be safer and easier to access from a lower shelf than from an overhead shelf.
You can also use the floor for a small step stool, provided there is enough clearance.
A folding step stool can help you safely access upper shelves without taking up too much space.
Another useful strategy is to reserve the very top shelf for rarely used items and the bottom area for heavy items.
This creates a logical weight distribution.
Do not stack extremely heavy objects high simply because there is room.
Your organization system should improve accessibility and safety, not just increase capacity.
Budget tip: A simple sturdy basket can turn an unattractive floor pile into a clean storage zone.
Best for: Bulk purchases, large packages, appliances, drinks, and heavy pantry items.
10. Build a Simple System That Stays Organized
The final and perhaps most important small pantry organization idea is to create a system you can actually maintain.
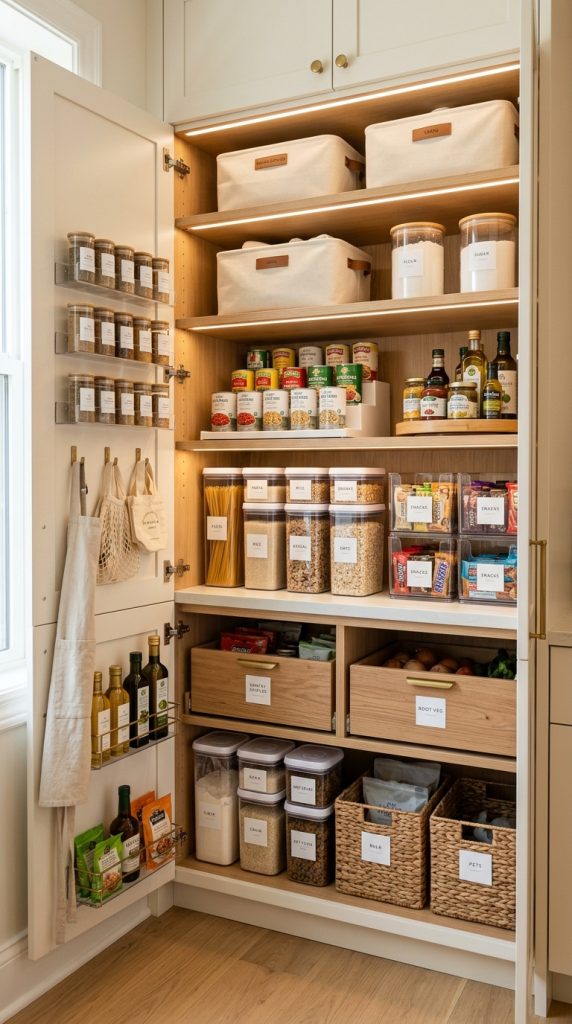
A pantry can look perfect immediately after organizing day.
The real challenge is keeping it organized two weeks later.
The solution is to make your system simple enough that putting something away takes only a few seconds.
Every item should have a clear home.
When you return from grocery shopping, do not simply place new items wherever there is an empty space.
Instead, rotate older products forward and place newer products behind them.
This is often called a first-in, first-out approach.
It helps you use older items before newer ones and makes it easier to see what you already have.
Do a quick pantry reset once a week.
You do not need to remove everything.
Simply:
- Return misplaced items
- Combine duplicate open packages when appropriate
- Move older products forward
- Check low-stock items
- Wipe obvious spills
- Straighten bins
- Remove empty packaging
This may take only five to ten minutes.
You can also keep a small shopping list or inventory note near the pantry.
When something runs low, add it immediately.
This helps prevent accidental duplicate purchases.
Overbuying is one of the reasons pantries become overcrowded. Current organizing experts specifically recommend reducing unnecessary stockpiling and keeping track of what you already have.
Another important rule is to avoid buying storage containers simply because they look beautiful.
First determine what problem you are solving.
Do you need visibility?
Choose clear containers.
Do you need accessibility?
Choose pull-out bins.
Do you need more vertical space?
Choose shelf risers.
Do you need corner access?
Choose a turntable.
Do you need category separation?
Choose baskets or bins.
The storage solution should follow the problem.
This prevents you from spending money on organizers that ultimately make the pantry less functional.
Finally, remember that your pantry does not have to look exactly like a professional organizing photograph.
It needs to work for your household.
If open bins work better than perfectly matching containers, use open bins.
If original packaging is easier for you, keep it.
If labels are helpful, label.
If labels become another chore, keep the system simpler.
The best pantry is not the one that looks perfect for one photograph.
It is the one that remains easy to use every day.
How to Organize a Small Pantry From Scratch
If your pantry is currently overflowing, do not try to reorganize it shelf by shelf while everything remains inside.
Start completely fresh.
Remove everything.
Place food on a nearby table, counter, or clean surface.
Then divide everything into broad categories.
You might have:
Breakfast
Snacks
Baking
Canned goods
Pasta and grains
Cooking ingredients
Drinks
Backstock
Miscellaneous
Now check what you actually have.
Remove empty packages and deal appropriately with food that is expired or no longer usable.
For unopened food that you know you will not use, consider donating it where appropriate.
Then clean the shelves.
This is the perfect time to measure.
Record:
- Shelf width
- Shelf depth
- Shelf height
- Door clearance
- Corner dimensions
- Floor clearance
Take photographs of the empty pantry before shopping for organizers.
This gives you a visual reference when comparing products.
Only after measuring should you purchase storage accessories.
This approach prevents one of the most common organization mistakes: buying containers first and discovering later that they do not fit.
The Best Small Pantry Layout for Maximum Efficiency
A practical small pantry can be divided vertically.
Eye-Level Zone
Use this area for everyday items.
Examples include:
- Cereal
- Coffee
- Snacks
- Pasta
- Frequently used ingredients
These should be the easiest things to reach.
Lower Zone
Use lower shelves for heavier products.
Examples:
- Cans
- Large jars
- Rice
- Flour
- Bulk packages
Upper Zone
Reserve the highest shelves for occasional items.
Examples:
- Holiday baking supplies
- Specialty ingredients
- Extra serving pieces
- Rarely used appliances
Door Zone
Use the door for small lightweight products.
Examples:
- Spices
- Wraps
- Snack packets
- Small jars
- Measuring tools
Floor Zone
Use the floor for large or heavy products that need stability.
This layout creates a natural flow and prevents you from placing everyday items in inconvenient locations.
Small Pantry Organization Mistakes to Avoid
One of the biggest mistakes is trying to fit too much into the pantry.
More storage does not automatically mean better organization.
If you own more food than the pantry can comfortably hold, adding another basket may only hide the problem.
Another mistake is purchasing oversized containers.
Large containers can look beautiful but may consume more space than the original packaging.
Always consider the actual footprint.
Another common mistake is putting frequently used items on high shelves.
If you use something every morning, it should not require a step stool.
Avoid creating deep rows of food without a way to access the back.
If you cannot see or reach something, it is effectively wasted storage.
Do not overuse turntables either.
They are useful for certain shapes and locations but can waste space on narrow rectangular shelves.
Finally, avoid organizing purely for appearance.
Your pantry should be beautiful, but functionality comes first.
How to Make a Small Pantry Look Beautiful
A functional pantry can also be attractive.
You do not need a luxury renovation.
Start by choosing one simple visual direction.
For example:
Warm and Natural:
Wood, woven baskets, cream labels, glass containers, warm lighting.
Modern Minimalist:
Clear containers, white bins, black labels, simple shelving.
Soft Neutral:
Cream baskets, light wood, glass jars, beige labels.
Modern Farmhouse:
Wooden crates, woven baskets, black labels, glass jars.
Keep the visual system consistent.
If you use clear containers, use them selectively and keep labels consistent.
If you use baskets, choose similar colors or materials.
Add lighting if the pantry is dark.
Rechargeable LED shelf lights can make a huge difference because they illuminate areas that are otherwise difficult to see.
Good lighting is especially valuable in small pantries because it makes every shelf more usable. Current pantry design advice also highlights integrated or rechargeable lighting as a practical upgrade for darker storage areas.
Final Thoughts
A small pantry does not have to feel cramped, chaotic, or impossible to maintain.
The key is to stop thinking only about the amount of shelf space you have and start looking at the unused vertical, door, corner, depth, and floor space.
Adjustable shelving can capture vertical space.
Labeled zones can make the pantry easier to understand.
Door organizers can create an extra storage surface.
Clear containers can make dry goods easier to see.
Tiered risers can make cans visible.
Pull-out bins can solve deep-shelf problems.
Lazy Susans can make awkward corners accessible.
Snack stations can control small packages.
Lower shelves and floor bins can handle bulky products.
And a simple weekly reset can keep the entire system working.
Most importantly, you do not need to buy everything at once.
Start with the biggest problem in your pantry.
If cans are impossible to see, add a riser.
If snacks are taking over, create a snack bin.
If the back of the shelf is disappearing, use pull-out baskets.
If vertical space is wasted, add a shelf riser.
If the door is empty, turn it into storage.
Small changes can create a surprisingly large improvement.
The goal is not simply to make your pantry look organized.
The goal is to make every inch work harder while making everyday cooking, grocery shopping, and meal preparation easier.
With the right layout and a few thoughtful storage solutions, even the smallest pantry can become a clean, efficient, attractive part of your kitchen.
Leave a Reply