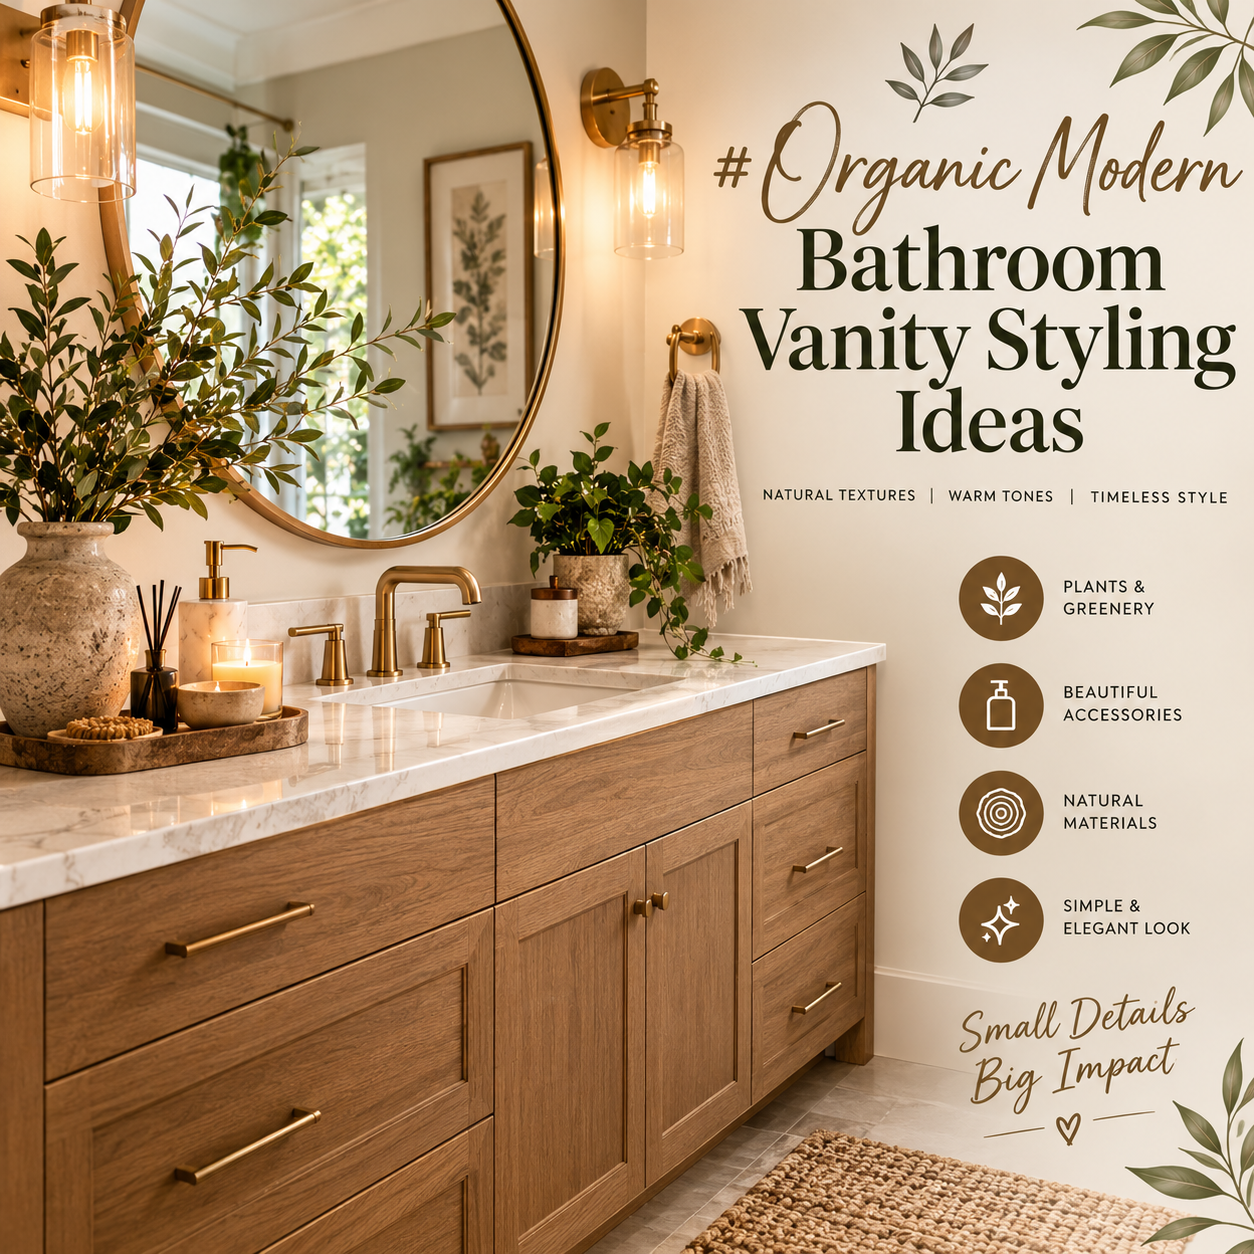
The bathroom has evolved from a purely utilitarian, task-driven space into one of the most vital wellness sanctuaries within the contemporary home. In high-end residential architecture and mindful interior design, the morning and evening routines are no longer viewed merely as functional hygiene habits; they are regarded as deeply therapeutic daily rituals that bookend the modern human experience. Consequently, the physical environment in which these moments unfold wields immense influence over our emotional equilibrium, cognitive clarity, and physical nervous system. For decades, commercial bathroom design leaned heavily into hyper-clinical, ultra-sterile, and industrial aesthetics. We were surrounded by high-gloss synthetic polymers, icy polished chrome fixtures, expansive reflective white subway tiles, and stark blue-toned artificial illumination. While this clinical approach projected cleanliness, it frequently rendered the master bath cold, unwelcoming, and emotionally detached—evoking the atmosphere of a commercial laboratory or medical facility rather than a nurturing retreat.
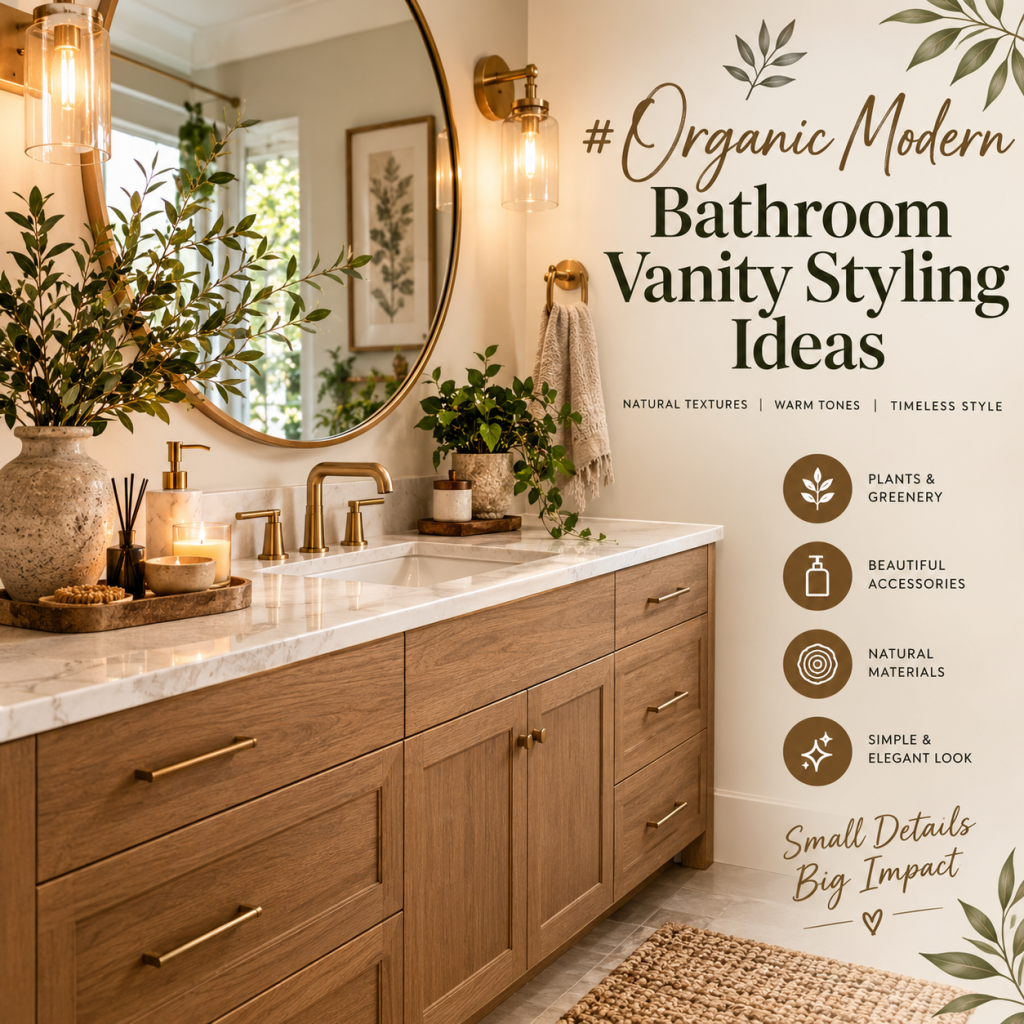
The organic modern design movement emerged as a conscious, restorative response to this stark architectural sterility. At its philosophical and aesthetic foundation, organic modernism seeks to dissolve the harsh boundary between human-built indoor spaces and the grounding calm of the natural world. It achieves this balance through the intentional interplay between crisp modern architectural geometry and raw, tactile, earth-derived materiality. Rather than introducing ornamental clutter or superficial decorations, the organic modern ethos celebrates the quiet elegance of genuine, time-tested raw materials: the porous cavities of volcanic travertine, the rich interlocking grain of sustainably harvested white oak, the living and evolving golden warmth of unlacquered brass, the tactile unevenness of hand-thrown stoneware ceramics, and the organic asymmetry of live botanicals. In this harmonious environment, every single object serves an authentic functional purpose while simultaneously delivering a grounded tactile and visual delight.
Within the architecture of the bathroom, the vanity serves as the absolute emotional, structural, and aesthetic anchor of the entire space. It is the visual focal point that immediately commands attention upon entering the room, and it is the physical workstation where we interact directly with running water, grooming tools, and sensory self-care formulations. Yet, styling an organic modern vanity is one of the most deceptively complex disciplines in residential interior design. Because a bathroom vanity must endure constant splashing water, fluctuating humidity levels, daily soap residue, and tight spatial constraints, styling cannot simply consist of arranging decorative curios on a counter. True mastery lies in achieving a delicate balance between rigorous spatial ergonomics, daily practicality, and artful composition. A vanity top crowded with excessive objects quickly becomes chaotic and difficult to clean; conversely, a vanity stripped entirely bare feels vacant, austere, and uninviting.
Achieving a Pinterest-worthy, spa-caliber organic modern vanity requires a disciplined design methodology rooted in functional zoning, textural layering, tonal restraint, and lighting architecture. Every surface item must be curated with intention, ensuring that daily necessities—such as hand soaps, lotions, jewelry dishes, and fresh towels—are elevated into sculptural moments rather than tolerated as visual clutter. By employing structural stone trays to define functional perimeters, integrating earthy ceramic catchalls to contain tiny grooming pieces, framing mirrors with warm indirect lighting, and celebrating artisanal textures like raw-edge waffle linens and sculptural branches, you create an environment that feels effortless, luxurious, and timeless. Furthermore, honoring the intrinsic qualities of honest materials—embracing the natural water-spotting patina of raw brass or the unique pores of unsealed stone—instills a sense of authentic, slow luxury that deepens with daily living. The following exhaustive, ten-part architectural masterclass provides the exact structural frameworks, material palettes, toolkits, and step-by-step methodologies needed to transform your bathroom vanity into a breathtaking organic modern haven.
1. Honed Travertine Slab Tray with Amber Glass Apothecary Bottles
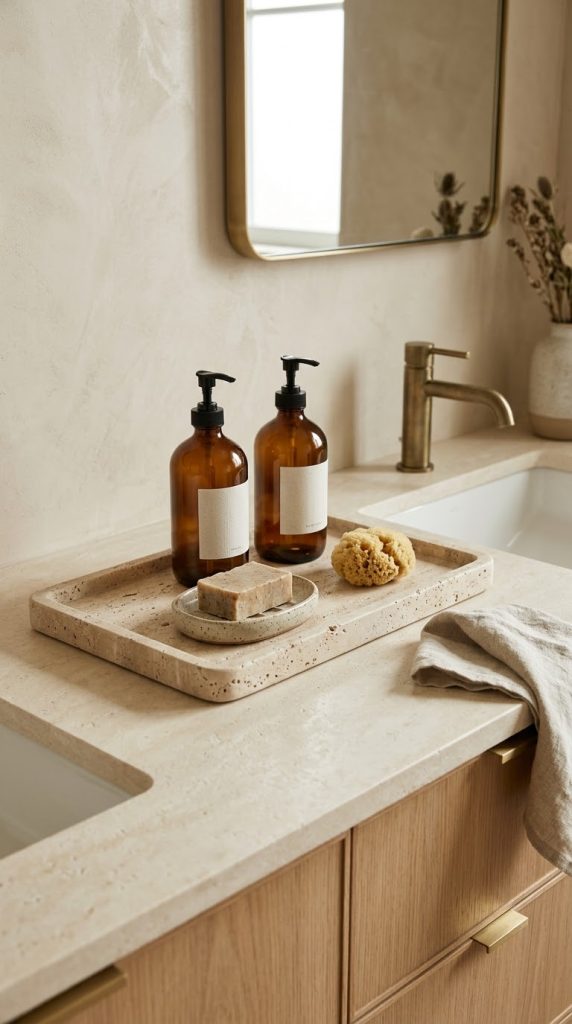
Travertine stands as one of the most influential architectural stones in modern organic interior design, celebrated for its warm limestone undertones and natural porous cavities that reflect ancient geology. Introducing a heavy, low-profile slab tray crafted from honed Roman travertine immediately establishes a grounded, structural foundation on smooth quartz, marble, or microcement countertops. This stone foundation prevents everyday countertop items from appearing scattered and disorganized, creating a dedicated visual zone that transforms standard grooming products into an intentional, gallery-worthy vignette.
The visual success of this styling layout relies on contrasting the stone’s matte, porous texture with the smooth, translucent warmth of amber glass apothecary vessels. Amber glass serves a dual purpose: practically, it shields natural botanical soaps and essential oils from light degradation; visually, it catches both natural window light and warm artificial vanity lighting, projecting golden, honey-colored reflections across the stone. By choosing bottles with uniform matte black or brushed raw brass pump heads, you eliminate loud commercial branding, creating a serene, cohesive visual rhythm across the sink area.
- Required Elements and Materials:
- 1 rectangular or pill-shaped honed Roman travertine tray (minimum 30 cm by 18 cm, matte unfilled finish)
- 2 matching 500 ml amber glass pump bottles with matte black or unlacquered brass pumps
- Minimalist waterproof linen or paper-look labels for hand wash and botanical lotion
- 1 small round hand-pinched ceramic soap dish with subtle reactive oatmeal glaze
- 1 block of artisanal cold-process olive oil or French goat milk soap with raw, deckled cut edges
- 1 piece of natural, porous Mediterranean sea silk sponge or raw volcanic pumice stone
- Clear miniature silicone surface bumper pads for the base of the stone tray
Begin by clearing the entire countertop and thoroughly cleaning the stone surface with a pH-neutral cleaner to eliminate any residual soap scum or mineral deposits. Affix four small silicone bumper pads to the underside corners of your travertine tray; this lifts the porous stone approximately two millimeters above the countertop, allowing stray water droplets to evaporate naturally and preventing moisture rings. Place the travertine tray on the dry side of your sink basin, approximately five to eight centimeters away from the faucet base to avoid direct water splashing. Fill your amber glass bottles with your preferred botanical hand wash and moisturizing lotion, affixing the labels precisely level on the front face of each bottle. Position the two glass bottles side by side at the back of the travertine tray, oriented toward the user. In the front corner of the tray, rest your small hand-pinched ceramic dish, placing the raw-cut block of artisanal soap inside. Complete the composition by tucking your natural sea sponge or raw pumice stone into the remaining open corner, creating a balanced triangular arrangement that blends structural stone with organic, marine-derived softness.
2. Sculptural Aged Ceramic Vessel with Single Botanical Branch
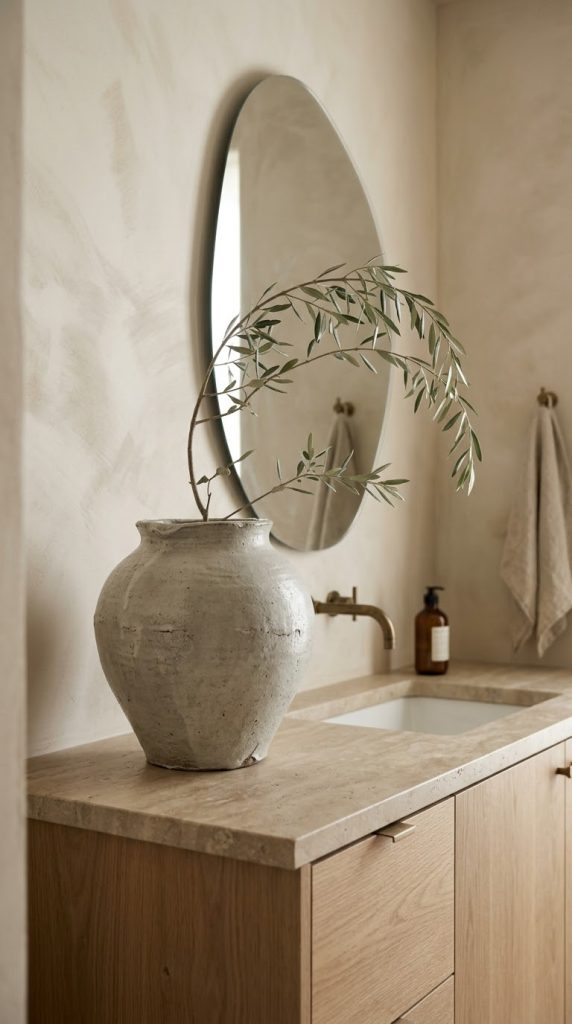
Symmetry is often overused in traditional interior design, resulting in environments that feel rigid, formulaic, and static. In the organic modern philosophy, dynamic asymmetrical balance—deeply rooted in the Japanese aesthetic of wabi-sabi—celebrates the beauty of natural irregularity and movement. Positioning an oversized, artisan-crafted ceramic vessel holding a single, dramatically arching botanical branch on one side of the vanity introduces living height and organic form, instantly breaking the rigid right angles of rectangular mirrors, backsplashes, and cabinetry.
The vessel itself should be treated as an art object rather than a generic flower vase. Seek out stoneware that displays clear evidence of tactile craftsmanship: heavy coarse grog clay bodies, rough volcanic ash glazes, subtle pitting, exposed sand textures, or chalky white mineral washes that mimic ancient terracotta. The botanical branch placed within must feel sculptural and architectural rather than dense, busy, or floral. An olive branch with its silver-green leaf undersides, a wild manzanita branch, a bare budding magnolia stem, or a delicate sprig of dried wild plum creates a striking, minimalist silhouette that moves gracefully across the plane of the vanity mirror.
- Required Elements and Materials:
- 1 heavy, hand-thrown stoneware or unglazed ceramic vase (25 cm to 35 cm in height, with a narrow or flared neck)
- 1 to 2 sculptural, architectural live or dried branches (such as Mediterranean olive, silver dollar eucalyptus, or bare quince)
- Heavy-duty bypass floral or branch pruners
- 1 brass floral pin frog (kenzan) sized to fit inside the vase base
- Clear non-staining surface protector pads for the ceramic base
- Floral preservative and clean, room-temperature filtered water (if using fresh cuttings)
Inspect your vanity layout to identify the visual dead zone—typically the wider counter margin on an offset single-sink vanity, or the central expanse between double basins. Affix protective pads to the underside of your ceramic vessel to prevent the coarse clay from scratching your countertop. Place the brass floral pin frog into the base of the vase, pressing it firmly to anchor it in place. Take your architectural branch and examine its natural curvature; trim the thick wooden stem at an aggressive forty-five-degree angle using sharp bypass pruners, ensuring the overall height of the branch reaches approximately one-and-a-half to two times the total height of the ceramic vase. Strip away any lower foliage or erratic side twigs that obscure the main wood line, keeping the stem clean and structural. Press the cut stem firmly into the brass pin frog, adjusting the angle so the branch arches organically upward and inward toward the center of the mirror, framing the reflection without blocking visibility.
3. Fluted White Oak Vanity Base with Integrated J-Pull Joinery
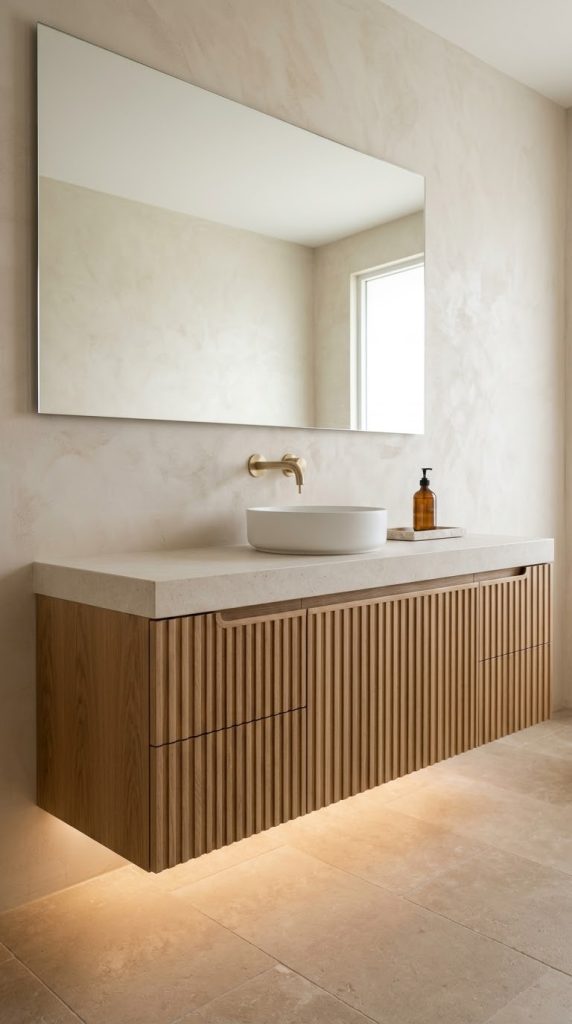
While countertop accessories provide essential finishing layers, the vanity base cabinet itself represents the single largest visual plane in the bathroom. Opting for a custom or semi-custom vanity constructed from quarter-sawn white oak featuring a vertically fluted or micro-tambour facade introduces rich architectural depth and natural warmth to the space. The repeating vertical timber slats create soft, delicate shadow lines that draw the eye upward toward the ceiling, establishing a rhythm that softens the hard, cool surfaces of surrounding porcelain, marble, and glass.
To preserve the authentic organic modern character, the timber must not be obscured by high-gloss synthetic varnishes or orange-toned stains that mask its natural beauty. The oak should be treated with an ultra-matte, non-yellowing low-VOC finish—such as a natural hardwax oil or an invisible waterborne polyurethane containing a subtle white pigment—preserving the dry, raw appearance of freshly milled European timber. Eliminating bulky, surface-mounted metal handles in favor of continuous, integrated J-pull channels or discreet finger-routed edge joinery keeps the cabinetry streamlined, ensuring that the natural wood grain and fluted relief remain the focal point.
- Required Elements and Materials:
- Custom or semi-custom vertically fluted white oak vanity cabinet with continuous integrated J-pull channels
- Matte low-VOC protective hardwax oil or invisible waterborne finish (zero-gloss sheen)
- Honed warm-white limestone, Taj Mahal quartzite, or Calacatta Gold quartz countertop with an eased edge profile
- Microfiber dusting wand and soft-bristled horsehair vacuum attachment for cleaning vertical grooves
- Natural plant-based timber conditioning balm formulated with beeswax and mineral oil
- Heavy-duty structural wall brackets for floating installations or concealed leveler feet for floor-mounted units
If installing a floating vanity, securely anchor the structural wooden chassis into wall studs using heavy-duty steel brackets, maintaining a clear clearance of thirty to forty centimeters between the bottom rail of the cabinet and the finished floor. This open reveal creates an expansive, airy feel that visually enlarges compact bathrooms while leaving room for indirect accent lighting. Position your honed stone countertop on top of the oak base, securing it with neutral-cure structural silicone adhesive. Keep the countertop surface minimal, allowing the warm timber facade below to anchor the design. Maintain the fluted timber slats weekly using a soft-bristled vacuum brush to gently clear household dust from the recesses, followed by a light application of matte timber conditioning balm every six months to nourish the wood and protect it against bathroom humidity.
4. Unlacquered Living Brass Wall-Mount Plumbing Fixtures
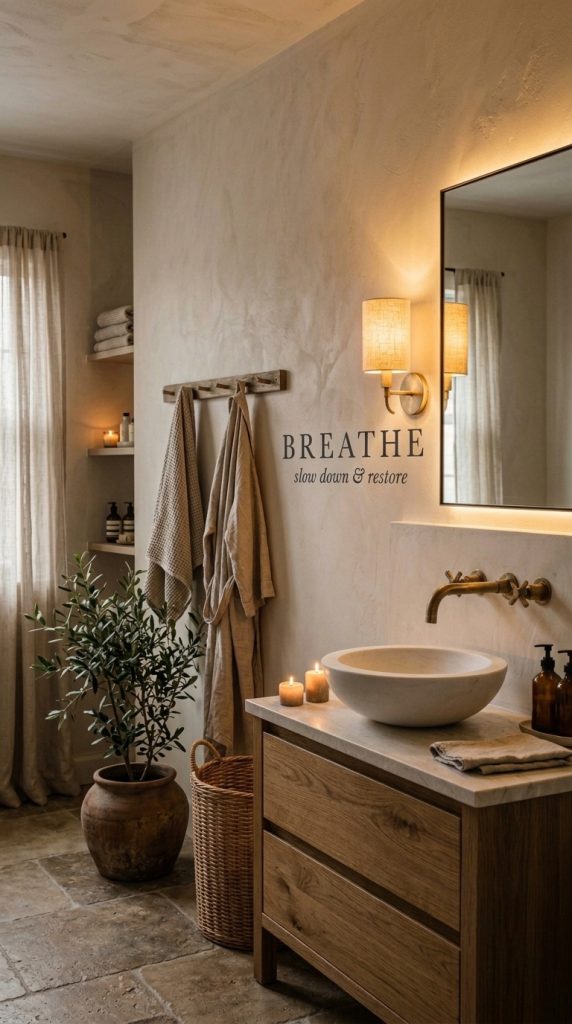
Plumbing fixtures are often described as the jewelry of the bathroom, and the metal finish you select establishes the tonal warmth for the entire room. In place of standard polished chrome, industrial matte black, or brushed nickel, the organic modern aesthetic champions unlacquered, raw living brass. Unlike mass-manufactured, chemically sealed lacquered metals that look artificial and unchanging, raw brass is an untreated alloy that naturally responds to moisture, oxygen, and the touch of daily use. Over time, it sheds its initial brightness, developing a complex patina marked by deep golden tones, soft undertones, and warm highlights.
Mounting the plumbing fixtures directly to the wall rather than through the countertop deck is both an aesthetic and functional choice. Elevating the faucet spout and control handles off the counter surface leaves the stone workspace completely clear, eliminating the stubborn calcium and soap scum buildup that typically gathers around deck-mounted faucet bases. This wall-mounted configuration showcases the natural backdrop—whether textured limewash paint, waterproof tadelakt plaster, or matte ceramic wall tiles—while providing generous clearance for washing hands and filling vessels.
- Required Elements and Materials:
- Wall-mounted unlacquered living brass gooseneck faucet spout with matching cross-handle or minimalist lever valves
- In-wall rough-in brass valve manifold with ceramic disc cartridges
- Matching unlacquered brass pop-up sink drain assembly and bottle trap
- Soft microfiber cleaning cloths
- Specialized brass polishing cream (optional, reserved only if you choose to reset the patina)
- Non-acidic, mild castile soap for daily surface maintenance
During the rough-in plumbing stage, mount the in-wall valve body so the finished faucet spout sits approximately twenty to twenty-five centimeters above the rim of your sink basin, ensuring water drops directly into the center of the drain to prevent splashing. Following final wall tiling or plastering, install the unlacquered brass trim plates and handles, sealing the wall penetrations with clear silicone to prevent moisture intrusion. To maintain the living finish, avoid harsh, abrasive chemical cleaners or acidic solutions, which will strip the natural patina and cause blotchy discoloration. Simply wipe the brass fixtures dry with a soft microfiber cloth at the end of each day; as droplets of water and natural skin oils contact the raw metal, the fixture will gracefully age, producing an authentic vintage character that feels timeless.
5. Asymmetrical Backlit Frameless Pebble Mirror
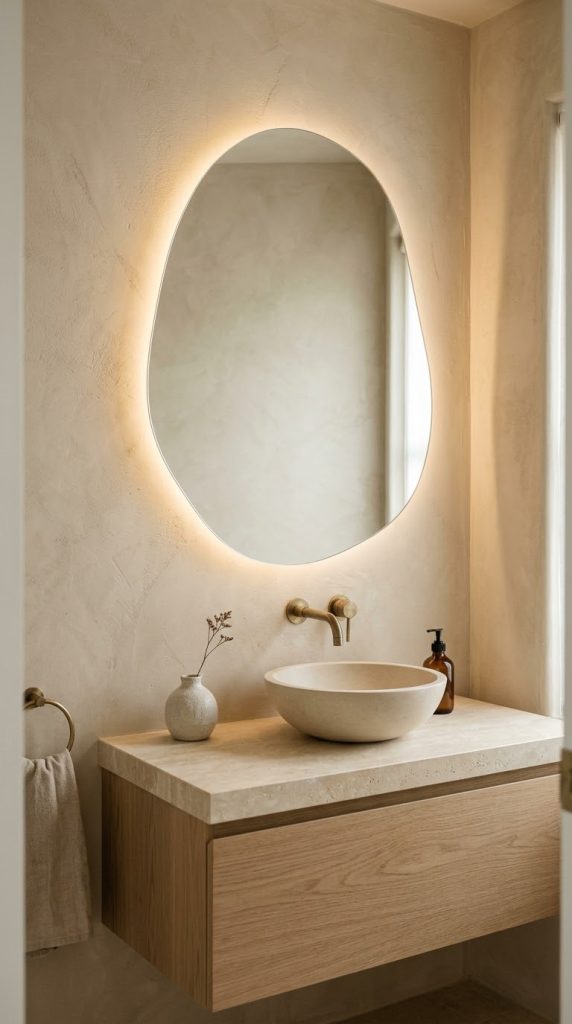
The mirror above a bathroom vanity is an essential functional fixture, but standard rectangular medicine cabinets or mass-produced square frames can feel rigid, predictable, and sharp. Swapping out conventional geometric shapes for an organically inspired, asymmetrical pebble, puddle, or river-rock mirror introduces soft, flowing contours that disrupt linear room architecture. The gentle, undulating perimeter mirrors the shapes found in river stones and natural shorelines, softening the straight lines of countertops, wall tiles, and cabinetry.
Integrating warm, indirect backlighting behind an asymmetrical mirror transforms it into an ethereal floating light sculpture. By concealing low-profile, high-CRI LED strips behind the beveled edge of the glass, light reflects softly against the wall rather than projecting forward into the user’s eyes. This indirect glow highlights natural textures in plaster, limestone, or handcrafted tiles, creating a relaxing, spa-like evening ambiance while providing balanced illumination across the face that eliminates harsh shadows.
- Required Elements and Materials:
- Custom or manufactured asymmetrical pebble-shaped frameless mirror with polished, pencil-eased edges
- Flexible high-CRI (95+) LED strip lighting (IP65 moisture-rated, strictly 2400K to 2700K ultra-warm white)
- Slimline aluminum LED channel extrusion with a continuous frosted milky diffuser lens
- In-wall low-voltage LED driver compatible with modern magnetic low-voltage dimmers
- Heavy-duty aluminum French cleat hanging system with anti-tip locking screws
- Glass-cleaning solution and lint-free microfiber polishing cloths
Map the placement of your asymmetrical mirror on the wall, positioning the widest portion of the organic curve at average eye level—typically around 150 to 160 centimeters from the finished floor to the center of the glass. Install the continuous aluminum LED channel around the structural wooden backing frame on the reverse side of the mirror, setting it five to eight centimeters inward from the outer glass perimeter so the light source remains hidden from side angles. Adhere the flexible LED strip inside the channel and snap the frosted diffuser into place to eliminate visible diode dots. Connect the low-voltage wiring to your recessed in-wall driver and secure the mirror to the wall studs using the heavy-duty French cleat. Wire the driver to an independent dimmer switch, allowing you to transition smoothly from crisp, functional morning illumination to a soft, amber nightlight.
6. Raw Textured Wabi-Sabi Stoneware Catchalls and Pinch Pots
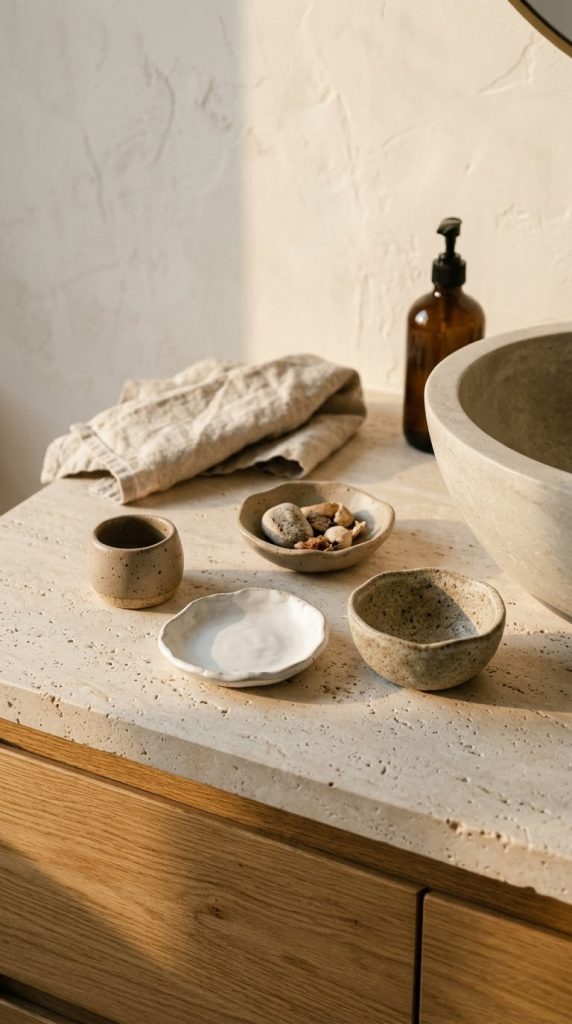
A functional bathroom vanity naturally hosts small, easily scattered personal items: rings, bracelets, hair pins, tweezers, natural sea-sponge pads, and matchsticks. When these tiny items are left resting directly on a wide countertop, they quickly create visual friction and make the entire space feel cluttered. Using small, hand-built wabi-sabi ceramic catchalls and pinch pots provides a dedicated, artful solution for organizing daily grooming accessories while introducing grounding, handmade texture to the vanity.
The charm of wabi-sabi ceramics lies in embracing organic imperfection. Rather than factory-perfect, mold-pressed porcelain bowls, seek out pieces shaped by hand using traditional pinching, slabbing, or wheel-throwing techniques. Look for irregular rims, visible finger indentations, exposed coarse sand grog, and reactive satin-matte glazes that pool in gentle cream, oatmeal, taupe, and unglazed terracotta tones. These subtle variations humanize the vanity environment, balancing the clean precision of manufactured stone countertops with artisanal craftsmanship.
- Required Elements and Materials:
- 2 to 3 hand-built stoneware pinch pots or shallow footed ceramic catchall dishes (ranging from 8 cm to 14 cm in diameter)
- Handcrafted stoneware match striker vessel with natural strike-on-bottle matchsticks
- Clear miniature silicone protective bumper pads for ceramic bases
- Plant-based linen cloths for dusting and wiping
- Neutral jewelry-safe velvet or linen fabric liners for inside the dishes (optional)
Select a curated grouping of two or three small ceramic vessels that share a cohesive, earthy color palette but feature varying heights and rim contours. Apply tiny clear silicone bumper pads to the underside of each piece to protect delicate countertop stone from scratches. Place the shallowest, widest footed dish close to the front edge of the vanity on your non-dominant side, creating an accessible landing zone for rings, earrings, and watches removed before washing. Position a deeper pinch pot slightly behind it to hold organic cotton rounds or reusable skincare pads. Complete the grouping by placing a small ceramic match striker alongside an amber glass or stoneware candle vessel, keeping the entire cluster contained within a compact ten-to-fifteen-centimeter footprint that feels organized, practical, and sculptural.
7. Cast Concrete or Carved River Stone Vessel Sink Basin
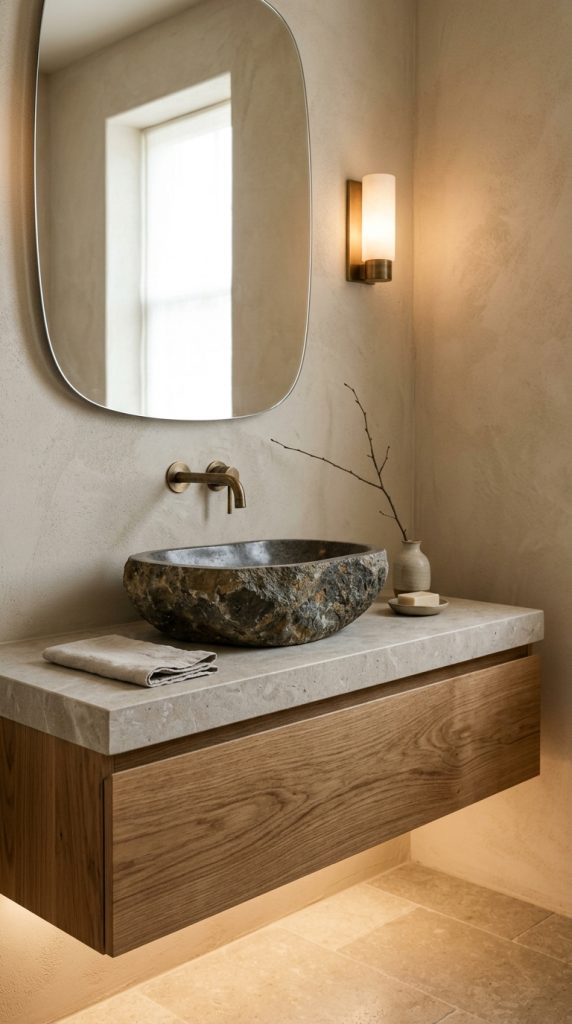
Replacing a standard, glossy white under-mount porcelain sink with a surface-mounted vessel basin made of cast concrete or hand-carved river stone turns the sink itself into an architectural centerpiece. Rising proudly above the flat horizontal plane of the vanity countertop, a vessel sink introduces rich three-dimensional volume, tactile depth, and a grounded geological presence to the bathroom.
An organic modern vessel basin should always feature a soft, non-reflective honed or matte finish. High-density, glass-fiber reinforced concrete (GFRC) allows for silky smooth, cast curves in muted, earth-inspired tones like sand, desert taupe, pale sage, and warm greige. Alternatively, a basin carved directly from a solid natural river boulder or honed volcanic basalt block showcases rough, chiseled outer surfaces contrasted against a silky, water-smoothed interior bowl. These natural variations break away from standard industrial fixtures, evoking the quiet beauty of water collecting in a natural mountain stream.
- Required Elements and Materials:
- Cast glass-fiber reinforced concrete (GFRC) or solid carved limestone/river rock vessel basin
- Professional penetrating stone and concrete breathable sealer (matte, zero-gloss, non-yellowing)
- Extended-height vessel-mount brass faucet or wall-mounted brass spout assembly
- Heavy-duty non-closing umbrella or grid brass sink drain assembly without overflow
- Neutral-cure, mold-resistant 100% silicone sealant for base installation
- Microfiber sponges and specialized pH-neutral concrete/stone cleansing wash
Prior to installation, apply two coats of a high-performance penetrating sealer to both the interior and exterior of your concrete or natural stone basin. This breathable barrier absorbs deeply into the stone pores, shielding it from water rings, toothpaste acids, and natural oils without creating an artificial, plastic-looking shine. Drill the appropriate drain clearance hole through your vanity countertop, positioning the basin so its centerline aligns with your faucet spout. Apply a discreet bead of clear, neutral-cure silicone adhesive around the base rim of the vessel, press the basin firmly down onto the countertop, and wipe away any excess sealant with an alcohol-dampened microfiber sponge. Install the matching unlacquered brass umbrella drain, taking care not to over-tighten the lower retaining nut against the stone. Clean the basin daily by rinsing with warm water and wiping dry with a soft cloth to keep the honed stone finish looking pristine.
8. Natural Braided Jute and Split-Rattan Under-Vanity Storage
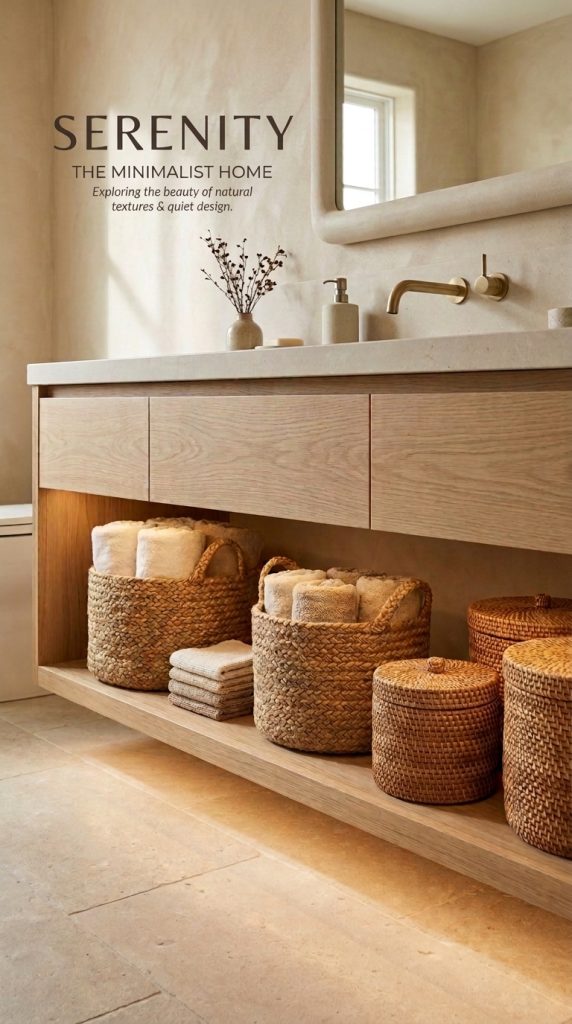
Open-shelf vanities—often designed with a solid wood top shelf and an open, floating slat shelf below—are popular in organic modern bathrooms because they maintain open sightlines, making compact rooms feel light and spacious. However, open shelving requires deliberate storage solutions to keep spare bath sheets, skincare backups, and hair tools from turning into an untidy catchall. Integrating structured, hand-woven baskets made from natural plant fibers brings organized functionality while introducing rich, coarse texture to the lower half of the vanity.
Natural fibers like twisted natural jute, split rattan cane, woven water hyacinth, and untreated seagrass introduce warm, sun-dried honey tones that complement cool stone countertops. These fibrous materials break up the flat, hard surfaces of surrounding wall and floor tiles while absorbing sound reflections, helping soften acoustic echoes and lending a quiet, spa-like feel to tiled bathrooms.
- Required Elements and Materials:
- 2 to 4 structured, rectangular woven storage baskets (sized to fit open lower shelving with 5 cm clearance on all sides)
- Materials: Hand-braided natural jute, thick split kubu rattan, or sustainably harvested water hyacinth
- Removable, washable natural unbleached cotton or linen basket liner bags
- Non-marking wool felt pads or silicone furniture glides for basket bottoms
- Mild, plant-derived botanical conditioning spray for natural fiber dusting
Carefully measure the open shelf area beneath your vanity, accounting for central drainage pipe drops and the height of the open reveal. Select baskets that fill approximately seventy to eighty percent of the vertical clearance, leaving an intentional five-centimeter space at the top so items can be accessed easily without pulling the baskets all the way out. Adhere heavy-duty wool felt pads to the bottom contact points of each basket to prevent rough woven fibers from scratching the sealed wood shelf. Line the interior of the baskets with natural, unbleached linen liners to catch loose lint and protect delicate linens. Use one basket exclusively for rolled or neatly folded waffle bath towels, dedicate the second to hair tools and grooming appliances, and reserve a third for toiletries, sliding them onto the shelf in a balanced, evenly spaced row that brings tidy, textured calm to the room.
9. Seamless Tadelakt Plaster or Limewash Mineral Backsplash Wall
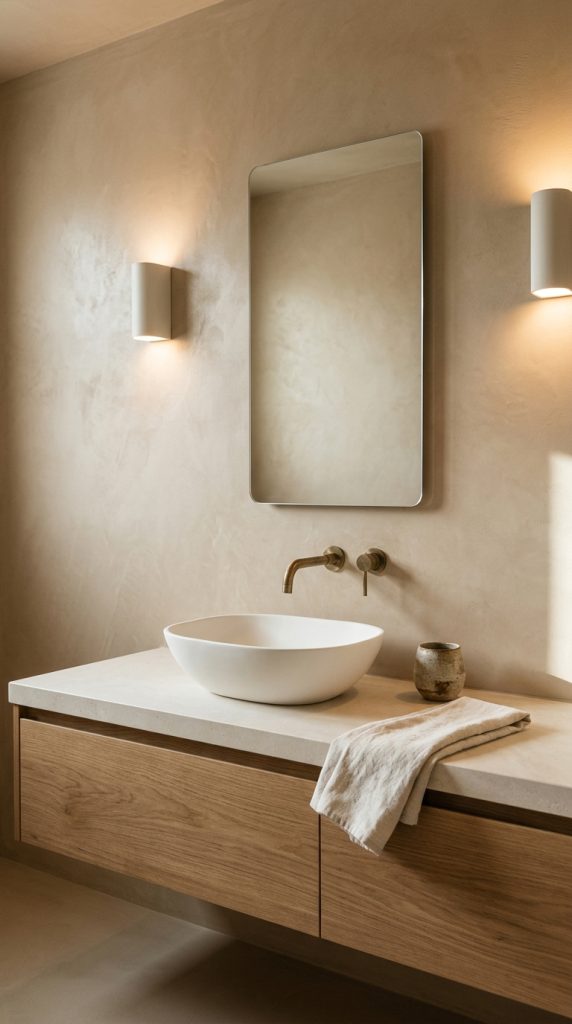
Standard bathroom backsplashes frequently rely on grids of ceramic or porcelain tiles joined by continuous cementitious grout lines. While functional, busy grout patterns can fragment wall planes and collect moisture, soap residue, and mildew over time. In high-end organic modern bathrooms, replacing traditional tile with seamless Moroccan Tadelakt plaster, Roman clay, or breathable slaked-lime mineral wash paint creates a continuous backdrop with subtle visual movement and tactile depth.
Originating in Marrakech, authentic Tadelakt is an ancient lime-based plaster polished smooth with river stones and treated with natural olive oil soap, yielding an impervious, waterproof surface that develops rich, cloud-like mottling as natural light hits it. On walls outside direct water splash zones, slaked-lime wash paint offers a similar chalky, velvety finish that softens incoming light, wrapping the vanity in an earthy, historic visual warmth reminiscent of a Mediterranean thermal bathhouse.
- Required Elements and Materials:
- Authentic Moroccan Tadelakt lime plaster kit or high-grade slaked lime mineral paint (in bone, pale oat, or soft greige)
- Natural black olive oil soap (Savon Noir) for chemical waterproofing of Tadelakt surfaces
- High-grade flexible stainless steel Venetian finishing trowel
- Hard, polished basalt river stone for burnishing and stone-polishing
- Breathable silica-based mineral wall primer
- High-precision painter’s masking tape and clean protective drop cloths
Tape off the vanity countertop edges, mirror perimeters, and ceiling margins using high-precision painter’s tape to establish sharp boundaries. Apply an even coat of mineral primer across the drywall substrate to ensure the plaster bonds securely. Using a flexible Venetian trowel, spread the first base coat of Tadelakt plaster in thin, sweeping arced strokes, maintaining an even thickness of approximately one to two millimeters. Once the base coat sets to the touch, trowel on a second, tighter finish coat. As the plaster begins its initial cure, glide a smooth basalt river stone in continuous circular motions across the surface to compress and polish the lime. Rub an emulsion of natural black olive oil soap into the surface and burnish it once more with the stone; the reaction between the lime and the olive oil creates an impervious, water-resistant stearate barrier with a soft sheen that repels water behind the vanity without a single grout line.
10. Stacked Organic Waffle-Weave and Raw-Fringed Linen Textiles
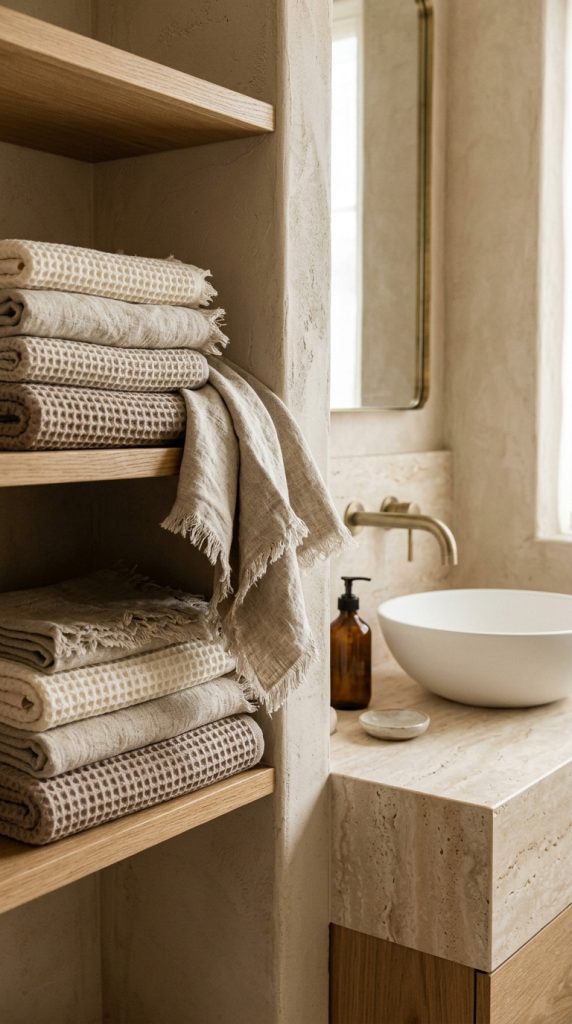
The soft textiles resting on or draped around your vanity are just as critical to the overall look as the stone and wood surfaces. Standard, plush terry-cloth towels often feel visually heavy, bulky, and generic. Upgrading your hand towels and washcloths to deep honeycomb waffle-weave organic cotton or raw-edged, stone-washed European flax linen introduces inviting, tactile softness to the vanity area.
Waffle weaves naturally catch ambient light within their three-dimensional, recessed pockets, casting micro-shadows that add depth to neutral, monochromatic palettes. Meanwhile, stonewashed European linen hand towels—especially those finished with delicate, hand-pulled frayed fringes—bring an effortless, lived-in feel. These natural textiles dry quickly, resist moisture buildup in humid bathrooms, and soften with every wash, bringing quiet luxury to your daily routine.
- Required Elements and Materials:
- 2 to 3 long-staple organic cotton waffle-weave hand towels (in warm oat, undyed ivory, or soft sage)
- 2 pure European stone-washed flax linen fingertip towels with hand-frayed raw fringe borders
- 1 solid unlacquered brass, blackened iron, or turned white oak wall peg, ring, or side-mount towel bar
- Eco-friendly, plant-based laundry wash free from synthetic optical brighteners and chemical fabric softeners
Avoid tightly rolling towels into stiff cylinders, as this styling approach can feel rigid and overly staged. Instead, fold an organic cotton waffle-weave hand towel loosely in half lengthwise, drape it over a side-mounted unlacquered brass towel bar or wooden wall peg, and allow it to fall naturally with soft, relaxed folds. If you prefer to keep towels on the countertop, take two neatly folded waffle-weave towels, stack them beside the sink basin on the dry side of your vanity, and top the stack with a raw-fringed linen fingertip towel. This combination showcases the varied textile weaves and delicate edge detailing, creating an inviting, tactile element that makes daily hand-washing feel like a visit to a bespoke wellness spa.
The organic modern bathroom vanity represents far more than a passing interior design trend; it is an enduring celebration of natural materials, spatial calm, and intentional living. By moving away from sterile, hyper-clinical fixtures in favor of honest, earth-derived textures—such as porous travertine, sustainably harvested white oak, living raw brass, handcrafted ceramics, and breathable natural linens—the vanity becomes a grounding focal point that transforms everyday grooming routines into restorative self-care rituals. Each tactile element works in harmony: smooth stone balances coarse ceramics, structured timber warms cool plaster walls, and soft amber lighting brings out the rich depth of every surface. By curating your countertop with restraint, utilizing vertical wall space for clean plumbing and hidden niches, and embracing the subtle, evolving imperfections of natural materials, you create an enduring bathroom sanctuary that provides physical comfort, visual serenity, and grounded calm for years to come.