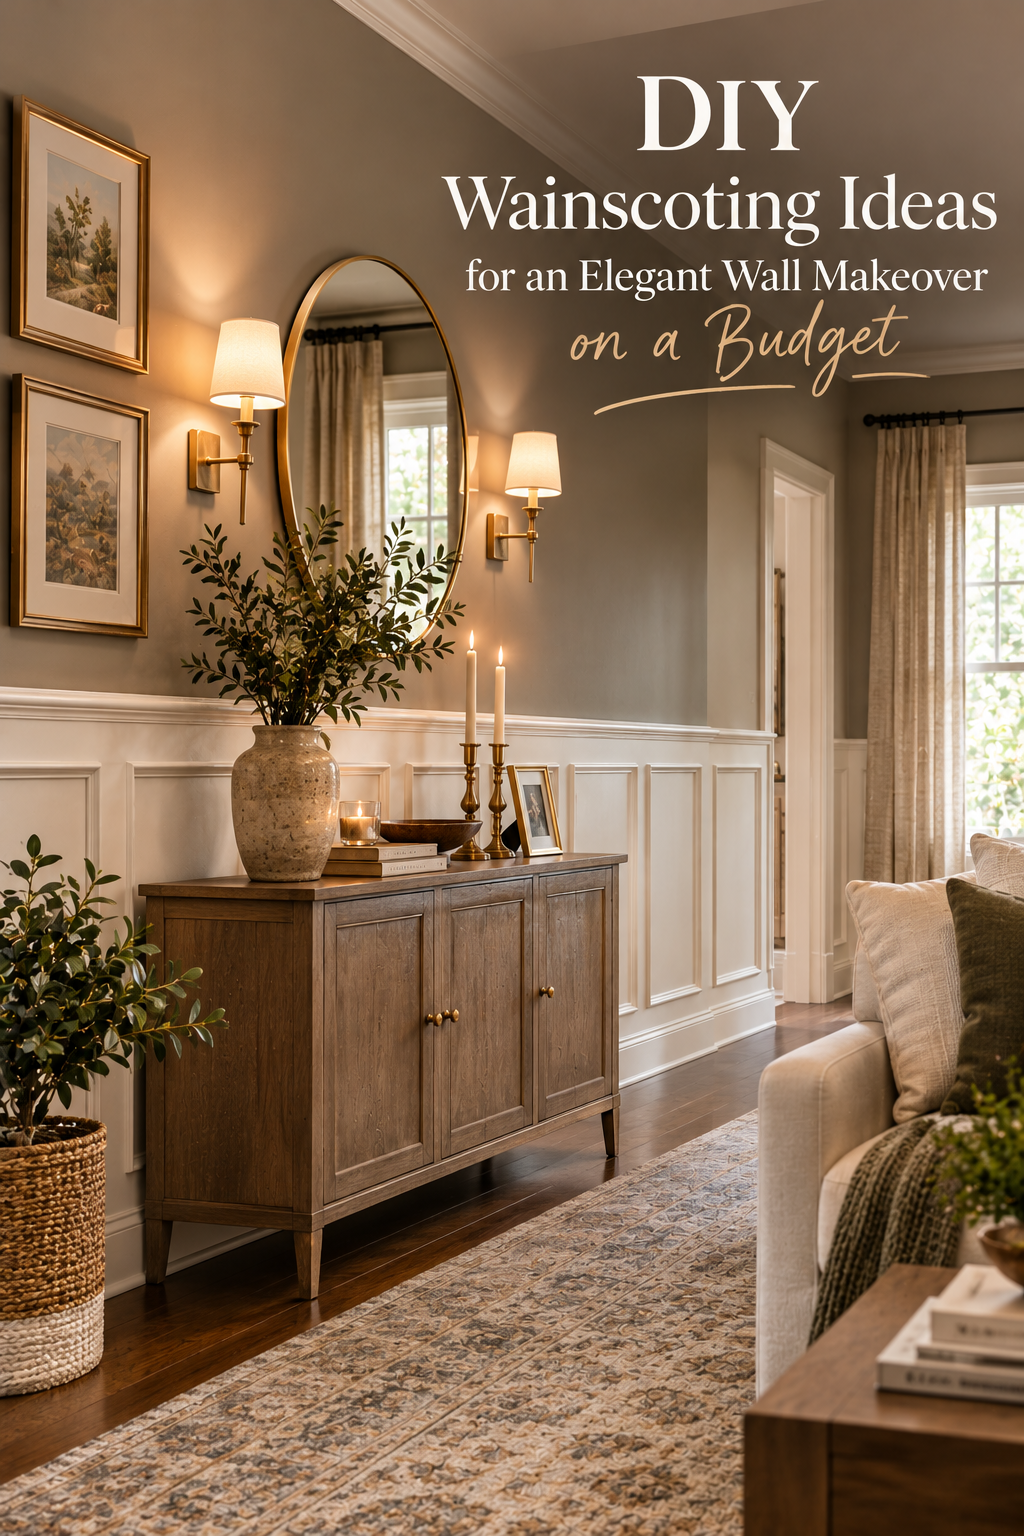
Wainscoting is one of the easiest ways to make an ordinary wall look architectural, polished, and expensive without spending a fortune on a complete room renovation. With the right trim, paint color, proportions, and a little patience, you can create a beautiful feature wall that looks custom-built while keeping your project within a realistic DIY budget. DIY wainscoting ideas are especially useful for homeowners who want to add character, warmth, and visual interest to bedrooms, living rooms, dining rooms, hallways, entryways, and home offices.
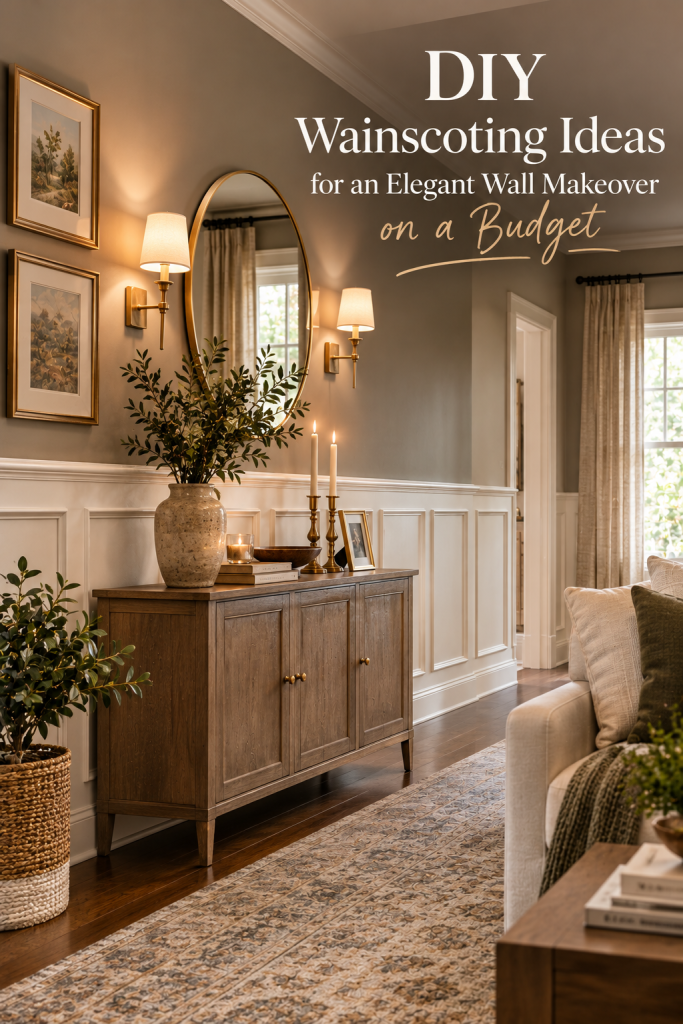
Traditional wainscoting was originally used as a practical wall treatment, but today it has become a popular interior design feature. Modern homeowners use everything from simple picture-frame molding to board-and-batten panels, vertical slats, half-wall treatments, and full-height designs to transform plain walls. The best part is that you do not necessarily need expensive hardwood panels or professional carpentry to achieve the look.
A simple wall can become a sophisticated focal point with inexpensive MDF trim, basic tools, paint, adhesive, and careful measurements. The finished result can make a room feel more intentional and visually complete. Even a small amount of molding can create the impression of custom architecture.
Budget-friendly wainscoting works particularly well because it allows you to change the appearance of a room without replacing major furniture pieces. Instead of purchasing a new bed, sofa, dining set, or console, you can upgrade the wall behind it. A carefully designed wall treatment can completely change the atmosphere of the space while allowing your existing furniture to remain.
Another advantage is versatility. Wainscoting does not have to look formal or traditional. You can make it warm and contemporary with natural wood, sophisticated with deep olive or charcoal paint, soft and feminine with creamy beige, or minimal with the same color on the wall and molding. The design can be adapted to almost any decorating style.
The secret to making inexpensive wainscoting look expensive is not necessarily the price of the materials. It is the planning. Correct spacing, consistent measurements, clean corners, smooth finishing, and a carefully selected color can make a simple DIY installation look remarkably professional.
Before purchasing materials, decide what type of wainscoting fits your room. A half-wall design is often the easiest starting point for beginners. Picture-frame molding can create an elegant appearance with relatively little material. Board-and-batten can introduce vertical structure and make ceilings appear taller. Thin slats can give a modern room a warmer architectural feature.
You also need to consider the size of the wall. A design that looks beautiful on a large dining-room wall may appear too crowded in a narrow hallway. Large rooms can usually handle wider panels and stronger contrasts, while small rooms often benefit from simpler spacing and lighter colors.
Paint is another major part of the transformation. You can paint the wainscoting white while leaving the upper wall a contrasting color, or paint everything the same shade for a more sophisticated built-in appearance. Warm white, creamy beige, greige, muted sage, olive, dusty blue, charcoal, and rich brown can all work beautifully depending on the room.
Lighting should also be considered. Wainscoting becomes particularly attractive when warm lamps, sconces, pendant lights, or natural daylight create gentle shadows across the molding. Even a basic wall treatment can look luxurious when it is illuminated properly.
For a budget project, material selection matters. MDF trim is often easier and less expensive than solid wood. Construction adhesive can reduce the number of nails required, while caulk can hide small gaps and create a seamless finish. A quality primer and paint can make inexpensive materials look dramatically better.
The project also does not have to cover every wall. In many rooms, one feature wall is enough. Installing wainscoting behind a bed, sofa, dining table, or console can create a focal point while keeping the cost and workload under control.
Most importantly, do not rush the measuring stage. Measure the wall several times, mark your layout with painter’s tape, and step back to evaluate the proportions before cutting anything. This simple habit can prevent expensive mistakes and help you create a design that looks balanced.
The following DIY wainscoting ideas are designed to help you create an elegant wall makeover without requiring an expensive renovation. Each idea offers a different visual effect, from classic picture-frame molding to modern vertical panels and warm wood-inspired designs.
1. Create Elegant Picture-Frame Wainscoting With Simple Trim
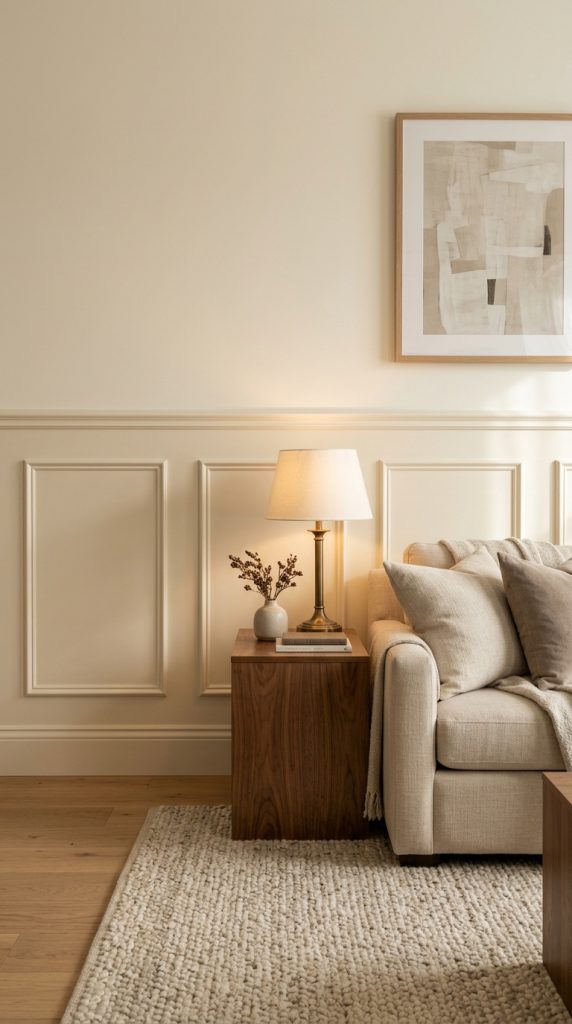
Picture-frame wainscoting is one of the most effective choices for a budget-friendly wall makeover because it can look highly customized while using relatively simple materials. The design consists of rectangular or square molding frames attached directly to the wall, creating the appearance of traditional architectural paneling.
This style works particularly well in bedrooms, dining rooms, living rooms, and hallways. It can instantly give a plain wall more structure without overwhelming the rest of the decor.
For a classic appearance, use evenly spaced rectangular frames across the lower portion of the wall. The panels can be painted crisp white against a soft beige, greige, or muted color above. For a more modern appearance, paint the molding and wall the same color.
Materials You Need
- MDF or wooden molding
- Measuring tape
- Pencil
- Level
- Painter’s tape
- Construction adhesive
- Finishing nails
- Caulk
- Sandpaper
- Primer
- Interior paint
- Paintbrush and roller
How to Create It
Start by deciding the height of your wainscoting. A common approach is to cover approximately the lower third of the wall, although the exact height should depend on your ceiling height and furniture placement.
Measure the wall carefully and determine how many rectangular panels will fit comfortably. Try to maintain equal spacing between the panels and keep the side margins visually balanced.
Use painter’s tape to outline your proposed frames directly on the wall. This gives you an opportunity to adjust the design before cutting your molding.
Once the layout looks right, cut your trim pieces to size. Attach them using construction adhesive and finishing nails. Check every piece with a level before securing it permanently.
After installation, fill nail holes and visible joints with caulk. Allow everything to dry before sanding lightly.
The finishing stage is what makes this inexpensive project look professional. Prime the molding and apply two thin coats of paint rather than one heavy coat.
For an elegant look, pair cream walls with warm white molding, or use a sophisticated monochromatic shade such as soft greige throughout the entire wall.
Add a simple console, framed artwork, or upholstered bench in front of the finished wall, and the molding can become the architectural foundation of the entire room.
2. Use Budget-Friendly Board-and-Batten to Make Ceilings Look Taller
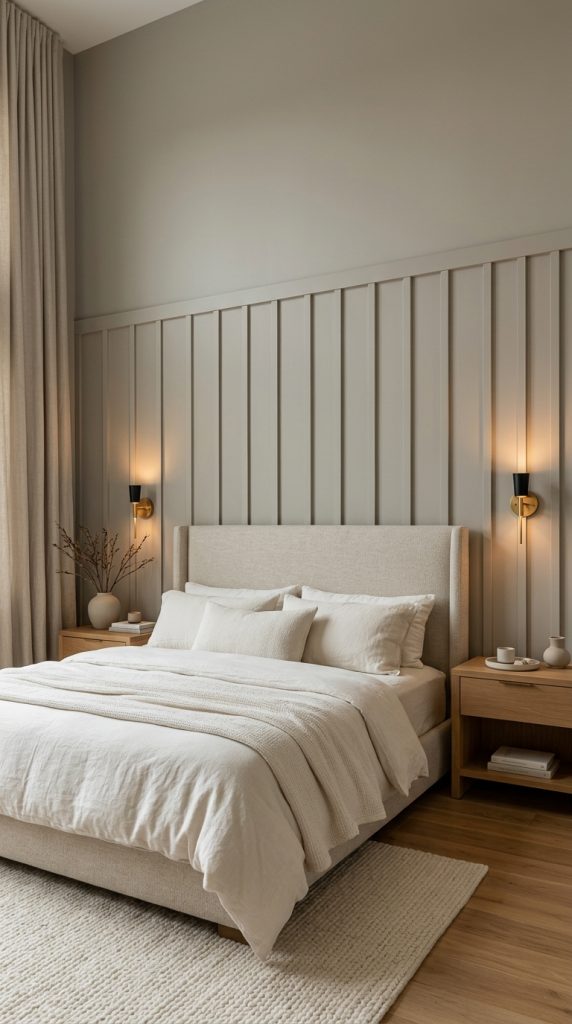
Board-and-batten is another excellent option for a DIY wainscoting project. Its vertical structure naturally draws the eye upward, making it particularly useful in rooms where you want to create the impression of greater ceiling height.
Instead of expensive architectural panels, you can create the effect using narrow MDF boards or trim pieces attached vertically to the wall.
This treatment works beautifully in bedrooms, entryways, living rooms, bathrooms, and home offices.
Materials You Need
- MDF boards or narrow trim
- Measuring tape
- Level
- Pencil
- Stud finder
- Construction adhesive
- Finishing nails
- Caulk
- Sandpaper
- Primer
- Paint
How to Create It
First determine the height of your lower wall treatment. Mark a horizontal line around the room using a level.
Next, decide how far apart your vertical battens should be. Consistent spacing is essential. Uneven gaps can make even expensive materials look poorly installed.
Measure the width of the wall and calculate the number of vertical boards required. Remember to account for the width of each board when calculating the spaces between them.
Attach the boards vertically, checking each one with a level. Once all the battens are installed, add a horizontal top rail to create a finished edge.
Caulk the seams, fill nail holes, sand the surfaces, and apply primer before painting.
For a modern elegant look, consider a warm greige, creamy beige, muted olive, or soft taupe instead of bright white.
You can make the design even more sophisticated by using the same color on the upper wall. This creates a seamless architectural effect where the texture and shadows become the primary visual interest.
Place a tall mirror, narrow console, or vertical artwork nearby to reinforce the upward movement created by the battens.
3. Install Half-Wall Wainscoting in a Warm Neutral Color
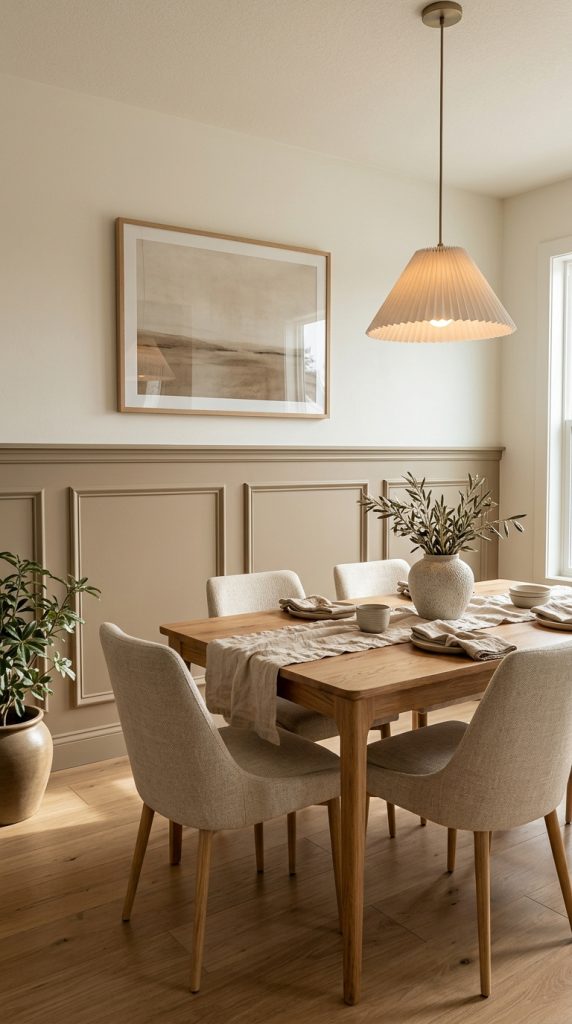
Half-wall wainscoting is one of the most beginner-friendly choices because it provides a dramatic transformation without requiring materials across the entire wall.
The lower portion of the wall receives the decorative treatment while the upper section remains painted or wallpapered.
This approach works especially well in dining rooms, hallways, stairways, bedrooms, and living spaces.
For a sophisticated budget makeover, consider painting the lower wainscoting in warm greige, taupe, creamy white, or muted beige.
Materials You Need
- MDF trim or paneling
- Measuring tape
- Level
- Adhesive
- Finishing nails
- Caulk
- Primer
- Paint
- Roller and brush
Installation Approach
Begin by deciding where the horizontal top edge will sit. The height should relate to the furniture and architecture of the room.
In a dining room, for example, the wainscoting can visually connect with the height of dining chairs. In a hallway, a slightly taller treatment can provide more architectural presence.
Mark the horizontal line around the room using a level.
Install your chosen panel or molding treatment below this line. Add a substantial top rail to create a clean transition between the wainscoting and upper wall.
Once the installation is complete, fill gaps and nail holes.
Paint the lower portion in your chosen color and allow the upper wall to remain lighter for contrast.
For a more sophisticated appearance, use closely related colors. A warm beige wainscoting against a slightly lighter cream wall can create subtle depth without making the room feel busy.
This design is particularly useful if you want your wall treatment to feel elegant rather than overly decorative.
4. Create a Monochromatic Wainscoting Wall for a Luxury Look
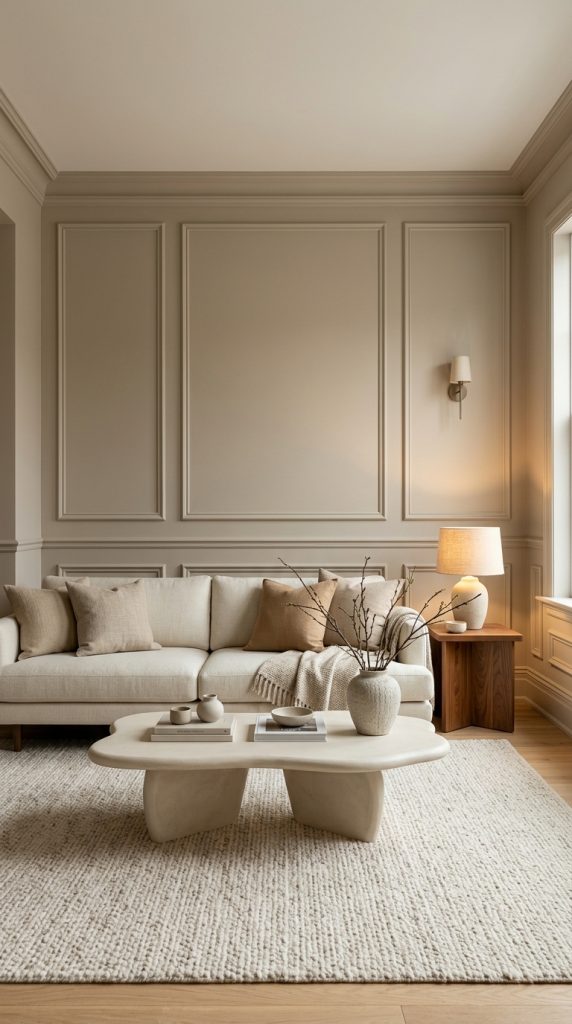
One of the easiest ways to make inexpensive wainscoting appear more expensive is to paint the entire wall one color.
Instead of using white molding against a contrasting wall, use one consistent shade across both the wall and trim. The architectural details remain visible because of the shadows and texture, while the overall effect feels more sophisticated.
This approach works beautifully with warm neutrals and deeper colors.
Consider shades such as:
- Warm ivory
- Soft beige
- Mushroom
- Greige
- Taupe
- Sage green
- Olive
- Charcoal
- Deep brown
- Muted blue
How to Make It Work
Choose a simple wainscoting pattern such as picture-frame molding or board-and-batten.
Install the molding following your planned layout. Make sure all edges are smooth and properly caulked.
Once the surface is prepared, prime everything consistently.
Paint the wall and molding in the same color.
The result will have a subtle architectural quality rather than a strongly contrasting decorative pattern.
This technique is particularly effective behind a bed or sofa because it creates a sophisticated backdrop without competing with furniture.
For an elevated appearance, combine monochromatic wainscoting with warm lighting, linen upholstery, natural wood, brushed brass, and simple ceramic accessories.
The result can resemble a custom designer wall while requiring relatively inexpensive materials.
5. Add Thin Vertical Wood Slats for a Modern DIY Accent Wall
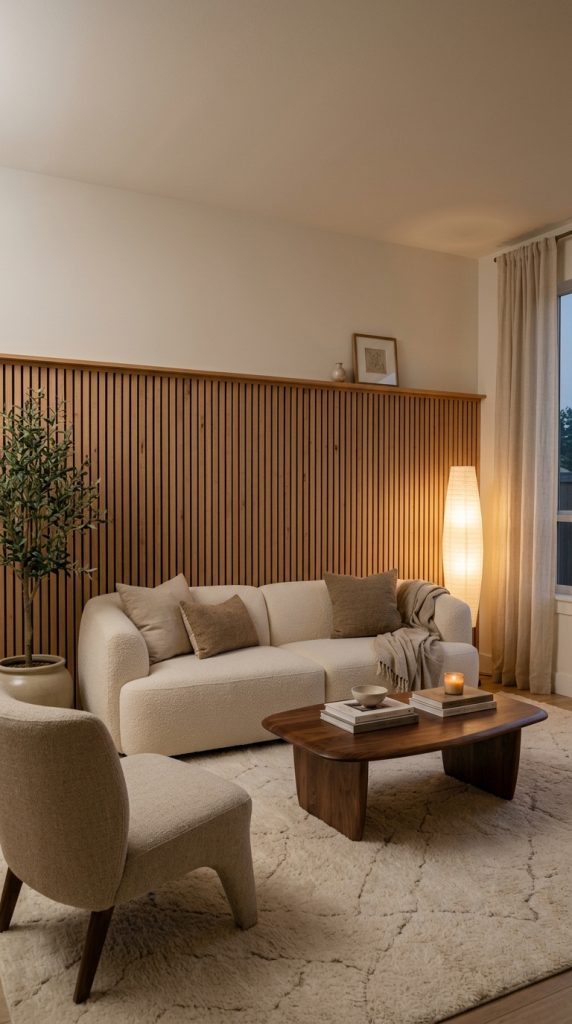
If traditional panel molding feels too formal for your decorating style, consider thin vertical wood slats.
Slat walls have a modern architectural appearance and can add warmth without requiring elaborate decorative molding.
This treatment is especially attractive in contemporary bedrooms, living rooms, home offices, and entryways.
Natural wood is beautiful, but you can also create a painted version using inexpensive MDF strips.
Materials You Need
- Thin wood strips or MDF
- Measuring tape
- Level
- Saw
- Construction adhesive
- Finishing nails
- Sandpaper
- Wood filler
- Stain or paint
- Clear protective finish if using natural wood
Installation Steps
Begin with a completely clean wall.
Determine the spacing between each slat. Narrower gaps create a more detailed appearance, while wider spacing creates a cleaner contemporary look.
Mark the positions carefully.
Cut all slats to the same height before installation. This makes the process faster and ensures visual consistency.
Attach each strip using adhesive and finishing nails.
Check the vertical alignment regularly.
If using natural wood, sand the surface carefully before applying stain. Warm oak, walnut, or medium wood tones can create a sophisticated look.
If using MDF, paint the entire wall and slats in one color for a modern architectural appearance.
Avoid filling the wall with too many accessories afterward. The slats should remain the focal point.
A simple upholstered bed, neutral sofa, minimalist console, or sculptural chair can complement the texture beautifully.
6. Build a Budget-Friendly Bedroom Wainscoting Feature Wall
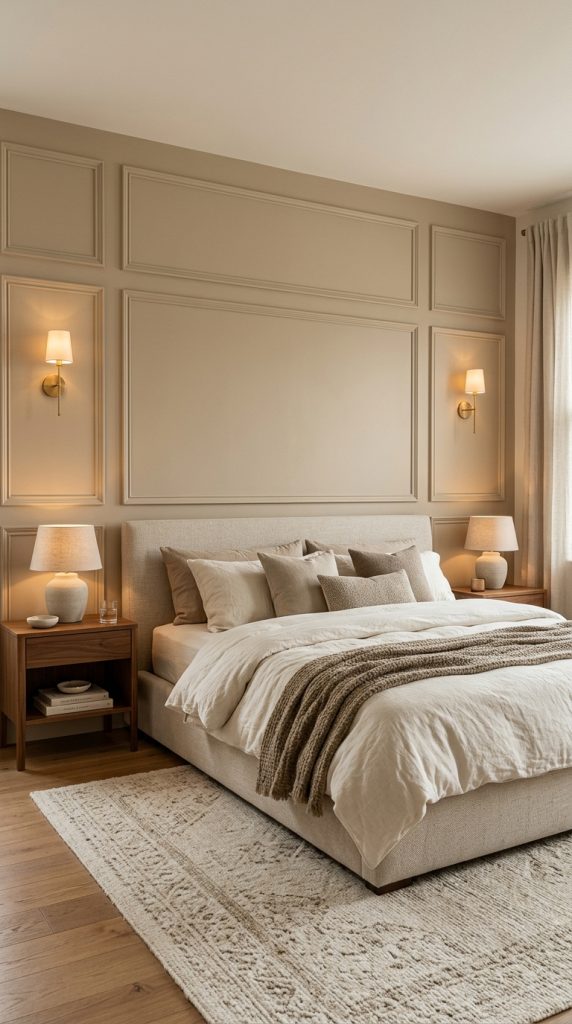
A bedroom is one of the best places to experiment with DIY wainscoting because the wall behind the bed naturally acts as a focal point.
Instead of purchasing an expensive headboard, use wainscoting to create an architectural backdrop.
This can make even a basic bedroom feel more custom and finished.
For a soft elegant bedroom, consider a wall treatment painted in warm beige, creamy taupe, soft sage, or muted greige.
Step-by-Step Design
Start by centering the wainscoting design around the bed.
Measure the width of the bed and determine how much wall treatment should extend beyond each side.
A wider treatment usually looks more intentional than a narrow strip that ends just outside the mattress.
Choose picture-frame molding for a classic look or vertical battens for a more contemporary appearance.
Install the treatment symmetrically around the center of the bed.
Paint the entire wall in one color for a calm appearance.
Then layer the room with soft bedding, linen curtains, warm bedside lighting, and natural wood furniture.
If you have a simple bed frame, the architectural wall can provide the visual impact that the furniture lacks.
This is also a smart budget strategy because the wall treatment can become the main decorative feature, reducing the need for expensive accessories.
Use a pair of simple sconces or pendant lights beside the bed to highlight the molding while providing functional illumination.
7. Transform a Dining Room With Classic White Wainscoting
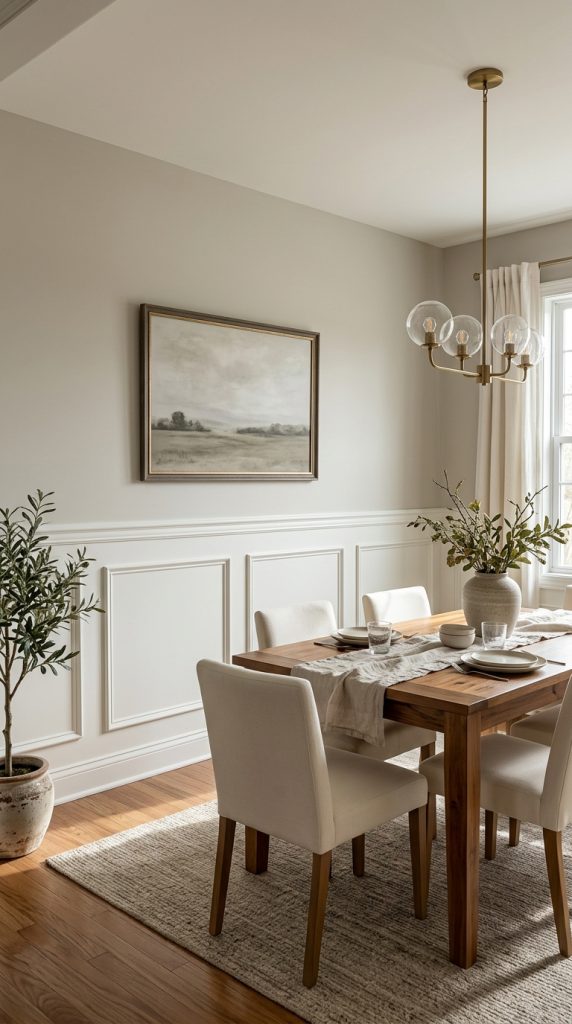
Dining rooms are naturally suited to wainscoting because the treatment can visually frame the dining furniture while protecting the lower walls from everyday wear.
A classic white or warm ivory wainscoting design can make a dining room feel elegant without requiring expensive renovation.
For a timeless appearance, combine simple rectangular panels with a substantial horizontal rail.
Creating the Look
Measure the wall height and determine the appropriate wainscoting level.
If your dining chairs sit against the wall, make sure the treatment works with their scale.
Install the molding or panels around the room.
Use caulk generously at visible seams, especially around corners.
Sand everything smooth after the caulk dries.
Apply primer before painting.
Instead of a stark white, consider warm white or creamy ivory if the room contains natural wood and warm lighting.
This softer shade can feel more sophisticated and inviting.
Pair the wainscoting with a wooden dining table, linen or upholstered chairs, a simple pendant light, and a restrained tablescape.
For an especially elegant result, add a large mirror or artwork above the wainscoting.
The combination of architectural wall treatment and warm furniture can make a relatively inexpensive dining room look thoughtfully designed.
8. Create an Elegant Entryway With Simple Wainscoting
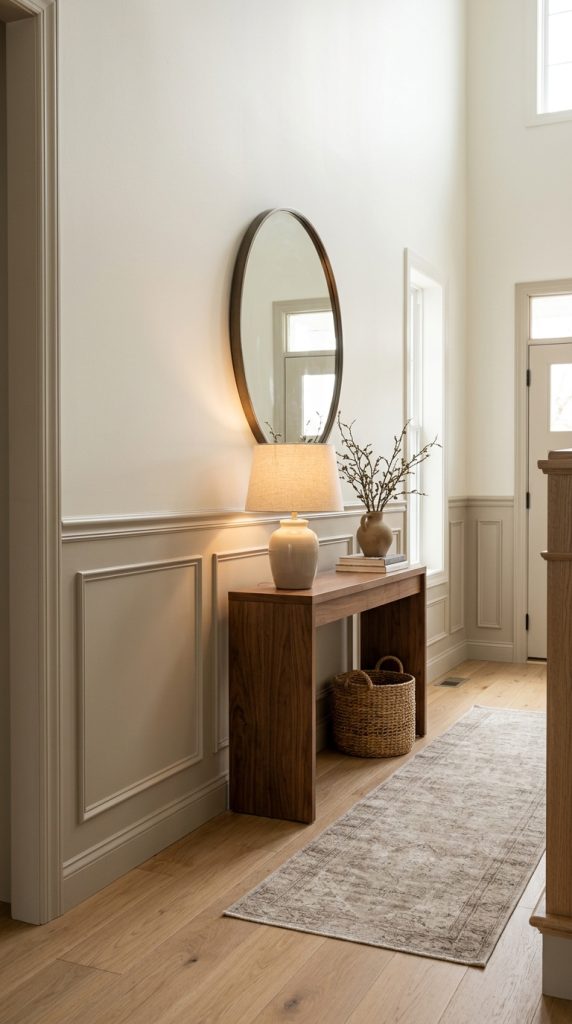
The entryway is often overlooked, yet it is one of the most important areas of the home because it creates the first impression.
Wainscoting can instantly make an ordinary hallway or entrance feel more finished.
A simple half-wall treatment is often enough.
Budget-Friendly Approach
Use inexpensive MDF molding or narrow boards.
Keep the layout simple so that installation does not become unnecessarily complicated.
A horizontal top rail can create a finished architectural edge.
Paint the lower wall treatment in a durable satin or eggshell finish.
For the upper wall, use a complementary neutral shade.
You can create a sophisticated palette with:
- Warm white and beige
- Cream and taupe
- Greige and ivory
- Soft olive and warm white
- Charcoal and cream
Once the wall is complete, add only a few functional accessories.
A slim console table, round mirror, small lamp, ceramic bowl, or woven basket may be enough.
Avoid overcrowding the entryway. The purpose of the wainscoting is to provide architectural character, so excessive decoration can weaken the overall effect.
If the hallway is narrow, choose a lighter color and simpler molding pattern.
This can make the space feel brighter and visually organized.
9. Use Dark Wainscoting for a Dramatic but Affordable Makeover

Budget-friendly does not have to mean plain.
A deep paint color can transform simple molding into a dramatic design feature.
Dark wainscoting works especially well in dining rooms, offices, libraries, bedrooms, and sophisticated living spaces.
Consider charcoal, deep olive, espresso brown, muted navy, or a rich earthy tone.
How to Keep Dark Wainscoting Elegant
Choose a simple panel design so that the color remains the focal point.
Install the molding carefully and make sure all seams are properly finished.
Use a high-quality primer appropriate for your material.
Apply two thin coats of dark paint for even coverage.
If the room has limited natural light, balance the dark wall treatment with lighter furniture and warm lighting.
Cream upholstery, light wood, brass details, ivory curtains, and warm lamps can prevent the room from feeling too heavy.
For example, a charcoal picture-frame wall behind a cream sofa can create a sophisticated contrast.
In a bedroom, deep olive wainscoting paired with warm ivory bedding and walnut furniture can create a cozy boutique-hotel atmosphere.
The beauty of this approach is that the expensive appearance comes primarily from contrast and proportion rather than costly materials.
10. Combine Two-Tone Wainscoting With Warm Wood for a Custom Designer Look

For a more distinctive makeover, combine painted wainscoting with natural wood accents.
This approach adds both color and texture while maintaining a sophisticated appearance.
You might use warm white or beige molding with a walnut console, oak bench, wood-framed mirror, or natural wood furniture.
Another option is to use natural wood inside selected panels while keeping the surrounding molding painted.
How to Create the Look
Start with a simple wainscoting pattern.
Picture-frame molding works particularly well because the individual panels create opportunities for visual contrast.
Install the molding and prepare the surface carefully.
Paint the surrounding wall in a warm neutral.
Then introduce natural wood through furniture or selected panel inserts.
Avoid using too many wood tones. Choose one primary wood family and repeat it throughout the room.
Warm oak works well for lighter interiors, while walnut creates a richer and more sophisticated appearance.
Add aged brass hardware or lighting for subtle warmth.
The result should feel balanced rather than overly decorative.
This design is particularly effective in living rooms and bedrooms where natural materials can make the architecture feel warmer.
How to Choose the Right Wainscoting Style for Your Room
The best wainscoting design depends on the size, architecture, furniture, and decorating style of your room.
For traditional spaces, picture-frame molding is an excellent choice. It creates classic architectural detail and works especially well with elegant furniture.
For modern interiors, vertical battens or thin wood slats can provide structure without looking overly traditional.
For small spaces, avoid overly complicated patterns. Simple layouts with generous spacing often look cleaner.
For large rooms, you have more freedom to experiment with wider panels, stronger colors, or full-height treatments.
The furniture should also influence the design. A wainscoting wall behind a large sofa needs different proportions from one behind a narrow hallway console.
Always consider the entire composition rather than treating the wall as an isolated project.
How to Make Cheap Wainscoting Look Expensive
The material itself is only part of the final appearance. Finishing quality makes an enormous difference.
First, prioritize accurate measurements.
Second, use a level constantly during installation.
Third, do not skip caulking. Small gaps can make a project look unfinished, while properly filled seams create a built-in appearance.
Fourth, sand rough areas before painting.
Fifth, use primer when necessary, especially on raw MDF.
Sixth, apply multiple thin coats of paint instead of one thick coat.
Finally, choose a sophisticated color palette.
A simple cream picture-frame wall can look more expensive than elaborate molding painted in an unsuitable color.
Proportion is also extremely important. Avoid making panels too narrow or too crowded.
The spacing between panels should look intentional.
Best Budget Materials for DIY Wainscoting
You do not need premium materials to create beautiful wainscoting.
MDF trim is one of the most practical choices for painted projects. It is relatively easy to cut and provides a smooth surface.
Wood trim can be used when you want a natural finish.
Adhesive can make installation easier, while finishing nails provide additional security.
Caulk is essential for creating seamless joints.
Wood filler is useful for filling nail holes.
Primer helps create a consistent paint surface.
Paint is one of the most important finishing materials because the final color and sheen strongly influence the appearance of the project.
If you are trying to minimize costs, focus your budget on the visible finishing materials rather than expensive structural components.
Common DIY Wainscoting Mistakes to Avoid
One of the biggest mistakes is installing the molding before planning the complete layout.
Always map the design first.
Another common problem is inconsistent spacing. Even small differences can become obvious across a long wall.
Do not assume that every room needs the same wainscoting height.
Consider your ceiling height, furniture, doors, windows, and architectural details.
Avoid choosing a complicated pattern simply because it looks impressive online.
A simpler design that fits your room will usually look more professional.
Another mistake is skipping surface preparation.
Dust, rough edges, visible nail holes, and unfilled seams can immediately reveal that the project was DIY.
Take time with the finishing stage.
Finally, avoid excessive decoration after installation. Wainscoting is already a strong visual element. Let the architectural detail breathe.
How to Style a Room After Installing Wainscoting
Once the wall is finished, keep the furniture and accessories intentional.
Use natural textures to soften painted molding.
Linen curtains, boucle seating, wool rugs, ceramic accessories, woven baskets, and warm wood furniture can complement almost any neutral wainscoting design.
Lighting is also important.
Warm table lamps, wall sconces, floor lamps, and pendant lights can highlight the architectural shadows.
Avoid relying entirely on one bright overhead light.
For a sophisticated Pinterest-inspired room, combine architectural detail with a limited palette.
Cream, beige, warm white, taupe, walnut, muted olive, charcoal, and subtle brass work particularly well.
Use one or two statement accessories rather than filling every surface.
Budget-Friendly Wainscoting Ideas for Small Rooms
Small rooms can benefit significantly from wainscoting because architectural detail can add personality without requiring additional furniture.
However, keep the design simple.
Use narrow vertical battens to create the impression of height.
Choose light colors when the room has limited natural light.
Consider painting the entire wall the same shade so the room feels cohesive.
Avoid very thick molding in narrow spaces because it can visually reduce the usable wall area.
In a small bedroom, a simple wainscoting wall behind the bed can replace the need for a large decorative headboard.
In a hallway, half-wall wainscoting can add character while leaving enough upper-wall space for artwork or mirrors.
Final Thoughts
DIY wainscoting is one of the most effective ways to create an elegant wall makeover without committing to an expensive renovation. With affordable materials, careful measurements, thoughtful proportions, and a polished paint finish, even a plain wall can become a sophisticated architectural feature.
The best design does not necessarily use the most expensive materials. A simple picture-frame pattern, carefully installed board-and-batten, warm monochromatic wall, or modern vertical slat treatment can completely change the character of a room.
If you are new to DIY projects, begin with one feature wall rather than attempting the entire house. A bedroom wall behind the bed, a dining-room wall, a living-room focal wall, or an entryway can provide a manageable starting point.
Focus on clean installation, consistent spacing, smooth finishing, and a color that works with your existing furniture. Once the basic technique becomes comfortable, you can experiment with more elaborate patterns and materials.
For a timeless look, warm white, cream, beige, greige, and natural wood are excellent choices. For a dramatic interior, consider charcoal, olive, deep brown, or muted navy. If you prefer modern design, vertical battens and slim slats can provide architectural texture without feeling traditional.
The most important thing is to design the wainscoting around your room rather than simply copying a wall treatment from another space. Consider the ceiling height, furniture scale, windows, doors, lighting, and overall color palette before beginning.
With a little planning and patience, inexpensive molding can become one of the most beautiful features in your home. A well-executed DIY wainscoting project can make a room feel warmer, more intentional, and custom-designed while keeping the renovation budget under control.